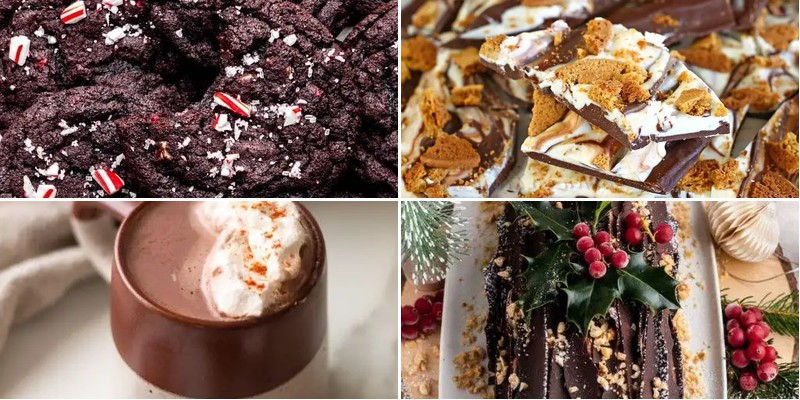
Kick off your holiday baking with the most irresistible chocolate treats! Whether you’re craving rich truffles, fudgy brownies, or festive cookies, this collection of 34 decadent Christmas chocolate recipes has something for every sweet tooth. Get ready to fill your kitchen with warmth and delight your family and friends—let’s dive into these mouthwatering creations!
Classic Chocolate Yule Log
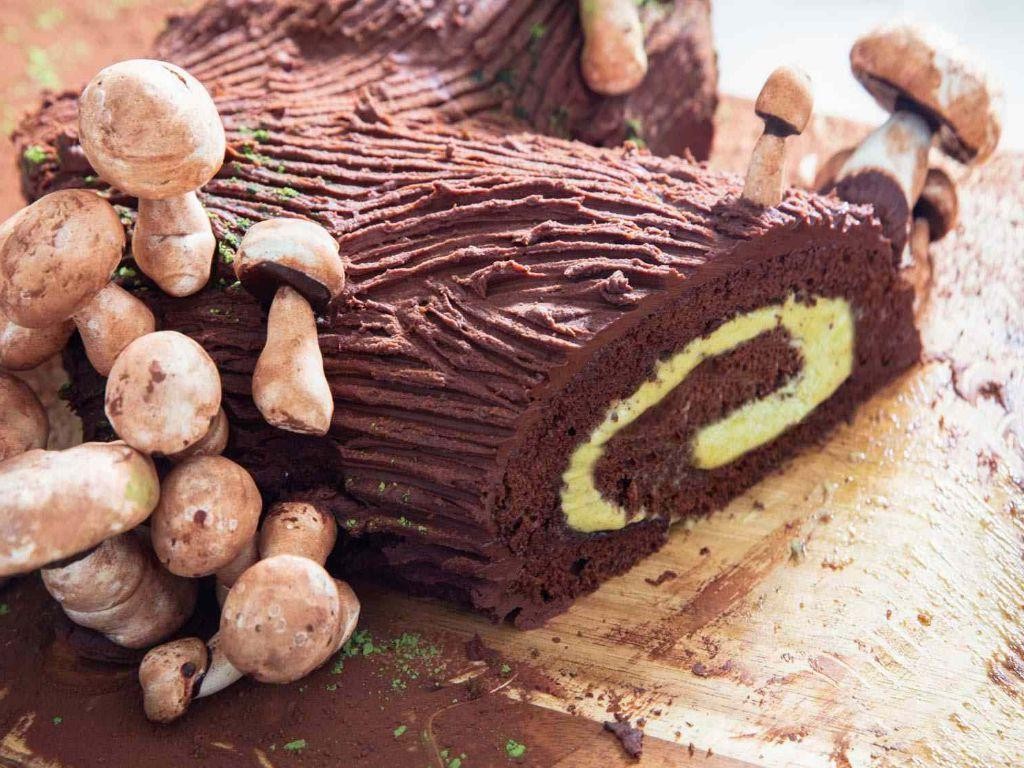
Nothing says holiday cheer quite like a dessert that looks like it could warm your fireplace. This Classic Chocolate Yule Log is the edible equivalent of a cozy winter sweater—rich, comforting, and guaranteed to make your guests swoon with chocolate-induced happiness.
8
servings30
minutes15
minutesIngredients
For the Cake
- 3/4 cup all-purpose flour
- 1/4 cup unsweetened cocoa powder
- 1 tsp baking powder
- 1/4 tsp salt
- 4 large eggs
- 3/4 cup granulated sugar
- 1 tsp vanilla extract
For the Filling
- 1 1/2 cups heavy cream
- 1/4 cup powdered sugar
- 1/2 tsp vanilla extract
For the Chocolate Ganache
- 8 oz semisweet chocolate, chopped
- 1 cup heavy cream
Instructions
- Preheat your oven to 350°F.
- Grease a 10×15-inch jelly roll pan and line it with parchment paper.
- In a medium bowl, whisk together 3/4 cup all-purpose flour, 1/4 cup unsweetened cocoa powder, 1 tsp baking powder, and 1/4 tsp salt.
- In a separate large bowl, beat 4 large eggs on high speed for 5 minutes until pale and thick.
- Gradually add 3/4 cup granulated sugar while continuing to beat for 2 more minutes.
- Mix in 1 tsp vanilla extract.
- Gently fold the dry ingredients into the egg mixture until just combined.
- Spread the batter evenly into the prepared pan.
- Bake for 12-15 minutes until the cake springs back when lightly touched.
- Immediately invert the warm cake onto a clean kitchen towel dusted with powdered sugar.
- Carefully peel off the parchment paper.
- Starting from one short end, roll the cake and towel together into a tight log.
- Let the rolled cake cool completely on a wire rack for 1 hour.
- While the cake cools, make the filling by beating 1 1/2 cups heavy cream, 1/4 cup powdered sugar, and 1/2 tsp vanilla extract until stiff peaks form.
- Unroll the cooled cake and spread the whipped cream filling evenly over the surface.
- Re-roll the cake tightly without the towel.
- Place the rolled cake seam-side down on a serving platter.
- Make the ganache by heating 1 cup heavy cream until just boiling.
- Pour the hot cream over 8 oz chopped semisweet chocolate and let sit for 2 minutes.
- Stir the chocolate and cream until smooth and glossy.
- Let the ganache cool for 10 minutes until slightly thickened.
- Spread the ganache over the entire cake log using an offset spatula.
- Use a fork to create bark-like texture lines in the ganache.
- Refrigerate for at least 2 hours before serving.
Velvety chocolate sponge wrapped around clouds of whipped cream creates a texture contrast that’s pure magic. The rich ganache shell cracks perfectly when sliced, revealing swirls that look like tree rings. Serve thick slices with a dusting of powdered “snow” and watch it become the centerpiece of your holiday table.
Peppermint Hot Chocolate Cake
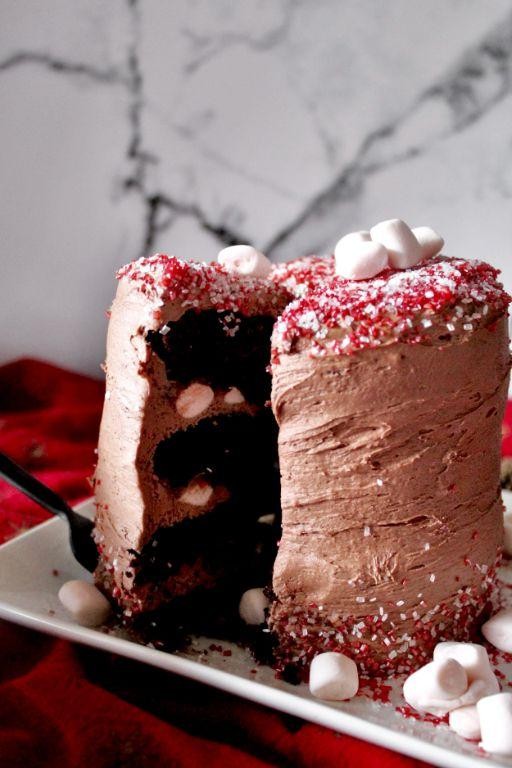
Visions of cozy winter evenings just got a major upgrade with this decadent creation that combines everyone’s favorite holiday flavor with rich chocolate indulgence. This peppermint hot chocolate cake is basically a warm hug for your taste buds, guaranteed to make you forget about that questionable fruitcake your aunt insists on bringing every year.
2
layers25
minutes35
minutesIngredients
For the Cake Batter:
– 2 cups all-purpose flour
– 1 ½ cups granulated sugar
– ¾ cup unsweetened cocoa powder
– 2 tsp baking soda
– 1 tsp baking powder
– 1 tsp salt
– 1 cup buttermilk
– ½ cup vegetable oil
– 2 large eggs
– 1 tsp vanilla extract
– 1 cup hot brewed coffee
For the Peppermint Hot Chocolate Ganache:
– 1 cup heavy cream
– 8 oz semi-sweet chocolate chips
– ½ tsp peppermint extract
– ¼ cup crushed peppermint candies
Instructions
1. Preheat your oven to 350°F and grease two 9-inch round cake pans.
2. Whisk together flour, sugar, cocoa powder, baking soda, baking powder, and salt in a large bowl.
3. Add buttermilk, vegetable oil, eggs, and vanilla extract to the dry ingredients.
4. Mix on medium speed until just combined, about 2 minutes.
5. Slowly pour in hot coffee while mixing on low speed.
6. Divide the batter evenly between the prepared pans.
7. Bake for 30-35 minutes until a toothpick inserted in the center comes out clean.
8. Cool the cakes in pans for 15 minutes before transferring to wire racks.
9. Heat heavy cream in a saucepan over medium heat until it just begins to simmer.
10. Pour the hot cream over chocolate chips in a heatproof bowl and let sit for 2 minutes.
11. Whisk the chocolate and cream mixture until smooth and glossy.
12. Stir in peppermint extract and half of the crushed peppermint candies.
13. Let the ganache cool for 10 minutes until slightly thickened.
14. Place one cake layer on a serving plate and spread with ½ cup of ganache.
15. Top with the second cake layer and pour remaining ganache over the top.
16. Sprinkle the remaining crushed peppermint candies over the ganache.
17. Let the cake set for at least 30 minutes before serving.
Perfectly moist and intensely chocolatey, this cake delivers that classic hot chocolate warmth with a refreshing peppermint kick that’ll have you going back for seconds. The ganache sets up with a gorgeous glossy finish that cracks beautifully when sliced, revealing layers of pure comfort. Try serving warm slices with a dollop of whipped cream and extra candy cane dust for that full winter wonderland experience!
Christmas Chocolate Truffles

Gather ’round, holiday warriors! These Christmas Chocolate Truffles are the edible equivalent of finding the perfect present under the tree—except you get to eat your success immediately, no gift receipt required. They’re the kind of decadent little spheres that make you question why you bother with any other holiday dessert when chocolate perfection is just a roll away.
24
truffles30
minutes2
minutesIngredients
For the Truffle Filling
– 8 oz semi-sweet chocolate chips
– 1/2 cup heavy cream
– 2 tbsp unsalted butter
– 1 tsp vanilla extract
– Pinch of salt
For Coating and Decorating
– 1/2 cup cocoa powder
– 1/2 cup powdered sugar
– 1/4 cup crushed candy canes
– 1/4 cup festive sprinkles
Instructions
1. Place 8 oz semi-sweet chocolate chips in a heatproof bowl.
2. Heat 1/2 cup heavy cream in a small saucepan over medium heat until it reaches 180°F and begins to steam.
3. Immediately pour the hot cream over the chocolate chips and let it sit undisturbed for 2 minutes.
4. Add 2 tbsp unsalted butter, 1 tsp vanilla extract, and a pinch of salt to the chocolate mixture.
5. Whisk the mixture continuously until completely smooth and glossy, about 1-2 minutes.
6. Cover the bowl with plastic wrap, pressing it directly onto the surface of the chocolate.
7. Refrigerate the mixture for exactly 2 hours until firm enough to scoop but not rock hard.
8. Line a baking sheet with parchment paper.
9. Use a 1-tablespoon cookie scoop to portion the chilled chocolate mixture.
10. Roll each portion between your palms into smooth 1-inch balls, working quickly to prevent melting.
11. Place the formed truffles on the prepared baking sheet.
12. Return the truffles to the refrigerator for 15 minutes to firm up completely.
13. Place 1/2 cup cocoa powder in one shallow bowl.
14. Place 1/2 cup powdered sugar in a second shallow bowl.
15. Place 1/4 cup crushed candy canes in a third shallow bowl.
16. Place 1/4 cup festive sprinkles in a fourth shallow bowl.
17. Roll half of the chilled truffles in cocoa powder until completely coated.
18. Roll one quarter of the truffles in powdered sugar until completely coated.
19. Roll one eighth of the truffles in crushed candy canes until completely coated.
20. Roll the remaining truffles in festive sprinkles until completely coated.
21. Return all coated truffles to the baking sheet.
22. Refrigerate the finished truffles for 30 minutes before serving.
Just imagine biting through that delicate cocoa powder coating into the impossibly smooth, melt-in-your-mouth chocolate center that’s rich without being overly sweet. These little gems transform any holiday platter into a showstopper—try arranging them in a festive tree pattern on a serving tray or tucking them into mini cupcake liners for individual party favors that scream “I’m basically a professional chocolatier.”
Gingerbread Chocolate Bark
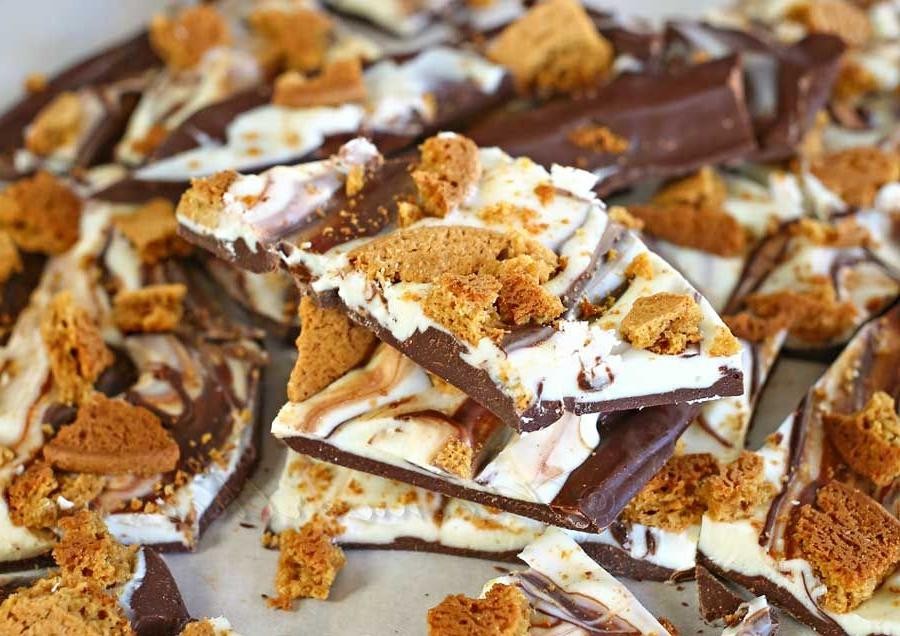
Zesty, spicy, and unapologetically addictive—this gingerbread chocolate bark is basically holiday cheer you can break into pieces and devour in one glorious, messy sitting. It’s the kind of treat that makes you forget you ever liked fruitcake.
1
bark15
minutes3
minutesIngredients
For the Chocolate Base:
– 12 oz semi-sweet chocolate chips
– 1 tsp vegetable oil
For the Gingerbread Topping:
– 1/2 cup crushed gingersnap cookies
– 2 tbsp crystallized ginger, finely chopped
– 1 tsp ground cinnamon
– 1/4 tsp ground cloves
– 1/4 cup mini marshmallows
– 2 tbsp white chocolate chips
Instructions
1. Line a baking sheet with parchment paper.
2. Combine 12 oz semi-sweet chocolate chips and 1 tsp vegetable oil in a microwave-safe bowl.
3. Microwave the chocolate mixture on high for 30 seconds, then stir thoroughly.
4. Repeat microwaving in 15-second intervals, stirring after each, until the chocolate is completely smooth and glossy.
5. Tip: Avoid overheating—chocolate should feel warm, not hot, to prevent seizing.
6. Pour the melted chocolate onto the prepared baking sheet.
7. Use a spatula to spread the chocolate into an even layer about 1/4-inch thick.
8. Immediately sprinkle 1/2 cup crushed gingersnap cookies evenly over the chocolate.
9. Sprinkle 2 tbsp chopped crystallized ginger over the bark.
10. Dust 1 tsp ground cinnamon and 1/4 tsp ground cloves evenly across the surface.
11. Scatter 1/4 cup mini marshmallows and 2 tbsp white chocolate chips over the top.
12. Tip: Press toppings gently into the chocolate so they adhere as it sets.
13. Transfer the baking sheet to the refrigerator.
14. Chill the bark for 45 minutes, or until completely firm.
15. Tip: For clean breaks, let the bark sit at room temperature for 2 minutes before cracking.
16. Remove the bark from the refrigerator and break it into irregular pieces with your hands.
17. Enjoy immediately or store in an airtight container.
Effortlessly crunchy and warmly spiced, this bark delivers a satisfying snap with every bite. Serve it piled high on a platter at holiday parties or crumbled over vanilla ice cream for a next-level dessert—because why should gingerbread houses have all the fun?
Nutty Chocolate Fudge
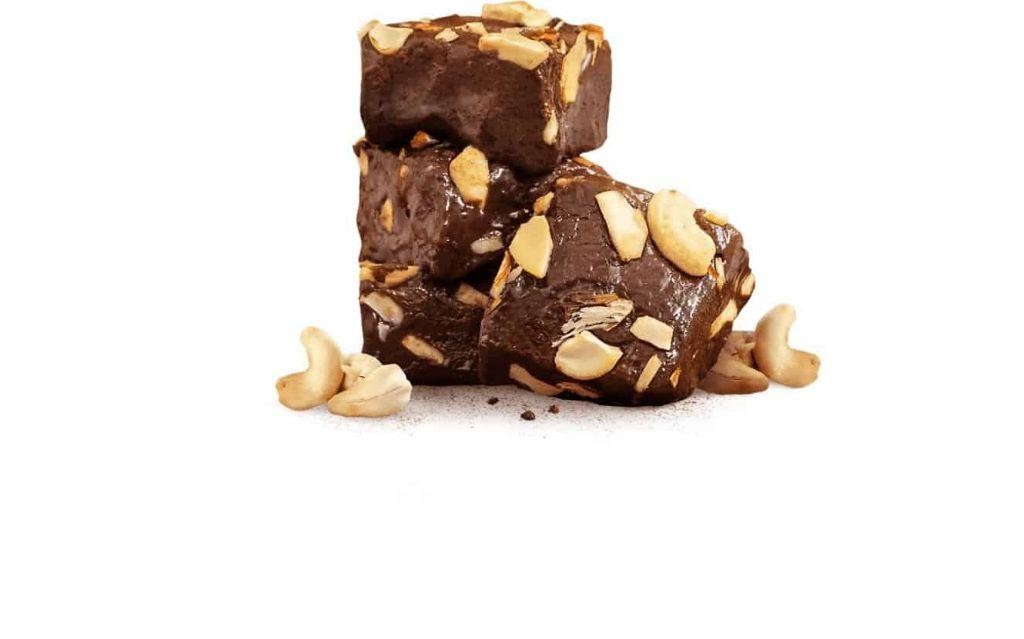
Unbelievably, we’ve managed to make chocolate even more irresistible by adding nuts—because apparently, regular chocolate fudge just wasn’t decadent enough for our taste buds. This nutty chocolate fudge is the kind of treat that’ll make you forget all your problems, at least until you realize you’ve eaten the entire pan.
64
squares15
minutes7
minutesIngredients
For the fudge base:
– 3 cups semi-sweet chocolate chips
– 1 can (14 oz) sweetened condensed milk
– 1/4 cup unsalted butter
– 1 teaspoon vanilla extract
For the nut mixture:
– 1 cup chopped walnuts
– 1/2 cup chopped pecans
Instructions
1. Line an 8×8 inch baking pan with parchment paper, leaving some overhang on two opposite sides for easy removal later.
2. Combine 3 cups semi-sweet chocolate chips, 1 can sweetened condensed milk, and 1/4 cup unsalted butter in a medium saucepan.
3. Heat the mixture over low heat, stirring constantly with a wooden spoon until completely smooth and glossy, about 5-7 minutes.
4. Remove the saucepan from heat and immediately stir in 1 teaspoon vanilla extract until fully incorporated.
5. Gently fold in 1 cup chopped walnuts and 1/2 cup chopped pecans until evenly distributed throughout the fudge mixture.
6. Pour the fudge mixture into your prepared baking pan, using a spatula to spread it into an even layer.
7. Refrigerate the fudge for at least 4 hours, or until completely firm and set.
8. Use the parchment paper overhang to lift the fudge block out of the pan and place it on a cutting board.
9. Cut the fudge into 1-inch squares using a sharp knife, wiping the blade clean between cuts for neat edges.
Perfectly rich and studded with crunchy nuts, this fudge delivers that satisfying snap when you break a piece in half. The walnuts add earthy depth while the pecans bring buttery sweetness that plays beautifully against the intense chocolate. Try serving these squares slightly chilled alongside strong coffee, or crumble them over vanilla ice cream for an instant dessert upgrade that’ll have everyone asking for your secret.
Mulled Wine Chocolate Tart
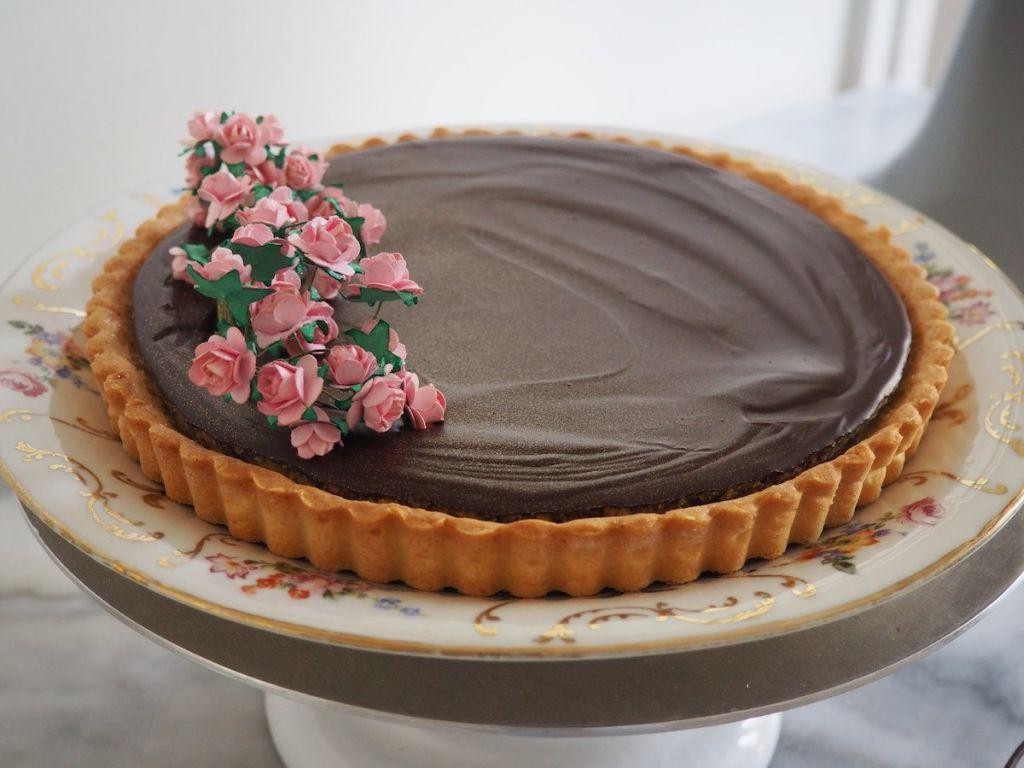
Picture this: you’ve invited your fanciest friends over for dinner, and they’re expecting something sophisticated. Meanwhile, you’re secretly hoping to serve dessert that tastes like Christmas morning got tipsy and crashed a chocolate party. Presenting the mulled wine chocolate tart—where elegance meets “I definitely meant to spill that spice” energy.
8
portions30
minutes25
minutesIngredients
For the Crust
- 1 ½ cups graham cracker crumbs
- 6 tbsp unsalted butter, melted
- 2 tbsp granulated sugar
For the Filling
- 1 cup heavy cream
- 8 oz semisweet chocolate, finely chopped
- ½ cup mulled wine (reduced from 1 cup red wine)
- 2 tbsp unsalted butter, room temperature
- ¼ tsp ground cinnamon
- ⅛ tsp ground cloves
- Pinch of salt
Instructions
- Preheat your oven to 350°F and grab a 9-inch tart pan with a removable bottom.
- Combine the graham cracker crumbs, 6 tbsp melted butter, and 2 tbsp sugar in a medium bowl until the mixture resembles wet sand. Tip: Press a small amount between your fingers—if it holds together, you’ve nailed the texture.
- Firmly press the crumb mixture into the bottom and up the sides of the tart pan, using a flat-bottomed cup to create an even layer.
- Bake the crust for 10 minutes at 350°F until lightly golden and fragrant, then let it cool completely on a wire rack.
- While the crust cools, pour 1 cup red wine into a small saucepan and simmer over medium heat until reduced to ½ cup, about 12–15 minutes. Tip: Swirl the pan occasionally—you’ll know it’s ready when the wine coats the back of a spoon.
- Heat 1 cup heavy cream in another saucepan until it just begins to simmer, with tiny bubbles forming around the edges.
- Pour the hot cream over the 8 oz chopped chocolate in a heatproof bowl, let it sit for 1 minute, then whisk until smooth and glossy.
- Stir in the ½ cup reduced mulled wine, 2 tbsp room-temperature butter, ¼ tsp cinnamon, ⅛ tsp cloves, and a pinch of salt until fully combined.
- Pour the chocolate filling into the cooled crust and gently tap the pan on the counter to release any air bubbles.
- Refrigerate the tart for at least 4 hours, or until the filling is firm to the touch. Tip: For clean slices, dip your knife in hot water and wipe it dry between cuts.
Outrageously silky and spiced with cozy warmth, this tart delivers a fudgy texture that’s somehow both rich and light. Serve it with a dollop of whipped cream dusted with extra cinnamon, or lean into the drama by garnishing with a candied orange slice—because why should the wine have all the fun?
Chocolate-Cranberry Biscotti
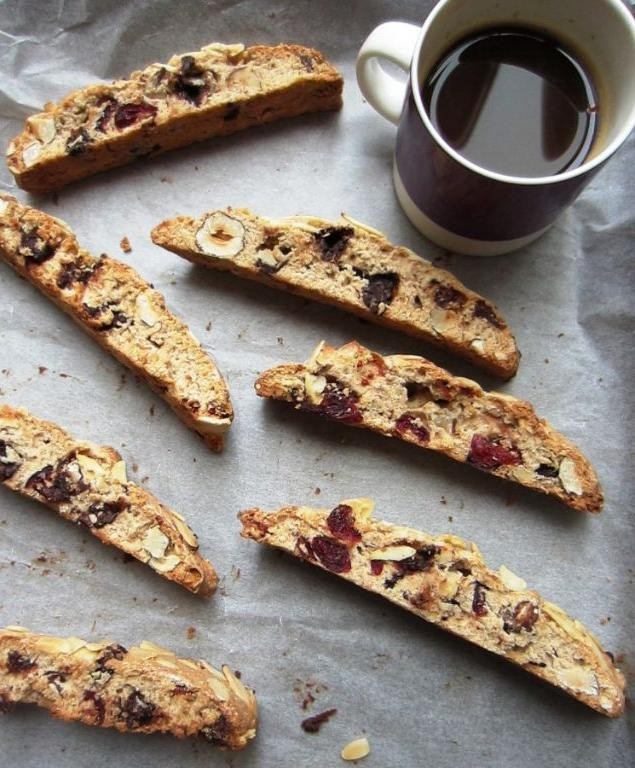
Crisp, crunchy, and dangerously dunkable, these chocolate-cranberry biscotti are the twice-baked Italian cookies that refuse to be boring. They’re studded with tart dried cranberries and rich chocolate chunks, making them the perfect excuse to have cookies for breakfast (with coffee, of course). Consider this your official permission slip to embrace your inner nonna—with a sassy twist.
12
biscotti20
minutes45
minutesIngredients
For the Dough:
- 2 cups all-purpose flour
- 1 ½ tsp baking powder
- ¼ tsp salt
- ½ cup unsalted butter, softened
- ¾ cup granulated sugar
- 2 large eggs
- 1 tsp vanilla extract
- ½ cup dried cranberries
- ½ cup semi-sweet chocolate chunks
Instructions
- Preheat your oven to 350°F and line a baking sheet with parchment paper.
- In a medium bowl, whisk together 2 cups all-purpose flour, 1 ½ tsp baking powder, and ¼ tsp salt until well combined.
- In a separate large bowl, use an electric mixer to cream ½ cup softened unsalted butter and ¾ cup granulated sugar on medium speed for 2–3 minutes, until light and fluffy.
- Beat in 2 large eggs, one at a time, followed by 1 tsp vanilla extract, scraping down the bowl as needed.
- Gradually add the dry ingredients to the wet ingredients, mixing on low speed just until a dough forms.
- Fold in ½ cup dried cranberries and ½ cup semi-sweet chocolate chunks with a spatula until evenly distributed.
- Turn the dough out onto a lightly floured surface and shape it into a log about 12 inches long and 3 inches wide.
- Transfer the log to the prepared baking sheet and bake for 25 minutes, or until the top is firm and lightly golden.
- Remove the log from the oven and let it cool on the baking sheet for 10 minutes.
- Using a serrated knife, slice the log diagonally into ½-inch-thick slices while still warm.
- Arrange the slices cut-side down on the baking sheet and return to the oven for 10 minutes.
- Flip each slice and bake for another 10 minutes, until crisp and golden at the edges.
- Transfer the biscotti to a wire rack to cool completely.
These biscotti boast a satisfying snap with a buttery, crumbly interior that gives way to bursts of tangy cranberry and melty chocolate. Dunk them in a frothy latte for a cozy morning treat, or crumble them over vanilla ice cream for a next-level dessert—because why should breakfast have all the fun?
Spiced Mexican Hot Chocolate
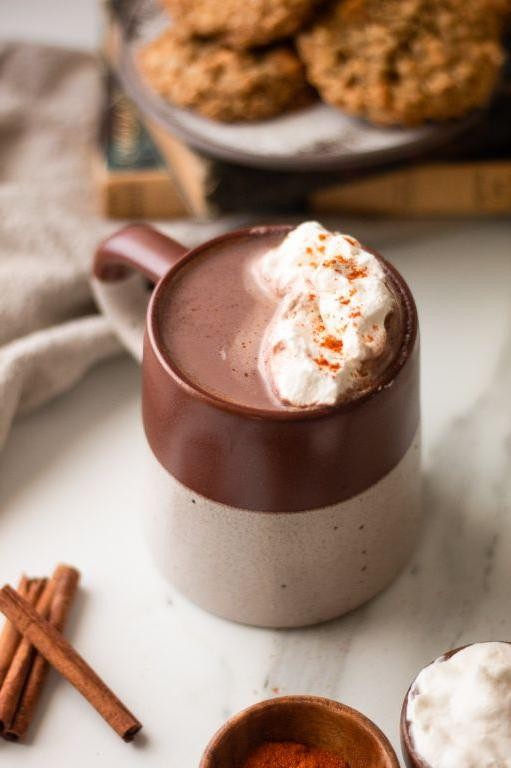
Every time the weather turns chilly, my taste buds stage a full-scale rebellion demanding something that’ll warm them from the inside out—and this Spiced Mexican Hot Chocolate is the deliciously spicy peace treaty. Imagine your favorite cozy drink decided to take a vacation south of the border and came back with a spicy tan and a whole new attitude. It’s basically a hug in a mug, but with a little kick to keep things interesting.
2
servings5
minutes15
minutesIngredients
– For the chocolate base: 2 cups whole milk, 1/2 cup heavy cream, 1/4 cup granulated sugar, 1/4 cup unsweetened cocoa powder
– For the spice blend: 1/2 tsp ground cinnamon, 1/4 tsp chili powder, 1/8 tsp cayenne pepper
– For finishing: 4 oz chopped semi-sweet chocolate, 1 tsp vanilla extract
Instructions
1. Pour 2 cups whole milk and 1/2 cup heavy cream into a medium saucepan.
2. Heat the mixture over medium heat until small bubbles form around the edges, about 5-7 minutes (don’t let it boil—trust me, scalded milk is nobody’s friend).
3. Whisk in 1/4 cup granulated sugar and 1/4 cup unsweetened cocoa powder until completely smooth and no lumps remain.
4. Add 1/2 tsp ground cinnamon, 1/4 tsp chili powder, and 1/8 tsp cayenne pepper, whisking vigorously to incorporate the spices evenly.
5. Reduce heat to low and stir in 4 oz chopped semi-sweet chocolate until fully melted and the mixture is glossy, about 2-3 minutes.
6. Remove the saucepan from heat and stir in 1 tsp vanilla extract.
7. Pour the hot chocolate into mugs immediately while still warm.
Unbelievably smooth with a velvety texture that clings to your spoon, this drink delivers a warm cinnamon hug followed by a playful chili kick that dances on your tongue. Serve it alongside churros for dipping or spike it with a shot of coffee liqueur for an adults-only upgrade that’ll make you the hero of any chilly evening.
Festive Chocolate Snowball Cookies
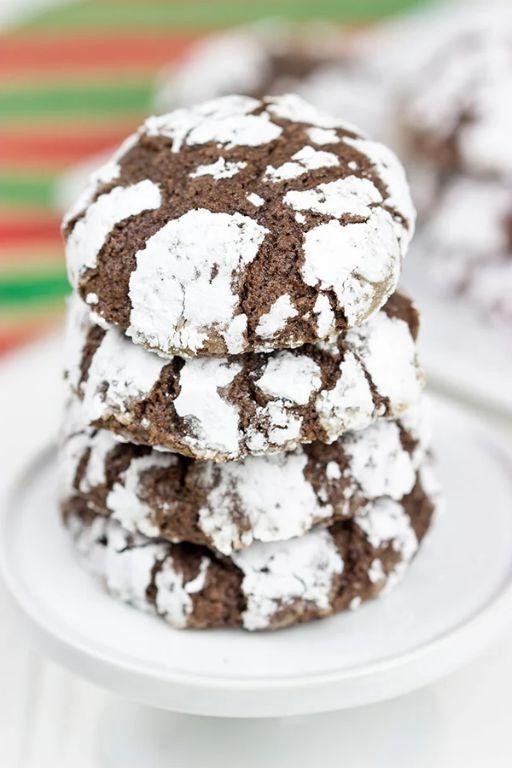
Zesty, zany, and downright magical—these Festive Chocolate Snowball Cookies are about to become your winter baking obsession. Imagine biting into a delicate, powdered-sugar-dusted sphere that collapses into rich chocolatey bliss, leaving you wondering how something so simple could be so spectacular. They’re basically edible snowballs, but with way more personality and zero risk of frostbite.
24
cookies20
minutes12
minutesIngredients
For the cookie dough:
- 1 cup unsalted butter, softened
- 1/2 cup granulated sugar
- 2 tsp vanilla extract
- 2 cups all-purpose flour
- 1/2 cup cocoa powder
- 1/4 tsp salt
- 1 cup finely chopped pecans
For coating:
- 1 cup powdered sugar
Instructions
- Preheat your oven to 350°F and line two baking sheets with parchment paper.
- In a large bowl, beat the softened butter and granulated sugar together with an electric mixer on medium speed for 2 minutes, until light and fluffy.
- Add the vanilla extract and mix for 30 seconds until fully incorporated.
- In a separate bowl, whisk together the all-purpose flour, cocoa powder, and salt until no streaks remain.
- Gradually add the dry ingredients to the butter mixture, mixing on low speed just until a crumbly dough forms.
- Fold in the finely chopped pecans with a spatula until evenly distributed throughout the dough.
- Scoop 1 tablespoon of dough and roll it between your palms into a tight 1-inch ball. Pro tip: If the dough feels too soft, chill it for 15 minutes—this prevents spreading and ensures perfect spheres.
- Place the dough balls 2 inches apart on the prepared baking sheets.
- Bake for 12 minutes exactly—the cookies will still feel soft but will firm up as they cool.
- Let the cookies cool on the baking sheet for 5 minutes until they’re firm enough to handle but still warm.
- Pour the powdered sugar into a shallow bowl and gently roll each warm cookie in it until fully coated. Pro tip: Rolling while warm helps the sugar adhere better, creating that iconic snowy look.
- Transfer the coated cookies to a wire rack to cool completely, about 20 minutes.
- Once cooled, give them a second roll in the powdered sugar for maximum winter wonderland vibes. Pro tip: This double coating ensures no bald spots and extra festive flair.
Seriously, these cookies are a textural dream—crisp powdered sugar shells give way to fudgy, nutty centers that melt on the tongue. Serve them stacked like a mini snowman family or tucked into mugs of hot cocoa for a dunkable delight that’ll have everyone begging for your secret recipe.
Orange Chocolate Bread Pudding
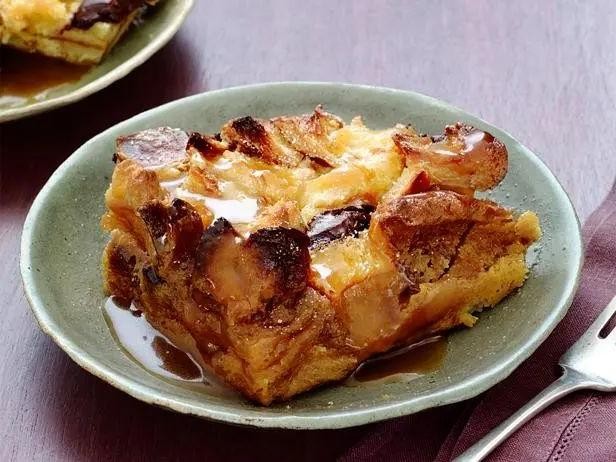
Craving something that combines the sophistication of a fancy dessert with the cozy comfort of your favorite blanket? This Orange Chocolate Bread Pudding is here to rescue your taste buds from boredom and your soul from dessert monotony. Imagine pillowy bread soaked in citrus-kissed custard, studded with melty chocolate chunks—it’s basically a hug in baking dish form.
8
servings20
minutes50
minutesIngredients
- For the Bread Base:
- 6 cups cubed day-old French bread (1-inch pieces)
- 1 cup semi-sweet chocolate chips
- For the Custard:
- 2 cups whole milk
- 1 cup heavy cream
- 3 large eggs
- 1/2 cup granulated sugar
- 1 tbsp orange zest
- 1 tsp vanilla extract
- 1/2 tsp ground cinnamon
- 1/4 tsp salt
Instructions
- Preheat your oven to 350°F and grease a 9×13-inch baking dish with butter or non-stick spray.
- Spread the 6 cups of cubed French bread evenly in the prepared baking dish.
- Sprinkle 1 cup of semi-sweet chocolate chips over the bread cubes.
- In a large mixing bowl, whisk together 2 cups whole milk and 1 cup heavy cream until combined.
- Add 3 large eggs to the milk mixture and whisk vigorously until fully incorporated.
- Stir in 1/2 cup granulated sugar, 1 tbsp orange zest, 1 tsp vanilla extract, 1/2 tsp ground cinnamon, and 1/4 tsp salt until the sugar dissolves.
- Pour the custard mixture evenly over the bread and chocolate chips in the baking dish.
- Press down gently on the bread with a spatula to ensure all pieces are submerged in the custard.
- Let the mixture sit for 15 minutes to allow the bread to fully absorb the custard.
- Bake in the preheated oven for 45–50 minutes, or until the top is golden brown and the center is set (no liquid jiggles when you gently shake the dish).
- Remove from the oven and let cool for 10 minutes before serving.
Unbelievably, each bite delivers a warm, custardy interior with pockets of gooey chocolate and a bright orange zing that cuts through the richness. Serve it slightly warm with a dusting of powdered sugar or a scoop of vanilla ice cream for that extra “wow” factor—it’s the kind of dessert that makes you forget you’re eating leftovers-turned-gourmet.
Double Chocolate Peppermint Cookies
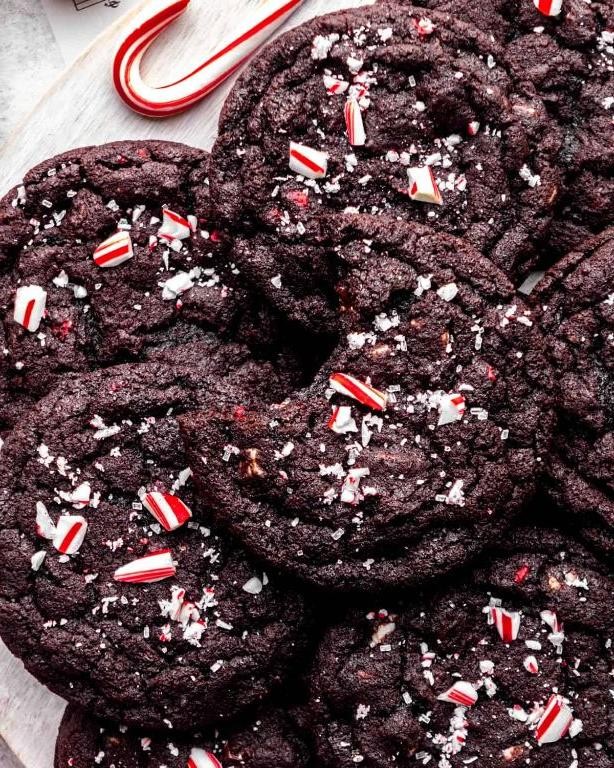
Craving something that combines the sophistication of a fancy bakery with the comfort of your favorite childhood candy? These double chocolate peppermint cookies are here to deliver that exact magical collision, promising a fudgy, minty experience that will make your taste buds do a happy dance.
24
cookies15
minutes12
minutesIngredients
For the Cookie Dough:
- 1 cup all-purpose flour
- 1/2 cup unsweetened cocoa powder
- 1/2 tsp baking soda
- 1/4 tsp salt
- 1/2 cup unsalted butter, softened to room temperature
- 3/4 cup granulated sugar
- 1/4 cup packed light brown sugar
- 1 large egg
- 1 tsp pure peppermint extract
For the Mix-ins & Topping:
- 1 cup semi-sweet chocolate chips
- 1/2 cup crushed peppermint candies
Instructions
- Preheat your oven to 350°F and line two baking sheets with parchment paper.
- In a medium bowl, whisk together 1 cup all-purpose flour, 1/2 cup unsweetened cocoa powder, 1/2 tsp baking soda, and 1/4 tsp salt until no streaks remain.
- In a large bowl, use an electric mixer on medium speed to beat 1/2 cup softened unsalted butter, 3/4 cup granulated sugar, and 1/4 cup packed light brown sugar for 2 minutes until light and fluffy.
- Beat in 1 large egg and 1 tsp pure peppermint extract just until combined, scraping down the bowl halfway through.
- Gradually add the dry flour mixture to the wet butter mixture, mixing on low speed until a thick dough forms—don’t overmix! Tip: For extra tender cookies, mix just until the last traces of flour disappear.
- Switch to a spatula and fold in 1 cup semi-sweet chocolate chips and 1/2 cup crushed peppermint candies until evenly distributed.
- Scoop 1.5-tablespoon portions of dough, roll into balls, and place 2 inches apart on the prepared baking sheets.
- Bake for 10–12 minutes, until the edges look set but the centers still appear slightly soft. Tip: For perfectly chewy cookies, pull them out when they still look a tiny bit underbaked in the middle.
- Let the cookies cool on the baking sheet for 5 minutes before transferring to a wire rack. Tip: This resting time helps them firm up without becoming crunchy.
Brace yourself for cookies that are crackly on top, irresistibly chewy inside, and packed with a cool mint kick that plays perfectly against the rich double chocolate. Try serving them slightly warm with a glass of cold milk for the ultimate cozy treat, or crumble them over vanilla ice cream for a next-level dessert hack.
Chocolate Hazelnut Bûche de Noël

Look, we all know the holiday season is basically a competitive sport, and this Chocolate Hazelnut Bûche de Noël is your secret weapon to absolutely crush the dessert table. Let’s roll up our sleeves (and this cake) for a showstopper that’s equal parts elegant and deliciously decadent.
8
servings45
minutes12
minutesIngredients
For the Chocolate Sponge Cake:
- 4 large eggs, at room temperature
- 3/4 cup granulated sugar
- 1/2 cup all-purpose flour
- 1/4 cup unsweetened cocoa powder
- 1/4 tsp salt
For the Hazelnut Filling:
- 1 cup heavy cream
- 1/2 cup chocolate hazelnut spread
- 1/4 cup powdered sugar
For the Chocolate Ganache:
- 1 cup semi-sweet chocolate chips
- 1/2 cup heavy cream
Instructions
- Preheat your oven to 350°F and line a 10×15-inch jelly roll pan with parchment paper.
- In a large bowl, beat the 4 eggs and 3/4 cup granulated sugar with an electric mixer on high speed for 5 minutes, until pale and thick.
- Sift in the 1/2 cup flour, 1/4 cup cocoa powder, and 1/4 tsp salt, then gently fold with a spatula until just combined.
- Spread the batter evenly into the prepared pan and bake for 12 minutes, until the top springs back when lightly touched.
- Immediately invert the warm cake onto a clean kitchen towel dusted with powdered sugar and carefully peel off the parchment paper.
- Starting from a short end, tightly roll the cake and towel together into a log, then let it cool completely on a wire rack for 1 hour.
- While the cake cools, make the filling: In a chilled bowl, whip 1 cup heavy cream, 1/2 cup chocolate hazelnut spread, and 1/4 cup powdered sugar until stiff peaks form.
- Unroll the cooled cake, spread the hazelnut filling evenly over the surface, and re-roll tightly without the towel.
- Place the rolled cake seam-side down on a serving platter and refrigerate for 30 minutes.
- Make the ganache: Heat 1/2 cup heavy cream until just simmering, then pour over 1 cup chocolate chips in a bowl, letting it sit for 2 minutes before stirring until smooth.
- Spread the ganache over the chilled cake, using a fork to create bark-like texture lines along the length.
- Refrigerate the finished bûche for at least 1 hour before slicing to set completely.
Velvety ganache gives way to a fluffy, nutty swirl that’s pure holiday magic. Serve thick slices with a dusting of powdered “snow” and watch it disappear faster than holiday shopping deadlines.
White Chocolate and Cranberry Bars
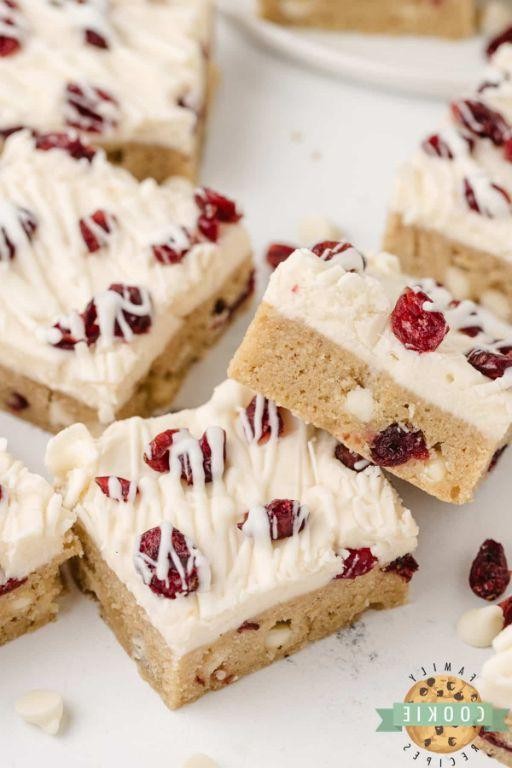
Virtually every dessert enthusiast has that one treat that makes them do a little happy dance—and these white chocolate and cranberry bars are about to become your new rhythm. Imagine buttery shortbread meeting tart cranberries and creamy white chocolate in a symphony of textures that’ll have you sneaking back for seconds before the pan even cools.
16
bars20
minutes40
minutesIngredients
For the Crust:
– 1 ½ cups all-purpose flour
– ½ cup granulated sugar
– ½ cup unsalted butter, cold and cubed
For the Filling:
– 1 cup dried cranberries
– ½ cup white chocolate chips
– 2 large eggs
– ¾ cup granulated sugar
– 1 teaspoon vanilla extract
– ¼ teaspoon salt
Instructions
1. Preheat your oven to 350°F and line an 8×8-inch baking pan with parchment paper, leaving overhang on two sides for easy removal.
2. In a medium bowl, combine 1 ½ cups all-purpose flour and ½ cup granulated sugar.
3. Add ½ cup cold, cubed unsalted butter to the flour mixture, using a pastry cutter or your fingers to work it in until the mixture resembles coarse crumbs.
4. Press the crust mixture firmly into the bottom of the prepared pan in an even layer—pro tip: use the bottom of a measuring cup to get it perfectly flat and compact.
5. Bake the crust for 15 minutes at 350°F until the edges are just beginning to turn golden.
6. While the crust bakes, whisk 2 large eggs, ¾ cup granulated sugar, 1 teaspoon vanilla extract, and ¼ teaspoon salt in a medium bowl until smooth and slightly thickened.
7. Stir 1 cup dried cranberries and ½ cup white chocolate chips into the egg mixture until evenly distributed.
8. Pour the filling over the hot crust immediately after removing it from the oven, spreading it evenly with a spatula.
9. Return the pan to the oven and bake for 20-25 minutes at 350°F until the filling is set and the edges are lightly browned—another pro tip: the center should no longer jiggle when you gently shake the pan.
10. Cool the bars completely in the pan on a wire rack for at least 2 hours before slicing.
11. Use the parchment overhang to lift the bars from the pan, then cut into squares with a sharp knife—final pro tip: wipe the knife clean between cuts for neat edges.
Perfectly balancing chewy cranberries with melty white chocolate pockets, these bars offer a delightful contrast against the crisp shortbread base. Package them in cellophane for holiday gifting or crumble over vanilla ice cream for an instant dessert upgrade that’ll make any Tuesday feel celebratory.
Rich Chocolate Cheesecake

Fellow dessert devotees, gather ’round your mixing bowls because we’re about to create a chocolate cheesecake so decadent it might just replace your morning coffee as your primary reason for getting out of bed. This rich, velvety masterpiece is the love child of classic New York cheesecake and your favorite chocolate bar, and it’s here to make your dessert dreams come true without requiring a culinary degree.
8
servings30
minutes75
minutesIngredients
For the Crust
– 1 ½ cups chocolate cookie crumbs
– ¼ cup granulated sugar
– 6 tbsp unsalted butter, melted
For the Filling
– 24 oz cream cheese, softened to room temperature
– 1 cup granulated sugar
– 3 large eggs, room temperature
– 1 cup semi-sweet chocolate chips, melted
– 1 tsp vanilla extract
– ½ cup sour cream
Instructions
1. Preheat your oven to 325°F and grease a 9-inch springform pan.
2. Combine chocolate cookie crumbs, ¼ cup sugar, and melted butter in a medium bowl until the mixture resembles wet sand.
3. Press the crust mixture firmly into the bottom of the prepared pan using the bottom of a measuring cup to create an even layer.
4. Bake the crust for 10 minutes at 325°F until slightly fragrant, then remove from oven and let cool while you prepare the filling.
5. In a large mixing bowl, beat the softened cream cheese with an electric mixer on medium speed for 2 minutes until smooth and creamy.
6. Gradually add 1 cup sugar while continuing to beat for another 2 minutes until fully incorporated and no graininess remains.
7. Add eggs one at a time, beating for 30 seconds after each addition until just combined—don’t overmix!
8. Melt chocolate chips in a microwave-safe bowl using 30-second intervals, stirring between each until completely smooth.
9. Fold the melted chocolate and vanilla extract into the cream cheese mixture using a spatula until uniformly chocolate-colored.
10. Gently stir in the sour cream until the filling is completely smooth and homogeneous.
11. Pour the filling over the cooled crust and smooth the top with an offset spatula.
12. Place the springform pan in a larger baking dish and create a water bath by pouring hot water into the outer dish until it reaches halfway up the sides of the springform pan.
13. Bake at 325°F for 55-65 minutes until the edges are set but the center still jiggles slightly when gently shaken.
14. Turn off the oven, crack the door open about 1 inch, and let the cheesecake cool in the oven for 1 hour to prevent cracking.
15. Remove from oven and run a knife around the edge of the pan to loosen the cheesecake from the sides.
16. Refrigerate for at least 6 hours, preferably overnight, before serving.
Every slice reveals a velvety texture that melts on your tongue while delivering an intense chocolate flavor balanced by the tangy cream cheese base. Elevate this beauty by topping with fresh raspberries and a drizzle of chocolate ganache, or go wild with crushed peppermint candies for a festive twist that’ll make your guests think you secretly trained at a fancy pastry shop.
Holiday Chocolate Rum Balls
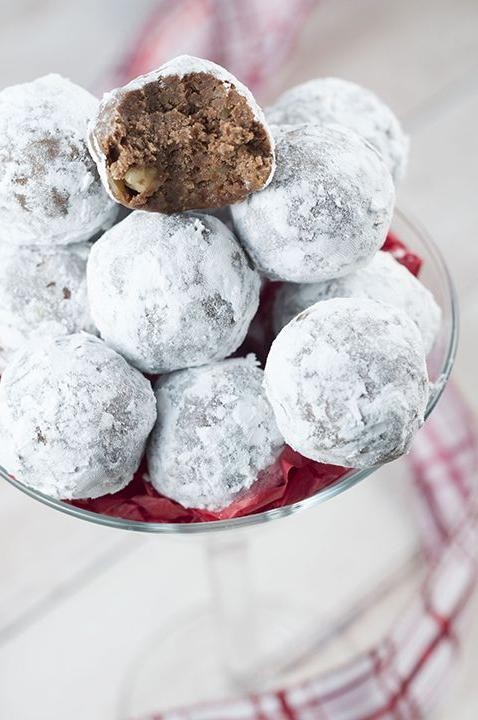
Mmm, nothing says ‘festive cheer’ quite like boozy chocolate that requires zero baking skills—because let’s be real, the holidays are chaotic enough without worrying about your oven timer. These Holiday Chocolate Rum Balls are the ultimate no-fuss, make-ahead treat that’ll have your guests thinking you’re a dessert wizard (even if you can barely microwave popcorn). They’re rich, rum-spiked, and roll together faster than you can say “egg nog refill, please!”
24
balls45
minutesIngredients
For the base mixture:
– 2 cups finely crushed vanilla wafer cookies
– 1 cup powdered sugar
– 1/2 cup finely chopped walnuts
– 2 tablespoons unsweetened cocoa powder
– 3 tablespoons dark rum
For binding and coating:
– 3 tablespoons light corn syrup
– 1/4 cup granulated sugar (for rolling)
Instructions
- Place vanilla wafer cookies in a zip-top bag and crush them into fine crumbs using a rolling pin until you have 2 cups.
- Combine the cookie crumbs, powdered sugar, chopped walnuts, and cocoa powder in a large mixing bowl, whisking until evenly distributed.
- Pour in the dark rum and light corn syrup, stirring with a spatula until the mixture resembles damp sand and holds together when pressed.
- Cover the bowl with plastic wrap and chill the mixture in the refrigerator for 30 minutes to firm it up for easier rolling.
- Scoop 1 tablespoon of the chilled mixture and roll it firmly between your palms into a 1-inch ball.
- Roll each ball in a shallow dish of granulated sugar until fully coated, shaking off any excess.
- Arrange the coated balls on a parchment-lined baking sheet, spacing them 1 inch apart.
- Refrigerate the rum balls for at least 2 hours, or until firm to the touch, before serving.
Keep these little gems chilled until the party starts—they’re delightfully fudgy with a subtle crunch from the walnuts and a warm rum kick that’ll make you feel extra festive. For a next-level presentation, stack them in a rustic wooden bowl or tuck them into mini cupcake liners for easy grabbing between carols and gift-unwrapping chaos.
Mocha Chocolate Meringue Pie
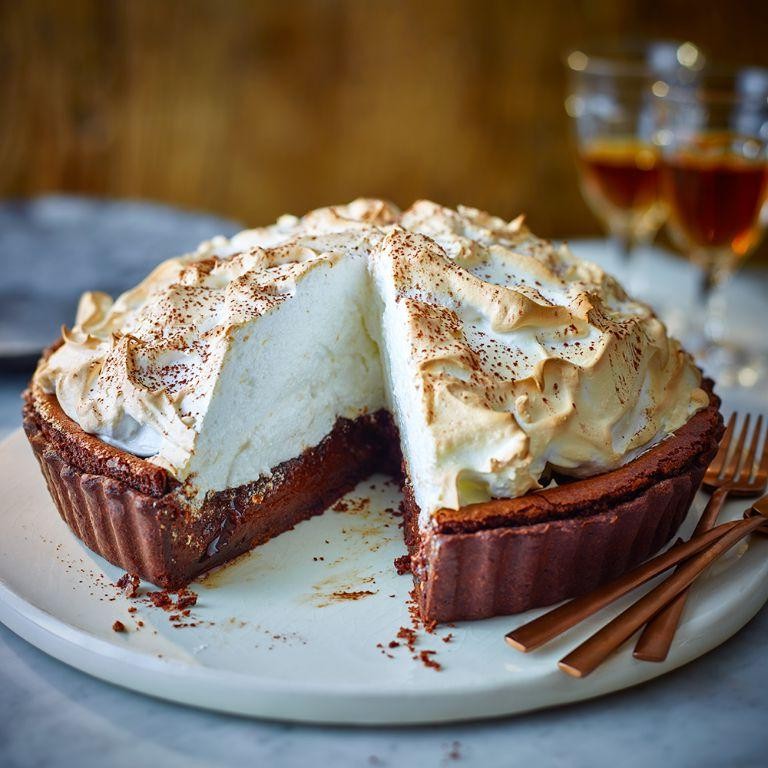
Fancy a dessert that combines your coffee addiction with your chocolate obsession in one glorious, cloud-like creation? Meet the mocha chocolate meringue pie—the sophisticated cousin of your average pie that somehow manages to be both elegantly light and decadently rich. This beauty features a crisp chocolate crust, a silky mocha filling, and a billowy meringue topping that’ll make you want to skip dinner and dive straight into dessert heaven.
8
servings30
minutes30
minutesIngredients
For the Crust
- 1 ½ cups chocolate wafer cookie crumbs
- 6 tbsp unsalted butter, melted
- 2 tbsp granulated sugar
For the Filling
- 1 cup granulated sugar
- ⅓ cup cornstarch
- ¼ tsp salt
- 3 cups whole milk
- 4 large egg yolks
- 3 oz bittersweet chocolate, chopped
- 2 tbsp instant espresso powder
- 2 tsp vanilla extract
- 2 tbsp unsalted butter
For the Meringue
- 4 large egg whites
- ¼ tsp cream of tartar
- ½ cup granulated sugar
Instructions
- Preheat your oven to 350°F.
- Combine 1 ½ cups chocolate wafer cookie crumbs, 6 tbsp melted unsalted butter, and 2 tbsp granulated sugar in a medium bowl. Tip: Press the crumbs firmly into the pie plate to prevent a crumbly crust.
- Press the mixture evenly into the bottom and up the sides of a 9-inch pie plate.
- Bake the crust for 10 minutes at 350°F until fragrant and set.
- Remove the crust from the oven and let it cool completely on a wire rack.
- Whisk together 1 cup granulated sugar, ⅓ cup cornstarch, and ¼ tsp salt in a medium saucepan.
- Gradually whisk in 3 cups whole milk until smooth.
- Cook the mixture over medium heat, stirring constantly with a wooden spoon, until it thickens and bubbles, about 8–10 minutes.
- Reduce the heat to low and cook for 2 more minutes, stirring continuously.
- Place 4 large egg yolks in a small bowl and whisk lightly.
- Slowly whisk about 1 cup of the hot milk mixture into the egg yolks to temper them.
- Pour the tempered egg yolk mixture back into the saucepan, whisking constantly.
- Bring the filling to a gentle boil over medium heat, stirring constantly, and cook for 2 minutes.
- Remove the saucepan from the heat and stir in 3 oz chopped bittersweet chocolate, 2 tbsp instant espresso powder, 2 tsp vanilla extract, and 2 tbsp unsalted butter until smooth. Tip: Stir in one direction to avoid incorporating air bubbles for a silkier texture.
- Pour the filling into the cooled crust and smooth the top with a spatula.
- Place plastic wrap directly on the surface of the filling and refrigerate for at least 4 hours until completely chilled and set.
- Preheat your oven to 400°F for the meringue.
- Beat 4 large egg whites and ¼ tsp cream of tartar in a clean, grease-free bowl with an electric mixer on medium speed until soft peaks form.
- Gradually add ½ cup granulated sugar, 1 tbsp at a time, beating on high speed until stiff, glossy peaks form, about 5–7 minutes. Tip: Ensure no yolk gets into the whites and your bowl is completely dry for the best meringue volume.
- Spread the meringue over the chilled filling, sealing it completely to the edges of the crust.
- Use the back of a spoon to create decorative peaks all over the meringue.
- Bake the pie for 8–10 minutes at 400°F until the meringue peaks are golden brown.
- Let the pie cool on a wire rack for 1 hour, then refrigerate for another 2 hours before serving.
Ready to impress? The meringue offers a lightly sweet, airy contrast to the rich, velvety mocha chocolate filling that melts on your tongue. Serve slices with a dusting of cocoa powder or alongside a shot of espresso for an extra caffeine kick that’ll have your guests swooning.
Chocolate and Chestnut Pudding

Unbelievably decadent and ridiculously easy, this chocolate and chestnut pudding is basically a hug in dessert form—perfect for when your sweet tooth demands immediate satisfaction and your patience has clocked out for the day. Seriously, who needs therapy when you can just bake this?
8
servings15
minutes30
minutesIngredients
- For the Pudding Base:
- 1 cup all-purpose flour
- 1/2 cup granulated sugar
- 1/4 cup unsweetened cocoa powder
- 1 tsp baking powder
- 1/4 tsp salt
- 1/2 cup whole milk
- 1 large egg
- 1/4 cup unsalted butter, melted
- 1 tsp vanilla extract
- For the Chestnut Layer:
- 1 cup canned sweetened chestnut spread
- 1/4 cup heavy cream
- For Serving (Optional):
- Whipped cream
- Chocolate shavings
Instructions
- Preheat your oven to 350°F and grease an 8-inch round baking pan.
- In a medium bowl, whisk together 1 cup all-purpose flour, 1/2 cup granulated sugar, 1/4 cup unsweetened cocoa powder, 1 tsp baking powder, and 1/4 tsp salt until no lumps remain.
- In a separate bowl, whisk 1/2 cup whole milk, 1 large egg, 1/4 cup melted unsalted butter, and 1 tsp vanilla extract until fully combined.
- Pour the wet ingredients into the dry ingredients and stir just until the batter is smooth—overmixing can make the pudding tough, so stop as soon as you see no dry streaks.
- Spread the batter evenly into the prepared pan using a spatula.
- In a small bowl, mix 1 cup canned sweetened chestnut spread with 1/4 cup heavy cream until it reaches a spoonable consistency.
- Drop dollops of the chestnut mixture over the chocolate batter, then use a knife to gently swirl them together for a marbled effect—don’t over-swirl or you’ll lose the pattern.
- Bake for 25–30 minutes, or until a toothpick inserted into the center comes out with a few moist crumbs (not wet batter).
- Let the pudding cool in the pan for 10 minutes before slicing.
- Serve warm, topped with whipped cream and chocolate shavings if desired.
Magically rich and fudgy, this pudding boasts a velvety texture with earthy chestnut swirls that melt right into each bite. Try it à la mode with a scoop of vanilla ice cream for a cozy contrast, or simply eat it straight from the pan—we won’t judge.
Dark Chocolate Covered Ginger
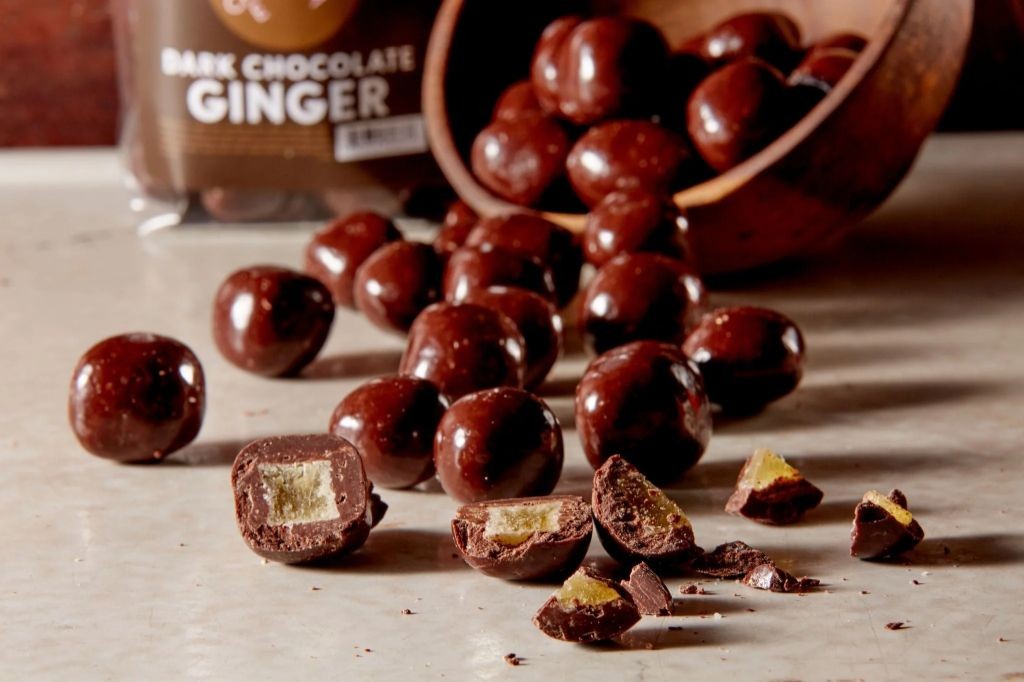
Zesty, zingy, and downright addictive—these dark chocolate covered ginger bites are the rebellious cousin of your average candy. They’re the perfect blend of spicy kick and rich indulgence, guaranteed to make your taste buds do a happy dance. Trust me, once you pop one, you’ll be scheming ways to hide the batch from your family (or yourself!).
1
batch10
minutes2
minutesIngredients
- For the Ginger Base
- 1 cup crystallized ginger pieces
- For the Chocolate Coating
- 8 oz high-quality dark chocolate (60-70% cocoa), chopped
- 1 tsp coconut oil
Instructions
- Line a baking sheet with parchment paper and set it aside.
- Place the chopped dark chocolate and coconut oil in a microwave-safe bowl.
- Microwave the chocolate mixture in 30-second intervals, stirring thoroughly after each interval, until completely melted and smooth (about 1.5–2 minutes total). Tip: Stirring prevents overheating and ensures a silky texture.
- Using a fork or dipping tool, submerge each crystallized ginger piece fully into the melted chocolate.
- Lift the coated ginger, allowing excess chocolate to drip back into the bowl.
- Place each piece onto the prepared parchment-lined baking sheet, spacing them about 1 inch apart.
- Once all pieces are coated, transfer the baking sheet to the refrigerator.
- Chill for 20–25 minutes, or until the chocolate is firm to the touch. Tip: Don’t rush this step—proper chilling prevents smudging and ensures a crisp shell.
- Remove the set chocolate-covered ginger from the refrigerator.
- Gently peel each piece from the parchment paper. Tip: If any stick, slide a thin spatula underneath to release them cleanly.
Glossy, crackly chocolate gives way to chewy, fiery ginger inside—a textural tango that’s pure magic. Serve these gems alongside strong coffee for a midday pick-me-up, or crumble them over vanilla ice cream for an instant dessert upgrade. Honestly, they’re so good, you might just start gifting them (if you can bear to share).
Conclusion
Embark on a festive chocolate journey with these 34 decadent recipes! From cozy cocoa to elegant truffles, there’s something to delight every sweet tooth. We’d love to hear which creations become your holiday favorites—drop a comment below and share the sweetness by pinning this roundup on Pinterest. Happy baking!


