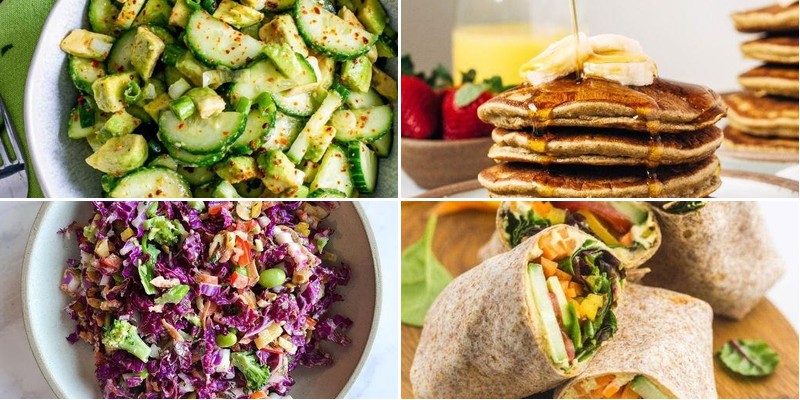
Plant-based eating doesn’t have to be complicated or boring! Whether you’re looking for quick weeknight dinners, cozy comfort foods, or fresh seasonal favorites, we’ve gathered 21 delicious whole food recipes perfect for beginners. These approachable dishes will have you creating vibrant, satisfying meals that your whole family will love. Get ready to discover how easy and tasty plant-based cooking can be—let’s dive in!
Savory Chickpea Stir-Fry
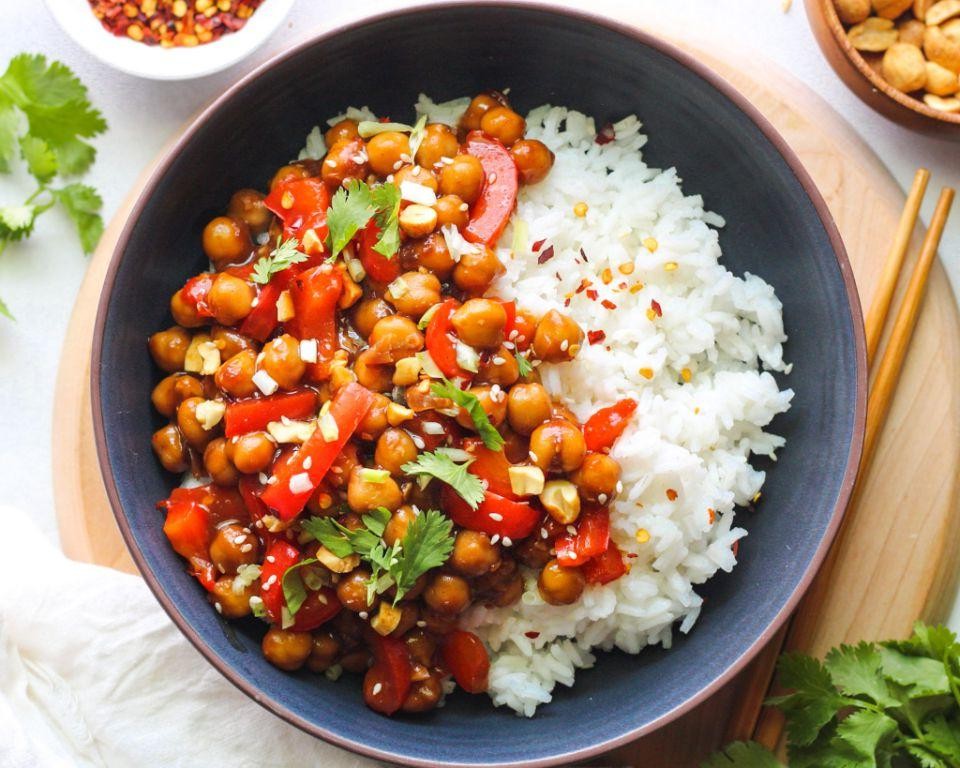
Last week, after another exhausting day of recipe testing, I found myself staring into my nearly empty pantry with that familiar “what’s for dinner” dread. That’s when this savory chickpea stir-fry was born—a quick, satisfying meal that’s become my new go-to when I need something delicious in under 20 minutes.
5
servings10
minutes15
minutesIngredients
- 2 tablespoons olive oil
- 1 medium yellow onion, diced
- 3 cloves garlic, minced
- 1 red bell pepper, sliced
- 2 cans (15 oz each) chickpeas, drained and rinsed
- 1 tablespoon soy sauce
- 1 teaspoon smoked paprika
- 1/2 teaspoon cumin
- 1/4 teaspoon black pepper
- 1/4 cup vegetable broth
- 2 tablespoons fresh parsley, chopped
Instructions
- Heat 2 tablespoons olive oil in a large skillet over medium-high heat until shimmering, about 1 minute.
- Add 1 diced yellow onion and cook until translucent, stirring frequently for 3-4 minutes.
- Stir in 3 minced garlic cloves and cook until fragrant, about 30 seconds—be careful not to burn it.
- Add 1 sliced red bell pepper and cook until slightly softened, about 2 minutes.
- Mix in 2 cans of drained chickpeas, spreading them evenly across the skillet.
- Sprinkle 1 teaspoon smoked paprika, 1/2 teaspoon cumin, and 1/4 teaspoon black pepper over the chickpeas, stirring to coat everything evenly.
- Pour in 1/4 cup vegetable broth and 1 tablespoon soy sauce, scraping any browned bits from the bottom of the pan.
- Cook uncovered for 5-7 minutes, stirring occasionally, until the liquid has reduced by half.
- Remove from heat and stir in 2 tablespoons chopped fresh parsley.
Golden brown chickpeas with a slightly crispy exterior give this dish wonderful texture against the tender peppers. The smoked paprika adds a subtle smokiness that pairs perfectly with the savory soy sauce. I love serving this over quinoa or stuffing it into warm pita bread for a quick lunch the next day.
Creamy Cauliflower Curry

Keeping my kitchen warm and fragrant is my favorite way to welcome autumn, and this creamy cauliflower curry has become my go-to comfort dish when the evenings turn crisp. I first discovered this recipe during a cozy potluck with friends, and now it’s a staple in my weekly rotation—perfect for those nights when you want something hearty without spending hours at the stove.
5
servings15
minutes27
minutesIngredients
– 1 tbsp olive oil
– 1 medium yellow onion, diced
– 3 cloves garlic, minced
– 1 tbsp fresh ginger, grated
– 1 head cauliflower, cut into florets
– 1 can (13.5 oz) coconut milk
– 2 tbsp curry powder
– 1 tsp ground turmeric
– 1/2 tsp red pepper flakes
– 1 cup vegetable broth
– 1/2 cup frozen peas
– 1/4 cup fresh cilantro, chopped
– 1 tbsp lime juice
Instructions
1. Heat 1 tbsp olive oil in a large pot over medium heat until shimmering.
2. Add diced onion and cook for 5 minutes, stirring occasionally, until translucent.
3. Stir in minced garlic and grated ginger, cooking for 1 minute until fragrant.
4. Add cauliflower florets and cook for 3 minutes, stirring to coat with aromatics.
5. Sprinkle in curry powder, turmeric, and red pepper flakes, toasting for 30 seconds to deepen flavors.
6. Pour in coconut milk and vegetable broth, scraping any browned bits from the pot bottom.
7. Bring to a simmer, then reduce heat to low, cover, and cook for 15 minutes until cauliflower is fork-tender.
8. Stir in frozen peas and cook uncovered for 3 minutes until heated through.
9. Remove from heat and stir in chopped cilantro and lime juice.
What I love most is how the cauliflower becomes meltingly tender while soaking up the rich, spiced coconut sauce. Serve it over fluffy jasmine rice for a complete meal, or scoop it up with warm naan—the creamy texture and subtle heat make it irresistible for both weeknight dinners and casual gatherings.
Zesty Quinoa Salad
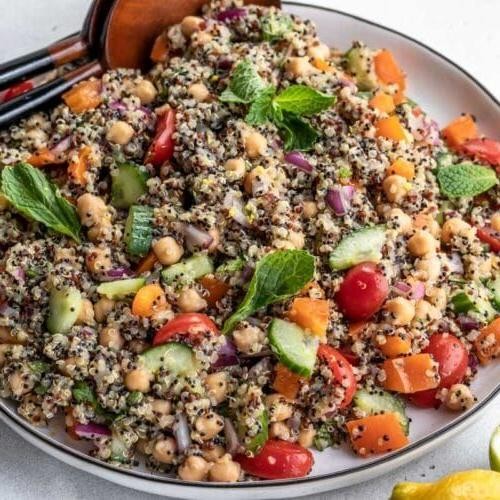
Oftentimes, I find myself craving something fresh and vibrant after a long day, which is exactly how this zesty quinoa salad came to be—it was one of those throw-everything-together moments that turned into a weekly staple. I love how the bright flavors wake up my taste buds, and it’s become my go-to for potlucks because it’s always a hit.
4
servings20
minutes20
minutesIngredients
– 1 cup quinoa
– 2 cups water
– 1/4 cup olive oil
– 3 tbsp lime juice
– 1 tsp salt
– 1/2 tsp black pepper
– 1 cup cherry tomatoes, halved
– 1/2 cup red onion, finely diced
– 1/4 cup fresh cilantro, chopped
– 1 avocado, diced
Instructions
1. Rinse 1 cup of quinoa under cold water in a fine-mesh strainer for 1 minute to remove bitterness.
2. Combine the rinsed quinoa and 2 cups of water in a medium saucepan.
3. Bring the mixture to a boil over high heat, then reduce the heat to low and cover the saucepan.
4. Simmer the quinoa for 15 minutes until all the water is absorbed and the grains are tender.
5. Remove the saucepan from the heat and let the quinoa sit, covered, for 5 minutes to steam.
6. Fluff the quinoa with a fork and spread it on a baking sheet to cool completely to room temperature, which prevents it from becoming mushy.
7. In a small bowl, whisk together 1/4 cup olive oil, 3 tbsp lime juice, 1 tsp salt, and 1/2 tsp black pepper until emulsified.
8. Halve 1 cup of cherry tomatoes and finely dice 1/2 cup of red onion.
9. Chop 1/4 cup of fresh cilantro leaves, avoiding the stems for a milder flavor.
10. Dice 1 avocado just before mixing to prevent browning.
11. In a large bowl, combine the cooled quinoa, halved cherry tomatoes, diced red onion, chopped cilantro, and diced avocado.
12. Pour the dressing over the salad and toss gently to coat all ingredients evenly.
13. Chill the salad in the refrigerator for at least 30 minutes to allow the flavors to meld.
Great for a quick lunch or side, this salad boasts a fluffy quinoa base with pops of juicy tomatoes and creamy avocado. The zesty lime dressing ties it all together, making it perfect for stuffing into wraps or serving alongside grilled chicken for a heartier meal.
Hearty Lentil Soup

Diving into my recipe archives always brings back memories of chilly autumn evenings, and this lentil soup recipe is one I’ve perfected over countless cozy nights. There’s something incredibly comforting about the way the earthy lentils mingle with vegetables and spices as they simmer away on the stove. I actually learned this version from my grandmother, who always insisted on adding a splash of vinegar at the end to brighten everything up.
3
servings15
minutes55
minutesIngredients
– 2 tbsp olive oil
– 1 medium yellow onion
– 2 medium carrots
– 2 celery stalks
– 3 garlic cloves
– 1 cup brown lentils
– 6 cups vegetable broth
– 1 tsp dried thyme
– 1 bay leaf
– 1 tbsp red wine vinegar
– 1 tsp salt
– ½ tsp black pepper
Instructions
1. Heat 2 tablespoons of olive oil in a large Dutch oven over medium heat for 2 minutes until shimmering.
2. Dice 1 medium yellow onion, 2 medium carrots, and 2 celery stalks into ¼-inch pieces.
3. Add the diced vegetables to the hot oil and cook for 8-10 minutes, stirring occasionally, until the onions become translucent and the carrots begin to soften.
4. Mince 3 garlic cloves and add to the pot, cooking for 1 minute until fragrant but not browned.
5. Rinse 1 cup of brown lentils under cold water in a fine-mesh strainer to remove any debris.
6. Add the rinsed lentils to the pot along with 6 cups of vegetable broth, 1 teaspoon of dried thyme, and 1 bay leaf.
7. Bring the soup to a boil over high heat, then immediately reduce to a gentle simmer.
8. Cover the pot and simmer for 35-40 minutes, until the lentils are tender but not mushy.
9. Remove the bay leaf and stir in 1 tablespoon of red wine vinegar, 1 teaspoon of salt, and ½ teaspoon of black pepper.
10. Let the soup rest off the heat for 5 minutes to allow the flavors to meld together.
You’ll love how the lentils create a naturally thick, almost creamy texture without any dairy, while the vegetables still maintain just enough bite. The vinegar adds a subtle brightness that cuts through the richness beautifully. Sometimes I like to serve it with a crusty baguette for dipping, or even over a bed of rice for a heartier meal.
Roasted Vegetable Medley
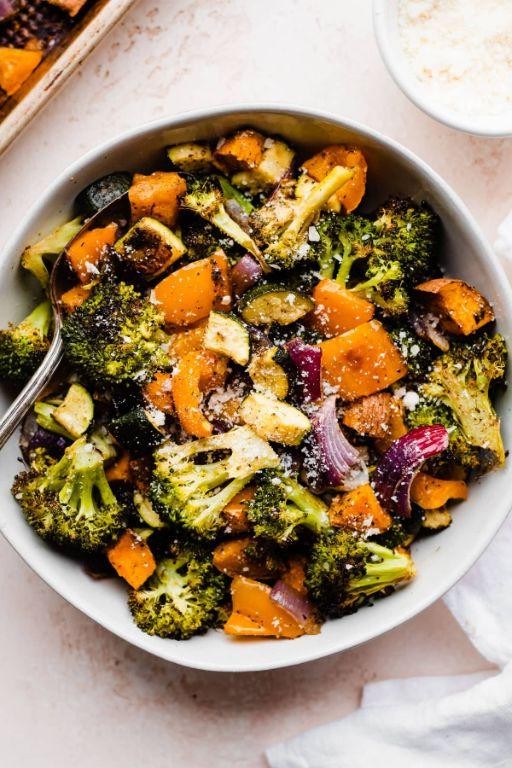
Bursting with vibrant colors and earthy aromas, this roasted vegetable medley has become my go-to side dish for busy weeknights. I first discovered this combination when trying to use up leftover farmers market finds, and now it’s a staple that even my picky nephew devours. There’s something magical about how roasting transforms simple vegetables into caramelized perfection.
5
servings15
minutes30
minutesIngredients
– 2 cups broccoli florets
– 1 cup carrot slices
– 1 cup zucchini chunks
– 1 cup bell pepper strips
– 2 tbsp olive oil
– 1 tsp garlic powder
– 1 tsp dried oregano
– ½ tsp salt
– ¼ tsp black pepper
Instructions
1. Preheat your oven to 425°F and line a baking sheet with parchment paper.
2. Combine broccoli florets, carrot slices, zucchini chunks, and bell pepper strips in a large mixing bowl.
3. Drizzle olive oil over the vegetables and toss until evenly coated.
4. Sprinkle garlic powder, dried oregano, salt, and black pepper over the vegetables.
5. Toss the vegetables again to ensure even seasoning distribution.
6. Spread the vegetables in a single layer on the prepared baking sheet.
7. Roast the vegetables for 20 minutes at 425°F.
8. Remove the baking sheet from the oven and flip the vegetables using a spatula.
9. Return the baking sheet to the oven and roast for another 10 minutes at 425°F.
10. Check that the carrots are fork-tender and the broccoli edges are slightly crispy.
11. Remove the baking sheet from the oven and let the vegetables rest for 5 minutes before serving.
You’ll love how the high roasting temperature creates crispy edges while keeping the interiors tender. Yesterday I served this over quinoa with a squeeze of lemon, and the bright acidity perfectly balanced the sweet roasted flavors. The colorful peppers and carrots become almost candy-like, while the broccoli develops those delightful charred bits that are impossible to resist.
Simple Spinach and Mushroom Pasta

Craving something cozy but don’t want to spend hours in the kitchen? This spinach and mushroom pasta has been my go-to weeknight dinner for years—it’s the perfect balance of earthy flavors and creamy comfort that comes together faster than you can decide what to watch on TV.
5
servings10
minutes20
minutesIngredients
– 8 ounces fettuccine pasta
– 2 tablespoons olive oil
– 3 cloves garlic, minced
– 8 ounces cremini mushrooms, sliced
– 5 ounces fresh spinach
– 1 cup heavy cream
– 1/2 cup grated Parmesan cheese
– 1/4 teaspoon salt
– 1/4 teaspoon black pepper
Instructions
1. Bring a large pot of salted water to a rolling boil over high heat.
2. Add fettuccine pasta to the boiling water and cook for 9-11 minutes until al dente, stirring occasionally to prevent sticking.
3. While pasta cooks, heat olive oil in a large skillet over medium heat until shimmering.
4. Add minced garlic and sauté for 30 seconds until fragrant but not browned.
5. Add sliced mushrooms and cook for 6-8 minutes, stirring occasionally, until they release their liquid and turn golden brown.
6. Stir in fresh spinach and cook for 2-3 minutes until completely wilted, pressing down with your spoon to help it cook evenly.
7. Pour heavy cream into the skillet and bring to a gentle simmer over medium-low heat.
8. Stir in grated Parmesan cheese until fully melted and the sauce thickens slightly, about 2 minutes.
9. Drain cooked pasta, reserving 1/4 cup of pasta water.
10. Add drained pasta to the skillet and toss to coat evenly with the sauce.
11. If the sauce seems too thick, gradually add reserved pasta water 1 tablespoon at a time until desired consistency is reached.
12. Season with salt and black pepper, then serve immediately. The creamy sauce clings beautifully to every strand of pasta, while the mushrooms add meaty texture and the spinach keeps it fresh. I love topping mine with extra Parmesan and serving it with garlic bread to soak up every last bit of that luxurious sauce.
Refreshing Cucumber Avocado Salad
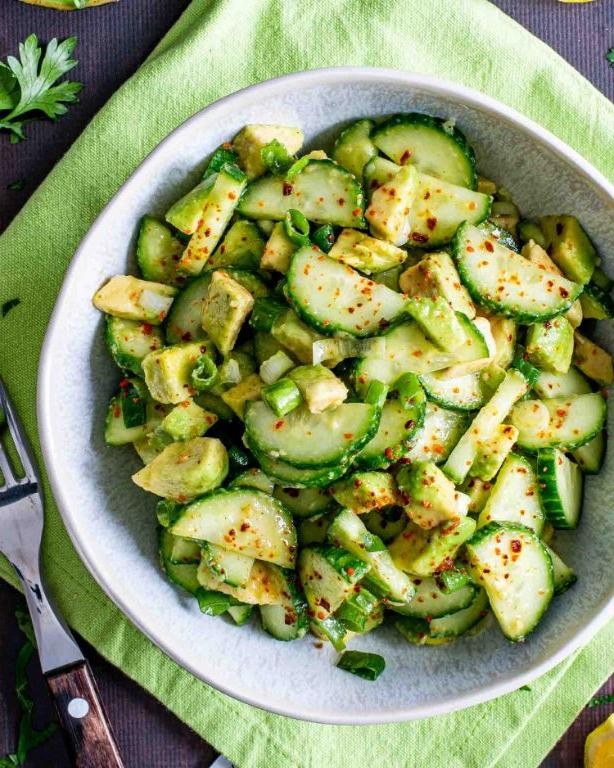
Unbelievably simple yet incredibly satisfying, this cucumber avocado salad has become my go-to summer side dish after discovering it at a friend’s backyard barbecue last month. I love how the crisp freshness cuts through richer grilled foods, and it’s become my secret weapon for potlucks when I’m short on time but want to impress.
5
servings15
minutesIngredients
– 2 large English cucumbers
– 2 ripe avocados
– 1/4 cup red onion
– 2 tbsp fresh lime juice
– 1 tbsp extra virgin olive oil
– 1/4 cup fresh cilantro
– 1/2 tsp salt
– 1/4 tsp black pepper
Instructions
1. Wash 2 large English cucumbers thoroughly under cold running water.
2. Slice cucumbers into 1/4-inch thick rounds using a sharp chef’s knife.
3. Cut 2 ripe avocados in half lengthwise, remove pits, and scoop flesh from skins.
4. Dice avocado into 1/2-inch cubes directly over the bowl to catch any juices.
5. Finely chop 1/4 cup red onion into small, uniform pieces.
6. Roughly chop 1/4 cup fresh cilantro leaves, discarding the thick stems.
7. Combine cucumbers, avocado, red onion, and cilantro in a large mixing bowl.
8. Drizzle 2 tbsp fresh lime juice over the salad mixture immediately to prevent avocado browning.
9. Add 1 tbsp extra virgin olive oil and gently toss ingredients together.
10. Sprinkle 1/2 tsp salt and 1/4 tsp black pepper evenly across the salad.
11. Fold all ingredients gently with a rubber spatula until evenly coated, being careful not to mash the avocado.
12. Let salad rest at room temperature for 5 minutes to allow flavors to meld.
What I adore about this salad is the wonderful contrast between the crunchy cucumber and creamy avocado, with the lime juice providing just enough zing to balance the richness. Serve it alongside grilled chicken or fish, or spoon it over toasted bread for an instant open-faced sandwich that feels both light and substantial.
Wholesome Sweet Potato Tacos

Finally, after years of taco Tuesdays, I’ve perfected my go-to vegetarian option that even my meat-loving husband requests weekly. These wholesome sweet potato tacos came about during a pantry clean-out when I discovered roasted sweet potatoes make the most satisfying taco filling.
8
tacos15
minutes25
minutesIngredients
– 2 medium sweet potatoes
– 1 tablespoon olive oil
– 1/2 teaspoon chili powder
– 1/4 teaspoon cumin
– 1/4 teaspoon garlic powder
– 1/4 teaspoon salt
– 8 small corn tortillas
– 1 cup shredded purple cabbage
– 1/2 cup crumbled cotija cheese
– 1/4 cup chopped cilantro
– 2 tablespoons lime juice
Instructions
1. Preheat your oven to 400°F and line a baking sheet with parchment paper.
2. Peel 2 medium sweet potatoes and cut them into 1/2-inch cubes.
3. Toss the sweet potato cubes with 1 tablespoon olive oil until evenly coated.
4. Sprinkle 1/2 teaspoon chili powder, 1/4 teaspoon cumin, 1/4 teaspoon garlic powder, and 1/4 teaspoon salt over the sweet potatoes.
5. Spread the seasoned sweet potatoes in a single layer on the prepared baking sheet.
6. Roast for 20-25 minutes until the edges are caramelized and a fork easily pierces through the cubes.
7. While the sweet potatoes roast, warm 8 small corn tortillas directly over a gas flame for 15-20 seconds per side until lightly charred.
8. Place 1/4 cup of roasted sweet potatoes in the center of each warmed tortilla.
9. Top each taco with 2 tablespoons of shredded purple cabbage.
10. Sprinkle 1 tablespoon of crumbled cotija cheese over the cabbage on each taco.
11. Garnish with 1/2 tablespoon of chopped cilantro per taco.
12. Drizzle 3/4 teaspoon of lime juice over each completed taco before serving. Getting that perfect char on your tortillas makes all the difference, and don’t skip the lime juice at the end—it brightens everything up. Great texture comes from the contrast between the soft sweet potatoes and crunchy cabbage, while the cotija cheese adds a salty balance to the natural sweetness. I love serving these with extra lime wedges and hot sauce for those who want an extra kick.
Quick Black Bean Chili

Just last Tuesday, I found myself staring into my pantry after a long workday, craving something hearty but not wanting to spend hours in the kitchen. That’s when this quick black bean chili was born—it’s become my go-to weeknight rescue meal that somehow tastes like it simmered all afternoon.
5
servings10
minutes30
minutesIngredients
- 2 tbsp olive oil
- 1 medium yellow onion, diced
- 3 cloves garlic, minced
- 1 lb ground beef
- 2 tbsp chili powder
- 1 tsp ground cumin
- 1/2 tsp smoked paprika
- 1/4 tsp cayenne pepper
- 1 can (15 oz) black beans, rinsed
- 1 can (14.5 oz) diced tomatoes
- 1 cup beef broth
- 1/2 tsp salt
- 1/4 tsp black pepper
- 1/4 cup fresh cilantro, chopped
Instructions
- Heat 2 tablespoons of olive oil in a large pot over medium-high heat until shimmering.
- Add 1 diced yellow onion and cook for 4-5 minutes until translucent and fragrant.
- Stir in 3 minced garlic cloves and cook for 1 minute until aromatic but not browned.
- Add 1 pound of ground beef, breaking it apart with a wooden spoon, and cook for 6-7 minutes until no pink remains.
- Sprinkle 2 tablespoons of chili powder, 1 teaspoon of cumin, 1/2 teaspoon of smoked paprika, and 1/4 teaspoon of cayenne pepper over the meat mixture.
- Toast the spices with the meat for 1 minute to deepen their flavors—this quick bloom makes a noticeable difference.
- Pour in 1 can of rinsed black beans, 1 can of diced tomatoes with their juices, and 1 cup of beef broth.
- Bring the chili to a boil, then reduce heat to maintain a gentle simmer.
- Stir in 1/2 teaspoon of salt and 1/4 teaspoon of black pepper.
- Simmer uncovered for 20 minutes, stirring occasionally, until the chili has thickened slightly.
- Stir in 1/4 cup of chopped fresh cilantro just before serving—adding herbs at the end preserves their bright flavor.
What I love most about this chili is how the beans maintain their firm texture while the ground beef becomes incredibly tender. The smoky paprika and subtle heat from the cayenne create layers of flavor that develop beautifully in just 30 minutes. We often serve it over baked potatoes or with cornbread for dipping—it’s equally fantastic topped with avocado slices or a dollop of sour cream for extra creaminess.
Nutty Brown Rice and Veggie Bowl
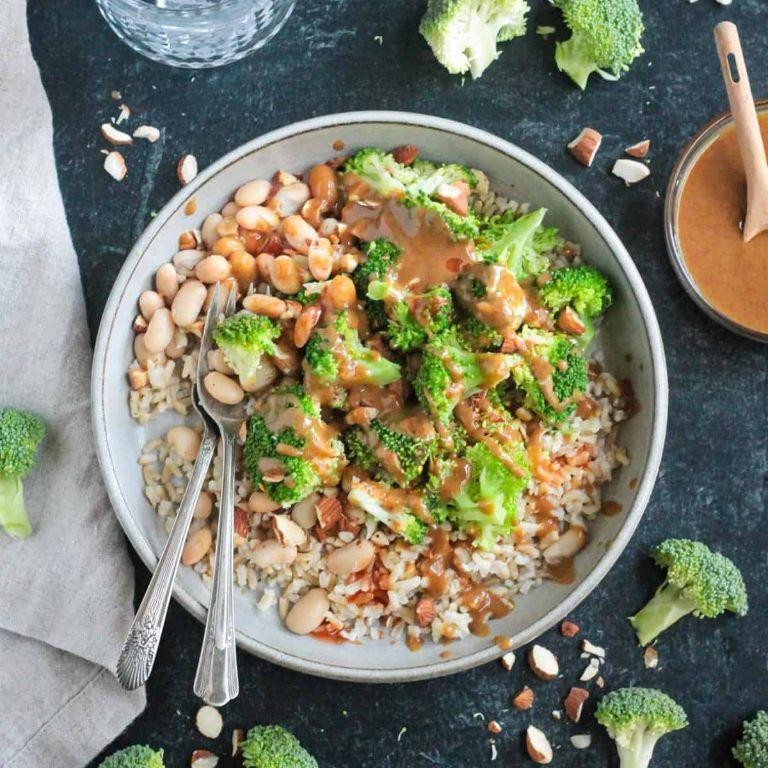
Bursting with earthy flavors and satisfying textures, this Nutty Brown Rice and Veggie Bowl has become my go-to weeknight dinner. I first discovered this combination after a busy farmers market trip left me with an abundance of fresh vegetables, and now it’s in regular rotation at our house. There’s something so comforting about the nutty rice paired with those perfectly roasted veggies that just hits the spot every single time.
5
servings20
minutes65
minutesIngredients
– 1 cup brown rice
– 2 cups water
– 2 tbsp olive oil
– 1 tsp salt
– 1/2 tsp black pepper
– 2 cloves garlic, minced
– 1 medium red onion, sliced
– 1 large sweet potato, cubed
– 1 cup broccoli florets
– 1 red bell pepper, sliced
– 1/4 cup chopped walnuts
– 2 tbsp lemon juice
Instructions
1. Rinse 1 cup brown rice under cold running water until the water runs clear.
2. Combine rinsed rice with 2 cups water in a medium saucepan and bring to a boil over high heat.
3. Reduce heat to low, cover the saucepan, and simmer for 45 minutes until all water is absorbed.
4. Preheat oven to 400°F while the rice cooks.
5. Toss cubed sweet potato with 1 tablespoon olive oil, 1/2 teaspoon salt, and 1/4 teaspoon black pepper on a baking sheet.
6. Roast sweet potatoes at 400°F for 15 minutes until they begin to soften.
7. Add broccoli florets, sliced red bell pepper, and sliced red onion to the baking sheet with the sweet potatoes.
8. Drizzle remaining 1 tablespoon olive oil over all vegetables and sprinkle with remaining 1/2 teaspoon salt and 1/4 teaspoon black pepper.
9. Roast all vegetables together at 400°F for another 20 minutes until edges are lightly browned and crispy.
10. Toast 1/4 cup chopped walnuts in a dry skillet over medium heat for 3-4 minutes, shaking the pan frequently until fragrant.
11. Mince 2 cloves garlic while vegetables finish roasting.
12. Fluff the cooked brown rice with a fork and stir in minced garlic.
13. Combine the garlic-infused rice with roasted vegetables in a large mixing bowl.
14. Drizzle 2 tablespoons lemon juice over the rice and vegetable mixture.
15. Gently fold in toasted walnuts until evenly distributed.
Unbelievably satisfying, the contrast between the chewy brown rice and crispy roasted vegetables creates a wonderful mouthfeel that keeps me coming back for more. I love how the lemon juice brightens all the earthy flavors, and sometimes I’ll top it with a fried egg for extra protein—the runny yolk mingling with the rice is absolutely divine.
Fluffy Banana Oat Pancakes

Kicking off my weekend mornings with these banana oat pancakes has become my absolute favorite ritual—there’s something so comforting about that sweet banana aroma filling the kitchen while I sip my first coffee. I actually started making this version after my toddler refused to eat regular oatmeal, and now it’s our special Saturday tradition that even gets my husband out of bed early. The best part is how easily they come together with pantry staples, making those lazy weekend breakfasts feel both indulgent and wholesome.
8
pancakes10
minutes20
minutesIngredients
– 2 cups rolled oats
– 2 ripe bananas
– 2 large eggs
– 1 cup milk
– 2 tablespoons maple syrup
– 1 teaspoon baking powder
– 1/2 teaspoon cinnamon
– 1/4 teaspoon salt
– 2 tablespoons butter
Instructions
1. Place 2 cups rolled oats in a blender and blend on high speed for 45 seconds until they form a fine flour consistency.
2. Add 2 ripe bananas, 2 large eggs, 1 cup milk, 2 tablespoons maple syrup, 1 teaspoon baking powder, 1/2 teaspoon cinnamon, and 1/4 teaspoon salt to the blender.
3. Blend all ingredients on medium speed for 60 seconds until the batter is completely smooth and well combined.
4. Let the batter rest for 5 minutes to allow the oat flour to hydrate and thicken slightly.
5. Heat a non-stick skillet or griddle over medium heat (350°F) and melt 1/2 tablespoon of butter, swirling to coat the surface evenly.
6. Pour 1/4 cup portions of batter onto the hot skillet, leaving 2 inches between each pancake for spreading.
7. Cook for 2-3 minutes until the edges look set and bubbles form across the entire surface of each pancake.
8. Flip each pancake carefully using a thin spatula and cook for another 2 minutes until golden brown on both sides.
9. Transfer cooked pancakes to a wire rack instead of stacking them to prevent sogginess.
10. Repeat steps 5-8 with remaining batter, adding more butter to the skillet as needed between batches.
My favorite thing about these pancakes is their wonderfully light texture that somehow stays moist thanks to the bananas, with just the right hint of cinnamon warmth. They’re fantastic topped with extra sliced bananas and a drizzle of maple syrup, but I’ve also loved them spread with almond butter for a protein-packed twist—sometimes I even make extra to freeze for quick weekday breakfasts.
Fresh Mango and Black Bean Salsa
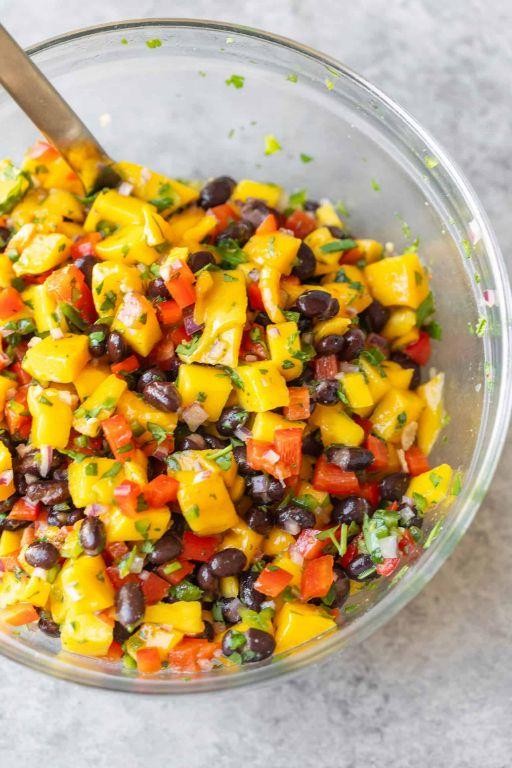
My love for this vibrant salsa began last summer when my neighbor brought over a bowl bursting with colors from her garden. Making this fresh mango and black bean salsa has become my go-to for potlucks and backyard gatherings because it always disappears within minutes. I love how the sweet mango balances perfectly with the zesty lime and spicy jalapeño—it’s a crowd-pleaser that’s as easy to make as it is delicious.
6
servings20
minutesIngredients
– 2 cups diced fresh mango
– 1 cup canned black beans, rinsed and drained
– 1/2 cup finely diced red onion
– 1/4 cup chopped fresh cilantro
– 1 jalapeño, seeds removed and finely minced
– 3 tablespoons fresh lime juice
– 1 tablespoon olive oil
– 1/2 teaspoon salt
Instructions
1. Rinse and drain 1 cup of canned black beans thoroughly in a colander to remove excess sodium.
2. Dice 2 cups of fresh mango into 1/4-inch cubes, cutting around the pit for even pieces.
3. Finely dice 1/2 cup of red onion to ensure it distributes evenly without overpowering the salsa.
4. Remove seeds from 1 jalapeño and mince it finely to control the heat level.
5. Chop 1/4 cup of fresh cilantro leaves, avoiding the stems for better texture.
6. Combine mango, black beans, red onion, jalapeño, and cilantro in a large mixing bowl.
7. Whisk together 3 tablespoons of fresh lime juice, 1 tablespoon of olive oil, and 1/2 teaspoon of salt in a small bowl.
8. Pour the dressing over the salsa ingredients and toss gently with a spatula to coat everything evenly.
9. Let the salsa rest at room temperature for 15 minutes to allow the flavors to meld together.
10. Give the salsa one final gentle stir before serving to redistribute the juices.
Zesty and refreshing, this salsa delivers a perfect crunch from the red onion against the creamy black beans and juicy mango. I love scooping it up with tortilla chips, but it’s also fantastic spooned over grilled fish or folded into tacos for a bright, tropical twist.
Vegan Stuffed Bell Peppers
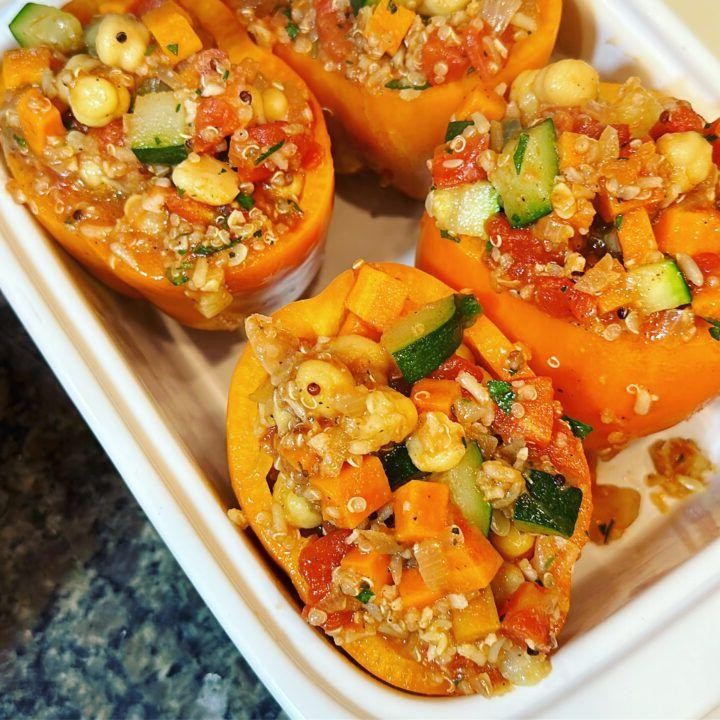
During my college days, I discovered stuffed bell peppers as the perfect make-ahead meal that actually improved overnight in the fridge. These vegan versions have become my go-to comfort food that even my meat-loving friends request regularly.
4
servings20
minutes84
minutesIngredients
- 4 large bell peppers
- 1 cup brown rice
- 2 cups vegetable broth
- 1 tbsp olive oil
- 1 medium onion, diced
- 2 cloves garlic, minced
- 1 can (15 oz) black beans, rinsed
- 1 cup corn kernels
- 1 tsp cumin
- 1/2 tsp smoked paprika
- 1/4 cup nutritional yeast
- 1/2 tsp salt
- 1/4 tsp black pepper
- 1/2 cup vegan cheese shreds
- 2 tbsp fresh cilantro, chopped
Instructions
- Preheat your oven to 375°F and lightly grease a baking dish.
- Cut the tops off the bell peppers and remove all seeds and membranes.
- Rinse the brown rice under cold water until the water runs clear.
- Combine the rice and vegetable broth in a saucepan and bring to a boil.
- Reduce heat to low, cover, and simmer for 35 minutes until the rice is tender and liquid is absorbed.
- Heat olive oil in a large skillet over medium heat until shimmering.
- Sauté the diced onion for 5 minutes until translucent and slightly golden.
- Add the minced garlic and cook for 1 minute until fragrant.
- Stir in the black beans, corn, cumin, and smoked paprika, cooking for 3 minutes to blend flavors.
- Combine the cooked rice with the bean mixture in a large bowl.
- Mix in nutritional yeast, salt, and black pepper until evenly distributed.
- Stuff each bell pepper with the rice mixture, pressing down gently to pack it in.
- Arrange the stuffed peppers upright in the prepared baking dish.
- Sprinkle vegan cheese shreds evenly over the top of each pepper.
- Cover the dish with foil and bake for 25 minutes.
- Remove the foil and bake for another 10 minutes until the cheese is melted and peppers are tender.
- Garnish with fresh cilantro before serving.
When these come out of the oven, the peppers have that perfect tender-crisp texture that holds up to the hearty filling. I love how the smoky paprika and cumin create this warm, savory flavor that makes you forget it’s completely plant-based. Sometimes I’ll serve them over a bed of greens with extra salsa for a deconstructed version that’s perfect for warm weather.
Easy Tofu Scramble

You know those mornings when you’re craving something hearty but don’t want to spend forever in the kitchen? Yeah, me too—that’s exactly why this easy tofu scramble became my weekday breakfast hero after one particularly chaotic school run left me dreaming of a faster, protein-packed alternative to eggs.
2
servings20
minutes12
minutesIngredients
– 1 block (14 oz) firm tofu
– 1 tbsp olive oil
– 1/4 cup diced yellow onion
– 1/4 cup diced red bell pepper
– 1 tbsp nutritional yeast
– 1/2 tsp turmeric
– 1/4 tsp garlic powder
– 1/4 tsp black salt (kala namak)
– 1/8 tsp black pepper
– 2 tbsp unsweetened plant-based milk
Instructions
1. Press the tofu block for 15 minutes using a tofu press or by placing it between paper towels with a heavy pan on top to remove excess water.
2. Heat 1 tbsp olive oil in a non-stick skillet over medium heat (350°F).
3. Add 1/4 cup diced yellow onion and 1/4 cup diced red bell pepper to the skillet.
4. Sauté vegetables for 5 minutes until onions are translucent and peppers are slightly softened.
5. Crumble the pressed tofu directly into the skillet using your hands or a fork for varied texture.
6. Cook the tofu mixture for 3 minutes, stirring occasionally to prevent sticking.
7. Sprinkle 1 tbsp nutritional yeast, 1/2 tsp turmeric, 1/4 tsp garlic powder, 1/4 tsp black salt, and 1/8 tsp black pepper evenly over the tofu.
8. Stir continuously for 2 minutes to coat the tofu thoroughly and activate the turmeric’s color.
9. Pour in 2 tbsp unsweetened plant-based milk to create a creamy consistency.
10. Cook for another 2 minutes until the milk is absorbed and the scramble is heated through. Really, the magic here is in the texture—it’s fluffy and moist with a subtle eggy tang from the black salt, making it perfect for stuffing into breakfast burritos or piling onto toast with avocado.
Garlicky Hummus and Veggie Wrap

My midweek lunch routine used to be a sad parade of leftovers and rushed sandwiches until I discovered this vibrant wrap that comes together in minutes. Just last Tuesday, I whipped this up while simultaneously answering work emails—it’s that simple and forgiving, even when you’re distracted. The garlicky hummus makes everything feel gourmet without any fancy techniques required.
2
portions10
minutesIngredients
– 1/2 cup hummus
– 2 cloves garlic, minced
– 1 tbsp lemon juice
– 1 large whole wheat tortilla
– 1/2 cup shredded carrots
– 1/2 cup thinly sliced cucumber
– 1/4 cup sliced red onion
– 1/4 cup crumbled feta cheese
– 2 tbsp chopped fresh parsley
Instructions
1. Combine 1/2 cup hummus, 2 minced garlic cloves, and 1 tablespoon lemon juice in a small bowl, stirring until fully incorporated.
2. Spread the garlic hummus mixture evenly across the surface of 1 large whole wheat tortilla, leaving a 1-inch border around the edges.
3. Layer 1/2 cup shredded carrots horizontally across the center third of the tortilla.
4. Arrange 1/2 cup thinly sliced cucumber in a single layer over the carrots.
5. Scatter 1/4 cup sliced red onion evenly over the cucumber layer.
6. Sprinkle 1/4 cup crumbled feta cheese over the vegetables.
7. Distribute 2 tablespoons chopped fresh parsley evenly across the fillings.
8. Fold the bottom edge of the tortilla up over the fillings, then fold in the sides tightly.
9. Roll the wrap away from you, applying gentle pressure to maintain a compact cylinder shape.
10. Cut the wrapped roll diagonally through the center at a 45-degree angle to create two portions. Just sliced, this wrap reveals beautiful layers of colorful vegetables against the creamy hummus backdrop. The garlic hummus provides a tangy punch that balances the sweet carrots and salty feta perfectly. I love serving these wedges with extra cucumber slices for dipping or packing them whole for a mess-free picnic lunch.
Bright Lemon Zucchini Noodles
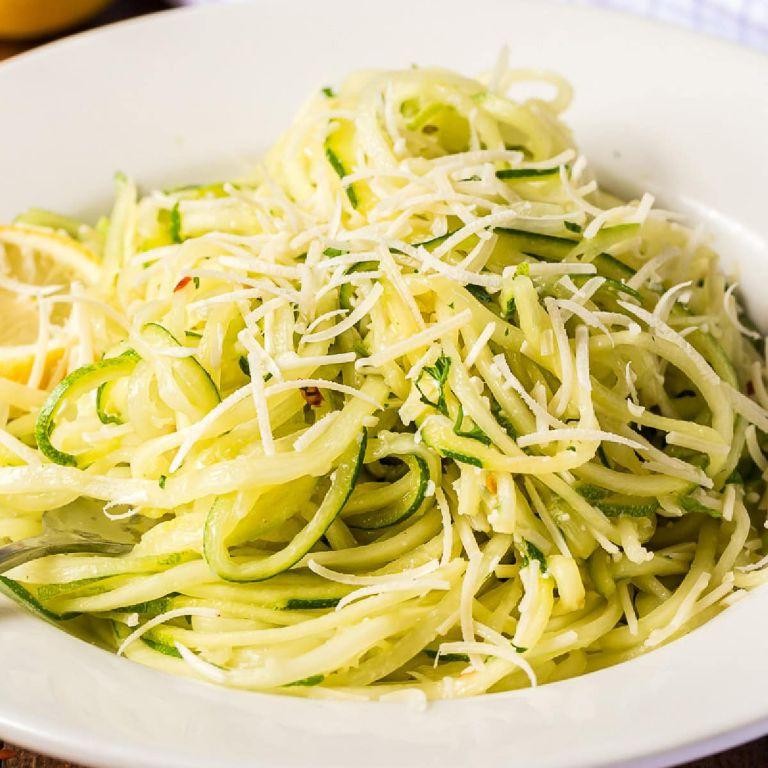
Getting dinner on the table during busy weeknights used to stress me out until I discovered how versatile zucchini noodles can be. Growing zucchini in my backyard garden means I’m always looking for fresh ways to use them, and this bright lemon version has become my go-to when I want something light yet satisfying that comes together in minutes. The combination of zesty lemon and tender zucchini just feels like sunshine in a bowl, especially after a long day.
2
servings10
minutes6
minutesIngredients
– 4 medium zucchini
– 2 tablespoons olive oil
– 3 cloves garlic, minced
– 1 lemon
– 1/4 cup grated Parmesan cheese
– 2 tablespoons chopped fresh parsley
– 1/4 teaspoon red pepper flakes
– 1/2 teaspoon salt
– 1/4 teaspoon black pepper
Instructions
1. Spiralize 4 medium zucchini using the medium blade of your spiralizer to create uniform noodles.
2. Heat 2 tablespoons olive oil in a large skillet over medium heat for 1 minute until shimmering.
3. Add 3 cloves minced garlic to the skillet and cook for 30 seconds until fragrant but not browned.
4. Add the zucchini noodles to the skillet and toss to coat with the garlic oil.
5. Cook the zucchini noodles for 3-4 minutes, stirring frequently, until slightly softened but still al dente.
6. Zest the entire lemon directly over the skillet using a microplane for maximum citrus flavor.
7. Cut the zested lemon in half and squeeze the juice from both halves into the skillet.
8. Sprinkle 1/4 teaspoon red pepper flakes, 1/2 teaspoon salt, and 1/4 teaspoon black pepper over the noodles.
9. Toss everything together thoroughly to distribute the seasonings evenly.
10. Remove the skillet from heat and stir in 1/4 cup grated Parmesan cheese until melted and creamy.
11. Garnish with 2 tablespoons chopped fresh parsley just before serving.
Fresh from the skillet, these noodles have the perfect tender-crisp texture that holds up beautifully against the bright, zesty lemon sauce. For a complete meal, I love topping them with grilled shrimp or serving alongside roasted chicken—the citrus notes complement protein perfectly while keeping everything feeling light and vibrant.
Sweet Potato and Black Bean Enchiladas

Haven’t we all had those nights where we crave something comforting yet healthy? I first made these enchiladas during a busy week when my fridge was full of sweet potatoes that needed using up. Now they’re my go-to meal prep solution that even my picky toddler devours.
8
enchiladas30
minutes76
minutesIngredients
– 2 large sweet potatoes
– 1 tablespoon olive oil
– 1 medium yellow onion
– 2 cloves garlic
– 1 can (15 oz) black beans
– 1 teaspoon ground cumin
– 1 teaspoon chili powder
– 1/2 teaspoon salt
– 8 corn tortillas
– 2 cups red enchilada sauce
– 1 cup shredded Monterey Jack cheese
– 1/4 cup chopped fresh cilantro
Instructions
1. Preheat your oven to 375°F.
2. Pierce the sweet potatoes several times with a fork.
3. Bake the sweet potatoes directly on the oven rack for 45 minutes until completely tender when pierced with a fork.
4. Let the sweet potatoes cool until you can handle them comfortably.
5. Peel the sweet potatoes and mash them in a medium bowl.
6. Heat the olive oil in a large skillet over medium heat.
7. Dice the onion and add it to the skillet.
8. Cook the onion for 5-7 minutes until translucent and slightly golden.
9. Mince the garlic and add it to the skillet.
10. Cook for 1 minute until fragrant.
11. Drain and rinse the black beans.
12. Add the black beans, cumin, chili powder, and salt to the skillet.
13. Stir to combine and cook for 2 minutes.
14. Combine the bean mixture with the mashed sweet potatoes.
15. Warm the corn tortillas in a dry skillet for 20 seconds per side to make them pliable.
16. Spread 1/2 cup of enchilada sauce in the bottom of a 9×13 inch baking dish.
17. Spoon 1/3 cup of the sweet potato mixture onto each tortilla.
18. Roll each tortilla tightly and place seam-side down in the baking dish.
19. Pour the remaining enchilada sauce over the rolled tortillas.
20. Sprinkle the shredded cheese evenly over the top.
21. Cover the dish with foil and bake for 20 minutes.
22. Remove the foil and bake for 10 more minutes until the cheese is bubbly and slightly browned.
23. Let the enchiladas rest for 5 minutes before serving.
24. Chop the fresh cilantro and sprinkle it over the enchiladas.
My favorite thing about these enchiladas is how the creamy sweet potatoes balance the smoky spices and tangy sauce. They’re substantial enough to stand alone but also pair beautifully with a crisp green salad. Making extra filling means I can quickly assemble another batch later in the week.
Crunchy Rainbow Coleslaw
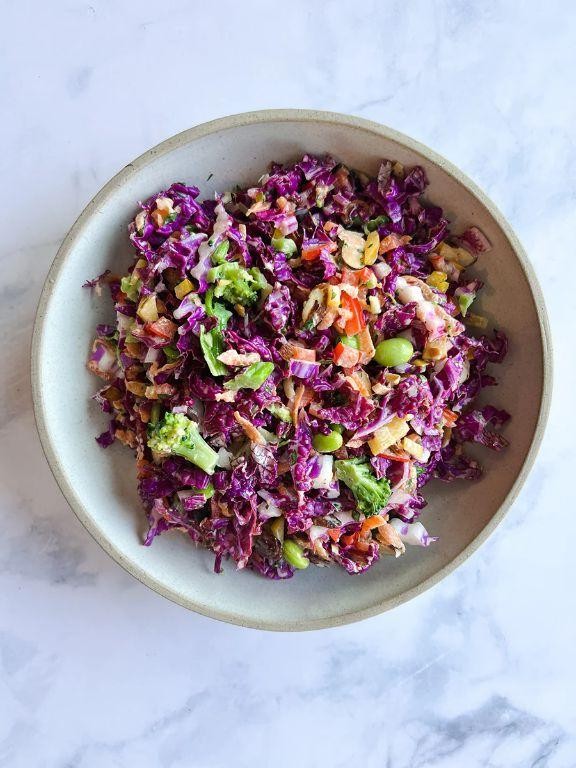
Oh my goodness, this crunchy rainbow coleslaw has become my absolute go-to for summer potlucks and backyard barbecues! I first whipped it up when I needed something quick for a last-minute gathering, and now my friends request it every time. There’s something magical about how the vibrant colors and satisfying crunch make even the simplest meal feel like a celebration.
8
servings20
minutesIngredients
– 6 cups shredded green cabbage
– 2 cups shredded red cabbage
– 1 cup shredded carrots
– 1/2 cup thinly sliced red onion
– 1/4 cup chopped fresh parsley
– 3/4 cup mayonnaise
– 2 tbsp apple cider vinegar
– 1 tbsp honey
– 1 tsp Dijon mustard
– 1/2 tsp celery seed
– 1/4 tsp black pepper
– 1/2 tsp salt
Instructions
1. Combine 6 cups shredded green cabbage, 2 cups shredded red cabbage, 1 cup shredded carrots, 1/2 cup thinly sliced red onion, and 1/4 cup chopped fresh parsley in a large mixing bowl.
2. In a separate medium bowl, whisk together 3/4 cup mayonnaise, 2 tbsp apple cider vinegar, 1 tbsp honey, 1 tsp Dijon mustard, 1/2 tsp celery seed, 1/4 tsp black pepper, and 1/2 tsp salt until completely smooth.
3. Pour the dressing over the cabbage mixture in the large bowl.
4. Use tongs to thoroughly toss everything together, making sure all vegetables are evenly coated with dressing.
5. Cover the bowl tightly with plastic wrap and refrigerate for at least 30 minutes to allow the flavors to meld and the cabbage to slightly soften.
6. Remove from refrigerator and give the coleslaw one final toss before serving.
Just look at how those jewel-toned vegetables create such a beautiful presentation in the bowl! The cabbage maintains its delightful crunch while the sweet-tangy dressing brings everything together perfectly. I love serving this alongside pulled pork sandwiches or piling it onto fish tacos for that extra fresh texture that cuts through richer flavors.
Conclusion
Embarking on a whole food plant-based journey has never been easier with these 21 beginner-friendly recipes. We hope this collection inspires you to create delicious, nourishing meals that your whole family will love. Try these recipes, leave a comment sharing your favorites, and don’t forget to pin this article to your Pinterest boards for easy reference. Happy cooking!


