Hungry for delicious vegetarian meals that won’t weigh you down? You’re in the right place! We’ve gathered 20 amazing, very low-calorie recipes that are packed with flavor and perfect for everyday cooking. From vibrant salads to cozy soups, these dishes make healthy eating feel effortless and exciting. Get ready to discover your new favorite meals—let’s dive into these tasty, guilt-free creations!
Zucchini Noodles with Tomato Basil Sauce
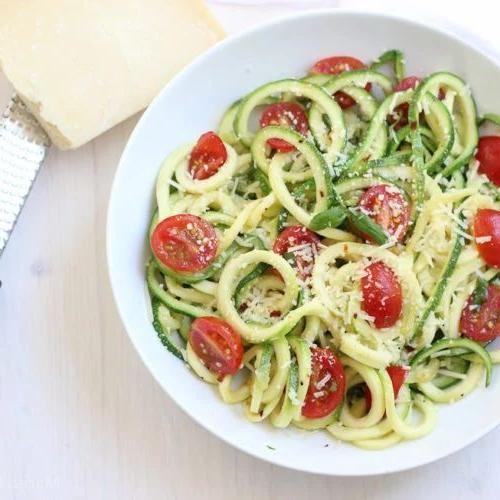
Here’s a light, vibrant dish that transforms humble zucchini into elegant, twirlable noodles, tossed in a bright tomato-basil sauce that sings of summer even in December. This quick, gluten-free meal feels indulgent yet wholesome, perfect for a busy weeknight when you crave something fresh and satisfying.
Serving: 4 | Pre Time: 15 minutes | Cooking Time: 20 minutes
Ingredients
– 4 medium zucchini, spiralized into noodles (I like using a handheld spiralizer for quick, even strands)
– 2 tablespoons extra virgin olive oil, my go‑to for its fruity aroma
– 3 cloves garlic, minced (freshly minced releases the best flavor)
– 1 (28‑ounce) can crushed tomatoes, preferably San Marzano for their sweet, low‑acidity profile
– ¼ cup fresh basil leaves, thinly sliced, plus extra for garnish
– ½ teaspoon kosher salt, to layer seasoning
– ¼ teaspoon freshly ground black pepper, for a subtle kick
– ¼ cup grated Parmesan cheese, for finishing (I prefer a microplane for fluffy, melty shreds)
Instructions
1. Spiralize the zucchini into noodle‑like strands using a spiralizer, then set them aside in a colander to drain excess moisture—this prevents a watery sauce. Tip: Lightly salt the noodles and let them sit for 10 minutes to draw out more liquid, then pat dry with paper towels for better texture.
2. Heat the extra virgin olive oil in a large skillet over medium‑low heat until it shimmers, about 1 minute.
3. Add the minced garlic to the skillet and sauté until fragrant and just golden, about 1–2 minutes, stirring constantly to avoid burning.
4. Pour in the crushed tomatoes, then stir to combine with the garlic.
5. Season the sauce with kosher salt and freshly ground black pepper.
6. Simmer the sauce uncovered over medium heat, stirring occasionally, until it thickens slightly and deepens in color, about 15 minutes. Tip: A longer simmer develops richer flavor, but don’t overcook—you want it vibrant, not reduced to a paste.
7. While the sauce simmers, pat the zucchini noodles dry with paper towels to remove any remaining moisture.
8. Add the thinly sliced fresh basil to the sauce and stir until wilted, about 1 minute.
9. Gently fold the zucchini noodles into the skillet with the tomato‑basil sauce, tossing to coat evenly. Tip: Cook just until the noodles are warmed through and tender‑crisp, about 2–3 minutes—overcooking makes them mushy.
10. Remove the skillet from the heat and sprinkle with grated Parmesan cheese.
11. Serve immediately, garnished with extra fresh basil leaves.
A delightfully fresh finish, this dish offers tender‑crisp zucchini noodles that hold their shape against the robust, herb‑flecked sauce. The Parmesan melts into a savory gloss, while the basil brightens each bite—try topping it with grilled shrimp or a sprinkle of red pepper flakes for a spicy twist.
Cucumber and Avocado Gazpacho

Savor the essence of summer in a bowl with this refreshing, no-cook soup that marries crisp cucumber with creamy avocado. This elegant gazpacho is a vibrant, velvety blend that comes together in mere minutes, offering a cool respite on warm days while celebrating peak-season produce at its simplest and most sublime. It’s a dish that feels both effortlessly chic and deeply satisfying, perfect for al fresco lunches or as a sophisticated starter.
Serving: 4 | Pre Time: 15 minutes | Cooking Time: 0 minutes
Ingredients
– 2 large English cucumbers, peeled and roughly chopped (about 4 cups)—I prefer these for their thin skin and minimal seeds, which yield a smoother texture.
– 2 ripe Hass avocados, pitted and scooped (look for ones that yield slightly to gentle pressure for peak creaminess).
– 1/2 cup plain Greek yogurt (full-fat is my go-to for richness, but low-fat works too).
– 1/4 cup extra virgin olive oil, plus extra for drizzling—this fruity, high-quality oil really elevates the flavor.
– 2 tbsp fresh lime juice (from about 1 lime, juiced just before using for the brightest acidity).
– 1 small garlic clove, minced (a little goes a long way here to avoid overpowering).
– 1 tsp kosher salt, plus more as needed.
– 1/4 tsp freshly ground black pepper.
– 1/4 cup cold water, if needed for thinning.
– Fresh dill or chives for garnish, finely chopped (I love dill’s herbaceous note, but chives add a mild oniony kick).
Instructions
1. Combine the peeled and chopped English cucumbers, scooped Hass avocados, plain Greek yogurt, 1/4 cup extra virgin olive oil, fresh lime juice, minced garlic clove, 1 tsp kosher salt, and 1/4 tsp freshly ground black pepper in a high-speed blender.
2. Blend the mixture on high speed for 60–90 seconds until completely smooth and velvety, scraping down the sides with a spatula halfway through to ensure even incorporation.
3. Check the consistency: if the gazpacho seems too thick, add 1/4 cup cold water, 1 tbsp at a time, and blend for 15 seconds after each addition until it reaches a pourable, soup-like texture.
4. Taste and adjust seasoning, adding more kosher salt in 1/4 tsp increments if desired, then blend for another 10 seconds to incorporate.
5. Transfer the gazpacho to an airtight container and refrigerate for at least 2 hours, or until thoroughly chilled to 40°F—this resting time allows the flavors to meld beautifully.
6. Just before serving, give the gazpacho a gentle stir, then ladle it into chilled bowls.
7. Drizzle each serving with a thin stream of extra virgin olive oil and garnish generously with finely chopped fresh dill or chives.
Finally, this gazpacho delights with its lush, creamy texture that’s lightened by the cucumber’s crisp freshness, while the avocado lends a subtle richness. For a creative twist, serve it in small glasses as a chilled appetizer or top with a sprinkle of toasted pepitas for added crunch.
Roasted Cauliflower Steaks with Chimichurri Sauce

Radiantly simple yet sophisticated, roasted cauliflower steaks transform the humble vegetable into a stunning centerpiece, especially when paired with a vibrant chimichurri sauce. This dish celebrates cauliflower’s natural sweetness and meaty texture, elevated by the herbaceous, tangy notes of the sauce. It’s a perfect example of how plant-based cooking can be both elegant and deeply satisfying.
Serving: 4 | Pre Time: 15 minutes | Cooking Time: 25 minutes
Ingredients
– 1 large head of cauliflower, sliced into 1-inch-thick steaks (I look for a firm, tight head to hold its shape)
– 3 tablespoons extra virgin olive oil, my go-to for its fruity depth
– 1 teaspoon kosher salt
– ½ teaspoon freshly ground black pepper
– 1 cup fresh parsley leaves, packed (flat-leaf parsley is my preference for its robust flavor)
– ¼ cup fresh cilantro leaves, packed
– 3 cloves garlic, minced
– 2 tablespoons red wine vinegar
– ¼ cup extra virgin olive oil
– ¼ teaspoon red pepper flakes, optional for a subtle kick
– Salt to taste
Instructions
1. Preheat your oven to 425°F (218°C) and line a baking sheet with parchment paper for easy cleanup.
2. Place the cauliflower steaks on the prepared baking sheet in a single layer, ensuring they don’t overlap.
3. Drizzle 3 tablespoons of extra virgin olive oil evenly over both sides of each cauliflower steak.
4. Season both sides with 1 teaspoon kosher salt and ½ teaspoon freshly ground black pepper, rubbing gently to coat.
5. Roast the cauliflower in the preheated oven for 20-25 minutes, flipping halfway through, until the edges are golden brown and caramelized.
6. While the cauliflower roasts, prepare the chimichurri sauce by finely chopping 1 cup of fresh parsley leaves and ¼ cup of fresh cilantro leaves.
7. In a medium bowl, combine the chopped herbs with 3 cloves of minced garlic, 2 tablespoons of red wine vinegar, and ¼ cup of extra virgin olive oil.
8. Stir the mixture well to emulsify, then add ¼ teaspoon of red pepper flakes if using, and season with salt to taste.
9. Let the chimichurri sauce sit at room temperature for at least 10 minutes to allow the flavors to meld.
10. Remove the roasted cauliflower steaks from the oven and transfer them to a serving platter.
11. Spoon the chimichurri sauce generously over the warm cauliflower steaks just before serving.
Achieving a perfect balance, the roasted cauliflower offers a tender, slightly crisp exterior with a creamy interior, while the chimichurri adds a bright, herbaceous punch that cuts through the richness. For a creative twist, serve these steaks atop a bed of quinoa or alongside grilled vegetables, making it a versatile dish that shines as both a main course or a standout side.
Spaghetti Squash with Garlic and Herb Mushrooms

Crafted for those seeking a lighter alternative to traditional pasta, this spaghetti squash with garlic and herb mushrooms transforms humble ingredients into an elegant, satisfying meal. Roasted until tender and tossed with savory mushrooms, it’s a dish that feels both comforting and refined—perfect for a cozy dinner or an impressive side.
Serving: 4 | Pre Time: 15 minutes | Cooking Time: 45 minutes
Ingredients
– 1 medium spaghetti squash (about 3 pounds), halved and seeded—I find a sharp chef’s knife works best for cutting through the tough skin.
– 2 tablespoons extra virgin olive oil, my go-to for its fruity depth.
– 1 teaspoon kosher salt, divided—I prefer it for its clean flavor.
– ½ teaspoon freshly ground black pepper.
– 1 pound cremini mushrooms, sliced; their earthy flavor pairs beautifully here.
– 4 cloves garlic, minced—freshly minced garlic makes all the difference.
– 2 tablespoons unsalted butter, which adds a rich, velvety finish.
– 1 tablespoon fresh thyme leaves, stripped from the stems for a fragrant herbal note.
– ¼ cup grated Parmesan cheese, for a salty, umami boost.
– 2 tablespoons chopped fresh parsley, as a bright garnish.
Instructions
1. Preheat your oven to 400°F and line a baking sheet with parchment paper for easy cleanup.
2. Brush the cut sides of the spaghetti squash with 1 tablespoon of olive oil and sprinkle with ½ teaspoon of salt and ¼ teaspoon of pepper.
3. Place the squash cut-side down on the prepared baking sheet and roast for 35–40 minutes, until the flesh is tender when pierced with a fork.
4. While the squash roasts, heat the remaining 1 tablespoon of olive oil in a large skillet over medium-high heat.
5. Add the sliced mushrooms to the skillet in a single layer and cook without stirring for 5 minutes to allow them to brown nicely—this builds deep flavor.
6. Stir the mushrooms and continue cooking for another 5–7 minutes, until they release their moisture and become golden brown.
7. Reduce the heat to medium-low and add the minced garlic, cooking for 1 minute until fragrant to prevent burning.
8. Stir in the butter, thyme leaves, remaining ½ teaspoon of salt, and ¼ teaspoon of pepper, cooking for 2 minutes until the butter melts and coats the mushrooms.
9. Once the squash is done, use a fork to scrape the flesh into strands, transferring it to a large bowl.
10. Toss the spaghetti squash strands with the garlic-herb mushroom mixture until well combined.
11. Stir in the grated Parmesan cheese until evenly distributed.
12. Garnish with chopped fresh parsley before serving.
Silky strands of squash mingle with the savory, buttery mushrooms, creating a dish that’s both light and deeply flavorful. For a creative twist, top it with a poached egg or serve alongside grilled chicken for a heartier meal—its versatility makes it a staple in my kitchen.
Eggplant and Red Pepper Ratatouille
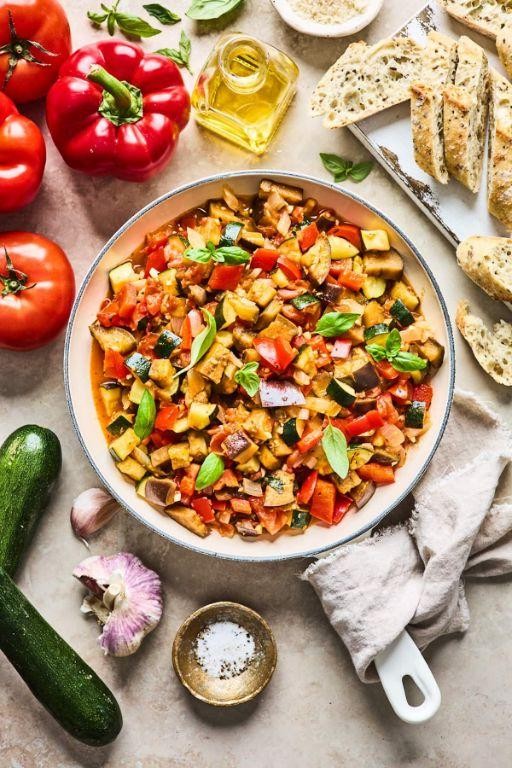
There’s something deeply satisfying about a rustic, vegetable‑forward dish that feels both nourishing and elegant—this eggplant and red pepper ratatouille is exactly that. Transform humble summer produce into a vibrant, aromatic stew that sings with Mediterranean flair, perfect for a cozy dinner or an impressive side. Today, we’ll build layers of flavor with a few simple techniques, yielding a dish that’s as beautiful as it is delicious.
Serving: 4 | Pre Time: 15 minutes | Cooking Time: 45 minutes
Ingredients
– 2 medium eggplants, cut into 1‑inch cubes (I like to leave the skin on for texture)
– 2 large red bell peppers, seeded and chopped into 1‑inch pieces
– 1 large yellow onion, finely diced
– 3 cloves garlic, minced (fresh garlic makes all the difference here)
– 1 (28‑ounce) can whole peeled tomatoes, crushed by hand—their bright acidity balances the vegetables
– ¼ cup extra‑virgin olive oil, my go‑to for its fruity notes
– 1 tablespoon fresh thyme leaves, stripped from the stems
– 1 teaspoon kosher salt, plus more for seasoning
– ½ teaspoon freshly ground black pepper
– ¼ teaspoon red pepper flakes, for a subtle kick
Instructions
1. Heat 2 tablespoons of the olive oil in a large Dutch oven or heavy‑bottomed pot over medium‑high heat until shimmering, about 2 minutes.
2. Add the cubed eggplant and cook, stirring occasionally, until golden brown on all sides, 8–10 minutes; transfer to a plate and set aside. (Tip: Don’t overcrowd the pot—work in batches if needed to ensure proper browning.)
3. Reduce the heat to medium and add the remaining 2 tablespoons of olive oil to the same pot.
4. Add the diced onion and cook, stirring frequently, until soft and translucent, about 5 minutes.
5. Stir in the minced garlic and cook until fragrant, 30–45 seconds, being careful not to let it burn.
6. Add the chopped red bell peppers and cook, stirring occasionally, until they begin to soften, about 5 minutes.
7. Pour in the hand‑crushed tomatoes along with their juices, then add the thyme, 1 teaspoon kosher salt, black pepper, and red pepper flakes.
8. Bring the mixture to a gentle simmer, then reduce the heat to low, cover, and cook for 15 minutes to let the flavors meld. (Tip: A low, slow simmer helps the tomatoes break down into a rich sauce.)
9. Return the browned eggplant to the pot, stirring to combine it with the tomato‑pepper base.
10. Cover and simmer over low heat until all the vegetables are tender and the stew has thickened slightly, 20–25 minutes. (Tip: Taste and adjust seasoning with a pinch more salt if needed—the flavors should be bright and balanced.)
11. Remove from the heat and let it rest, uncovered, for 5 minutes before serving.
Soft, velvety eggplant melds with sweet peppers in a tangy tomato broth, creating a stew that’s both hearty and light. Serve it warm over creamy polenta or alongside crusty bread to soak up every last drop, or chill it overnight—the flavors deepen beautifully, making it even more irresistible the next day.
Stuffed Bell Peppers with Quinoa and Black Beans

Unveiling a vibrant, wholesome dish that transforms humble ingredients into an elegant centerpiece, these stuffed bell peppers marry the earthy richness of quinoa and black beans with the sweet, tender embrace of roasted peppers. Perfect for a cozy weeknight dinner or an impressive gathering, this recipe delivers both nourishment and sophistication in every bite.
Serving: 4 | Pre Time: 20 minutes | Cooking Time: 40 minutes
Ingredients
– 4 large bell peppers, any color (I love a mix of red and yellow for visual appeal)
– 1 cup quinoa, rinsed well to remove bitterness
– 1 can (15 oz) black beans, drained and rinsed
– 1 small yellow onion, finely diced
– 2 cloves garlic, minced
– 1 cup vegetable broth (low-sodium is my preference for better flavor control)
– 1 cup shredded Monterey Jack cheese, divided
– 2 tbsp extra virgin olive oil, my go-to for its fruity notes
– 1 tsp ground cumin
– 1/2 tsp smoked paprika
– Salt and freshly ground black pepper
– Fresh cilantro, chopped, for garnish
Instructions
1. Preheat your oven to 375°F (190°C) and lightly grease a baking dish with olive oil.
2. Slice the tops off the bell peppers, remove seeds and membranes, and arrange them upright in the baking dish.
3. In a medium saucepan, heat 1 tbsp olive oil over medium heat and sauté the diced onion for 5 minutes until translucent.
4. Add the minced garlic and cook for 1 minute until fragrant, being careful not to burn it.
5. Stir in the rinsed quinoa, cumin, and smoked paprika, toasting for 2 minutes to enhance the spices’ aroma.
6. Pour in the vegetable broth, bring to a boil, then reduce heat to low, cover, and simmer for 15 minutes until the quinoa is tender and liquid is absorbed.
7. Remove the quinoa from heat and fluff with a fork, then fold in the black beans and 3/4 cup shredded cheese until evenly combined.
8. Generously stuff each bell pepper with the quinoa mixture, packing it gently to fill completely.
9. Sprinkle the remaining 1/4 cup cheese over the tops of the stuffed peppers.
10. Cover the baking dish with aluminum foil and bake for 25 minutes.
11. Remove the foil and bake for an additional 15 minutes until the peppers are tender and the cheese is golden and bubbly.
12. Let the peppers rest for 5 minutes before serving to allow the filling to set.
13. Garnish with fresh cilantro just before serving.
Offering a delightful contrast of textures, the tender-crisp peppers yield to a fluffy, savory filling with subtle smokiness from the paprika. Serve these warm, perhaps with a dollop of cool sour cream or alongside a crisp green salad, to elevate this dish into a memorable meal that satisfies both the palate and the soul.
Kale and Spinach Detox Soup
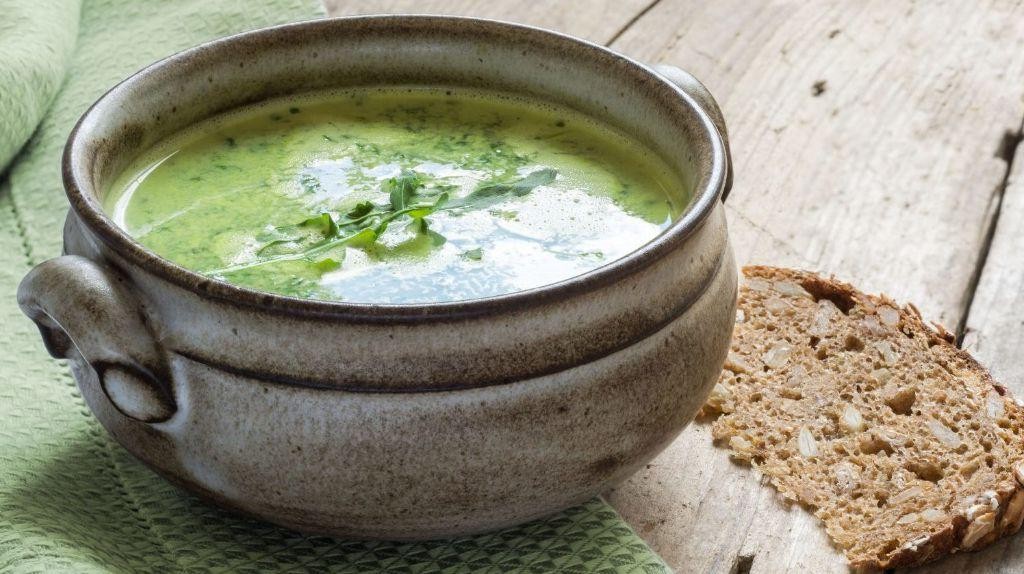
Perfect for a post-holiday reset or a nourishing weeknight meal, this vibrant Kale and Spinach Detox Soup is a celebration of clean, wholesome ingredients. Its emerald broth, brimming with earthy greens and aromatic vegetables, offers both comfort and rejuvenation in every spoonful—a true testament to how simple, real food can make you feel utterly revitalized.
Serving: 4 | Pre Time: 15 minutes | Cooking Time: 25 minutes
Ingredients
– 2 tablespoons extra-virgin olive oil (my go-to for its fruity depth)
– 1 medium yellow onion, finely diced (I find a sharp chef’s knife makes all the difference here)
– 3 cloves garlic, minced
– 1 teaspoon finely grated fresh ginger (for a bright, zesty kick)
– 4 cups low-sodium vegetable broth
– 1 large bunch curly kale, stems removed and leaves roughly chopped (about 4 packed cups)
– 5 ounces fresh baby spinach (I love the tender texture)
– 1 (15-ounce) can cannellini beans, drained and rinsed
– 1 tablespoon fresh lemon juice
– ½ teaspoon fine sea salt
– ¼ teaspoon freshly ground black pepper
Instructions
1. Heat the extra-virgin olive oil in a large Dutch oven or heavy-bottomed pot over medium heat until it shimmers, about 1 minute.
2. Add the finely diced yellow onion and cook, stirring occasionally, until translucent and softened, 5 to 7 minutes.
3. Stir in the minced garlic and grated ginger and cook until fragrant, about 30 seconds, being careful not to let the garlic brown.
4. Pour in the low-sodium vegetable broth and bring the mixture to a gentle boil over medium-high heat.
5. Reduce the heat to medium-low, add the chopped kale, and simmer uncovered until the kale is tender and vibrant green, 8 to 10 minutes.
6. Stir in the baby spinach and cook just until wilted, about 1 minute—this preserves its delicate texture.
7. Add the drained cannellini beans and simmer for 2 minutes to heat them through.
8. Remove the pot from the heat and stir in the fresh lemon juice, fine sea salt, and freshly ground black pepper.
9. Taste and adjust seasoning if desired, then ladle the soup into bowls.
Glistening with a velvety, broth-rich consistency, this soup delivers a harmonious blend of earthy kale, sweet spinach, and creamy beans, punctuated by the bright acidity of lemon. For a creative twist, top each bowl with a drizzle of chili oil or a sprinkle of toasted pumpkin seeds to add a delightful crunch and a hint of warmth.
Lentil and Vegetable Stir-Fry
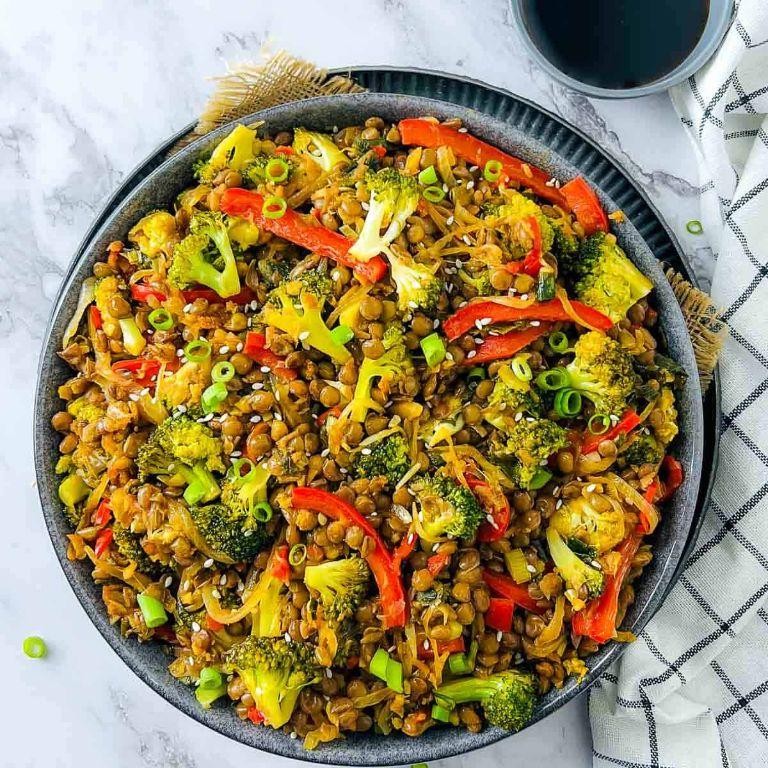
There’s something deeply satisfying about transforming humble ingredients into a vibrant, nourishing meal that comes together in minutes. This lentil and vegetable stir-fry is exactly that—a colorful medley of textures and flavors that feels both wholesome and indulgent, perfect for busy weeknights when you crave something substantial yet light.
Serving: 4 | Pre Time: 15 minutes | Cooking Time: 20 minutes
Ingredients
– 1 cup dried green lentils, rinsed (I find they hold their shape better than red lentils for stir-fries)
– 2 tablespoons extra virgin olive oil, my go-to for its fruity notes
– 1 large yellow onion, thinly sliced
– 3 cloves garlic, minced (freshly minced makes all the difference)
– 1 red bell pepper, cut into thin strips
– 2 medium carrots, julienned
– 2 cups broccoli florets, cut into bite-sized pieces
– 3 tablespoons low-sodium soy sauce
– 1 tablespoon rice vinegar
– 1 teaspoon grated fresh ginger
– ½ teaspoon red pepper flakes, optional for a subtle kick
– ¼ cup chopped fresh cilantro, for garnish
– Cooked brown rice or quinoa, for serving (I love the nuttiness of brown rice here)
Instructions
1. In a medium saucepan, combine the rinsed lentils with 3 cups of water and bring to a boil over high heat.
2. Reduce the heat to low, cover, and simmer the lentils for 15–18 minutes, until tender but not mushy; drain any excess water and set aside.
3. While the lentils cook, heat the extra virgin olive oil in a large skillet or wok over medium-high heat until shimmering, about 1 minute.
4. Add the thinly sliced onion to the skillet and sauté for 4–5 minutes, stirring occasionally, until softened and lightly golden.
5. Stir in the minced garlic and grated ginger, cooking for 30 seconds until fragrant to avoid burning.
6. Add the red bell pepper strips, julienned carrots, and broccoli florets to the skillet, tossing to combine with the aromatics.
7. Cook the vegetables for 6–8 minutes, stirring frequently, until crisp-tender and bright in color.
8. Tip: For even cooking, cut the vegetables into uniform sizes—this ensures they finish at the same time.
9. Add the cooked lentils to the skillet, gently folding them into the vegetable mixture.
10. Pour in the low-sodium soy sauce and rice vinegar, sprinkling with red pepper flakes if using, and stir to coat everything evenly.
11. Cook for 2–3 minutes more, allowing the flavors to meld and the sauce to reduce slightly.
12. Tip: Taste and adjust seasoning with a pinch of salt only if needed, as the soy sauce adds plenty of savoriness.
13. Remove the skillet from heat and stir in the chopped cilantro just before serving to preserve its fresh aroma.
14. Tip: Serve immediately over warm brown rice or quinoa for the best texture, as the lentils can firm up if left to sit.
Rely on this dish to deliver a hearty yet light experience, with the lentils offering a tender bite against the crisp vegetables and a savory-sweet glaze. Its versatility shines—try it wrapped in lettuce cups for a low-carb twist or topped with a fried egg for extra richness, making it a staple that adapts to any craving.
Grilled Asparagus with Lemon Vinaigrette
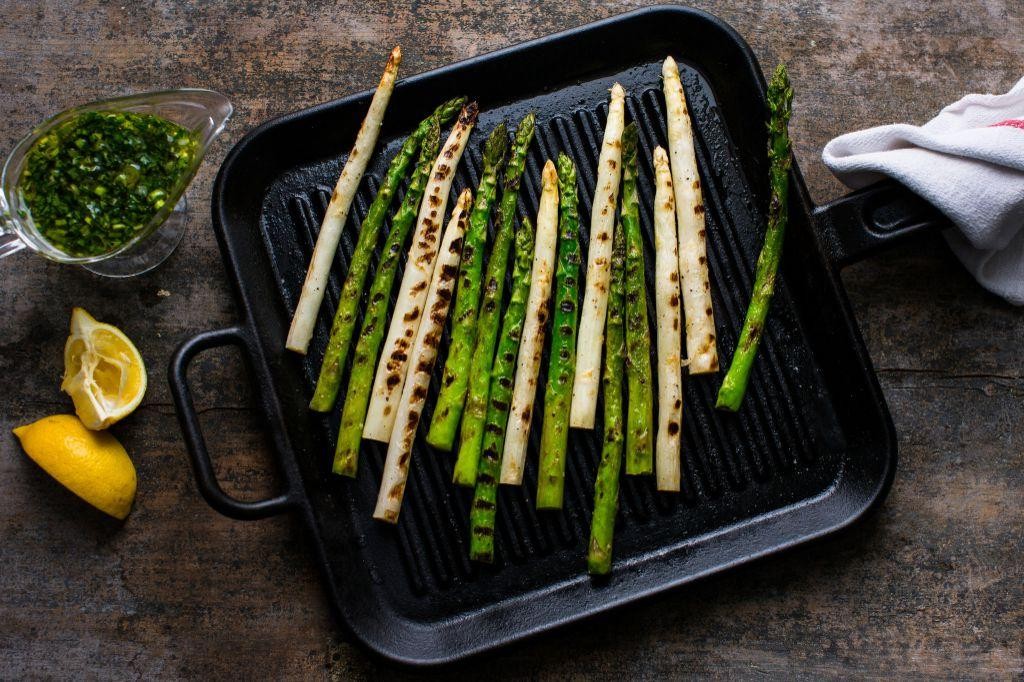
Unveiling the vibrant simplicity of spring produce, this grilled asparagus with lemon vinaigrette transforms humble spears into a show-stopping side. The smoky char from the grill perfectly complements the bright, zesty dressing, creating a dish that feels both rustic and refined. It’s an effortless way to elevate any meal, from a casual weeknight dinner to an elegant al fresco gathering.
Serving: 4 | Pre Time: 10 minutes | Cooking Time: 8 minutes
Ingredients
– 1 pound fresh asparagus spears, ends trimmed (look for firm, bright green stalks)
– 2 tablespoons extra virgin olive oil, my go-to for its fruity depth
– 1/2 teaspoon kosher salt
– 1/4 teaspoon freshly ground black pepper
– 3 tablespoons extra virgin olive oil (yes, more for the vinaigrette—it makes all the difference)
– 2 tablespoons freshly squeezed lemon juice (about 1 medium lemon, I always roll it first to maximize juice)
– 1 teaspoon Dijon mustard, for a subtle tang and emulsification
– 1 small garlic clove, minced (use a microplane for a fine paste)
– 1/4 teaspoon kosher salt
– 1/8 teaspoon freshly ground black pepper
– 1 tablespoon chopped fresh parsley, for a final herbal lift
Instructions
1. Preheat your grill to medium-high heat, about 400°F, ensuring the grates are clean and lightly oiled to prevent sticking.
2. Place the trimmed asparagus spears on a large baking sheet in a single layer.
3. Drizzle the asparagus with 2 tablespoons of extra virgin olive oil, then sprinkle evenly with 1/2 teaspoon kosher salt and 1/4 teaspoon black pepper.
4. Toss the asparagus gently with your hands to coat each spear thoroughly with the oil and seasonings.
5. Arrange the asparagus perpendicular to the grill grates to prevent them from falling through.
6. Grill the asparagus for 6 to 8 minutes, turning once halfway through with tongs, until tender-crisp and lightly charred in spots.
7. While the asparagus grills, make the vinaigrette: in a small bowl, whisk together 3 tablespoons extra virgin olive oil, 2 tablespoons lemon juice, 1 teaspoon Dijon mustard, and 1 minced garlic clove until fully combined and slightly thickened.
8. Season the vinaigrette with 1/4 teaspoon kosher salt and 1/8 teaspoon black pepper, whisking again to incorporate.
9. Transfer the grilled asparagus to a serving platter using tongs.
10. Drizzle the lemon vinaigrette evenly over the warm asparagus.
11. Sprinkle 1 tablespoon of chopped fresh parsley over the top for a burst of color and freshness.
Warm from the grill, the asparagus offers a delightful contrast: tender interiors with a satisfying smoky snap. The vinaigrette clings to each spear, its bright acidity cutting through the richness with every bite. For a creative twist, serve it alongside grilled salmon or crumble over some tangy goat cheese for added creaminess.
Chickpea and Spinach Stew

Yielded from humble origins yet brimming with sophisticated flavor, this Chickpea and Spinach Stew is a testament to how simple ingredients can transform into something truly extraordinary. As winter’s chill settles in, this one-pot wonder offers both nourishing comfort and vibrant, plant-based elegance—a dish that feels equally at home on a weeknight table or as the star of a leisurely weekend gathering.
Serving: 4 | Pre Time: 15 minutes | Cooking Time: 25 minutes
Ingredients
– 2 tablespoons extra-virgin olive oil (my go-to for its fruity depth)
– 1 medium yellow onion, finely diced (I find a sharp knife here makes all the difference)
– 3 cloves garlic, minced (freshly minced releases the best aroma)
– 1 teaspoon smoked paprika (this adds a warm, subtle smokiness)
– 1/2 teaspoon ground cumin
– 1 (15-ounce) can chickpeas, drained and rinsed (I give them a good rinse to remove excess sodium)
– 1 (14.5-ounce) can diced tomatoes, with their juices
– 2 cups vegetable broth
– 4 cups fresh spinach, roughly chopped (packed cups—it wilts down significantly)
– 1/2 teaspoon kosher salt
– 1/4 teaspoon freshly ground black pepper
– 1 tablespoon fresh lemon juice (squeezed just before adding for brightest flavor)
– Optional for serving: crusty bread or cooked quinoa
Instructions
1. In a large Dutch oven or heavy-bottomed pot, heat the extra-virgin olive oil over medium heat until it shimmers, about 1 minute.
2. Add the finely diced yellow onion and cook, stirring occasionally, until translucent and softened, 5–7 minutes.
3. Stir in the minced garlic and cook until fragrant, about 30 seconds, being careful not to let it brown.
4. Add the smoked paprika and ground cumin to the pot, stirring constantly for 30 seconds to toast the spices and unlock their oils.
5. Pour in the drained and rinsed chickpeas, tossing to coat them evenly in the spiced onion mixture.
6. Add the can of diced tomatoes with their juices and the vegetable broth, stirring to combine.
7. Increase the heat to medium-high and bring the stew to a gentle boil.
8. Once boiling, reduce the heat to low, cover the pot with a lid, and simmer for 15 minutes to allow the flavors to meld.
9. Uncover the pot and stir in the roughly chopped fresh spinach, cooking just until wilted, about 2–3 minutes.
10. Season the stew with kosher salt and freshly ground black pepper, stirring to distribute evenly.
11. Remove the pot from the heat and stir in the fresh lemon juice.
12. Ladle the stew into bowls and serve immediately.
Rich and velvety from the simmered tomatoes, the stew boasts tender chickpeas and vibrant spinach in every spoonful. The smoky paprika and bright lemon create a harmonious balance, making it perfect ladled over a mound of fluffy quinoa or alongside a slice of crusty, toasted bread for dipping.
Cauliflower Fried Rice
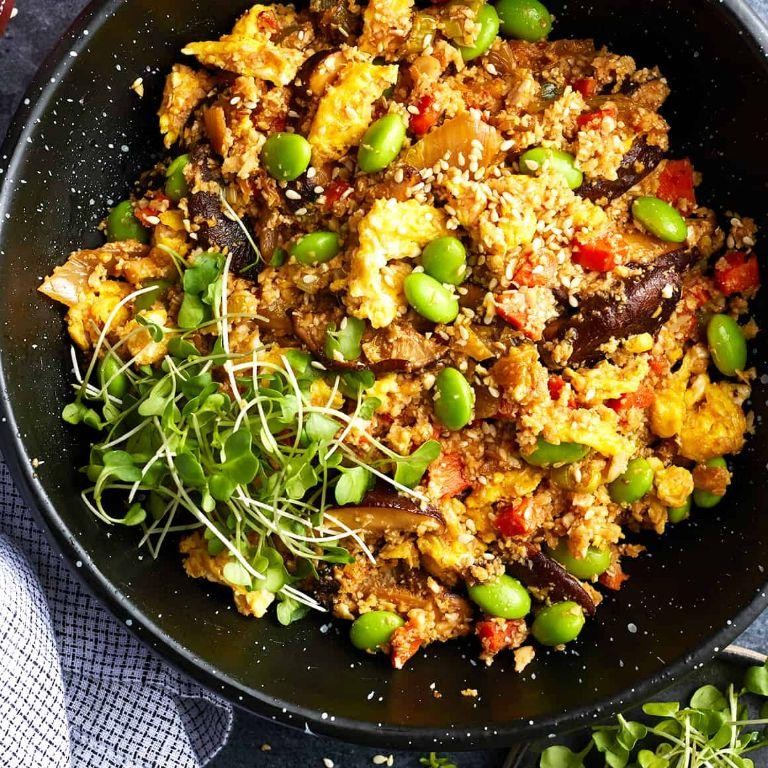
Zesty and vibrant, cauliflower fried rice transforms humble vegetables into a sophisticated, grain-free masterpiece that delights both the palate and the eye. This elegant dish offers a lighter, nutrient-packed alternative to traditional fried rice, perfect for a quick weeknight dinner or an impressive side. With its colorful medley of crisp-tender vegetables and savory seasonings, it’s a celebration of simplicity and flavor.
Serving: 4 | Pre Time: 15 minutes | Cooking Time: 15 minutes
Ingredients
– 1 large head of cauliflower, riced (about 4 cups—I find pulsing florets in a food processor yields the perfect rice-like texture)
– 2 tablespoons extra virgin olive oil (my go-to for its fruity notes)
– 3 large eggs, lightly beaten (I prefer room temperature eggs here for even cooking)
– 1 cup frozen peas and carrots, thawed (a convenient shortcut that adds sweetness and crunch)
– 3 cloves garlic, minced (freshly minced makes all the difference)
– 3 tablespoons low-sodium soy sauce (adjust to your preference for saltiness)
– 2 green onions, thinly sliced (reserve some for garnish for a pop of color)
– 1 teaspoon toasted sesame oil (just a drizzle at the end elevates the aroma)
Instructions
1. Heat 1 tablespoon of extra virgin olive oil in a large skillet or wok over medium-high heat until shimmering, about 1 minute.
2. Add the beaten eggs and cook, stirring constantly with a spatula, until just set into soft curds, about 1–2 minutes; transfer to a plate immediately to prevent overcooking.
3. In the same skillet, add the remaining 1 tablespoon of extra virgin olive oil and heat for 30 seconds.
4. Add the minced garlic and sauté until fragrant, about 30 seconds, being careful not to let it burn.
5. Stir in the riced cauliflower and cook, stirring occasionally, until it begins to soften and turn lightly golden, about 5–7 minutes.
6. Add the thawed peas and carrots and cook for another 2 minutes until heated through.
7. Pour in the low-sodium soy sauce and stir to coat the cauliflower mixture evenly.
8. Return the cooked eggs to the skillet and gently fold them into the cauliflower rice.
9. Remove the skillet from heat and drizzle with toasted sesame oil, stirring once to combine.
10. Garnish with sliced green onions just before serving.
Oozing with umami from the soy sauce and aromatic sesame oil, this cauliflower fried rice boasts a satisfyingly crisp yet tender texture that mimics traditional rice without the heaviness. Serve it warm as a standalone meal or alongside grilled chicken for a complete, health-conscious feast; its vibrant colors and fresh flavors make it a standout on any table.
Vegetable and Tofu Skewers with Soy Marinade

Unveiling a dish that transforms humble vegetables and tofu into an elegant, protein-packed centerpiece, these skewers are marinated in a savory soy-based glaze that caramelizes beautifully on the grill. Perfect for a summer gathering or a quick weeknight meal, they offer a delightful interplay of smoky char and tender, flavorful bites. The recipe is wonderfully adaptable, allowing you to showcase your favorite seasonal produce with minimal fuss.
Serving: 4 | Pre Time: 20 minutes | Cooking Time: 10 minutes
Ingredients
– 1 (14-ounce) block extra-firm tofu, pressed for at least 30 minutes to remove excess water—this step is crucial for achieving a meaty texture that holds up on the skewer.
– 2 bell peppers (I love using one red and one yellow for vibrant color), cored and cut into 1-inch pieces.
– 1 medium zucchini, sliced into ½-inch thick rounds.
– 1 red onion, peeled and cut into 1-inch chunks.
– ¼ cup low-sodium soy sauce, my pantry staple for balanced saltiness.
– 2 tablespoons pure maple syrup, which adds a subtle sweetness that complements the soy beautifully.
– 2 tablespoons rice vinegar, for a bright, tangy note.
– 1 tablespoon toasted sesame oil, my secret for deep, nutty flavor.
– 2 cloves garlic, minced—freshly minced makes all the difference here.
– 1 teaspoon grated fresh ginger, which I keep frozen for easy use.
– 8 (10-inch) wooden skewers, soaked in water for 30 minutes to prevent burning.
– 1 tablespoon neutral oil (like avocado or grapeseed), for brushing the grill.
Instructions
1. In a medium bowl, whisk together the soy sauce, maple syrup, rice vinegar, sesame oil, minced garlic, and grated ginger until fully combined to create the marinade.
2. Cut the pressed tofu into 1-inch cubes and place them in a shallow dish or resealable bag.
3. Pour half of the marinade over the tofu cubes, ensuring they are evenly coated, then cover and refrigerate for at least 15 minutes to allow the flavors to penetrate.
4. While the tofu marinates, thread the tofu cubes, bell pepper pieces, zucchini rounds, and red onion chunks alternately onto the soaked wooden skewers, leaving a small space between each piece for even cooking.
5. Preheat a grill or grill pan to medium-high heat (about 400°F) and lightly brush the grates with neutral oil to prevent sticking.
6. Place the assembled skewers on the preheated grill and cook for 4-5 minutes per side, or until the vegetables are tender with visible grill marks and the tofu is lightly charred, brushing with the remaining marinade during the last minute of cooking for a glossy finish.
7. Remove the skewers from the grill and let them rest for 2-3 minutes before serving to allow the juices to redistribute.
The finished skewers boast a satisfying contrast: the tofu is firm and savory, while the vegetables retain a slight crunch, all enveloped in a sticky, umami-rich glaze. Serve them over a bed of fluffy jasmine rice or alongside a crisp Asian slaw for a complete meal that feels both rustic and refined.
Butternut Squash and Carrot Soup

Savor the essence of autumn in a bowl with this velvety butternut squash and carrot soup, where sweet roasted vegetables meld into a comforting puree. Its vibrant orange hue promises warmth and nourishment, perfect for crisp evenings when you crave something both elegant and effortless. This recipe transforms humble roots into a silky, sophisticated starter or light meal that feels like a gentle embrace.
Serving: 4 | Pre Time: 15 minutes | Cooking Time: 45 minutes
Ingredients
– 1 medium butternut squash (about 2 lbs), peeled and cubed—I find a sharp peeler makes this task a breeze
– 3 large carrots, peeled and chopped into 1-inch pieces for even roasting
– 1 yellow onion, diced—sweet varieties like Vidalia add a lovely depth
– 2 cloves garlic, minced—freshly minced releases the best aroma
– 4 cups vegetable broth, low-sodium so you can control the seasoning
– 2 tbsp extra virgin olive oil, my go-to for its fruity notes
– 1 tsp ground cumin, toasty and warm
– ½ tsp smoked paprika, for a subtle smoky hint
– Salt and freshly ground black pepper, to layer the flavors
– ¼ cup heavy cream, optional but adds a luxurious richness
– Fresh thyme sprigs for garnish, because a herbal touch elevates it beautifully
Instructions
1. Preheat your oven to 400°F (200°C) and line a baking sheet with parchment paper for easy cleanup.
2. In a large bowl, toss the cubed butternut squash and chopped carrots with 1 tbsp of olive oil, ½ tsp salt, and ¼ tsp black pepper until evenly coated.
3. Spread the vegetables in a single layer on the prepared baking sheet and roast for 25–30 minutes, until they are tender and lightly caramelized at the edges—this roasting step deepens their natural sweetness.
4. While the vegetables roast, heat the remaining 1 tbsp of olive oil in a large pot over medium heat.
5. Add the diced onion and cook for 5–7 minutes, stirring occasionally, until it becomes soft and translucent.
6. Stir in the minced garlic, ground cumin, and smoked paprika, cooking for 1 minute until fragrant—toasting the spices briefly unlocks their full flavor.
7. Pour in the vegetable broth and bring the mixture to a gentle simmer.
8. Once the roasted vegetables are done, carefully add them to the pot with the broth.
9. Reduce the heat to low, cover the pot, and let it simmer for 10 minutes to allow the flavors to meld together.
10. Remove the pot from the heat and use an immersion blender to puree the soup until completely smooth—for a silkier texture, you can blend in batches in a countertop blender, but be cautious as hot liquids can expand.
11. Stir in the heavy cream if using, then taste and adjust the seasoning with additional salt and pepper as needed.
12. Ladle the soup into bowls and garnish each serving with a few fresh thyme sprigs.
This soup boasts a velvety, creamy texture that glides across the spoon, with a harmonious balance of sweet squash and earthy carrots enhanced by warm spices. Try serving it in hollowed-out bread bowls for a rustic presentation, or drizzle with a swirl of crème fraîche and a sprinkle of toasted pumpkin seeds for added crunch and visual appeal.
Broccoli and Bell Pepper Stir-Fry
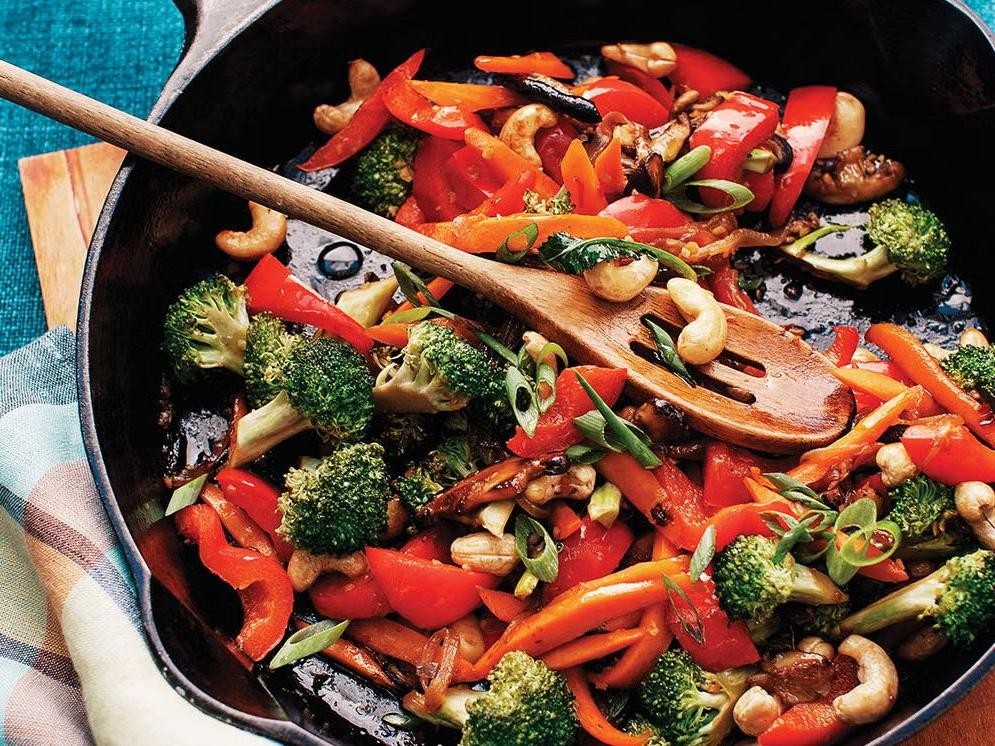
Wondering how to transform humble vegetables into a vibrant, restaurant-worthy meal in minutes? This Broccoli and Bell Pepper Stir-Fry is your answer—a symphony of crisp textures and bright flavors that celebrates simplicity with elegance, perfect for a quick yet impressive weeknight dinner.
Serving: 4 | Pre Time: 15 minutes | Cooking Time: 10 minutes
Ingredients
– 1 large head of broccoli, cut into bite-sized florets (I always save the stems for slaw)
– 2 large bell peppers, any color you love, thinly sliced (I adore the sweetness of red and yellow together)
– 3 cloves garlic, minced (freshly minced makes all the difference)
– 1 tablespoon freshly grated ginger (my secret for a warm, aromatic kick)
– 3 tablespoons soy sauce, preferably low-sodium to control saltiness
– 2 tablespoons rice vinegar, for that essential tangy balance
– 1 tablespoon honey, to add a subtle, mellow sweetness
– 2 tablespoons vegetable oil, with a high smoke point like avocado oil for best results
– 1 teaspoon sesame oil, drizzled at the end for a nutty finish
– ¼ teaspoon red pepper flakes, optional but lovely for a gentle heat
Instructions
1. Prepare all ingredients: cut broccoli into florets, thinly slice bell peppers, mince garlic, and grate ginger.
2. In a small bowl, whisk together soy sauce, rice vinegar, honey, and red pepper flakes until honey is fully dissolved.
3. Heat a large wok or skillet over high heat until a drop of water sizzles and evaporates immediately, about 2 minutes.
4. Add vegetable oil and swirl to coat the pan evenly, then immediately add broccoli florets.
5. Stir-fry broccoli for 3–4 minutes until it turns bright green and develops slight char marks on the edges.
6. Add bell peppers and continue stir-frying for 2–3 minutes until peppers soften slightly but remain crisp-tender.
7. Push vegetables to the sides of the pan, creating a well in the center, and add minced garlic and grated ginger.
8. Cook garlic and ginger in the center for 30–45 seconds until fragrant, being careful not to let them burn.
9. Pour the sauce mixture over the vegetables and toss everything together to coat evenly.
10. Cook for 1–2 more minutes, stirring constantly, until sauce thickens slightly and clings to the vegetables.
11. Remove from heat and drizzle with sesame oil, tossing once more to distribute the nutty aroma.
12. Transfer immediately to a serving dish to preserve the vibrant colors and crisp texture.
Fresh from the wok, this stir-fry offers a delightful contrast: the broccoli remains satisfyingly crisp, while the peppers soften just enough to release their natural sweetness. For a creative twist, serve it over a bed of jasmine rice or toss with soba noodles, garnished with toasted sesame seeds for extra crunch and visual appeal.
Spinach and Tomato Stuffed Mushrooms

These elegant stuffed mushrooms transform humble button caps into savory, bite-sized delights, perfect for holiday gatherings or a sophisticated appetizer spread. Their rich filling of wilted spinach, sun-dried tomatoes, and creamy cheeses bakes into a golden, aromatic masterpiece that never fails to impress guests. Simple to prepare yet undeniably luxurious, they offer a delightful balance of earthy, tangy, and umami flavors in every mouthful.
Serving: 24 | Pre Time: 20 minutes | Cooking Time: 25 minutes
Ingredients
– 24 large white button mushrooms, cleaned and stems removed (I gently twist the stems—they pop right out!)
– 2 tablespoons extra virgin olive oil, my go-to for its fruity notes
– 1 small yellow onion, finely diced (about ½ cup)
– 2 cloves garlic, minced
– 5 ounces fresh baby spinach, roughly chopped
– ½ cup sun-dried tomatoes packed in oil, drained and chopped
– 4 ounces cream cheese, softened to room temperature for easy blending
– ½ cup grated Parmesan cheese, plus extra for sprinkling
– ¼ teaspoon kosher salt
– ¼ teaspoon freshly ground black pepper
– ¼ teaspoon smoked paprika, for a subtle depth
Instructions
1. Preheat your oven to 375°F (190°C) and line a large baking sheet with parchment paper.
2. Place the mushroom caps on the prepared sheet, gill-side up, and drizzle with 1 tablespoon of olive oil, rubbing it gently into each cap.
3. Bake the mushrooms for 10 minutes to release excess moisture—this prevents sogginess later.
4. While the mushrooms bake, heat the remaining 1 tablespoon of olive oil in a large skillet over medium heat.
5. Add the diced onion and cook for 4–5 minutes, stirring occasionally, until translucent and fragrant.
6. Stir in the minced garlic and cook for 1 minute until aromatic, being careful not to let it brown.
7. Add the chopped spinach to the skillet and cook for 2–3 minutes, stirring constantly, until wilted and bright green.
8. Transfer the spinach mixture to a medium bowl and let it cool for 5 minutes to avoid melting the cheese.
9. To the cooled spinach, add the sun-dried tomatoes, cream cheese, Parmesan, salt, pepper, and smoked paprika.
10. Mix everything thoroughly with a fork until well combined and creamy.
11. Remove the mushrooms from the oven and carefully drain any liquid from the caps using a paper towel.
12. Spoon the filling mixture evenly into each mushroom cap, mounding it slightly.
13. Sprinkle a little extra Parmesan over the top of each stuffed mushroom for a golden crust.
14. Return the mushrooms to the oven and bake for 15–18 minutes, until the filling is hot and the tops are lightly browned.
15. Let the mushrooms cool on the baking sheet for 5 minutes before serving to allow the flavors to meld.
Each bite offers a tender, juicy mushroom cap contrasting with the creamy, tangy filling, where the sun-dried tomatoes add a chewy sweetness. For a festive touch, garnish with fresh thyme leaves or serve alongside a crisp white wine to complement the earthy notes.
Roasted Brussels Sprouts with Balsamic Glaze
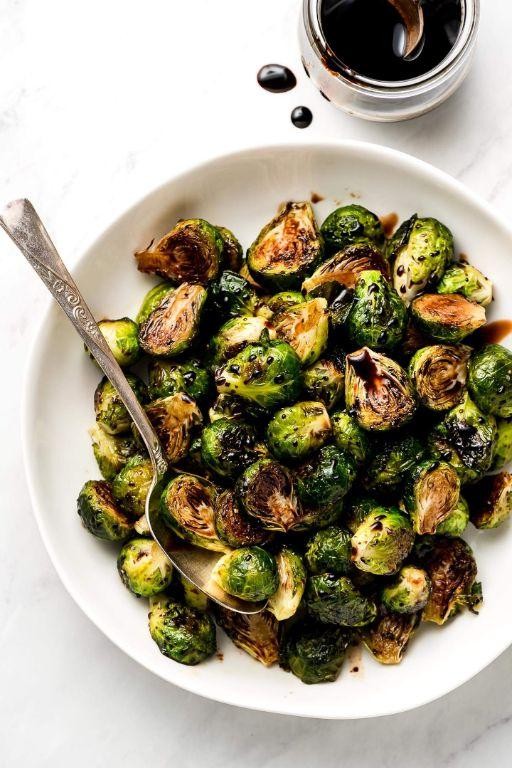
These caramelized Brussels sprouts, kissed with a sweet-tart balsamic reduction, transform a humble vegetable into a show-stopping side dish that’s both rustic and refined. The high-heat roasting coaxes out their natural sugars, while the glossy glaze adds a sophisticated finish that’s perfect for holiday tables or weeknight dinners.
Serving: 4 | Pre Time: 10 minutes | Cooking Time: 25 minutes
Ingredients
– 1½ pounds Brussels sprouts, trimmed and halved (look for firm, bright green sprouts)
– 3 tablespoons extra virgin olive oil, my go-to for its fruity notes
– ¾ teaspoon kosher salt (I prefer Diamond Crystal for its lighter texture)
– ½ teaspoon freshly ground black pepper
– 3 tablespoons balsamic vinegar (a good-quality aged variety makes all the difference)
– 1 tablespoon honey, for a touch of sweetness that balances the vinegar’s acidity
– 2 cloves garlic, minced (freshly minced releases the best flavor)
Instructions
1. Preheat your oven to 425°F and line a large, rimmed baking sheet with parchment paper for easy cleanup.
2. In a large bowl, toss the halved Brussels sprouts with olive oil, salt, and pepper until evenly coated.
3. Arrange the sprouts in a single layer on the prepared baking sheet, cut-side down, to maximize caramelization.
4. Roast for 20–25 minutes, until the sprouts are tender and the edges are deeply browned and crispy.
5. While the sprouts roast, combine balsamic vinegar, honey, and minced garlic in a small saucepan over medium heat.
6. Simmer the mixture for 3–5 minutes, stirring frequently, until it reduces to a syrupy glaze that coats the back of a spoon.
7. Transfer the roasted Brussels sprouts to a serving bowl and drizzle the warm balsamic glaze over them.
8. Toss gently to coat the sprouts evenly with the glaze, being careful not to crush them.
9. Serve immediately while hot.
Here, the crispy, caramelized edges of the sprouts contrast beautifully with their tender centers, all enveloped in a sticky-sweet glaze with a subtle garlicky undertone. For a creative twist, sprinkle with toasted pecans or crumbled goat cheese just before serving to add crunch and creaminess.
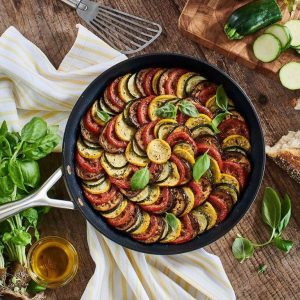
Summer Vegetable Ratatouille
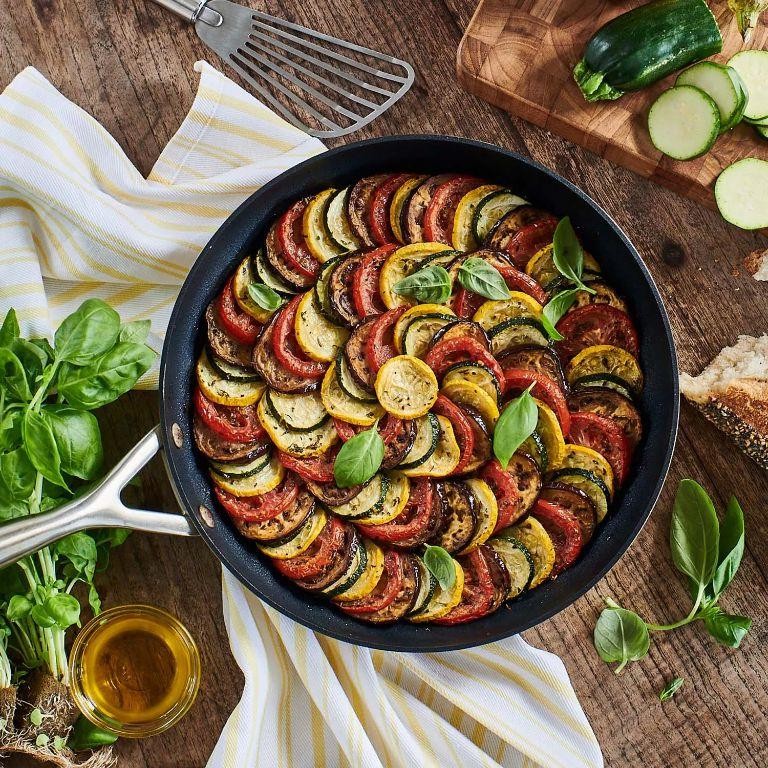
Heralding the vibrant essence of the season, this Summer Vegetable Ratatouille captures the sun-drenched flavors of peak produce in a rustic, elegant dish. It transforms humble vegetables into a harmonious, aromatic stew that’s as versatile as it is delicious, perfect for a light dinner or a stunning side. Here, each vegetable retains its character while melding into a cohesive, deeply satisfying whole.
Serving: 4 | Pre Time: 20 minutes | Cooking Time: 45 minutes
Ingredients
– 2 tablespoons extra virgin olive oil (my go-to for its fruity depth)
– 1 medium yellow onion, diced (about 1 cup)
– 4 cloves garlic, minced (freshly minced makes all the difference)
– 1 medium eggplant, cut into 1-inch cubes (I prefer salting it first to draw out bitterness)
– 2 medium zucchini, cut into 1-inch cubes
– 1 large red bell pepper, cut into 1-inch pieces
– 3 medium tomatoes, chopped (ripe, in-season tomatoes are key)
– 1 teaspoon dried thyme
– 1 teaspoon dried oregano
– 1/2 teaspoon salt
– 1/4 teaspoon black pepper
– 1/4 cup fresh basil, chopped (added at the end for a bright finish)
Instructions
1. Heat 2 tablespoons extra virgin olive oil in a large Dutch oven or heavy-bottomed pot over medium heat until shimmering, about 2 minutes.
2. Add 1 cup diced yellow onion and cook, stirring occasionally, until translucent and softened, about 5 minutes.
3. Add 4 cloves minced garlic and cook, stirring constantly, until fragrant, about 30 seconds.
4. Add 1 cubed eggplant, 2 cubed zucchini, and 1 cubed red bell pepper to the pot. Cook, stirring occasionally, until vegetables begin to soften slightly, about 8 minutes.
5. Stir in 3 chopped tomatoes, 1 teaspoon dried thyme, 1 teaspoon dried oregano, 1/2 teaspoon salt, and 1/4 teaspoon black pepper until well combined.
6. Reduce heat to low, cover the pot with a lid, and simmer gently for 30 minutes, stirring every 10 minutes to prevent sticking. Tip: The lid should be slightly ajar to allow steam to escape and thicken the sauce.
7. After 30 minutes, remove the lid and check the vegetables; they should be tender but not mushy. Tip: If the ratatouille seems too watery, simmer uncovered for an additional 5-10 minutes to reduce the liquid.
8. Remove the pot from heat and stir in 1/4 cup chopped fresh basil until just wilted. Tip: Let the ratatouille rest for 5 minutes off the heat to allow flavors to meld further.
9. Serve warm. Ultimately, this ratatouille offers a tender yet distinct texture, with each vegetable contributing its unique sweetness and earthiness to a rich, herb-infused base. Its deep, savory notes shine when paired with crusty bread for soaking up the juices or spooned over creamy polenta for a comforting meal.
Conclusion
Whether you’re looking to eat lighter, boost your veggie intake, or simply find delicious new meals, this roundup has you covered. We hope these 20 amazing low-calorie vegetarian recipes inspire your next kitchen adventure! Give them a try, leave a comment with your favorite, and don’t forget to share this article on Pinterest to spread the inspiration. Happy cooking!