Finally, spring has arrived, bringing with it the perfect opportunity to refresh your Easter menu with vibrant, meat-free dishes! Whether you’re hosting a festive brunch or a cozy family dinner, these vegetarian recipes celebrate the season’s freshest flavors. From savory mains to sweet treats, get ready to discover 30 delicious options that will make your holiday celebration truly special. Let’s dive into these spring-inspired creations!
Spring Vegetable Quiche with Asparagus and Leeks

Spring’s vibrant produce shines in this savory quiche. Sautéed asparagus and leeks create a fresh foundation, while a rich egg custard binds everything together. This versatile dish works for brunch, lunch, or a light dinner.
6
servings20
minutes55
minutesIngredients
– For the crust: 1 store-bought pie crust, 1 tbsp olive oil
– For the filling: 1 cup chopped asparagus (1-inch pieces), 1 cup thinly sliced leeks (white and light green parts only), 4 large eggs, 1 cup whole milk, 1/2 cup shredded Gruyère cheese, 1/4 tsp salt, 1/8 tsp black pepper
Instructions
1. Preheat your oven to 375°F.
2. Press the store-bought pie crust into a 9-inch pie dish.
3. Prick the bottom of the crust with a fork 10-12 times to prevent bubbling.
4. Bake the empty crust for 10 minutes at 375°F until lightly golden.
5. Heat 1 tbsp olive oil in a skillet over medium heat.
6. Add 1 cup chopped asparagus and 1 cup sliced leeks to the hot oil.
7. Sauté vegetables for 5-7 minutes until asparagus is bright green and tender-crisp.
8. Spread the cooked vegetables evenly over the pre-baked crust.
9. Sprinkle 1/2 cup shredded Gruyère cheese over the vegetables.
10. Whisk 4 large eggs in a medium bowl until fully combined.
11. Add 1 cup whole milk, 1/4 tsp salt, and 1/8 tsp black pepper to the eggs.
12. Whisk the egg mixture for 1 minute until smooth and uniform.
13. Pour the egg mixture over the vegetables and cheese in the crust.
14. Bake at 375°F for 35-40 minutes until the center is set and the top is golden brown.
15. Insert a knife into the center – it should come out clean when fully cooked.
16. Let the quiche rest for 10 minutes before slicing.
Our quiche emerges with a flaky crust supporting a tender, custardy interior. The asparagus adds subtle crunch while leeks provide sweet onion notes. Serve warm slices with a crisp green salad or chill leftovers for easy weekday lunches.
Stuffed Bell Peppers with Quinoa and Chickpeas
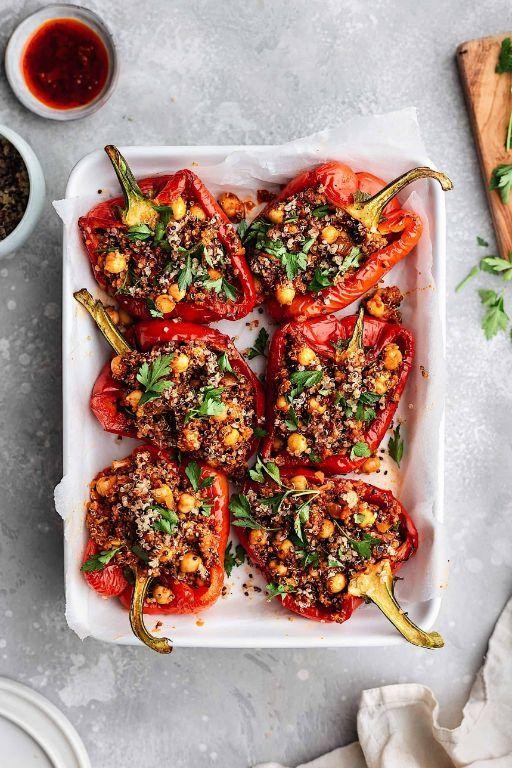
Every weeknight dinner deserves a healthy, satisfying option that comes together quickly. These stuffed peppers combine protein-packed quinoa and chickpeas for a complete meal in one colorful package. Even picky eaters will appreciate the vibrant flavors and textures.
4
portions20
minutes53
minutesIngredients
For the filling:
– 1 cup quinoa, rinsed
– 2 cups vegetable broth
– 1 (15-ounce) can chickpeas, drained and rinsed
– 1 yellow onion, diced
– 3 cloves garlic, minced
– 1 teaspoon ground cumin
– 1/2 teaspoon smoked paprika
– 1/4 teaspoon black pepper
– 4 large bell peppers (any color)
For assembly:
– 1 cup shredded mozzarella cheese
– 2 tablespoons olive oil
– 1/4 cup chopped fresh parsley
Instructions
1. Preheat your oven to 375°F.
2. Cut the tops off the bell peppers and remove all seeds and membranes.
3. Heat 1 tablespoon olive oil in a medium saucepan over medium heat.
4. Add diced onion and cook for 5 minutes until translucent.
5. Stir in minced garlic and cook for 1 minute until fragrant.
6. Add rinsed quinoa to the pan and toast for 2 minutes, stirring constantly.
7. Pour in 2 cups vegetable broth and bring to a boil.
8. Reduce heat to low, cover, and simmer for 15 minutes until quinoa is tender and liquid is absorbed.
9. Tip: Let the quinoa sit covered for 5 minutes after cooking for fluffier results.
10. Stir in drained chickpeas, cumin, smoked paprika, and black pepper.
11. Brush the outside of the bell peppers with remaining 1 tablespoon olive oil.
12. Spoon the quinoa-chickpea mixture into the prepared bell peppers, packing it down gently.
13. Arrange stuffed peppers upright in a baking dish.
14. Tip: If peppers won’t stand upright, slice a thin piece off the bottom to create a flat surface.
15. Cover the baking dish with aluminum foil and bake for 25 minutes.
16. Remove foil and sprinkle 1 cup shredded mozzarella evenly over the tops.
17. Bake uncovered for 10 more minutes until cheese is melted and bubbly.
18. Tip: For extra browning, broil for the final 2-3 minutes, watching carefully to prevent burning.
19. Remove from oven and let rest for 5 minutes before serving.
20. Garnish with 1/4 cup chopped fresh parsley.
Perfectly tender peppers cradle the nutty quinoa and creamy chickpeas in every bite. The smoked paprika adds subtle warmth while the melted cheese creates a golden crust. Try serving them alongside a crisp green salad or with a dollop of Greek yogurt for extra creaminess.
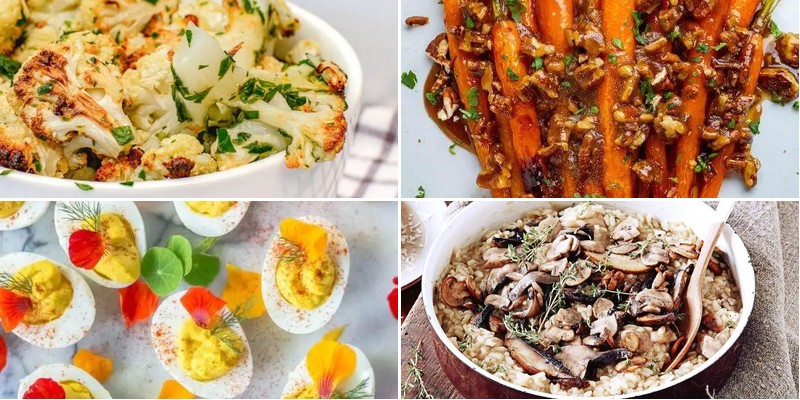
Lemony Herb Roasted Cauliflower
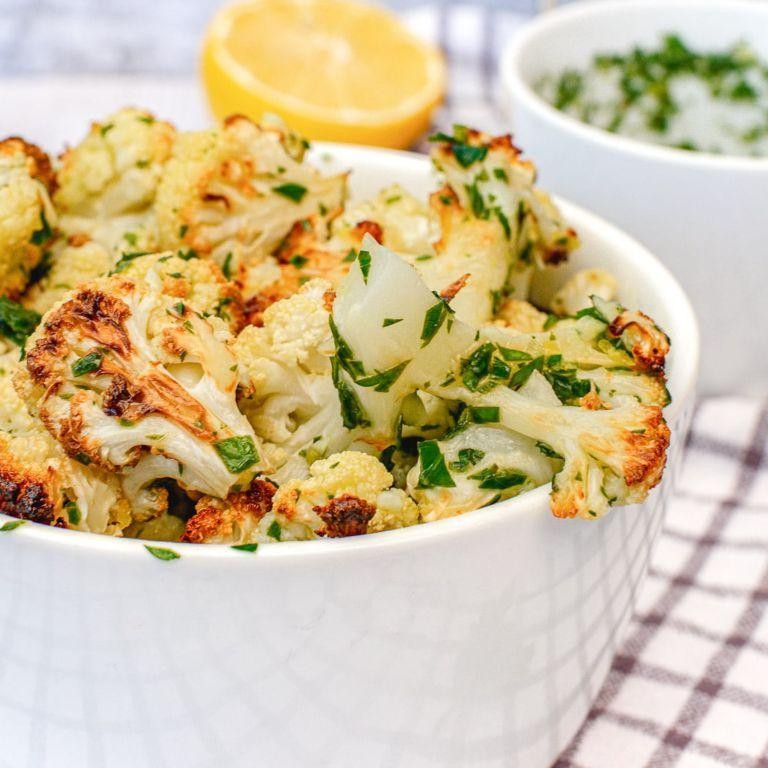
Earthy cauliflower gets a vibrant makeover with zesty lemon and aromatic herbs. This simple roasting method transforms humble florets into a standout side dish. Minimal effort yields maximum flavor payoff.
4
servings10
minutes32
minutesIngredients
– For the cauliflower: 1 large head cauliflower (cut into 1-inch florets), 3 tablespoons olive oil, 1 teaspoon kosher salt, ½ teaspoon black pepper
– For the seasoning: 2 tablespoons fresh lemon juice, 2 cloves garlic (minced), 1 tablespoon fresh thyme leaves, 1 teaspoon lemon zest
Instructions
1. Preheat your oven to 425°F and line a baking sheet with parchment paper.
2. Place cauliflower florets in a large mixing bowl and drizzle with 3 tablespoons olive oil.
3. Sprinkle 1 teaspoon kosher salt and ½ teaspoon black pepper over the cauliflower.
4. Toss thoroughly until all florets are evenly coated with oil and seasonings.
5. Spread cauliflower in a single layer on the prepared baking sheet, ensuring florets aren’t touching.
6. Roast at 425°F for 20 minutes without disturbing to develop golden edges.
7. While cauliflower roasts, combine 2 tablespoons fresh lemon juice, 2 minced garlic cloves, 1 tablespoon fresh thyme, and 1 teaspoon lemon zest in a small bowl.
8. Remove baking sheet from oven after 20 minutes and drizzle lemon-herb mixture over cauliflower.
9. Toss cauliflower directly on the hot baking sheet to evenly distribute the seasoning.
10. Return to oven and roast for another 10-12 minutes until edges are deeply browned and crispy.
11. Test doneness by piercing a floret with a fork – it should be tender but not mushy.
Warm from the oven, the cauliflower boasts crispy, caramelized edges with tender-crisp interiors. The bright lemon cuts through the richness while garlic and thyme add earthy depth. Serve over creamy polenta or fold into grain bowls for a complete meal.
Carrot and Ginger Soup with Coconut Milk

Even the simplest ingredients transform into something extraordinary. Earthy carrots and spicy ginger create magic with creamy coconut milk. This soup comes together in under 30 minutes for maximum flavor with minimal effort.
2
servings10
minutes32
minutesIngredients
For the base
– 1 tablespoon olive oil
– 1 medium yellow onion, chopped
– 2 cloves garlic, minced
– 1 tablespoon fresh ginger, grated
– 1 pound carrots, peeled and chopped
For cooking and finishing
– 4 cups vegetable broth
– 1 (13.5 oz) can coconut milk
– 1 teaspoon salt
– 1/4 teaspoon black pepper
– 2 tablespoons fresh lime juice
Instructions
1. Heat 1 tablespoon olive oil in a large pot over medium heat for 1 minute.
2. Add chopped onion and cook for 5 minutes until translucent, stirring occasionally.
3. Stir in minced garlic and grated ginger, cooking for 1 minute until fragrant.
4. Add chopped carrots and cook for 2 minutes, stirring to coat with oil.
5. Pour in 4 cups vegetable broth and bring to a boil.
6. Reduce heat to low, cover, and simmer for 20 minutes until carrots are fork-tender.
7. Carefully transfer the hot mixture to a blender in batches.
8. Blend on high speed for 2 minutes until completely smooth.
9. Return the pureed soup to the pot over low heat.
10. Stir in the entire can of coconut milk until fully incorporated.
11. Add 1 teaspoon salt and 1/4 teaspoon black pepper, stirring to combine.
12. Heat for 3 minutes until warmed through, but do not boil.
13. Remove from heat and stir in 2 tablespoons fresh lime juice.
Rich, velvety texture meets bright, spicy notes in every spoonful. The coconut milk creates a luxurious creaminess that balances the ginger’s heat perfectly. Serve topped with toasted coconut flakes or a drizzle of chili oil for extra dimension.
Spinach and Ricotta Stuffed Pasta Shells
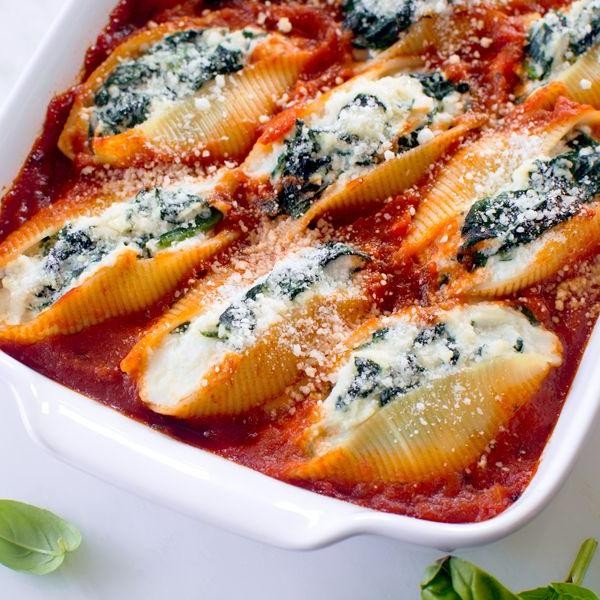
Baked pasta dishes are the ultimate comfort food, and these stuffed shells deliver creamy satisfaction without the fuss. They’re perfect for feeding a crowd or prepping ahead for busy nights.
12
shells25
minutes44
minutesIngredients
For the filling:
– 12 oz jumbo pasta shells
– 15 oz whole milk ricotta cheese
– 10 oz frozen chopped spinach, thawed and squeezed dry
– 1 large egg
– 1/2 cup grated Parmesan cheese
– 1/4 tsp ground nutmeg
– 1/2 tsp salt
– 1/4 tsp black pepper
For the sauce and assembly:
– 24 oz jarred marinara sauce
– 2 cups shredded mozzarella cheese
– 1 tbsp olive oil
Instructions
1. Preheat your oven to 375°F.
2. Bring a large pot of salted water to a rolling boil.
3. Add pasta shells and cook for 9 minutes until al dente.
4. Drain shells immediately and toss with 1 tbsp olive oil to prevent sticking.
5. In a medium bowl, combine ricotta, spinach, egg, Parmesan, nutmeg, salt, and pepper.
6. Spread 1 cup marinara sauce evenly in a 9×13 inch baking dish.
7. Fill each cooked shell with about 2 tbsp of the ricotta mixture using a small spoon.
8. Arrange stuffed shells in a single layer in the baking dish.
9. Pour remaining marinara sauce over the shells, covering completely.
10. Sprinkle shredded mozzarella evenly over the top.
11. Cover dish tightly with aluminum foil.
12. Bake at 375°F for 25 minutes.
13. Remove foil and bake for another 10 minutes until cheese is golden and bubbly.
14. Let rest for 5 minutes before serving to allow filling to set.
Outstandingly creamy and satisfying, the ricotta filling stays remarkably light against the tangy marinara. For a fresh twist, serve with a crisp arugula salad dressed in lemon vinaigrette to cut through the richness.
Vegetable Wellington with Mushrooms and Kale

Zesty vegetable Wellington transforms humble ingredients into an impressive centerpiece. This meat-free version delivers satisfying umami depth with minimal fuss. Perfect for holiday meals or special weeknight dinners.
3
servings25
minutes48
minutesIngredients
For the filling:
– 2 tbsp olive oil
– 1 large onion, diced
– 3 garlic cloves, minced
– 8 oz cremini mushrooms, finely chopped
– 4 cups kale, stems removed and chopped
– 1/2 cup walnuts, toasted and chopped
– 1/4 cup breadcrumbs
– 1 tbsp soy sauce
– 1 tsp dried thyme
– 1/2 tsp black pepper
For assembly:
– 1 sheet frozen puff pastry, thawed
– 1 egg, beaten
– 2 tbsp Dijon mustard
Instructions
1. Preheat oven to 400°F and line a baking sheet with parchment paper.
2. Heat olive oil in a large skillet over medium heat for 1 minute.
3. Add diced onion and cook for 5 minutes until translucent.
4. Add minced garlic and cook for 1 minute until fragrant.
5. Add chopped mushrooms and cook for 8 minutes until browned and moisture evaporates.
6. Stir in chopped kale and cook for 3 minutes until wilted.
7. Remove skillet from heat and stir in walnuts, breadcrumbs, soy sauce, thyme, and black pepper.
8. Cool filling completely to room temperature, about 20 minutes.
9. Roll puff pastry sheet into a 12×14-inch rectangle on a floured surface.
10. Spread Dijon mustard evenly over the center third of the pastry, leaving 2-inch borders.
11. Spoon cooled filling over the mustard in a tight log shape.
12. Fold pastry sides over filling, then fold ends to seal completely.
13. Flip Wellington seam-side down onto prepared baking sheet.
14. Brush entire surface with beaten egg using a pastry brush.
15. Score diagonal lines across the top with a sharp knife for decoration.
16. Bake at 400°F for 30 minutes until golden brown and puffed.
17. Rest for 10 minutes before slicing with a serrated knife.
Juicy mushrooms and earthy kale create a satisfying texture contrast against the flaky pastry. The Dijon mustard adds subtle tang that cuts through the richness beautifully. Serve thick slices alongside roasted root vegetables or atop a bed of arugula salad for a complete meal.
Roasted Beet and Citrus Salad with Pistachios
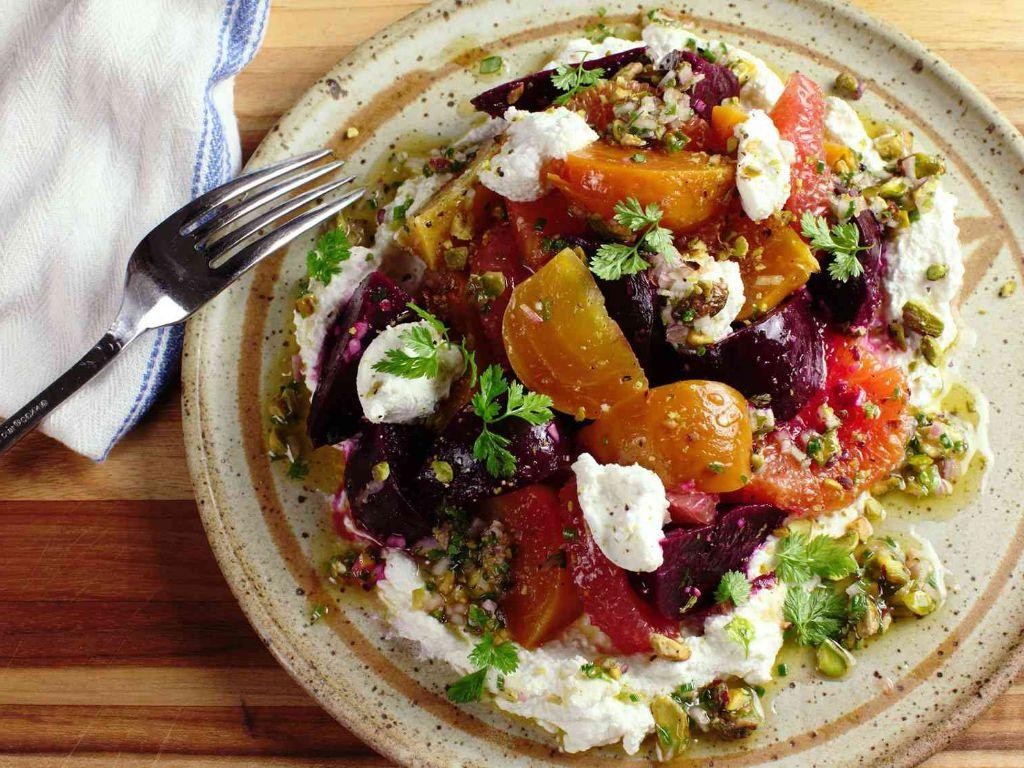
Zesty roasted beets and bright citrus segments create a vibrant winter salad that’s both beautiful and satisfying. This colorful dish balances earthy sweetness with tangy freshness, all topped with crunchy pistachios. It’s surprisingly simple to assemble yet impressive enough for holiday gatherings.
4
servings20
minutes40
minutesIngredients
For the roasted beets:
– 4 medium red beets (about 1.5 lbs), peeled and cubed
– 2 tbsp olive oil
– 1/2 tsp salt
For the salad assembly:
– 2 large oranges, peeled and segmented
– 1 grapefruit, peeled and segmented
– 1/2 cup shelled pistachios, roughly chopped
– 4 cups mixed greens
For the dressing:
– 3 tbsp olive oil
– 2 tbsp orange juice
– 1 tbsp lemon juice
– 1 tsp honey
– 1/4 tsp black pepper
Instructions
1. Preheat your oven to 400°F.
2. Toss cubed beets with 2 tbsp olive oil and 1/2 tsp salt in a mixing bowl.
3. Spread beets in a single layer on a parchment-lined baking sheet.
4. Roast for 35-40 minutes until tender when pierced with a fork.
5. Let beets cool completely to room temperature (tip: cooling prevents wilting the greens).
6. While beets cool, whisk together 3 tbsp olive oil, orange juice, lemon juice, honey, and black pepper in a small bowl.
7. Arrange mixed greens on a large serving platter.
8. Scatter cooled roasted beets over the greens.
9. Arrange orange and grapefruit segments among the beets (tip: save citrus juice for extra dressing).
10. Drizzle the prepared dressing evenly over the salad.
11. Sprinkle chopped pistachios over the top (tip: toast pistachios first for deeper flavor).
12. Serve immediately.
Really, the contrast between tender roasted beets and juicy citrus makes each bite exciting. The pistachios add satisfying crunch against the soft textures, while the bright dressing ties everything together beautifully. Try serving it alongside roasted chicken or as a standalone lunch with crusty bread for dipping into the remaining dressing.
Creamy Avocado and Pea Bruschetta
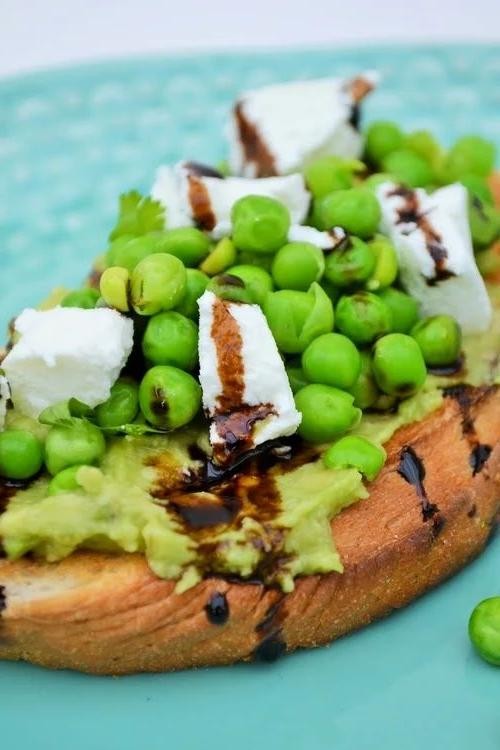
Deliciously simple yet sophisticated, this creamy avocado and pea bruschetta transforms basic ingredients into an elegant appetizer. Don’t let the fancy appearance fool you—this comes together in under 20 minutes with minimal effort. Perfect for last-minute entertaining or a quick snack that feels special.
20
portions10
minutes10
minutesIngredients
- For the toasts:
- 1 baguette, sliced into ½-inch thick pieces
- 2 tbsp olive oil
- For the topping:
- 2 ripe avocados, pitted and peeled
- 1 cup frozen peas, thawed
- 2 tbsp fresh lemon juice
- ¼ cup plain Greek yogurt
- 2 tbsp chopped fresh mint
- ½ tsp salt
- ¼ tsp black pepper
- 2 oz crumbled feta cheese
Instructions
- Preheat your oven to 375°F.
- Arrange the baguette slices in a single layer on a baking sheet.
- Brush both sides of each slice lightly with olive oil using a pastry brush.
- Bake for 8-10 minutes until the edges are golden brown and crisp.
- Remove the toasts from the oven and let them cool completely on a wire rack.
- While the toasts cool, combine the avocados, peas, lemon juice, and Greek yogurt in a medium bowl.
- Mash the mixture with a fork until mostly smooth but with some texture remaining.
- Fold in the chopped mint, salt, and black pepper until evenly distributed.
- Taste the mixture and adjust seasoning if needed, adding more salt or lemon juice.
- Spoon about 1 tablespoon of the avocado-pea mixture onto each cooled toast.
- Sprinkle crumbled feta cheese evenly over the top of each bruschetta.
- Serve immediately to prevent the toasts from becoming soggy.
Zesty lemon brightens the creamy avocado base, while the peas add subtle sweetness and pops of texture. The crisp, golden toasts provide the perfect crunchy contrast to the smooth topping. For a stunning presentation, garnish with extra mint leaves and a drizzle of olive oil just before serving.
Grilled Artichokes with Lemon Garlic Sauce
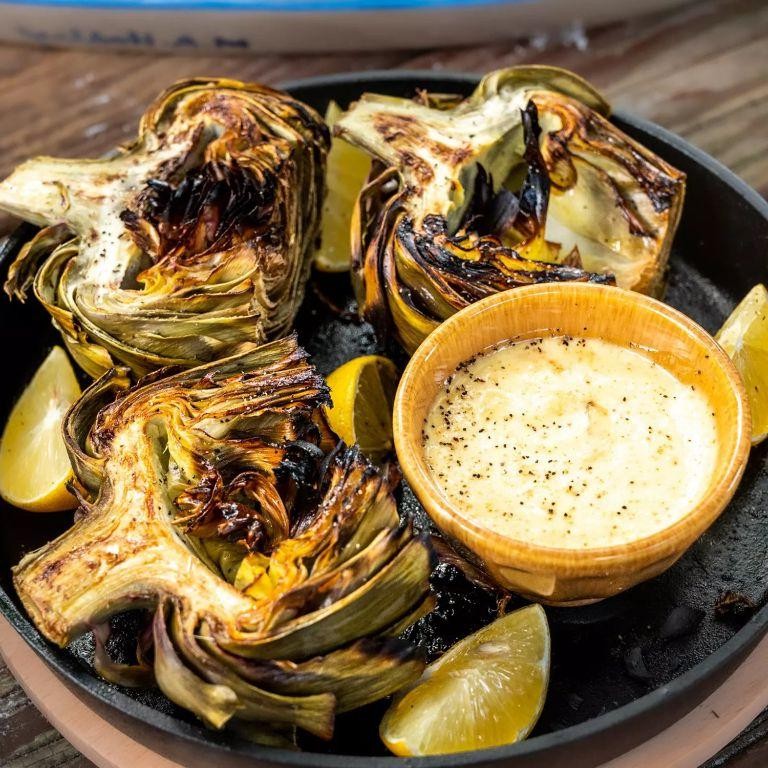
Crisp, charred artichokes meet a zesty lemon garlic sauce in this simple grilled side. Cut prep time by using pre-trimmed artichokes if available. This dish brings Mediterranean flair to any backyard barbecue or weeknight dinner.
3
servings20
minutes25
minutesIngredients
- For the artichokes:
- 4 large artichokes
- 2 tbsp olive oil
- 1 tsp salt
- For the lemon garlic sauce:
- 1/4 cup olive oil
- 3 cloves garlic, minced
- 1/4 cup fresh lemon juice
- 2 tbsp chopped fresh parsley
- 1/2 tsp black pepper
Instructions
- Fill a large pot with water and bring to a boil over high heat.
- Trim 1 inch off the top of each artichoke using a sharp knife.
- Cut each artichoke in half lengthwise through the stem.
- Use kitchen shears to trim the sharp tips from remaining outer leaves.
- Place artichoke halves in the boiling water and cook for 15 minutes.
- Remove artichokes from water and let drain in a colander for 5 minutes.
- Preheat grill to medium-high heat (400°F).
- Brush artichoke halves with 2 tbsp olive oil, coating all surfaces.
- Sprinkle artichokes evenly with 1 tsp salt.
- Place artichokes cut-side down on the hot grill grates.
- Grill for 5 minutes until lightly charred.
- Flip artichokes and grill for another 5 minutes until tender.
- While artichokes grill, combine 1/4 cup olive oil and minced garlic in a small bowl.
- Whisk in 1/4 cup lemon juice until emulsified.
- Stir in 2 tbsp parsley and 1/2 tsp black pepper.
- Remove artichokes from grill and arrange on a serving platter.
- Drizzle lemon garlic sauce generously over the grilled artichokes.
Mellow, earthy artichoke hearts contrast with the sharp, acidic sauce. The grilled edges provide satisfying crunch against the tender interior. Serve alongside grilled fish or fold leftover artichokes into pasta with extra sauce.
Zucchini and Feta Fritters

Zucchini fritters with salty feta make a quick, satisfying meal any night. Zest up your dinner routine with these crispy, golden patties that come together in minutes. They’re perfect for using up that extra zucchini from the garden or farmers market.
8
portions15
minutes24
minutesIngredients
For the fritter mixture
– 2 medium zucchinis, grated (about 2 cups)
– 1 teaspoon salt
– 2 large eggs
– 1/2 cup crumbled feta cheese
– 1/4 cup all-purpose flour
– 2 tablespoons chopped fresh dill
– 1/4 teaspoon black pepper
For cooking
– 3 tablespoons olive oil
Instructions
1. Place grated zucchini in a colander and sprinkle with 1 teaspoon salt.2. Let zucchini sit for 10 minutes to draw out excess moisture.3. Squeeze zucchini firmly with your hands to remove as much liquid as possible.4. Transfer dried zucchini to a medium mixing bowl.5. Add 2 eggs, 1/2 cup feta, 1/4 cup flour, 2 tablespoons dill, and 1/4 teaspoon pepper to the bowl.6. Mix all ingredients until just combined—do not overmix.7. Heat 3 tablespoons olive oil in a large skillet over medium heat until shimmering (about 350°F).8. Drop 1/4 cup portions of the zucchini mixture into the hot oil, flattening slightly with a spatula.9. Cook fritters for 3-4 minutes until golden brown on the bottom.10. Flip fritters carefully using a thin spatula.11. Cook for another 3-4 minutes until golden brown and cooked through.12. Transfer cooked fritters to a paper towel-lined plate to drain excess oil.13. Repeat with remaining batter, adding more oil if needed.Your fritters should be crisp outside with a tender, savory interior. Yield about 8 golden patties with visible zucchini shreds and melted feta pockets. You’ll love them topped with Greek yogurt or alongside a simple tomato salad for a complete meal.
Balsamic Glazed Carrots and Maple Pecans
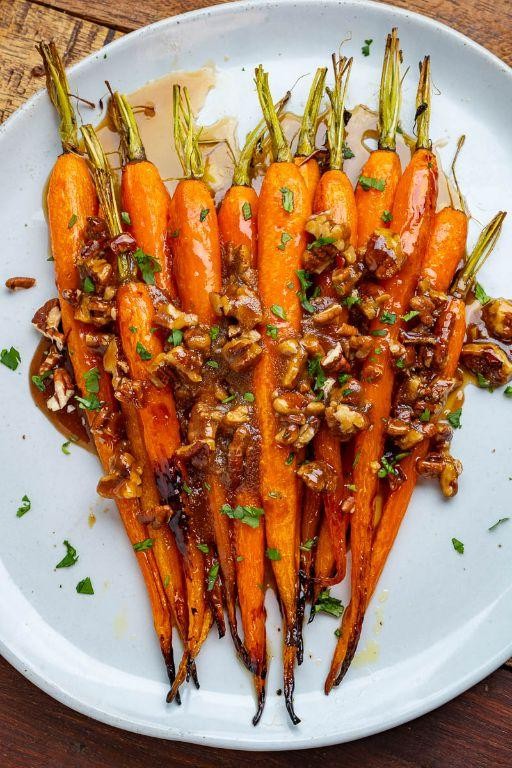
Forget boring vegetable sides. Fresh carrots get a sweet-savory upgrade with balsamic and maple. This dish comes together fast for a standout weeknight meal.
2
servings10
minutes30
minutesIngredients
For the carrots:
- 1 lb carrots, peeled and sliced into 1/2-inch coins
- 2 tbsp olive oil
- 1/2 tsp salt
- 1/4 tsp black pepper
For the glaze and topping:
- 3 tbsp balsamic vinegar
- 1 tbsp maple syrup
- 1/2 cup pecans, roughly chopped
Instructions
- Preheat your oven to 400°F.
- Toss the sliced carrots with olive oil, salt, and pepper on a rimmed baking sheet.
- Roast the carrots for 20 minutes, stirring halfway through.
- Whisk the balsamic vinegar and maple syrup together in a small bowl.
- Remove the baking sheet from the oven and pour the balsamic-maple mixture over the carrots.
- Sprinkle the chopped pecans evenly over the carrots.
- Return the baking sheet to the oven and roast for another 10 minutes.
- Check that the carrots are tender when pierced with a fork and the glaze is bubbling.
- Transfer the glazed carrots and pecans to a serving dish.
Here, the tender carrots soak up the tangy-sweet glaze while the pecans add a maple-candied crunch. Serve them warm alongside roasted chicken or flaky white fish for a balanced plate. The glossy finish makes this simple side look restaurant-worthy.
Mediterranean Orzo Salad with Cherry Tomatoes
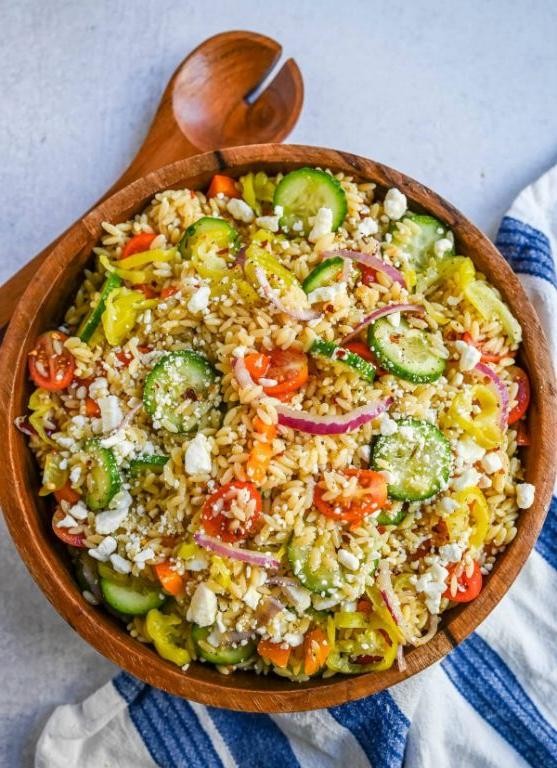
Hitting the perfect balance between fresh and satisfying, this Mediterranean orzo salad brings vibrant flavors to any table. Packed with cherry tomatoes and briny feta, it’s a versatile side or light main that comes together in under 30 minutes.
2
servings15
minutes8
minutesIngredients
For the orzo and vegetables
– 1 cup orzo
– 2 cups cherry tomatoes, halved
– 1/2 cup diced red onion
– 1/4 cup chopped fresh parsley
– 1/4 cup crumbled feta cheese
– 2 tbsp extra virgin olive oil
For the dressing
– 3 tbsp extra virgin olive oil
– 2 tbsp red wine vinegar
– 1 tsp dried oregano
– 1/2 tsp salt
– 1/4 tsp black pepper
Instructions
1. Bring 4 cups of salted water to a boil in a medium saucepan over high heat.
2. Add 1 cup orzo to the boiling water and cook for 8 minutes, stirring occasionally to prevent sticking.
3. Drain the orzo in a fine-mesh strainer and rinse under cold water for 1 minute to stop the cooking process.
4. Transfer the cooled orzo to a large mixing bowl.
5. Halve 2 cups of cherry tomatoes and add them to the bowl with the orzo.
6. Dice 1/2 cup red onion and add it to the bowl.
7. Chop 1/4 cup fresh parsley and add it to the bowl.
8. In a small bowl, whisk together 3 tbsp extra virgin olive oil, 2 tbsp red wine vinegar, 1 tsp dried oregano, 1/2 tsp salt, and 1/4 tsp black pepper until emulsified.
9. Pour the dressing over the orzo mixture and toss thoroughly to coat all ingredients.
10. Gently fold in 1/4 cup crumbled feta cheese and 2 tbsp extra virgin olive oil.
11. Let the salad rest at room temperature for 10 minutes to allow flavors to meld. A bright, tangy dressing clings to each tender orzo pearl, while the juicy tomatoes and salty feta create bursts of flavor. Serve it alongside grilled chicken or stuff it into pita pockets for a portable lunch.
Creamy Mushroom Risotto with Thyme
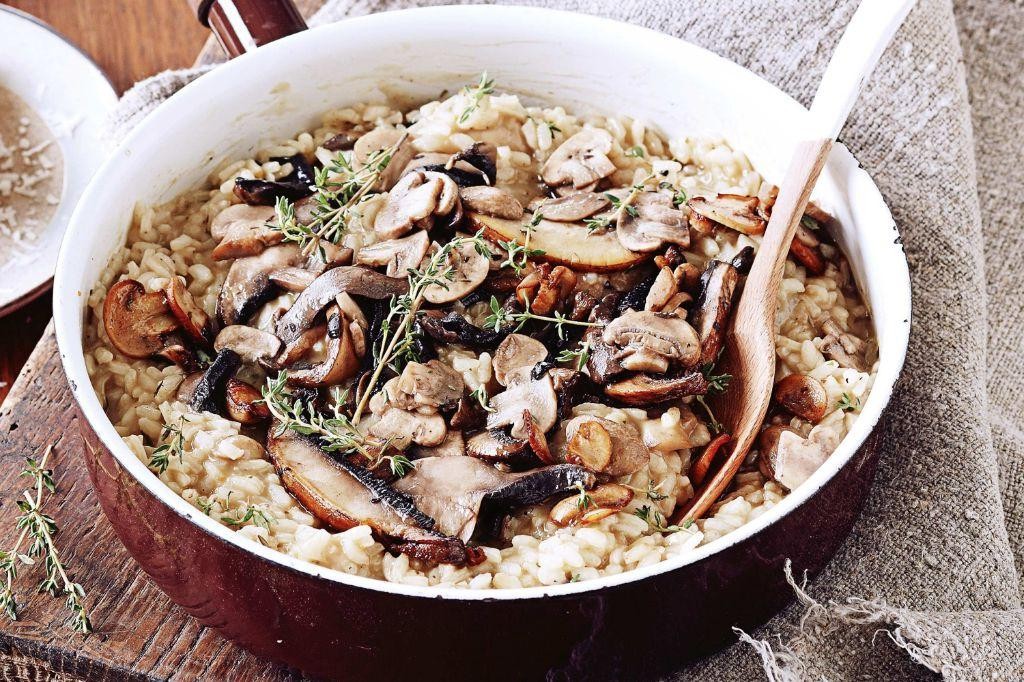
Warm, creamy risotto makes any evening feel special. This mushroom version comes together with minimal fuss. Thyme adds earthy fragrance that complements the mushrooms perfectly.
3
servings15
minutes35
minutesIngredients
For the mushroom base:
– 1 lb cremini mushrooms, sliced
– 2 tbsp olive oil
– 2 tbsp unsalted butter
– 3 cloves garlic, minced
– 1 tbsp fresh thyme leaves
For the risotto:
– 1½ cups Arborio rice
– ½ cup dry white wine
– 6 cups chicken broth, kept at a simmer
– ½ cup grated Parmesan cheese
– 2 tbsp unsalted butter
– Salt to season
Instructions
1. Heat olive oil and 2 tbsp butter in a large Dutch oven over medium-high heat until butter foams.
2. Add sliced mushrooms and cook for 8-10 minutes until browned and moisture evaporates.
3. Stir in minced garlic and thyme leaves, cooking for 1 minute until fragrant.
4. Transfer mushroom mixture to a bowl, leaving any oil in the pot.
5. Add Arborio rice to the pot and toast for 2 minutes, stirring constantly until grains turn translucent at edges.
6. Pour in white wine and cook while stirring until liquid fully absorbs, about 2 minutes.
7. Add 1 cup of simmering chicken broth, stirring continuously until rice absorbs most liquid.
8. Continue adding broth ½ cup at a time, stirring after each addition until liquid nearly absorbs before adding more.
9. Cook rice for 18-20 minutes total until grains are tender but still firm to the bite.
10. Remove pot from heat and stir in reserved mushroom mixture.
11. Fold in 2 tbsp butter and Parmesan cheese until melted and creamy.
12. Season with salt until properly balanced.
13. Let risotto rest for 2 minutes before serving.
Ultra-creamy texture coats each grain while maintaining perfect bite. Earthy mushroom flavor shines through the rich Parmesan base. Serve immediately topped with extra thyme sprigs for restaurant-quality presentation at home.
Roasted Bell Pepper and Pesto Tart
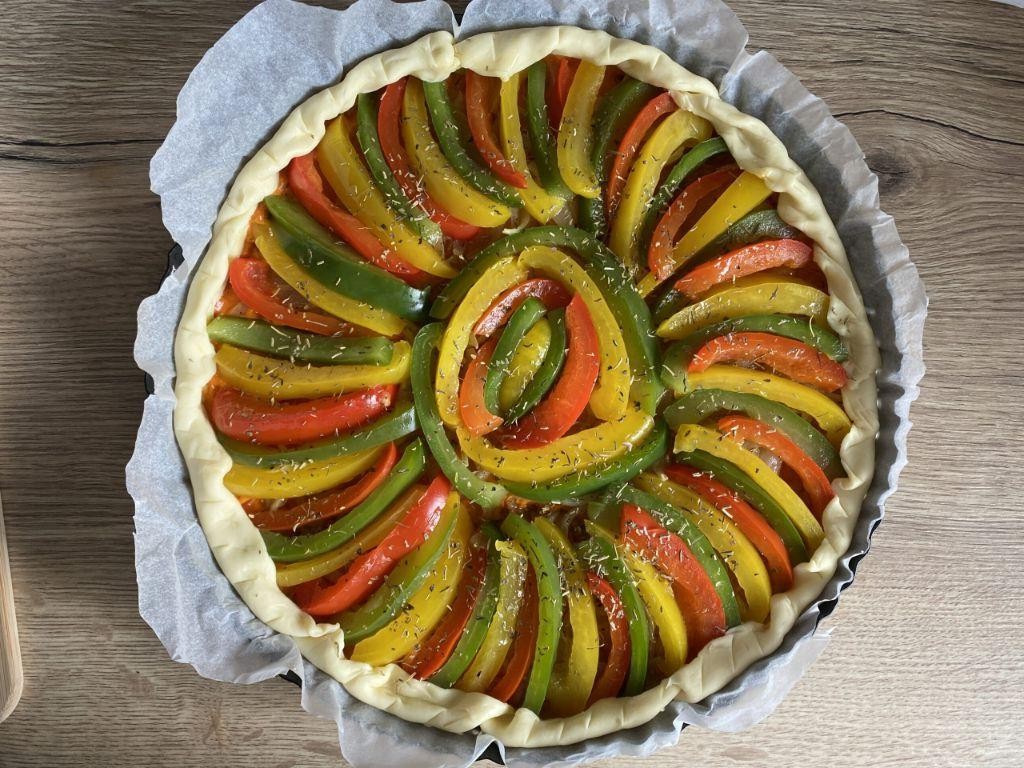
Naturally sweet roasted peppers and vibrant pesto come together in this savory tart that’s perfect for brunch or a light dinner. The flaky crust and creamy filling make it a crowd-pleaser every time. You’ll love how simple it is to put together with minimal prep work.
6
portions30
minutes70
minutesIngredients
For the crust:
- 1 1/4 cups all-purpose flour
- 1/2 cup cold unsalted butter, cubed
- 1/4 cup ice water
- 1/2 tsp salt
For the filling:
- 3 large bell peppers (red, yellow, or orange)
- 1/2 cup basil pesto
- 4 oz cream cheese, softened
- 1/2 cup heavy cream
- 2 large eggs
- 1/4 tsp black pepper
- 1/4 cup grated Parmesan cheese
Instructions
- Preheat your oven to 400°F.
- Cut bell peppers into 1-inch wide strips and remove seeds.
- Place pepper strips skin-side up on a baking sheet lined with aluminum foil.
- Roast peppers for 20 minutes until skins are blackened and blistered.
- Transfer peppers to a bowl and cover tightly with plastic wrap for 10 minutes to steam.
- Peel off the charred skins from the peppers and discard.
- Combine 1 1/4 cups all-purpose flour and 1/2 tsp salt in a food processor.
- Add 1/2 cup cold cubed butter and pulse until mixture resembles coarse crumbs.
- Slowly add 1/4 cup ice water while pulsing until dough just comes together.
- Press dough into a 9-inch tart pan, ensuring even thickness across bottom and sides.
- Prick the crust bottom all over with a fork to prevent bubbling.
- Bake crust at 400°F for 15 minutes until lightly golden.
- Spread 1/2 cup basil pesto evenly over the baked crust.
- Arrange roasted pepper strips in a single layer over the pesto.
- Whisk together 4 oz softened cream cheese, 1/2 cup heavy cream, 2 eggs, and 1/4 tsp black pepper until smooth.
- Pour the cream mixture over the peppers in the crust.
- Sprinkle 1/4 cup grated Parmesan cheese evenly over the top.
- Reduce oven temperature to 375°F and bake tart for 25-30 minutes until center is set and top is golden brown.
- Let tart cool for 15 minutes before slicing and serving.
Creamy, savory filling contrasts beautifully with the flaky, buttery crust in every bite. The roasted peppers add a subtle sweetness that balances the rich pesto flavor perfectly. Serve warm slices alongside a crisp green salad for a complete meal that feels both elegant and approachable.
Golden Turmeric Deviled Eggs

Filled with vibrant color and earthy flavor, these golden turmeric deviled eggs offer a modern twist on a classic appetizer. They’re perfect for gatherings or as a protein-packed snack that’s as visually appealing as it is delicious.
12
portions25
minutes12
minutesIngredients
For the hard-boiled eggs:
– 6 large eggs
– 1 tablespoon white vinegar
– 4 cups cold water
– 1 teaspoon salt
For the filling:
– 1/4 cup mayonnaise
– 1 tablespoon Dijon mustard
– 1 teaspoon ground turmeric
– 1/2 teaspoon smoked paprika
– 1/4 teaspoon black pepper
– 1/8 teaspoon cayenne pepper
– 2 tablespoons fresh chives, finely chopped
Instructions
1. Place 6 large eggs in a single layer at the bottom of a medium saucepan.
2. Add 4 cups cold water, 1 tablespoon white vinegar, and 1 teaspoon salt to the saucepan.
3. Bring the water to a rolling boil over high heat.
4. Once boiling, immediately remove the pan from heat and cover with a tight-fitting lid.
5. Let the eggs sit in the hot water for exactly 12 minutes.
6. Transfer the eggs to an ice water bath using a slotted spoon.
7. Cool the eggs completely for 15 minutes until cold to the touch.
8. Gently tap each egg on a hard surface to crack the shell.
9. Peel the eggs under cool running water to help remove the shell cleanly.
10. Slice each egg in half lengthwise using a sharp knife.
11. Carefully remove the yolks and place them in a medium bowl.
12. Arrange the empty egg white halves on a serving platter.
13. Mash the egg yolks with a fork until they form fine crumbs.
14. Add 1/4 cup mayonnaise and 1 tablespoon Dijon mustard to the yolks.
15. Mix thoroughly until the mixture becomes smooth and creamy.
16. Stir in 1 teaspoon ground turmeric, 1/2 teaspoon smoked paprika, 1/4 teaspoon black pepper, and 1/8 teaspoon cayenne pepper.
17. Fold in 2 tablespoons finely chopped fresh chives until evenly distributed.
18. Spoon or pipe the yolk mixture into the egg white halves.
19. Sprinkle additional smoked paprika over the filled eggs for garnish.
20. Chill the deviled eggs in the refrigerator for at least 30 minutes before serving.
Keep these golden beauties chilled until ready to serve for the best texture. The creamy filling contrasts beautifully with the firm egg whites, while the turmeric provides earthy warmth balanced by the mustard’s tang. Try serving them on a bed of microgreens or alongside pickled vegetables for extra color and crunch.
Herb-Crusted Eggplant Steaks
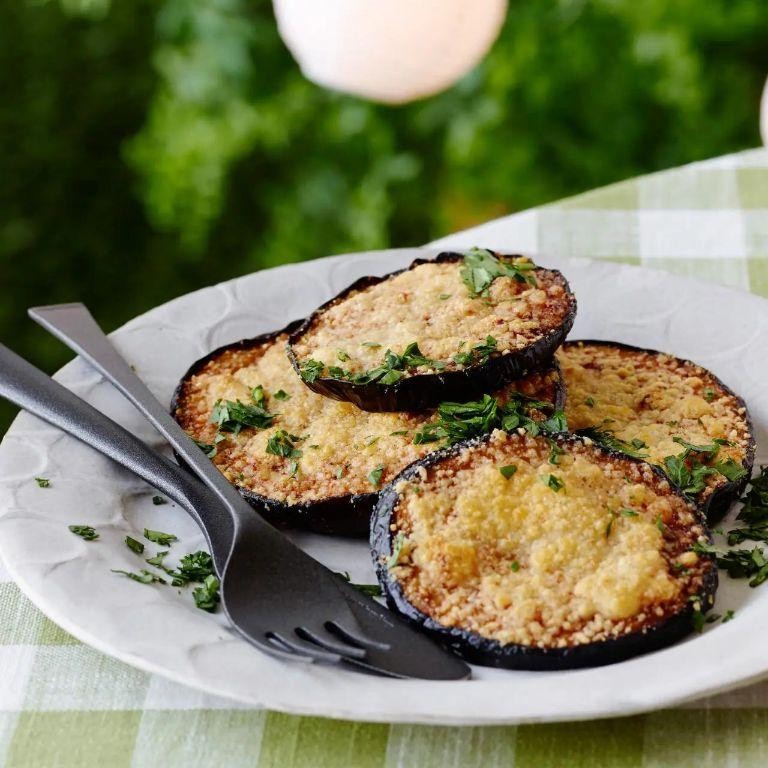
Perfect for meatless Mondays, these herb-crusted eggplant steaks deliver satisfying texture and bold flavor. They’re simple to prepare and versatile enough for any weeknight dinner. Pair them with a fresh salad or creamy mashed potatoes for a complete meal.
5
servings25
minutes35
minutesIngredients
For the eggplant:
– 1 large eggplant (about 1.5 lbs)
– 2 tbsp olive oil
– 1 tsp salt
For the herb crust:
– 1 cup panko breadcrumbs
– 1/4 cup grated Parmesan cheese
– 2 tbsp chopped fresh parsley
– 1 tsp dried oregano
– 1/2 tsp garlic powder
– 1/4 tsp black pepper
– 1 large egg
Instructions
1. Preheat your oven to 400°F.
2. Slice the eggplant into 1-inch thick rounds.
3. Sprinkle both sides of each eggplant slice with salt.
4. Let the salted eggplant sit for 15 minutes to draw out excess moisture.
5. Pat the eggplant slices completely dry with paper towels.
6. Brush both sides of each eggplant slice with olive oil.
7. In a shallow bowl, whisk the egg until uniform.
8. In a separate bowl, combine panko, Parmesan, parsley, oregano, garlic powder, and black pepper.
9. Dip each eggplant slice into the beaten egg, coating both sides.
10. Press the egg-coated eggplant firmly into the breadcrumb mixture, ensuring full coverage.
11. Arrange the coated eggplant slices in a single layer on a baking sheet.
12. Bake for 20 minutes at 400°F.
13. Flip each eggplant steak carefully with a spatula.
14. Bake for another 15 minutes until the crust is golden brown and crispy.
15. Remove from oven and let rest for 3 minutes before serving.
Remarkably crispy outside with tender, meaty interiors, these eggplant steaks offer a satisfying bite. The herb crust provides aromatic depth that complements the vegetable’s natural sweetness. Try stacking them with fresh mozzarella and tomato slices for a vegetarian take on steak caprese.
Lentil and Vegetable Shepherd’s Pie

You know those chilly evenings when only comfort food will do? Lentil and vegetable shepherd’s pie delivers that cozy satisfaction without the heaviness of traditional versions. Your family will love this plant-based twist on a classic.
6
portions25
minutes70
minutesIngredients
For the lentil filling:
– 1 tbsp olive oil
– 1 medium onion, diced
– 2 carrots, diced
– 2 celery stalks, diced
– 3 garlic cloves, minced
– 1 cup brown lentils, rinsed
– 4 cups vegetable broth
– 1 tbsp tomato paste
– 1 tsp dried thyme
– 1 tsp smoked paprika
– 1 cup frozen peas
For the potato topping:
– 2 lbs russet potatoes, peeled and cubed
– 1/2 cup unsweetened almond milk
– 2 tbsp vegan butter
– 1/2 tsp salt
Instructions
1. Preheat your oven to 400°F.
2. Place peeled, cubed potatoes in a large pot and cover with cold water by 1 inch.
3. Bring potatoes to a boil over high heat, then reduce to a simmer for 15-18 minutes until fork-tender.
4. While potatoes cook, heat olive oil in a large oven-safe skillet over medium heat.
5. Add diced onion, carrots, and celery to the skillet and cook for 6-8 minutes until softened.
6. Stir in minced garlic and cook for 1 minute until fragrant.
7. Add rinsed lentils, vegetable broth, tomato paste, thyme, and smoked paprika to the skillet.
8. Bring the lentil mixture to a boil, then reduce heat and simmer uncovered for 25 minutes until lentils are tender and liquid has reduced.
9. Drain the cooked potatoes thoroughly and return them to the hot pot for 30 seconds to evaporate excess moisture.
10. Mash potatoes with almond milk, vegan butter, and salt until smooth.
11. Stir frozen peas into the lentil filling and remove from heat.
12. Spread the mashed potatoes evenly over the lentil filling using a spatula.
13. Create decorative peaks with a fork across the potato surface to help browning.
14. Bake for 20-25 minutes until the filling is bubbly and topping is golden brown.
15. Let the shepherd’s pie rest for 10 minutes before serving.
Keep this shepherd’s pie warm for gatherings—it holds beautifully at 200°F for up to an hour. The creamy potato topping contrasts perfectly with the savory lentil filling, while the peas add bright pops of sweetness. Try serving individual portions in ramekins for an elegant presentation that makes everyone feel special.
Pear and Gorgonzola Flatbread with Walnuts
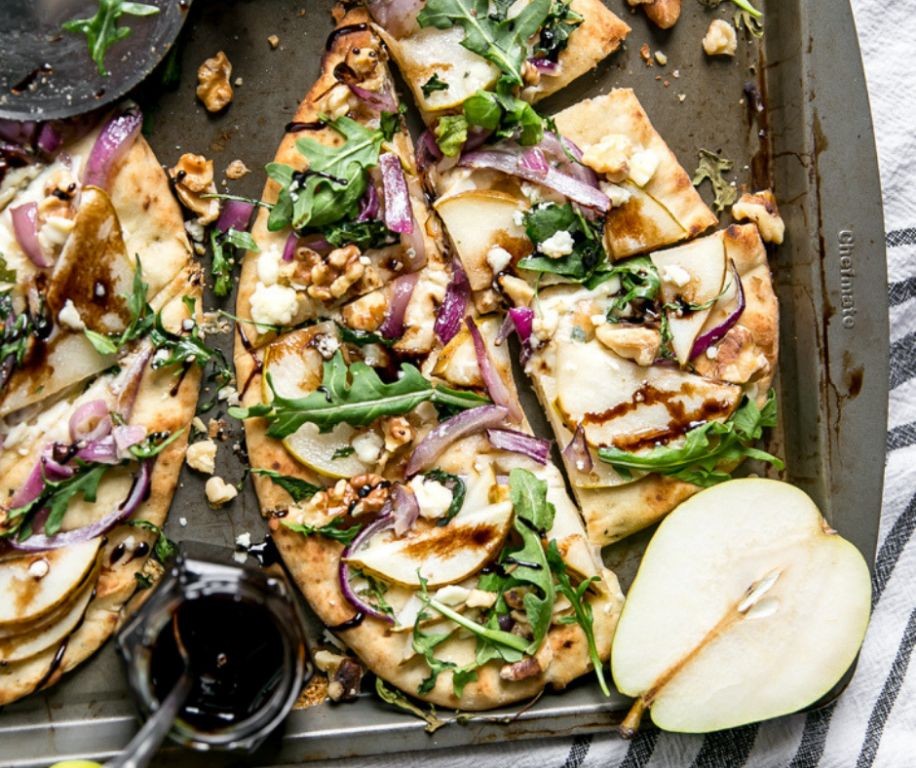
You’re craving something savory, sweet, and crunchy all at once. This pear and Gorgonzola flatbread with walnuts delivers exactly that—fast. It’s a gourmet-style pizza perfect for busy weeknights or last-minute entertaining.
1
flatbread10
minutes15
minutesIngredients
- For the base:
- 1 pre-made pizza crust (12-inch)
- 1 tbsp olive oil
- For the topping:
- 1 ripe pear, thinly sliced
- 1/2 cup crumbled Gorgonzola cheese
- 1/4 cup chopped walnuts
- 2 tbsp honey
- 1 tbsp fresh thyme leaves
Instructions
- Preheat your oven to 425°F.
- Place the pizza crust on a baking sheet.
- Brush the entire surface evenly with 1 tbsp olive oil.
- Arrange the thinly sliced pear in a single layer over the crust.
- Sprinkle 1/2 cup crumbled Gorgonzola cheese evenly over the pears.
- Scatter 1/4 cup chopped walnuts on top.
- Drizzle 2 tbsp honey over the flatbread.
- Bake for 12–15 minutes, or until the crust is golden and the cheese is bubbly.
- Remove the flatbread from the oven.
- Sprinkle 1 tbsp fresh thyme leaves over the top.
- Let the flatbread rest for 2 minutes before slicing.
Golden and crisp, the flatbread offers a satisfying crunch against the soft, melted Gorgonzola and tender pears. Drizzle with extra honey right before serving to enhance the sweet-savory balance, or pair it with a simple arugula salad for a complete meal.
Conclusion
Bringing these 30 vibrant vegetarian recipes to your Easter table makes spring celebrations extra special. From colorful sides to satisfying mains, there’s something delicious for everyone. We’d love to hear which recipes become your family favorites—leave a comment below and don’t forget to share this roundup on Pinterest to inspire fellow home cooks!


