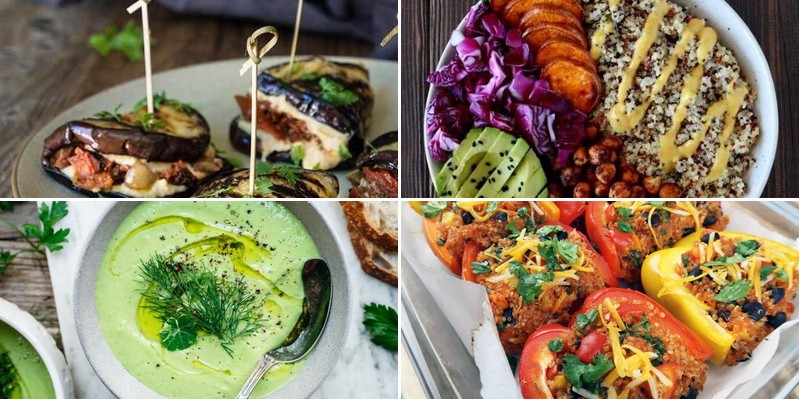
Feeling stuck in your weight loss journey while trying to eat vegan? You’re not alone! We’ve gathered 33 mouthwatering plant-based recipes that are not only delicious but designed to help you shed pounds without sacrificing flavor. From quick weeknight dinners to satisfying comfort foods, these dishes will make healthy eating feel like a treat. Get ready to transform your meals and discover your new favorites!
Quinoa & Black Bean Stuffed Bell Peppers

Lately, I’ve been craving something that feels both nourishing and comforting, the kind of meal that fills the kitchen with a warm, earthy aroma and leaves you feeling completely satisfied. These stuffed peppers are just that—a simple, wholesome dish that comes together with little fuss but delivers so much flavor.
3
portions15
minutes53
minutesIngredients
– 4 large bell peppers, any color you like
– 1 cup of uncooked quinoa
– 1 can (15 ounces) of black beans, rinsed well
– 1 small yellow onion, finely chopped
– 2 cloves of garlic, minced
– 1 cup of your favorite tomato sauce
– A couple of tablespoons of olive oil
– A generous pinch of salt
– A splash of water
Instructions
1. Preheat your oven to 375°F to ensure it’s ready when the peppers are stuffed.
2. Slice the tops off the bell peppers and remove all seeds and membranes from the inside.
3. Place the hollowed peppers upright in a baking dish that fits them snugly.
4. In a medium saucepan, heat the olive oil over medium heat until it shimmers.
5. Add the chopped onion and cook for about 5 minutes, stirring occasionally, until it turns soft and translucent.
6. Stir in the minced garlic and cook for 1 more minute until fragrant.
7. Add the uncooked quinoa to the pan and toast it for 2 minutes, stirring constantly, to enhance its nutty flavor—this is a great tip for boosting depth.
8. Pour in the tomato sauce and a splash of water, then bring the mixture to a gentle boil.
9. Reduce the heat to low, cover the pan, and simmer for 15 minutes until the quinoa is tender and has absorbed most of the liquid.
10. Remove the pan from the heat and stir in the rinsed black beans and a generous pinch of salt.
11. Spoon the quinoa and black bean mixture evenly into the prepared bell peppers, filling them to the top.
12. Cover the baking dish tightly with aluminum foil and bake for 25 minutes.
13. Remove the foil and bake for another 10 minutes until the pepper edges are slightly charred and tender—this extra time gives a nice caramelized touch.
14. Let the peppers rest for 5 minutes before serving to allow the flavors to meld together, a simple step that makes a big difference.
As you cut into them, the peppers yield softly, revealing a fluffy quinoa filling speckled with beans. The subtle sweetness of the bell pepper pairs beautifully with the earthy quinoa and creamy beans, making each bite a comforting blend. For a creative twist, try serving them topped with a dollop of cool Greek yogurt or alongside a crisp green salad to balance the warmth.
Zucchini Noodles with Avocado Pesto
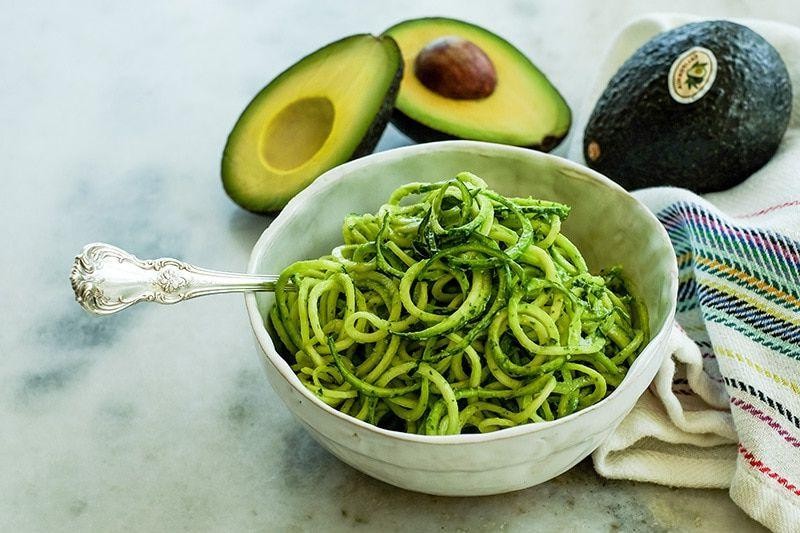
Just yesterday, I found myself standing in the kitchen with a handful of late-summer zucchini, their vibrant green skins catching the morning light, and remembered how simple transformations can turn ordinary ingredients into something quietly extraordinary. Yielding to the gentle rhythm of spiralizing, I let the zucchini ribbons fall like soft confetti, knowing this would become one of those effortless meals that feels both nourishing and deeply comforting.
2
servings15
minutes4
minutesIngredients
– 2 medium zucchini
– 1 ripe avocado
– a big handful of fresh basil leaves (about 1 cup packed)
– a couple of garlic cloves
– a generous squeeze of lemon juice (about 2 tablespoons)
– a good glug of extra virgin olive oil (about 1/4 cup)
– a small handful of pine nuts (about 1/4 cup)
– a pinch of salt and a few cracks of black pepper
Instructions
1. Wash and dry 2 medium zucchini thoroughly, then trim off both ends.
2. Spiralize the zucchini using the medium blade setting to create noodle-like strands, placing them in a large bowl (tip: if your zucchini seems watery, lightly salt the noodles and let them sit for 10 minutes, then pat dry with paper towels).
3. Toast 1/4 cup pine nuts in a dry skillet over medium heat for 3-4 minutes, shaking the pan frequently until golden and fragrant.
4. Cut 1 ripe avocado in half, remove the pit, and scoop the flesh into a food processor.
5. Add 1 cup packed basil leaves, 2 peeled garlic cloves, 2 tablespoons lemon juice, 1/4 cup olive oil, and the toasted pine nuts to the food processor.
6. Blend the mixture on high speed for 1-2 minutes until completely smooth and creamy, scraping down the sides once (tip: if the pesto seems too thick, add another tablespoon of olive oil while blending).
7. Season the pesto with a generous pinch of salt and several cracks of black pepper, then pulse briefly to combine.
8. Pour the avocado pesto over the zucchini noodles and use tongs to toss everything together until evenly coated (tip: for best flavor, let the dressed noodles sit for 5 minutes to allow the zucchini to slightly soften).
9. Divide the zucchini noodles among serving bowls immediately. The creamy pesto clings to each noodle like velvet, while the fresh basil and lemon keep it bright and lively—try topping with extra pine nuts or serving alongside grilled shrimp for a complete summer meal that feels both light and satisfying.
Spicy Chickpea & Sweet Potato Buddha Bowl
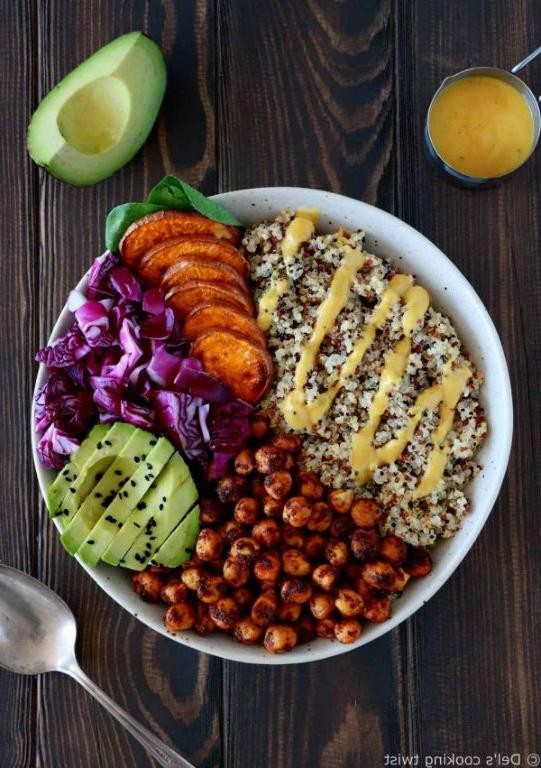
Remembering how the crisp autumn air makes me crave something both comforting and vibrant, I found myself drawn to the kitchen this morning, wanting to create a bowl that felt like a warm hug but tasted like a fresh start. There’s something deeply satisfying about combining earthy sweet potatoes with the gentle heat of spices, a quiet meditation for a busy day.
1
bowl15
minutes30
minutesIngredients
For the roasted part, you’ll need one large sweet potato (peeled and cubed), a can of chickpeas (rinsed and patted dry), a good drizzle of olive oil, a couple of teaspoons of smoked paprika, a pinch of cayenne pepper, and a generous sprinkle of salt. For the bowl itself, grab a cup of cooked quinoa, a big handful of fresh spinach, half an avocado (sliced), and a splash of lemon juice. For the creamy drizzle, whisk together a quarter cup of tahini, a couple of tablespoons of water, another squeeze of lemon juice, and a tiny pinch of salt.
Instructions
1. Preheat your oven to 400°F (200°C). 2. Toss the cubed sweet potato and dried chickpeas on a baking sheet with the olive oil, smoked paprika, cayenne pepper, and salt until everything is evenly coated. A pro tip: spreading them in a single layer ensures they get crispy instead of steaming. 3. Roast for 25-30 minutes, or until the sweet potatoes are tender when pierced with a fork and the chickpeas are slightly golden and crisp. 4. While that roasts, fluff your cooked quinoa with a fork to separate the grains. 5. Assemble your bowl by placing the fresh spinach at the bottom as a base. 6. Top the spinach with the fluffy quinoa. 7. Carefully arrange the hot roasted sweet potatoes and chickpeas over the quinoa. 8. Add the sliced avocado on top. 9. Squeeze the lemon juice directly over the avocado to prevent it from browning. 10. In a small bowl, whisk the tahini, water, the remaining lemon juice, and salt until it forms a smooth, drizzle-able consistency. If it’s too thick, add another teaspoon of water. 11. Drizzle the creamy tahini sauce generously over the entire bowl. Nothing completes a bowl like the contrast of cool, creamy avocado against the warm, spiced chickpeas and sweet potatoes; the tahini sauce ties all the earthy and bright flavors together in the most silky way. Consider topping it with a sprinkle of sesame seeds for a little extra crunch, or enjoy it just as it is, a perfect, self-contained meal.
Vegan Lentil & Kale Soup

Just thinking about how the crisp autumn air outside makes me crave something deeply nourishing and warm. Joyfully, this simple lentil and kale soup comes together with humble ingredients that transform into something truly comforting. It’s the kind of meal that feels like a gentle hug from the inside out.
6
servings15
minutes46
minutesIngredients
– A couple of tablespoons of olive oil
– One large yellow onion, chopped
– A couple of carrots, chopped
– A couple of celery stalks, chopped
– A few cloves of garlic, minced
– A cup and a half of brown lentils, rinsed
– A 28-ounce can of crushed tomatoes
– 6 cups of vegetable broth
– A big bunch of kale, stems removed and leaves chopped
– A splash of apple cider vinegar
– A pinch of red pepper flakes (optional)
Instructions
1. Heat 2 tablespoons of olive oil in a large pot over medium heat for about 1 minute until it shimmers.
2. Add the chopped onion, carrots, and celery, and cook for 8–10 minutes, stirring occasionally, until the onions are translucent and the carrots have softened slightly.
3. Stir in the minced garlic and cook for 1 minute until fragrant, being careful not to let it burn.
4. Add the rinsed brown lentils, crushed tomatoes, and 6 cups of vegetable broth to the pot.
5. Bring the soup to a boil over high heat, then reduce the heat to low, cover the pot, and let it simmer for 30 minutes until the lentils are tender but not mushy.
6. Stir in the chopped kale leaves and cook for 5 more minutes until the kale has wilted and turned bright green.
7. Remove the pot from the heat and stir in a splash of apple cider vinegar to brighten the flavors.
8. Season the soup with salt and a pinch of red pepper flakes if you like a little heat.
You’ll love the way the lentils create a hearty, thick broth while the kale adds a pleasant, slightly chewy texture. The tomatoes and vinegar give it a subtle tang that balances the earthiness beautifully. Try serving it with a thick slice of crusty bread for dipping, or even over a scoop of creamy mashed potatoes for an extra cozy twist.
Cauliflower Fried Rice with Tofu

Vaguely remembering the comforting sizzle of takeout containers, I find myself reaching for simpler comforts these days—the quiet transformation of humble vegetables into something that feels both nourishing and nostalgic, like this cauliflower fried rice with soft cubes of tofu that somehow manage to taste like home.
5
servings20
minutes25
minutesIngredients
– A large head of cauliflower, riced (about 4 cups)
– A 14-ounce block of firm tofu, pressed and cubed
– A couple of tablespoons of olive oil
– A splash of soy sauce (about 2 tablespoons)
– A spoonful of minced garlic (roughly 2 cloves)
– A handful of frozen peas and carrots (about 1 cup)
– A pinch of salt and a crack of black pepper
Instructions
1. Press the tofu block between paper towels with a heavy pan on top for 15 minutes to remove excess water, then cut it into ½-inch cubes.
2. Heat 1 tablespoon of olive oil in a large skillet over medium-high heat until it shimmers.
3. Add the tofu cubes and cook for 5–7 minutes, turning occasionally, until golden brown on all sides.
4. Transfer the tofu to a plate and set aside.
5. In the same skillet, add the remaining tablespoon of olive oil and heat for 30 seconds.
6. Stir in the minced garlic and cook for 1 minute until fragrant but not browned.
7. Tip in the riced cauliflower and frozen peas and carrots, stirring to combine.
8. Cook for 8–10 minutes, stirring every 2 minutes, until the cauliflower is tender and any liquid has evaporated.
9. Return the tofu to the skillet and drizzle with soy sauce.
10. Toss everything together and cook for 2 more minutes to warm through.
11. Season with a pinch of salt and a crack of black pepper, then remove from heat.
Tip: Pressing tofu thoroughly prevents splattering and helps it crisp up nicely.
Tip: Don’t overcrowd the skillet when cooking cauliflower to avoid steaming instead of frying.
Tip: Let the cauliflower sit undisturbed for a minute between stirs to develop a slight toasted flavor.
This dish settles into a lovely contrast of textures—the tender, almost rice-like cauliflower mingling with crisp-edged tofu and sweet pops of peas. The gentle saltiness from the soy sauce ties it all together, making it perfect scooped into lettuce cups for a light lunch or topped with a fried egg for a heartier twist.
Roasted Vegetable & Quinoa Salad
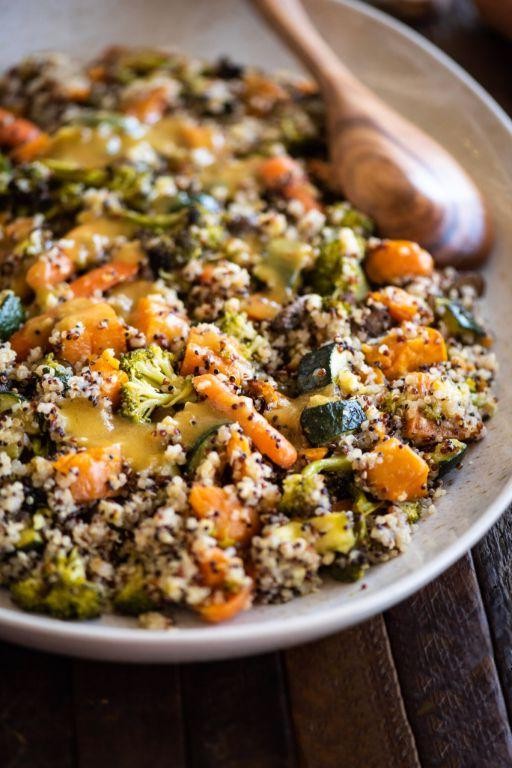
Mornings like this, when the kitchen fills with golden light, I find myself craving something that feels both nourishing and comforting—a bowl that holds the warmth of roasted vegetables and the gentle satisfaction of quinoa, simple yet deeply satisfying.
4
servings15
minutes40
minutesIngredients
– 1 cup of quinoa, rinsed well
– 2 cups of water
– a couple of bell peppers, chopped into bite-sized pieces
– a medium zucchini, sliced into half-moons
– a red onion, cut into wedges
– 2 tablespoons of olive oil
– a generous pinch of salt
– a splash of lemon juice
– a handful of fresh parsley, roughly chopped
Instructions
1. Preheat your oven to 400°F.
2. Spread the chopped bell peppers, zucchini, and red onion on a baking sheet.
3. Drizzle the vegetables with 2 tablespoons of olive oil and sprinkle with a generous pinch of salt, tossing to coat evenly.
4. Roast the vegetables in the preheated oven for 25 minutes, or until the edges are lightly browned and tender.
5. While the vegetables roast, rinse 1 cup of quinoa under cold water until the water runs clear to remove any bitterness.
6. In a medium saucepan, combine the rinsed quinoa and 2 cups of water, then bring to a boil over high heat.
7. Reduce the heat to low, cover the saucepan, and simmer the quinoa for 15 minutes, or until all the water is absorbed and the grains are fluffy.
8. Remove the quinoa from the heat and let it sit, covered, for 5 minutes to steam further.
9. Fluff the cooked quinoa with a fork to separate the grains.
10. In a large bowl, combine the roasted vegetables and fluffed quinoa.
11. Drizzle the salad with a splash of lemon juice and toss gently to mix.
12. Stir in a handful of roughly chopped fresh parsley until evenly distributed.
Now, as you scoop a spoonful, notice how the soft quinoa cradles the caramelized vegetables, each bite brightened by the lemon and parsley—perfect for packing into a jar for a picnic or topping with a soft-boiled egg for a heartier meal.
Turmeric & Ginger Spiced Vegetable Curry

Wandering through the kitchen this quiet afternoon, I found myself reaching for the warm spices, wanting to create something that would fill the house with comforting aromas and wrap around me like a soft blanket on this crisp autumn day.
5
servings20
minutes37
minutesIngredients
– a couple of tablespoons of olive oil
– one large yellow onion, chopped
– three cloves of garlic, minced
– about two inches of fresh ginger, grated
– a tablespoon of ground turmeric
– a teaspoon of ground cumin
– half a teaspoon of cayenne pepper
– two large carrots, sliced into coins
– one red bell pepper, chopped
– a head of cauliflower, cut into florets
– one can of chickpeas, drained and rinsed
– a can of coconut milk
– two cups of vegetable broth
– a big handful of fresh spinach
– a generous squeeze of lime juice
– a sprinkle of salt
Instructions
1. Heat two tablespoons of olive oil in a large Dutch oven over medium heat until it shimmers.
2. Add the chopped onion and cook for 5-7 minutes, stirring occasionally, until the onion turns translucent and soft.
3. Stir in the minced garlic and grated ginger, cooking for exactly 1 minute until fragrant but not browned.
4. Sprinkle in the turmeric, cumin, and cayenne pepper, toasting the spices for 30 seconds to release their oils and deepen their flavor.
5. Add the carrot coins and cook for 3 minutes, allowing them to absorb the spice mixture.
6. Toss in the chopped bell pepper and cauliflower florets, stirring to coat everything evenly with the spices.
7. Pour in the vegetable broth and coconut milk, scraping the bottom of the pot to incorporate any browned bits.
8. Bring the mixture to a gentle boil, then reduce heat to low and simmer uncovered for 20 minutes until the vegetables are tender when pierced with a fork.
9. Stir in the drained chickpeas and cook for 5 more minutes to heat them through.
10. Remove the pot from heat and fold in the fresh spinach until it wilts into the curry.
11. Squeeze in the lime juice and sprinkle with salt, stirring gently to combine.
Beneath the vibrant golden surface lies a creamy, velvety texture that clings to each vegetable piece, while the ginger provides little bursts of warmth that dance across your tongue. I love serving this over fluffy jasmine rice, but it’s equally wonderful scooped up with warm naan bread, the spices staining the bread with sunset-colored streaks.
Cucumber & Avocado Gazpacho

Under the gentle hum of the refrigerator, I find myself craving something cool and quiet, something that requires no heat at all on this warm afternoon. This cucumber and avocado gazpacho feels like a whispered secret between summer and autumn, a way to hold onto the last of the garden’s brightness just a little longer. It’s the kind of recipe that asks for patience rather than effort, for noticing rather than rushing.
3
servings15
minutesIngredients
– 2 large English cucumbers, roughly chopped
– 1 perfectly ripe avocado, pitted and scooped
– 1 small garlic clove, minced
– a generous handful of fresh basil leaves
– a big glug of extra virgin olive oil (about ¼ cup)
– a good squeeze of fresh lime juice (about 2 tablespoons)
– a splash of cold water (about ½ cup)
– a couple of generous pinches of sea salt
– a few cracks of black pepper
Instructions
1. Combine the chopped cucumbers, avocado, minced garlic, and basil leaves in a blender. 2. Pour in the olive oil, lime juice, and cold water. 3. Add the sea salt and black pepper. 4. Blend on high speed for about 90 seconds, until completely smooth and pale green. 5. Taste the soup and adjust the salt or lime juice if needed—it should taste bright and balanced. 6. Pour the gazpacho through a fine-mesh strainer into a large bowl to remove any fibrous bits, pressing gently with a spatula. 7. Cover the bowl tightly with plastic wrap and chill in the refrigerator for at least 2 hours, or until very cold. 8. Stir the chilled gazpacho well before serving. Smooth and creamy from the avocado, this soup carries the fresh crispness of cucumber and a gentle garlic warmth. I love serving it in shallow bowls with a drizzle of olive oil and a few tiny basil leaves floating on top, like little green boats on a pale sea.
Grilled Eggplant & Hummus Wraps
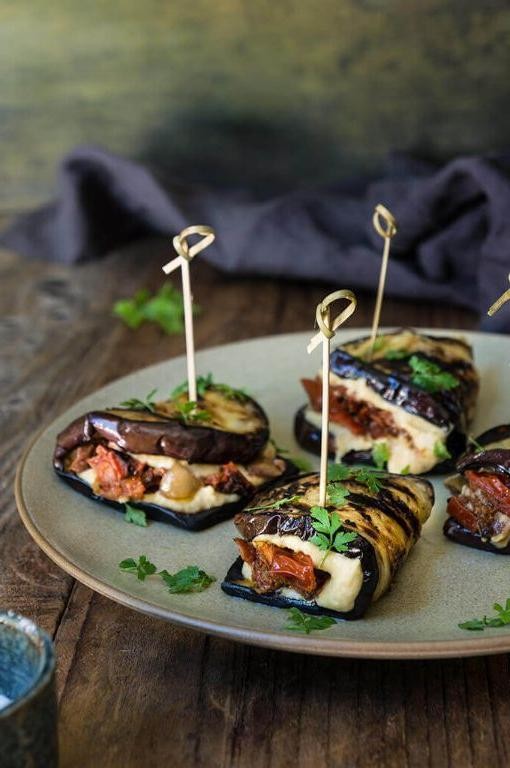
Lately, I’ve been craving something that feels both nourishing and comforting, the kind of meal you can wrap your hands around on a quiet afternoon. These grilled eggplant and hummus wraps are just that—a simple, satisfying embrace of smoky vegetables and creamy spread, all tucked into a soft tortilla. It’s the sort of effortless lunch that makes you pause and appreciate the little things.
5
wraps10
minutes15
minutesIngredients
– A couple of medium eggplants, sliced into ½-inch thick rounds
– A generous drizzle of olive oil
– A pinch or two of kosher salt
– A splash of lemon juice
– About a cup of your favorite hummus
– A handful of fresh parsley, roughly chopped
– 4 large flour tortillas
Instructions
1. Preheat your grill or grill pan to medium-high heat, around 400°F.
2. Brush both sides of each eggplant slice lightly with olive oil.
3. Sprinkle the oiled eggplant slices evenly with kosher salt.
4. Place the eggplant slices on the hot grill and cook for 4–5 minutes.
5. Flip each slice using tongs and grill for another 4–5 minutes, until you see clear grill marks and the flesh is tender when pierced with a fork.
6. Transfer the grilled eggplant to a plate and drizzle with a splash of lemon juice while still warm.
7. Warm the flour tortillas on the grill for about 30 seconds per side, just until pliable.
8. Spread a quarter cup of hummus evenly over the center of each warmed tortilla.
9. Arrange several slices of grilled eggplant in a single layer over the hummus.
10. Sprinkle a handful of chopped parsley over the eggplant.
11. Fold the bottom edge of the tortilla up over the filling, then fold in the sides and roll tightly away from you to form a wrap.
As you take that first bite, the creamy hummus melts into the smoky, tender eggplant, while the fresh parsley adds a bright, herbal note that cuts through the richness. I love slicing these wraps in half on a diagonal and serving them with extra lemon wedges for squeezing over the top, making each mouthful a little celebration of texture and calm.
Spinach & Mushroom Stuffed Portobellos

Sometimes the simplest meals feel like the most profound—those quiet kitchen moments when earthy mushrooms and vibrant greens transform into something deeply comforting. Zestful and savory, these stuffed portobellos emerge from the oven with juices bubbling at the edges, their caps tender enough to cut with a fork yet sturdy enough to hold the rich filling. I love serving them over a bed of creamy polenta or alongside a crisp arugula salad for a meal that feels both nourishing and indulgent.
5
portions15
minutes40
minutesIngredients
– 4 large portobello mushroom caps
– a couple of big handfuls of fresh spinach
– 8 ounces of cremini mushrooms, chopped small
– a generous glug of olive oil (about 2 tablespoons)
– half of a yellow onion, finely diced
– 2 cloves of garlic, minced
– a quarter cup of grated Parmesan cheese
– a third cup of panko breadcrumbs
– a splash of balsamic vinegar (about 1 tablespoon)
– a pinch of salt and a few cracks of black pepper
Instructions
1. Preheat your oven to 375°F.
2. Use a spoon to gently scrape out the gills from the portobello caps—this prevents the final dish from turning too dark and watery.
3. Brush both sides of the portobello caps with 1 tablespoon of olive oil and place them gill-side up on a baking sheet.
4. Roast the portobello caps for 10 minutes until they begin to soften and release some moisture.
5. While the portobellos roast, heat the remaining 1 tablespoon of olive oil in a large skillet over medium heat.
6. Add the diced onion and cook for 4–5 minutes until translucent and fragrant.
7. Stir in the chopped cremini mushrooms and cook for 6–8 minutes, until they’ve browned and reduced in size.
8. Add the minced garlic and cook for 1 minute until fragrant—be careful not to burn it.
9. Toss in the fresh spinach and cook for 2–3 minutes, stirring constantly, until it’s fully wilted.
10. Remove the skillet from heat and stir in the panko breadcrumbs, Parmesan cheese, balsamic vinegar, salt, and pepper until everything is well combined.
11. Divide the spinach-mushroom filling evenly among the par-baked portobello caps, pressing it gently into each one.
12. Return the baking sheet to the oven and bake for 15–18 minutes, until the filling is golden and the portobello caps are tender when pierced with a fork.
13. Let the stuffed portobellos rest for 3–4 minutes before serving—this allows the flavors to settle and makes them easier to handle.
Tofu Stir-Fry with Broccoli & Peppers

Zigzagging through my thoughts today, I find myself drawn to the quiet comfort of simple ingredients coming together in the pan, the way tofu absorbs flavors while broccoli keeps its bright crunch. There’s something grounding about the sizzle and steam, a small ritual that slows the rush of hours. Maybe it’s the soft colors of peppers and greens that make this stir-fry feel like a gentle pause in the day.
3
servings25
minutes19
minutesIngredients
– A 14-ounce block of firm tofu, pressed and cubed
– A couple of cups of broccoli florets
– One large bell pepper, sliced thin
– A quarter cup of soy sauce
– Two tablespoons of olive oil
– A tablespoon of minced garlic
– A splash of rice vinegar
– A teaspoon of cornstarch mixed with two tablespoons of water
Instructions
1. Press the tofu block for 20 minutes using a heavy plate to remove excess water, then cut it into 1-inch cubes.
2. Heat one tablespoon of olive oil in a large skillet over medium-high heat until it shimmers.
3. Add the tofu cubes and cook for 5–7 minutes, flipping occasionally, until golden brown on all sides.
4. Remove the tofu from the skillet and set it aside on a plate.
5. Add the remaining tablespoon of olive oil to the same skillet.
6. Toss in the minced garlic and sauté for 1 minute until fragrant but not browned.
7. Add the broccoli florets and stir-fry for 4 minutes until they turn bright green and slightly tender.
8. Tip: If the pan gets dry, splash in a tablespoon of water to steam the broccoli gently.
9. Incorporate the sliced bell pepper and cook for another 3 minutes until just softened.
10. Return the tofu to the skillet and pour in the quarter cup of soy sauce and splash of rice vinegar.
11. Stir everything together and let it simmer for 2 minutes to blend the flavors.
12. Tip: For a glossy sauce, mix the teaspoon of cornstarch with two tablespoons of water in a small bowl until smooth.
13. Drizzle the cornstarch mixture into the skillet, stirring continuously for 1–2 minutes until the sauce thickens.
14. Tip: Taste a piece of broccoli to ensure it’s tender-crisp—if needed, cook 1 minute more.
15. Remove the skillet from the heat and let it rest for a minute before serving.
Crisp-edged tofu and vibrant vegetables mingle in a savory-sweet glaze, each bite offering a contrast of soft and crunchy textures. I love scooping it over a bed of fluffy jasmine rice or tucking it into warm tortillas for a quick wrap, the colors spilling out like a quiet celebration.
Chia Seed Pudding with Fresh Berries

Wandering through the quiet morning kitchen, I find myself drawn to simple comforts that require little effort but reward with gentle nourishment. This chia seed pudding feels like a soft whisper of self-care, something that prepares itself while you sleep and greets you with quiet sweetness at dawn.
2
servings10
minutesIngredients
– Half a cup of chia seeds
– Two cups of your favorite milk (I like almond for its lightness)
– A generous tablespoon of maple syrup
– A splash of vanilla extract
– A couple of handfuls of fresh mixed berries
– A sprinkle of cinnamon if you’re feeling cozy
Instructions
1. Pour the half cup of chia seeds into a medium-sized mixing bowl.
2. Add the two cups of milk slowly while whisking continuously to prevent clumping.
3. Drizzle in the tablespoon of maple syrup and the splash of vanilla extract.
4. Whisk everything together for about 30 seconds until the mixture looks evenly combined.
5. Let the mixture sit undisturbed for 5 minutes, then whisk again to break up any seed clusters that formed.
6. Cover the bowl tightly with plastic wrap, pressing it directly against the surface of the pudding.
7. Refrigerate for at least 4 hours, though overnight gives the best creamy texture as the seeds fully hydrate.
8. Wash your handfuls of fresh berries and pat them dry with a paper towel.
9. Remove the pudding from the refrigerator and give it one final stir to check consistency.
10. Spoon the pudding into serving glasses, layering with berries as you go.
11. Top with remaining berries and that sprinkle of cinnamon if using.
The pudding transforms into this wonderfully gelatinous yet creamy texture that holds the sweet berries perfectly. Each spoonful carries the gentle vanilla scent mingling with the bright burst of berry juices. Sometimes I layer it in a tall glass with granola for crunch, or spread it thick on toast for a different kind of morning treat.
Spiralized Carrot & Beet Salad
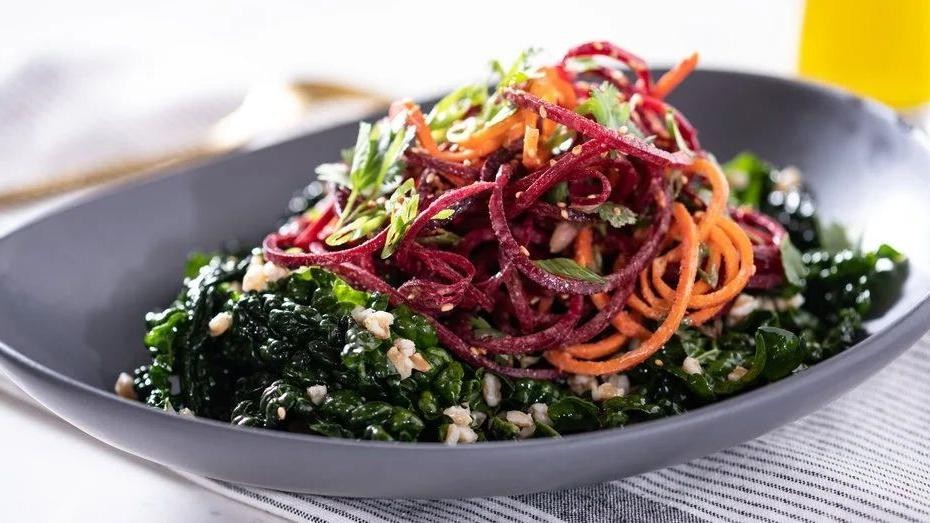
Kind of quietly, I found myself standing at the kitchen counter this afternoon, watching the late autumn light filter through the window and land in soft patches on the wooden surface. There was something about the crispness in the air that made me crave colors—vibrant, earthy colors that felt both grounding and joyful. So I reached for the carrots and beets, thinking a spiralized salad might be just the thing to bridge the gap between summer’s lightness and winter’s warmth.
2
servings15
minutesIngredients
– 2 large carrots, peeled
– 1 medium beet, peeled
– a couple of handfuls of fresh baby spinach
– a generous drizzle of extra virgin olive oil
– a squeeze of fresh lemon juice
– a pinch of sea salt
– a sprinkle of toasted sunflower seeds
Instructions
1. Set your spiralizer to the medium noodle blade and secure it firmly to your countertop.
2. Spiralize both peeled carrots and the peeled beet into separate bowls to keep their colors from bleeding too soon.
3. In a large mixing bowl, combine the spiralized carrots and beets.
4. Add the baby spinach to the bowl with the spiralized vegetables.
5. Drizzle the extra virgin olive oil evenly over the vegetables and spinach.
6. Squeeze the fresh lemon juice directly over the salad.
7. Sprinkle the sea salt across the top of the salad.
8. Toss everything gently with clean hands or salad tongs until the oil and lemon juice coat all the vegetables evenly.
9. Let the salad sit for about 5 minutes to allow the flavors to meld and the vegetables to soften slightly.
10. Just before serving, sprinkle the toasted sunflower seeds over the top for crunch.
Tip: If your spiralizer has trouble with the beet, try cutting it into smaller, more manageable chunks before spiralizing.
Tip: Toasting the sunflower seeds in a dry skillet over medium heat for 3-4 minutes until fragrant will enhance their nutty flavor.
Tip: For the best texture, spiralize the carrots and beets just before assembling to keep them crisp.
Each bite offers a delightful contrast—the crisp, slightly sweet carrots play against the earthy, tender beets, while the spinach adds a soft backdrop. I love how the lemon brightens everything up without overpowering the vegetables’ natural flavors. Sometimes I’ll serve this piled high on a dark plate to make the colors pop, or maybe tucked into a wrap with some creamy goat cheese for a heartier lunch.
Creamy Vegan Tomato Basil Soup

There’s something quietly comforting about a pot of soup simmering on the stove, especially when it’s this creamy vegan tomato basil version that feels like a warm hug in a bowl. Today, as the autumn light filters through my kitchen window, I’m leaning into that simplicity, letting the rich aroma of tomatoes and fresh basil fill the air while I stir and reflect. It’s the kind of recipe that doesn’t demand perfection—just patience and presence, yielding a bowl that’s both nourishing and deeply satisfying.
4
servings15
minutes35
minutesIngredients
– a couple of tablespoons of olive oil
– one large yellow onion, chopped
– three cloves of garlic, minced
– two 28-ounce cans of whole peeled tomatoes (with their juices)
– a cup of raw cashews, soaked for at least 4 hours
– two cups of vegetable broth
– a big handful of fresh basil leaves
– a splash of balsamic vinegar
– a teaspoon of maple syrup
– salt and black pepper to season
Instructions
1. Heat the olive oil in a large pot over medium heat until it shimmers lightly.
2. Add the chopped onion and cook for about 8–10 minutes, stirring occasionally, until it turns soft and translucent.
3. Stir in the minced garlic and cook for another minute until fragrant, being careful not to let it brown.
4. Pour in the canned tomatoes with their juices, using a wooden spoon to break them up slightly in the pot.
5. Add the soaked cashews, vegetable broth, and fresh basil leaves to the pot.
6. Bring the mixture to a gentle boil, then reduce the heat to low and let it simmer uncovered for 20 minutes to allow the flavors to meld.
7. Carefully transfer the soup in batches to a blender, filling it only halfway to avoid spills, and blend until completely smooth and creamy.
8. Return the blended soup to the pot and stir in the balsamic vinegar and maple syrup.
9. Season with salt and black pepper, simmer for another 5 minutes to warm through, and adjust seasoning if needed.
Velvety and rich, this soup wraps you in a smooth texture that belies its dairy-free nature, with the sweet acidity of tomatoes balanced by the earthy hint of basil and a touch of maple. For a cozy twist, I love serving it with a drizzle of olive oil and extra torn basil, or pairing it with crusty bread for dipping—each spoonful feels like a quiet moment of comfort on a crisp day.
Vegan Sushi Rolls with Brown Rice & Veggies

Mornings like this, when the light falls soft through the kitchen window, I find myself drawn to the quiet ritual of making food with my hands. There’s a gentle satisfaction in rolling these vegan sushi rolls, a slow, mindful process that feels like a small meditation. Today, I’m using nutty brown rice and whatever crisp vegetables are waiting in the drawer.
3
rolls25
minutes45
minutesIngredients
- 1 cup of short-grain brown rice
- 1 ¼ cups of water
- 2 tablespoons of rice vinegar
- 1 teaspoon of maple syrup
- ½ teaspoon of salt
- 4 sheets of nori
- 1 small avocado, sliced thin
- 1 small cucumber, cut into matchsticks
- 1 medium carrot, cut into matchsticks
- a splash of tamari for dipping
Instructions
- Rinse 1 cup of short-grain brown rice under cold running water in a fine-mesh strainer until the water runs clear.
- Combine the rinsed rice and 1 ¼ cups of water in a small saucepan, bring to a boil over high heat, then reduce heat to low, cover, and simmer for 45 minutes.
- Remove the saucepan from the heat and let the rice stand, covered, for 10 minutes to steam and finish absorbing the water.
- While the rice rests, whisk together 2 tablespoons of rice vinegar, 1 teaspoon of maple syrup, and ½ teaspoon of salt in a small bowl until the salt and syrup dissolve.
- Transfer the hot cooked rice to a wide, non-metallic bowl and gently fold in the vinegar mixture with a rice paddle or spatula, fanning the rice as you mix to help it cool and become glossy.
- Place one sheet of nori, shiny side down, on a bamboo sushi mat, and with damp hands, spread about ¾ cup of the seasoned rice evenly over the nori, leaving a 1-inch border at the top edge.
- Arrange a few slices of avocado, some cucumber matchsticks, and carrot matchsticks horizontally across the center of the rice.
- Lift the edge of the mat closest to you, roll it over the filling, and press gently but firmly to shape the roll, using the mat to tighten it as you complete the roll onto the bare nori edge.
- Moisten the bare nori edge with a little water on your fingertip and press to seal the roll completely.
- Repeat the rolling process with the remaining nori sheets, rice, and vegetables.
- Use a sharp, wet knife to slice each roll into 6 even pieces, wiping the blade clean between cuts for neat edges.
But these rolls are more than just pretty; they offer a wonderful contrast of the soft, slightly chewy rice against the crisp, cool vegetables. The subtle tang from the vinegar and the creamy avocado make each bite feel both light and satisfying. I love serving them arranged on a platter with a little dish of tamari for dipping, perfect for a quiet lunch or sharing with a friend who stops by.
Conclusion
Finally, you have 33 delicious vegan recipes to support your weight loss journey while nourishing your body. These meals prove healthy eating can be satisfying and flavorful. Try them out, leave a comment with your favorites, and share this article on Pinterest to inspire others. Happy cooking!


