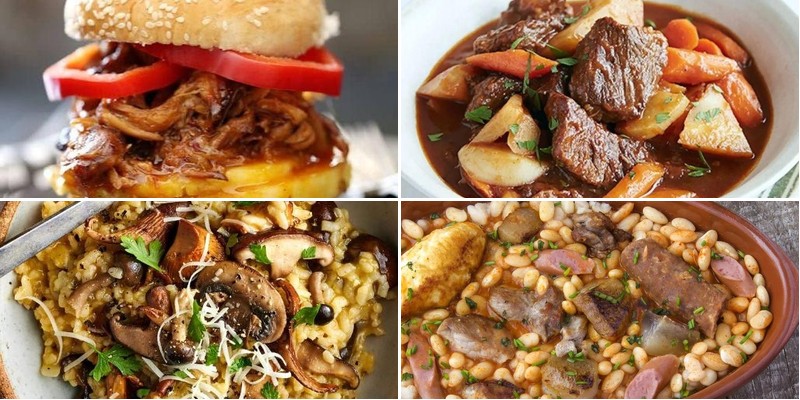
Now, who doesn’t love coming home to a warm, delicious meal after a long day? If you’re juggling work, family, and everything in between, these two-hour slow cooker recipes are about to become your new best friends. From cozy comfort foods to quick weeknight dinners, we’ve gathered 27 mouthwatering dishes that practically cook themselves. Get ready to make your busy evenings so much tastier—let’s dive in!
Hearty Beef Stew with Root Vegetables
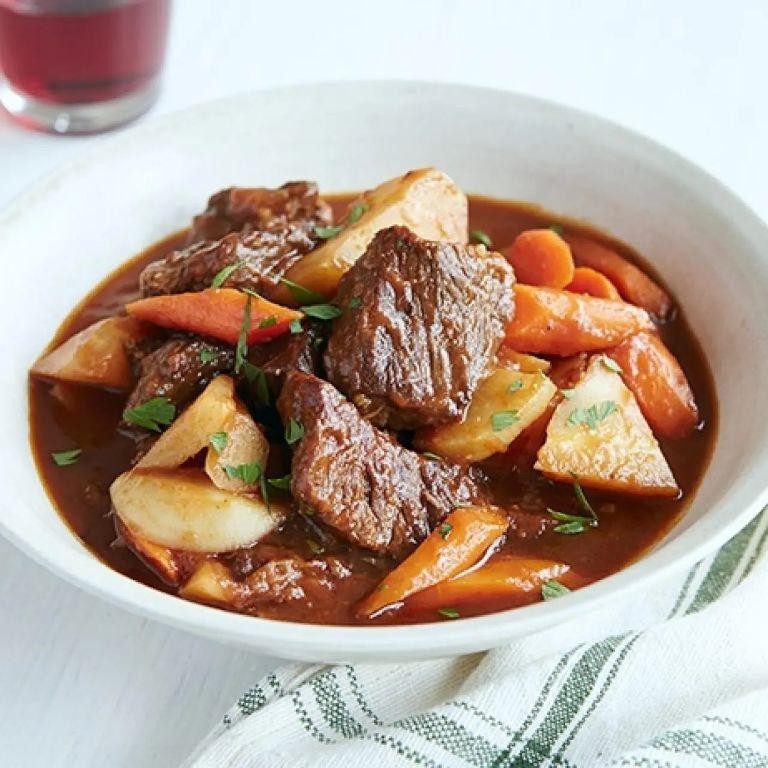
Remember those chilly autumn evenings when you just crave something warm and comforting? I always make this beef stew when the leaves start turning—it fills the whole house with the most incredible aroma that reminds me of my grandmother’s kitchen.
4
servings25
minutes145
minutesIngredients
Beef chuck – 2 lbs
Olive oil – 2 tbsp
Onion – 1 large
Carrots – 3 medium
Potatoes – 2 large
Beef broth – 4 cups
Flour – ¼ cup
Salt – 1 tsp
Black pepper – ½ tsp
Instructions
1. Cut the beef chuck into 1-inch cubes.
2. Pat the beef cubes completely dry with paper towels.
3. Toss the dried beef cubes with flour, salt, and black pepper until evenly coated.
4. Heat olive oil in a large Dutch oven over medium-high heat until it shimmers.
5. Brown the beef cubes in a single layer for 3-4 minutes per side until deeply browned.
6. Remove the beef from the pot and set aside.
7. Chop the onion into ½-inch pieces.
8. Add the chopped onion to the same pot and cook for 5 minutes until translucent.
9. Peel and chop the carrots into 1-inch chunks.
10. Peel and chop the potatoes into 1-inch cubes.
11. Return the beef to the pot with the onions.
12. Add the chopped carrots and potatoes to the pot.
13. Pour in the beef broth until it just covers the ingredients.
14. Bring the stew to a boil over high heat.
15. Reduce heat to low, cover the pot, and simmer for 2 hours.
16. Check the stew after 2 hours – the beef should tear easily with a fork.
17. Serve the stew immediately in deep bowls.
Perfect for those cozy nights when you want something substantial. The beef becomes incredibly tender and falls apart, while the vegetables soak up all that rich broth. I love serving this with crusty bread for dipping into the flavorful juices.
Southwestern Chicken and Black Bean Chili

Very few dishes hit the spot like a comforting bowl of chili, especially when it’s packed with Southwest flair. I first made this chicken and black bean version during a chilly football weekend, and it’s been a staple ever since—my secret is letting it simmer just a bit longer for maximum flavor.
3
servings15
minutes52
minutesIngredients
- Olive oil – 2 tbsp
- Onion – 1, chopped
- Garlic – 3 cloves, minced
- Ground cumin – 1 tbsp
- Chili powder – 2 tbsp
- Boneless chicken breast – 1 lb, cubed
- Black beans – 2 (15 oz) cans, drained
- Diced tomatoes – 1 (14.5 oz) can
- Chicken broth – 2 cups
- Salt – 1 tsp
Instructions
- Heat olive oil in a large pot over medium heat until it shimmers.
- Add chopped onion and cook for 5 minutes, stirring occasionally, until translucent.
- Stir in minced garlic and cook for 1 minute until fragrant.
- Sprinkle ground cumin and chili powder over the onion mixture, toasting for 30 seconds to deepen flavors.
- Add cubed chicken breast and cook for 6–8 minutes, turning pieces until no pink remains.
- Pour in drained black beans, diced tomatoes, and chicken broth.
- Season with salt and bring to a boil.
- Reduce heat to low, cover, and simmer for 25 minutes, stirring once halfway.
- Uncover and simmer for an additional 10 minutes until slightly thickened.
Perfectly hearty with tender chicken and creamy beans, this chili has a smoky kick that pairs wonderfully with cornbread or a dollop of sour cream. I love topping it with fresh cilantro for a bright finish that balances the richness.
Savory Mushroom and Herb Risotto

Yesterday, I found myself craving something creamy and earthy after a long rainy afternoon, which led me straight to my favorite comfort food. There’s something magical about how simple ingredients transform into this luxurious dish that always feels like a warm hug. I love making this on days when I want something fancy-feeling without too much fuss.
2
servings15
minutes35
minutesIngredients
- Arborio rice – 1 ½ cups
- Vegetable broth – 4 cups
- Mixed mushrooms – 8 oz
- Yellow onion – 1 medium
- Garlic – 2 cloves
- Dry white wine – ½ cup
- Parmesan cheese – ½ cup grated
- Unsalted butter – 2 tbsp
- Olive oil – 2 tbsp
- Fresh thyme – 1 tbsp
- Salt – 1 tsp
- Black pepper – ½ tsp
Instructions
- Heat vegetable broth in a saucepan over medium heat until it simmers, then reduce to low to keep warm.
- Chop the yellow onion into fine pieces and mince the garlic cloves.
- Heat olive oil in a large skillet over medium heat until it shimmers.
- Add chopped onion and cook for 4–5 minutes until translucent, stirring occasionally.
- Add minced garlic and cook for 1 minute until fragrant.
- Stir in Arborio rice and toast for 2 minutes, coating it evenly with oil.
- Pour in dry white wine and cook while stirring until the liquid is fully absorbed, about 2–3 minutes.
- Add 1 cup of warm broth and stir continuously until the rice absorbs the liquid.
- Repeat adding broth ½ cup at a time, stirring after each addition until absorbed, for about 18–20 minutes total.
- Slice mixed mushrooms while the risotto cooks.
- Sauté mushrooms in a separate pan with 1 tbsp butter over medium-high heat for 5–7 minutes until browned.
- Stir cooked mushrooms, fresh thyme, salt, and black pepper into the risotto.
- Remove skillet from heat and stir in remaining 1 tbsp butter and grated Parmesan cheese until creamy.
- Let the risotto rest for 2 minutes before serving.
Heavenly and velvety, this risotto has a rich umami depth from the mushrooms and a subtle herbaceous note. I love topping it with extra thyme or serving it alongside a crisp green salad for contrast—it’s perfect for cozy dinners or impressing guests without stress.
Creamy Tomato Basil Soup with Grilled Cheese

Nothing warms my soul quite like a bowl of creamy tomato soup paired with a perfectly crispy grilled cheese sandwich—it’s the ultimate comfort food duo that always brings back memories of rainy afternoons in my grandma’s kitchen.
2
sandwiches10
minutes32
minutesIngredients
- Butter – 2 tbsp
- Onion – ½ cup, chopped
- Garlic – 2 cloves, minced
- Canned crushed tomatoes – 28 oz
- Vegetable broth – 2 cups
- Heavy cream – ½ cup
- Fresh basil – ¼ cup, chopped
- Salt – 1 tsp
- Black pepper – ½ tsp
- Bread – 4 slices
- Cheddar cheese – 4 slices
Instructions
- Melt 1 tbsp butter in a large pot over medium heat.
- Add chopped onion and cook for 5 minutes until translucent.
- Stir in minced garlic and cook for 1 minute until fragrant.
- Pour in crushed tomatoes and vegetable broth, then bring to a boil.
- Reduce heat to low, cover, and simmer for 15 minutes.
- Use an immersion blender to puree the soup until completely smooth.
- Stir in heavy cream, chopped basil, salt, and black pepper.
- Heat a skillet over medium heat and melt remaining 1 tbsp butter.
- Place 2 bread slices in the skillet and top each with 2 cheese slices.
- Cover with remaining bread slices and cook for 3-4 minutes until golden brown.
- Flip sandwiches and cook for another 3-4 minutes until cheese is melted and bread is crispy.
- Ladle soup into bowls and serve immediately with grilled cheese sandwiches.
Just the way the velvety soup coats your spoon and the sharp cheddar oozes from the crispy bread makes every bite pure comfort. I love dipping the sandwich right into the soup for that perfect texture combination—it’s simple, satisfying, and always hits the spot.
Zesty Lemon Garlic Chicken Thighs

Yesterday, I was craving something bright and savory after a long day, and these lemon garlic chicken thighs hit the spot perfectly. I love how the citrus cuts through the richness of the chicken, making it feel both comforting and fresh—it’s become my go-to weeknight dinner when I need a quick flavor boost without much fuss.
4
portions10
minutes35
minutesIngredients
- Chicken thighs – 1.5 lbs
- Lemon juice – ¼ cup
- Garlic cloves – 4, minced
- Olive oil – 2 tbsp
- Salt – 1 tsp
- Black pepper – ½ tsp
Instructions
- Pat the chicken thighs dry with paper towels to help the skin crisp up evenly.
- Season both sides of the chicken thighs with salt and black pepper.
- Heat olive oil in a large oven-safe skillet over medium-high heat until it shimmers.
- Place the chicken thighs skin-side down in the skillet and cook for 6–8 minutes until the skin is golden brown and crispy.
- Flip the chicken thighs and cook for another 4 minutes to sear the other side.
- Add minced garlic to the skillet and sauté for 1 minute until fragrant, being careful not to burn it.
- Pour lemon juice over the chicken, scraping any browned bits from the bottom of the pan for extra flavor.
- Transfer the skillet to a preheated 375°F oven and bake for 20–25 minutes until the internal temperature of the chicken reaches 165°F.
- Remove the skillet from the oven and let the chicken rest for 5 minutes before serving to keep it juicy.
Here, the chicken emerges with a crispy, golden skin and tender, juicy meat infused with zesty lemon and aromatic garlic. I love serving it over a bed of fluffy quinoa or with roasted asparagus to soak up the bright pan sauce—it’s a simple dish that always feels special.
Sweet and Spicy Pineapple Pulled Pork

Finally, after years of experimenting with pulled pork recipes, I’ve landed on this sweet and spicy pineapple version that’s become my go-to for game days and casual gatherings. I actually created this recipe by accident when I ran out of my usual barbecue sauce and had to improvise with what was in my pantry—now my family requests it monthly! There’s something magical about how the pineapple caramelizes while keeping the pork incredibly moist.
8
sandwiches15
minutes240
minutesIngredients
Pork shoulder – 3 lbs
Pineapple juice – 1 cup
Brown sugar – ¼ cup
Soy sauce – 2 tbsp
Chili powder – 1 tbsp
Garlic powder – 1 tsp
Salt – 1 tsp
Instructions
1. Preheat your oven to 300°F.
2. Pat the pork shoulder completely dry with paper towels—this helps create a better crust.
3. Combine pineapple juice, brown sugar, soy sauce, chili powder, garlic powder, and salt in a medium bowl.
4. Place the pork shoulder in a Dutch oven or oven-safe pot with a tight-fitting lid.
5. Pour the marinade mixture over the pork, making sure it coats all sides.
6. Cover the pot and place it in the preheated oven for 4 hours.
7. After 4 hours, remove the lid and check if the pork shreds easily with a fork—if not, return to oven for another 30 minutes.
8. Transfer the pork to a cutting board, reserving the cooking liquid in the pot.
9. Use two forks to shred the pork completely, discarding any large fat pieces.
10. Return the shredded pork to the pot with the cooking liquid.
11. Stir to combine and let it absorb the juices for 10 minutes before serving.
Unbelievably tender and packed with flavor, this pork develops the most incredible caramelized edges while staying juicy throughout. The pineapple creates this beautiful sweet-tangy balance that plays perfectly against the subtle heat from the chili powder. I love serving it piled high on toasted buns with a crunchy coleslaw, or even over rice for a quick weeknight dinner that feels special.
Italian Sausage and White Bean Cassoulet

Zesty aromas of garlic and herbs always transport me back to my grandmother’s kitchen, where she’d simmer this rustic cassoulet for hours on chilly autumn afternoons. I’ve streamlined her classic recipe to fit busy weeknights while keeping all the comforting soul of the original. Nothing beats coming home to this bubbling pot of Italian sausage and creamy white beans after a long day.
3
servings15
minutes47
minutesIngredients
Italian sausage – 1 lb
White beans – 2 cans (15 oz each)
Chicken broth – 2 cups
Garlic – 3 cloves
Onion – 1 medium
Olive oil – 2 tbsp
Salt – 1 tsp
Black pepper – ½ tsp
Instructions
1. Heat olive oil in a large Dutch oven over medium-high heat until shimmering.
2. Remove Italian sausage from casings and crumble into the hot oil.
3. Brown the sausage for 5-7 minutes, breaking it into small pieces with a wooden spoon.
4. Dice one medium onion while the sausage cooks to save prep time.
5. Transfer browned sausage to a plate using a slotted spoon, leaving drippings in the pot.
6. Add diced onion to the hot drippings and sauté for 4 minutes until translucent.
7. Mince 3 cloves of garlic and add to the onions, cooking for 1 minute until fragrant.
8. Return the browned sausage to the pot along with any accumulated juices.
9. Drain and rinse 2 cans of white beans thoroughly to remove excess sodium.
10. Add the beans to the pot along with 2 cups of chicken broth.
11. Season with 1 teaspoon salt and ½ teaspoon black pepper.
12. Bring the mixture to a boil, then reduce heat to low and cover.
13. Simmer for 25 minutes, stirring occasionally to prevent sticking.
14. Remove the lid and continue simmering for 10 more minutes to thicken the sauce.
15. Check seasoning and adjust if needed before serving.
Savory and deeply satisfying, this cassoulet develops a wonderful creamy texture as the beans break down slightly during the long simmer. The rich sausage flavor permeates every bite, creating a hearty dish that’s perfect spooned over crusty bread or served alongside a simple green salad. I love how the flavors deepen even more when reheated the next day.
Moroccan Spiced Lamb Shanks with Apricots
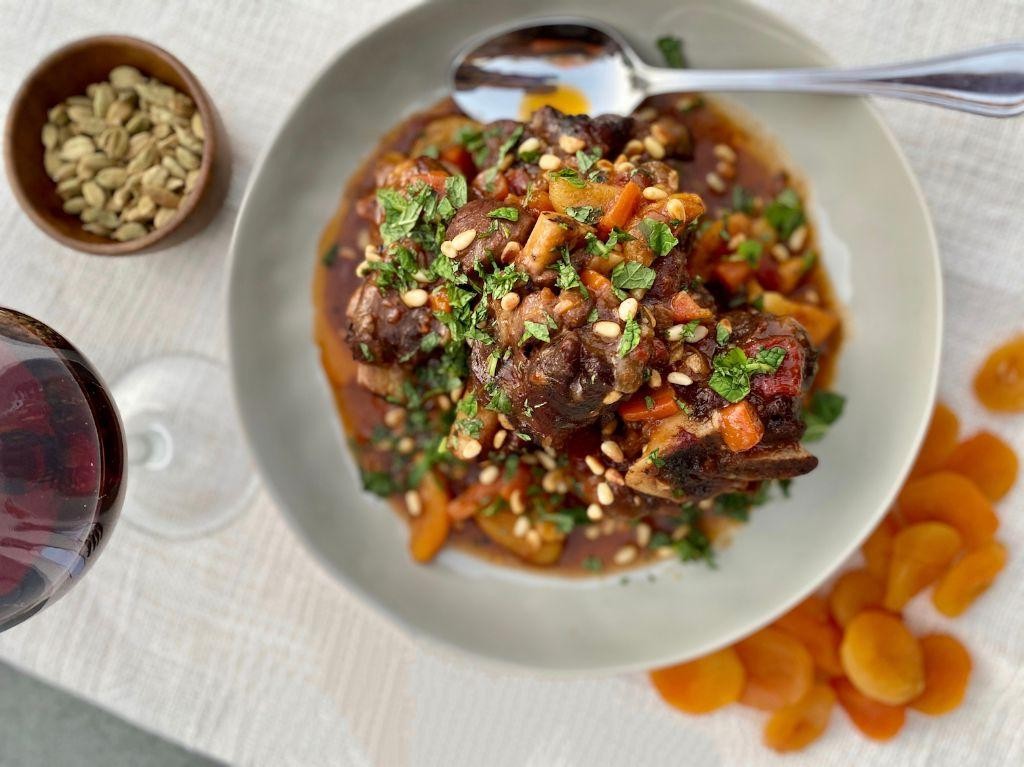
Every time I smell these Moroccan spices filling my kitchen, I’m transported back to that tiny Marrakech restaurant where I first fell in love with this dish. I’ve been perfecting this recipe for years, and it’s become my go-to comfort food for chilly evenings when I want something that feels both exotic and deeply satisfying.
2
portions15
minutes175
minutesIngredients
Lamb shanks – 4 pieces
Olive oil – 2 tbsp
Onion – 1 large, chopped
Garlic – 4 cloves, minced
Ground cumin – 2 tsp
Ground cinnamon – 1 tsp
Ground ginger – 1 tsp
Paprika – 1 tsp
Cayenne pepper – ¼ tsp
Chicken broth – 2 cups
Dried apricots – 1 cup
Honey – 2 tbsp
Salt – 1 tsp
Black pepper – ½ tsp
Instructions
1. Preheat your oven to 325°F.
2. Pat the lamb shanks completely dry with paper towels.
3. Season all sides of the lamb shanks with salt and black pepper.
4. Heat olive oil in a large Dutch oven over medium-high heat until shimmering.
5. Sear the lamb shanks for 4-5 minutes per side until deeply browned.
6. Remove the lamb shanks and set them aside on a plate.
7. Add the chopped onion to the same pot and cook for 5 minutes until softened.
8. Stir in the minced garlic and cook for 1 minute until fragrant.
9. Add all the ground spices and toast for 30 seconds to release their oils.
10. Pour in the chicken broth, scraping up any browned bits from the bottom.
11. Return the lamb shanks to the pot along with any accumulated juices.
12. Add the dried apricots and drizzle with honey.
13. Bring the liquid to a simmer, then cover the pot tightly with a lid.
14. Transfer the covered pot to the preheated oven and braise for 2.5 hours.
15. Check the lamb by inserting a fork – it should pull apart easily with no resistance.
16. Remove the pot from the oven and let it rest for 15 minutes before serving.
17. Skim any excess fat from the surface of the sauce with a spoon.
A perfectly braised lamb shank should be so tender that the meat falls cleanly off the bone with just a gentle tug. The apricots melt into the sauce, creating this incredible sweet-savory balance that pairs beautifully with fluffy couscous or creamy polenta. I love serving this family-style right from the Dutch oven – it makes for such a dramatic, aromatic centerpiece that always gets everyone talking.
Classic Pot Roast with Carrots and Potatoes
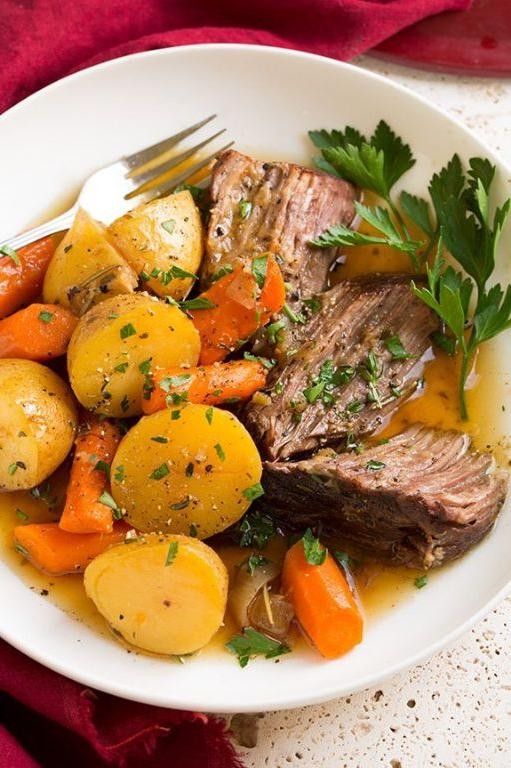
Yesterday, I was craving that nostalgic comfort only a slow-cooked pot roast can deliver—the kind that fills your kitchen with the most incredible aroma and makes everyone gather around the table early. My grandma always said the secret was in the sear, and after years of testing, I have to agree!
6
servings20
minutes195
minutesIngredients
Beef chuck roast – 3 lbs
Olive oil – 2 tbsp
Yellow onion – 1 large
Garlic – 4 cloves
Beef broth – 2 cups
Worcestershire sauce – 1 tbsp
Carrots – 1 lb
Potatoes – 2 lbs
Salt – 1 tsp
Black pepper – ½ tsp
Instructions
1. Preheat your oven to 325°F.
2. Pat the beef chuck roast completely dry with paper towels—this helps achieve a perfect crust.
3. Season all sides of the roast evenly with salt and black pepper.
4. Heat olive oil in a large Dutch oven over medium-high heat until it shimmers.
5. Sear the roast for 4-5 minutes per side until deeply browned, developing rich flavor.
6. Transfer the roast to a plate, leaving drippings in the pot.
7. Chop the yellow onion into 1-inch pieces and add to the hot drippings.
8. Sauté the onion for 5 minutes until softened and lightly browned.
9. Mince the garlic cloves and stir into the onions for 30 seconds until fragrant.
10. Pour in the beef broth and Worcestershire sauce, scraping up all the browned bits from the bottom.
11. Return the seared roast to the pot, nestling it into the liquid.
12. Cover the Dutch oven with a tight-fitting lid and transfer to the preheated oven.
13. Braise for 2 hours without opening the lid to maintain consistent temperature.
14. Peel the carrots and cut into 2-inch chunks.
15. Scrub the potatoes and cut into 2-inch cubes.
16. After 2 hours, carefully remove the pot from the oven and arrange the carrots and potatoes around the roast.
17. Submerge the vegetables partially in the liquid for even cooking.
18. Return the covered pot to the oven and continue braising for 1 more hour.
19. Check for doneness—the roast should shred easily with a fork and vegetables should be tender when pierced.
20. Let the roast rest in the pot for 15 minutes before slicing against the grain.
Cooking this low and slow transforms the beef into fall-apart tender perfection, while the potatoes soak up all those savory juices. I love serving this over creamy polenta or with crusty bread to mop up every last bit of the rich gravy—it’s the ultimate Sunday dinner that always brings everyone together.
Teriyaki Chicken with Steamed Broccoli

Whenever I’m craving something that feels both comforting and healthy, this teriyaki chicken with steamed broccoli is my go-to. I actually started making this recipe back in college when my roommate introduced me to the magic of homemade teriyaki sauce, and now it’s a weekly staple in my kitchen that comes together faster than ordering takeout.
2
servings15
minutes15
minutesIngredients
Chicken breast – 1 lb
Soy sauce – ¼ cup
Brown sugar – 2 tbsp
Garlic – 2 cloves
Ginger – 1 tsp
Cornstarch – 1 tbsp
Water – 2 tbsp
Broccoli – 1 head
Vegetable oil – 1 tbsp
Instructions
1. Cut 1 lb chicken breast into 1-inch cubes. 2. Heat 1 tbsp vegetable oil in a large skillet over medium-high heat until shimmering. 3. Add chicken cubes to the hot skillet in a single layer. 4. Cook chicken for 5-6 minutes, turning occasionally, until all sides are golden brown. 5. While chicken cooks, mince 2 cloves garlic and grate 1 tsp ginger. 6. In a small bowl, whisk together ¼ cup soy sauce, 2 tbsp brown sugar, minced garlic, and grated ginger until sugar dissolves. 7. Pour teriyaki sauce over the browned chicken in the skillet. 8. Reduce heat to medium and simmer for 3 minutes, stirring occasionally. 9. In another small bowl, mix 1 tbsp cornstarch with 2 tbsp water until smooth. 10. Stir cornstarch mixture into the skillet to thicken the sauce. 11. Continue cooking for 2 more minutes until sauce coats the back of a spoon. 12. While sauce thickens, cut 1 head broccoli into florets. 13. Steam broccoli florets for 4-5 minutes until bright green and tender-crisp. 14. Remove broccoli from steamer and drain any excess water. But what I love most is how the glossy teriyaki sauce clings to every piece of chicken while the broccoli stays crisp enough to provide the perfect textural contrast. Sometimes I’ll serve this over cauliflower rice for a low-carb option, or pack the leftovers cold for lunch the next day—the flavors actually deepen overnight.
Tuscan White Bean and Kale Soup
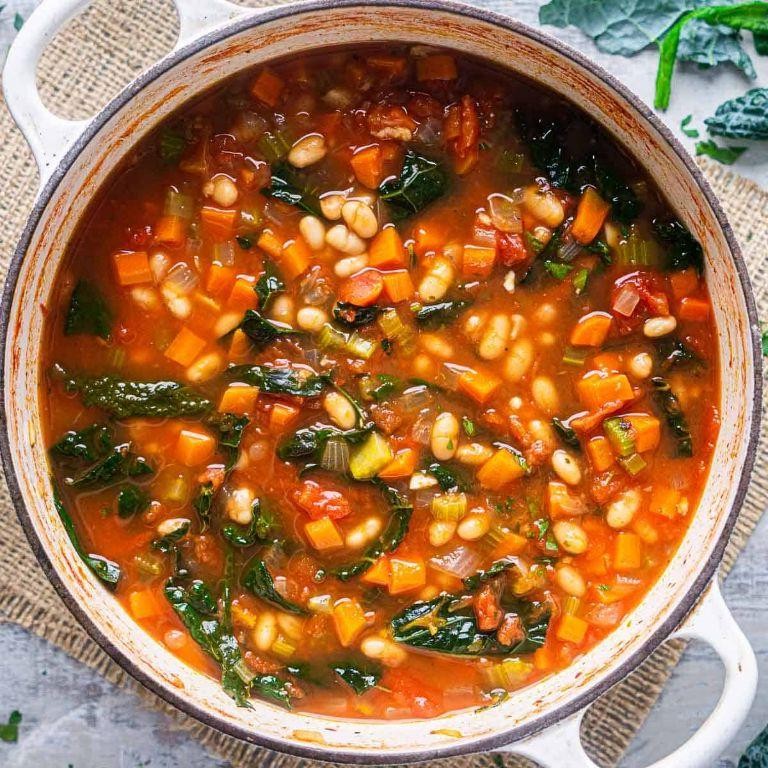
Remember those chilly autumn evenings when all you want is something warm and comforting? That’s exactly why I keep coming back to this Tuscan white bean and kale soup—it’s like a cozy blanket in a bowl, and it reminds me of the simple, hearty meals my grandmother used to make after a long day in the garden.
5
servings15
minutes21
minutesIngredients
– Olive oil – 2 tbsp
– Onion – 1, chopped
– Garlic – 3 cloves, minced
– Vegetable broth – 4 cups
– Canned white beans – 2 cans, drained and rinsed
– Kale – 4 cups, stems removed and chopped
– Salt – 1 tsp
– Black pepper – ½ tsp
Instructions
1. Heat 2 tbsp olive oil in a large pot over medium heat for 2 minutes until shimmering.
2. Add 1 chopped onion and cook for 5 minutes, stirring occasionally, until translucent.
3. Stir in 3 minced garlic cloves and cook for 1 minute until fragrant.
4. Pour in 4 cups vegetable broth and bring to a boil over high heat.
5. Reduce heat to low and simmer for 10 minutes to develop flavor.
6. Add 2 cans drained and rinsed white beans and 1 tsp salt.
7. Simmer for 5 minutes until beans are heated through.
8. Stir in 4 cups chopped kale and cook for 3 minutes until wilted but still bright green.
9. Season with ½ tsp black pepper and remove from heat.
10. Ladle soup into bowls and serve immediately. Sometimes I’ll top mine with a sprinkle of red pepper flakes for a little kick—it really brings out the earthy flavors of the beans and kale. The broth stays light but satisfying, while the kale adds just the right amount of texture without overwhelming the dish.
Vegetarian Lentil Curry with Spinach and Coconut

Gosh, I first discovered this curry during a rainy autumn evening when I needed something comforting but didn’t want to spend hours in the kitchen—it’s become my go-to weeknight meal ever since. The combination of earthy lentils and creamy coconut milk creates the most satisfying bowl that even my meat-loving husband requests regularly.
3
servings10
minutes28
minutesIngredients
– Olive oil – 2 tbsp
– Yellow onion – 1 medium, diced
– Garlic – 3 cloves, minced
– Red lentils – 1 cup
– Vegetable broth – 2 cups
– Coconut milk – 1 (13.5 oz) can
– Spinach – 4 cups fresh
– Curry powder – 2 tbsp
– Salt – 1 tsp
Instructions
1. Heat olive oil in a large pot over medium heat until it shimmers.
2. Add diced onion and cook for 5 minutes, stirring occasionally, until translucent.
3. Stir in minced garlic and cook for 1 minute until fragrant.
4. Add curry powder and toast for 30 seconds to release its oils and deepen the flavor.
5. Pour in red lentils and vegetable broth, then bring to a boil.
6. Reduce heat to low, cover, and simmer for 15 minutes until lentils are tender but not mushy.
7. Stir in coconut milk and simmer uncovered for 5 minutes to thicken slightly.
8. Add fresh spinach and cook for 2 minutes until just wilted.
9. Stir in salt and remove from heat.
Really, the magic happens when the creamy coconut milk melds with the earthy lentils, creating a velvety texture that clings perfectly to rice or naan. I love how the spinach adds bright green flecks and a subtle freshness that balances the rich curry—sometimes I’ll top it with a squeeze of lime or chopped cilantro for an extra pop of flavor.
Conclusion
Life just got easier with these 27 delicious slow cooker recipes perfect for busy evenings! We hope these time-saving meals bring warmth and flavor to your table. Try your favorites and let us know which ones you love in the comments below. Don’t forget to share this helpful roundup on Pinterest so other busy cooks can enjoy these tasty dishes too!


