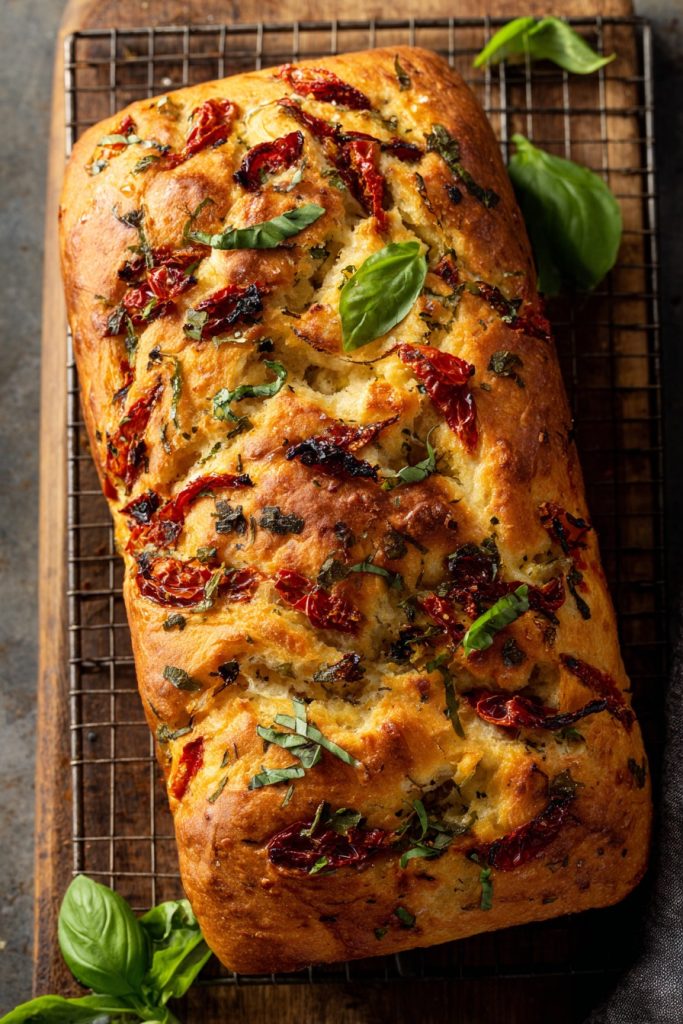
Remember those Sunday afternoons at Grandma’s house, when the entire neighborhood would gather just to catch a whiff of whatever was baking in her oven? The way the warm, yeasty aroma would drift through the screen door, mingling with the scent of fresh-cut grass and childhood laughter. Rising from those cherished memories comes this tomato basil bread, a recipe that captures the very essence of family gatherings and the comforting embrace of homemade traditions passed down through flour-dusted hands.
Why This Recipe Works
- The slow fermentation process develops complex flavors that remind me of my grandmother’s patient approach to baking – she always said good bread can’t be rushed, much like the stories she’d tell while we waited for the dough to rise
- Sun-dried tomatoes provide concentrated bursts of sweetness that transport me back to summer afternoons spent helping my mother preserve our garden harvest, their rich intensity balancing perfectly with the fresh basil’s herbal notes
- The combination of bread flour and vital wheat gluten creates that perfect chewy texture I remember from the local bakery where my father would take me every Saturday morning, the crust crackling as we tore into still-warm loaves on the drive home
- Fresh basil folded into the dough releases its essential oils during baking, filling the kitchen with that unmistakable scent that always meant someone was cooking with love, the same aroma that welcomed me home after school every day
- The olive oil brushed crust creates a beautiful golden-brown finish that reminds me of my aunt’s prized bread bowl, the one she used for forty years until it developed that perfect patina of family meals and shared stories
Ingredients
- 3 ½ cups bread flour, plus extra for dusting
- 1 tablespoon vital wheat gluten
- 2 teaspoons instant yeast
- 1 ½ teaspoons fine sea salt
- 1 tablespoon granulated sugar
- 1 cup warm water (110°F)
- ¼ cup extra virgin olive oil, plus extra for brushing
- ¾ cup sun-dried tomatoes packed in oil, drained and chopped
- ½ cup fresh basil leaves, thinly sliced
- 2 tablespoons tomato paste
- 1 large egg, for egg wash
Equipment Needed
- Stand mixer with dough hook attachment
- Large mixing bowl
- Digital kitchen scale
- Measuring cups and spoons
- Bench scraper
- Loaf pan (9×5 inches)
- Pastry brush
- Wire cooling rack
- Instant-read thermometer
- Plastic wrap or clean kitchen towel
Instructions
Preparing the Dough Foundation
In the bowl of your stand mixer, combine 3 ½ cups of bread flour with 1 tablespoon of vital wheat gluten, creating that strong protein network my grandfather always said was the backbone of good bread. Add 2 teaspoons of instant yeast and 1 ½ teaspoons of fine sea salt to opposite sides of the bowl – my mother taught me this trick to prevent the salt from killing the yeast prematurely. In a separate measuring cup, whisk together 1 cup of warm water heated to exactly 110°F (test it on your wrist like Grandma did – it should feel warm but not hot), ¼ cup of extra virgin olive oil, and 1 tablespoon of granulated sugar until the sugar dissolves completely. Pour the liquid mixture into the dry ingredients and attach the dough hook, mixing on low speed for 2 minutes until a shaggy dough forms, then increase to medium speed and knead for 8 minutes until the dough becomes smooth and elastic, pulling away cleanly from the sides of the bowl. This rhythmic kneading process always takes me back to watching my grandmother’s capable hands working magic in her yellow mixing bowl, her movements as steady and reassuring as her voice.
Incorporating the Flavor Elements
Turn the dough out onto a lightly floured surface and gently press it into a rough rectangle about ½-inch thick, being careful not to deflate all the precious air bubbles that have started forming. Evenly distribute ¾ cup of chopped sun-dried tomatoes and ½ cup of thinly sliced fresh basil across the surface, then drizzle with 2 tablespoons of tomato paste that you’ve thinned slightly with a teaspoon of warm water. Begin folding the dough over itself, incorporating the additions through a series of gentle stretches and folds – this method reminds me of how my aunt would tuck us into bed, wrapping the dough around the flavorful elements like a warm blanket. Continue this process for about 5 minutes until the tomatoes and basil are evenly distributed, taking care not to overwork the dough and tear those beautiful red and green specks. The dough will feel slightly sticky from the tomato paste, but resist adding too much extra flour – that moisture is what will create those lovely irregular holes in the finished crumb, just like in the rustic loaves from the Italian bakery where my family would stop after church.
The First Rise and Shaping
Place the beautifully marbled dough into a large bowl that you’ve lightly greased with olive oil, turning it once to coat all surfaces – I always use my grandmother’s big ceramic bowl for this step, the one with the tiny chip on the rim from when my cousin dropped it during Thanksgiving preparations. Cover the bowl tightly with plastic wrap or a clean kitchen towel and set it in a warm, draft-free place to rise until doubled in size, which should take about 1 to 1 ½ hours depending on your kitchen temperature. To test if it’s ready, gently press two fingers about ½ inch into the dough – if the indentations remain, it’s perfectly proofed and ready for shaping. Turn the risen dough out onto a lightly floured surface and gently deflate it, then shape it into a tight loaf by pulling the edges toward the center and pinching them together, creating surface tension that will help it rise beautifully in the oven, just like my mother taught me during my first solo baking attempt at age twelve.
Final Proofing and Preparation
Transfer the shaped loaf seam-side down into a standard 9×5-inch loaf pan that you’ve generously greased with olive oil, tucking the ends neatly underneath to create that classic rectangular shape. Cover the pan loosely with plastic wrap or a clean kitchen towel and let it rise in a warm place until the dough crests about 1 inch above the rim of the pan, which typically takes 45 to 60 minutes – this second rise always tests my patience, filling the kitchen with anticipation much like those Christmas Eves of my childhood. About 20 minutes before baking, position a rack in the center of your oven and preheat it to 375°F, giving it plenty of time to reach the perfect temperature for creating that crisp, golden crust. In a small bowl, whisk one large egg with 1 tablespoon of water to create an egg wash, then use a pastry brush to gently coat the entire surface of the risen loaf, being careful not to deflate it – this simple step creates that beautiful glossy finish that always made my grandmother’s bread look professionally baked.
Baking to Perfection
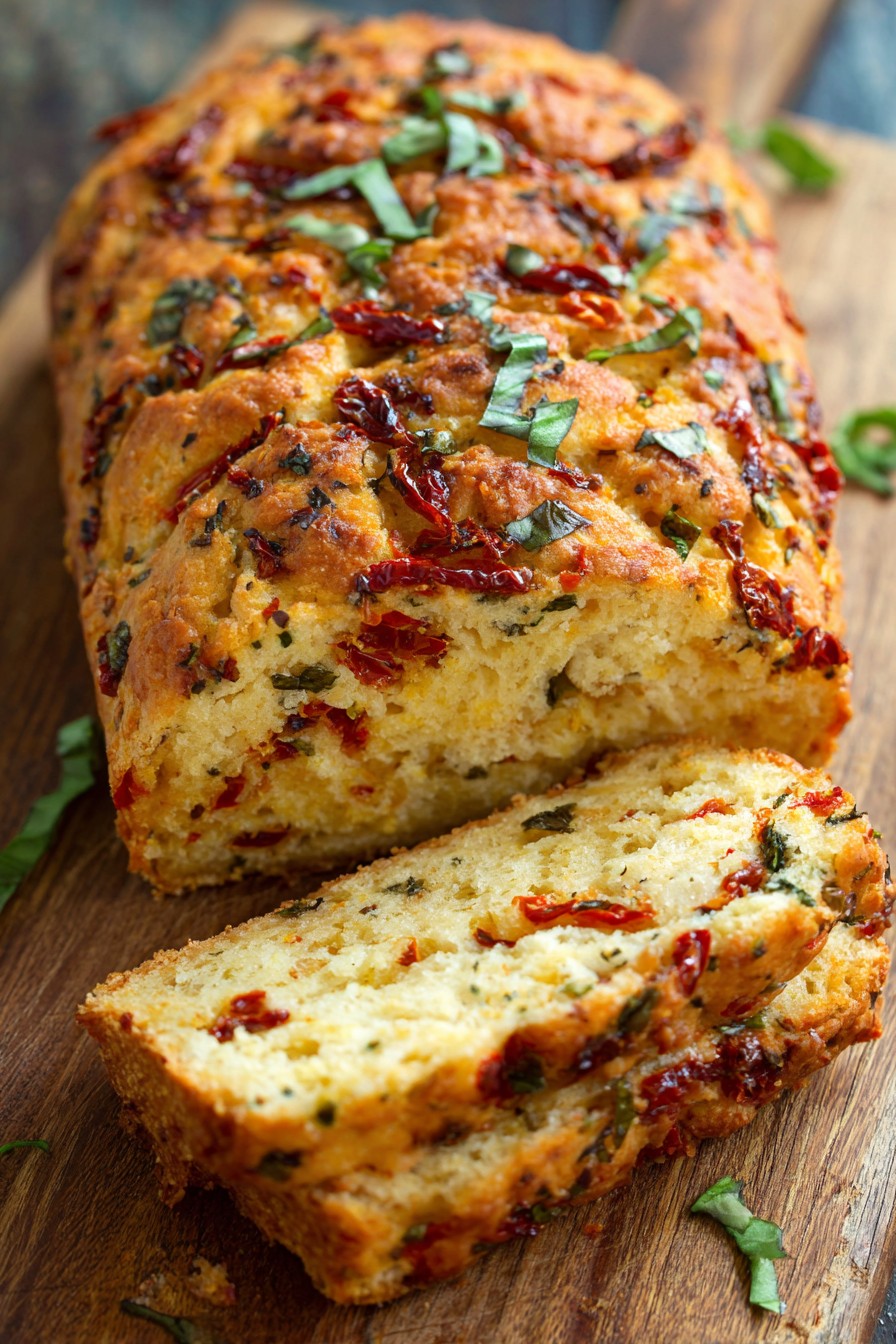
Place the loaf pan in the preheated 375°F oven and bake for 35 to 40 minutes, rotating the pan halfway through to ensure even browning – that moment when the first aromas begin wafting through the house always transports me back to childhood weekends. The bread is done when it develops a deep golden-brown crust and sounds hollow when you tap the bottom, but for absolute certainty, use an instant-read thermometer inserted into the center – it should register between 190°F and 200°F. Carefully remove the baked bread from the pan immediately and transfer it to a wire cooling rack, resisting the overwhelming temptation to slice into it while it’s still hot, though I must confess I never managed to wait as a child when my mother would bake. Let the bread cool completely for at least 2 hours before slicing – this allows the crumb to set properly and makes for cleaner slices, though I understand completely if you can’t resist tearing off that first warm heel, slathering it with butter just like we did after school.
Tips and Tricks
If your kitchen tends to be cool, create a warm proofing environment by placing the dough in your oven with only the light turned on – the gentle heat generated is perfect for encouraging yeast activity without cooking the dough. This trick reminds me of how my resourceful grandmother would use every available resource during lean times, making do with what she had to create something beautiful. When measuring flour, always spoon it into your measuring cup and level it off with a straight edge rather than scooping directly from the bag – this prevents compacting and ensures you don’t end up with too much flour, which was the secret behind my aunt’s famously light breads. For the most vibrant basil flavor, reserve about two tablespoons of fresh chopped basil to sprinkle over the loaf during the last five minutes of baking – the heat will gently wilt the leaves without burning them, releasing their essential oils and creating an aromatic crust that will fill your kitchen with memories of summer herb gardens. If your sun-dried tomatoes seem particularly dry, you can plump them up by soaking them in warm water for 15 minutes before chopping, though I prefer the oil-packed variety for their richer flavor and softer texture, much like the ones my mother would preserve from our backyard plants. For an extra crisp crust, place a small oven-safe dish of water on the bottom rack while baking to create steam – this technique mimics professional bakery ovens and creates that satisfying crackle when you break into the loaf, just like the bread my father would bring home from his favorite Italian bakery. If you need to speed up the rising process, you can place the dough in a slightly warmed oven (turned off) with a pan of hot water on the rack below, but I’ve found that slower rises always develop better flavor, much like how the best family stories unfold gradually over Sunday dinners. Store any leftover bread in a paper bag at room temperature for up to three days, or slice and freeze it for up to three months – my mother always kept several loaves in the freezer for unexpected guests, believing that offering bread to visitors was one of life’s simplest and most meaningful gestures of welcome.
Recipe Variations
- For a cheesy twist that reminds me of my uncle’s famous grilled cheese sandwiches, fold in 1 cup of shredded sharp cheddar or provolone cheese during the final kneading stage, creating pockets of melted goodness throughout each slice – the cheese will brown beautifully against the red tomato specks, making every piece look as festive as our family holiday tables
- Transform this into Mediterranean focaccia by pressing the dough into a oiled baking sheet, dimpling the surface with your fingertips, and sprinkling with coarse sea salt and additional fresh basil before baking at 400°F for 20-25 minutes – this version always takes me back to summer visits with my Italian relatives, where bread was never just bread but an expression of love and tradition
- Create individual rolls perfect for family gatherings by dividing the dough into 12 equal portions, shaping them into rounds, and baking for 20-25 minutes until golden – these smaller portions remind me of how my grandmother would make everyone their own personal roll, believing that food tasted better when it was made with individual care and attention
- For a heartier loaf that could stand up to my father’s thick stews, replace 1 cup of bread flour with whole wheat flour and add ¼ cup of toasted pine nuts during the folding stage – the nutty complexity pairs beautifully with the sweet tomatoes and adds a satisfying crunch that echoes through family dinners like laughter around the table
- Make this bread gluten-free by using a high-quality gluten-free flour blend and adding 1 teaspoon of xanthan gum, though the texture will be more cake-like – this adaptation reminds me of how cooking evolves with family needs, just like when we adjusted recipes for my cousin with celiac disease, proving that love adapts while tradition endures
Frequently Asked Questions
Can I use active dry yeast instead of instant yeast?
Yes, you can substitute active dry yeast for instant yeast, but you’ll need to activate it first by dissolving it in the warm water with the sugar and letting it sit for 5-10 minutes until foamy. This extra step always reminds me of my grandmother’s meticulous approach to baking – she believed that taking your time with the fundamentals created better results and more meaningful cooking experiences. The conversion is equal measurement, so use 2 teaspoons of active dry yeast, but remember that the rising times might be slightly longer since instant yeast works more quickly. This small adjustment in process connects us to generations of bakers who worked with what they had, adapting techniques while preserving the heart of family recipes.
Why did my bread turn out dense instead of light and airy?
Dense bread usually results from over-proofing, under-proofing, or using too much flour during kneading. If the dough over-proofs, the gluten structure collapses, while under-proofing doesn’t allow enough gas bubbles to form – finding that perfect balance reminds me of learning to ride a bike with my father’s steadying hand, that delicate point between wobbling and flying. Make sure you’re measuring flour correctly by spooning it into cups rather than scooping, and watch for visual cues rather than strict timing – the dough should nearly double in size and spring back slowly when gently poked. This attention to detail connects us to the intuitive cooking of our ancestors, who baked by feel and experience rather than rigid recipes.
Can I make this dough ahead and refrigerate it?
Absolutely – this dough actually develops more complex flavors with a slow, cold fermentation. After the first rise, punch down the dough, place it in a greased bowl, cover tightly with plastic wrap, and refrigerate for up to 24 hours. When ready to bake, let it come to room temperature for about 2 hours before shaping and proceeding with the second rise – this flexible timing always reminds me of my mother’s ability to coordinate family meals around everyone’s busy schedules, making tradition adaptable without losing its essence. The extended cold rise creates deeper flavor notes that echo through each slice like cherished family stories retold across generations.
How do I know when the bread is fully baked?
The most reliable method is using an instant-read thermometer – the internal temperature should reach 190°F to 200°F in the center of the loaf. The crust should be deep golden brown and sound hollow when tapped on the bottom, much like the satisfying thump of my grandmother’s rolling pin on her well-worn bread board. If the top browns too quickly while baking, tent it loosely with aluminum foil during the last 15 minutes – this careful monitoring reminds me of watching over younger cousins during family gatherings, making small adjustments to ensure everything turns out perfectly. Letting the bread cool completely before slicing allows the crumb to set properly, though I understand the temptation to taste while warm, just like we could never resist my aunt’s fresh-from-the-oven creations.
Summary
This tomato basil bread carries the warmth of family kitchens and the comfort of shared meals, blending sun-drenched tomato sweetness with fresh herbal notes in every nostalgic slice. More than just a recipe, it’s an edible memory of generations gathered around flour-dusted counters, where patience and love transform simple ingredients into lasting traditions.
Tomato Basil Bread
6
servings30
minutes40
minutesIngredients
Instructions
- 1 Combine flour, vital wheat gluten, yeast, and salt in stand mixer bowl. Mix water, olive oil, and sugar separately, then add to dry ingredients. Knead with dough hook for 10 minutes until smooth and elastic.
- 2 Turn dough onto floured surface, press into rectangle, and distribute sun-dried tomatoes and basil. Drizzle with thinned tomato paste and fold to incorporate evenly.
- 3 Place dough in greased bowl, cover, and let rise until doubled, about 1-1½ hours. Gently deflate and shape into loaf, placing in greased 9x5-inch pan.
- 4 Cover and let rise until 1 inch above pan rim, about 45-60 minutes. Preheat oven to 375°F. Brush loaf with egg wash.
- 5 Bake for 35-40 minutes until golden brown and internal temperature reaches 190°F-200°F. Cool completely on wire rack before slicing.


