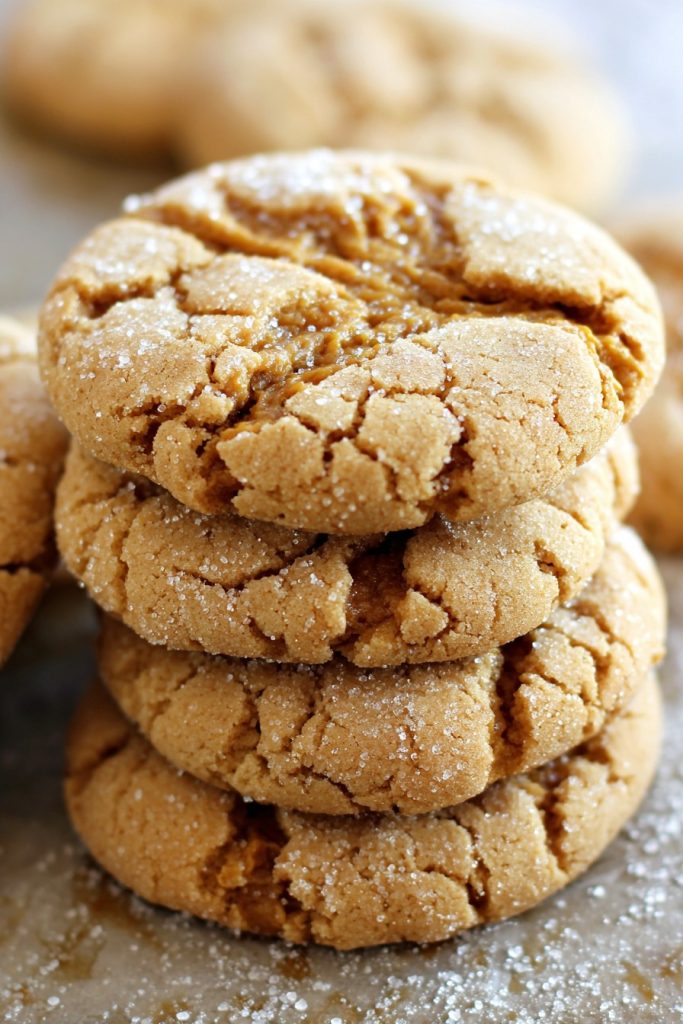
Kissing the edge of winter with warmth, these thick peanut butter cookies cradle the soul in buttery tenderness, each crumb whispering secrets of comfort and connection. Imagine sinking your teeth into pillows of peanut richness that dissolve like sweet promises on the tongue, creating moments where time stands still and hearts beat in rhythm with the oven’s gentle hum.
Why This Recipe Works
- The precise balance of creamy peanut butter to butter creates cookies that spread just enough to develop delicate edges while maintaining a gloriously thick center that melts like velvet against the palate
- Chilling the dough for exactly thirty minutes allows the flavors to marry while firming the fats, ensuring each cookie bakes with structural integrity and bakes to a perfect golden hue
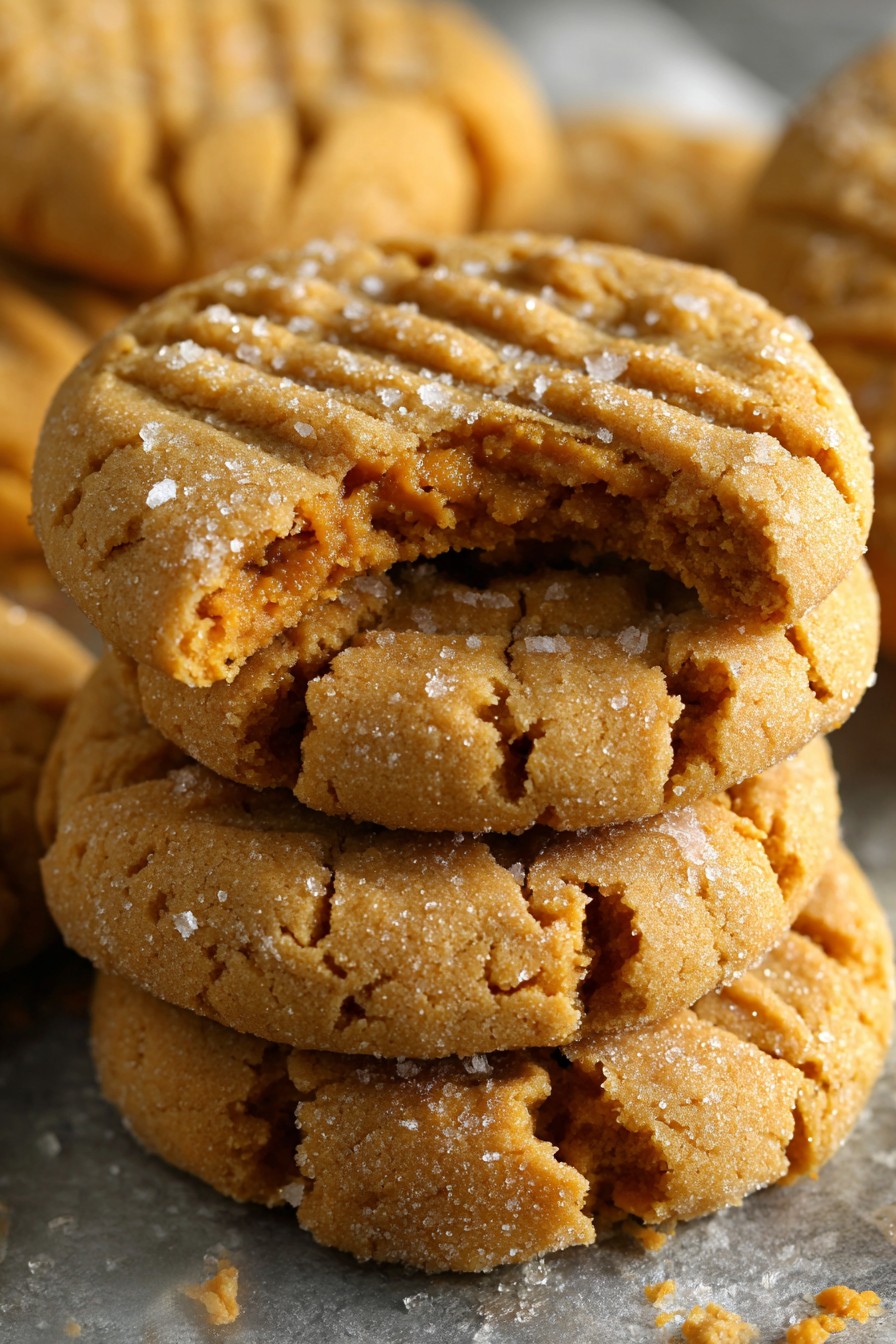
- Using both brown and white sugars creates complexity in sweetness—the molasses notes from brown sugar deepen the flavor profile while granulated sugar provides that delicate crackle on the surface
- The addition of an extra egg yolk enriches the dough with additional fat and emulsifiers, yielding cookies that are simultaneously sturdy and tender, holding their shape while offering that dreamy melt-away texture
- Baking at 350°F for precisely 12-14 minutes achieves the ideal balance—crisp enough on the exterior to provide satisfaction with each bite, yet soft enough within to feel like biting into edible clouds
Ingredients
- 1 cup unsalted butter, softened to room temperature
- 1 cup creamy peanut butter, preferably natural style
- ¾ cup granulated white sugar
- ¾ cup packed light brown sugar
- 2 large eggs plus 1 additional egg yolk, at room temperature
- 2 teaspoons pure vanilla extract
- 2 ¼ cups all-purpose flour, spooned and leveled
- 1 teaspoon baking soda
- ½ teaspoon baking powder
- ½ teaspoon fine sea salt
- Additional granulated sugar for rolling
Equipment Needed
- Stand mixer or electric hand mixer
- Large mixing bowls
- Measuring cups and spoons
- Baking sheets
- Parchment paper or silicone baking mats
- Wire cooling rack
- Cookie scoop or tablespoon measure
- Plastic wrap
Instructions
Creaming the Foundation of Flavor
In the bowl of your stand mixer fitted with the paddle attachment, combine one cup of softened unsalted butter with one cup of creamy peanut butter, beating them together on medium speed until they become one seamless, pale golden mixture—this should take about two minutes of gentle whipping. Add three-quarters cup each of granulated white sugar and packed light brown sugar, continuing to beat for another three minutes until the sugars dissolve into the fats and the texture turns noticeably lighter and fluffier. The transformation here is magical—what begins as separate ingredients becomes a cohesive base that will carry the soul of your cookies. Scrape down the sides of the bowl with a rubber spatula to ensure every bit participates in this alchemy. Tip: When testing if your butter is properly softened, press gently with your finger—it should leave an indentation without sinking through, like touching a lover’s cheek.
Incorporating the Binding Elements
With the mixer on low speed, add two large eggs plus one additional egg yolk, one at a time, allowing each to fully incorporate before adding the next—this patience ensures proper emulsification and prevents the dough from breaking. Pour in two teaspoons of pure vanilla extract, letting its floral notes weave through the rich peanut butter base. The extra egg yolk works wonders here, contributing additional fat and lecithin that will create cookies with exceptional tenderness and that sought-after chewy texture. Continue mixing until the mixture appears smooth and homogeneous, about one minute more. You’ll notice the color lightening slightly and the texture becoming creamier, almost like a luxurious pudding. This stage requires gentle attention—overmixing can incorporate too much air, while undermixing might leave streaks of egg.
Combining the Dry Ingredients
Bringing the Dough Together
With your mixer on the lowest setting, gradually add the dry ingredients to the wet mixture in three additions, mixing just until the flour disappears after each addition. The moment you no longer see white streaks, stop mixing—overworking the dough at this stage develops gluten and can make your cookies tough rather than tender. The finished dough should be soft but not sticky, holding together when pressed between your fingers. If it feels too soft, you can add one additional tablespoon of flour, but do so sparingly. Gather the dough into a ball and wrap it tightly in plastic wrap, pressing it into a disc about one inch thick. This shape will help it chill evenly and make scooping easier later.
Chilling for Perfect Texture
Place the wrapped dough in the refrigerator to chill for exactly thirty minutes—this crucial resting period allows the flour to fully hydrate and the fats to firm up, which is essential for cookies that hold their shape while baking. Meanwhile, preheat your oven to 350°F and line baking sheets with parchment paper or silicone mats. The chilled dough should be firm enough that your finger leaves only a slight impression when pressed gently. If you refrigerate longer than two hours, you may need to let the dough sit at room temperature for ten minutes before scooping. Tip: For exceptionally thick cookies, you can chill the shaped dough balls for an additional fifteen minutes before baking—this extra step prevents excessive spreading.
Shaping and Baking to Perfection
Using a cookie scoop or tablespoon, portion the dough into two-tablespoon-sized balls, rolling each between your palms to create smooth spheres. Roll each ball in additional granulated sugar, creating a delicate crystalline coating that will crackle beautifully during baking. Place the dough balls about two inches apart on your prepared baking sheets, as they will spread slightly. Bake one sheet at a time in the center of your preheated 350°F oven for 12-14 minutes, until the edges are set and lightly golden while the centers still appear slightly soft. The cookies will continue to set as they cool, so resist the temptation to overbake them for that perfect chewy center.
The Final Resting Period
Remove the baking sheets from the oven and let the cookies rest on the hot pan for exactly five minutes—this allows them to finish setting without becoming overbaked. During this time, you’ll notice the centers firming up while maintaining their tender quality. Using a spatula, carefully transfer the cookies to a wire rack to cool completely, about thirty minutes. The waiting is perhaps the most challenging part, as the aroma of warm peanut butter and caramelized sugars fills your kitchen with promises of comfort. These cookies achieve their ideal texture once fully cooled, developing that perfect balance of crisp edge and soft center that makes them utterly irresistible.
Tips and Tricks
For cookies that transcend the ordinary, consider these additional insights gathered from years of baking romance into every batch. When selecting your peanut butter, natural varieties with just peanuts and salt will give you the most authentic peanut flavor, though they may cause slightly more spreading—if using natural peanut butter, consider reducing the butter by two tablespoons. The quality of your vanilla extract matters tremendously here—since peanut butter cookies have relatively few ingredients, each one shines through, so opt for pure vanilla extract rather than imitation for its complex, floral notes that complement the nuttiness. If you find your cookies spreading more than desired, try replacing one-quarter cup of the all-purpose flour with bread flour—the higher protein content provides additional structure without compromising tenderness. For picture-perfect cookies every time, rotate your baking sheet halfway through the baking time to ensure even browning, as most ovens have hot spots that can cause uneven coloring. If baking multiple sheets at once, switch their positions top to bottom and front to back at the midway point. When measuring brown sugar, pack it firmly into the measuring cup—the moisture content in brown sugar contributes significantly to the chewiness of the final product, and under-measuring can result in cookies that are too crisp. For an extra layer of flavor complexity, consider browning your butter before creaming it with the peanut butter—this adds nutty, caramel notes that elevate the entire experience. If you prefer cookies with more pronounced cracking on top, roll the dough balls in granulated sugar twice—the additional sugar creates a thicker crust that fractures beautifully as the cookies expand in the oven. Storage is equally important—these cookies keep beautifully in an airtight container at room temperature for up to five days, or you can freeze the baked cookies for up to three months. The dough itself also freezes wonderfully—portion it into balls before freezing, then bake directly from frozen, adding two to three minutes to the baking time.
Recipe Variations
- Chocolate-Stuffed Wonder: Press a high-quality dark chocolate square into the center of each dough ball before baking, creating a molten core that spills forth with each bite—the bitterness of dark chocolate provides exquisite contrast to the sweet, salty cookie
- Sea Salt Caramel Swirl: Gently fold half a cup of thick caramel sauce into the finished dough, taking care not to overmix, then sprinkle each cookie with flaky sea salt before baking—the result is a sophisticated treat where sweet and salty dance across your palate
- Peanut Butter Cup Delight: Chop eight full-sized peanut butter cups into chunks and fold them into the dough along with half a cup of peanut butter chips—this double peanut butter indulgence creates pockets of creamy richness throughout each cookie
- Espresso-Kissed Elegance: Dissolve two teaspoons of instant espresso powder in the vanilla extract before adding to the dough—the coffee notes deepen the flavor profile without overwhelming, creating a sophisticated cookie perfect for after-dinner indulgence
- Jam-Filled Heart: Use your thumb to create a deep well in each dough ball, fill with one teaspoon of raspberry or strawberry jam, then pinch the dough closed over the filling—the fruity burst provides delightful contrast to the rich peanut butter base
Frequently Asked Questions
Can I use crunchy peanut butter instead of creamy?
Absolutely, though the texture will change in delightful ways. Using crunchy peanut butter will give your cookies additional texture and visible peanut pieces throughout, creating a more rustic appearance and satisfying crunch with each bite. The cookies may spread slightly differently due to the variation in oil content between brands, so keep an eye on your first batch to determine if any adjustments are needed. Many peanut butter enthusiasts actually prefer the added dimension that crunchy peanut butter provides, as it enhances the nutty flavor and gives your teeth something substantial to sink into. If using natural crunchy peanut butter, be sure to stir it thoroughly before measuring to incorporate any separated oils.
Why did my cookies turn out flat instead of thick?
Can I make these cookies without a stand mixer?
Certainly, though the process requires a bit more patience and muscle. Use a large bowl and a sturdy wooden spoon or silicone spatula to cream the butter and peanut butter together—this will take about five minutes of vigorous mixing until light and fluffy. When adding the sugars, continue mixing energetically until well combined and the mixture lightens in color. For incorporating the dry ingredients, switch to a folding motion to avoid overworking the dough. While electric mixers make the process easier, hand-mixing can create a more intimate connection with the dough, allowing you to feel its transformation from separate ingredients into a cohesive whole.
How can I tell when the cookies are perfectly baked?
Look for several visual cues that indicate doneness while preserving that desirable chewiness. The edges should be set and lightly golden brown, while the centers still appear slightly soft and puffed. If you gently press the edge of a cookie, it should offer resistance without feeling firm. The surfaces will have developed those characteristic cracks, and the sugary coating will have crystallized into a delicate crust. Remember that cookies continue to cook on the hot baking sheet after removal from the oven, so what appears slightly underbaked will become perfectly tender after the five-minute resting period. Overbaked cookies will be crisp throughout rather than maintaining that soft center.
Can I freeze the cookie dough for later use?
Freezing the dough is an excellent way to have fresh-baked cookies available whenever the mood strikes. After portioning the dough into balls, arrange them on a parchment-lined baking sheet and freeze until solid, about two hours. Then transfer the frozen dough balls to an airtight container or freezer bag, separating layers with parchment paper. When ready to bake, place the frozen dough balls on prepared baking sheets and bake at 350°F for 14-16 minutes, until golden around the edges. The frozen dough may spread slightly less than fresh, resulting in even thicker cookies—a delightful bonus for those who prefer substantial, bakery-style treats.
Summary
These thick peanut butter cookies embody culinary romance—each tender bite melts like whispered affection, with crisp edges giving way to centers that dissolve into sweet memory. Perfect for sharing with someone special or savoring in quiet moments of self-care, they transform simple ingredients into edible poetry that comforts the soul and delights the senses.
Thick Peanut Butter Cookies
5
servings20
minutes12
minutesIngredients
Instructions
- 1 Cream butter, peanut butter, and sugars until light and fluffy
- 2 Beat in eggs, yolk, and vanilla until combined
- 3 Whisk flour, baking soda, baking powder, and salt in separate bowl
- 4 Gradually mix dry ingredients into wet until just combined
- 5 Chill dough 30 minutes, then preheat oven to 350°F
- 6 Shape dough into balls, roll in sugar, and bake 12-14 minutes
- 7 Cool on pan 5 minutes before transferring to wire rack