Sizzling, savory, and seriously simple—this ground beef taco filling is about to become your kitchen’s MVP. Seriously, this recipe is so good it might just convince your family you’ve secretly been training with Mexican abuelas.
Why This Recipe Works
- The magical trifecta of chili powder, cumin, and paprika creates flavor fireworks that’ll make your taste buds do the cha-cha slide
- Simmering the beef in its own juices with tomato sauce creates a texture so perfect it could win texture pageants
- Using both onion and garlic is like having the dynamic duo of flavor town working overtime in your skillet
- The secret splash of beef broth adds depth that separates the amateurs from the taco professionals
- Proper browning technique ensures every bite has that caramelized goodness that makes you want to write love letters to your dinner
Ingredients
- 1 pound ground beef (80/20 blend for optimal flavor)
- 1 medium yellow onion, finely diced
- 3 cloves garlic, minced
- 2 tablespoons chili powder
- 1 tablespoon ground cumin
- 1 teaspoon smoked paprika
- 1 teaspoon dried oregano
- 1/2 teaspoon black pepper
- 1 teaspoon salt
- 1/4 teaspoon cayenne pepper (optional for heat seekers)
- 1/2 cup tomato sauce
- 1/4 cup beef broth
- 1 tablespoon olive oil
Equipment Needed
- Large skillet or frying pan
- Wooden spoon or spatula
- Cutting board
- Chef’s knife
- Measuring spoons
- Small bowls for spice organization
Instructions
Step 1: The Flavor Foundation
Heat your large skillet over medium-high heat and add that glorious tablespoon of olive oil. While it’s warming up like a sunbather on Miami Beach, grab your onion and dice it into pieces small enough to hide from picky eaters but large enough to maintain their dignity. Toss those onion bits into the skillet and cook for about 4-5 minutes until they turn translucent and start smelling like heaven’s doorstep. This is where the magic begins—the sizzle should sound like gentle applause for your cooking skills. Don’t rush this step! Those onions need time to sweeten up and lose their sharp attitude, transforming from crunchy wallflowers to caramelized dance partners ready to tango with the beef.
Step 2: Beef Meets Heat
Now for the main event—add your ground beef to the party in the skillet. Break it up with your wooden spoon like you’re conducting an orchestra of deliciousness. Cook for 6-8 minutes, stirring occasionally but not obsessively—this isn’t a helicopter parenting situation. You’re looking for that beautiful brown color across all the meat, with no pink spots waving surrender flags. The beef should release some of its fat, creating a flavorful base that’ll make your spices hitch a ride to Flavor Town. Tip: Don’t drain the fat unless there’s an excessive amount—that liquid gold carries flavor that water bottles wish they had!
Step 3: Spice Symphony
Clear a little space in the center of your skillet like you’re making room for the celebrity guests at this flavor party. Add your minced garlic and cook for exactly 60 seconds—set a timer if you must, because burned garlic is the culinary equivalent of a bad haircut. Now sprinkle in all your spices: chili powder, cumin, smoked paprika, oregano, black pepper, salt, and that optional cayenne if you like living dangerously. Stir everything together until the beef is wearing its spice coat like it’s headed to the Met Gala of taco fillings. The aroma at this point should make your neighbors suspiciously jealous.
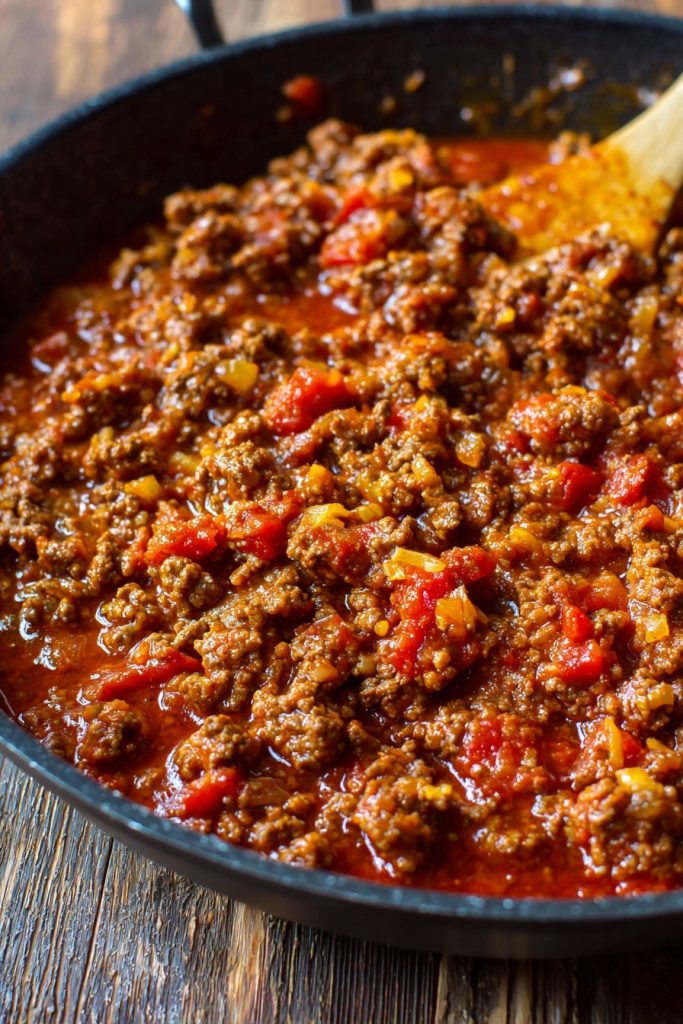
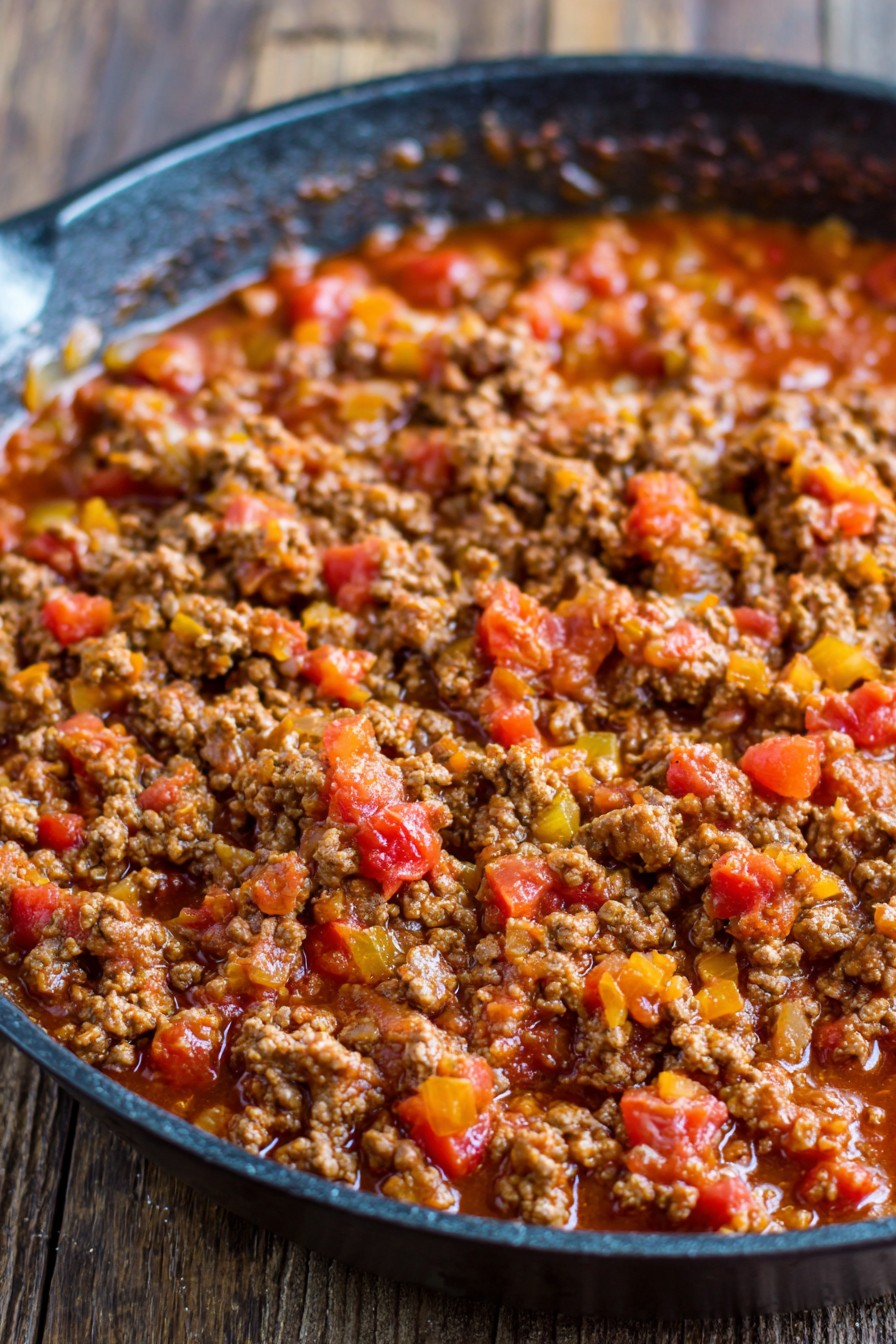
Step 4: Simmer to Perfection
Pour in the tomato sauce and beef broth, then reduce the heat to medium-low. You’ll hear a satisfying sizzle that sounds like the universe approving your choices. Let this mixture simmer uncovered for 10-12 minutes, stirring occasionally like you’re gently rocking a baby to sleep—except this baby tastes amazing wrapped in tortillas. The liquid should reduce by about half, creating a thick, luxurious coating on the beef that clings to tortillas better than your favorite jeans after holiday dinners. Tip: If it looks too dry, add another tablespoon of broth; too wet? Give it another 2-3 minutes of simmer time.
Step 5: The Grand Finale
After your simmering session, do the ultimate test: take a small spoonful and let it cool for a moment before tasting. This is where you become the boss of your taco destiny—need more salt? More heat? This is your chance to play flavor god. Once perfected, remove from heat and let it rest for 3-4 minutes. This allows the flavors to have one last committee meeting before heading to taco paradise. The texture should be moist but not watery, seasoned but not overwhelming, and generally perfect enough to make you consider opening a food truck. Tip: For extra restaurant-quality magic, let it sit covered for 5 minutes off heat—the flavors will marry more beautifully than a royal couple.
Tips and Tricks
If you really want to level up your taco game, consider these pro moves that separate the casual cooks from the taco titans. First, let’s talk meat selection: while 80/20 beef is perfect for flavor, you can use leaner blends if you’re watching fat intake—just add an extra tablespoon of olive oil during cooking to compensate for the missing fat content. The type of chili powder matters more than your choice of streaming service—look for authentic Mexican chili powder rather than the generic stuff, as it typically contains a blend of chilies plus garlic and oregano already mixed in.
For those who like to plan ahead like overachieving squirrels preparing for winter, this taco meat freezes beautifully. Cool it completely, then portion into freezer bags or containers. It’ll maintain its quality for up to 3 months, ready to rescue you from desperate dinner situations. When reheating, add a splash of water or broth to bring back that perfect consistency. Another secret weapon? Toast your spices in a dry pan for 30 seconds before adding them to the beef—this wakes up their essential oils and makes them more fragrant than a perfume counter during holiday shopping.
If you’re cooking for a crowd and need to double or triple the recipe, use the largest skillet you own or work in batches—overcrowding the pan leads to steaming rather than browning, and nobody wants steamed beef that tastes like disappointment. For ultimate flavor development, consider making the meat a day ahead—refrigerate it overnight and reheat gently. The flavors will have mingled and deepened like guests at a really good party who become best friends by morning. Finally, if you’re using this for meal prep, store the meat separately from your tortillas and toppings to prevent sogginess—because nobody likes a limp taco unless it’s literally exhausted from being too delicious.
Recipe Variations
- Tex-Mex Twist: Add a can of drained black beans and corn during the final 5 minutes of cooking for a hearty, budget-friendly extension that stretches your meat further than yoga instructors on retreat
- Creamy Dream: Stir in 4 ounces of cream cheese during the last 2 minutes of cooking for a luxuriously smooth filling that’ll make you question all your previous taco life choices
- Poultry Party: Substitute ground turkey or chicken for the beef, but add an extra tablespoon of olive oil and consider increasing the spices by 25% since poultry can be slightly less flavorful than beef
- Vegetarian Victory: Use plant-based ground meat alternative or cooked lentils, and replace beef broth with vegetable broth—the spices work their magic regardless of protein source
- Heat Seeker Special: Add a diced jalapeño with the onions, increase cayenne to 1/2 teaspoon, and include a teaspoon of chipotle powder for smoke and fire that’ll clear your sinings better than mountain air
Frequently Asked Questions
Can I make this taco meat in advance?
Absolutely! This taco meat actually improves with a little rest time, like a fine wine or your patience after dealing with traffic. You can prepare it up to 3 days in advance and store it in an airtight container in the refrigerator. When ready to serve, reheat gently in a skillet over medium heat with a splash of water or broth to restore the perfect consistency. The flavors will have mingled and deepened during their refrigerator vacation, creating an even more harmonious taste experience. Some swear the second-day tacos are superior—it’s like the ingredients needed time to become best friends before the taco party.
What’s the best way to store leftovers?
Leftover taco meat should be cooled completely within two hours of cooking—no leaving it on the counter overnight unless you enjoy playing gastrointestinal roulette. Transfer it to an airtight container and refrigerate for up to 4 days. For freezing, portion it into freezer-safe bags or containers, removing as much air as possible to prevent freezer burn. Properly stored, it’ll maintain quality for 2-3 months in the freezer. When reheating frozen meat, thaw it in the refrigerator overnight first for best results, then warm it in a skillet with a tablespoon of liquid to bring back that fresh-cooked texture and prevent dryness.
Can I use different types of ground meat?
You can absolutely mix up your meat game! Ground turkey and chicken work beautifully but may require an extra tablespoon of oil since they’re leaner. Ground pork creates a richer, slightly sweeter filling that pairs wonderfully with the spices—just ensure it’s cooked to 160°F internally. For something truly special, try a 50/50 blend of beef and pork—it’s like the power couple of the taco world. Venison or bison can also be used, but their stronger flavors might require adjusting spices upward by about 20%. The key is cooking whatever meat you choose to the proper internal temperature and adjusting fat content as needed.
Why does my taco meat sometimes taste bland?
Bland taco meat is usually the result of three common missteps: insufficient salt, old spices, or inadequate browning. Salt is crucial for making flavors pop—don’t be shy with it! Spices lose their potency over time, so if yours have been in your cabinet since the last presidential administration, it’s time for fresh ones. Proper browning creates hundreds of flavor compounds through the Maillard reaction—that’s science talk for “makes stuff taste amazing.” Ensure your pan is hot enough before adding meat, don’t overcrowd it, and let it develop that beautiful brown crust. Finally, taste and adjust seasoning at the end—your palate is the ultimate judge!
Summary
This ground beef taco recipe transforms simple ingredients into taco perfection through proper technique and balanced spices. With customizable heat levels and endless serving possibilities, it’s guaranteed to become your go-to for Taco Tuesday and every other day ending in Y.
Taco Ground Beef Recipe
4
servings10
minutes25
minutesIngredients
Instructions
- 1 Heat olive oil in large skillet over medium-high heat. Add diced onion and cook 4-5 minutes until translucent.
- 2 Add ground beef, breaking it up with spoon. Cook 6-8 minutes until browned throughout.
- 3 Clear center space, add garlic, cook 60 seconds. Add all spices, stir to coat beef evenly.
- 4 Pour in tomato sauce and beef broth. Reduce heat to medium-low, simmer 10-12 minutes until liquid reduces by half.
- 5 Remove from heat, taste and adjust seasoning. Let rest 3-4 minutes before serving.


