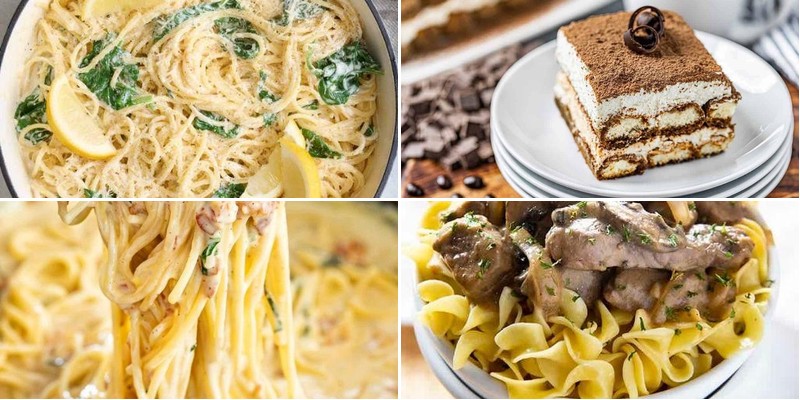
Tired of the same old meals? Get ready to transform your kitchen with these 25 delicious, super yummy recipes perfect for any occasion. From quick weeknight dinners to indulgent comfort food, this collection is packed with crowd-pleasing dishes that will have everyone asking for seconds. Let’s dive in and discover your new favorite recipes!
Hearty Chicken Alfredo Pasta Bake

Hearty chicken Alfredo pasta bake hits that perfect comfort food sweet spot. This creamy, cheesy dish comes together quickly for busy weeknights. Everyone always asks for seconds when I make this family favorite.
6
servings15
minutes39
minutesIngredients
– 1 lb boneless chicken breasts, cut into 1-inch pieces (I prefer fresh over frozen for better texture)
– 12 oz fettuccine pasta (the ridges hold sauce beautifully)
– 2 cups heavy cream (don’t skimp – this creates the rich base)
– 1 cup grated Parmesan cheese (freshly grated melts smoother)
– 4 tbsp unsalted butter (I always use real butter for flavor)
– 3 garlic cloves, minced (fresh garlic makes all the difference)
– 1 tsp salt
– ½ tsp black pepper
– 1 cup shredded mozzarella cheese (for that perfect golden top)
– 2 tbsp chopped fresh parsley (adds bright freshness at the end)
Instructions
1. Preheat your oven to 375°F and grease a 9×13 inch baking dish.
2. Bring a large pot of salted water to a rolling boil.
3. Add fettuccine and cook for 8 minutes until al dente.
4. Drain pasta immediately to prevent overcooking.
5. While pasta cooks, heat a large skillet over medium-high heat.
6. Add chicken pieces in a single layer and cook for 6 minutes until golden brown.
7. Flip chicken and cook another 4 minutes until internal temperature reaches 165°F.
8. Remove chicken from skillet and set aside.
9. Reduce heat to medium and melt butter in the same skillet.
10. Add minced garlic and cook for 1 minute until fragrant but not browned.
11. Pour in heavy cream and bring to a gentle simmer.
12. Whisk in Parmesan cheese until sauce is smooth and thickened.
13. Season sauce with salt and pepper.
14. Combine cooked pasta, chicken, and Alfredo sauce in the prepared baking dish.
15. Top evenly with shredded mozzarella cheese.
16. Bake for 20 minutes until cheese is bubbly and lightly browned.
17. Remove from oven and let rest for 5 minutes before serving.
18. Sprinkle with fresh parsley just before serving.
Keep this bake in mind for potlucks – it travels beautifully and feeds a crowd. The creamy sauce clings perfectly to every noodle while the baked cheese topping adds wonderful texture contrast. I love serving it with a simple green salad to balance the richness.
Mouth-watering Beef Stroganoff
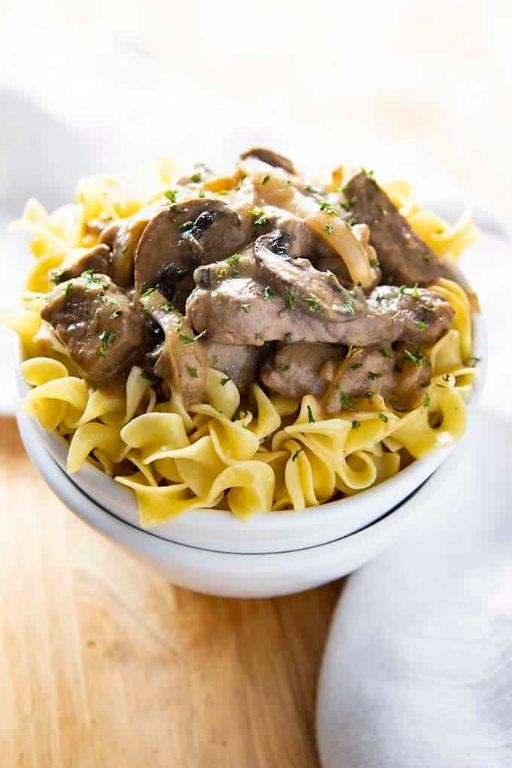
Zesty and comforting, this beef stroganoff delivers rich flavor with minimal fuss. Tender strips of beef mingle with mushrooms in a creamy sauce that coats every noodle perfectly. You’ll want seconds before you finish your first bowl.
3
servings15
minutes25
minutesIngredients
- 1 lb sirloin steak, sliced thin against the grain—this makes all the difference for tenderness
- 8 oz wide egg noodles, my favorite for holding that creamy sauce
- 1 yellow onion, diced small for even cooking
- 8 oz cremini mushrooms, sliced—I find they have more flavor than white buttons
- 2 cloves garlic, minced fine to distribute evenly
- 2 tbsp all-purpose flour for thickening the sauce just right
- 1 cup beef broth, preferably low-sodium to control saltiness
- 1/2 cup sour cream, full-fat for the creamiest results
- 2 tbsp unsalted butter, divided for cooking stages
- 1 tbsp olive oil for searing the beef
- 1 tsp paprika, sweet Hungarian style if you have it
- 1/2 tsp Dijon mustard for a subtle tang
- Fresh parsley, chopped for garnish—don’t skip this bright finish
Instructions
- Bring a large pot of salted water to a rolling boil over high heat.
- Add egg noodles and cook for 8 minutes exactly, stirring occasionally to prevent sticking.
- Drain noodles thoroughly and return to the pot off heat.
- Heat olive oil in a large skillet over medium-high heat until shimmering.
- Season sliced sirloin generously with salt and pepper on all sides.
- Sear beef in a single layer for 2 minutes per side until browned but not cooked through.
- Transfer beef to a clean plate, reserving any juices in the skillet.
- Melt 1 tablespoon butter in the same skillet over medium heat.
- Add diced onion and cook for 4 minutes until translucent and softened.
- Add sliced mushrooms and cook for 6 minutes until browned and moisture has evaporated.
- Stir in minced garlic and cook for 1 minute until fragrant.
- Sprinkle flour over the mushroom mixture and cook for 1 minute while stirring constantly.
- Gradually pour in beef broth while scraping up any browned bits from the skillet bottom.
- Add paprika and Dijon mustard, then simmer for 3 minutes until slightly thickened.
- Reduce heat to low and stir in sour cream until fully incorporated.
- Return beef and any accumulated juices to the skillet, simmering for 2 minutes to heat through.
- Stir remaining 1 tablespoon butter into the cooked noodles until coated.
- Divide noodles among bowls and top generously with beef stroganoff sauce.
- Garnish with fresh chopped parsley before serving immediately.
This stroganoff achieves perfect balance with tender beef, earthy mushrooms, and silky sauce clinging to each noodle. The creamy texture contrasts beautifully with the slight chew of properly cooked pasta. Try serving over mashed potatoes for a comforting twist, or with crusty bread to soak up every last bit of sauce.
Savory Garlic Butter Shrimp
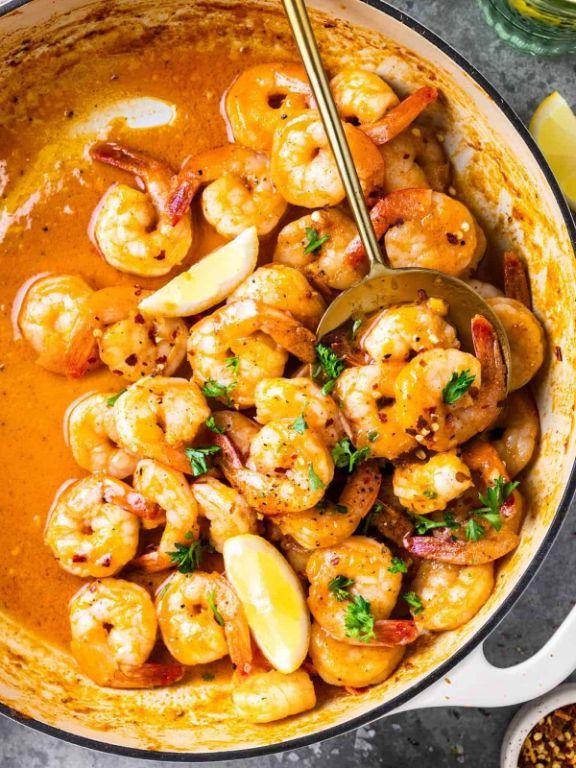
Perfect for busy weeknights, this garlic butter shrimp comes together in under 15 minutes. Packed with bold flavor and requiring minimal cleanup, it’s my go-to when I want something impressive without the effort. Pair it with pasta, rice, or crusty bread to soak up every last drop of that delicious sauce.
2
servings5
minutes8
minutesIngredients
- 1 lb large raw shrimp, peeled and deveined (I keep the tails on for presentation)
- 4 tbsp unsalted butter (salted works too, just adjust seasoning)
- 4 cloves garlic, minced (fresh is key—don’t use jarred!)
- 1/4 cup dry white wine like Sauvignon Blanc (optional but adds great acidity)
- 2 tbsp fresh lemon juice (about half a lemon)
- 1/4 tsp red pepper flakes (adjust for your heat preference)
- 2 tbsp chopped fresh parsley (flat-leaf holds up better than curly)
- Salt and black pepper to season
Instructions
- Pat shrimp completely dry with paper towels—this ensures a good sear instead of steaming.
- Season shrimp evenly with 1/2 tsp salt and 1/4 tsp black pepper.
- Heat a large skillet over medium-high heat for 2 minutes until hot.
- Add 2 tbsp butter and swirl to coat the pan.
- Arrange shrimp in a single layer and cook for 2 minutes without moving them.
- Flip each shrimp and cook for 1 more minute until opaque and lightly browned.
- Transfer shrimp to a plate—they’ll finish cooking later.
- Reduce heat to medium and add remaining 2 tbsp butter to the same skillet.
- Add minced garlic and red pepper flakes, sauté for 45 seconds until fragrant but not browned.
- Pour in white wine and lemon juice, scraping up any browned bits from the pan bottom.
- Simmer sauce for 2 minutes until slightly reduced.
- Return shrimp to skillet and toss to coat in sauce.
- Remove from heat and stir in chopped parsley.
Velvety shrimp soak up the rich, garlicky butter sauce with just enough heat from the pepper flakes. Serve immediately over angel hair pasta or with crusty bread for dipping—the sauce is too good to waste. Leftovers make a fantastic filling for next-day tacos or salad topping.
Flavorful Thai Red Curry

Zesty and aromatic, this Thai red curry delivers bold flavors in under 30 minutes. I love how the coconut milk creates a creamy base that balances the spice. Perfect for busy weeknights when you crave something restaurant-quality.
2
servings10
minutes15
minutesIngredients
– 1 tbsp vegetable oil (my go-to for high-heat cooking)
– 1 tbsp red curry paste (I prefer Mae Ploy brand for authentic flavor)
– 1 (13.5 oz) can coconut milk (full-fat gives the creamiest texture)
– 1 lb boneless chicken thighs, cut into 1-inch pieces (thighs stay juicier than breast)
– 1 red bell pepper, sliced into thin strips
– 1 tbsp fish sauce (essential for that umami depth)
– 1 tsp brown sugar
– ¼ cup fresh basil leaves (Thai basil if you can find it)
Instructions
1. Heat vegetable oil in a large skillet over medium-high heat until shimmering.
2. Add red curry paste and cook for 1 minute, stirring constantly until fragrant.
3. Pour in coconut milk and whisk vigorously to combine with the curry paste.
4. Add chicken pieces and simmer for 8 minutes, stirring occasionally.
5. Tip: Don’t boil vigorously—gentle simmering keeps the coconut milk from separating.
6. Stir in bell pepper strips and cook for 4 minutes until slightly softened.
7. Add fish sauce and brown sugar, stirring to dissolve completely.
8. Tip: Taste now and adjust seasoning—the curry should balance spicy, salty, and sweet.
9. Remove from heat and stir in fresh basil leaves until just wilted.
10. Tip: Let curry rest for 2 minutes off heat—this allows flavors to meld beautifully.
Glossy and aromatic, this curry coats each ingredient in a vibrant sauce. The tender chicken contrasts with crisp-tender peppers, while basil adds fresh herbal notes. Serve over jasmine rice or with crusty bread to soak up every last drop.
Rich and Creamy Carbonara
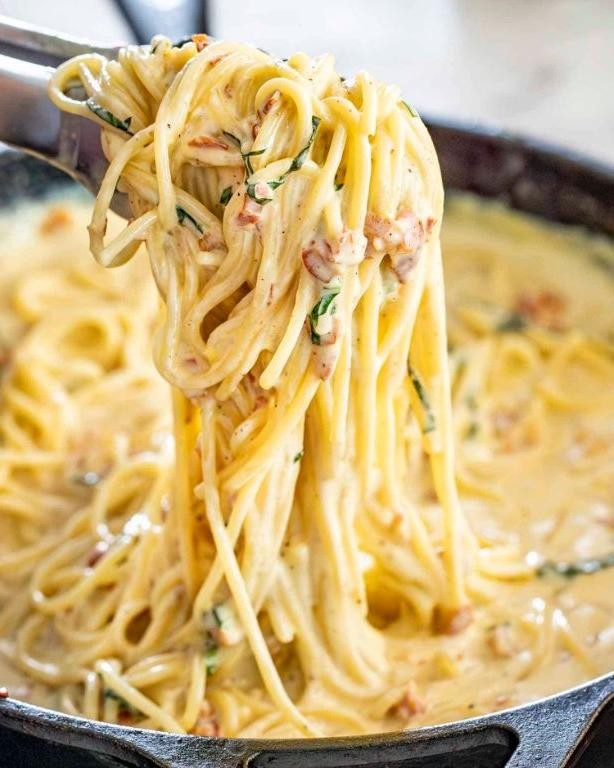
You’ve probably had carbonara before, but this version takes it to another level of creamy indulgence. Forget the heavy cream—this authentic approach relies on eggs and cheese for that signature silkiness. Let’s make the richest, most satisfying carbonara you’ll ever taste.
4
servings10
minutes15
minutesIngredients
– 8 oz spaghetti (I always use bronze-die cut for better sauce adhesion)
– 4 large eggs, room temperature (this prevents curdling when mixing with hot pasta)
– 1 cup freshly grated Pecorino Romano (the sharper the better for authentic flavor)
– 6 oz thick-cut pancetta, diced (bacon works but pancetta gives superior texture)
– 3 cloves garlic, smashed (just for flavor infusion, we’ll remove them later)
– 1 tsp freshly cracked black pepper (don’t skimp—this adds essential heat)
– 1/2 tsp kosher salt (adjust based on your pancetta’s saltiness)
Instructions
1. Bring 4 quarts of water to a rolling boil in a large pot.
2. Add 2 tablespoons of salt to the boiling water—it should taste like seawater.
3. Cook spaghetti according to package directions minus 1 minute for al dente texture.
4. Meanwhile, whisk eggs, grated Pecorino Romano, and black pepper in a medium bowl until fully combined.
5. Cook diced pancetta in a large skillet over medium heat for 8-10 minutes until crispy and fat renders.
6. Add smashed garlic cloves to the pancetta and cook for 2 minutes until fragrant.
7. Remove garlic cloves from the skillet and discard them.
8. Reserve 1 cup of starchy pasta water before draining the spaghetti.
9. Transfer hot spaghetti directly into the skillet with pancetta and rendered fat.
10. Remove skillet from heat to prevent eggs from scrambling in the next step.
11. Quickly pour egg and cheese mixture over the hot pasta, tossing continuously with tongs.
12. Add 1/4 cup of reserved pasta water to create a creamy, emulsified sauce.
13. Continue tossing for 1-2 minutes until sauce thickens and coats every strand.
14. Add more pasta water if needed until sauce reaches your desired consistency.
15. Taste and adjust seasoning with additional salt only if necessary.
Keep tossing off heat until the sauce becomes luxuriously thick and glossy. The residual heat cooks the eggs perfectly without curdling. Serve immediately while it’s piping hot—carbonara waits for no one.
Juicy Herb-infused Grilled Steak
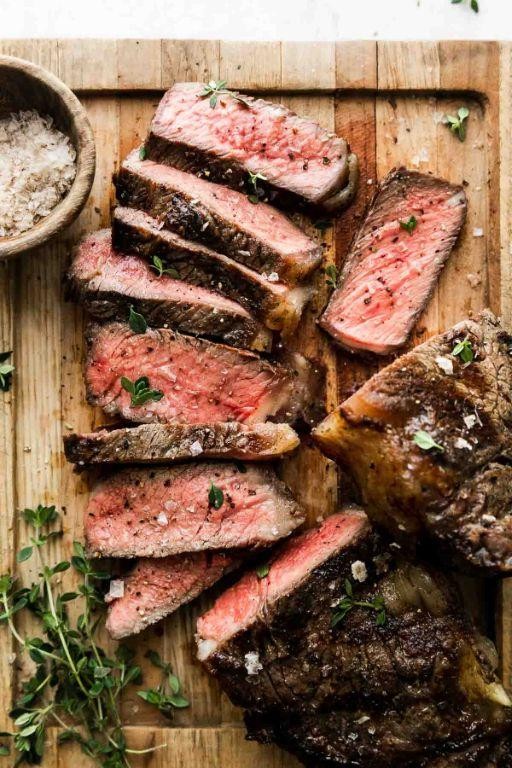
Tender, herb-kissed steak straight from the grill delivers pure satisfaction without the fuss. This method ensures deep flavor penetration and perfect doneness every time. Fire up your grill—it’s time to eat well.
2
steaks15
minutes20
minutesIngredients
– 2 thick-cut ribeye steaks (1.5 inches thick for optimal juiciness)
– 3 tbsp extra virgin olive oil, my go-to for rich flavor
– 4 garlic cloves, finely minced (fresh only—jarred lacks punch)
– 2 tbsp fresh rosemary, chopped (I prefer the woody aroma over dried)
– 1 tbsp fresh thyme leaves, stripped from stems
– 1 tsp coarse kosher salt, for better crust formation
– ½ tsp freshly cracked black pepper, to taste but measured for balance
– 1 lemon, halved (for a bright finish right off the grill)
Instructions
1. Pat steaks dry with paper towels to ensure a crisp sear.
2. Rub steaks evenly with olive oil on all surfaces.
3. Combine garlic, rosemary, thyme, salt, and pepper in a small bowl.
4. Press herb mixture firmly onto both sides of each steak.
5. Let steaks rest at room temperature for 30 minutes to cook evenly.
6. Preheat grill to high heat, aiming for 450°F.
7. Place steaks on the hottest part of the grill.
8. Sear for 4 minutes without moving to develop a crust.
9. Flip steaks using tongs to avoid piercing the meat.
10. Sear the second side for another 4 minutes.
11. Move steaks to a cooler zone of the grill, around 350°F.
12. Continue grilling for 6–8 minutes for medium-rare (135°F internal temperature).
13. Check doneness with an instant-read thermometer inserted horizontally.
14. Squeeze lemon halves over steaks while still on the grill.
15. Transfer steaks to a cutting board and let rest for 5 minutes.
16. Slice against the grain for maximum tenderness.
With a crisp herb crust giving way to rosy, juicy interior, this steak stands alone or elevates grain bowls. The garlic and rosemary meld into a savory perfume that lingers. Try slicing over arugula with shaved Parmesan for a quick, impressive salad.
Crispy Honey Garlic Chicken Wings

These wings deliver that perfect sweet-savory crunch everyone craves. They’re surprisingly simple to make at home with just a few pantry staples. Trust me, these will disappear faster than you can say “more please.”
5
servings15
minutes58
minutesIngredients
- 2 lbs chicken wings, separated into flats and drumettes – I always pat them super dry for maximum crispiness
- 1/2 cup cornstarch – this creates that incredible light, crispy coating
- 1 tsp kosher salt – I prefer the larger flakes for better seasoning distribution
- 1/2 tsp black pepper, freshly ground – it makes a noticeable difference
- 1/4 cup honey – use good quality for the best flavor
- 3 tbsp soy sauce – my go-to for that umami punch
- 4 garlic cloves, minced – fresh only, the powdered stuff won’t cut it here
- 1 tbsp rice vinegar – this little splash balances the sweetness perfectly
- 1 tsp sesame oil – just enough for that nutty aroma
- 2 tbsp vegetable oil – for that high-heat sear we need
- 1 tbsp sesame seeds – for that final visual pop
- 2 green onions, thinly sliced – my favorite fresh finish
Instructions
- Preheat your oven to 400°F and line a baking sheet with parchment paper.
- Pat chicken wings completely dry with paper towels – this is crucial for crispy skin.
- In a large bowl, toss wings with cornstarch, salt, and pepper until evenly coated.
- Arrange wings in a single layer on the prepared baking sheet, making sure they don’t touch.
- Bake for 45-50 minutes, flipping halfway through, until golden brown and crispy.
- While wings bake, combine honey, soy sauce, minced garlic, rice vinegar, and sesame oil in a small saucepan.
- Simmer the sauce over medium heat for 3-4 minutes until slightly thickened, stirring constantly.
- Heat vegetable oil in a large skillet over medium-high heat until shimmering.
- Transfer baked wings to the hot skillet and cook for 1 minute per side to crisp further.
- Pour the prepared sauce over the wings in the skillet, tossing to coat evenly.
- Cook for another 1-2 minutes, tossing frequently, until the sauce glazes the wings beautifully.
- Transfer wings to a serving platter and immediately sprinkle with sesame seeds and green onions.
Velvety garlic glaze clings to each crackly wing, creating that irresistible sticky-sweet coating. The contrast between the crispy exterior and tender meat underneath is pure magic. Serve these straight from the skillet with plenty of napkins – they’re meant to be messy.
Zesty Lemon Herb Ricotta Pasta
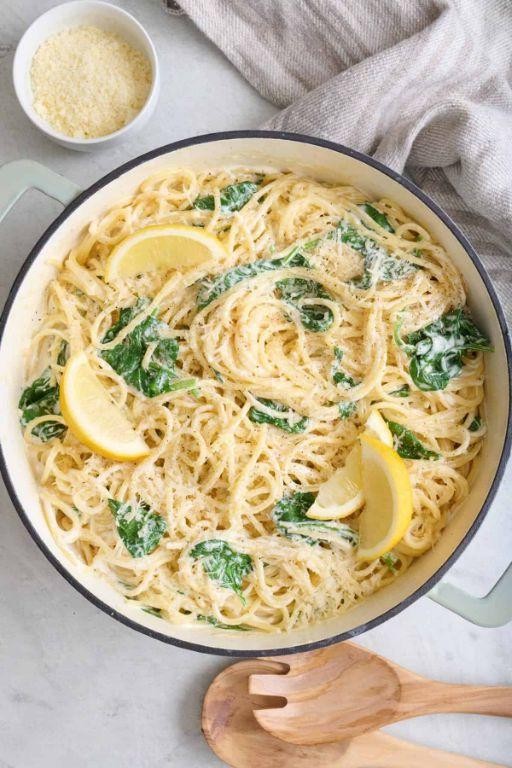
Pasta nights just got a major upgrade with this bright, creamy ricotta situation. Perfect for when you want something impressive but don’t have hours to spend in the kitchen. This lemon herb version comes together in about the time it takes to boil water.
2
servings15
minutes10
minutesIngredients
– 1 lb dried pasta (I always use linguine for this—it holds the sauce beautifully)
– 1 cup whole milk ricotta cheese (let it sit out for 15 minutes to take the chill off)
– 2 large lemons (zest them first before juicing—trust me on this)
– 3 cloves garlic (freshly minced makes all the difference)
– 1/4 cup extra virgin olive oil (my go-to for its fruity notes)
– 1/4 cup fresh parsley (flat-leaf holds up better than curly)
– 2 tbsp fresh basil (tear it by hand to prevent bruising)
– 1 tsp red pepper flakes (adjust based on your heat preference)
– 1/2 cup reserved pasta water (this is the secret to silky sauce)
– Salt for pasta water (make it as salty as the sea)
Instructions
1. Fill a large pot with 4 quarts of water and bring to a rolling boil over high heat.
2. Add 2 tablespoons of salt to the boiling water—it should taste like seawater.
3. Add pasta and cook for 8-10 minutes until al dente (check package directions).
4. While pasta cooks, zest both lemons directly into a large mixing bowl.
5. Juice the zested lemons until you have 1/4 cup fresh lemon juice.
6. Mince 3 garlic cloves finely—this ensures even distribution in the sauce.
7. Chop 1/4 cup fresh parsley and tear 2 tablespoons basil by hand.
8. Add ricotta, olive oil, lemon juice, garlic, and herbs to the mixing bowl.
9. Whisk vigorously until the mixture becomes smooth and creamy.
10. Reserve 1/2 cup of starchy pasta water just before draining.
11. Drain pasta immediately when done—don’t rinse it.
12. Add hot pasta directly to the ricotta mixture in the bowl.
13. Pour in 1/4 cup of reserved pasta water and toss quickly.
14. Continue tossing while adding remaining pasta water until sauce coats every strand.
15. Stir in red pepper flakes and season with additional salt if needed.
Not overly heavy but satisfyingly creamy, this pasta delivers bright citrus notes balanced by rich cheese. The fresh herbs provide garden-fresh bursts that cut through the richness beautifully. Serve it immediately with extra lemon wedges for squeezing over the top—it’s also fantastic cold the next day straight from the fridge.
Indulgent Chocolate Lava Cake

Oozing with molten chocolate, these individual cakes deliver restaurant-quality decadence in under 30 minutes. Perfect for impressing guests or treating yourself after a long day. The crackly exterior gives way to a warm, flowing center every time.
3
portions15
minutes12
minutesIngredients
– ½ cup unsalted butter (plus extra for greasing—I always use cold butter straight from the fridge for easier handling)
– 4 oz high-quality semisweet chocolate bars, chopped (splurge on the good stuff—it makes all the difference)
– 2 large eggs, room temperature (they incorporate better into the batter when not cold)
– ¼ cup granulated sugar
– 2 tbsp all-purpose flour
– ¼ tsp fine sea salt (I prefer this over table salt for more even distribution)
– Butter and cocoa powder for dusting ramekins
Instructions
1. Preheat your oven to 425°F.
2. Generously butter four 6-oz ramekins using cold butter.
3. Dust each buttered ramekin with cocoa powder, tapping out any excess.
4. Combine ½ cup butter and chopped chocolate in a microwave-safe bowl.
5. Microwave in 30-second intervals, stirring between each, until completely smooth.
6. Let the chocolate mixture cool for 5 minutes—this prevents cooking the eggs.
7. Whisk 2 eggs and ¼ cup sugar in a separate bowl until pale and slightly thickened, about 2 minutes.
8. Slowly pour the cooled chocolate mixture into the egg mixture while whisking constantly.
9. Sift 2 tbsp flour and ¼ tsp salt directly into the batter.
10. Fold gently until just combined—don’t overmix.
11. Divide the batter evenly among the prepared ramekins.
12. Bake for 12 minutes exactly—the edges will be set but centers still jiggly.
13. Remove from oven and let rest for 1 minute.
14. Run a knife around each ramekin’s edge to loosen the cakes.
15. Invert each ramekin onto a serving plate.
16. Carefully lift the ramekin to reveal the cake.
Velvety and rich, the liquid center contrasts beautifully with the delicate cake shell. Serve immediately with vanilla ice cream melting into the warm chocolate pool. For extra flair, dust with powdered sugar or add fresh berries to cut through the sweetness.
Refreshing Caprese Salad with Balsamic Glaze
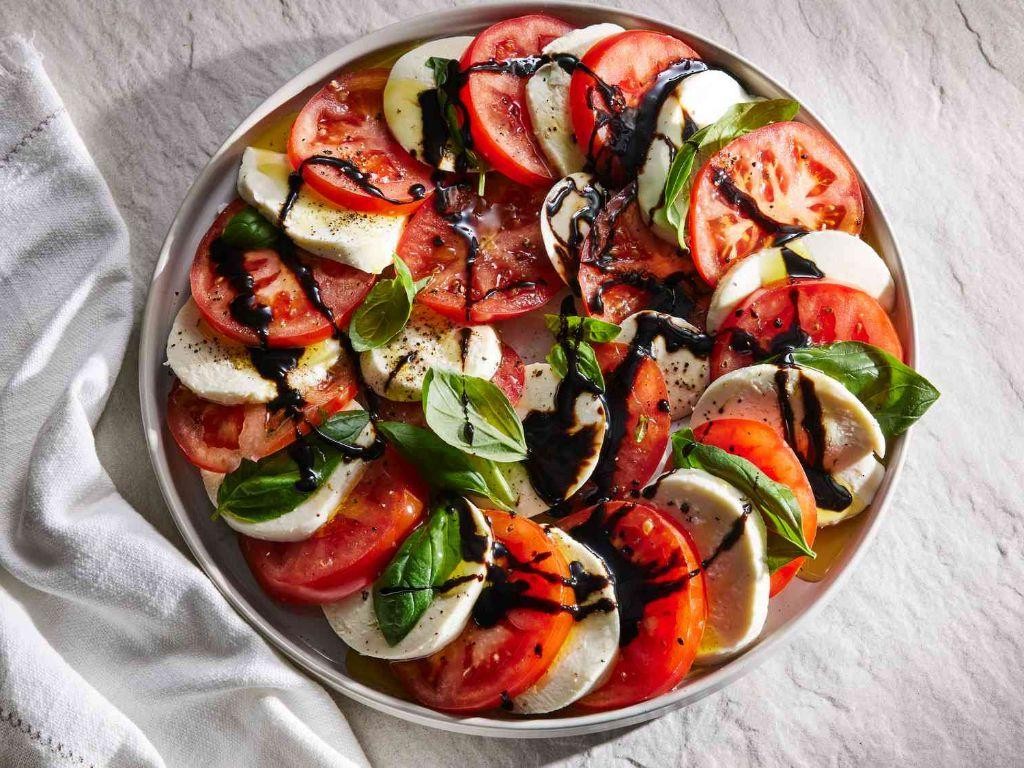
Unbelievably simple yet sophisticated, this Caprese salad comes together in minutes. Using peak-season tomatoes and fresh basil makes all the difference. It’s my go-to summer dish when I want something impressive but effortless.
5
servings15
minutesIngredients
– 2 large ripe heirloom tomatoes (I look for ones that feel heavy for their size)
– 8 ounces fresh mozzarella cheese (the kind packed in water gives the best texture)
– 1/4 cup fresh basil leaves (torn by hand to prevent bruising)
– 2 tablespoons extra virgin olive oil (my favorite California olive oil adds fruity notes)
– 1 tablespoon balsamic glaze (the thick, syrupy kind that coats the back of a spoon)
– 1/2 teaspoon flaky sea salt (Maldon salt provides the perfect crunch)
– 1/4 teaspoon freshly cracked black pepper (I grind it coarse for better flavor)
Instructions
1. Slice 2 large heirloom tomatoes into 1/4-inch thick rounds using a sharp serrated knife.
2. Drain 8 ounces fresh mozzarella and slice into 1/4-inch thick rounds matching the tomato size.
3. Arrange tomato and mozzarella slices alternately on a serving platter in a circular pattern.
4. Tuck 1/4 cup fresh basil leaves between the tomato and mozzarella slices throughout the arrangement.
5. Drizzle 2 tablespoons extra virgin olive oil evenly over the entire salad.
6. Drizzle 1 tablespoon balsamic glaze in a zigzag pattern across the arranged ingredients.
7. Sprinkle 1/2 teaspoon flaky sea salt uniformly over the salad.
8. Crack 1/4 teaspoon black pepper directly over the finished arrangement.
9. Let the assembled salad rest at room temperature for 5 minutes before serving.
Serve immediately while the tomatoes are still firm and the mozzarella is cool. The creamy cheese against the juicy tomatoes creates perfect textural contrast. For a stunning presentation, layer it on a wooden board and garnish with whole basil sprigs.
Warm and Spiced Pumpkin Soup

Savor the cozy embrace of autumn with this velvety pumpkin soup. Spices like cinnamon and nutmeg create warmth that lingers. It’s the perfect bowl for crisp fall evenings.
5
servings15
minutes32
minutesIngredients
– 2 tbsp extra virgin olive oil (my go-to for richer flavor)
– 1 medium yellow onion, diced (I prefer sweet onions for balance)
– 2 cloves garlic, minced (freshly crushed releases more aroma)
– 4 cups pumpkin puree (homemade or canned both work well)
– 4 cups vegetable broth (low-sodium lets spices shine)
– 1 tsp ground cinnamon
– 1/2 tsp ground nutmeg
– 1/2 tsp ground ginger
– 1 cup heavy cream (room temperature blends smoother)
– Salt to taste (I start with 1/2 tsp and adjust)
Instructions
1. Heat olive oil in a large pot over medium heat until it shimmers.
2. Add diced onion and cook for 5 minutes until translucent, stirring occasionally.
3. Stir in minced garlic and cook for 1 minute until fragrant.
4. Add pumpkin puree and cook for 3 minutes, stirring constantly to deepen the flavor.
5. Pour in vegetable broth, scraping any browned bits from the pot bottom.
6. Whisk in cinnamon, nutmeg, and ginger until fully incorporated.
7. Bring soup to a boil, then reduce heat to low and simmer uncovered for 20 minutes.
8. Carefully blend soup with an immersion blender until completely smooth.
9. Stir in heavy cream until fully combined.
10. Season with salt, starting with 1/2 tsp and adding more if needed.
11. Heat soup for 3 more minutes until steaming hot.
Enjoy this soup’s silky texture that coats your spoon perfectly. The cinnamon and nutmeg create warm spice notes without overwhelming the pumpkin. For a creative twist, top with toasted pumpkin seeds or a drizzle of maple syrup.
Decadent Tiramisu Dessert

Satisfy your sweet tooth with this classic Italian dessert that’s surprisingly simple to make at home. Rich espresso-soaked ladyfingers layered with creamy mascarpone create the perfect balance of bitter and sweet. This no-bake treat comes together in under 30 minutes of active time.
9
portions30
minutesIngredients
– 1 cup strong brewed espresso, cooled to room temperature (I make mine extra strong for that authentic coffee kick)
– 24 ladyfinger cookies (the crisp Savoiardi type work best for proper absorption)
– 16 oz mascarpone cheese, at room temperature (cold mascarpone won’t whip properly)
– 3 large eggs, separated and at room temperature (room temp whites whip up much higher)
– 1/2 cup granulated sugar, divided
– 2 tbsp dark rum (optional but highly recommended for depth)
– 1 tbsp unsweetened cocoa powder for dusting
– 1/4 cup heavy cream (my secret for extra creamy texture)
Instructions
1. Brew 1 cup of strong espresso and let it cool completely to room temperature.
2. Separate 3 eggs, placing whites in a clean, dry bowl and yolks in a separate large bowl.
3. Add 1/4 cup sugar to the egg yolks and whisk vigorously until pale yellow and thickened, about 3 minutes.
4. Beat the mascarpone into the yolk mixture until smooth and fully incorporated.
5. Whip the heavy cream in a separate bowl until soft peaks form, about 2 minutes.
6. Fold the whipped cream gently into the mascarpone mixture until no white streaks remain.
7. Using a clean whisk, beat the egg whites until foamy, about 1 minute.
8. Gradually add the remaining 1/4 cup sugar while beating until stiff peaks form, about 3-4 minutes.
9. Gently fold the beaten egg whites into the mascarpone mixture in three additions.
10. Stir the rum into the cooled espresso if using.
11. Quickly dip each ladyfinger into the espresso mixture for 2 seconds per side.
12. Arrange a single layer of soaked ladyfingers in the bottom of an 8×8 inch dish.
13. Spread half of the mascarpone mixture evenly over the ladyfinger layer.
14. Repeat with another layer of dipped ladyfingers and remaining mascarpone mixture.
15. Sift cocoa powder evenly over the top layer using a fine mesh strainer.
16. Cover with plastic wrap and refrigerate for at least 6 hours, preferably overnight.
Ultimate indulgence awaits after the chilling period when the flavors fully meld together. The ladyfingers transform from crisp to cake-like while absorbing all the coffee goodness. Serve chilled in elegant glasses or rustic squares – either way, the creamy texture and bold coffee flavor will transport you straight to an Italian café.
Tangy Barbecue Pulled Pork Sliders
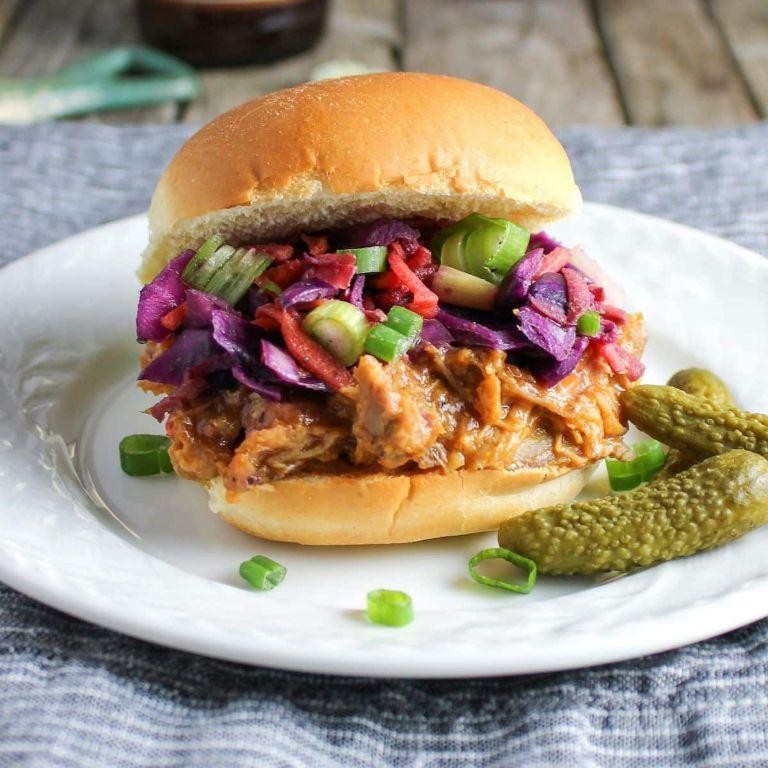
Unbelievably tender pulled pork meets tangy barbecue sauce in these crowd-pleasing sliders. Using a slow cooker makes this recipe incredibly simple while delivering maximum flavor. Perfect for game day or casual gatherings.
12
sandwiches15
minutes510
minutesIngredients
– 3 lbs pork shoulder roast (I always trim excess fat but leave some for flavor)
– 1 cup ketchup (use your favorite brand – I find Heinz gives the best consistency)
– 1/2 cup apple cider vinegar (this adds the perfect tangy kick)
– 1/4 cup brown sugar, packed (dark brown sugar creates richer flavor)
– 2 tbsp Worcestershire sauce (Lea & Perrins is my go-to)
– 1 tbsp smoked paprika (this provides that essential smoky depth)
– 1 tsp garlic powder (fresh minced garlic works too)
– 1 tsp onion powder
– 12 slider buns (I prefer brioche for their buttery softness)
– 1 cup coleslaw mix (the crunch balances the rich pork perfectly)
Instructions
1. Place pork shoulder roast in a 6-quart slow cooker.
2. In a medium bowl, whisk together ketchup, apple cider vinegar, brown sugar, Worcestershire sauce, smoked paprika, garlic powder, and onion powder until fully combined.
3. Pour the sauce mixture evenly over the pork shoulder in the slow cooker.
4. Cover and cook on LOW for 8 hours until the pork shreds easily with a fork.
5. Tip: Don’t lift the lid during cooking – this maintains consistent temperature for perfect tenderness.
6. Carefully remove the pork from the slow cooker and place on a cutting board.
7. Using two forks, shred the pork completely, discarding any large fat pieces.
8. Return the shredded pork to the slow cooker and stir to coat with the remaining sauce.
9. Cook for an additional 30 minutes on LOW to allow the pork to absorb the flavors.
10. Tip: For crispier edges, spread the sauced pork on a baking sheet and broil for 2-3 minutes.
11. Split slider buns and lightly toast them in a 350°F oven for 3-4 minutes until golden.
12. Spoon generous portions of pulled pork onto the bottom halves of the toasted buns.
13. Top each slider with approximately 2 tablespoons of coleslaw mix.
14. Place the top bun halves over the coleslaw to complete the sliders.
15. Tip: Serve immediately while the buns are still warm and slightly crisp.
Keep these sliders warm in a 200°F oven if serving a crowd. The pork becomes incredibly tender after slow cooking, practically melting in your mouth. That tangy barbecue sauce soaks into the soft buns, while the cool coleslaw provides the perfect crunchy contrast. Try serving them with pickle spears and extra sauce for dipping.
Conclusion
Ready to elevate your cooking game? This collection of 25 delicious recipes offers something for every taste and occasion—from quick weeknight dinners to impressive weekend feasts. We hope you find new favorites to savor and share. Don’t forget to leave a comment with your top picks and pin this article on Pinterest to keep these yummy ideas handy. Happy cooking!


