
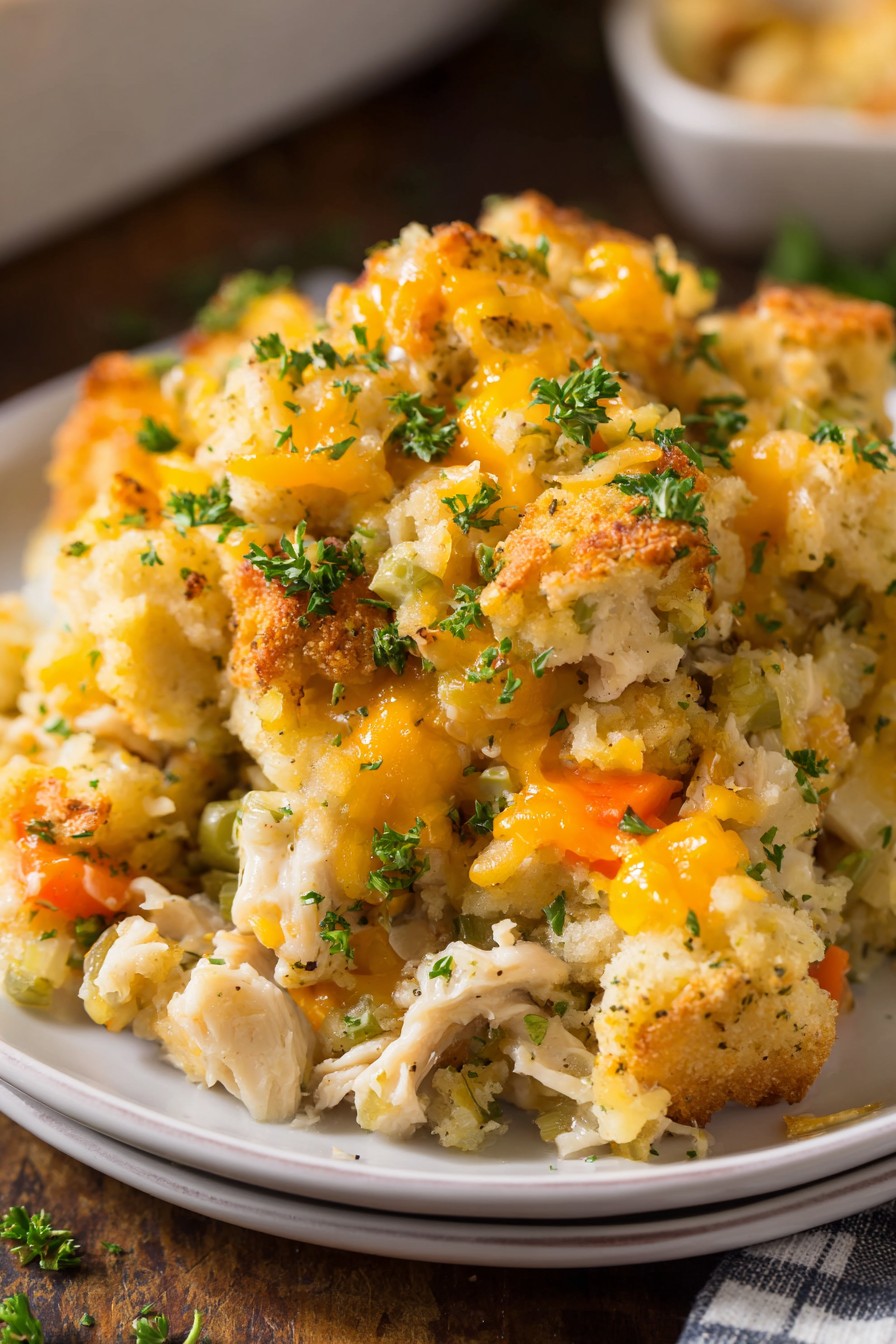
Just when you thought comfort food couldn’t get any cozier, this stove top stuffing chicken casserole bursts onto the scene like a culinary superhero! Join me on this delicious journey where crispy stuffing meets tender chicken in a creamy, dreamy sauce that’ll have your taste buds doing the happy dance. Get ready to transform simple ingredients into a family favorite that’s perfect for busy weeknights or cozy Sunday suppers.
Why This Recipe Works
- The combination of crispy stove top stuffing and tender chicken creates an irresistible texture contrast that keeps every bite interesting and satisfying
- Using cream of chicken soup as the base provides instant creaminess and flavor depth without requiring complicated sauce-making techniques, making it accessible for cooks of all skill levels
- The one-dish preparation means minimal cleanup and maximum flavor infusion as all ingredients bake together harmoniously
- Customization is incredibly easy – you can swap stuffing flavors, add vegetables, or adjust seasonings to suit your family’s preferences
- It reheats beautifully, making it perfect for meal prep and ensuring delicious leftovers that might even taste better the next day
Ingredients
- 2 cups cooked chicken, shredded or diced into 1/2-inch pieces
- 1 package (6 ounces) stove top chicken flavor stuffing mix
- 1 can (10.5 ounces) cream of chicken soup, undiluted
- 1 cup sour cream
- 1/2 cup chicken broth
- 1/2 cup unsalted butter, melted
- 1 cup frozen mixed vegetables, thawed (peas, carrots, corn blend)
- 1/2 cup onion, finely diced
- 1 teaspoon garlic powder
- 1/2 teaspoon black pepper
- 1/4 teaspoon paprika
- 1 cup shredded cheddar cheese
- 2 tablespoons fresh parsley, chopped
Equipment Needed
- 9×13 inch baking dish
- Large mixing bowl
- Medium saucepan
- Measuring cups and spoons
- Mixing spoons
- Cutting board and knife
- Aluminum foil
Instructions
Prepare the Stuffing Base
Begin by preheating your oven to 375°F and greasing your 9×13 inch baking dish with butter or cooking spray. In your medium saucepan, melt the 1/2 cup of butter over medium heat until completely liquid and fragrant, about 3-4 minutes. Remove from heat and stir in the entire package of stove top stuffing mix until all the crumbs are evenly moistened. The mixture should resemble wet sand with no dry spots remaining. Press half of this stuffing mixture into the bottom of your prepared baking dish, creating an even layer that will form your delicious crust. This initial layer will absorb flavors from the chicken mixture while maintaining some crispness.
Create the Creamy Chicken Filling
In your large mixing bowl, combine the cream of chicken soup, sour cream, and chicken broth, whisking until smooth and fully incorporated – no white streaks should remain. Add the diced onion, garlic powder, black pepper, and paprika, stirring vigorously to distribute the seasonings evenly throughout the creamy base. Gently fold in the cooked chicken and thawed mixed vegetables, ensuring every piece gets coated with the luxurious sauce without breaking up the chicken too much. The mixture should be thick but pourable, resembling a hearty chicken salad consistency. Tip: For extra flavor, use rotisserie chicken or leftover roasted chicken rather than boiled chicken.
Layer and Assemble the Casserole
Pour the chicken mixture over the pressed stuffing layer in your baking dish, using a spatula to spread it into an even layer that reaches all corners. Sprinkle the shredded cheddar cheese evenly over the entire surface, creating a golden blanket that will melt into gooey perfection. Take the remaining prepared stuffing and crumble it over the cheese layer, creating an uneven, textured topping that will bake up crispy and golden brown. Don’t press this layer down – the loose crumbs will create wonderful texture contrast. The casserole should now have distinct layers: stuffing crust, creamy chicken filling, cheese, and crispy topping.
Bake to Perfection
Cover the baking dish tightly with aluminum foil and place it in your preheated 375°F oven. Bake for 25 minutes exactly, then remove the foil to allow the topping to crisp up. Continue baking uncovered for another 15-20 minutes, or until the edges are bubbly and the topping is golden brown. You should see steady bubbling around the edges and the cheese should be completely melted with some light browning spots. The internal temperature should reach 165°F when tested with an instant-read thermometer inserted into the center. The top should be crispy while the bottom remains moist but firm.
Rest and Serve
Remove the casserole from the oven and let it rest on a wire rack for exactly 10 minutes before serving. This crucial resting time allows the layers to set properly so you get clean slices rather than a soupy mess. During this time, the residual heat will continue cooking the ingredients slightly while the fats redistribute throughout the dish. Sprinkle with fresh chopped parsley for a pop of color and freshness. Serve using a sharp spatula to cut through the crispy topping and lift out perfect portions that maintain their layered structure. Tip: Letting it rest ensures perfect slicing and allows flavors to meld together beautifully.
Tips and Tricks
For the ultimate flavor experience, consider making your own cream of chicken soup substitute by melting 3 tablespoons of butter with 3 tablespoons of flour to create a roux, then whisking in 1 1/4 cups of chicken broth and 1/2 cup of half-and-half until thickened, seasoned with poultry seasoning and black pepper. If you prefer extra crispy topping, spread the remaining stuffing mixture on a baking sheet and toast it separately at 400°F for 5-7 minutes before adding it to the casserole during the last 10 minutes of baking. For make-ahead convenience, assemble the entire casserole up to 24 hours in advance, cover tightly, and refrigerate – add 10-15 minutes to the baking time when cooking from cold. If your casserole seems too dry, drizzle 1/4 cup of additional chicken broth over the top before baking, and if it’s too wet, add an extra 1/4 cup of dry stuffing mix to the topping. For perfect leftovers, reindividual portions in the oven at 350°F for 15-20 minutes rather than the microwave to maintain the crispy texture. If you’re feeding a crowd, double the recipe and use a 10×15 inch baking dish, increasing baking time by 10-15 minutes. Always let the casserole rest before serving – this allows the starches to fully absorb the liquids and creates cleaner slices. For extra nutrition, add 1 cup of fresh spinach chopped fine or 1/2 cup of diced mushrooms sautéed with the onions. If you’re watching sodium, use low-sodium cream of chicken soup and reduced-sodium stuffing mix, and taste before adding salt. For a golden brown top without over-baking, brush the stuffing topping with melted butter during the last 10 minutes of baking. Always use a glass or ceramic baking dish rather than metal for more even heating and better browning. If your oven runs hot, check at 20 minutes uncovered rather than 25 to prevent burning. For maximum crispness, ensure your stuffing mixture isn’t over-moistened – it should be damp but not soggy before baking.
Recipe Variations
- Southwestern Twist: Use cornbread stuffing mix, add 1 cup of black beans (drained and rinsed), 1/2 cup of corn, 1 teaspoon of cumin, and 1/4 teaspoon of chili powder. Top with pepper jack cheese instead of cheddar and garnish with fresh cilantro and a dollop of sour cream for a fiesta-inspired version that brings some spice to your dinner table.
- Thanksgiving Style: Use turkey flavor stuffing mix, substitute cooked turkey for chicken, add 1/2 cup of dried cranberries, and include 1 teaspoon of poultry seasoning. Top with a combination of cheddar and Monterey jack cheeses for a holiday-inspired casserole that tastes like Thanksgiving dinner in every bite, perfect for using up holiday leftovers.
- Vegetarian Delight: Omit the chicken and use vegetable broth instead of chicken broth. Add 2 cups of mixed vegetables (broccoli florets, sliced mushrooms, and diced zucchini) sautéed until tender. Use cream of mushroom soup and add 1 cup of cooked wild rice for extra substance, creating a meat-free version that’s still satisfying and packed with flavor.
- Italian Inspiration: Use herb-seasoned stuffing mix, add 1/2 cup of sun-dried tomatoes (chopped), 1/4 cup of grated Parmesan cheese, and 1 teaspoon of Italian seasoning. Substitute mozzarella cheese for cheddar and add 1/4 cup of chopped fresh basil for a Mediterranean flair that will transport your taste buds to Italy.
- Breakfast Version: Use pork flavor stuffing mix, substitute cooked breakfast sausage for chicken, and add 6 beaten eggs mixed into the creamy base. Include 1/2 cup of diced bell peppers and onions, and top with sharp cheddar cheese for a hearty breakfast casserole that’s perfect for brunch gatherings or holiday mornings.
Frequently Asked Questions
Can I use fresh vegetables instead of frozen?
Absolutely! Fresh vegetables work wonderfully but require slight preparation adjustments. Dice carrots, celery, and peas into small, uniform pieces and blanch them in boiling water for 2-3 minutes until slightly tender but still crisp. Drain thoroughly and pat dry before adding to the mixture to prevent excess moisture from making your casserole watery. You’ll need about 1 1/2 cups of fresh mixed vegetables to equal the frozen amount since fresh vegetables have less water content when prepared properly.
How long does this casserole keep in the refrigerator?
Properly stored in an airtight container, your casserole will maintain quality for 3-4 days in the refrigerator. The stuffing topping will soften over time but still tastes delicious. For best results, reheat portions in the oven at 350°F for 15-20 minutes rather than the microwave to restore some crispness to the topping. Always ensure the internal temperature reaches 165°F when reheating. If you notice any off smells or mold, discard immediately – when in doubt, throw it out!
Can I freeze this casserole before or after baking?
You can freeze this casserole either before or after baking with excellent results. For unbaked freezing, assemble completely but don’t bake, wrap tightly in plastic wrap and then foil, and freeze for up to 3 months. Bake directly from frozen, adding 20-30 minutes to the covered baking time. For baked freezing, cool completely, portion, and freeze in airtight containers for up to 2 months. Thaw in refrigerator overnight before reheating. The texture may be slightly softer after freezing but the flavor remains fantastic.
What can I use instead of cream of chicken soup?
If you prefer not to use canned soup, make a simple white sauce by melting 3 tablespoons of butter, whisking in 3 tablespoons of flour until smooth, then gradually adding 1 1/4 cups of chicken broth and 1/2 cup of milk or cream. Cook until thickened and season with 1/2 teaspoon of poultry seasoning, 1/4 teaspoon of garlic powder, and salt and pepper to taste. Greek yogurt thinned with broth also works well for a tangier, healthier alternative that still provides creaminess.
Can I make this recipe gluten-free?
Yes! Use gluten-free stuffing mix (several brands available) and ensure your cream of chicken soup is gluten-free or make your own sauce using gluten-free flour. Check that your chicken broth and all other ingredients are certified gluten-free. The texture might be slightly different but still delicious. You may need to add an extra tablespoon of butter to the stuffing mixture since gluten-free bread products tend to absorb more moisture. Bake as directed, watching carefully as gluten-free items can brown faster.
Summary
This stove top stuffing chicken casserole combines crispy stuffing, tender chicken, and creamy sauce in one glorious dish that’s perfect for family dinners, potlucks, or comfort food cravings. Easy to make and endlessly customizable, it’s sure to become a regular in your recipe rotation.
Stove Top Stuffing Chicken Casserole
6
servings15
minutes45
minutesIngredients
Instructions
- 1 Preheat oven to 375°F and grease 9x13 inch baking dish
- 2 Mix stuffing with melted butter, press half into dish bottom
- 3 Combine soup, sour cream, broth, seasonings, chicken and vegetables
- 4 Spread over stuffing layer, top with cheese and remaining stuffing
- 5 Cover and bake 25 minutes, uncover and bake 15-20 minutes more
- 6 Rest 10 minutes, garnish with parsley and serve


