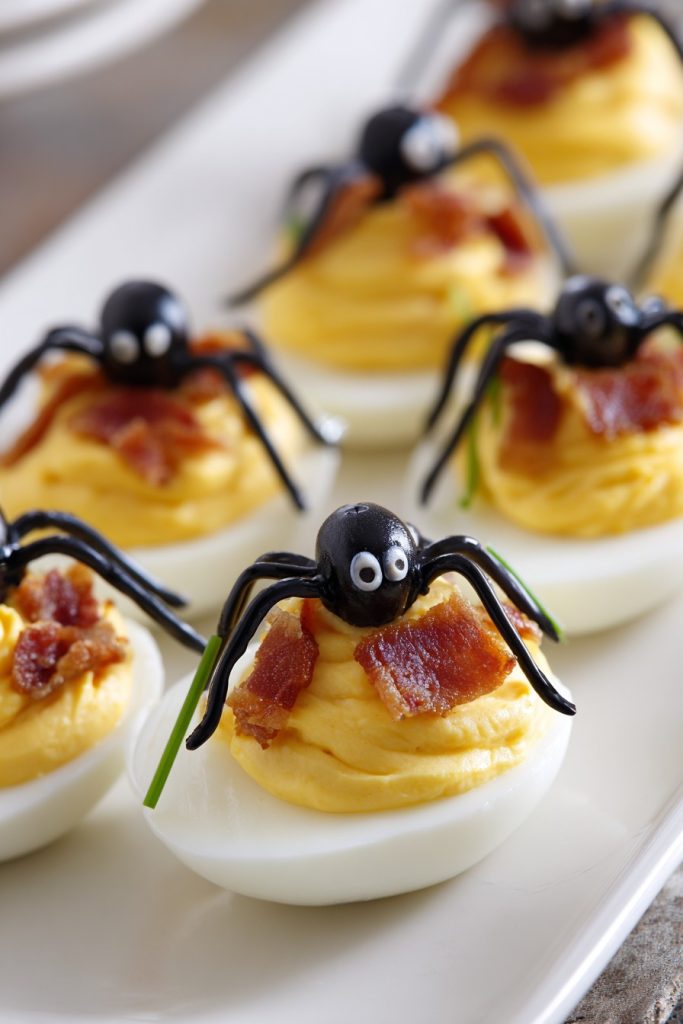
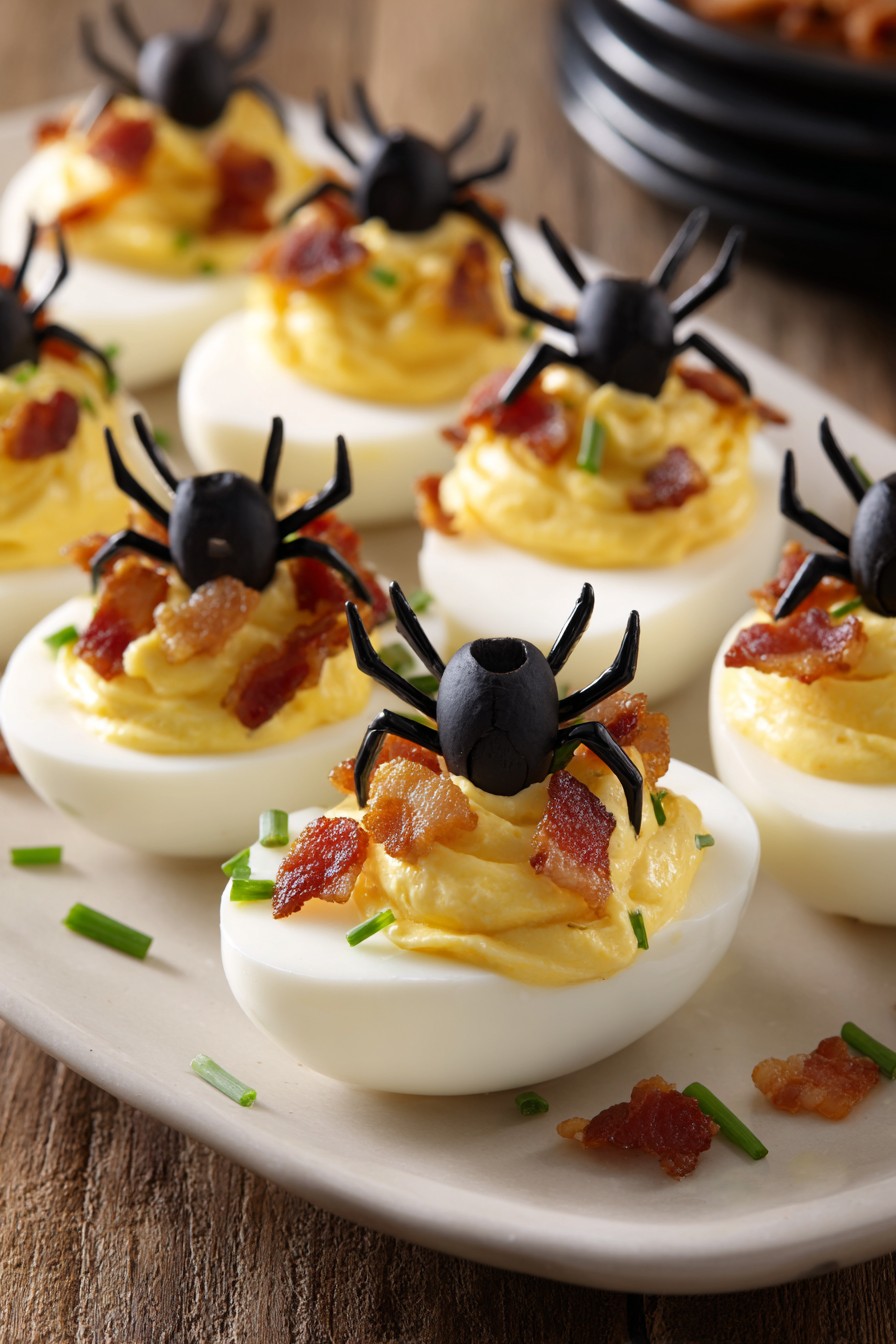
A busy parent’s dream Halloween recipe that transforms ordinary deviled eggs into creepy crawly spider treats without adding extra stress to your already packed schedule. All you need are basic ingredients and about thirty minutes to create these festive appetizers that will have both kids and adults reaching for more during your Halloween celebrations.
Why This Recipe Works
- The hard-boiled egg preparation uses a foolproof method that guarantees easy peeling every single time, eliminating the frustration of torn egg whites that can ruin your spider presentation
- Using pre-cooked bacon or bacon bits saves significant time and reduces cleanup since you avoid the greasy splatter of cooking raw bacon on the stovetop
- The mayonnaise and mustard filling comes together in minutes with just a quick mix, and piping it through a plastic bag eliminates the need for specialized kitchen tools
- Olive slices for eyes and chive legs create instant spider recognition without requiring any artistic skills or complicated food decorating techniques
- This recipe scales perfectly for large gatherings, allowing you to make two dozen spider eggs in roughly the same time as one dozen, making party planning stress-free
Ingredients
- 12 large eggs, cold from refrigerator
- 1/2 cup mayonnaise
- 2 tablespoons yellow mustard
- 1/4 teaspoon salt
- 1/4 teaspoon black pepper
- 1/4 teaspoon paprika
- 1/2 cup cooked bacon pieces, finely chopped
- 24 small black olive slices, for spider eyes
- 12 long chives, cut into thin strips for spider legs
Equipment Needed
- Large pot with lid
- Slotted spoon
- Mixing bowl
- Sharp knife
- Cutting board
- Plastic zip-top bag
- Ice bath bowl
- Paper towels
Instructions
Step 1: Perfect Hard-Boiled Egg Preparation
Place your twelve cold eggs in a single layer at the bottom of your large pot, then add enough cold water to cover the eggs by about one inch. Bring the water to a rolling boil over high heat, which should take approximately 8-10 minutes depending on your stove’s power. Once boiling vigorously, immediately remove the pot from heat, cover with the lid, and set your timer for 12 minutes exactly. While waiting, prepare your ice bath by filling a large bowl with cold water and ice cubes – this rapid cooling stops the cooking process and prevents that unappetizing green ring around the yolk. After 12 minutes, use your slotted spoon to transfer the eggs directly into the ice bath and let them sit for at least 15 minutes until completely cooled. This method consistently produces perfectly cooked eggs with creamy yellow yolks and firm whites that hold their shape beautifully for decorating.
Step 2: Egg Peeling and Preparation
Remove the cooled eggs from the ice bath and gently tap each one on your countertop to crack the shell evenly all around. Start peeling from the wider end where the air pocket is located, as this typically makes removal easier. Run each egg under cool running water while peeling to help loosen any stubborn shell fragments and ensure you get smooth, unblemished egg whites for your spider bodies. Once all eggs are peeled, use a sharp knife to slice each egg in half lengthwise, wiping the knife clean between cuts to maintain neat edges. Carefully pop out the yolks into your mixing bowl, then arrange the twenty-four egg white halves on your serving platter or a paper towel-lined tray. If any egg whites tear during this process, don’t stress – you can always use those for sampling or arrange them strategically where the damage won’t be noticeable once decorated.
Step 3: Creamy Filling Creation
Add the half cup of mayonnaise, two tablespoons of yellow mustard, quarter teaspoon of salt, quarter teaspoon of black pepper, and quarter teaspoon of paprika to the egg yolks in your mixing bowl. Use a fork to mash and mix everything together until completely smooth and well-combined, which should take about 2-3 minutes of vigorous mixing. The mixture should be creamy but still hold its shape when scooped – if it seems too thick, add another tablespoon of mayonnaise, and if too runny, you can sprinkle in a tiny bit more paprika to thicken it slightly. Now stir in your half cup of finely chopped cooked bacon pieces, distributing them evenly throughout the filling for that savory crunch in every bite. Taste the mixture and adjust seasoning if needed, remembering that flavors will mellow slightly once chilled, so it’s okay if it tastes a bit strong at this stage.
Step 4: Spider Assembly and Decoration
Scoop your egg yolk mixture into a plastic zip-top bag, push the filling down toward one bottom corner, then snip about a half-inch opening from that corner to create your makeshift piping bag. Pipe the filling generously into each egg white half, mounding it slightly higher in the center to create a rounded spider body shape. Immediately place two small black olive slices near the front of each filled egg to create the spider’s eyes, pressing them gently into the filling so they adhere properly. Take your thin chive strips and arrange eight “legs” coming out from each side of the spider body – four on the left and four on the right, bending them slightly to create a more natural spider appearance. Work relatively quickly once you start decorating since the filling can form a slight crust if left exposed to air too long, though this doesn’t affect the taste at all.
Step 5: Final Presentation and Serving
Once all your spider deviled eggs are assembled, cover the platter loosely with plastic wrap and refrigerate for at least 30 minutes before serving to allow the flavors to meld and the filling to firm up slightly. This chilling time makes them easier to handle and prevents the filling from squishing out when guests pick them up. If preparing ahead for a party, you can make these up to 24 hours in advance – just wait to add the chive legs until within a few hours of serving since they can wilt if refrigerated too long. When ready to serve, you can sprinkle a light dusting of paprika over the platter for extra color contrast, or arrange some lettuce leaves underneath for a festive Halloween presentation. These spider deviled eggs are best served chilled and should be consumed within two days for optimal food safety and texture quality.
Tips and Tricks
For the absolute easiest peeling experience, use eggs that are at least 7-10 days old rather than brand new ones from the store, as slightly older eggs have a higher pH level that causes the membrane to separate more cleanly from the egg white. If you’re really pressed for time or dealing with particularly stubborn shells, you can add a tablespoon of baking soda to the cooking water, which raises the pH further and almost guarantees perfect peeling every single time. When selecting olives for the eyes, look for small black olives rather than large ones, and if you can’t find pre-sliced olives, simply take whole black olives and slice them yourself into thin rounds – the smaller eyes create a more proportional spider appearance. For the chive legs, cut them into approximately two-inch lengths using kitchen scissors rather than a knife for faster, more uniform strips, and if chives aren’t available, you can use very thin scallion greens or even blanched carrot strips as alternatives. If you’re making these for a classroom party or event where food allergies might be a concern, you can easily omit the bacon and add a quarter cup of finely chopped pickles or celery instead for that needed crunch factor. To transport these to parties without messing up your decorations, place the completed spider eggs in a single layer in a rectangular container, then carefully place a layer of parchment paper over them before adding the lid to prevent shifting during transport. If your filling seems too runny after mixing, you can stir in a tablespoon of finely crushed cracker crumbs or breadcrumbs to help absorb excess moisture and create a sturdier piping consistency that holds its shape better. For a professional piping look without buying special tools, use a gallon-sized freezer bag instead of a sandwich bag – the thicker plastic is less likely to burst under pressure and gives you more control over the filling flow.
Recipe Variations
- For a spicy kick that adults will love, add one teaspoon of Sriracha or your favorite hot sauce to the filling mixture, along with a tablespoon of finely chopped jalapeños (seeds removed for milder heat). You could also garnish with thin slices of pickled jalapeño instead of olives for a different look, or mix in some cayenne pepper with the paprika for extra warmth throughout every bite.
- Create a vegetarian version by omitting the bacon completely and substituting with quarter cup of finely chopped sun-dried tomatoes and two tablespoons of chopped fresh basil. The sun-dried tomatoes provide that needed texture contrast and umami flavor, while the basil adds freshness that complements the creamy egg filling beautifully without requiring any other major adjustments to the recipe.
- For a colorful twist that kids adore, divide your filling into two batches and mix one with a tablespoon of beet juice for pink spiders and the other with a teaspoon of turmeric for yellow spiders. The natural food coloring creates vibrant Halloween colors without artificial dyes, and you can mix and match eye colors using different olive varieties for a really festive platter presentation.
- Transform these into “web-covered” spiders by placing a small amount of the filling in a separate bag with a very tiny tip cut off and piping web designs across the spider bodies before adding the olive eyes. You can make simple cross patterns or more elaborate web designs depending on your time and patience level, using the same filling but applying it in delicate lines across the mound.
- For a gourmet presentation that’s still family-friendly, substitute the mayonnaise with Greek yogurt and add two tablespoons of crumbled blue cheese to the filling mixture. The tanginess pairs wonderfully with the eggs and bacon, creating a more sophisticated flavor profile that appeals to adult palates while maintaining the fun spider appearance that children enjoy.
Frequently Asked Questions
Can I make spider deviled eggs ahead of time for a party?
Absolutely, and this is one of the reasons this recipe works so well for busy parents. You can hard-boil and peel the eggs up to three days in advance, storing them in an airtight container in the refrigerator until you’re ready to assemble. The filling can also be prepared 24 hours ahead and kept in a separate container, then simply piped into the egg whites and decorated on party day. I recommend waiting to add the chive legs until within 4-6 hours of serving since they can become limp if refrigerated too long, but the olive eyes hold up perfectly fine overnight.
What’s the best way to transport these to a potluck or school event?
Use a rectangular container with a tight-fitting lid and place a non-slip mat or damp paper towel in the bottom to prevent shifting during transport. Arrange the spider eggs in a single layer, then create a barrier by placing crumpled parchment paper between layers if you need to stack them. For extra security, you can place toothpicks vertically in a few of the eggs to act as stabilizers, just be sure to remove them before serving and warn guests if any remain.
My egg yolks have green rings – did I do something wrong?
Those green rings around the yolk occur when eggs are overcooked or cooled too slowly, but they’re completely safe to eat and don’t affect the flavor. To prevent this next time, make sure you transfer the eggs to the ice bath immediately after the 12-minute steep time and ensure you have enough ice to properly chill them quickly. If you already have green rings, the good news is that once you mash the yolks with the other ingredients, the color becomes much less noticeable in the final filling.
Are there alternatives to chives for the spider legs?
Several alternatives work well depending on what you have available. Thin scallion greens provide a similar appearance and flavor, while blanched carrot strips or zucchini strips offer different color options. For a completely different look, you could use very thin slices of black olives arranged in straight lines, or even cooked spaghetti strands cut to size, though these might be less stable than chives during handling and transport.
How long do spider deviled eggs last in the refrigerator?
Properly stored in an airtight container, they will maintain good quality for up to two days, though the chives may begin to wilt after 24 hours. The eggs themselves are safe to eat for up to four days if refrigerated at 40°F or below, but the texture and appearance are best within the first 48 hours. If you need to make them further in advance, prepare and store the components separately, then assemble the day you plan to serve them for optimal freshness.
Summary
These spider deviled eggs transform ordinary ingredients into festive Halloween treats using time-saving techniques that busy parents will appreciate. With make-ahead options and simple decorations, you can create impressive party food without adding stress to your already packed schedule.
Spider Deviled Eggs
4
servings20
minutes10
minutesIngredients
Instructions
- 1 Place eggs in single layer in large pot, cover with cold water by 1 inch. Bring to boil, then remove from heat, cover, and let stand 12 minutes. Transfer to ice bath for 15 minutes.
- 2 Peel eggs under running water, slice in half lengthwise, and remove yolks to mixing bowl. Arrange egg whites on serving platter.
- 3 Mash yolks with mayonnaise, mustard, salt, pepper, and paprika until smooth. Stir in bacon pieces until well combined.
- 4 Transfer filling to plastic bag, snip corner, and pipe into egg whites. Add olive slices for eyes and chive strips for legs.
- 5 Refrigerate at least 30 minutes before serving. Best consumed within 2 days.


