
Maybe you’ve just baked your first loaf of sourdough, or perhaps you’re still nervously feeding your starter—either way, you’re in the right place! We’ve gathered 34 essential recipes that turn that bubbly jar of potential into everything from crusty loaves to fluffy pancakes. Dive in and discover how simple and rewarding sourdough baking can be for every home cook.
Classic Sourdough Bread
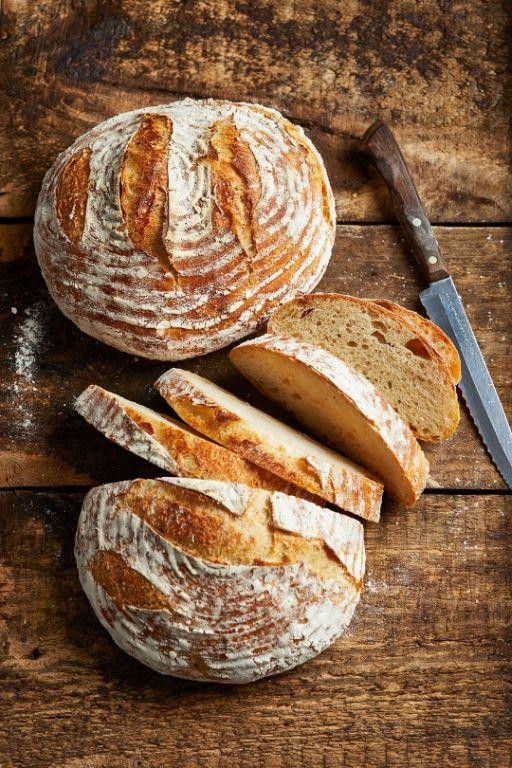
Elevating the humble loaf to an art form, classic sourdough bread represents the perfect marriage of science and craftsmanship. Each golden crust and airy crumb tells the story of patient fermentation and skilled hands transforming simple ingredients into something extraordinary. This timeless recipe celebrates the beautiful simplicity of flour, water, and wild yeast working in harmonious partnership.
1
loaf60
minutes70
minutesIngredients
– 4 cups bread flour
– 1 cup active sourdough starter
– 1 ½ cups warm water (85°F)
– 2 tsp fine sea salt
– 1 tbsp olive oil
– Rice flour for dusting
Instructions
1. Combine 4 cups bread flour and 1 ½ cups warm water (85°F) in a large mixing bowl until no dry flour remains.
2. Cover the bowl with plastic wrap and let the mixture rest for 30 minutes to hydrate the flour completely.
3. Add 1 cup active sourdough starter and mix thoroughly until fully incorporated into the dough.
4. Sprinkle 2 tsp fine sea salt over the dough surface and knead for 8-10 minutes until smooth and elastic.
5. Transfer the dough to a lightly oiled bowl, coating all surfaces with 1 tbsp olive oil to prevent drying.
6. Cover the bowl with a damp kitchen towel and let rise at room temperature (72°F) for 4-6 hours until doubled in size.
7. Perform a series of stretch-and-fold maneuvers every 30 minutes during the first 2 hours of rising to strengthen gluten development.
8. Gently turn the dough onto a lightly floured surface and shape into a tight round boule without deflating the air pockets.
9. Generously dust a proofing basket with rice flour to prevent sticking and place the shaped dough seam-side up.
10. Cover the proofing basket with plastic wrap and refrigerate for 12-18 hours for slow fermentation and flavor development.
11. Preheat a Dutch oven with lid in your oven at 475°F for 45 minutes to ensure even heat distribution.
12. Carefully transfer the chilled dough into the preheated Dutch oven and score the top with a sharp razor blade.
13. Bake covered at 475°F for 25 minutes to create steam and develop the crust.
14. Remove the lid and continue baking at 450°F for 20-25 minutes until deeply golden brown.
15. Transfer the bread to a wire cooling rack and let cool completely for 2-3 hours before slicing.
Keeping with tradition, this sourdough develops a crackling crust that gives way to a tender, hole-riddled crumb with complex tanginess. The slow fermentation creates subtle notes of wild yeast and wheat that pair beautifully with cultured butter or artisanal cheeses. Consider toasting thick slices for avocado toast or using day-old bread for exceptional bread pudding that highlights its distinctive character.
Simple Sourdough Starter
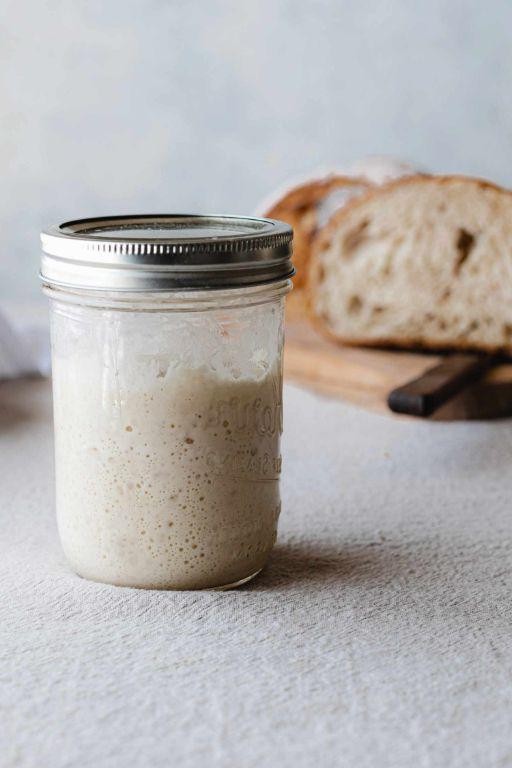
Heralding the revival of artisanal baking traditions, this simple sourdough starter transforms humble flour and water into a living, breathing foundation for exceptional bread. Harnessing wild yeasts from your own kitchen environment creates a uniquely personal leavening agent that develops complex flavor profiles unattainable with commercial yeast. Here, we guide you through creating this culinary cornerstone with precision and care.
10
minutesIngredients
– 4 cups all-purpose flour
– 3 ½ cups filtered water, at 75°F
– 1 tbsp whole wheat flour
Instructions
1. Combine ½ cup all-purpose flour and ¼ cup filtered water in a clean glass jar.
2. Stir vigorously with a wooden spoon for 2 minutes until no dry flour remains.
3. Cover the jar loosely with cheesecloth and secure with a rubber band.
4. Place the jar in a draft-free area maintaining consistent 70-75°F temperature.
5. After 24 hours, discard half the mixture and add ½ cup all-purpose flour and ¼ cup filtered water.
6. Stir until completely incorporated, scraping down the sides with a spatula.
7. Repeat this feeding process every 24 hours for 5 days, observing for small bubbles.
8. On day 6, incorporate 1 tablespoon whole wheat flour during feeding to boost microbial activity.
9. Continue daily feedings until the starter doubles in volume within 4-6 hours after feeding.
10. Test readiness by dropping a teaspoon of starter into a glass of water—if it floats, it’s active.
Perfectly maintained sourdough starter develops tangy, complex flavors with subtle fruity notes and a pleasantly acidic aroma. Its bubbly, elastic texture creates exceptional oven spring in breads, while the mature starter can be used to elevate pancakes, waffles, or even as a flavorful base for savory crepes.
Beginner’s Sourdough Pancakes

Sourdough transforms the humble pancake into something truly extraordinary, where tangy complexity meets cloud-like texture in every golden-brown bite. This beginner-friendly recipe harnesses the magic of your starter to create breakfast elegance that feels both rustic and refined. With just a few simple ingredients and gentle technique, you’ll achieve pancakes worthy of any brunch table.
8
portions10
minutes20
minutesIngredients
– 1 cup sourdough starter
– 1 cup all-purpose flour
– 1 cup whole milk
– 1 large egg
– 2 tbsp granulated sugar
– 1 tbsp melted butter
– 1 tsp baking soda
– 1/2 tsp salt
– 2 tbsp vegetable oil
Instructions
1. Combine 1 cup sourdough starter, 1 cup all-purpose flour, and 1 cup whole milk in a large mixing bowl.
2. Whisk the mixture vigorously for 30 seconds until no dry flour remains and bubbles begin to form.
3. Cover the bowl with plastic wrap and let rest at room temperature for 30 minutes to activate the sourdough.
4. Crack 1 large egg into a separate small bowl and whisk until uniform in color.
5. Add the whisked egg, 2 tbsp granulated sugar, 1 tbsp melted butter, and 1/2 tsp salt to the sourdough mixture.
6. Sprinkle 1 tsp baking soda over the batter and fold gently until just combined—do not overmix.
7. Heat a non-stick skillet or griddle over medium heat until water droplets sizzle upon contact.
8. Add 1 tsp vegetable oil to the heated surface and spread evenly with a paper towel.
9. Pour 1/4 cup portions of batter onto the skillet, leaving 2 inches between pancakes.
10. Cook for 2-3 minutes until bubbles cover the surface and edges appear set.
11. Flip each pancake carefully using a thin spatula when the bottoms are golden brown.
12. Cook the second side for 1-2 minutes until golden and the centers spring back when pressed.
13. Transfer cooked pancakes to a wire rack in a single layer to prevent steaming.
14. Repeat steps 8-13 with remaining batter, adding more vegetable oil as needed.
Remarkably light with a delicate crumb, these pancakes boast a subtle tang that pairs beautifully with maple syrup’s sweetness. Their golden exteriors give way to tender interiors that practically melt on the tongue. For an elegant twist, layer them with lemon curd and fresh berries, creating a stack that celebrates sourdough’s unique character in every sophisticated forkful.
Easy Sourdough Pizza Dough

Unleashing the magic of sourdough in pizza form transforms the ordinary into something truly extraordinary. This beautifully fermented dough develops complex flavors and an airy, chewy texture that elevates any topping combination. Using your sourdough starter creates a crust with character that store-bought versions simply cannot replicate.
2
portions30
minutes12
minutesIngredients
– 1 cup active sourdough starter
– 3 ½ cups bread flour
– 1 ¼ cups warm water (100°F)
– 2 tbsp olive oil
– 1 ½ tsp salt
– 1 tsp honey
Instructions
1. Combine 1 cup active sourdough starter, 3 ½ cups bread flour, 1 ¼ cups warm water (100°F), 2 tbsp olive oil, 1 ½ tsp salt, and 1 tsp honey in a large mixing bowl.
2. Mix with a wooden spoon until a shaggy dough forms, about 2 minutes, ensuring all dry flour becomes incorporated.
3. Turn the dough onto a lightly floured surface and knead for 8-10 minutes until smooth and elastic, using the windowpane test to check gluten development.
4. Place the dough in a lightly oiled bowl, cover with plastic wrap, and let rise at room temperature (70-75°F) for 8-12 hours until doubled in size.
5. Gently deflate the dough and divide into two equal portions, handling carefully to preserve air bubbles for optimal texture.
6. Shape each portion into a tight ball, place on a parchment-lined baking sheet, cover with a damp cloth, and rest for 30 minutes.
7. Preheat your oven to 500°F with a pizza stone or baking sheet inside for at least 45 minutes to ensure proper heat distribution.
8. Stretch each dough ball into a 12-inch circle on a floured surface, working from the center outward to maintain an even thickness.
9. Transfer the stretched dough to a pizza peel dusted with semolina or cornmeal to prevent sticking during sliding.
10. Add your desired toppings quickly, keeping them light to prevent a soggy crust and ensure even cooking.
11. Slide the pizza onto the preheated stone and bake for 10-12 minutes until the crust is golden brown with visible char spots.
12. Remove from oven using a peel and let cool on a wire rack for 2 minutes before slicing.Delightfully crisp on the outside with a tender, airy crumb, this sourdough crust offers subtle tanginess that complements both classic and adventurous toppings. The fermented complexity shines through whether you opt for minimalist margherita or loaded vegetable combinations. Consider serving rectangular slices for elegant appetizers or folding individual portions for portable street-style enjoyment.
Sourdough Biscuits for Starters

Crafted with the tangy complexity only a well-maintained starter can provide, these sourdough biscuits transform humble ingredients into flaky, golden perfection. The natural leavening creates an airy crumb with just enough chew, while the subtle acidity balances beautifully with rich butter notes. This recipe honors both tradition and innovation, yielding biscuits that stand proudly on their own or serve as the foundation for countless culinary creations.
8
biscuits15
minutes18
minutesIngredients
– 2 cups all-purpose flour
– 1 tablespoon baking powder
– 1 teaspoon salt
– ½ cup cold unsalted butter
– 1 cup active sourdough starter
– ⅓ cup buttermilk
Instructions
1. Preheat your oven to 425°F and line a baking sheet with parchment paper.
2. Whisk together 2 cups all-purpose flour, 1 tablespoon baking powder, and 1 teaspoon salt in a large bowl.
3. Cut ½ cup cold unsalted butter into small cubes and work it into the flour mixture using a pastry cutter until pea-sized crumbs form.
4. Combine 1 cup active sourdough starter with ⅓ cup buttermilk in a separate bowl, stirring until fully incorporated.
5. Pour the wet ingredients into the flour-butter mixture and gently fold with a spatula until just combined, being careful not to overmix.
6. Turn the shaggy dough onto a lightly floured surface and pat it into a 1-inch thick rectangle.
7. Fold the dough in half, rotate it 90 degrees, and pat it back to 1-inch thickness—repeat this folding process two more times to create flaky layers.
8. Use a 2.5-inch round biscuit cutter to stamp out biscuits, pressing straight down without twisting to ensure proper rise.
9. Arrange the biscuits on the prepared baking sheet, spacing them about 1 inch apart.
10. Bake at 425°F for 15-18 minutes until the tops are golden brown and the sides feel firm to the touch.
11. Transfer the biscuits to a wire rack and let them cool for 5 minutes before serving.
Warm from the oven, these biscuits reveal a tender, layered interior with the distinctive tang of sourdough that pairs wonderfully with sweet jams or savory gravies. Their crisp exterior gives way to a soft, airy crumb that makes them perfect for breakfast sandwiches or as an elegant accompaniment to soups and stews.
Basic Sourdough Waffles

A golden opportunity to transform your sourdough discard into something truly spectacular, these waffles marry the tangy complexity of fermented dough with the crisp, airy texture that defines breakfast perfection. An elegant morning ritual that elevates humble ingredients through careful technique and patient preparation, they emerge from the iron with a delicate crust giving way to a tender, honeycombed interior that captures syrup and butter in the most delightful way.
5
waffles15
minutes25
minutesIngredients
– 1 cup sourdough starter
– 1 cup all-purpose flour
– 1 cup whole milk
– 2 large eggs
– 1/4 cup unsalted butter, melted
– 2 tablespoons granulated sugar
– 1 teaspoon baking soda
– 1/2 teaspoon fine sea salt
– Cooking spray
Instructions
1. Combine 1 cup sourdough starter, 1 cup all-purpose flour, and 1 cup whole milk in a large mixing bowl.
2. Cover the bowl with plastic wrap and let the batter ferment at room temperature for 8-12 hours until bubbly and slightly expanded.
3. Separate 2 large eggs, placing whites in a clean medium bowl and yolks in the fermented batter.
4. Add 1/4 cup melted unsalted butter, 2 tablespoons granulated sugar, and 1/2 teaspoon fine sea salt to the batter, whisking until fully incorporated.
5. Whip the egg whites with an electric mixer on medium-high speed until they form stiff peaks that hold their shape when the beaters are lifted.
6. Gently fold the whipped egg whites into the batter using a spatula, being careful to maintain as much air as possible.
7. Sprinkle 1 teaspoon baking soda evenly over the batter and fold gently just until combined, taking care not to overmix.
8. Preheat your waffle iron to 375°F, spraying both surfaces lightly with cooking spray once hot.
9. Ladle approximately 1/2 cup of batter onto the center of the preheated waffle iron.
10. Close the iron and cook for 4-5 minutes until the waffle is deeply golden brown and releases easily from the grids.
11. Transfer the cooked waffle to a wire rack rather than a plate to prevent sogginess on the bottom.
12. Repeat the cooking process with remaining batter, respraying the iron between each waffle if necessary.
Unbelievably light with a satisfying crispness that yields to an airy, tangy interior, these waffles possess a complexity that stands beautifully on their own or serves as the perfect canvas for seasonal fruit compotes. Their honeycomb texture makes them ideal for holding pools of warm maple syrup or dollops of whipped cream, while the subtle sourdough notes provide a sophisticated counterpoint to sweet toppings that will make this recipe your new weekend centerpiece.
Sourdough Crackers for Beginners

Venture beyond your usual sourdough discard routine with these elegant, crisp crackers that transform humble ingredients into sophisticated snacks. Perfect for beginners seeking to elevate their baking repertoire, these golden wafers offer a delightful crunch with subtle tangy notes that pair beautifully with cheeses and dips. Their rustic appearance and artisanal flavor belie the straightforward technique required to achieve bakery-worthy results at home.
2
portions15
minutes18
minutesIngredients
– 1 cup sourdough starter discard
– 1/4 cup olive oil
– 1 cup all-purpose flour
– 1/2 teaspoon salt
– 1/4 teaspoon baking soda
– 2 tablespoons cold water
– 1 tablespoon coarse sea salt for sprinkling
Instructions
1. Preheat your oven to 350°F and line two baking sheets with parchment paper.
2. Combine sourdough starter discard, olive oil, all-purpose flour, salt, and baking soda in a large mixing bowl.
3. Mix with a wooden spoon until a shaggy dough forms, about 2 minutes of consistent stirring.
4. Add cold water gradually while kneading by hand until the dough becomes smooth and cohesive, approximately 3-4 minutes of kneading.
5. Divide the dough into two equal portions for easier handling.
6. Roll one portion directly on parchment paper to 1/8-inch thickness, using a lightly floured rolling pin to prevent sticking.
7. Score the rolled dough into 1-inch squares using a pizza cutter or sharp knife, being careful not to cut through the parchment.
8. Sprinkle half of the coarse sea salt evenly over the surface, gently pressing it into the dough with your palms.
9. Transfer the parchment with scored dough directly onto a baking sheet.
10. Repeat the rolling, scoring, and salting process with the second portion of dough.
11. Bake for 15-18 minutes, rotating the sheets halfway through, until the crackers are golden brown at the edges.
12. Remove from oven and immediately break along the scored lines while still warm for clean edges.
13. Cool completely on wire racks for about 30 minutes to achieve maximum crispness. For perfectly even baking, ensure your rolled dough maintains uniform thickness throughout. Freshly baked crackers will continue to crisp as they cool, so resist sampling them straight from the oven. Storing in an airtight container preserves their delicate crunch for up to two weeks.
Flawlessly crisp with a satisfying snap, these crackers reveal subtle sourdough complexity that deepens over time. Their rustic appearance and artisanal texture make them ideal for elegant cheese boards or as standalone snacks. Consider serving alongside creamy brie or topping with smoked salmon for a sophisticated appetizer that showcases your homemade craftsmanship.
Beginner’s Sourdough Bagels
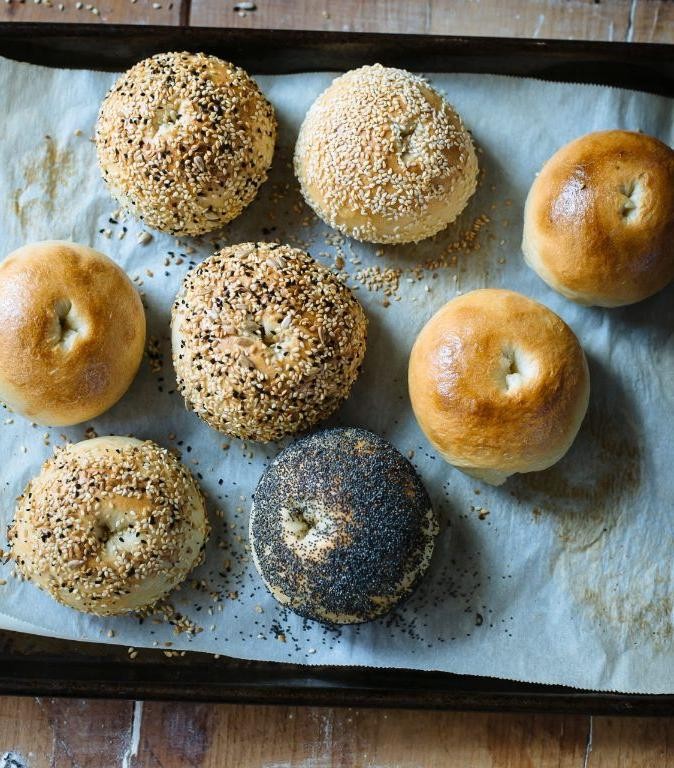
Just as autumn leaves begin their graceful descent, there’s something profoundly satisfying about mastering the art of sourdough bagels—those chewy, tangy circles of comfort that transform your kitchen into a artisan bakery. Journey with us through this accessible recipe that demystifies the process while delivering professional-quality results worthy of any brunch table or breakfast spread. These beginner-friendly bagels blend the complexity of sourdough with the timeless appeal of a New York-style classic.
8
portions25
minutes26
minutesIngredients
- 1 cup active sourdough starter
- 3 ½ cups bread flour
- 1 ¼ cups warm water (110°F)
- 2 tbsp honey
- 2 tsp salt
- 1 tbsp baking soda
- 1 egg white
- 2 tbsp sesame seeds
Instructions
- Combine 1 cup active sourdough starter, 3 ½ cups bread flour, 1 ¼ cups warm water (110°F), 2 tbsp honey, and 2 tsp salt in a large mixing bowl.
- Mix ingredients until a shaggy dough forms, then knead on a floured surface for 8-10 minutes until smooth and elastic.
- Place dough in a lightly oiled bowl, cover with plastic wrap, and let rise at room temperature for 8-12 hours until doubled in size.
- Divide dough into 8 equal portions and shape each into smooth balls.
- Press your thumb through the center of each ball and gently stretch to form a 2-inch diameter hole.
- Arrange shaped bagels on a parchment-lined baking sheet, cover with a damp cloth, and proof for 1 hour until puffy.
- Preheat oven to 425°F and bring a large pot of water to a rolling boil.
- Add 1 tbsp baking soda to the boiling water and carefully lower 2-3 bagels at a time using a slotted spoon.
- Boil each side for 30 seconds, then return to the baking sheet.
- Whisk 1 egg white with 1 tbsp water and brush lightly over each boiled bagel.
- Sprinkle 2 tbsp sesame seeds evenly over the egg-washed surfaces.
- Bake at 425°F for 20-25 minutes until deeply golden brown with a crisp exterior.
- Transfer bagels to a wire rack and cool completely before slicing.
What emerges from your oven are bagels with a crackly, blistered crust giving way to a tangy, chewy crumb that holds up beautifully to generous schmears of cream cheese or avocado. Their substantial texture makes them ideal for breakfast sandwiches, while the subtle sourdough complexity elevates even simple buttered slices. Consider splitting one warm from the oven and topping with smoked salmon and capers for an effortless yet elegant brunch centerpiece.
Easy Sourdough Focaccia
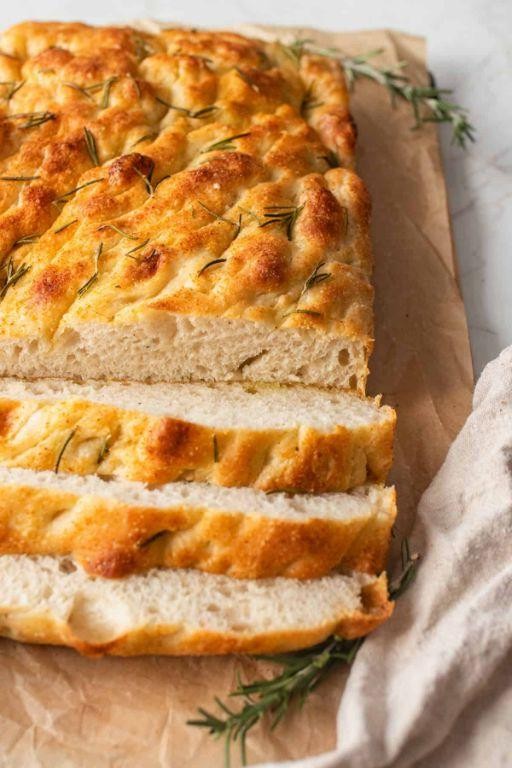
Unmistakably rustic yet refined, this sourdough focaccia transforms humble ingredients into a canvas of golden perfection. Using your active starter creates a complex, tangy depth that elevates this Italian classic beyond ordinary bread. With its crisp exterior and airy, olive oil-kissed crumb, it’s the kind of baking project that feels both impressive and approachable.
8
portions30
minutes25
minutesIngredients
– 1 cup active sourdough starter
– 3 ½ cups bread flour
– 1 ½ cups warm water (100°F)
– 2 tsp fine sea salt
– ¼ cup extra virgin olive oil
– 2 tbsp flaky sea salt
Instructions
1. Combine 1 cup active sourdough starter, 3 ½ cups bread flour, 1 ½ cups warm water (100°F), and 2 tsp fine sea salt in a large mixing bowl.
2. Mix with a wooden spoon until no dry flour remains, about 2 minutes.
3. Cover the bowl with a damp kitchen towel and let rest at room temperature for 30 minutes.
4. Perform the first set of stretch and folds: wet your hands, grab one edge of the dough, stretch it upward, and fold it over the center.
5. Rotate the bowl 90 degrees and repeat the stretch and fold process three more times, covering all four sides.
6. Cover the bowl again and let the dough rise at room temperature for 8-12 hours, until doubled in size and bubbly on surface.
7. Pour 2 tbsp extra virgin olive oil into a 9×13-inch baking pan, coating the bottom completely.
8. Transfer the dough to the oiled pan, gently stretching it toward the corners without tearing.
9. Cover the pan and let the dough proof for 2-4 hours until puffy and nearly reaching pan edges.
10. Preheat your oven to 425°F with a rack positioned in the center.
11. Dimple the dough deeply with oiled fingers, creating characteristic focaccia pockets across the entire surface.
12. Drizzle the remaining 2 tbsp extra virgin olive oil over the dimpled dough.
13. Sprinkle 2 tbsp flaky sea salt evenly across the surface.
14. Bake at 425°F for 20-25 minutes until deeply golden brown and crisp around the edges.
15. Transfer the focaccia to a wire rack and let cool for at least 30 minutes before slicing.
Such texture emerges from this patient process—a crackling crust giving way to an open, tender crumb infused with olive oil. Serve warm alongside roasted vegetables or tear into generous pieces for dipping in herbed oil. Slice horizontally for exceptional sandwich bread that transforms ordinary fillings into something memorable.
Beginner Level Sourdough English Muffins
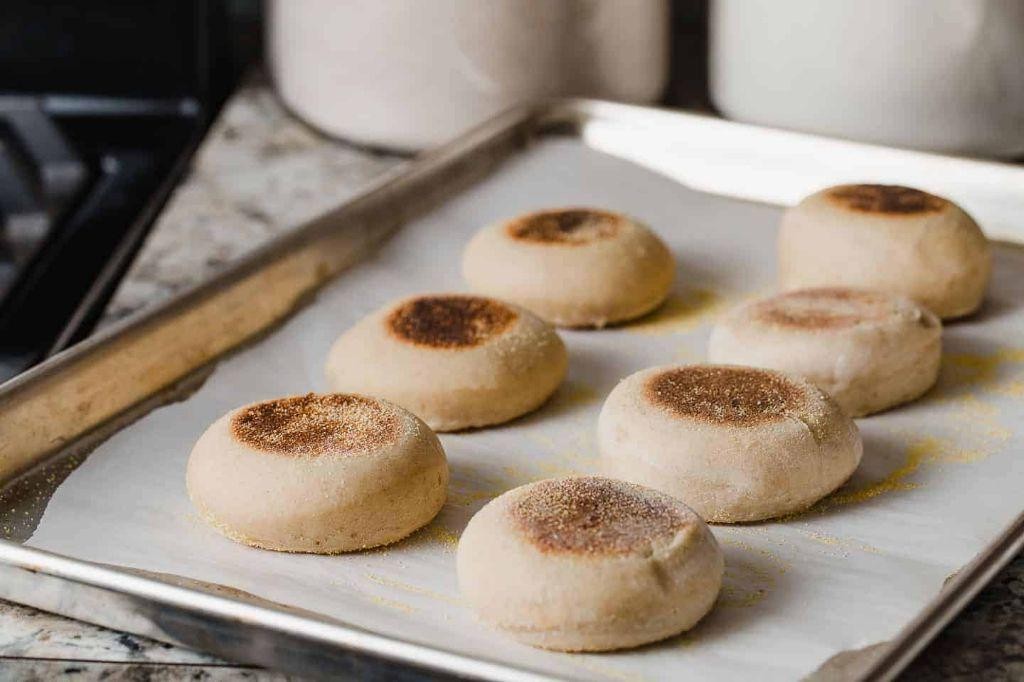
Perfectly crisp yet tender, these sourdough English muffins offer the ideal gateway into artisanal baking for novice enthusiasts. Possessing a delicate tang and signature nooks, they transform humble ingredients into breakfast elegance with minimal effort. Prepare to elevate your morning ritual with these golden, fork-split delights.
8
muffins30
minutes48
minutesIngredients
– 1 cup active sourdough starter
– 2 cups all-purpose flour
– 1 tbsp granulated sugar
– 1 tsp fine sea salt
– 1/2 cup whole milk
– 2 tbsp unsalted butter
– 1 tbsp cornmeal
Instructions
1. Combine 1 cup active sourdough starter, 2 cups all-purpose flour, 1 tbsp granulated sugar, and 1 tsp fine sea salt in a large mixing bowl.
2. Heat 1/2 cup whole milk and 2 tbsp unsalted butter in a saucepan until the butter melts and the mixture reaches 110°F.
3. Pour the warm milk mixture into the dry ingredients and stir until a shaggy dough forms.
4. Knead the dough on a floured surface for 8 minutes until smooth and elastic.
5. Place the dough in a greased bowl, cover with a damp cloth, and let rise at room temperature for 8 hours until doubled in size.
6. Gently deflate the dough and roll it out to 1-inch thickness on a lightly floured surface.
7. Use a 3-inch round cutter to cut out muffins, re-rolling scraps once.
8. Sprinkle 1 tbsp cornmeal evenly on a baking sheet and place muffins 2 inches apart.
9. Cover muffins with a clean kitchen towel and proof for 1 hour until slightly puffed.
10. Preheat an ungreased cast-iron skillet over medium-low heat for 5 minutes until it reaches 325°F.
11. Cook muffins in batches for 6 minutes per side until golden brown with firm edges.
12. Transfer cooked muffins to a wire rack to cool completely before splitting.
Heavenly when toasted, these muffins reveal a tender, airy crumb with a subtle tang that complements sweet jams or savory eggs. Their craggy interiors perfectly cradle melted butter, while the crisp exterior gives way to a pillowy softness. For an indulgent twist, use them as the base for eggs Benedict or simply enjoy warm with honey.
Simplified Sourdough Banana Bread
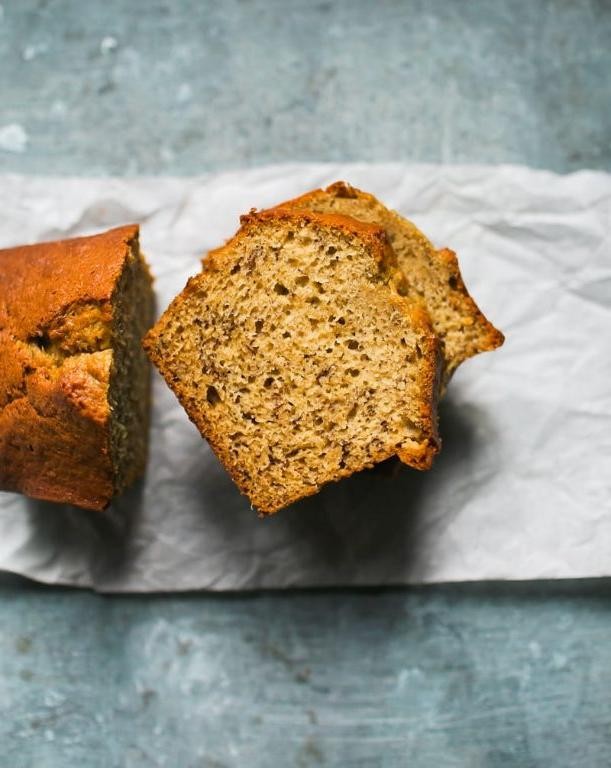
Warm, aromatic, and deeply comforting, this simplified sourdough banana bread transforms overripe bananas and active starter into a sophisticated treat. With its crackled crust and tender crumb, this recipe elevates the classic quick bread through gentle fermentation and careful baking. Each slice reveals complex flavors that develop beautifully overnight, making it worth the modest planning ahead.
1
loaf20
minutes60
minutesIngredients
– 1 ½ cups mashed very ripe bananas
– ½ cup active sourdough starter
– ½ cup unsalted butter, melted and cooled
– ¾ cup granulated sugar
– 2 large eggs, room temperature
– 1 teaspoon pure vanilla extract
– 2 cups all-purpose flour
– 1 teaspoon baking soda
– ½ teaspoon fine sea salt
– ½ cup chopped walnuts
Instructions
1. Preheat your oven to 350°F and generously grease a 9×5-inch loaf pan.
2. In a large mixing bowl, combine 1 ½ cups mashed very ripe bananas, ½ cup active sourdough starter, and ½ cup melted unsalted butter until fully incorporated.
3. Whisk in ¾ cup granulated sugar until the mixture becomes slightly pale and smooth.
4. Beat in 2 large eggs one at a time, followed by 1 teaspoon pure vanilla extract, ensuring each addition is fully combined before adding the next.
5. In a separate bowl, whisk together 2 cups all-purpose flour, 1 teaspoon baking soda, and ½ teaspoon fine sea salt.
6. Gently fold the dry ingredients into the wet mixture using a spatula, stopping as soon as no flour streaks remain to avoid overmixing.
7. Fold in ½ cup chopped walnuts until evenly distributed throughout the batter.
8. Pour the batter into the prepared loaf pan and smooth the top with your spatula.
9. Bake at 350°F for 55-65 minutes, or until a toothpick inserted into the center comes out completely clean with no wet crumbs attached.
10. Cool the bread in the pan on a wire rack for 15 minutes before transferring it directly to the rack to cool completely.
The bread develops a beautifully crisp, caramelized crust that gives way to a moist, tender interior flecked with toasted walnuts. For an elegant presentation, slice thickly and serve slightly warmed with a dollop of crème fraîche and a drizzle of honey, allowing the tangy sourdough notes to shine alongside the sweet banana richness.
Sourdough Cookies for Beginners

Heralding the perfect marriage of tangy sourdough starter and classic cookie comfort, these beginner-friendly treats transform your discard into golden, chewy delights. Here, the subtle complexity of fermented flour meets the nostalgic warmth of buttery cookies, creating something truly special for both novice bakers and sourdough enthusiasts alike. With straightforward techniques and common pantry staples, this recipe demystifies sourdough baking while delivering exceptional flavor and texture.
24
cookies20
minutes14
minutesIngredients
– 1 cup active sourdough starter
– 1/2 cup unsalted butter, softened
– 3/4 cup granulated sugar
– 1 large egg
– 1 teaspoon vanilla extract
– 2 cups all-purpose flour
– 1/2 teaspoon baking soda
– 1/2 teaspoon salt
– 1/2 cup chocolate chips
Instructions
1. Preheat your oven to 350°F and line two baking sheets with parchment paper.
2. In a large mixing bowl, cream together the softened butter and granulated sugar using an electric mixer on medium speed for 2-3 minutes until light and fluffy.
3. Add the egg and vanilla extract to the butter mixture, beating for 1 minute until fully incorporated.
4. Mix in the active sourdough starter until just combined, being careful not to overmix.
5. In a separate bowl, whisk together the all-purpose flour, baking soda, and salt until evenly distributed.
6. Gradually add the dry ingredients to the wet mixture, mixing on low speed until a soft dough forms.
7. Fold in the chocolate chips using a spatula until evenly distributed throughout the dough.
8. Cover the bowl with plastic wrap and refrigerate the dough for 30 minutes to prevent spreading during baking.
9. Using a cookie scoop or tablespoon, portion dough into 1.5-inch balls and place them 2 inches apart on prepared baking sheets.
10. Bake for 12-14 minutes until the edges are golden brown but centers still appear slightly soft.
11. Remove from oven and let cookies cool on baking sheets for 5 minutes before transferring to a wire rack.
12. Repeat with remaining dough, ensuring baking sheets cool completely between batches.
Outstanding in both texture and flavor, these cookies emerge with crisp edges giving way to soft, cake-like centers that carry the distinctive tang of sourdough. The subtle fermented notes beautifully complement the sweet chocolate chips, creating a sophisticated twist on traditional cookies. For an elegant presentation, serve them warm with a dusting of flaky sea salt or alongside a scoop of vanilla bean ice cream for a delightful contrast of temperatures and textures.
Quick Sourdough Flatbreads
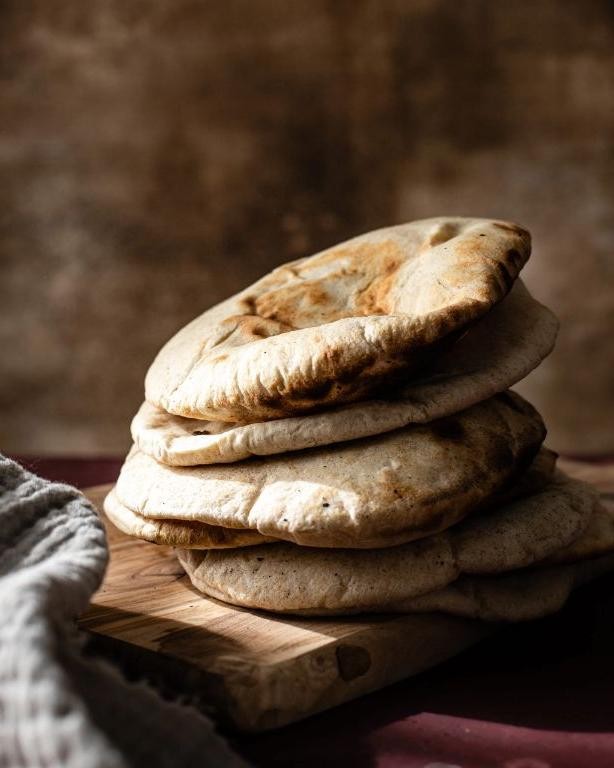
A sophisticated twist on traditional bread-making, these quick sourdough flatbreads transform your starter discard into elegant, rustic rounds perfect for any occasion. Their delicate tang and tender crumb elevate simple meals while requiring minimal active preparation time. With just a few basic ingredients and a hot skillet, you can create impressively artisanal flatbreads that showcase the beautiful simplicity of sourdough.
4
portions35
minutes16
minutesIngredients
– 1 cup sourdough starter discard
– 1 cup all-purpose flour
– 1/2 tsp salt
– 2 tbsp olive oil
– 1/4 cup warm water (110°F)
Instructions
1. Combine 1 cup sourdough starter discard, 1 cup all-purpose flour, and 1/2 tsp salt in a medium mixing bowl.
2. Add 2 tbsp olive oil and 1/4 cup warm water (110°F) to the dry ingredients.
3. Mix with a wooden spoon until a shaggy dough forms, then knead by hand for 3 minutes until smooth and slightly tacky.
4. Cover the bowl with a damp kitchen towel and let the dough rest at room temperature for 30 minutes to develop flavor.
5. Divide the rested dough into 4 equal portions using a bench scraper for precision.
6. Roll each portion into a ball, then flatten into 1/4-inch thick rounds using a rolling pin on a lightly floured surface.
7. Heat a cast-iron skillet over medium-high heat until a drop of water sizzles immediately upon contact.
8. Cook one flatbread at a time for 2 minutes until bubbles form and the bottom develops golden-brown spots.
9. Flip the flatbread using tongs and cook for another 1-2 minutes until both sides are evenly browned.
10. Transfer cooked flatbreads to a wire rack to prevent steaming and maintain crispness.
11. Repeat the cooking process with remaining dough rounds, adjusting heat if the skillet becomes too hot.
These flatbreads emerge with a delightfully chewy interior and crisp, blistered exterior that perfectly showcases the sourdough’s complex tang. Serve them warm alongside Mediterranean dips, use as a base for creative toppings, or simply enjoy brushed with garlic-infused olive oil for an effortless yet impressive bread experience.
Beginner’s Sourdough Cinnamon Rolls

Sourdough transforms the humble cinnamon roll into an artisanal masterpiece, where tangy fermentation meets sweet spice in perfect harmony. These beginner-friendly rolls feature a tender, airy crumb that cradles a ribbon of cinnamon sugar, achieving bakery-quality results with the distinct character only sourdough can provide. With patience and simple technique, even novice bakers can create these aromatic delights that fill the kitchen with the comforting scent of home baking.
12
rolls40
minutes25
minutesIngredients
– 1 cup active sourdough starter
– 3 ½ cups all-purpose flour
– ½ cup granulated sugar
– 1 tsp salt
– ½ cup whole milk, warmed to 110°F
– 6 tbsp unsalted butter, softened
– 1 large egg
– ¼ cup light brown sugar
– 2 tbsp ground cinnamon
– 4 oz cream cheese, softened
– 1 cup powdered sugar
– 2 tbsp heavy cream
Instructions
1. Combine sourdough starter, flour, ¼ cup granulated sugar, salt, warm milk, 4 tablespoons butter, and egg in a large mixing bowl.
2. Mix on low speed for 2 minutes until a shaggy dough forms, then knead for 8 minutes until smooth and elastic.
3. Transfer dough to a lightly oiled bowl, cover with plastic wrap, and let rise at room temperature for 8-12 hours until doubled in size.
4. Punch down the risen dough and roll out on a floured surface to a 12×16-inch rectangle.
5. Spread remaining 2 tablespoons softened butter evenly over the dough surface using an offset spatula.
6. Combine remaining ¼ cup granulated sugar, brown sugar, and cinnamon in a small bowl, then sprinkle evenly over the buttered dough.
7. Tightly roll the dough lengthwise into a log, pinching the seam to seal.
8. Cut the log into 12 equal pieces using a sharp serrated knife, wiping the blade between cuts for clean slices.
9. Arrange rolls in a greased 9×13-inch baking dish, cover with a clean kitchen towel, and let proof for 2-3 hours until puffy.
10. Preheat oven to 350°F and bake rolls for 22-25 minutes until golden brown and internal temperature reaches 190°F.
11. While rolls bake, beat cream cheese, powdered sugar, and heavy cream with an electric mixer until smooth and spreadable.
12. Remove rolls from oven and let cool in pan for 15 minutes before spreading cream cheese frosting evenly over the top.
What makes these sourdough cinnamon rolls exceptional is their complex flavor profile, where the tangy sourdough base beautifully contrasts with the sweet cinnamon filling and rich cream cheese frosting. The texture achieves an ideal balance between pillowy softness and substantial chew, creating layers that pull apart with satisfying resistance. For an elegant presentation, serve them warm alongside strong coffee or as the centerpiece of a brunch spread, where their aromatic spices and artisanal character will undoubtedly impress.
Conclusion
Great news for your sourdough journey! This collection offers 34 beginner-friendly recipes to build your confidence and skills. We hope you’ll try these delicious creations, share your favorites in the comments below, and pin this article to your Pinterest boards for easy reference. Happy baking!


