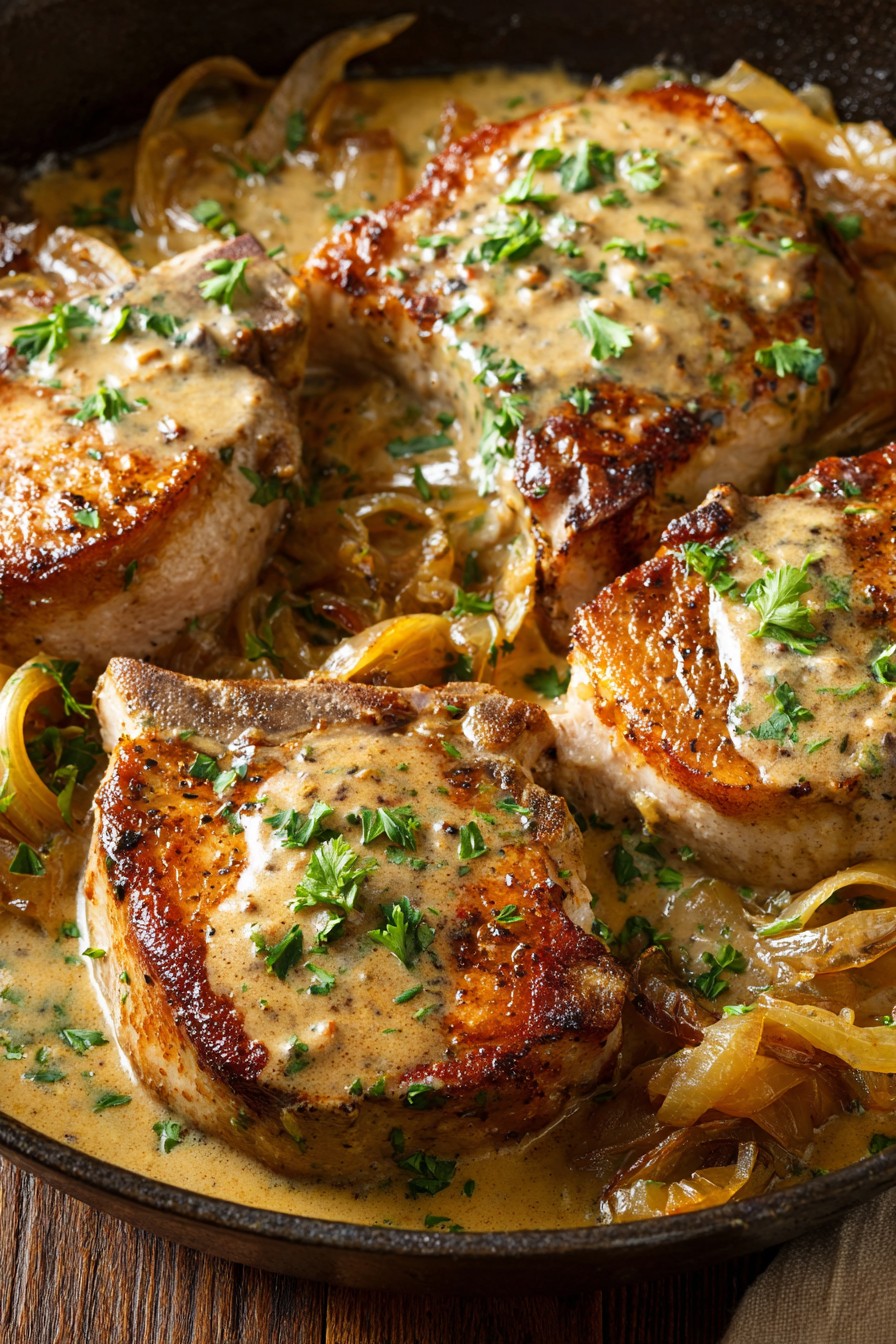
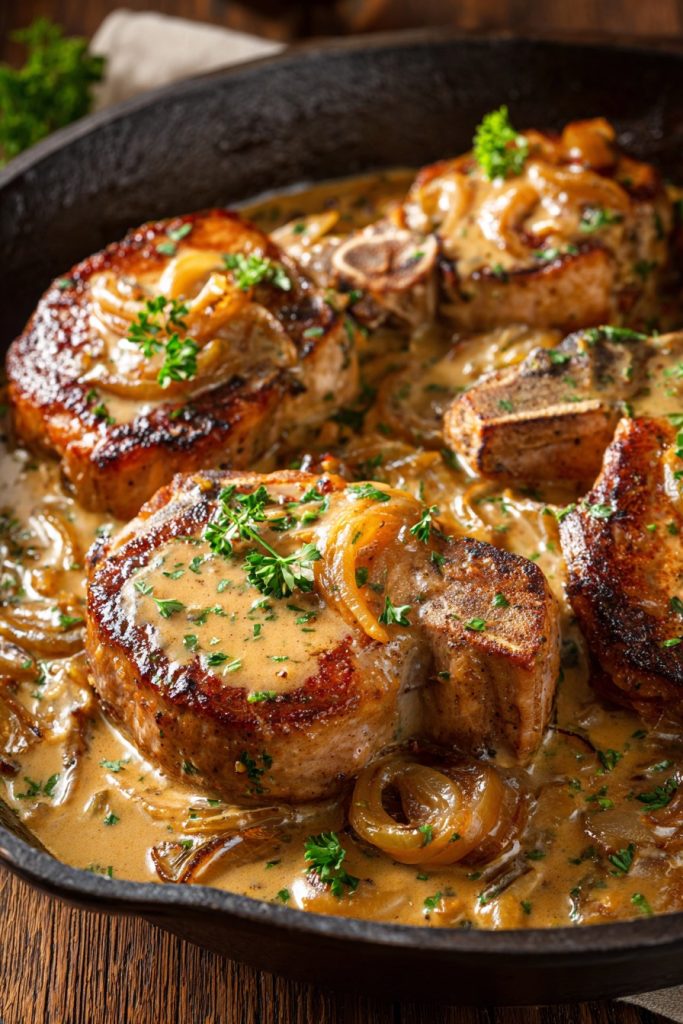
Picture this: thick-cut pork chops swimming in a rich, savory gravy that’s been simmered to perfection, filling your kitchen with aromas that transport you straight back to Sunday dinners at Grandma’s house. Perfectly browned chops become meltingly tender after a slow braise in that heavenly onion-laced sauce, creating the kind of meal that warms you from the inside out and leaves everyone at the table asking for seconds.
Why This Recipe Works
- The double-searing method creates an incredible fond in the pan that forms the foundation of our rich, deeply flavored gravy, ensuring every bite carries that beautiful caramelized essence.
- Slow braising transforms even the toughest pork chops into fork-tender perfection, allowing the meat to absorb all the wonderful flavors from the onions and gravy while becoming incredibly moist and succulent.
- Using both chicken broth and heavy cream creates a balanced gravy that’s neither too thin nor too thick, with just the right amount of richness to coat each chop beautifully without overwhelming the palate.
- The simple combination of onions, garlic, and basic pantry staples delivers complex, layered flavors that taste like they took hours more effort than they actually require, making this feel truly special.
- This method works reliably every single time, whether you’re using bone-in or boneless chops, making it a versatile technique you’ll return to again and again for family dinners and special occasions alike.
Ingredients
- 4 bone-in pork chops, about 1-inch thick
- 2 teaspoons kosher salt, divided
- 1 teaspoon freshly ground black pepper
- 1 teaspoon garlic powder
- 1 teaspoon paprika
- 1/2 cup all-purpose flour
- 3 tablespoons olive oil, divided
- 2 large yellow onions, thinly sliced
- 4 cloves garlic, minced
- 2 cups chicken broth
- 1/2 cup heavy cream
- 2 tablespoons unsalted butter
- 1 teaspoon Worcestershire sauce
- 1/2 teaspoon dried thyme
- 2 tablespoons fresh parsley, chopped for garnish
Equipment Needed
- Large cast iron skillet or heavy-bottomed oven-safe pan
- Tongs
- Measuring cups and spoons
- Cutting board and sharp knife
- Mixing bowls
- Whisk
- Aluminum foil
Instructions

Season and Prepare the Pork Chops
Begin by patting your pork chops completely dry with paper towels – this crucial step ensures we get that beautiful golden-brown sear rather than steaming the meat. In a small bowl, combine 1 teaspoon of kosher salt, the black pepper, garlic powder, and paprika, then rub this seasoning blend generously over both sides of each chop, making sure to work it into all the nooks and crannies. Let the seasoned chops rest at room temperature for about 20 minutes while you prepare your other ingredients; this brief resting period allows the seasoning to penetrate the meat and helps ensure even cooking. Meanwhile, spread the all-purpose flour out on a large plate or shallow dish – we’ll use this for dredging right before searing to create that perfect crust. Tip: Bringing the meat to room temperature before cooking helps prevent the chops from seizing up and becoming tough when they hit the hot pan.
Sear the Pork Chops to Perfection
Heat 2 tablespoons of olive oil in your large cast iron skillet over medium-high heat until it shimmers and just begins to smoke – you want that oil nice and hot to create an instant sear. While the oil heats, dredge each seasoned pork chop in the flour, shaking off any excess before carefully placing them in the hot skillet. You should hear that satisfying sizzle the moment the meat touches the pan! Cook the chops for 4-5 minutes per side without moving them, until they develop a deep golden-brown crust that releases easily from the pan. Work in batches if necessary to avoid overcrowding, as crowding will steam the chops rather than sear them. Remove the beautifully browned chops to a clean plate and set aside – we’ll return them to that glorious pan later to finish cooking in our savory gravy.
Create the Flavor Foundation with Onions
Reduce the heat to medium and add the remaining tablespoon of olive oil to the same skillet, then add your thinly sliced onions along with the remaining teaspoon of salt. The salt will help draw out the onions’ natural sweetness as they cook. Stir occasionally, scraping up all those delicious browned bits from the bottom of the pan – that’s pure flavor gold right there! Cook the onions for 15-20 minutes, until they become soft, translucent, and develop a beautiful caramel color, stirring frequently to prevent burning. About halfway through the onion cooking time, add the minced garlic and continue cooking until fragrant, about 1-2 minutes more. Tip: Don’t rush this step – properly caramelized onions provide the sweet, deep flavor base that makes this dish truly exceptional.
Build the Rich Gravy
Sprinkle 2 tablespoons of the remaining flour over the caramelized onions and garlic, stirring constantly to create a roux that will thicken our gravy. Cook this mixture for about 2 minutes to remove the raw flour taste, then slowly pour in the chicken broth while whisking continuously to prevent lumps from forming. Add the Worcestershire sauce and dried thyme, then bring the mixture to a gentle simmer, allowing it to thicken slightly for about 3-4 minutes. Stir in the heavy cream and butter, continuing to whisk until the butter melts completely and the sauce becomes smooth and velvety. Taste the gravy and adjust seasoning if needed – it should be richly flavored and perfectly seasoned before we add our pork chops back to the pan.
Braise to Tender Perfection
Nestle the seared pork chops back into the skillet, spooning plenty of that glorious onion gravy over the top of each chop. Reduce the heat to low, cover the skillet tightly with a lid or aluminum foil, and let everything simmer gently for 45-50 minutes. The low, slow braising time allows the pork to become incredibly tender while absorbing all the wonderful flavors from the gravy. After 45 minutes, check for doneness – the pork should be fork-tender and register at least 145°F on an instant-read thermometer. If the gravy has thickened too much during braising, you can thin it with a splash of additional chicken broth or cream. Tip: The low, slow braise is what transforms ordinary pork chops into something truly magical – don’t be tempted to rush this step!
Finish and Serve Your Masterpiece
Once your pork chops have reached that perfect fall-apart tenderness, remove the skillet from heat and let it rest for 5-10 minutes before serving. This brief resting period allows the juices to redistribute throughout the meat, ensuring every bite remains moist and flavorful. Garnish with freshly chopped parsley for a pop of color and freshness that cuts through the richness of the dish. Serve these beautiful smothered pork chops straight from the skillet, making sure each plate gets plenty of that incredible onion gravy. They’re perfect served over creamy mashed potatoes, buttered egg noodles, or with a side of crusty bread to soak up every last drop of that heavenly sauce.
Tips and Tricks
When selecting pork chops for this recipe, I always recommend choosing bone-in cuts whenever possible – the bone adds incredible flavor during the long braising process and helps keep the meat moist and tender. Thicker chops (about 1 to 1.5 inches) work best as they have more time to develop that beautiful crust without overcooking during the searing phase. If you only have thinner chops available, simply reduce the braising time to 25-30 minutes to prevent them from becoming dry. For the most flavorful results, consider brining your pork chops before cooking – dissolve 1/4 cup each of kosher salt and sugar in 4 cups of cold water, submerge the chops for 2-4 hours, then pat dry before seasoning. This simple step ensures incredibly juicy, well-seasoned meat throughout.
The type of pan you use makes a significant difference in the final result. While any heavy-bottomed skillet will work, a well-seasoned cast iron pan provides the most consistent heat distribution and creates the best fond for your gravy. If you don’t have an oven-safe skillet for the braising step, you can easily transfer everything to a Dutch oven or baking dish covered tightly with foil. When caramelizing your onions, patience is truly a virtue – rushing this process by cranking up the heat will only result in burned onions rather than the sweet, deeply flavored foundation we’re aiming for. If you find your onions are browning too quickly, don’t hesitate to add a tablespoon of water or broth to slow things down.
For those who prefer a smoother gravy, you can use an immersion blender to puree the onions after they’ve caramelized, though I personally love the texture and visual appeal of the sliced onions in the finished dish. If your gravy becomes too thick during braising, simply thin it with additional broth or cream until it reaches your desired consistency. Conversely, if the gravy seems too thin after braising, you can mix a tablespoon of cornstarch with two tablespoons of cold water and stir it into the simmering gravy to thicken it up. Leftovers reheat beautifully – store everything in an airtight container in the refrigerator for up to 4 days, and gently reheat on the stovetop over low heat, adding a splash of broth if needed to loosen the gravy.
Recipe Variations
- For a mushroom lover’s version, add 8 ounces of sliced cremini mushrooms when you add the garlic. The earthy flavor of mushrooms pairs beautifully with the rich gravy and creates an even heartier dish that’s perfect for chilly evenings. You could also use a combination of different mushroom varieties like shiitake, oyster, or porcini for more complex flavors.
- Create a creamy mustard version by stirring 2 tablespoons of whole grain mustard and 1 tablespoon of Dijon mustard into the gravy along with the heavy cream. The tangy mustard cuts through the richness of the dish beautifully and adds another layer of flavor that complements the pork perfectly. Serve this variation with roasted potatoes rather than mashed for a different texture experience.
- For a spicy kick, add 1-2 diced jalapeños (seeds removed for milder heat) when cooking the onions, and include 1 teaspoon of smoked paprika instead of regular paprika in the seasoning blend. You could also stir in a tablespoon of your favorite hot sauce along with the Worcestershire sauce for an extra layer of heat that builds gradually with each bite.
- Transform this into a complete one-pot meal by adding 2 cups of chopped potatoes and carrots to the skillet along with the pork chops during the braising step. The vegetables will cook in the flavorful gravy and become tender and delicious, making this an even more substantial meal that requires no additional sides beyond maybe some crusty bread to soak up the extra sauce.
- For an herbed version, replace the dried thyme with 2 teaspoons of fresh thyme leaves and add 1 teaspoon of chopped fresh rosemary when building the gravy. Garnish with additional fresh herbs like chives or tarragon along with the parsley for a brighter, more garden-fresh flavor profile that’s particularly lovely in the spring and summer months.
Frequently Asked Questions
Can I use boneless pork chops instead of bone-in?
Absolutely! Boneless pork chops work perfectly well in this recipe, though you may need to reduce the braising time slightly since they tend to cook a bit faster than their bone-in counterparts. Start checking boneless chops for doneness around the 35-minute mark – they should be fork-tender and register 145°F on an instant-read thermometer. The bone does add flavor and helps protect the meat from drying out, so if using boneless, I recommend choosing thicker cuts (at least 1 inch) and being extra careful not to overcook during the searing phase. The gravy and slow braising method will still yield incredibly tender, flavorful results regardless of which cut you choose.
What’s the best way to store and reheat leftovers?
Store any leftovers in an airtight container in the refrigerator for up to 4 days, making sure to include plenty of that delicious gravy with the pork chops. When reheating, I strongly recommend using the stovetop method rather than the microwave – place the chops and gravy in a skillet over low heat, adding a splash of chicken broth or water if the gravy has thickened too much in the refrigerator. Cover and heat gently, stirring occasionally, until warmed through, which usually takes about 10-15 minutes. This gentle reheating method preserves the tender texture of the pork much better than the microwave, which can make the meat tough and rubbery.
Can I make this recipe in a slow cooker?
You certainly can adapt this for the slow cooker, though I recommend still searing the pork chops and caramelizing the onions on the stovetop first to develop those deep, complex flavors. After searing, transfer everything to your slow cooker, pour the gravy ingredients over the top, and cook on low for 6-7 hours or on high for 3-4 hours. The longer, gentler cooking time in the slow cooker results in exceptionally tender meat, but the gravy may be thinner than the stovetop version. If needed, you can thicken it at the end by mixing 2 tablespoons of cornstarch with 1/4 cup cold water and stirring it into the hot gravy, then cooking on high for an additional 15-20 minutes.
What should I serve with smothered pork chops?
These rich, gravy-smothered pork chops pair beautifully with simple sides that can soak up that incredible sauce. Creamy mashed potatoes are the classic accompaniment, but buttered egg noodles, polenta, or rice also work wonderfully. For vegetables, I love serving green beans, roasted Brussels sprouts, or a simple garden salad to provide some freshness and contrast to the rich main dish. Crusty bread is practically mandatory for sopping up every last bit of gravy from your plate – there’s nothing more satisfying than that final piece of bread cleaning up what the fork missed! For a complete comfort food meal, you really can’t go wrong with the classic combination of smothered pork chops, mashed potatoes, and green beans.
Can I freeze this dish for later?
Yes, smothered pork chops freeze remarkably well! Allow the dish to cool completely, then transfer to freezer-safe containers, making sure the pork chops are fully submerged in the gravy to prevent freezer burn. They’ll keep well for up to 3 months in the freezer. When ready to enjoy, thaw overnight in the refrigerator before reheating gently on the stovetop as described above. You may need to add a bit of additional liquid when reheating if the gravy has separated or thickened during freezing – a splash of broth or cream will bring it back to the perfect consistency. Freezing is a wonderful way to have a comforting homemade meal ready for those busy weeknights when you don’t have time to cook from scratch.
Summary
This timeless smothered pork chops recipe delivers incredible comfort food perfection through simple techniques that transform basic ingredients into something truly special. The combination of perfectly seared chops, slowly caramelized onions, and rich, savory gravy creates a dish that feels both nostalgic and wonderfully satisfying, perfect for family dinners or special occasions alike.
Smothered Pork Chops
6
servings20
minutes1
minutesIngredients
Instructions
- 1 Pat pork chops dry and season with 1 teaspoon salt, pepper, garlic powder, and paprika. Let rest 20 minutes.
- 2 Dredge chops in flour. Heat 2 tablespoons oil in skillet over medium-high. Sear chops 4-5 minutes per side until golden brown. Remove and set aside.
- 3 Reduce heat to medium. Add remaining oil and onions with remaining salt. Cook 15-20 minutes until caramelized, adding garlic halfway through.
- 4 Sprinkle 2 tablespoons flour over onions, cook 2 minutes. Whisk in broth, Worcestershire, and thyme. Simmer 3-4 minutes. Stir in cream and butter until smooth.
- 5 Return chops to skillet, spoon gravy over top. Cover and simmer on low 45-50 minutes until tender and 145°F internal temperature.
- 6 Rest 5-10 minutes, garnish with parsley, and serve with mashed potatoes or egg noodles.


