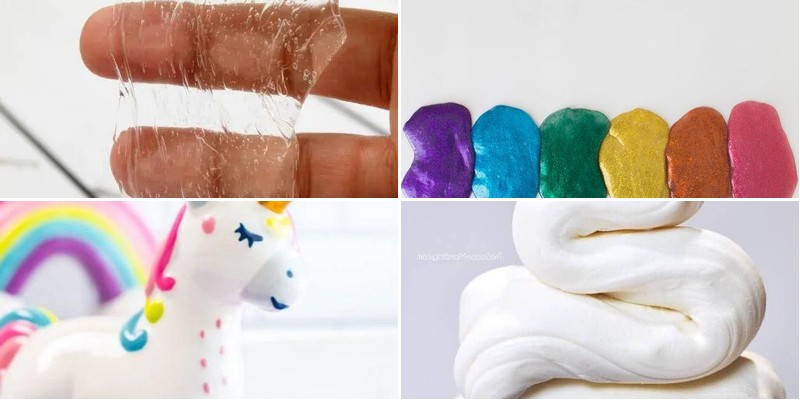
Transform your kitchen into a sensory wonderland with these 24 creative slime recipes using borax! Whether you’re crafting with kids or exploring textures for stress relief, these easy-to-follow recipes promise endless fun and tactile excitement. From glittery galaxies to fluffy clouds, get ready to dive into a world of squishy, stretchy creations. Let’s mix up some magic together—your next favorite sensory adventure awaits!
Glow-in-the-Dark Borax Slime
Wondering how to make something truly magical for your next party or just a fun weekend activity? I first discovered this glow-in-the-dark slime when my niece begged me to help with her science fair project, and we ended up having way more fun than expected—plus it doubled as the coolest nightlight ever!
1
batch15
minutesIngredients
– About 1/2 cup of clear school glue (the kind that dries clear)
– A good splash of warm water, around 1/4 cup
– A couple of tablespoons of glow-in-the-dark paint (the more, the glow-ier!)
– Roughly 1/2 teaspoon of borax powder
– Another 1/4 cup or so of warm water for dissolving the borax
Instructions
1. Pour 1/2 cup of clear school glue into a medium-sized mixing bowl.
2. Add 1/4 cup of warm water to the glue and stir with a spoon until fully combined.
3. Mix in 2 tablespoons of glow-in-the-dark paint thoroughly until the color is even throughout the mixture.
4. In a separate small cup, dissolve 1/2 teaspoon of borax powder in 1/4 cup of warm water, stirring until no granules remain visible.
5. Slowly pour the borax solution into the glue mixture while continuously stirring with your other hand.
6. Keep stirring until the slime begins to pull away from the sides of the bowl and forms a cohesive mass.
7. Knead the slime with your hands for 2-3 minutes until it reaches a smooth, stretchy consistency.
8. Charge the finished slime under a bright light for 5 minutes to activate the glow effect.
9. Store your glow-in-the-dark slime in an airtight container when not in use to prevent drying out.
My favorite thing about this slime is how satisfyingly stretchy it becomes after a good kneading, with a texture that’s neither too sticky nor too firm. For maximum glow power, try shaping it into fun forms like glowing snakes or rolling it into balls before your next movie night—it makes the perfect hands-on activity while watching films!
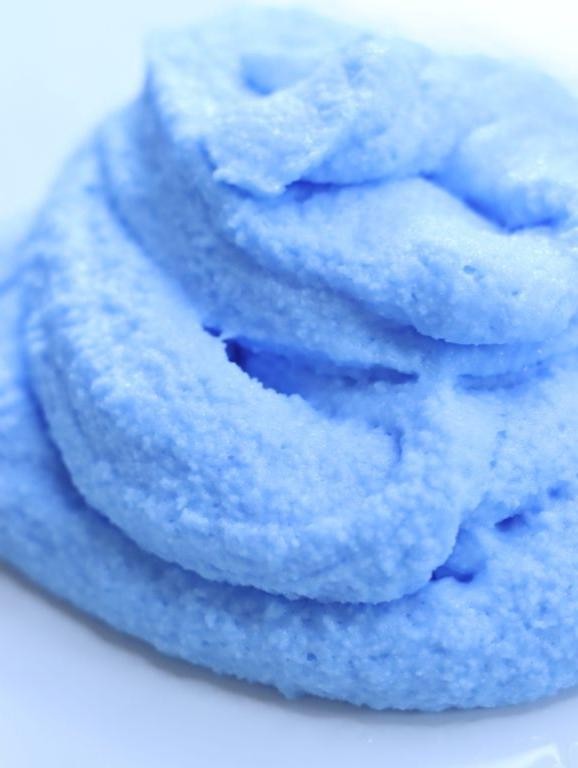
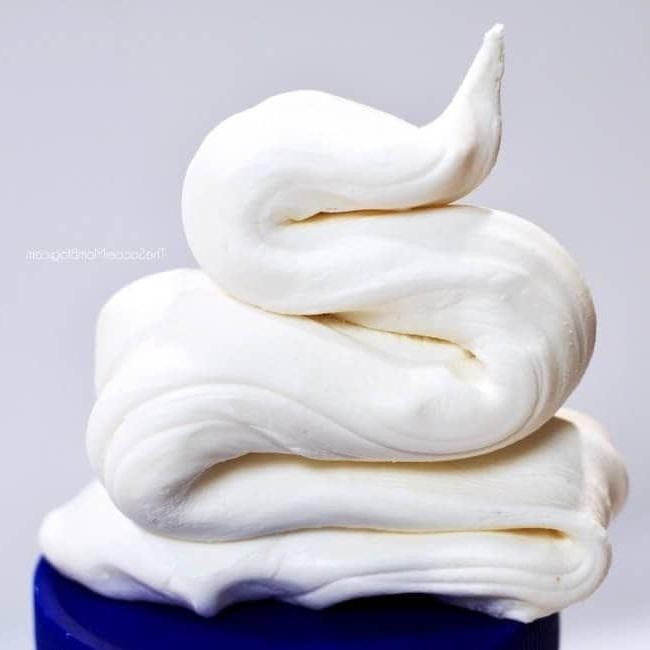
Fluffy Borax Slime with Shaving Cream
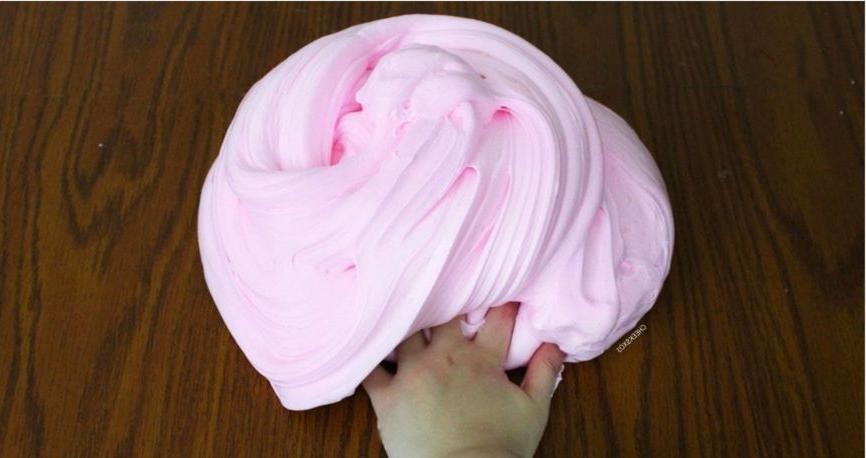
Remember when we were kids and thought the coolest science experiments doubled as snacks? Recently, my niece convinced me to recreate that magical kitchen chemistry with a twist on nostalgic slime. Fluffy Borax Slime with Shaving Cream brings back all the sensory fun with an irresistibly pillowy texture that’s perfect for stress relief or playful afternoons.
1
batch10
minutesIngredients
- A generous half cup of white school glue
- About two big handfuls of foamy shaving cream (not gel!)
- A couple of drops of your favorite food coloring
- A quarter cup of warm tap water
- A tiny half teaspoon of borax powder
Instructions
- Pour the half cup of white school glue into a medium mixing bowl.
- Squeeze in roughly two handfuls of shaving cream—enough to make the mixture look like a fluffy cloud.
- Add a couple of drops of food coloring and stir everything with a spatula until the color is evenly mixed. Tip: Use gel food coloring for more vibrant hues without thinning the slime.
- In a separate small cup, dissolve the half teaspoon of borax powder completely into the quarter cup of warm water, stirring for about 30 seconds until no grains remain.
- Slowly drizzle the borax solution into the glue mixture while stirring continuously with the spatula.
- Keep mixing for 1–2 minutes as the slime begins to pull away from the sides of the bowl and form a cohesive ball.
- Knead the slime with your hands for another 2–3 minutes until it’s smooth, stretchy, and no longer sticky. Tip: If it’s too sticky, add a pinch more borax solution; if too stiff, work in a dab of extra shaving cream.
- Play with the slime immediately or store it in an airtight container to keep it fresh for weeks. Tip: For extra fluffiness, let the slime rest for 10 minutes before stretching.
Doesn’t this slime feel like squeezing a soft, cool cloud? The shaving cream gives it such a lightweight, airy bounce that’s incredibly satisfying to poke and pull. Try shaping it into pastel-colored “cupcakes” for a fun party activity, or just enjoy its soothing texture during movie nights—it’s the ultimate hands-on comfort craft.
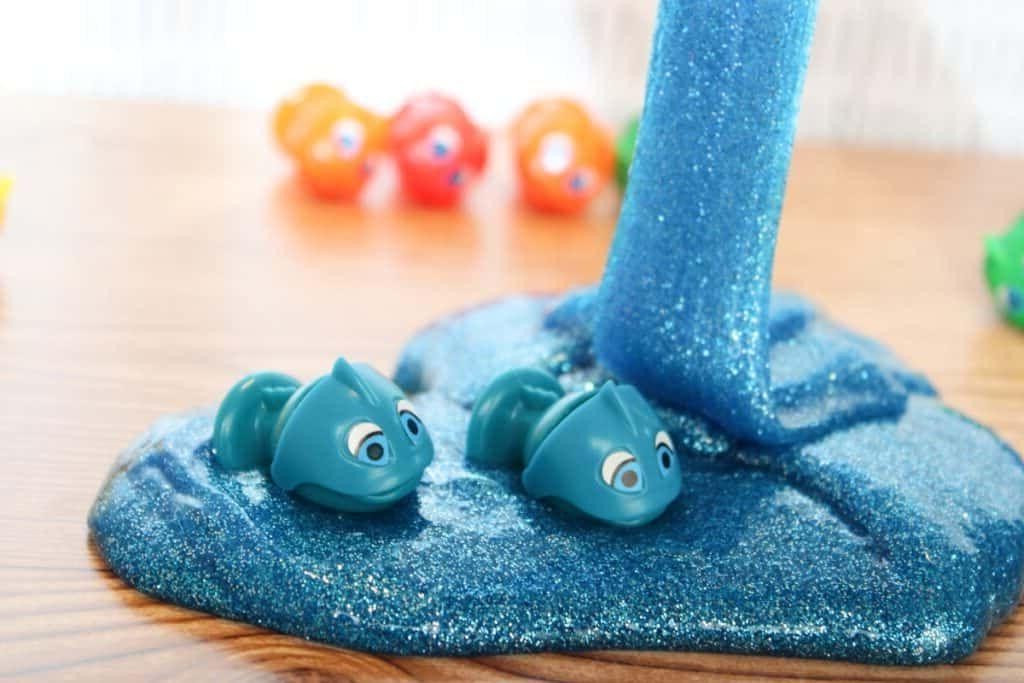
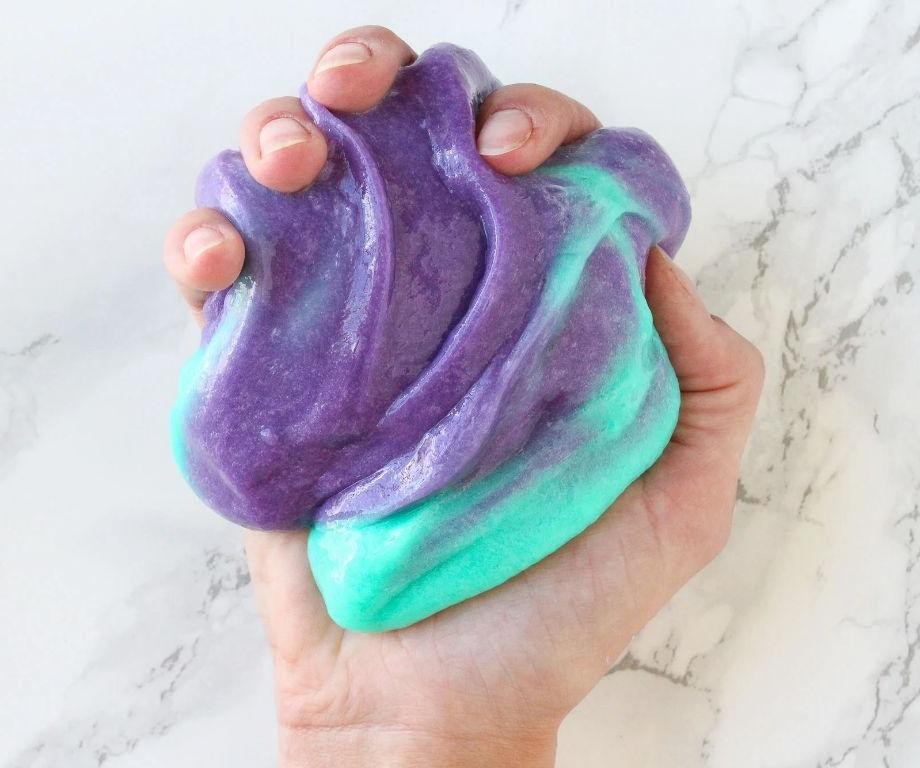
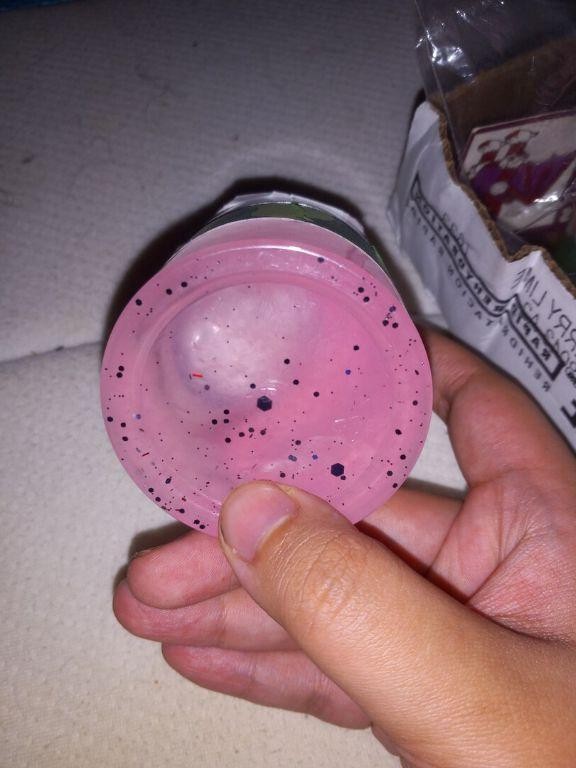
Galaxy-Themed Borax Slime
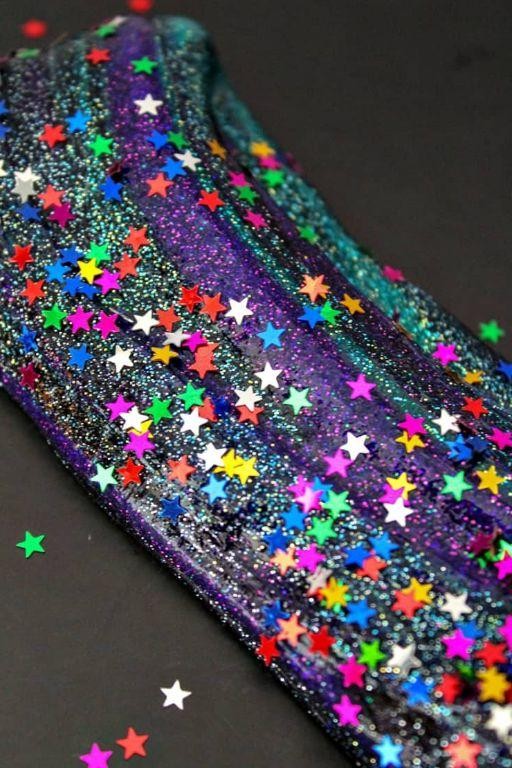
Haven’t we all dreamed of holding a piece of the cosmos in our hands? I first tried making this galaxy-themed borax slime with my niece last summer, and now it’s our go-to rainy-day project—it’s mesmerizingly stretchy and shimmers like a starry night. Honestly, it’s so fun to play with, I sometimes catch myself squishing it during Zoom calls!
1
batch15
minutesIngredients
– About 1/2 cup of clear school glue
– A generous splash of warm water (around 1/2 cup)
– A tiny pinch of borax powder (roughly 1/2 tsp)
– A couple of drops of blue food coloring
– A sprinkle of silver glitter
– A few dots of purple food coloring
– A dash of black food coloring
Instructions
1. Pour 1/2 cup of clear school glue into a medium-sized mixing bowl.
2. Add 1/2 cup of warm water to the glue and stir slowly with a wooden spoon until fully combined—this helps prevent lumps. Tip: Warm water blends more smoothly than cold!
3. Squeeze in 2-3 drops of blue food coloring and mix gently to create a base galaxy hue.
4. Sprinkle in a pinch of silver glitter and stir just enough to distribute it unevenly, mimicking scattered stars.
5. In a separate small cup, dissolve 1/2 tsp of borax powder in 1/2 cup of warm water, stirring until no crystals remain. Tip: Fully dissolved borax gives the slime a smoother texture.
6. Slowly pour the borax solution into the glue mixture while stirring continuously with your hands—the slime will start to pull away from the bowl.
7. Knead the slime for 2-3 minutes until it’s no longer sticky, adding a dot of purple and a dot of black food coloring as you go. Tip: Don’t overmix the colors; swirl them lightly for a marbled galaxy effect.
8. Stretch and fold the slime another 10 times to blend the colors subtly.
Feeling that cool, stretchy texture between your fingers is pure joy—it’s glossy, elastic, and shimmers under light. We love draping it over a black bowl to mimic a swirling nebula, or just pulling it slowly to watch the glitter sparkle like distant stars.
Unicorn-Colored Borax Slime
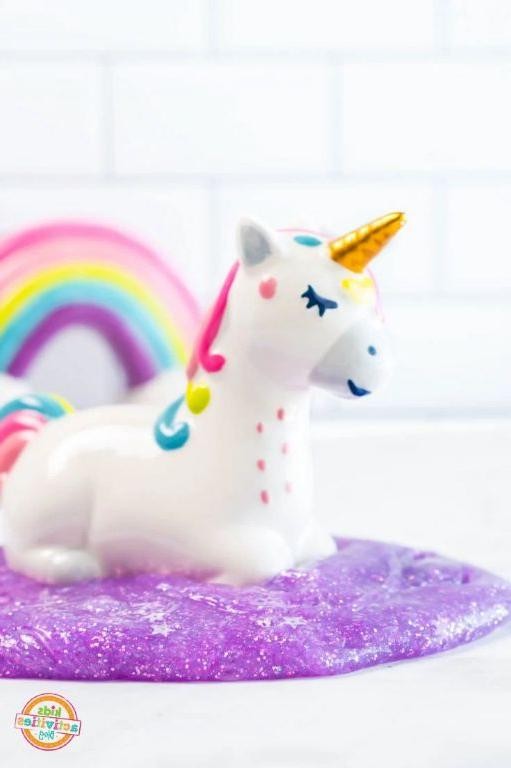
Gosh, I still remember the first time my niece begged me to make this magical slime after seeing it on TikTok—her eyes lit up like actual unicorns when she saw those swirls of color! It’s become our go-to rainy-day activity, and honestly, I love how it turns my kitchen into a mini science lab. Trust me, this borax slime is way more fun than any store-bought version, and the vibrant hues make it totally Instagram-worthy.
1
batch15
minutesIngredients
– A half cup of clear school glue
– A splash of warm water (about 1/4 cup)
– A couple of drops of pink gel food coloring
– A couple of drops of blue gel food coloring
– A couple of drops of purple gel food coloring
– A tiny sprinkle of borax powder (roughly 1/2 teaspoon)
– Another splash of warm water (about 1/2 cup)
Instructions
1. Pour a half cup of clear school glue into a medium-sized mixing bowl.
2. Add a splash of warm water (about 1/4 cup) to the glue and stir slowly with a wooden spoon until fully combined—this helps prevent lumps. Tip: Use warm water here; it makes the glue easier to mix without clumping.
3. Drop a couple of drops of pink gel food coloring into one section of the bowl, then add a couple of drops of blue gel food coloring to another section, and finish with a couple of drops of purple gel food coloring in a third section.
4. Gently swirl the colors with the spoon just once or twice to create marbled streaks—don’t overmix, or you’ll end up with a muddy color. Tip: Gel food coloring works best for bold, vibrant shades that won’t dilute the slime.
5. In a separate small bowl, dissolve a tiny sprinkle of borax powder (roughly 1/2 teaspoon) into another splash of warm water (about 1/2 cup), stirring until no grains remain.
6. Slowly pour the borax solution into the colored glue mixture, stirring continuously with the spoon until the slime starts to pull away from the sides of the bowl.
7. Use your hands to knead the slime for 2–3 minutes until it’s stretchy and no longer sticky. Tip: If it feels too sticky, add a pinch more borax solution, but be careful—too much can make it rubbery.
But the best part is that silky, squishy texture that’s perfect for stress-relief or just showing off to friends. Bright and dreamy, this slime looks like a rainbow cloud you can hold, and my niece loves stretching it into long, glittery ropes for pretend play.
Metallic Borax Slime with Glitter
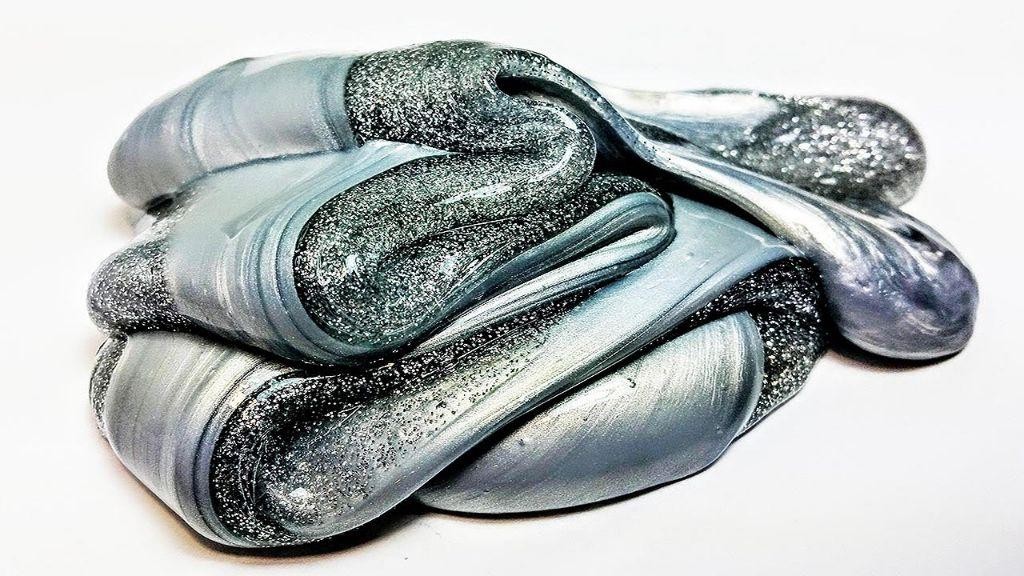
Did you ever have one of those kitchen experiments that went completely sideways but ended up being the best mistake ever? That’s exactly what happened when I first tried making this metallic borax slime with glitter. I was actually trying to recreate a childhood memory of homemade play dough when my glitter jar tipped over, and well—here we are with this gorgeous, shimmery creation that’s become my go-to stress reliever after a long day of recipe testing.
1
batch15
minutesIngredients
- About 1 cup of clear school glue
- A good splash of warm water (around 1/2 cup)
- A couple of teaspoons of borax powder
- A generous sprinkle of metallic glitter (I used silver)
- A few drops of blue food coloring
- A tiny pinch of baking soda
Instructions
- Pour 1 cup of clear school glue into a medium mixing bowl.
- Add 1/2 cup of warm water to the glue and stir until fully combined—this helps create a smoother base texture.
- Sprinkle in a tiny pinch of baking soda and mix thoroughly (this helps activate the borax later).
- Add a few drops of blue food coloring and stir until you achieve a consistent ocean-blue hue.
- Now for the magic—sprinkle a generous amount of metallic glitter into the mixture and stir until evenly distributed.
- In a separate small bowl, dissolve 2 teaspoons of borax powder in 1/2 cup of warm water, stirring until no crystals remain visible.
- Slowly pour the borax solution into your glitter-glue mixture while stirring continuously with your other hand.
- Keep stirring as the slime begins to pull away from the sides of the bowl and form a cohesive mass.
- Once the slime gathers into a ball, use your hands to knead it for 2-3 minutes until it becomes less sticky and more pliable.
- If the slime feels too sticky, let it rest for 5 minutes—the borax needs time to fully activate and firm up the texture.
- Store your finished slime in an airtight container at room temperature when not in use to prevent drying out.
After letting it rest overnight, the texture becomes this incredible stretchy, smooth consistency that holds its shape perfectly while still being pliable. The metallic glitter catches the light in the most mesmerizing way, and I love pulling off small pieces to create glittery marble effects on my desk while I work—it’s become my favorite fidget toy during recipe brainstorming sessions.
Scented Borax Slime with Essential Oils
Oh my goodness, you guys, I have to share this incredible scented borax slime recipe that my kids and I have been obsessed with lately—it’s become our go-after-school activity, and honestly, it’s just as relaxing for me as it is for them! There’s something so satisfying about mixing up a batch of this stretchy, fragrant slime, and I love how customizable it is with different essential oils.
1
batch10
minutesIngredients
– about 1/2 cup of clear school glue
– a generous splash of warm water (around 1/4 cup)
– a couple of drops of your favorite essential oil (I’m loving lavender lately!)
– a tiny pinch of borax powder (roughly 1/2 teaspoon)
– another splash of warm water (about 1/4 cup) for dissolving the borax
Instructions
1. Pour 1/2 cup of clear school glue into a medium-sized mixing bowl.
2. Add 1/4 cup of warm water to the glue and stir slowly with a spoon until fully combined—this helps prevent lumps. Tip: Use warm water (not hot) to help the glue mix smoothly without clumping.
3. Stir in 2–3 drops of your chosen essential oil, mixing gently to distribute the scent evenly.
4. In a separate small cup, dissolve 1/2 teaspoon of borax powder in 1/4 cup of warm water, stirring until no granules remain.
5. Slowly pour the borax solution into the glue mixture while stirring continuously with a spoon.
6. Keep stirring as the slime begins to form and pull away from the sides of the bowl. Tip: If the slime feels too sticky, add a tiny bit more borax solution, but go slowly—overmixing can make it tough.
7. Knead the slime with your hands for 2–3 minutes until it becomes smooth and stretchy. Tip: Wash and dry your hands thoroughly before kneading to avoid introducing moisture that could alter the texture.
8. Store the finished slime in an airtight container to keep it fresh and pliable.
Really, the texture of this slime is wonderfully stretchy and soft, with just the right amount of resistance—it’s perfect for sensory play or even as a stress reliever during busy days. I love how the essential oils leave a subtle, calming scent on your hands, and my kids enjoy shaping it into fun designs or hiding small treasures inside for a playful twist.
Butter Borax Slime
Wondering what to do with that extra borax from your latest science experiment? I recently discovered this quirky recipe while cleaning out my craft cupboard and decided to give it a culinary twist—because why should kids have all the fun? It’s become my gooey, buttery obsession for rainy afternoons when I’m craving something truly unconventional.
1
batch15
minutesIngredients
– A generous half-cup of white school glue
– A couple of tablespoons of warm water
– A splash of liquid starch
– A pat of unsalted butter, melted
– A pinch of borax powder
– A few drops of yellow food coloring
Instructions
1. Pour exactly half a cup of white school glue into a medium-sized mixing bowl.
2. Add two tablespoons of warm water to the glue and stir slowly with a wooden spoon until fully combined—this helps prevent lumps. Tip: Use water that’s warm to the touch but not hot, as extreme temperatures can alter the glue’s consistency.
3. Squeeze in a splash of liquid starch, about one tablespoon, and mix gently until the mixture starts to pull away from the sides of the bowl.
4. Melt one tablespoon of unsalted butter in a microwave-safe dish for 15 seconds at 1000W, or until fully liquid.
5. Drizzle the melted butter into the bowl while stirring continuously to incorporate it evenly.
6. Dissolve a pinch of borax powder (roughly 1/4 teaspoon) in one tablespoon of warm water in a separate small cup. Tip: Always dissolve borax completely to avoid grainy spots in your slime.
7. Gradually add the borax solution to the main mixture, stirring as you go, until the slime begins to form and pulls cleanly from the bowl.
8. Knead the slime with your hands for 2–3 minutes until it’s smooth and stretchy. Tip: If it feels too sticky, add a tiny bit more liquid starch, one teaspoon at a time, until it reaches the desired texture.
9. Add 3–4 drops of yellow food coloring and knead again until the color is uniform throughout.
So silky and rich, this slime has a surprisingly smooth, buttery feel that’s oddly satisfying to play with. I love stretching it into thin sheets and draping it over a chilled plate for a faux-butter sculpture, or just keeping it in a jar on my desk for stress relief during recipe testing marathons.
Ocean Wave Borax Slime
Creating this Ocean Wave Borax Slime brought back childhood memories of science fairs and messy kitchen experiments. I always keep borax on hand for cleaning, but today it’s helping me recreate those mesmerizing ocean waves in slime form—perfect for keeping my kids entertained on rainy afternoons.
1
batch15
minutesIngredients
– 1 cup of clear school glue
– A couple of tablespoons of water
– A few drops of blue food coloring
– A tiny pinch of green food coloring
– A generous sprinkle of silver glitter
– 1 teaspoon of borax powder
– A half cup of warm water
Instructions
1. Pour 1 cup of clear school glue into a medium-sized mixing bowl.
2. Add 2 tablespoons of water to the glue and stir with a wooden spoon for 30 seconds until fully combined.
3. Squeeze 4 drops of blue food coloring into the mixture.
4. Add 1 tiny drop of green food coloring to create that ocean water hue.
5. Sprinkle in 1 tablespoon of silver glitter while stirring continuously.
6. In a separate small cup, dissolve 1 teaspoon of borax powder in ½ cup of warm water (about 100°F), stirring for 1 full minute until no grains remain.
7. Slowly pour the borax solution into the glue mixture while stirring with your other hand.
8. Keep stirring for 2-3 minutes as the slime begins to pull away from the sides of the bowl.
9. Tip: If the slime feels too sticky, let it rest for 5 minutes—the borax needs time to fully activate.
10. Knead the slime with clean, dry hands for 3-4 minutes until it becomes smooth and stretchy.
11. Tip: Store your slime in an airtight container overnight to develop the perfect elasticity.
12. Stretch your slime between both hands to test its consistency—it should stretch about 12 inches without breaking.
13. Tip: For wave-like effects, slowly fold and stretch the slime rather than pulling it quickly.
Stretching this ocean wave slime creates the most satisfying undulating motions that really do mimic rolling waves. The silver glitter catches the light like sunlight on water, and the blue-green color deepens after resting overnight. My kids love making little “tsunamis” by rapidly stretching it across the kitchen table!
Cloud Borax Slime with Instant Snow
Crafting this whimsical Cloud Borax Slime with Instant Snow brought back memories of rainy afternoons with my niece—it’s the perfect sensory play project that looks like a fluffy winter wonderland. I love how the texture transforms from liquid to squishy cloud, making it almost magical to watch come together.
1
batch15
minutesIngredients
– 1 cup of clear school glue
– A generous splash of warm water (about ½ cup)
– A couple of tablespoons of borax powder
– A big handful of instant snow powder
– A few drops of blue food coloring
– A tiny pinch of silver glitter
Instructions
1. Pour 1 cup of clear school glue into a large mixing bowl.
2. Add a generous splash of warm water (about ½ cup) to the glue and stir slowly until fully combined—warming the water first helps the ingredients blend more smoothly.
3. Mix in a few drops of blue food coloring until you achieve a soft sky-blue hue.
4. Sprinkle a big handful of instant snow powder into the mixture and watch it expand dramatically.
5. In a separate small cup, dissolve a couple of tablespoons of borax powder in ¼ cup of warm water, stirring until no crystals remain visible.
6. Slowly pour the borax solution into the main bowl while continuously stirring with your other hand.
7. Keep stirring for about 2-3 minutes as the slime begins to pull away from the sides of the bowl and thicken.
8. Knead the slime with your hands for another 2 minutes until it becomes less sticky and more cohesive—if it feels too wet, let it rest for a minute to absorb excess moisture.
9. Work a tiny pinch of silver glitter evenly throughout the slime for a sparkling frost effect.
10. Stretch and fold the slime 10-15 times to improve its elasticity and create those perfect cloud-like peaks.
You’ll love how this slime holds its fluffy shape yet stretches like taffy—the instant snow gives it such a cool, crinkly texture that mimics fresh powder. Try shaping it into mini snowballs or pressing cookie cutters into it for festive holiday shapes; it makes a fantastic sensory bin filler or party activity for kids.
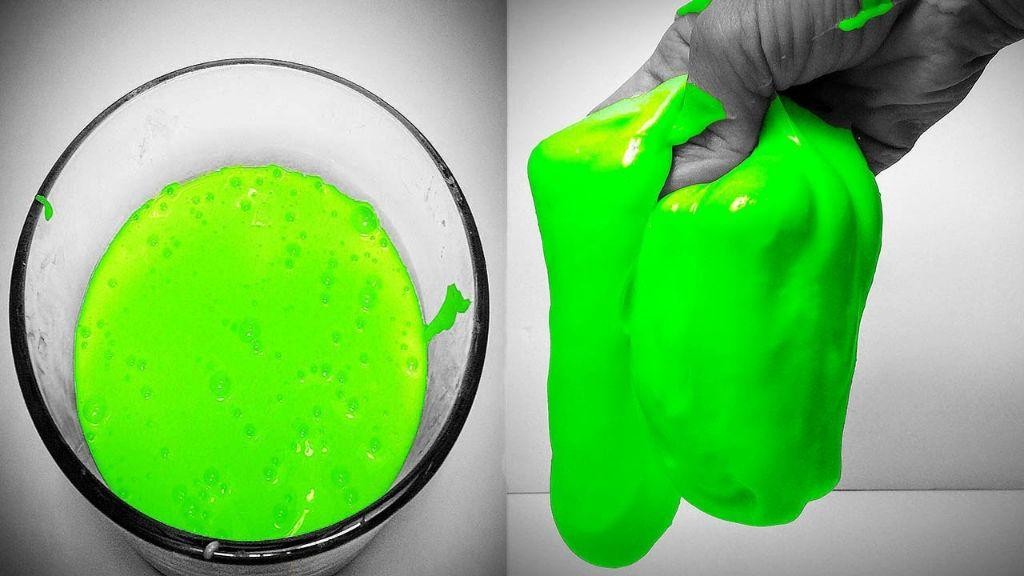
Magnetic Borax Slime
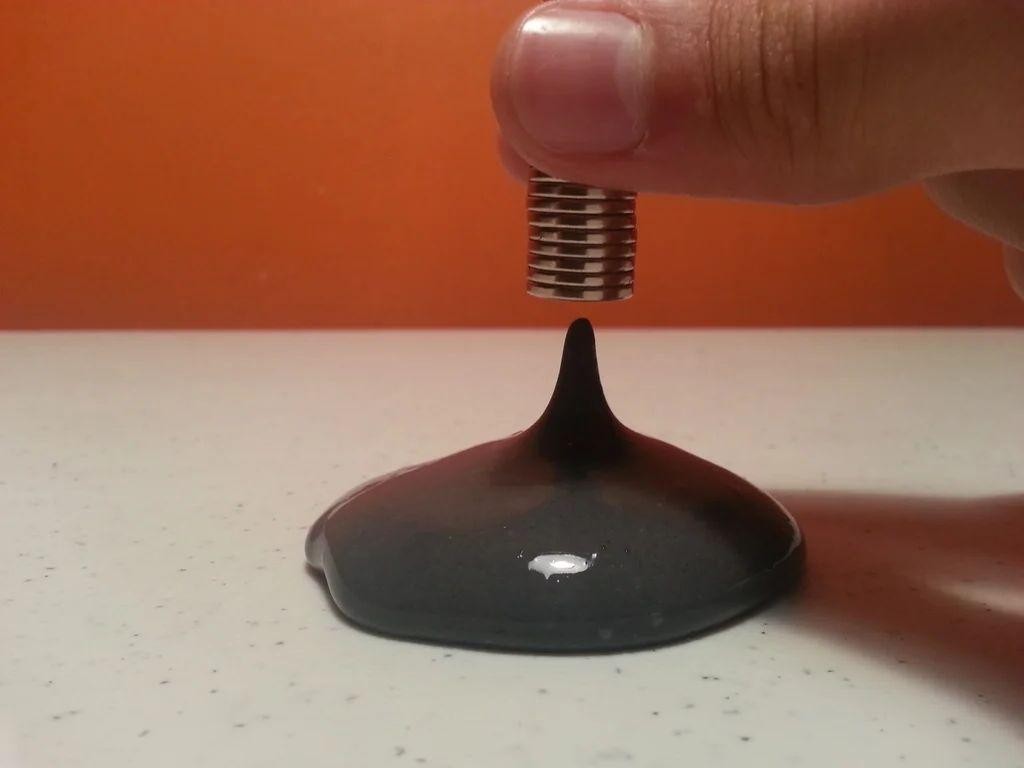
Never underestimate the power of a good science experiment turned snack—this magnetic borax slime is the perfect blend of kitchen chemistry and edible fun that had my kids mesmerized for hours. I first stumbled upon this recipe during a rainy weekend when we were desperate for indoor activities, and now it’s our go-to for playdates and family nights. There’s something magical about watching simple ingredients transform into a squishy, magnetic masterpiece right before your eyes.
1
batch15
minutesIngredients
– A half cup of clear school glue
– A couple of tablespoons of liquid starch
– A generous splash of warm water
– A teaspoon of borax powder
– A handful of iron filings
– A few drops of your favorite food coloring (we always go for neon green!)
Instructions
1. Pour exactly 1/2 cup of clear school glue into a medium-sized mixing bowl.
2. Add 2 tablespoons of warm water to the glue and stir slowly with a wooden spoon until fully combined—this helps prevent air bubbles. Tip: If your glue seems thick, warm the bottle in a bowl of hot water for 5 minutes first to make pouring easier.
3. Mix in 4-5 drops of food coloring, stirring until the color is evenly distributed and vibrant.
4. Sprinkle 1 teaspoon of borax powder into the mixture, then stir continuously for about 2 minutes until the slime starts to pull away from the sides of the bowl.
5. Knead the slime with your hands for 3-4 minutes until it’s no longer sticky and has a smooth, stretchy texture. Tip: If it’s too sticky, add a pinch more borax; if too stiff, a dab of water will soften it up.
6. Fold in 1 tablespoon of iron filings, working them evenly throughout the slime by stretching and pressing repeatedly for 1-2 minutes.
7. Test the magnetism by holding a strong magnet near the slime—it should slowly move toward it. Tip: For the best results, use neodymium magnets and store the slime in an airtight container to keep it fresh for up to a week.
Out of this world in texture, this slime stretches like taffy but grips magnets with a satisfying pull. We love shaping it into alien blobs or hiding small magnetic objects inside for a treasure hunt—it’s endlessly entertaining and surprisingly durable.
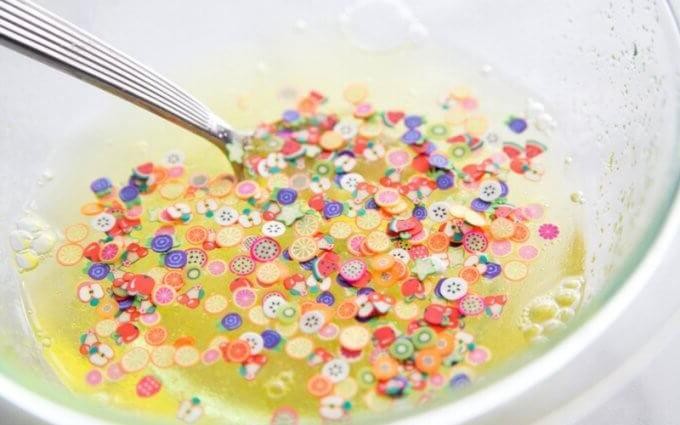
Fruit-Scented Borax Slime
Just when I thought I’d tried every fun kitchen project with my kids, we stumbled upon this magical sensory play creation during our rainy weekend experiments. My daughter actually came up with the name after declaring it smelled like a fruit basket had exploded in our craft room – and honestly, she wasn’t wrong!
1
portions10
minutesIngredients
- About 1/2 cup of white school glue
- A good glug of warm water (roughly 1/2 cup)
- A couple of tablespoons of borax powder
- A generous splash of your favorite fruit-scented lotion
- A few drops of food coloring in whatever fruity shade you’re feeling
Instructions
- Pour your 1/2 cup of white school glue into a medium mixing bowl.
- Add the 1/2 cup of warm water to the glue and stir for about 30 seconds until they’re completely combined – the warmth helps them blend more smoothly.
- Mix in your fruit-scented lotion and food coloring, stirring for another full minute until the color is evenly distributed throughout.
- In a separate small bowl, dissolve 2 tablespoons of borax powder in 1/2 cup of warm water, stirring until no crystals remain visible.
- Slowly pour the borax solution into your glue mixture while stirring continuously with your other hand.
- Keep stirring as the slime begins to form and pull away from the sides of the bowl, which should take about 2-3 minutes.
- Once the mixture becomes too thick to stir, use your hands to knead the slime for another 2-3 minutes until it reaches a smooth, stretchy consistency.
- Let the slime rest for 5 minutes to allow the texture to fully set before playing with it.
Look at that gorgeous, glossy slime you’ve created! The texture is wonderfully stretchy yet firm, holding its shape beautifully when you pull it apart. That fruity scent really lingers on your hands too – we love dividing ours into smaller portions and hiding little plastic fruit toys inside for a sensory scavenger hunt.
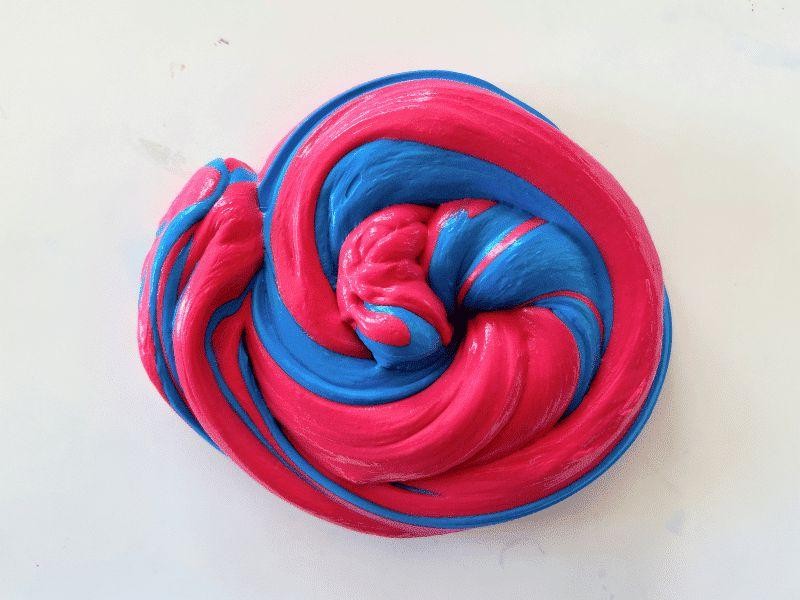
Color-Changing Borax Slime
Unbelievably, my kids have been begging me to make this magical slime ever since they saw it on TikTok, and let me tell you—it’s way more fun than I expected! As someone who usually sticks to edible recipes, I was skeptical at first, but watching the colors change right before our eyes made me feel like a kitchen wizard.
1
batch15
minutesIngredients
- A half cup of clear school glue
- A couple of tablespoons of warm water
- A few drops of thermochromic pigment (the color-changing magic!)
- A quarter teaspoon of borax powder
- A splash of warm water (about a quarter cup) for dissolving
Instructions
- Pour exactly a half cup of clear school glue into a medium-sized mixing bowl.
- Add a couple of tablespoons of warm water to the glue and stir slowly with a wooden spoon until fully combined—this helps prevent lumps.
- Drop in a few drops of thermochromic pigment and mix thoroughly; I like to use a vibrant blue that shifts to purple when warm.
- In a separate small bowl, dissolve a quarter teaspoon of borax powder into a splash of warm water (about a quarter cup), stirring until no grains remain.
- Slowly pour the borax solution into the glue mixture while stirring continuously; the slime will start to form immediately.
- Knead the mixture with your hands for 2–3 minutes until it’s stretchy and no longer sticky—if it’s too wet, add a tiny pinch more borax.
- Test the color change by holding a section in your palms for 15–20 seconds; it should shift hues as it warms up.
- Store the slime in an airtight container at room temperature to keep it fresh for weeks.
Lovely and squishy, this slime has a satisfying pull that’s perfect for stress relief. My favorite part is how the colors dance between your fingers—try shaping it into glowing “orbs” for a party or just let the kids marvel at the science in action!
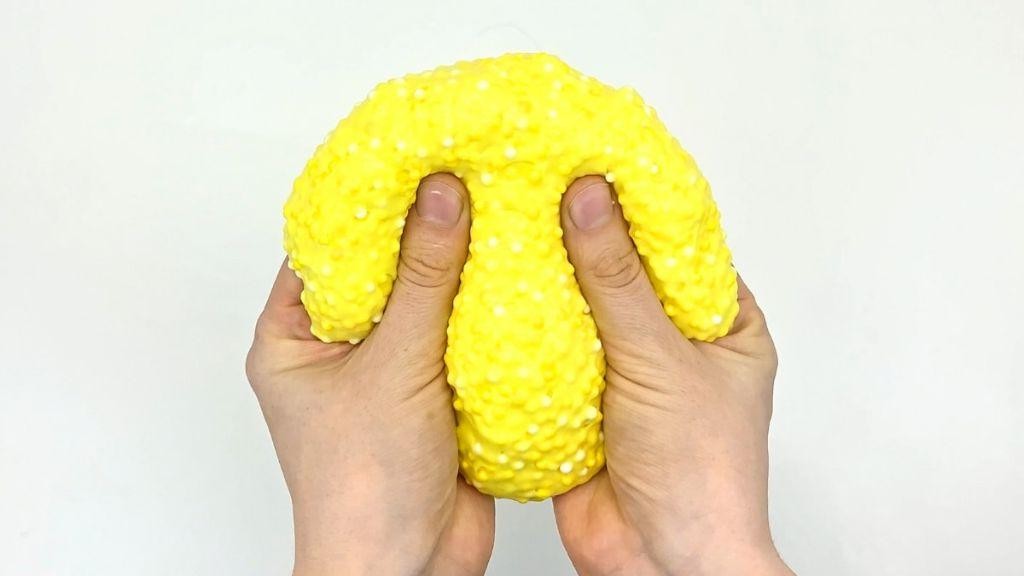
Foam Ball Borax Slime
Wondering what to make when the kids are bouncing off the walls and you need a quick, fun activity? This Foam Ball Borax Slime has saved many a rainy afternoon at our house, and it’s so satisfying to squish and stretch. I love how it turns basic craft supplies into something magical—plus, it’s way cheaper than store-bought slime!
1
batch15
minutesIngredients
– A couple of foam balls (the kind you find in the craft aisle) – A half cup of clear school glue – A quarter cup of warm water – A splash of liquid starch – A tiny sprinkle of borax powder (about half a teaspoon) – A few drops of your favorite food coloring (I always go for neon green!)
Instructions
1. Pour a half cup of clear school glue into a medium-sized mixing bowl. 2. Add a quarter cup of warm water to the glue and stir slowly with a wooden spoon until fully combined—this helps prevent lumps. 3. Squeeze in a few drops of food coloring and mix until the color is even throughout the glue mixture. 4. Tear apart a couple of foam balls into small, fluffy pieces and gently fold them into the colored glue. 5. In a separate small cup, dissolve a tiny sprinkle of borax powder (about half a teaspoon) in a splash of liquid starch, stirring until no grains remain. 6. Slowly drizzle the borax mixture into the glue and foam bowl while stirring continuously. 7. Keep stirring until the slime pulls away from the sides of the bowl and forms a cohesive, stretchy mass. 8. Knead the slime with your hands for 2–3 minutes until it’s smooth and no longer sticky. 9. Store the finished slime in an airtight container or zip-top bag to keep it fresh for play. 10. Let the slime rest for 5 minutes before stretching and playing to improve its elasticity. 11. Test the slime’s texture by pulling it slowly—if it tears easily, knead in a drop more liquid starch. 12. Enjoy your fluffy, foam-filled creation! Ultimately, this slime has the perfect stretchy yet fluffy texture thanks to those foam bits, and the neon green color makes it pop. My kids love hiding small toys inside for a surprise sensory hunt, or we just enjoy the satisfying pull and squish during movie nights.
Clear Crystal Borax Slime
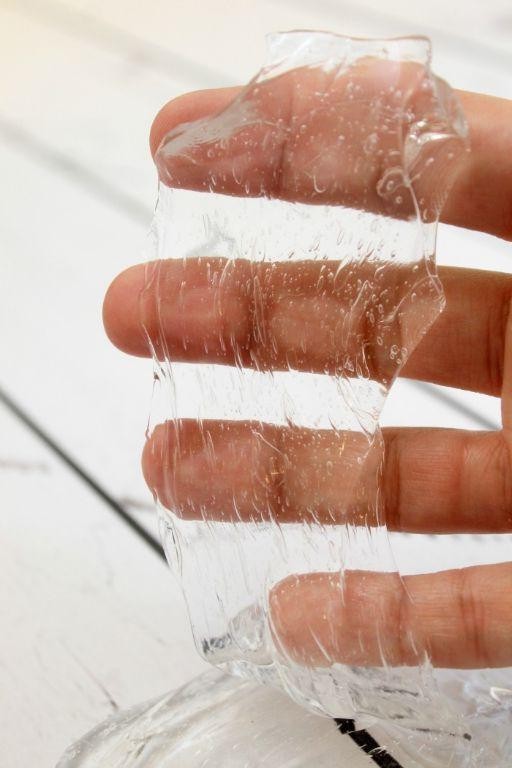
A few weeks ago, my niece begged me to help her make that viral clear slime everyone’s obsessed with on TikTok, and after several failed attempts, we finally perfected this crystal-clear borax slime that’s oddly satisfying to play with. As someone who usually sticks to edible recipes, I never thought I’d be sharing a slime tutorial, but here we are—sometimes the messiest projects bring the most joy. Trust me, once you get the hang of it, you’ll be hooked on that stretchy, glossy texture too.
1
batch10
minutesIngredients
– A half cup of clear school glue
– A quarter cup of warm water
– A couple of drops of your favorite food coloring (we love blue for that ocean vibe)
– A quarter teaspoon of borax powder
– A half cup of very warm water (for dissolving the borax)
Instructions
1. Pour a half cup of clear school glue into a medium-sized mixing bowl.
2. Add a quarter cup of warm water to the glue and stir slowly with a spoon until fully combined—this helps prevent air bubbles for that crystal-clear look.
3. Mix in a couple of drops of food coloring, stirring gently to avoid creating foam; if you want swirls, don’t overmix!
4. In a separate small cup, dissolve a quarter teaspoon of borax powder into a half cup of very warm water, stirring for about 30 seconds until no grains remain.
5. Slowly pour the borax solution into the glue mixture, a little at a time, while stirring continuously with your hands once it thickens.
6. Knead the slime for 2–3 minutes until it pulls away from the bowl and feels stretchy but not sticky—if it’s too wet, add a pinch more borax solution.
7. Store the slime in an airtight container for up to a week to keep it fresh and prevent drying out. The final slime should be transparent, glossy, and incredibly stretchy—perfect for stress relief or as a fun sensory activity for kids. Try adding glitter for a sparkly twist, or shape it into bubbles for a mesmerizing display.
Edible Marshmallow Borax Slime
Zany kitchen experiments have always been my guilty pleasure, and this edible marshmallow borax slime is no exception—I first tried making it when my niece begged for something “gross but tasty” for her science-themed birthday party. Trust me, watching kids’ eyes light up as they stretch this weird, wonderful creation is pure magic.
1
batch15
minutes2
minutesIngredients
- A 10-ounce bag of mini marshmallows
- A couple of tablespoons of coconut oil
- A generous splash of vanilla extract
- A few drops of green food coloring
- A quarter-cup of cornstarch
Instructions
- Grab a medium microwave-safe bowl and toss in the entire 10-ounce bag of mini marshmallows.
- Add 2 tablespoons of coconut oil to the marshmallows—this keeps things from sticking later.
- Microwave the mixture on high for 30 seconds, then stir with a spatula; repeat until fully melted and smooth, about 1–1.5 minutes total.
- Mix in 1 teaspoon of vanilla extract for a subtle sweetness that balances the marshmallow flavor.
- Stir in 3–4 drops of green food coloring until the color is evenly distributed, like a vibrant slime pool.
- Sprinkle in ¼ cup of cornstarch, a little at a time, while stirring continuously to avoid lumps.
- Let the mixture cool for 5–10 minutes until it’s safe to touch but still pliable—this prevents burns and makes kneading easier.
- Lightly dust your hands with extra cornstarch, then knead the mixture for 2–3 minutes on a clean surface until it’s stretchy and less sticky.
- Test the texture: if it’s too sticky, add another tablespoon of cornstarch; if too stiff, warm it in your hands for a minute.
- Store the slime in an airtight container at room temperature for up to 3 days to maintain its gooeyness.
Yielding a delightfully squishy texture, this slime pulls apart with satisfying strands and tastes like a sweet, vanilla-kissed marshmallow cloud. Serve it twisted into “worm jars” for Halloween or let kids mold it into edible sculptures—it’s foolproof fun that never fails to impress.
Watermelon Themed Borax Slime
Just when I thought I’d tried every watermelon recipe under the summer sun, my niece brought home this borax slime project from camp that got my creative juices flowing. I figured, why not combine my love for watermelon with some sensory fun? The result was this delightfully squishy, fruity-scented slime that’s perfect for keeping kids entertained during those long summer afternoons.
1
batch15
minutesIngredients
– About 1/2 cup of clear school glue
– A good splash of water (roughly 1/4 cup)
– Just a couple drops of red food coloring
– A tiny pinch of black food coloring for those “seeds”
– A generous squirt of watermelon-scented oil (about 1/2 teaspoon)
– Exactly 1/2 teaspoon of borax powder
– Another 1/4 cup of warm water for activating the borax
Instructions
1. Pour your 1/2 cup of clear school glue into a medium-sized mixing bowl.
2. Add the 1/4 cup of water to the glue and stir until they’re completely combined and smooth.
3. Drop in 2-3 drops of red food coloring and mix thoroughly until you get that perfect watermelon pink color.
4. Add just a tiny dot of black food coloring and gently swirl it through the mixture to create seed-like specks without fully mixing them in.
5. Squirt in about 1/2 teaspoon of watermelon-scented oil and stir until the fruity fragrance is evenly distributed.
6. In a separate small cup, dissolve exactly 1/2 teaspoon of borax powder in 1/4 cup of warm water, stirring until no crystals remain visible.
7. Slowly pour the borax solution into your colored glue mixture while continuously stirring with your other hand.
8. Keep stirring as the slime begins to form and pull away from the sides of the bowl, which should take about 1-2 minutes.
9. Once the slime forms a cohesive ball, knead it with your hands for another 2-3 minutes until it reaches the perfect stretchy consistency.
10. Store your finished slime in an airtight container when not in use to keep it fresh and pliable. Really, the texture of this watermelon slime is wonderfully stretchy with just the right amount of squish—it feels like playing with sweet, fruity goo that never gets sticky on your hands. The watermelon scent makes it extra fun, and those little black specks give it such an authentic look that kids absolutely adore pretending they’re playing with real watermelon guts!
Lava Lamp Borax Slime
Last week, my kids begged me to make something “cool and science-y” for their school project, and that’s how we discovered this mesmerizing lava lamp slime. Honestly, I was just as fascinated watching the colorful bubbles dance around as they were—it’s like having a mini light show right in your kitchen!
1
lava lamp8
minutesIngredients
– A generous 1/2 cup of clear school glue
– A couple of tablespoons of warm water
– A good splash of liquid starch
– A few drops of your favorite food coloring
– A tiny spoonful of borax powder
– A tablespoon of vegetable oil
Instructions
1. Pour exactly 1/2 cup of clear school glue into a medium-sized mixing bowl.
2. Add 2 tablespoons of warm water to the glue and stir continuously for 30 seconds until fully combined—this helps prevent clumps later.
3. Mix in 4-5 drops of food coloring and stir for another 20 seconds until the color is evenly distributed.
4. Slowly add 1/4 cup of liquid starch while stirring constantly; you’ll feel the mixture thicken almost immediately.
5. Knead the slime with your hands for 2-3 minutes until it’s no longer sticky and pulls away cleanly from the bowl.
6. Dissolve 1 teaspoon of borax powder in 1 cup of warm water in a separate container, stirring for 1 full minute until completely clear.
7. Add 1 tablespoon of vegetable oil to the borax solution and gently swirl—don’t stir vigorously or the oil will emulsify.
8. Carefully drop small spoonfuls of your colored slime into the oil mixture and watch as the bubbles slowly rise and fall.
Kind of magical how those colorful globs float and sink, right? The slime has this fascinating jelly-like texture that’s both stretchy and firm, while the oil creates these beautiful lava lamp effects that keep kids (and let’s be honest, adults too) entertained for hours. We love placing it near a sunny window where the light catches the moving bubbles—it’s like having our own DIY light therapy session!
Crunchy Borax Slime with Beads
A couple of weeks ago, I was experimenting with fun sensory activities for my niece’s playdate and stumbled upon this surprisingly satisfying crunchy borax slime—it’s become my go-to stress reliever after long blogging days, and the bead texture adds such a delightful pop!
1
batch10
minutesIngredients
– A half cup of clear school glue
– A splash of warm water (about 1/4 cup)
– A couple of tablespoons of borax powder
– A handful of small plastic beads (roughly 2 tablespoons)
– A few drops of green food coloring
Instructions
1. Pour exactly 1/2 cup of clear school glue into a medium mixing bowl.
2. Add 1/4 cup of warm water to the glue and stir continuously for 30 seconds until fully combined.
3. Mix in 3 drops of green food coloring and stir for another 20 seconds until the color is uniform.
4. Sprinkle 2 tablespoons of borax powder into a separate small bowl containing 1/2 cup of warm water, stirring until completely dissolved.
5. Slowly pour the borax solution into the glue mixture while stirring with a wooden spoon.
6. Knead the mixture with your hands for 2-3 minutes until it forms a cohesive ball that pulls away from the bowl.
7. Press 2 tablespoons of plastic beads into the slime, folding and stretching for 1 minute to distribute them evenly.
8. Let the slime rest at room temperature for 5 minutes to achieve optimal stretchiness.
9. Store the finished slime in an airtight container to prevent drying out.
Kneading this slime yields such a satisfying crackle-pop texture from the beads, with a vibrant green hue that kids adore. Try stretching it thin over a flashlight for a glowing sensory table centerpiece, or roll it into small balls for fidget-friendly desk toys—the crunch is oddly addictive!
Conclusion
Magnificent! These 24 borax slime recipes offer endless sensory play possibilities for creative fun. We hope you’re inspired to whip up some squishy, stretchy slime with your family. Don’t forget to share your favorite recipe in the comments below and pin this article on Pinterest to spread the gooey joy!