Realistically, we all need side dishes that don’t require constant attention while we’re juggling chicken on the stove and helping with homework at the kitchen table. Right now, you’re probably looking for something that goes from fridge to table with minimal effort and maximum flavor. Remember those nights when you ended up with three different pans going and a mountain of dishes? This recipe fixes all that with one simple sheet pan solution.
Why This Recipe Works
- One-pan cooking means you’re only dealing with a single sheet pan, some foil, and basic kitchen tools – cleanup becomes a five-minute task instead of a major production that eats into your evening downtime
- The 25-minute roasting time gives you exactly enough breathing room to focus on preparing your main chicken dish, whether you’re grilling, baking, or pan-searing, without feeling rushed or overwhelmed by multiple timers
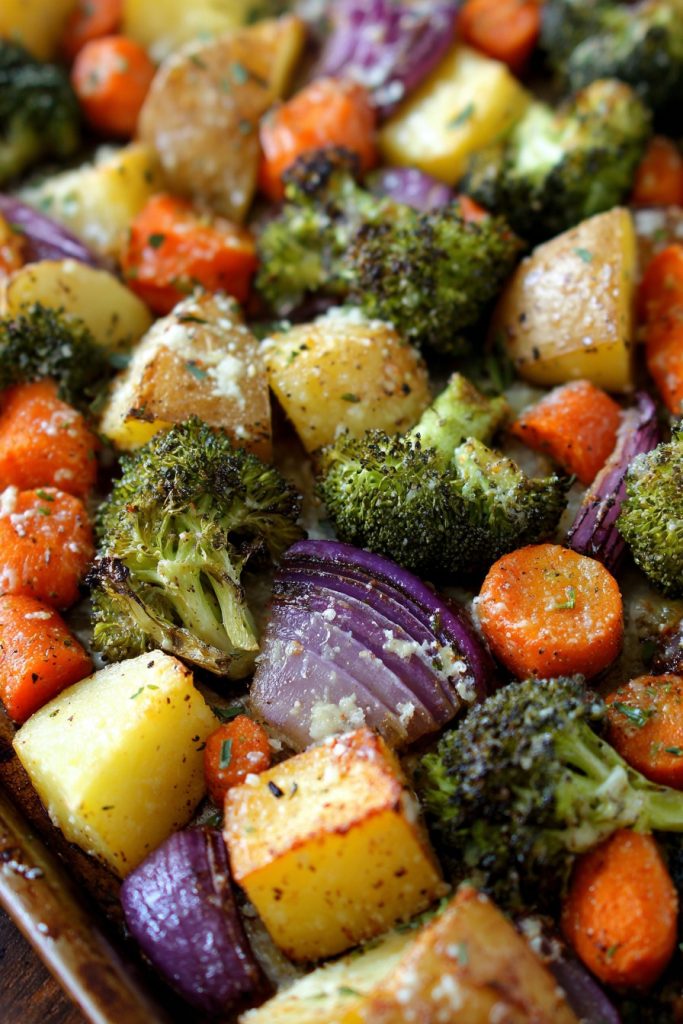
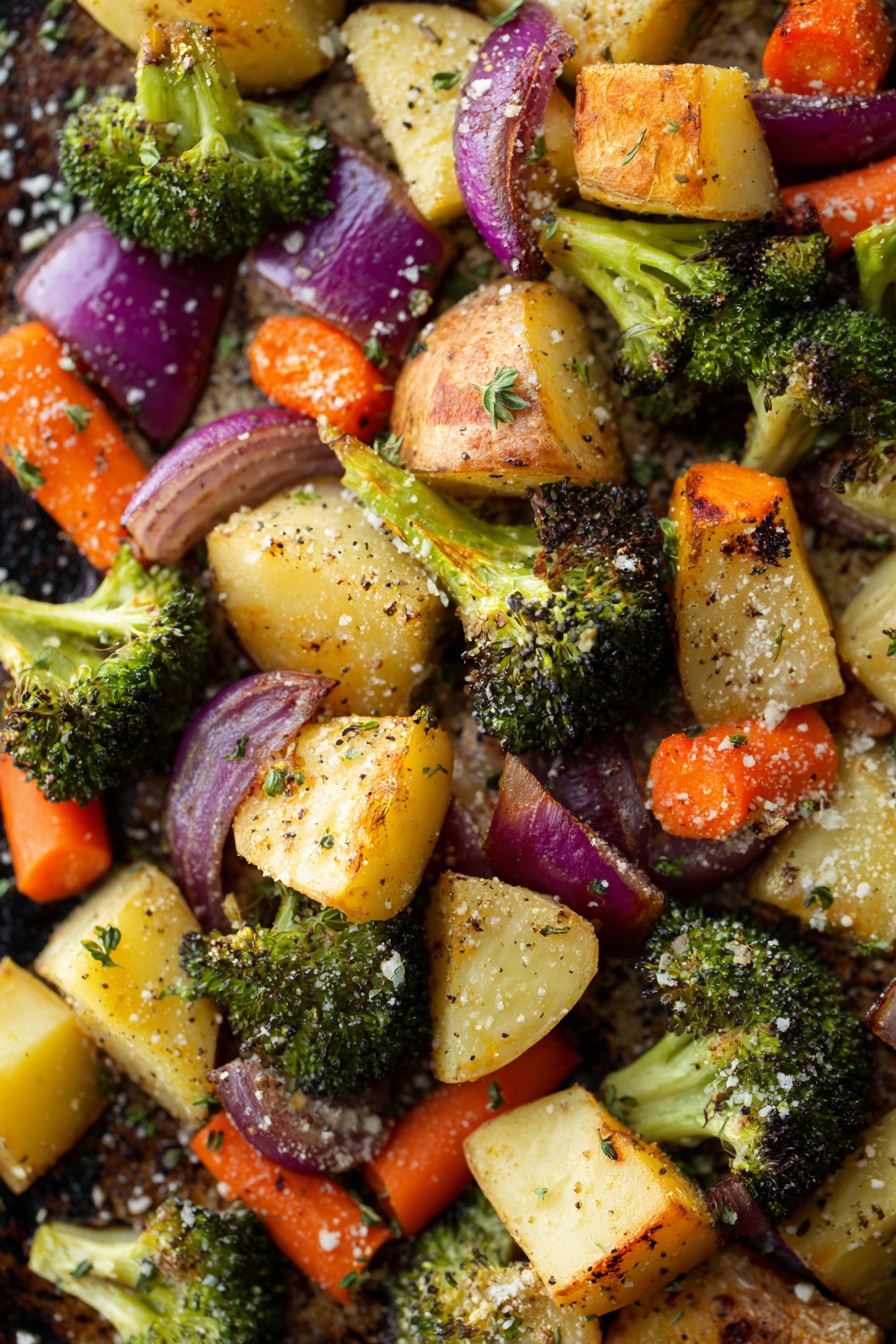
- Using sturdy vegetables like broccoli, carrots, and potatoes means they hold up well to high heat and won’t turn to mush if your chicken takes a few extra minutes to cook through properly
- The simple olive oil and seasoning blend enhances natural flavors without requiring specialty ingredients you’d need to make a special trip to the store to find
- Roasting at 425°F creates beautiful caramelization on the vegetable edges while keeping the interiors tender, giving you restaurant-quality results with home kitchen convenience
Ingredients
- 4 cups broccoli florets (about 1 large head, cut into bite-sized pieces)
- 3 medium carrots, peeled and sliced into 1/2-inch rounds
- 2 medium Yukon gold potatoes, scrubbed and cut into 1-inch cubes
- 1 large red onion, cut into 1-inch chunks
- 3 tablespoons olive oil
- 1 teaspoon garlic powder
- 1 teaspoon dried Italian seasoning
- 1/2 teaspoon salt
- 1/4 teaspoon black pepper
- 2 tablespoons grated Parmesan cheese (optional for serving)
Equipment Needed
- Large rimmed baking sheet
- Aluminum foil or parchment paper
- Large mixing bowl
- Cutting board and chef’s knife
- Measuring spoons and cups
- Spatula or tongs
Instructions
Prepare Your Vegetables and Seasoning Blend
Start by lining your baking sheet with aluminum foil – this isn’t just about easy cleanup, it’s about preserving your sanity when you’re tired after dinner and facing a mountain of dishes. Combine all your chopped vegetables in that large mixing bowl, making sure everything is relatively uniform in size so they cook evenly. In a small bowl or right over the vegetables, mix together the olive oil, garlic powder, Italian seasoning, salt, and pepper. The key here is to toss everything thoroughly until each piece glistens with that seasoned oil coating. Pro tip: If you’re really pressed for time, you can mix the oil and seasonings right in the baking sheet itself, though you might not get quite as even coverage. This entire prep process should take about 10 minutes max, and you’re already halfway to dinner being ready.
Arrange Vegetables for Optimal Roasting
Now pour those beautifully coated vegetables onto your prepared baking sheet and spread them into a single layer with some space between pieces – overcrowding is the enemy of crispy roasted veggies. Make sure the potatoes and carrots are facing cut-side down where possible, as this creates more surface contact with the hot pan for better browning. If you notice any pieces sticking together, gently separate them with your tongs or spatula. The goal here is to create enough space for steam to escape rather than creating a steamed vegetable situation. This careful arrangement might seem fussy, but it’s what separates mediocre roasted vegetables from ones that have those delicious caramelized edges everyone loves. You’ll spend about 2-3 minutes on this step, but it makes all the difference in the final texture and appearance.
Roast at High Heat for Caramelization
Place your arranged baking sheet into a preheated 425°F oven on the middle rack and set your timer for 15 minutes. This high temperature is crucial because it quickly evaporates surface moisture and starts the Maillard reaction that creates those beautiful browned, flavorful edges. Resist the temptation to open the oven door during this initial roasting period – every time you do, you’re dropping the oven temperature significantly and extending your cooking time. The vegetables should start smelling fragrant and you might hear some gentle sizzling sounds. Pro tip: If you’re cooking chicken at the same time, this is when you’d want to start checking its internal temperature since both dishes will be finishing around the same time frame.
Rotate and Continue Roasting
After 15 minutes, carefully remove the baking sheet from the oven using oven mitts – the pan will be very hot. Use your spatula or tongs to flip and stir the vegetables, making sure to move the pieces from the edges toward the center and vice versa since oven temperatures can vary. You should see some beautiful browning starting to form on the potatoes and the broccoli florets might be getting slightly crispy at the edges. Return the pan to the oven and continue roasting for another 8-10 minutes. This second phase is when the magic really happens as the vegetables become tender inside while developing more of those coveted crispy edges.
Check for Doneness and Final Touches
When your timer goes off, test the vegetables for doneness by piercing a potato cube and carrot slice with a fork – they should slide in easily without resistance. The broccoli should be tender-crisp with some darkened, crispy florets, and the onions should be soft and slightly caramelized. If anything needs more time, return to the oven in 3-minute increments until perfectly tender. Once done, immediately transfer to your serving dish and sprinkle with Parmesan cheese if using. Pro tip: Let the vegetables rest for 2-3 minutes before serving – this allows the starches to set slightly and makes them easier to handle while eating.
Tips and Tricks
If you’re really trying to maximize your time, consider prepping vegetables during weekend meal prep – you can wash, chop, and store broccoli florets, carrot rounds, and potato cubes in separate airtight containers in the refrigerator for up to 4 days. When dinner time rolls around, just toss them with oil and seasonings straight from the fridge, though you might need to add 2-3 extra minutes to the roasting time since cold vegetables take slightly longer to cook. For families with picky eaters, try roasting vegetables separately on the same pan by grouping similar veggies together – this way you can pull out the broccoli for your veggie-loving kid while leaving the carrots in longer for your carrot-resistant child. If you’re dealing with varying vegetable densities, consider staggering your additions – start with potatoes and carrots alone for 10 minutes, then add broccoli and onions for the remaining 15-18 minutes to prevent overcooking the more delicate vegetables. For extra crispiness, make sure your vegetables are completely dry before tossing with oil – any residual water will steam them rather than roast them. If you find your vegetables aren’t browning enough, try increasing your oven temperature to 450°F or using the convection setting if your oven has one, which circulates air for more even cooking and better browning. Leftover roasted vegetables store beautifully in the refrigerator for 3-4 days and can be repurposed into omelets, grain bowls, or blended into soups, making your cooking efforts stretch further throughout the week. For especially busy nights, many grocery stores now offer pre-cut vegetable mixes specifically for roasting – while slightly more expensive, the time savings can be worth it when you’re racing against homework deadlines and extracurricular schedules.
Recipe Variations
- For a Mediterranean twist, swap the Italian seasoning for a blend of dried oregano, thyme, and a pinch of red pepper flakes, then finish with crumbled feta cheese and a squeeze of lemon juice instead of Parmesan – the bright acidity cuts through the richness of the roasted vegetables beautifully and pairs wonderfully with lemon-herb chicken
- Create a sweet and savory version by replacing the carrots with cubed sweet potatoes and adding 2 tablespoons of maple syrup to the oil mixture – the natural sugars caramelize into a gorgeous glaze that kids absolutely love, making vegetable resistance much less likely at the dinner table
- Turn it into a complete meal by adding sliced chicken sausage or pre-cooked chickpeas to the sheet pan during the last 10 minutes of cooking – you’ll have proteins and vegetables ready simultaneously, perfect for those nights when you need dinner on the table in record time
- For an herby fresh version, use the basic oil and salt mixture during roasting, then toss the finished vegetables with 2 tablespoons of chopped fresh parsley, basil, or dill – the fresh herbs add vibrant flavor and color that makes the dish feel more special without additional work
- Make a creamy version by stirring in 1/4 cup of Greek yogurt or sour cream after roasting – this creates a comforting, almost potato-salad-like side that’s particularly popular with younger children who prefer milder flavors and creamier textures
Frequently Asked Questions
Can I use frozen vegetables instead of fresh?
While frozen vegetables can work in a pinch, they’ll release more moisture during roasting and won’t achieve the same crispy, caramelized texture as fresh vegetables. If you must use frozen, spread them in a single layer on a baking sheet and roast at 425°F for 5-7 minutes first to evaporate excess moisture, then toss with oil and seasonings and continue with the regular cooking time. The results will be softer and less browned, but still perfectly edible and much better than steamed vegetables. This method works best with frozen broccoli and carrots, while frozen potatoes tend to become mushy and aren’t recommended for roasting applications.
How do I prevent the vegetables from sticking to the pan?
Proper pan preparation is key to preventing sticking – always line your baking sheet with aluminum foil or parchment paper, and for extra insurance, give it a light spray with cooking oil before adding your vegetables. Make sure your vegetables are thoroughly coated in oil, as the oil creates a barrier between the food and pan surface. If you notice sticking during the flipping step, use a metal spatula to gently scrape under the vegetables rather than forcing them, which can tear them apart. Non-stick baking sheets can help, but the foil liner method works reliably with any type of pan and makes cleanup dramatically easier.
Can I prepare this recipe ahead of time?
You can absolutely do some advance preparation to make weeknight dinners smoother. Chop all vegetables up to 2 days in advance and store them in separate airtight containers in the refrigerator – the key is keeping them separate because potatoes can cause other vegetables to spoil faster. You can also mix the oil and seasoning blend ahead and store it at room temperature. When ready to cook, simply toss everything together and roast as directed. Fully cooked roasted vegetables will keep for 3-4 days in the refrigerator and reheat well in a 350°F oven or toaster oven to restore some crispiness.
What if my family members prefer different vegetable textures?
This is a common challenge with mixed vegetable dishes. The simplest solution is to cut vegetables into different sizes based on cooking time – make potato cubes smaller if you want them softer, or leave broccoli florets larger for more crunch. You can also roast vegetables in separate groups on the same pan, removing some earlier for those who prefer crisp-tender vegetables while leaving others in longer for softer results. Another approach is to serve the vegetables family-style and let everyone choose their preferred pieces – the well-done edges versus the tender centers often naturally appeal to different texture preferences.
How can I make this recipe work with different oven types?
Conventional ovens work perfectly with the given instructions, but if you have a convection oven, reduce the temperature to 400°F and check for doneness 3-5 minutes early since the circulating air cooks food faster and more evenly. For toaster ovens, use a smaller baking sheet that fits properly and rotate the pan halfway through cooking since hot spots are more common in smaller appliances. Gas ovens tend to have more moisture, which can affect browning – if you notice insufficient browning, try placing your baking sheet on the highest rack position or using the broiler for the final 1-2 minutes to boost color development.
Summary
This roasted vegetable medley delivers maximum flavor with minimal effort, using one pan and common ingredients to create a versatile side that complements any chicken dish while keeping cleanup manageable for busy families.
Quick Roasted Veggie Medley
4
servings10
minutes25
minutesIngredients
Instructions
- 1 Preheat oven to 425°F and line a baking sheet with aluminum foil
- 2 Combine all vegetables in a large bowl and toss with olive oil and seasonings until evenly coated
- 3 Spread vegetables in a single layer on prepared baking sheet
- 4 Roast for 15 minutes, then flip and stir vegetables
- 5 Continue roasting for 8-10 minutes until tender and browned
- 6 Sprinkle with Parmesan cheese if using and serve immediately


