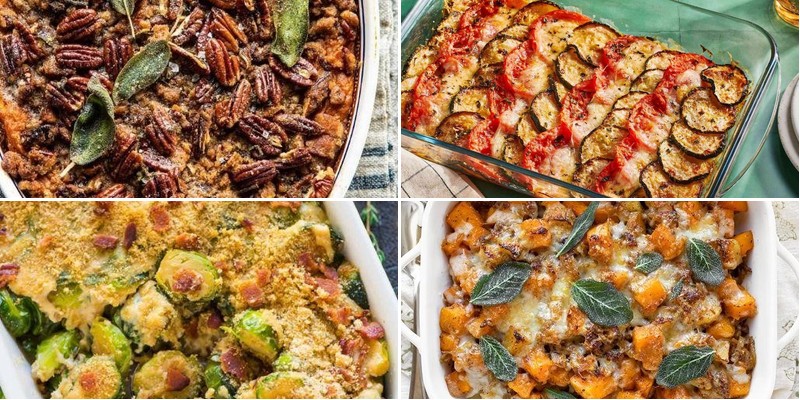
Hey there, home cooks! Have you ever found yourself staring at your dinner plate, wishing for that perfect side dish to tie everything together? Well, get ready to elevate your meals with these 29 mouthwatering casserole recipes. From cheesy comfort classics to fresh seasonal favorites, we’ve gathered the best dishes to impress your family and simplify your cooking. Let’s dive in and find your new go-to side!
Cheesy Broccoli and Rice Casserole

Y’all know that feeling when you open the fridge and find yourself staring down a bag of broccoli like it’s judging your life choices? This cheesy broccoli and rice casserole is here to rescue you from vegetable-related existential crises with maximum comfort and minimal effort. It’s basically a warm, cheesy hug in casserole form that somehow manages to make broccoli the star of the show.
6
servings20
minutes40
minutesIngredients
– 2 cups cooked white rice (I always make extra the night before because cold rice works beautifully here)
– 4 cups fresh broccoli florets (frozen works too, but fresh gives that satisfying crunch)
– 1 ½ cups shredded sharp cheddar cheese (go for the good stuff – it makes all the difference)
– 1 cup whole milk (2% works, but whole milk creates that dreamy creamy texture)
– ½ cup sour cream (full fat please, we’re not counting calories today)
– ¼ cup all-purpose flour
– 3 tablespoons unsalted butter (salted works too, just adjust seasoning)
– 1 small yellow onion, finely diced (the tears are worth it, I promise)
– 2 cloves garlic, minced (fresh only – jarred garlic is a crime in this household)
– 1 teaspoon smoked paprika
– ½ teaspoon black pepper
– ½ teaspoon salt
Instructions
1. Preheat your oven to 375°F and grease a 9×13 inch baking dish with butter or cooking spray.
2. Steam the broccoli florets for exactly 4 minutes until bright green but still crisp – they’ll finish cooking in the oven.
3. Melt the 3 tablespoons of butter in a large skillet over medium heat.
4. Add the diced onion and cook for 5 minutes until translucent and fragrant.
5. Stir in the minced garlic and cook for 1 more minute until golden but not browned.
6. Sprinkle the ¼ cup flour over the onion mixture and whisk continuously for 2 minutes to cook out the raw flour taste.
7. Gradually pour in the 1 cup milk while whisking constantly to prevent lumps from forming.
8. Cook the sauce for 3-4 minutes until thickened enough to coat the back of a spoon.
9. Remove the skillet from heat and stir in the ½ cup sour cream until completely smooth.
10. Add the 1 teaspoon smoked paprika, ½ teaspoon salt, and ½ teaspoon black pepper to the sauce.
11. Fold in the 2 cups cooked rice and steamed broccoli until everything is evenly coated.
12. Transfer the mixture to your prepared baking dish and spread into an even layer.
13. Sprinkle the 1 ½ cups shredded cheddar cheese evenly over the top.
14. Bake at 375°F for 25 minutes until the cheese is golden and bubbly around the edges.
15. Let the casserole rest for 10 minutes before serving – this helps the sauce set perfectly.
Oh my cheesy goodness, this casserole emerges from the oven with the most glorious golden crust that gives way to tender rice and broccoli swimming in that velvety sauce. The sharp cheddar provides that satisfying tang while the smoked paprika adds just enough smoky depth to keep things interesting. Try serving it alongside grilled chicken or scooping it into individual ramekins for a fancy-looking weeknight dinner that’ll have everyone fighting for seconds.
Classic Green Bean Casserole with Crispy Onions
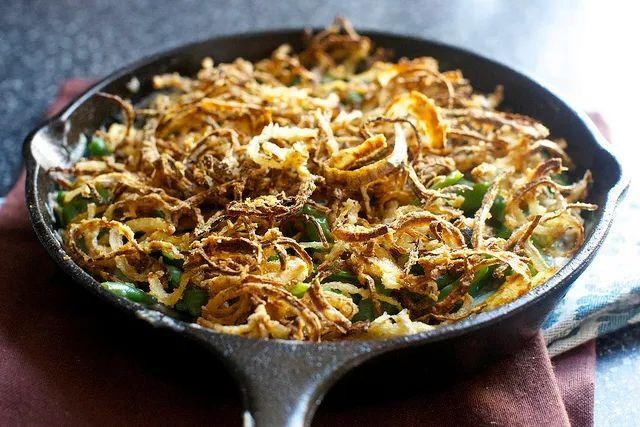
A Thanksgiving table without green bean casserole is like a fireworks show without the boom—technically possible, but why would you? This creamy, crunchy, nostalgic dish has been saving holiday meals from blandness since the 1950s, and my version keeps it classic with a few cheeky upgrades. Get ready to make the side dish that might just steal the turkey’s thunder.
6
servings15
minutes35
minutesIngredients
– 1 pound fresh green beans, trimmed and halved (canned beans? In this economy? Go fresh for that satisfying snap!)
– 1 (10.5 oz) can cream of mushroom soup (the retro hero that makes everything creamy)
– 1/2 cup whole milk (none of that skim stuff—we’re making comfort food here)
– 1 teaspoon soy sauce (my secret umami booster that makes flavors pop)
– 1/4 teaspoon black pepper, freshly ground if you’re fancy
– 1 (6 oz) can French-fried onions (the crispy crown jewels—don’t you dare skimp!)
Instructions
1. Preheat your oven to 350°F—this is where the magic happens, folks.
2. Bring a large pot of salted water to a rolling boil (salty like the sea makes those beans perfectly seasoned).
3. Add green beans and boil for exactly 5 minutes until bright green and slightly tender but still crisp.
4. Immediately drain beans and plunge them into an ice bath to stop cooking—this keeps them from turning mushy later.
5. In a large mixing bowl, whisk together cream of mushroom soup, milk, soy sauce, and black pepper until smooth.
6. Stir in the blanched green beans until evenly coated with the creamy mixture.
7. Transfer the bean mixture to a 1.5-quart baking dish, spreading it into an even layer.
8. Sprinkle half the French-fried onions evenly over the top—they’ll create a crispy bottom layer.
9. Bake uncovered for 25 minutes until bubbly around the edges.
10. Remove from oven and top with remaining fried onions.
11. Return to oven and bake 5 more minutes until top onions are golden and irresistible.
12. Let rest 5 minutes before serving—patience prevents third-degree tongue burns!
Creamy meets crunchy in every glorious bite, with tender beans swimming in that savory mushroom sauce that somehow tastes like childhood memories. Serve this beauty straight from the baking dish while it’s still bubbling—and watch it disappear faster than awkward family conversations when dessert arrives.
Savory Sweet Potato Casserole with Pecan Topping
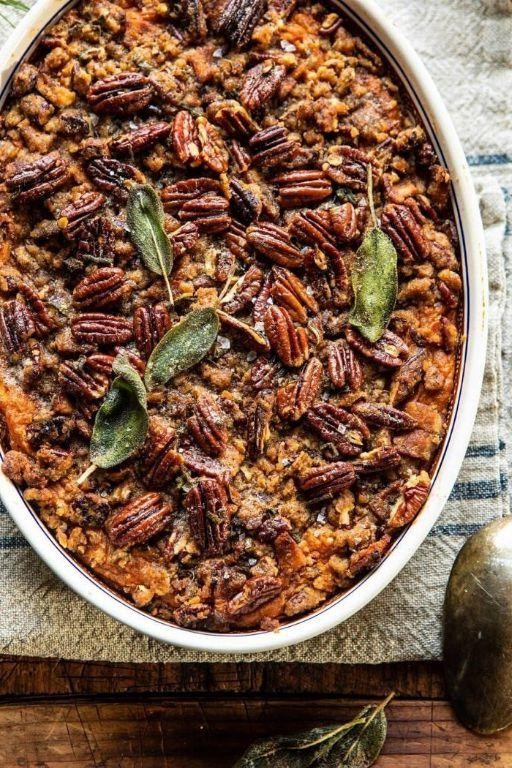
Tired of sweet potato casseroles that taste more like dessert than dinner? This savory spin will have your taste buds doing a happy dance—no marshmallow fluff required, just pure comfort food magic with a crunchy pecan topping that’s downright addictive.
8
servings25
minutes55
minutesIngredients
– 3 large sweet potatoes, peeled and cubed (about 4 cups—trust me, measuring beats guessing!)
– 1/2 cup unsalted butter, melted (I always use the real deal for that rich flavor)
– 1/3 cup heavy cream (because why skimp on creaminess?)
– 2 large eggs, at room temperature (they blend smoother, I promise)
– 1/4 cup brown sugar, packed (just enough to balance the savory notes)
– 1 tsp salt (sea salt is my go-to for a clean finish)
– 1/2 tsp black pepper, freshly ground (it wakes up the whole dish)
– 1/2 tsp smoked paprika (for that subtle smoky hug)
– 1 cup pecans, roughly chopped (toasted pecans are non-negotiable here)
– 1/4 cup all-purpose flour (helps the topping crisp up perfectly)
– 2 tbsp maple syrup (the real stuff—no pancake syrup imposters!)
Instructions
1. Preheat your oven to 375°F and grease a 9×13-inch baking dish lightly with butter or non-stick spray.
2. Place the peeled, cubed sweet potatoes in a large pot, cover with water, and bring to a boil over high heat.
3. Reduce heat to medium and simmer for 15–20 minutes, or until the sweet potatoes are fork-tender (a tip: don’t overcook, or they’ll get watery).
4. Drain the sweet potatoes thoroughly in a colander, then return them to the pot.
5. Mash the sweet potatoes with a potato masher until smooth, with no large lumps remaining.
6. Add the melted butter, heavy cream, eggs, brown sugar, salt, black pepper, and smoked paprika to the mashed sweet potatoes.
7. Stir the mixture vigorously with a wooden spoon until fully combined and creamy (another tip: mix while warm to avoid clumps).
8. Spread the sweet potato mixture evenly into the prepared baking dish using a spatula.
9. In a medium bowl, combine the chopped pecans, all-purpose flour, and maple syrup, stirring until the pecans are evenly coated.
10. Sprinkle the pecan topping evenly over the sweet potato layer, covering it completely.
11. Bake in the preheated oven for 25–30 minutes, or until the topping is golden brown and the edges are bubbly (final tip: check at 25 minutes to prevent burning).
12. Remove from the oven and let cool for 5–10 minutes before serving.
Zesty and satisfying, this casserole boasts a velvety smooth base with a nutty, crisp topping that crackles with every bite. Serve it alongside roasted turkey or as a standout side at potlucks—leftovers (if any!) reheat beautifully for a cozy next-day lunch.
Creamy Mushroom and Asparagus Casserole
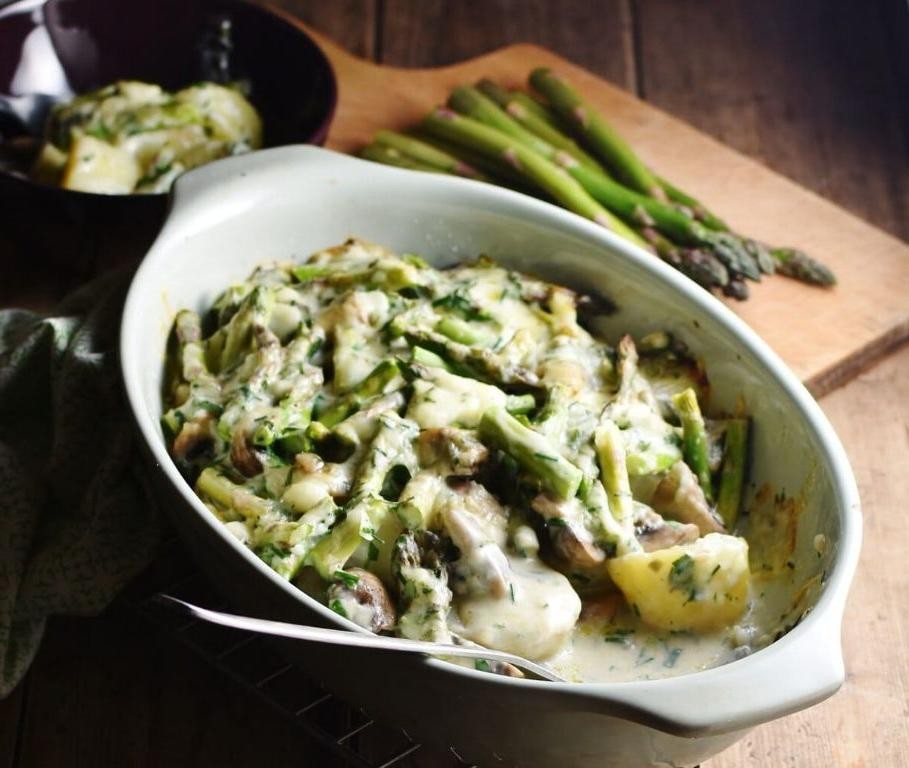
Unbelievably, this creamy mushroom and asparagus casserole is the dish that converted my “I don’t do casseroles” husband into a bona fide casserole enthusiast—it’s that magical combination of earthy, creamy, and downright comforting.
6
servings20
minutes50
minutesIngredients
- 1 lb cremini mushrooms, sliced (they have more flavor than white mushrooms, trust me!)
- 1 lb fresh asparagus, trimmed and cut into 1-inch pieces (snap off the woody ends—they’ll tell you where to break)
- 1 large yellow onion, diced (the sweet kind works wonders here)
- 3 cloves garlic, minced (fresh only—none of that jarred stuff)
- 2 cups heavy cream (go for the good stuff, it makes all the difference)
- 1 cup grated Parmesan cheese (the real deal, not the shaky-can variety)
- 1/2 cup panko breadcrumbs (for that perfect crispy topping)
- 2 tbsp unsalted butter (I always use unsalted to control the saltiness)
- 2 tbsp extra virgin olive oil (my go-to for sautéing)
- 1 tsp dried thyme (rubbed between your fingers to wake up the flavor)
- 1/2 tsp black pepper, freshly ground
- 1/2 tsp salt (adjust after tasting the sauce)
Instructions
- Preheat your oven to 375°F and grease a 9×13-inch baking dish with butter or cooking spray.
- Heat 2 tablespoons of olive oil in a large skillet over medium-high heat until shimmering.
- Add the diced onion and cook for 4-5 minutes, stirring occasionally, until translucent and slightly golden.
- Stir in the sliced mushrooms and cook for 8-10 minutes, until they release their liquid and become browned.
- Add the minced garlic and cook for 1 minute, just until fragrant—don’t let it burn!
- Mix in the asparagus pieces and dried thyme, cooking for 3-4 minutes until the asparagus is bright green but still crisp.
- Pour in the heavy cream and bring to a gentle simmer, then reduce heat to low.
- Stir in the Parmesan cheese, salt, and black pepper until the cheese melts and the sauce thickens slightly.
- Transfer the mixture to the prepared baking dish and spread evenly.
- Sprinkle the panko breadcrumbs evenly over the top for that essential crispy layer.
- Dot the surface with small pieces of the remaining 2 tablespoons of butter.
- Bake for 20-25 minutes, until the top is golden brown and the sauce is bubbling around the edges.
- Let the casserole rest for 5-10 minutes before serving—this helps the sauce set perfectly.
Marvel at the creamy, velvety texture that hugs each vegetable, with the earthy mushrooms playing off the bright asparagus in every bite. Serve this beauty alongside grilled chicken or spoon it over crusty bread for a meal that feels both elegant and completely comforting.
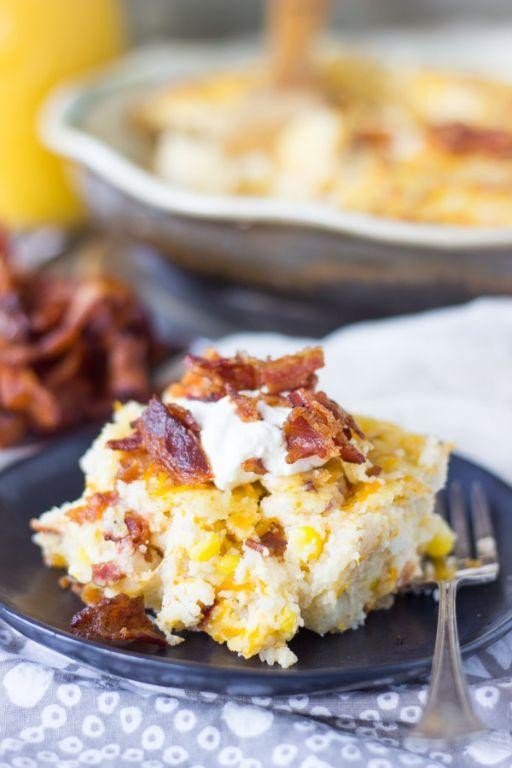
Baked Corn Casserole with Jalapeño and Cheddar

Nothing says “I love carbs” quite like diving face-first into a warm, cheesy casserole that basically hugs your soul. Now imagine that cozy embrace with a little spicy kick—yes, we’re talking about a baked corn casserole jazzed up with jalapeño and cheddar, the kind of dish that makes potlucks feel like winning the culinary lottery.
8
servings15
minutes50
minutesIngredients
- 4 cups frozen corn kernels (thawed—trust me, no one wants icy surprises)
- 1 cup sour cream (full-fat for maximum creaminess, because we’re not here to skimp)
- 1 cup shredded cheddar cheese (I go for sharp cheddar to balance the spice)
- 2 large eggs, at room temperature (they mix in smoother, no clumps!)
- 1/2 cup unsalted butter, melted (salted works, but unsalted lets you control the salt)
- 1/4 cup all-purpose flour (spoon and level it—no packing!)
- 2 jalapeños, finely chopped (seeds in if you’re brave, out for mild heat)
- 1/4 cup granulated sugar (just a hint to sweeten the corn)
- 1 tsp baking powder (the lift master for fluffy texture)
- 1/2 tsp salt (I use kosher for even distribution)
Instructions
- Preheat your oven to 350°F and grease a 9×13-inch baking dish with butter or non-stick spray to prevent sticking.
- In a large mixing bowl, whisk the room-temperature eggs until frothy, about 1 minute, to incorporate air for a lighter casserole.
- Add the sour cream and melted butter to the eggs, stirring until fully combined and smooth.
- Mix in the flour, sugar, baking powder, and salt, stirring for 30 seconds until no dry streaks remain.
- Fold in the thawed corn kernels, shredded cheddar cheese, and chopped jalapeños until evenly distributed.
- Pour the mixture into the prepared baking dish and spread it into an even layer with a spatula.
- Bake for 45-50 minutes, or until the top is golden brown and a toothpick inserted in the center comes out clean.
- Let the casserole cool for 10 minutes before serving to allow it to set properly.
Serve this beauty warm, and you’ll get a creamy, slightly sweet base with pops of corn, melted cheddar, and a jalapeño zing that sneaks up on you. Seriously, it’s the ultimate sidekick for grilled meats or a standalone star—just try not to eat the whole pan in one sitting!
Garlic Parmesan Potato Casserole

Just when you thought potatoes couldn’t get any more irresistible, along comes this garlicky, cheesy, soul-warming casserole that’ll have your taste buds doing cartwheels. Seriously, this Garlic Parmesan Potato Casserole is the culinary equivalent of a warm hug on a chilly day—comfort food that somehow manages to be both decadent and downright addictive. Consider this your official warning: one bite and you’ll be planning your next batch before the first is even gone.
8
servings20
minutes75
minutesIngredients
– 3 lbs russet potatoes, peeled and thinly sliced (I swear by russets for their perfect starchy texture)
– 1 ½ cups heavy cream (the richer, the better—this is no time for dieting)
– 1 cup grated Parmesan cheese (freshly grated melts so much smoother than the pre-shredded stuff)
– 4 cloves garlic, minced (feel free to go rogue and add an extra clove if you’re a garlic fiend like me)
– ½ cup unsalted butter, melted (salted works too, but then ease up on the added salt)
– 1 tsp salt (I use fine sea salt for even distribution)
– ½ tsp black pepper (freshly cracked, please—it makes all the difference)
– 2 tbsp chopped fresh parsley (for that final pop of color and freshness)
Instructions
1. Preheat your oven to 375°F and grease a 9×13-inch baking dish with butter or cooking spray.
2. Peel the russet potatoes and slice them into ⅛-inch thick rounds using a mandoline or sharp knife for uniform cooking.
3. In a large bowl, whisk together the heavy cream, minced garlic, salt, and black pepper until well combined.
4. Arrange half of the potato slices in an even layer at the bottom of the prepared baking dish.
5. Pour half of the cream mixture evenly over the first potato layer.
6. Sprinkle half of the grated Parmesan cheese over the cream-coated potatoes.
7. Repeat the layers with the remaining potatoes, cream mixture, and Parmesan.
8. Drizzle the melted butter evenly over the top layer—this will help create that gorgeous golden crust.
9. Cover the dish tightly with aluminum foil and bake at 375°F for 45 minutes.
10. Remove the foil and continue baking for another 25-30 minutes until the top is golden brown and bubbly.
11. Test for doneness by inserting a knife into the center—it should slide through the potatoes easily.
12. Let the casserole rest for 10 minutes before serving to allow the layers to set properly.
13. Sprinkle with fresh chopped parsley just before serving for a bright, fresh finish.
Buttery, creamy, and packed with savory garlic flavor, this casserole emerges from the oven with a golden-brown crust that gives way to tender, melt-in-your-mouth potato layers. The Parmesan adds a salty, nutty depth that perfectly balances the richness of the cream, making each bite pure comfort. Serve it alongside roasted chicken for a classic pairing, or go all-in and make it the star of your next potluck—either way, prepare for recipe requests!
Spinach and Artichoke Casserole with Mozzarella
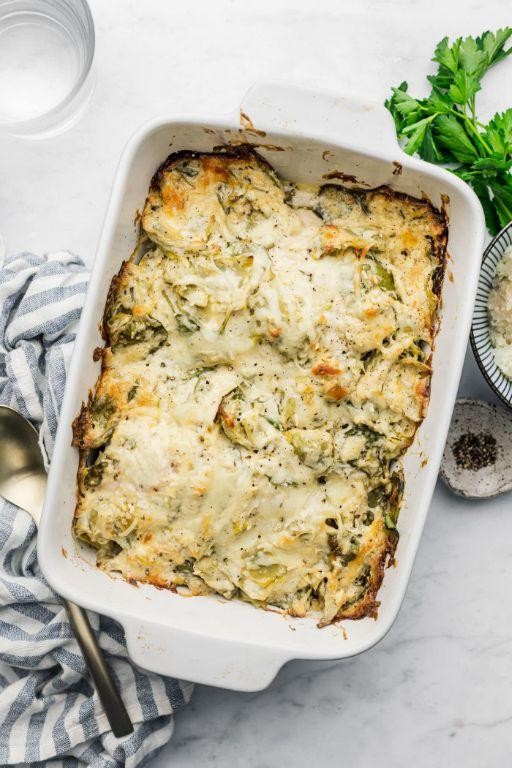
Kindly prepare your taste buds for a flavor fiesta that’ll make your oven the hottest spot in town! This spinach and artichoke casserole with mozzarella is basically a cozy blanket of cheesy goodness that hugs your soul – and yes, it’s absolutely worth every glorious, bubbly minute.
6
servings15
minutes33
minutesIngredients
– 2 cups fresh spinach (I always grab the pre-washed bags because life’s too short for gritty greens)
– 1 can artichoke hearts, drained and chopped (the marinated ones add extra pizzazz if you’re feeling fancy)
– 2 cups shredded mozzarella cheese (I use whole milk mozzarella for that epic stretch factor)
– 1 cup heavy cream (because we’re adults and we can handle the richness)
– 1/2 cup grated Parmesan cheese (the good stuff from the refrigerated section, not the shaky can)
– 3 cloves garlic, minced (fresh only – powdered garlic is for emergencies)
– 1 tbsp olive oil (extra virgin is my kitchen MVP)
– 1 tsp salt (I prefer kosher salt for better distribution)
– 1/2 tsp black pepper (freshly ground makes all the difference)
– 1/4 tsp red pepper flakes (optional but highly recommended for a subtle kick)
Instructions
1. Preheat your oven to 375°F and grab your favorite 9×13 inch baking dish.
2. Heat 1 tablespoon of olive oil in a large skillet over medium heat until it shimmers.
3. Add 3 minced garlic cloves and cook for exactly 1 minute until fragrant but not browned.
4. Toss in 2 cups of fresh spinach and cook for 2-3 minutes until completely wilted.
5. Tip: Squeeze excess moisture from the cooked spinach with paper towels to prevent a watery casserole.
6. Combine the wilted spinach, chopped artichoke hearts, 1 cup heavy cream, 1/2 cup Parmesan, 1 teaspoon salt, 1/2 teaspoon black pepper, and 1/4 teaspoon red pepper flakes in a large bowl.
7. Transfer the mixture to your prepared baking dish and spread it evenly.
8. Sprinkle 2 cups of shredded mozzarella cheese evenly over the top.
9. Tip: For extra crispy edges, make sure the cheese reaches all the way to the dish’s corners.
10. Bake at 375°F for 25-30 minutes until the top is golden brown and bubbles form around the edges.
11. Tip: Let it rest for 5 minutes before serving – this helps the layers set perfectly.
Utterly irresistible straight from the oven, this casserole delivers creamy, garlicky perfection with just enough texture from the artichokes to keep things interesting. Serve it alongside crusty bread for dipping into that glorious cheese pool, or spoon it over grilled chicken for a complete meal that’ll have everyone asking for seconds.
Butternut Squash and Sage Casserole
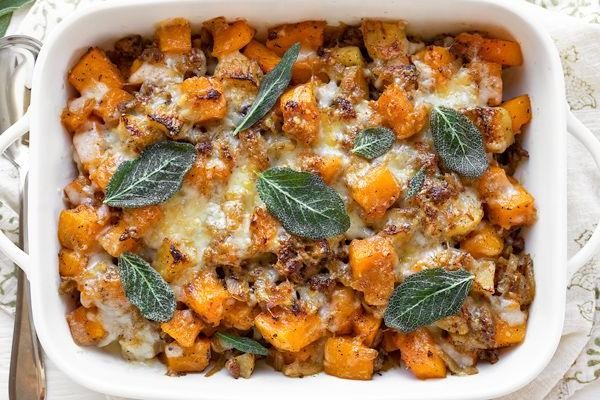
Kick your basic casserole game to the curb, because this butternut squash and sage situation is about to become your new autumn obsession—it’s cozy, it’s creamy, and it’s basically a hug in a baking dish. Seriously, if fall had a flavor, this would be it, with sweet squash, earthy sage, and a cheesy topping that’ll make you forget all about those sad, soupy casseroles of yore. Get ready to impress your friends, your family, and maybe even your cat (okay, maybe not the cat, but you get the idea).
6
servings20
minutes50
minutesIngredients
– 1 medium butternut squash, peeled and cubed (about 4 cups—trust me, peeling this guy is a workout, but worth it)
– 2 tbsp extra virgin olive oil (my go-to for that fruity kick)
– 1 cup heavy cream (don’t skimp—this is where the magic happens)
– 1/2 cup grated Parmesan cheese (the real stuff, please, no sawdust-like substitutes)
– 1/4 cup fresh sage leaves, chopped (fresh is key here; dried sage just can’t compete)
– 1 tsp garlic powder (because who has time to mince fresh garlic on a weeknight?)
– 1/2 tsp salt (I like a fine sea salt for even distribution)
– 1/4 tsp black pepper (freshly ground if you’re feeling fancy)
– 1 cup shredded mozzarella cheese (for that glorious, stretchy top layer)
Instructions
1. Preheat your oven to 375°F—this ensures everything bakes evenly without any cold-spot surprises.
2. Toss the cubed butternut squash with olive oil, salt, and black pepper in a large mixing bowl until evenly coated.
3. Spread the squash in a single layer on a baking sheet and roast for 25 minutes, or until tender when pierced with a fork—this step caramelizes the squash, boosting its natural sweetness.
4. Transfer the roasted squash to a greased 9×13-inch baking dish, mashing it lightly with a fork for a chunky texture.
5. In a small saucepan, heat the heavy cream over medium heat for 3-4 minutes until warm but not boiling—this prevents curdling when mixed.
6. Stir in the Parmesan cheese, chopped sage, and garlic powder into the warm cream until smooth and combined.
7. Pour the cream mixture evenly over the squash in the baking dish, gently folding to coat everything.
8. Sprinkle the shredded mozzarella cheese on top in an even layer—this creates that golden, bubbly crust we all crave.
9. Bake for 20-25 minutes, or until the cheese is melted and lightly browned at the edges.
10. Let the casserole rest for 5 minutes before serving; this allows the flavors to meld and makes slicing easier. Really, the velvety squash and crispy sage bits create a texture party in your mouth, while the cheesy top adds a savory punch. Serve it alongside a crisp salad or as a show-stopping side at Thanksgiving—either way, it’s bound to steal the spotlight.
Zucchini and Tomato Gratin Casserole
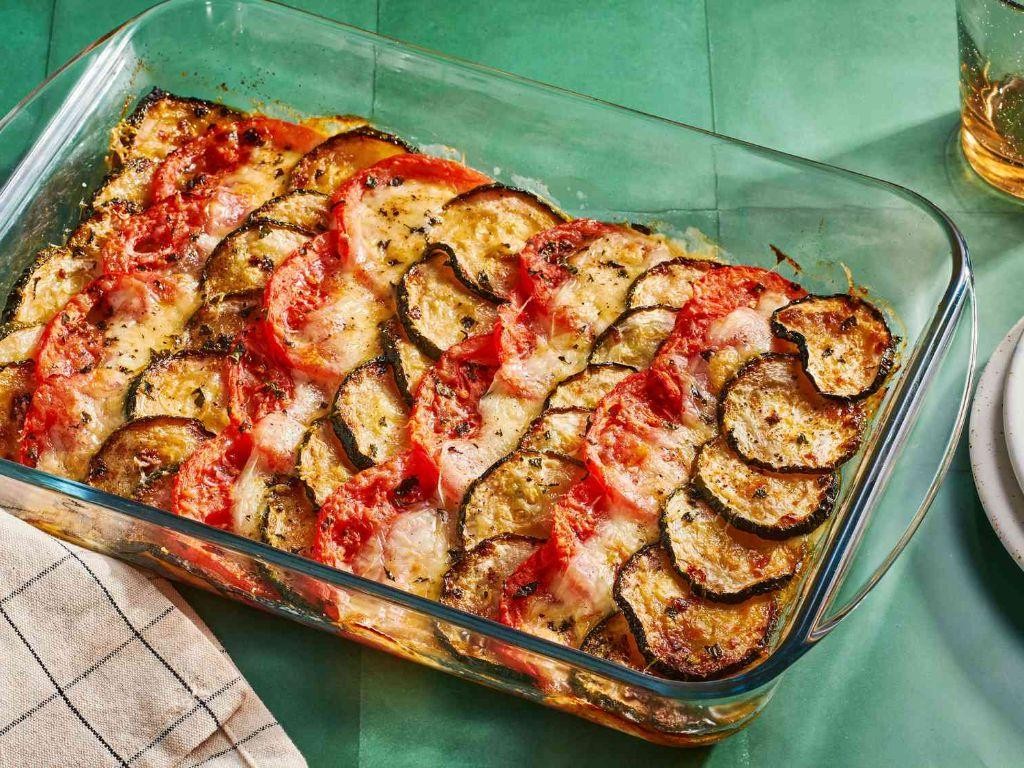
Picture this: your garden’s most prolific producers—zucchini and tomatoes—finally getting the cheesy, golden-brown treatment they deserve. This gratin casserole is basically summer’s answer to comfort food, minus the guilt trip and with maximum flavor payoff.
6
servings15
minutes30
minutesIngredients
- 2 medium zucchinis, sliced into ¼-inch rounds (because nobody likes a floppy zucchini)
- 3 large tomatoes, sliced ½-inch thick (go for beefsteak—they hold their shape like champs)
- 1 cup shredded mozzarella cheese (the low-moisture kind that actually melts, not weeps)
- ½ cup grated Parmesan cheese (the real stuff, not the shaky-can impostor)
- ½ cup panko breadcrumbs (for that satisfying crunch factor)
- 2 tbsp extra virgin olive oil (my go-to for everything from salads to sautés)
- 2 cloves garlic, minced (fresh only—jarred garlic is a crime against flavor)
- 1 tsp dried oregano (rub it between your palms to wake up the oils)
- ½ tsp salt (Diamond Crystal kosher salt distributes like a dream)
- ¼ tsp black pepper (freshly cracked, because pre-ground tastes like dust)
Instructions
- Preheat your oven to 375°F—this gives the zucchini time to soften without turning to mush.
- Toss zucchini rounds with 1 tbsp olive oil, half the salt, and pepper in a large bowl until evenly coated.
- Arrange zucchini slices in a single layer in a 9×13-inch baking dish—crowding leads to steaming, not browning.
- Layer tomato slices over the zucchini, slightly overlapping like edible roof shingles.
- Scatter minced garlic and oregano evenly over the tomatoes—this is where the flavor magic happens.
- In a small bowl, combine panko, Parmesan, remaining salt, and 1 tbsp olive oil until crumbs are moistened.
- Sprinkle mozzarella evenly over the vegetable layers, followed by the panko mixture.
- Bake for 25-30 minutes until the top is golden brown and juices are bubbling at the edges.
- Let rest for 10 minutes before serving—this allows the layers to set for clean slices.
Heavenly doesn’t begin to describe that crisp, cheesy crust giving way to tender vegetables beneath. Serve it alongside grilled chicken for a complete meal, or scoop it straight from the dish while pretending you have willpower.
Four-Cheese Macaroni Casserole
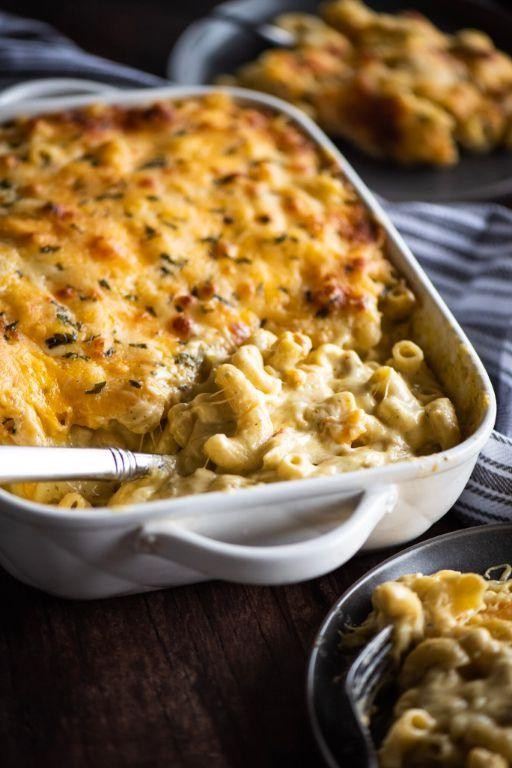
Aren’t we all just searching for that perfect cheesy hug in casserole form? This four-cheese macaroni situation is basically a warm blanket for your soul, with enough gooey goodness to make even Monday feel like a celebration. Get ready to dive fork-first into pure comfort!
8
servings20
minutes39
minutesIngredients
– 1 lb elbow macaroni (the classic choice for maximum cheese adhesion)
– 4 tbsp unsalted butter (because everything’s better with butter, right?)
– 1/4 cup all-purpose flour (the magic thickener)
– 3 cups whole milk (I like it cold from the fridge for smoother roux-making)
– 1 cup sharp cheddar, shredded (the bold backbone of our cheese quartet)
– 1 cup Gruyère, shredded (for that fancy nutty flavor that impresses guests)
– 1/2 cup fontina, shredded (the secret melt-master)
– 1/2 cup Parmesan, grated (because everything needs a salty kick)
– 1 tsp kosher salt (measured with love, not guesswork)
– 1/2 tsp black pepper (freshly ground if you’re feeling extra)
– 1/2 cup panko breadcrumbs (for that irresistible crunchy top)
Instructions
1. Preheat your oven to 375°F—this ensures even baking from the moment your casserole goes in.
2. Cook 1 lb elbow macaroni in salted boiling water for exactly 7 minutes (it should be al dente since it’ll continue cooking in the oven).
3. While pasta cooks, melt 4 tbsp unsalted butter in a large saucepan over medium heat.
4. Whisk in 1/4 cup all-purpose flour and cook for 2 minutes until golden and fragrant to cook out the raw flour taste.
5. Gradually pour in 3 cups whole milk while whisking constantly to prevent lumps from forming.
6. Cook the sauce, stirring frequently, until it thickens enough to coat the back of a spoon, about 5-7 minutes.
7. Remove from heat and stir in 1 cup sharp cheddar, 1 cup Gruyère, 1/2 cup fontina, and 1/2 cup Parmesan until completely melted and smooth.
8. Season the cheese sauce with 1 tsp kosher salt and 1/2 tsp black pepper.
9. Drain the cooked macaroni and immediately combine it with the cheese sauce in a 9×13 inch baking dish.
10. Sprinkle 1/2 cup panko breadcrumbs evenly over the top for maximum crunch factor.
11. Bake at 375°F for 25 minutes until the top is golden brown and the edges are bubbly.
12. Let rest for 10 minutes before serving—this allows the sauce to set up perfectly.
That glorious golden crust gives way to the creamiest, most decadent macaroni you’ll ever twirl around your fork. The four cheeses create a symphony of flavors that’s sharp, nutty, and utterly addictive. Try serving it alongside crispy roasted broccoli for a perfect salty-green contrast, or just eat it straight from the baking dish—we won’t judge!
Caramelized Onion and Cauliflower Casserole
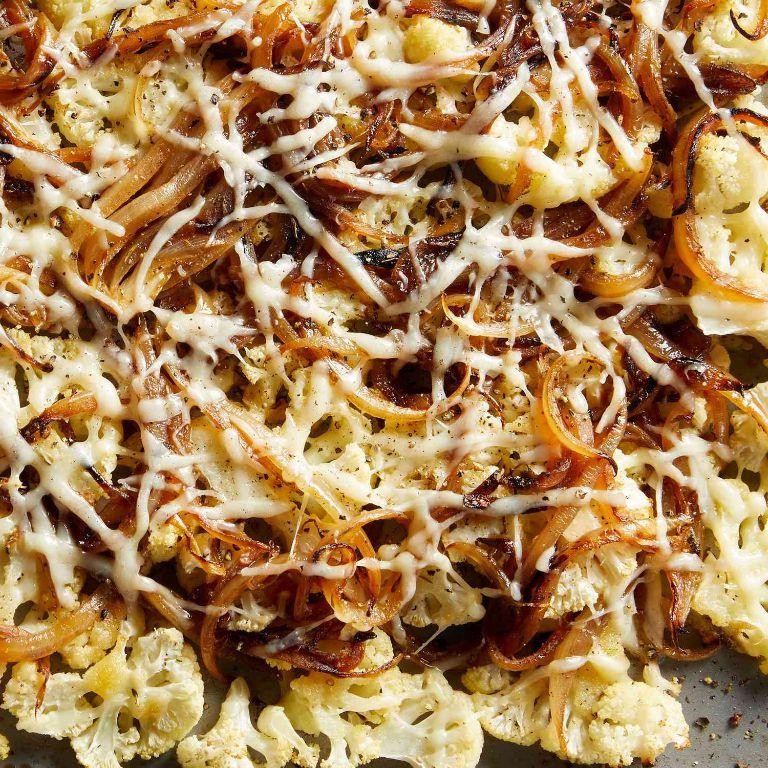
Who knew that caramelized onions and cauliflower could throw such an epic party in your baking dish? This casserole is the cozy, cheesy hug your taste buds have been dreaming about—perfect for when you want to impress without the stress. Trust me, it’s so good even the veggie skeptics will be begging for seconds.
8
servings25
minutes58
minutesIngredients
– 2 large yellow onions, thinly sliced (they’re the sweetest when caramelized, in my opinion)
– 1 head cauliflower, cut into bite-sized florets (go for fresh—it makes all the difference)
– 2 cups shredded sharp cheddar cheese (I always grab the block and shred it myself for extra meltiness)
– 1 cup heavy cream (none of that light stuff—this is comfort food, after all)
– 1/4 cup extra virgin olive oil (my go-to for sautéing)
– 2 cloves garlic, minced (freshly minced, please—no jarred nonsense)
– 1 tsp salt (I use fine sea salt for even distribution)
– 1/2 tsp black pepper (freshly ground adds a nice kick)
– 1/4 tsp red pepper flakes (optional, but a pinch gives a subtle heat I adore)
Instructions
1. Preheat your oven to 375°F—this ensures even baking from the get-go.
2. Heat 1/4 cup extra virgin olive oil in a large skillet over medium heat until it shimmers lightly.
3. Add 2 large yellow onions, thinly sliced, and cook for 20–25 minutes, stirring occasionally, until they turn a deep golden brown and smell sweet. Tip: Don’t rush this—low and slow is key for perfect caramelization.
4. Stir in 2 cloves garlic, minced, and cook for 1 minute until fragrant to avoid bitterness.
5. Add 1 head cauliflower, cut into bite-sized florets, and sauté for 5–7 minutes until slightly tender but not mushy.
6. Pour in 1 cup heavy cream, 1 tsp salt, 1/2 tsp black pepper, and 1/4 tsp red pepper flakes (if using), stirring to coat everything evenly.
7. Transfer the mixture to a greased 9×13-inch baking dish, spreading it out in an even layer. Tip: Grease the dish well to prevent sticking—I use a bit of olive oil spray.
8. Sprinkle 2 cups shredded sharp cheddar cheese evenly over the top for that gooey, golden finish.
9. Bake at 375°F for 25–30 minutes, until the cheese is bubbly and lightly browned. Tip: For extra crispiness, broil for the last 2–3 minutes, but watch it closely to avoid burning.
10. Remove from the oven and let it rest for 5 minutes before serving to allow the flavors to meld.
Yum—this casserole emerges creamy with a hint of sweetness from the onions, balanced by the cauliflower’s tender bite. Serve it alongside a crisp green salad or as a standout side at potlucks, and watch it disappear faster than you can say “seconds, please!”
Bacon and Cheese Grits Casserole
Whew, bacon and cheese grits casserole—the ultimate Southern hug in a baking dish that’ll make you forget all your troubles (or at least your lunch plans). This cheesy, smoky, comfort-food masterpiece is basically breakfast, lunch, and a warm embrace all rolled into one glorious bake. Trust me, your brunch guests will be begging for the recipe.
8
servings20
minutes65
minutesIngredients
– 1 cup stone-ground grits (the coarser kind gives the best texture, in my humble opinion)
– 4 cups water (for boiling—don’t skimp, or you’ll get lumpy grits)
– 1 tsp salt (I always add a pinch more at the end, but start here)
– 6 slices thick-cut bacon, chopped (go for the good stuff—it makes all the difference)
– 2 cups shredded sharp cheddar cheese (because mild cheddar is just a sad imitation)
– 3 large eggs, lightly beaten (room temp eggs blend smoother, FYI)
– 1 cup whole milk (none of that skim milk nonsense—this is comfort food, after all)
– 1/2 tsp black pepper (freshly ground if you’re fancy)
– 1 tbsp unsalted butter (for greasing the dish—because everything’s better with butter)
Instructions
1. Preheat your oven to 350°F and grease a 9×13-inch baking dish with the unsalted butter, making sure to coat the bottom and sides evenly.
2. In a medium saucepan, bring the 4 cups of water and 1 tsp salt to a rolling boil over high heat.
3. Slowly whisk in the 1 cup of stone-ground grits to prevent clumping, then reduce the heat to low.
4. Cover the saucepan and simmer the grits for 20–25 minutes, stirring occasionally, until they’re thick and creamy. (Tip: If the grits look too thick, add a splash of water to loosen them up.)
5. While the grits cook, place the chopped bacon in a skillet over medium heat and cook for 8–10 minutes, stirring often, until crispy and browned.
6. Remove the bacon from the skillet with a slotted spoon and drain it on paper towels to soak up excess grease.
7. In a large mixing bowl, combine the cooked grits, crispy bacon, 2 cups shredded sharp cheddar cheese, 3 lightly beaten eggs, 1 cup whole milk, and 1/2 tsp black pepper.
8. Stir the mixture vigorously until everything is well incorporated and the cheese starts to melt. (Tip: Let the grits cool slightly before adding the eggs to avoid scrambling them.)
9. Pour the mixture into the greased baking dish and spread it evenly with a spatula.
10. Bake at 350°F for 35–40 minutes, or until the top is golden brown and the center is set (no jiggle when you shake the dish). (Tip: For extra crispiness, broil for the last 2–3 minutes, but watch it like a hawk!)
11. Remove the casserole from the oven and let it rest for 5–10 minutes before serving.
Kick back and admire that golden, bubbly top—this casserole is creamy with a satisfying crunch from the bacon. The sharp cheddar melds perfectly with the smoky grits, making each bite a cozy revelation. Serve it up with a drizzle of hot sauce or alongside scrambled eggs for a brunch that’ll have everyone coming back for seconds.
Sausage and Herb Stuffing Casserole
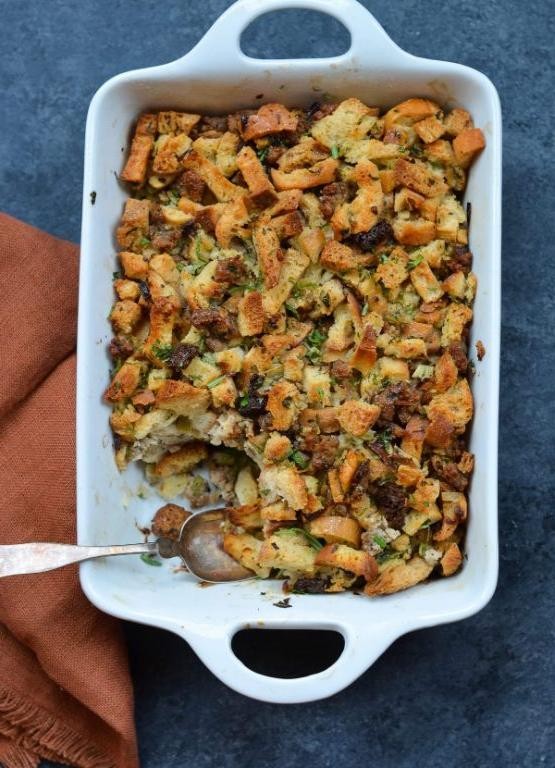
Tired of that same old stuffing that only makes an appearance once a year? This Sausage and Herb Stuffing Casserole is about to become your new favorite comfort food—it’s basically Thanksgiving’s main character in a cozy, bake-and-serve dish that’s perfect for any chilly evening. We’re talking savory sausage, crispy bread cubes, and herbs that’ll make your kitchen smell like a holiday dream, all baked up in one glorious pan that requires zero fancy plating skills. Trust me, this is the dish that’ll have everyone asking for seconds before they’ve even finished their first helping.
8
servings20
minutes65
minutesIngredients
- 1 lb breakfast sausage (I go for the spicy kind because life’s too short for bland sausage)
- 8 cups cubed day-old bread (stale bread works best here—it soaks up all that delicious flavor without turning to mush)
- 1 large yellow onion, diced (don’t skimp—this adds the perfect sweet balance to the savory sausage)
- 3 celery stalks, chopped (the crunch factor is non-negotiable)
- 2 cloves garlic, minced (fresh only—jarred garlic just doesn’t hit the same)
- 2 cups chicken broth (low-sodium is my preference so I can control the salt level)
- 2 large eggs (room temp eggs blend into the mixture much more smoothly)
- 4 tbsp unsalted butter (because everything’s better with butter)
- 2 tbsp fresh sage, chopped (dried works in a pinch, but fresh herbs really elevate this dish)
- 1 tbsp fresh thyme leaves (strip them from the stems—no one wants woody bites)
- 1 tsp black pepper (freshly cracked, please—it makes all the difference)
- 1/2 tsp salt (adjust after tasting since the sausage and broth add saltiness)
Instructions
- Preheat your oven to 375°F and grease a 9×13-inch baking dish with butter or cooking spray.
- Brown the breakfast sausage in a large skillet over medium-high heat for 8-10 minutes, breaking it into small crumbles with a wooden spoon until no pink remains.
- Transfer the cooked sausage to a large mixing bowl using a slotted spoon, leaving about 1 tablespoon of drippings in the skillet.
- Add the diced onion and chopped celery to the same skillet and sauté for 6-8 minutes over medium heat until softened and slightly translucent.
- Stir in the minced garlic and cook for exactly 1 minute until fragrant—be careful not to burn it!
- Pour the vegetable mixture into the bowl with the sausage, then add the cubed bread, fresh sage, thyme, black pepper, and salt.
- In a separate medium bowl, whisk together the chicken broth and eggs until fully combined and slightly frothy.
- Pour the broth-egg mixture over the bread and sausage combination, then gently fold everything together until the bread is evenly moistened.
- Transfer the mixture to your prepared baking dish and spread it into an even layer.
- Dot the top with small pieces of the 4 tablespoons of butter for that golden, crispy finish.
- Cover the dish with aluminum foil and bake at 375°F for 25 minutes.
- Remove the foil and continue baking for another 20-25 minutes until the top is golden brown and crispy around the edges.
- Let the casserole rest for 10 minutes before serving—this allows the flavors to settle and makes slicing much cleaner.
What emerges from your oven is pure magic—a golden-brown top giving way to a moist, savory interior where every bite delivers the perfect balance of herby bread, savory sausage, and subtle vegetable crunch. Whether you serve it alongside roasted chicken or proudly as the main event with a simple green salad, this casserole brings holiday-level comfort to any Tuesday night. Leftovers (if you’re lucky enough to have any) reheat beautifully and might just taste even better the next day.
Eggplant and Ricotta Casserole
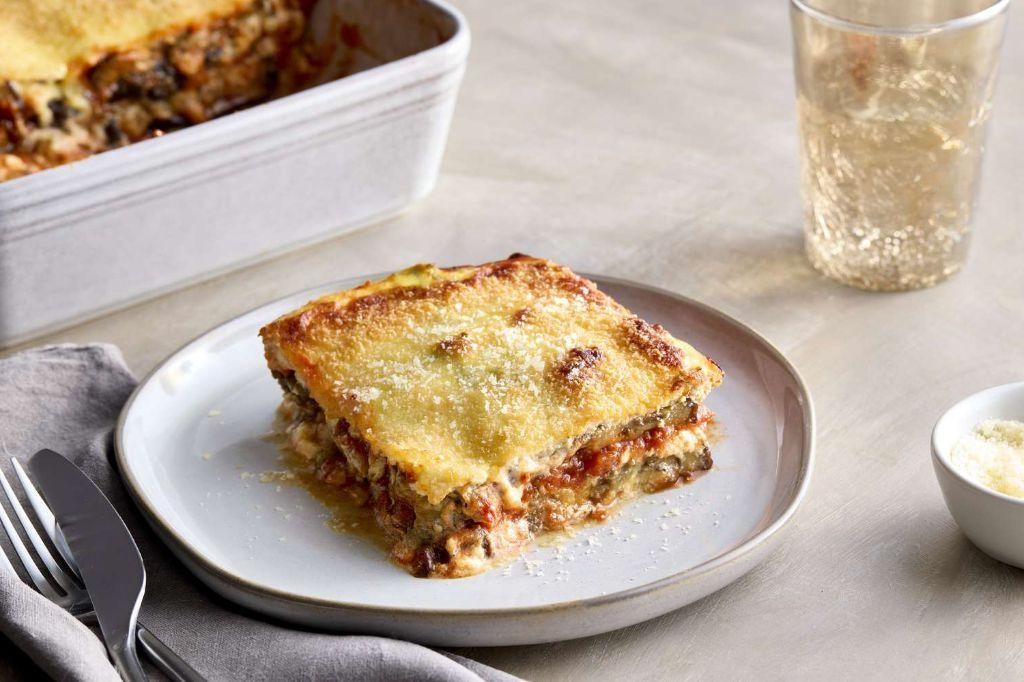
Aren’t we all just looking for that one cozy casserole that feels like a warm hug from your Italian grandma? This eggplant and ricotta masterpiece is basically a lasagna that decided to go on a low-carb vacation—and came back absolutely fabulous. Get ready to fall in love with layers of creamy, cheesy goodness that’ll make you forget all about pasta.
8
servings25
minutes50
minutesIngredients
- 2 large eggplants, sliced ¼-inch thick (I always look for firm, shiny ones—no sad, wrinkly eggplants allowed!)
- 1 tablespoon extra virgin olive oil (my go-to for that fruity kick)
- 1 teaspoon kosher salt (none of that wimpy table salt business)
- 15 ounces whole milk ricotta (room temperature blends smoother, trust me)
- 1 large egg (room temp here makes everything play nice together)
- ½ cup grated Parmesan cheese (the good stuff, not the green can)
- 2 cups marinara sauce (homemade if you’re fancy, jarred if you’re smart)
- 2 cups shredded mozzarella (because more cheese is always the answer)
- ¼ cup fresh basil leaves, chopped (fresh makes all the difference—your kitchen will smell amazing)
Instructions
- Preheat your oven to 400°F and line two baking sheets with parchment paper.
- Arrange eggplant slices in a single layer on the baking sheets and brush both sides with olive oil using a pastry brush.
- Sprinkle kosher salt evenly over all eggplant slices—this helps draw out excess moisture.
- Bake for 20 minutes until the eggplant is tender and slightly golden around the edges.
- While eggplant bakes, mix ricotta, egg, Parmesan, and chopped basil in a medium bowl until fully combined.
- Spread ½ cup marinara sauce in the bottom of a 9×13 inch baking dish to prevent sticking.
- Layer half of the baked eggplant slices over the sauce, overlapping slightly if needed.
- Spread all of the ricotta mixture evenly over the eggplant layer using a spatula.
- Top with remaining eggplant slices, creating your final vegetable layer.
- Pour remaining 1½ cups marinara sauce over the top and spread to cover completely.
- Sprinkle shredded mozzarella evenly over the entire surface—get every corner covered!
- Bake at 375°F for 30 minutes until the cheese is bubbly and golden brown.
- Let rest for 10 minutes before slicing—this is crucial for clean layers that won’t slide apart.
You’ll love how the eggplant becomes meltingly tender while the ricotta filling stays creamy and light. That crispy, cheesy top gives way to layers that somehow feel both decadent and wholesome. Seriously, serve this with a simple green salad and watch it become your new favorite comfort food—leftovers taste even better the next day, if there are any!
Brussels Sprouts and Bacon Casserole
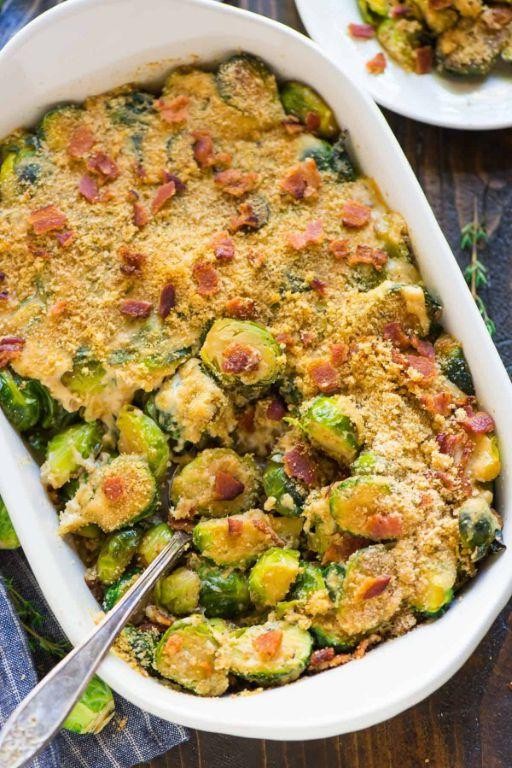
Mmm, let’s be real—Brussels sprouts have spent decades as the vegetable equivalent of that one cousin nobody wants to sit next to at Thanksgiving, until bacon swooped in like a culinary superhero and made them the life of the party. This casserole is basically their glow-up story in dish form, where crispy, salty bacon and tender sprouts get cozy under a blanket of melty cheese. Trust me, it’s the side dish that’ll have everyone asking for seconds (and the recipe).
6
servings15
minutes45
minutesIngredients
– 1.5 lbs Brussels sprouts, trimmed and halved (the smaller ones are sweeter, I swear!)
– 6 slices thick-cut bacon, chopped (go for the good stuff—it makes all the difference)
– 1 cup heavy cream (none of that half-and-half business here)
– 1 cup shredded sharp cheddar cheese (I like extra-sharp for a bolder kick)
– 1/2 cup grated Parmesan cheese (the real deal, not the shaky-can stuff)
– 2 cloves garlic, minced (fresh only—jarred garlic is a crime in this household)
– 1 tbsp olive oil (extra virgin is my ride-or-die)
– 1/2 tsp black pepper, freshly ground (pre-ground pepper is just sad dust)
– 1/4 tsp salt (adjust after tasting, since bacon brings its own saltiness)
Instructions
1. Preheat your oven to 375°F and grease a 9×13-inch baking dish lightly with olive oil.
2. Cook the chopped bacon in a large skillet over medium heat for 8–10 minutes, until crisp, then transfer to a paper towel-lined plate, reserving 1 tablespoon of bacon drippings in the skillet.
3. Add the halved Brussels sprouts to the skillet with the bacon drippings and sauté for 5–7 minutes, until they start to brown slightly at the edges.
4. Stir in the minced garlic and cook for 1 minute more, just until fragrant—don’t let it burn!
5. Pour in the heavy cream, then sprinkle in the black pepper and salt, stirring to combine everything evenly.
6. Tip: Let the cream simmer for 2–3 minutes to thicken slightly; it should coat the back of a spoon.
7. Transfer the Brussels sprout mixture to the prepared baking dish and spread it out in an even layer.
8. Sprinkle the shredded cheddar and grated Parmesan cheeses over the top, covering the sprouts completely.
9. Scatter the cooked bacon pieces evenly over the cheese layer.
10. Tip: For extra crispy edges, place the dish on the middle oven rack and bake for 20–25 minutes, until the cheese is bubbly and golden brown.
11. Remove the casserole from the oven and let it rest for 5 minutes before serving—this helps the cream set so it doesn’t run everywhere.
12. Tip: Use a sharp knife to test doneness; the sprouts should be tender but not mushy when pierced.
Whoa, this casserole emerges from the oven like a cheesy, bacon-y masterpiece—crispy on top, creamy in the middle, with sprouts that are tender but still have a bit of bite. Serve it straight from the dish with a sprinkle of extra Parmesan, or go wild and top it with a fried egg for a brunch twist that’ll make you feel fancy without the effort.
Wild Rice and Cranberry Casserole
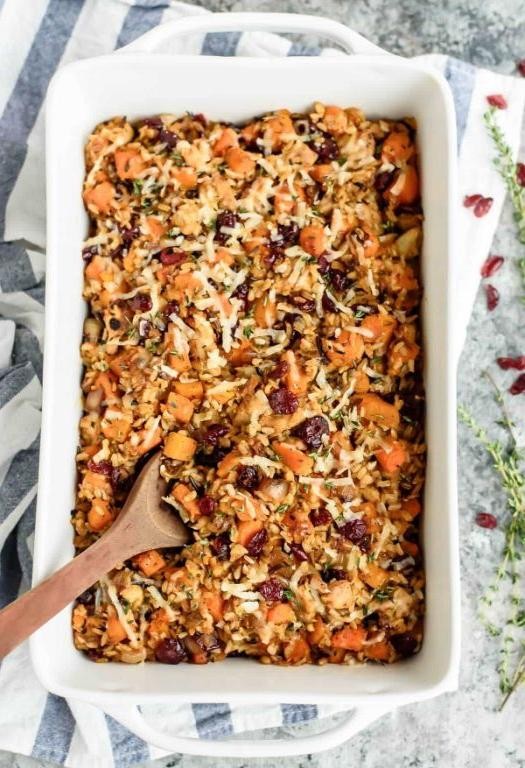
Sick of the same old side dishes that make your taste buds yawn louder than your uncle after Thanksgiving dinner? This wild rice and cranberry casserole is about to become the rockstar of your holiday table—a symphony of nutty, tart, and savory flavors that’ll have everyone asking for your secret (which you can totally take credit for).
6
servings15
minutes85
minutesIngredients
– 1 cup wild rice blend (the kind with the pretty black and brown grains—trust me, it matters)
– 2 cups vegetable broth (homemade if you’re fancy, boxed if you’re human)
– 1 cup fresh cranberries (the little ruby jewels that pop with tartness)
– 1/2 cup chopped pecans (toasted please—we’re not savages)
– 1 small yellow onion, diced (the sweet kind that won’t make you cry… much)
– 2 cloves garlic, minced (fresh only—jarred garlic is the culinary equivalent of a fake plant)
– 3 tbsp unsalted butter (because everything’s better with butter)
– 1/2 cup heavy cream (the rich, luxurious kind that makes everything taste expensive)
– 1 tsp dried thyme (rub it between your palms first to wake up the flavor)
– 1/2 tsp black pepper (freshly ground—pre-ground pepper is basically dust)
Instructions
1. Preheat your oven to 375°F—get that hot box ready for magic.
2. Rinse 1 cup wild rice blend under cold water until the water runs clear (this removes excess starch so your casserole isn’t gummy).
3. In a medium saucepan, combine rinsed wild rice and 2 cups vegetable broth, bring to a boil over high heat, then reduce to low, cover, and simmer for 45 minutes until rice is tender but still chewy.
4. While rice cooks, melt 3 tbsp unsalted butter in a skillet over medium heat until foamy.
5. Add 1 diced small yellow onion and cook for 5-7 minutes until translucent and sweet.
6. Stir in 2 minced garlic cloves and cook for 1 minute until fragrant (don’t let it brown—burnt garlic is sadness).
7. Transfer cooked wild rice to a large mixing bowl, fluffing with a fork to separate grains.
8. Add the onion-garlic mixture, 1 cup fresh cranberries, 1/2 cup chopped pecans, 1/2 cup heavy cream, 1 tsp dried thyme, and 1/2 tsp black pepper to the rice, stirring gently to combine.
9. Pour mixture into a greased 2-quart baking dish, spreading evenly with a spatula.
10. Cover with foil and bake at 375°F for 20 minutes, then remove foil and bake another 10 minutes until bubbly and golden at the edges.
11. Let rest for 5 minutes before serving (this allows the cream to settle so it doesn’t run everywhere).
Gloriously textured with chewy rice, bursting cranberries, and crunchy pecans, this casserole brings a festive pop to any plate. Serve it alongside roasted turkey or piled high on a bed of greens for a stunning lunch—leftovers (if you’re lucky enough to have any) taste even better the next day when the flavors have had a proper party overnight.
Chorizo and Pepper Jack Cornbread Casserole

Dare we say this might just be the coziest, most flavorful hug your taste buds will ever receive? This spicy, cheesy, chorizo-packed cornbread casserole is the ultimate comfort food upgrade—perfect for potlucks, game day, or just because Tuesday deserved something spectacular.
8
portions20
minutes45
minutesIngredients
- 1 lb fresh chorizo, casings removed (because nobody wants a surprise casing in their bite!)
- 1 large yellow onion, diced (the sweet kind works wonders here)
- 1 red bell pepper, chopped (for that pop of color and slight sweetness)
- 1 cup all-purpose flour (I always fluff it before measuring for accuracy)
- 1 cup yellow cornmeal (stone-ground gives the best texture, trust me)
- 1 tbsp baking powder (make sure it’s fresh—no one wants flat cornbread)
- 1 tsp salt (I use fine sea salt for even distribution)
- ½ tsp black pepper, freshly ground (because pre-ground just doesn’t hit the same)
- 2 large eggs, at room temperature (they incorporate so much better this way)
- 1 cup buttermilk (full-fat for maximum tenderness, no exceptions)
- ½ cup unsalted butter, melted and slightly cooled (salted butter lovers, just reduce the added salt a smidge)
- 8 oz Pepper Jack cheese, shredded (buy a block and shred it yourself—it melts like a dream)
- 1 (4 oz) can diced green chiles, undrained (they add just the right kick without overwhelming heat)
Instructions
- Preheat your oven to 375°F and generously grease a 9×13-inch baking dish with butter or non-stick spray.
- Heat a large skillet over medium-high heat and cook the chorizo, breaking it up with a spoon, for 6–8 minutes until fully browned and crumbly.
- Transfer the cooked chorizo to a plate lined with paper towels to drain excess grease—this keeps the casserole from getting too oily.
- In the same skillet, sauté the diced onion and chopped red bell pepper over medium heat for 5–7 minutes, until softened and slightly caramelized.
- In a large bowl, whisk together the flour, cornmeal, baking powder, salt, and black pepper until well combined.
- In a separate medium bowl, whisk the room temperature eggs, buttermilk, and melted butter until smooth and fully emulsified.
- Pour the wet ingredients into the dry ingredients and stir gently until just combined—overmixing leads to tough cornbread, so a few lumps are totally fine.
- Fold in the cooked chorizo, sautéed onion and pepper, shredded Pepper Jack cheese, and undrained diced green chiles until evenly distributed.
- Spread the batter evenly into the prepared baking dish and bake at 375°F for 25–30 minutes, or until the top is golden brown and a toothpick inserted into the center comes out clean.
- Let the casserole cool in the pan for 10 minutes before slicing—this helps it set and makes serving much easier.
Let’s talk about that glorious final product: the edges are crisp, the center is moist and fluffy, and every bite delivers a smoky-spicy-cheesy punch. Serve it warm with a dollop of cool sour cream or alongside a zesty black bean salad for a meal that’s downright irresistible.
Conclusion
Ready to transform your meals? These 29 side casserole recipes offer delicious comfort and convenience for any occasion. We hope you find new family favorites! Don’t forget to leave a comment sharing which dish you loved most and pin this roundup on Pinterest to save for later. Happy cooking!