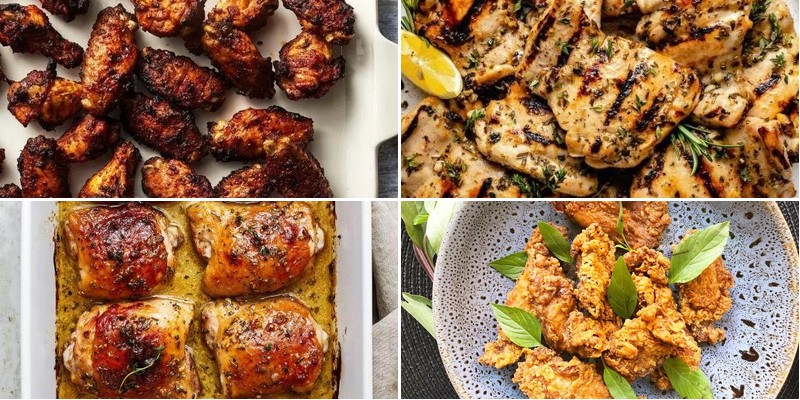
Mmm, who doesn’t love a perfectly seasoned chicken dish? Whether you’re craving quick weeknight dinners, impressive meals for guests, or cozy comfort food, we’ve gathered 29 mouthwatering recipes that will transform your chicken game. From zesty lemon herb to smoky barbecue rubs, there’s something here for every palate and occasion. Get ready to discover your new favorite ways to enjoy this versatile protein!
Lemon Herb Grilled Chicken
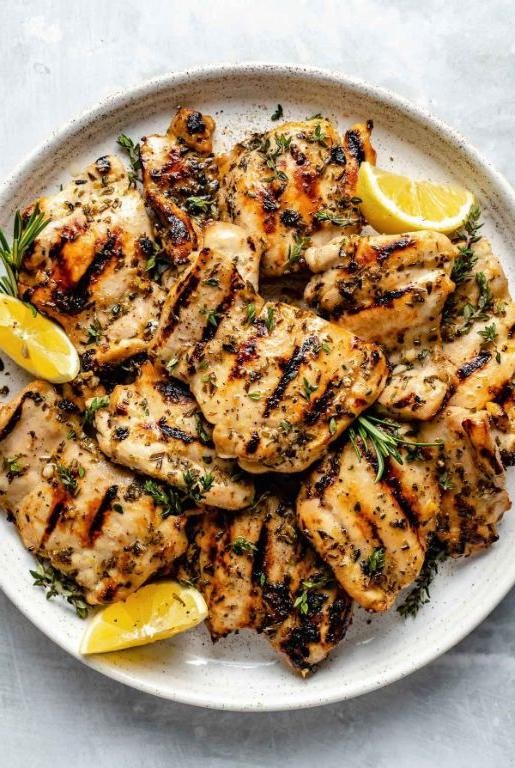
Here’s a straightforward method for achieving perfectly grilled chicken with bright, herbaceous flavors that will become your new summer staple.
3
servings15
minutes14
minutesIngredients
For the Marinade:
– 1/4 cup olive oil
– 3 tbsp fresh lemon juice
– 2 tbsp chopped fresh rosemary
– 1 tbsp chopped fresh thyme
– 3 cloves minced garlic
– 1 tsp salt
– 1/2 tsp black pepper
For Grilling:
– 4 boneless, skinless chicken breasts (6 oz each)
– Cooking spray
Instructions
1. Combine olive oil, lemon juice, rosemary, thyme, garlic, salt, and pepper in a large zip-top bag. 2. Add chicken breasts to the bag, seal tightly, and massage to coat evenly. 3. Refrigerate for at least 30 minutes or up to 4 hours—marinating longer than 4 hours can break down the chicken’s texture. 4. Preheat grill to medium-high heat (400°F). 5. Lightly spray grill grates with cooking spray to prevent sticking. 6. Remove chicken from marinade, letting excess drip off. 7. Place chicken on the grill and cook for 6–7 minutes. 8. Flip chicken using tongs—look for clear grill marks before turning. 9. Cook for another 6–7 minutes until the internal temperature reaches 165°F when checked with a meat thermometer. 10. Transfer chicken to a clean plate and let rest for 5 minutes to redistribute juices. Zesty lemon and aromatic herbs create a golden crust while keeping the interior remarkably juicy. Serve sliced over a crisp salad, tucked into warm pitas with tzatziki, or alongside grilled vegetables for a complete meal that shines with minimal effort.
Spicy Cajun Chicken Skewers
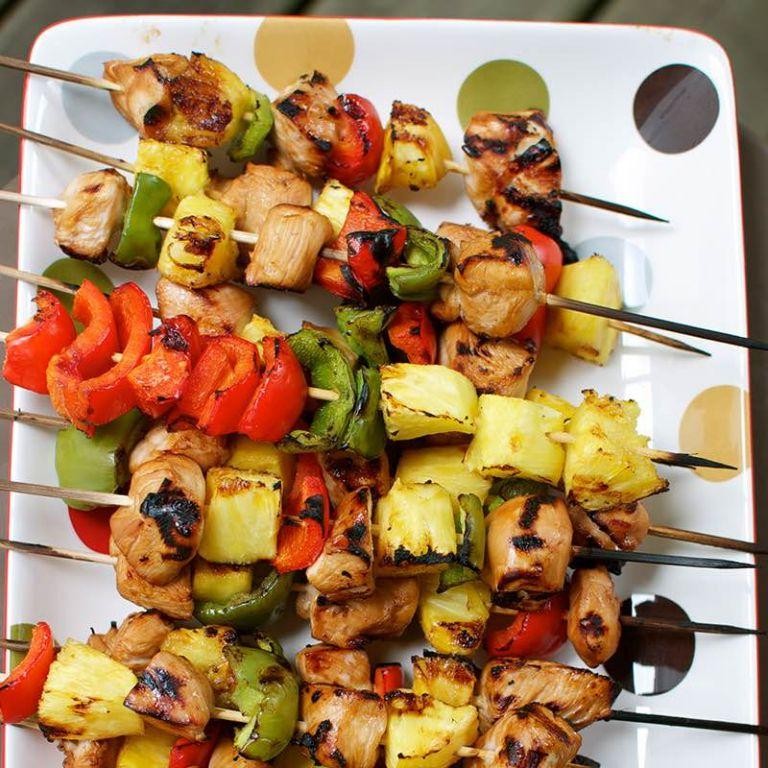
Haven’t you been searching for that perfect weeknight dinner that brings bold flavor without complicated techniques? Spicy Cajun Chicken Skewers deliver exactly that—a vibrant, hands-on meal where simple ingredients transform into something extraordinary. Let me guide you through each step methodically so you can achieve perfectly charred, juicy skewers every time.
3
servings95
minutes10
minutesIngredients
For the marinade:
- 1/4 cup olive oil
- 2 tbsp Cajun seasoning
- 1 tbsp smoked paprika
- 1 tsp garlic powder
- 1/2 tsp cayenne pepper
For assembly:
- 1.5 lbs boneless, skinless chicken breasts
- 1 red bell pepper
- 1 yellow onion
- 8 wooden skewers
Instructions
- Soak 8 wooden skewers in cold water for 30 minutes to prevent burning.
- Cut 1.5 lbs boneless, skinless chicken breasts into 1-inch cubes.
- Core and seed 1 red bell pepper, then cut into 1-inch pieces.
- Peel 1 yellow onion and cut into 1-inch chunks.
- Whisk together 1/4 cup olive oil, 2 tbsp Cajun seasoning, 1 tbsp smoked paprika, 1 tsp garlic powder, and 1/2 tsp cayenne pepper in a large bowl.
- Add chicken pieces to the marinade and toss until thoroughly coated.
- Cover the bowl with plastic wrap and refrigerate for at least 1 hour, or up to 4 hours for deeper flavor penetration.
- Preheat your grill to medium-high heat (400°F) or set oven to broil with rack 6 inches from heat source.
- Thread marinated chicken, bell pepper pieces, and onion chunks alternately onto soaked skewers.
- Place skewers on preheated grill and cook for 5 minutes.
- Flip skewers using tongs and cook for another 5 minutes.
- Check for doneness by inserting an instant-read thermometer into the thickest chicken piece—it should register 165°F.
- Remove skewers from heat and let rest for 3 minutes before serving.
Smoky, juicy chicken with a satisfying char pairs beautifully with the sweet bell peppers and pungent onions. Serve these skewers over fluffy rice to catch any drippings, or tuck them into warm tortillas with a dollop of cool sour cream for a quick wrap. The cayenne provides a gradual heat that builds with each bite, making this dish memorable enough for company yet simple enough for busy evenings.
Garlic Parmesan Roasted Chicken

Cooking a perfectly roasted chicken doesn’t require chef-level skills—just follow these straightforward steps to create a juicy, flavorful Garlic Parmesan Roasted Chicken that will become your new weeknight favorite. This methodical approach ensures even cooking and maximum flavor development, making it ideal for beginners who want impressive results.
5
servings20
minutes90
minutesIngredients
For the Chicken and Seasoning
– 1 whole chicken (4-5 pounds)
– 2 tablespoons olive oil
– 1 teaspoon salt
– 1/2 teaspoon black pepper
For the Garlic Parmesan Mixture
– 4 cloves garlic, minced
– 1/2 cup grated Parmesan cheese
– 2 tablespoons chopped fresh parsley
– 1 tablespoon lemon juice
Instructions
1. Preheat your oven to 425°F and position the rack in the center of the oven.
2. Pat the chicken completely dry with paper towels, including the cavity.
3. Rub the olive oil evenly over the entire surface of the chicken.
4. Sprinkle the salt and black pepper over all sides of the chicken.
5. Combine the minced garlic, grated Parmesan cheese, chopped parsley, and lemon juice in a small bowl.
6. Gently loosen the skin over the breast and thighs by sliding your fingers between the skin and meat.
7. Spread half of the garlic Parmesan mixture evenly under the loosened skin.
8. Rub the remaining mixture over the outside surface of the chicken.
9. Truss the chicken by tying the legs together with kitchen twine.
10. Place the chicken breast-side up in a roasting pan or oven-safe skillet.
11. Roast at 425°F for 15 minutes to crisp the skin.
12. Reduce the oven temperature to 375°F and continue roasting for 60-75 minutes.
13. Check for doneness when the internal temperature reaches 165°F in the thickest part of the thigh.
14. Remove the chicken from the oven and transfer it to a cutting board.
15. Let the chicken rest for 15 minutes before carving.
16. Carve the chicken and serve immediately. Here’s what makes this dish special: The skin becomes incredibly crisp while the meat underneath stays remarkably juicy, infused with the savory garlic and nutty Parmesan flavors. For a complete meal, serve the carved chicken over creamy polenta or alongside roasted vegetables to soak up the delicious pan juices.
Honey Mustard Baked Chicken Thighs
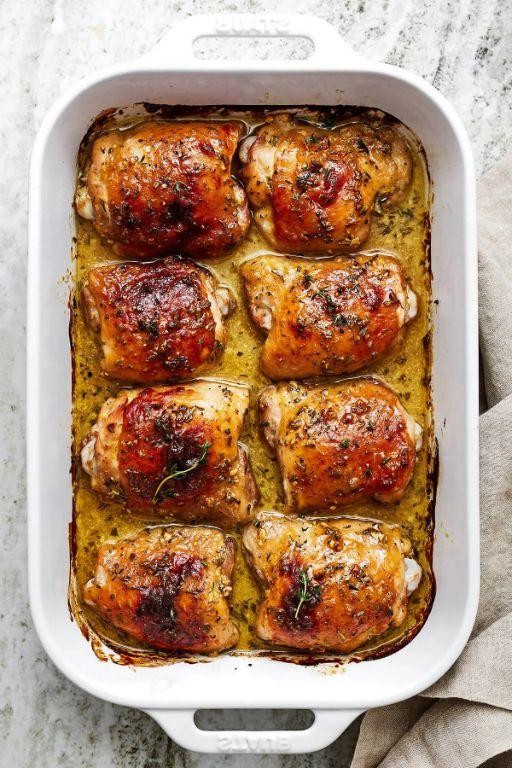
Even the busiest weeknights deserve a comforting, flavorful meal that comes together with minimal effort. Honey Mustard Baked Chicken Thighs deliver exactly that—a perfect balance of sweet and tangy flavors baked right into juicy, tender chicken. This methodical approach ensures even beginners can achieve delicious results every single time.
8
thighs15
minutes50
minutesIngredients
For the chicken:
– 8 bone-in, skin-on chicken thighs (about 3 pounds)
– 1 tablespoon olive oil
– 1 teaspoon kosher salt
– ½ teaspoon black pepper
For the honey mustard sauce:
– ½ cup Dijon mustard
– ¼ cup honey
– 2 tablespoons apple cider vinegar
– 2 cloves garlic, minced
– 1 teaspoon smoked paprika
Instructions
1. Preheat your oven to 400°F and position a rack in the center of the oven.
2. Pat the chicken thighs completely dry with paper towels to ensure crispy skin.
3. Arrange the chicken thighs skin-side up in a single layer in a 9×13-inch baking dish.
4. Drizzle the olive oil evenly over all chicken thighs.
5. Sprinkle the kosher salt and black pepper evenly over both sides of each thigh.
6. In a medium bowl, whisk together the Dijon mustard, honey, apple cider vinegar, minced garlic, and smoked paprika until smooth.
7. Brush half of the honey mustard sauce generously over the tops and sides of all chicken thighs.
8. Bake the chicken at 400°F for 25 minutes, then remove from the oven.
9. Brush the remaining honey mustard sauce over the partially cooked chicken.
10. Return the baking dish to the oven and continue baking for another 20-25 minutes.
11. Check for doneness by inserting an instant-read thermometer into the thickest part of a thigh—it should register 165°F.
12. Let the chicken rest in the baking dish for 5 minutes before serving to allow juices to redistribute.
Mouthwatering and perfectly glazed, these chicken thighs emerge from the oven with caramelized edges and juicy, flavorful meat that pulls easily from the bone. The sweet honey balances beautifully with the tangy mustard and subtle smokiness from the paprika. For a complete meal, serve alongside roasted potatoes to soak up the extra sauce or slice the meat over a crisp green salad for a lighter option.
Smoky Paprika Chicken Drumsticks
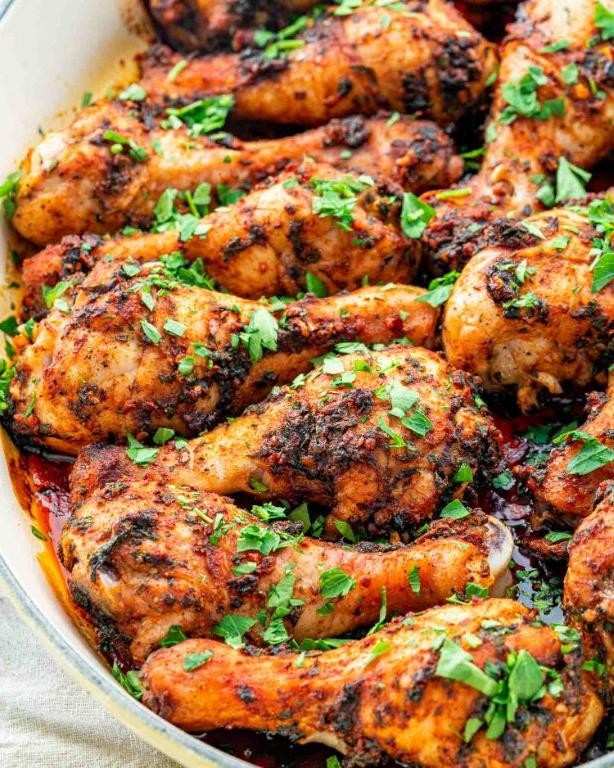
As we approach cozy season, there’s nothing more satisfying than a simple, hands-off dinner that fills your kitchen with incredible aromas. Smoky paprika chicken drumsticks deliver exactly that—tender, juicy meat with a beautifully crisp skin and a deep, smoky flavor that feels both rustic and refined.
8
drumsticks10
minutes43
minutesIngredients
- For the chicken and marinade:
- 8 chicken drumsticks (about 2 pounds)
- 2 tablespoons olive oil
- 1 tablespoon smoked paprika
- 1 teaspoon garlic powder
- 1 teaspoon onion powder
- 1/2 teaspoon salt
- 1/4 teaspoon black pepper
- For finishing:
- 1 tablespoon chopped fresh parsley
Instructions
- Preheat your oven to 400°F and line a baking sheet with aluminum foil.
- Pat the chicken drumsticks completely dry with paper towels. (Tip: Removing excess moisture helps the skin crisp up beautifully.)
- Place the drumsticks in a large mixing bowl.
- Drizzle the olive oil over the chicken.
- Sprinkle the smoked paprika, garlic powder, onion powder, salt, and black pepper evenly over the drumsticks.
- Use your hands to rub the seasoning mixture thoroughly into every surface of the chicken.
- Arrange the seasoned drumsticks in a single layer on the prepared baking sheet, making sure they aren’t touching.
- Bake for 35-40 minutes, or until the internal temperature reaches 165°F when measured with a meat thermometer. (Tip: Insert the thermometer into the thickest part of the meat without touching bone for an accurate reading.)
- Switch your oven to broil and cook for 2-3 more minutes until the skin is golden brown and crispy.
- Remove the baking sheet from the oven and let the chicken rest for 5 minutes. (Tip: Resting allows the juices to redistribute throughout the meat.)
- Sprinkle the chopped fresh parsley over the drumsticks before serving.
Perfectly cooked drumsticks emerge with crackling-crisp skin giving way to incredibly moist, tender meat. The deep smokiness from the paprika pairs wonderfully with creamy mashed potatoes or a bright, crunchy coleslaw, while any leftovers make fantastic next-day sandwiches when shredded from the bone.
Italian Herb Chicken Marinara
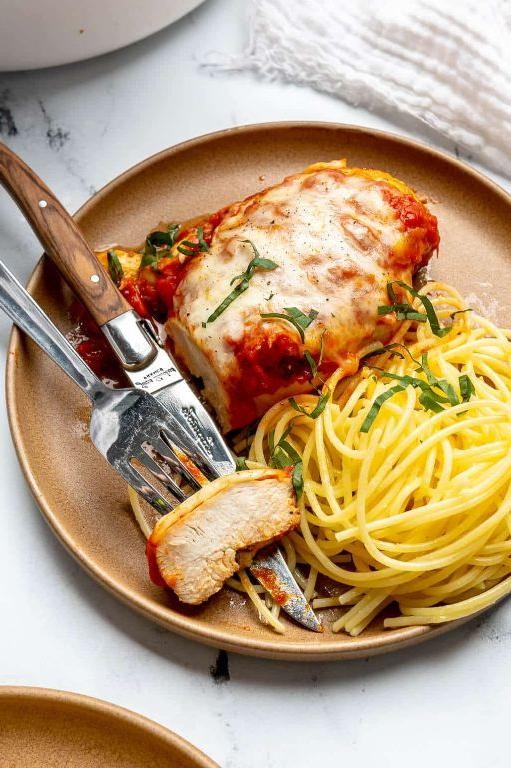
Creating a comforting Italian-inspired dinner doesn’t have to be complicated, especially when you master this straightforward Italian Herb Chicken Marinara. This recipe walks you through each stage methodically, ensuring even novice cooks can achieve restaurant-quality results right in their own kitchen.
3
servings15
minutes40
minutesIngredients
For the chicken:
– 4 boneless, skinless chicken breasts (about 1.5 lbs)
– 2 tbsp olive oil
– 1 tbsp Italian seasoning
– 1 tsp garlic powder
– 1/2 tsp salt
– 1/4 tsp black pepper
For the marinara sauce:
– 2 tbsp olive oil
– 1 medium yellow onion, diced
– 3 garlic cloves, minced
– 1 (28 oz) can crushed tomatoes
– 1 tsp dried basil
– 1/2 tsp dried oregano
– 1/4 tsp red pepper flakes
– 1/2 tsp salt
For serving:
– 1/4 cup grated Parmesan cheese
– 2 tbsp fresh basil, chopped
Instructions
1. Preheat your oven to 375°F and position the rack in the center.
2. Pat the chicken breasts completely dry with paper towels to ensure proper browning.
3. Rub 2 tablespoons of olive oil evenly over all surfaces of the chicken breasts.
4. Combine Italian seasoning, garlic powder, salt, and black pepper in a small bowl.
5. Sprinkle the seasoning mixture evenly over both sides of each chicken breast, pressing gently to adhere.
6. Heat 2 tablespoons of olive oil in a large oven-safe skillet over medium-high heat until shimmering.
7. Place chicken breasts in the hot skillet and cook for 4-5 minutes without moving them to develop a golden-brown crust.
8. Flip the chicken breasts using tongs and cook for another 3-4 minutes on the second side.
9. Transfer the partially cooked chicken to a clean plate, leaving any drippings in the skillet.
10. Add diced onion to the same skillet and cook for 4-5 minutes until softened and translucent.
11. Stir in minced garlic and cook for 30 seconds until fragrant but not browned.
12. Pour in the crushed tomatoes, then add dried basil, oregano, red pepper flakes, and salt.
13. Bring the sauce to a gentle simmer, stirring occasionally to combine all ingredients.
14. Return the chicken breasts to the skillet, nestling them into the sauce.
15. Transfer the skillet to the preheated oven and bake for 18-20 minutes until the chicken reaches 165°F internally.
16. Remove the skillet from the oven using oven mitts and let rest for 5 minutes.
17. Sprinkle grated Parmesan cheese and fresh basil over the chicken and sauce before serving.
Getting this dish on the table reveals tender, herb-infused chicken that practically melts under a vibrant marinara blanket. The sauce clings beautifully to pasta or polenta, while the Parmesan adds a salty sharpness that balances the tomatoes’ natural sweetness. For a complete meal, serve alongside garlic bread to soak up every last bit of the flavorful sauce.
Asian Sesame Ginger Chicken
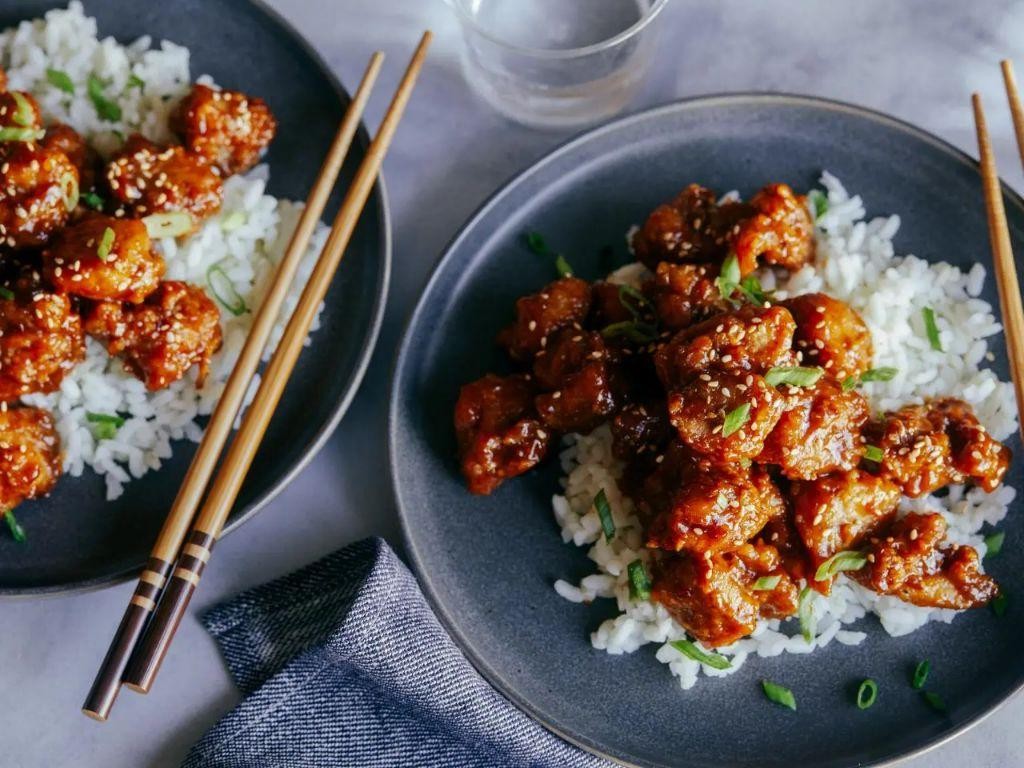
Here’s a straightforward recipe for Asian Sesame Ginger Chicken that breaks down each step clearly, perfect for beginners looking to master this flavorful dish.
5
servings15
minutes20
minutesIngredients
For the chicken:
– 1.5 lbs boneless, skinless chicken thighs, cut into 1-inch pieces
– 1/4 cup cornstarch
– 1/4 cup vegetable oil
For the sauce:
– 1/3 cup low-sodium soy sauce
– 2 tbsp honey
– 1 tbsp rice vinegar
– 2 tsp toasted sesame oil
– 1 tbsp minced fresh ginger
– 2 cloves garlic, minced
– 1 tbsp sesame seeds
Instructions
1. Place the chicken pieces in a medium bowl and toss with the cornstarch until evenly coated. 2. Heat the vegetable oil in a large skillet over medium-high heat until it shimmers, about 350°F. 3. Carefully add the coated chicken to the hot oil in a single layer, working in batches if needed. 4. Cook the chicken for 4–5 minutes per side until golden brown and the internal temperature reaches 165°F. 5. Remove the cooked chicken from the skillet and set it aside on a plate lined with paper towels. 6. In the same skillet, reduce the heat to medium and add the soy sauce, honey, rice vinegar, and toasted sesame oil. 7. Whisk the sauce constantly for 1–2 minutes until it begins to bubble and thicken slightly. 8. Stir in the minced ginger and garlic, cooking for 30 seconds until fragrant. 9. Return the cooked chicken to the skillet, tossing to coat evenly with the sauce. 10. Sprinkle the sesame seeds over the chicken and stir to combine. 11. Remove the skillet from the heat and let it rest for 2 minutes before serving. The chicken emerges with a crisp exterior that gives way to tender, juicy meat, all enveloped in a glossy sauce that balances savory soy with the warmth of ginger and a hint of sweetness. Try serving it over steamed jasmine rice or alongside stir-fried vegetables for a complete meal that highlights its aromatic depth.
Mediterranean Lemon Rosemary Chicken
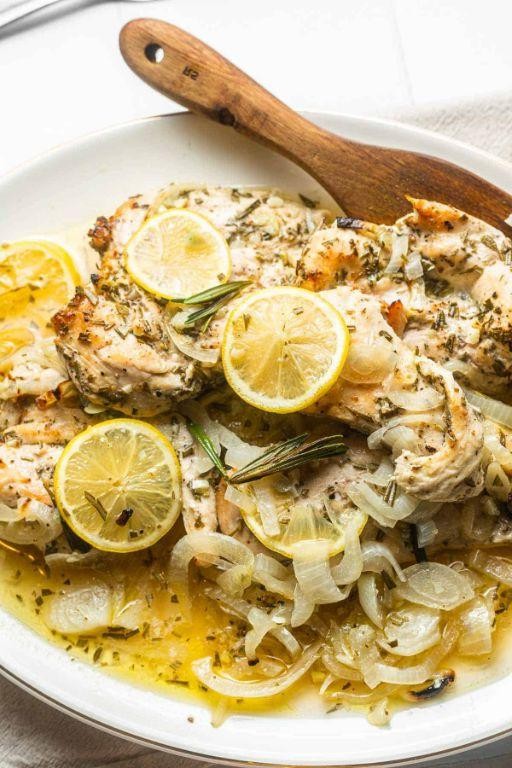
Getting perfectly tender, flavorful chicken doesn’t require complicated techniques—just a few quality ingredients and proper timing. Gather your ingredients and let’s walk through this Mediterranean-inspired dish that fills your kitchen with the most incredible aroma of lemon and herbs as it cooks. You’ll be amazed at how simple steps create such impressive results.
3
portions35
minutes25
minutesIngredients
For the marinade:
– 4 boneless, skinless chicken breasts (about 2 lbs)
– 1/4 cup olive oil
– 3 tbsp fresh lemon juice
– 2 tbsp chopped fresh rosemary
– 3 garlic cloves, minced
– 1 tsp salt
– 1/2 tsp black pepper
For cooking:
– 1 lemon, sliced into 1/4-inch rounds
– 1/4 cup chicken broth
Instructions
1. Place 4 boneless, skinless chicken breasts in a large bowl.
2. Pour 1/4 cup olive oil over the chicken breasts.
3. Add 3 tbsp fresh lemon juice to the bowl.
4. Sprinkle 2 tbsp chopped fresh rosemary over the chicken.
5. Add 3 minced garlic cloves to the mixture.
6. Season with 1 tsp salt and 1/2 tsp black pepper.
7. Use your hands to massage the marinade into the chicken, ensuring each piece is fully coated.
8. Cover the bowl with plastic wrap and refrigerate for 30 minutes—this resting time allows the flavors to penetrate the meat deeply.
9. Preheat your oven to 375°F while the chicken marinates.
10. Arrange the marinated chicken breasts in a single layer in a 9×13 inch baking dish.
11. Pour 1/4 cup chicken broth into the bottom of the baking dish around the chicken.
12. Arrange lemon slices over the top of each chicken breast.
13. Place the baking dish in the preheated oven and bake for 25 minutes.
14. Check the internal temperature of the thickest chicken breast using a meat thermometer—it should read 165°F for food safety.
15. Remove the baking dish from the oven and let the chicken rest for 5 minutes before serving—this allows the juices to redistribute throughout the meat.
Vibrant lemon slices caramelize beautifully during baking, creating both visual appeal and concentrated citrus flavor that complements the earthy rosemary. The chicken emerges incredibly moist with a subtle golden hue, perfect for slicing over quinoa or pairing with roasted vegetables. For an elegant presentation, arrange the sliced chicken on a platter with the baked lemon slices and drizzle with the pan juices.
Chipotle Lime Chicken Fajitas
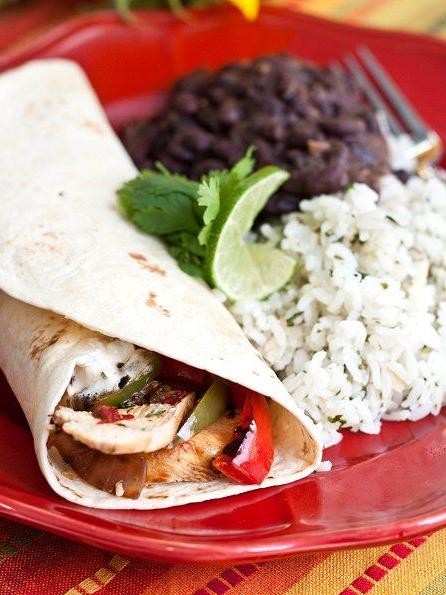
Zesty and vibrant, these chipotle lime chicken fajitas bring restaurant-quality flavor to your kitchen with minimal effort. Follow these methodical steps to achieve perfectly seasoned chicken and crisp-tender vegetables every time. You’ll master the technique of building layers of flavor through careful preparation and cooking.
8
fajitas35
minutes17
minutesIngredients
For the marinade:
– 2 tbsp olive oil
– 2 tbsp lime juice
– 1 tbsp chipotle powder
– 1 tsp ground cumin
– 1 tsp garlic powder
– 1 tsp salt
For the fajitas:
– 1.5 lbs chicken breasts
– 2 large bell peppers
– 1 large yellow onion
– 2 tbsp vegetable oil
– 8 flour tortillas
Instructions
1. Combine 2 tbsp olive oil, 2 tbsp lime juice, 1 tbsp chipotle powder, 1 tsp ground cumin, 1 tsp garlic powder, and 1 tsp salt in a medium bowl.
2. Cut 1.5 lbs chicken breasts into ½-inch thick strips against the grain.
3. Add chicken strips to the marinade bowl, ensuring each piece is fully coated.
4. Cover the bowl with plastic wrap and refrigerate for exactly 30 minutes.
5. While chicken marinates, slice 2 large bell peppers and 1 large yellow onion into ¼-inch strips.
6. Heat a large skillet over medium-high heat until a drop of water sizzles immediately.
7. Add 2 tbsp vegetable oil to the hot skillet and swirl to coat the surface.
8. Place marinated chicken strips in a single layer, cooking for 4 minutes without moving them.
9. Flip each chicken strip and cook for another 4 minutes until internal temperature reaches 165°F.
10. Transfer cooked chicken to a clean plate using tongs.
11. Add sliced bell peppers and onion to the same skillet, spreading them evenly.
12. Cook vegetables for 6-8 minutes, stirring every 90 seconds, until peppers are slightly blistered and onions are translucent.
13. Return chicken to the skillet with vegetables and toss to combine.
14. Warm 8 flour tortillas in a dry skillet for 30 seconds per side until pliable.
Just remember that letting the chicken rest after cooking ensures juicy results, while the high-heat vegetable cooking creates that signature fajita char. The chipotle provides smoky depth that balances beautifully with the bright lime acidity. Serve these wrapped in warm tortillas with a dollop of cool sour cream or pile them over cilantro-lime rice for a complete meal.
Turmeric and Cumin Chicken Breasts
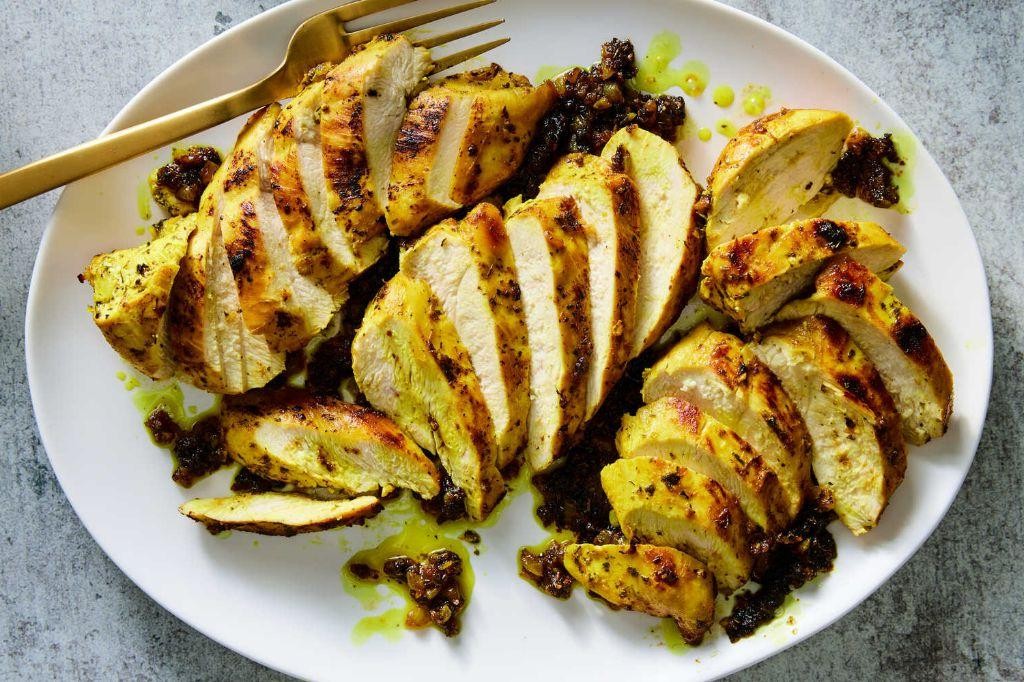
Perfectly spiced and incredibly simple, this turmeric and cumin chicken breast recipe transforms basic ingredients into a flavorful weeknight dinner that will become a regular in your rotation. Preparing these golden-hued chicken breasts requires just a few key steps and common pantry spices, making it accessible even for those just starting their cooking journey. Follow these methodical instructions to achieve tender, aromatic chicken every single time.
2
portions10
minutes14
minutesIngredients
- For the spice rub:
- 1 tbsp ground turmeric
- 1 tbsp ground cumin
- 1 tsp garlic powder
- 1 tsp salt
- For cooking:
- 2 boneless, skinless chicken breasts (about 1 lb total)
- 2 tbsp olive oil
Instructions
- Pat the chicken breasts completely dry with paper towels to ensure even browning.
- In a small bowl, combine 1 tbsp ground turmeric, 1 tbsp ground cumin, 1 tsp garlic powder, and 1 tsp salt to create the spice rub.
- Rub the spice mixture evenly over all surfaces of both chicken breasts, coating them thoroughly.
- Heat 2 tbsp olive oil in a large skillet over medium-high heat until it shimmers, about 2 minutes.
- Place the seasoned chicken breasts in the hot skillet and cook undisturbed for 6-7 minutes until a golden-brown crust forms on the bottom.
- Flip the chicken breasts using tongs and cook for another 6-7 minutes on the second side.
- Insert an instant-read thermometer into the thickest part of a chicken breast to check for an internal temperature of 165°F.
- Transfer the cooked chicken to a clean cutting board and let it rest for 5 minutes before slicing.
The finished chicken boasts a crisp, golden exterior that gives way to remarkably juicy, tender meat inside. The earthy warmth of cumin pairs beautifully with turmeric’s subtle bitterness, creating a complex flavor profile that stands up well to simple sides like rice or roasted vegetables. For a vibrant presentation, slice the chicken diagonally and fan it over a bed of quinoa tossed with fresh herbs and lemon juice.
Crispy Thai Basil Chicken

Perfect for busy weeknights, this Crispy Thai Basil Chicken brings authentic street food flavors to your kitchen in under 30 minutes. Preparing this dish requires minimal prep work but delivers maximum impact with its contrasting textures and bold seasoning. Follow these straightforward steps to achieve restaurant-quality results at home.
2
servings10
minutes15
minutesIngredients
For the chicken:
– 1 lb boneless, skinless chicken thighs, cut into 1-inch pieces
– 2 tbsp cornstarch
– 1/4 cup vegetable oil
For the sauce:
– 3 tbsp fish sauce
– 2 tbsp soy sauce
– 1 tbsp oyster sauce
– 1 tsp sugar
– 2 Thai chilies, thinly sliced
For finishing:
– 4 cloves garlic, minced
– 1 cup fresh Thai basil leaves
– 2 cups cooked jasmine rice
Instructions
- Pat the chicken pieces completely dry with paper towels.
- Toss the dried chicken with 2 tablespoons of cornstarch until evenly coated.
- Heat 1/4 cup vegetable oil in a large skillet over medium-high heat until it shimmers, about 350°F.
- Carefully place the coated chicken in the hot oil in a single layer without crowding.
- Fry the chicken for 4-5 minutes until the bottom develops a golden-brown crust.
- Flip each piece and cook for another 3-4 minutes until crispy and cooked through.
- Transfer the crispy chicken to a paper towel-lined plate to drain excess oil.
- Pour off all but 1 tablespoon of oil from the skillet.
- Add 4 cloves of minced garlic to the skillet and sauté for 30 seconds until fragrant.
- Combine 3 tablespoons fish sauce, 2 tablespoons soy sauce, 1 tablespoon oyster sauce, and 1 teaspoon sugar in a small bowl.
- Pour the sauce mixture into the skillet with the garlic.
- Add 2 thinly sliced Thai chilies to the sauce.
- Return the crispy chicken to the skillet and toss to coat evenly with the sauce.
- Turn off the heat and stir in 1 cup of fresh Thai basil leaves until just wilted.
You’ll love how the crispy chicken exterior gives way to tender meat while the savory-sweet sauce clings perfectly to every bite. Serve this immediately over 2 cups of fluffy jasmine rice to soak up the delicious sauce, or try wrapping portions in crisp lettuce cups for a refreshing contrast to the rich flavors.
Classic BBQ Rubbed Chicken Wings
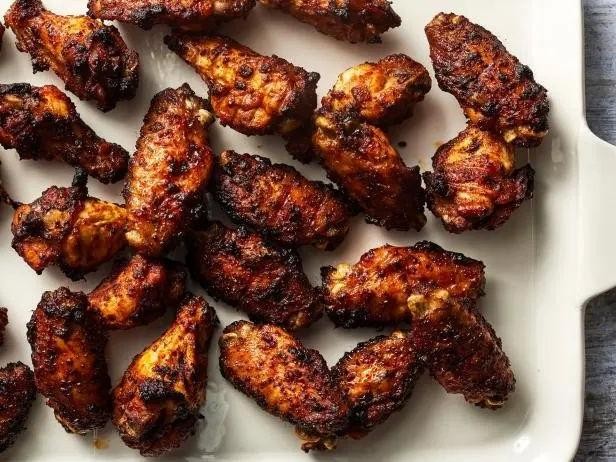
Getting perfectly crispy, flavorful chicken wings is easier than you think when you follow these methodical steps. Great barbecue wings start with proper preparation and careful temperature control throughout the cooking process. Let me guide you through creating these classic BBQ rubbed wings that will become your new favorite game day snack.
3
servings15
minutes50
minutesIngredients
For the chicken preparation:
– 2 pounds chicken wings, separated into drumettes and flats
– 1 tablespoon vegetable oil
– 1 teaspoon kosher salt
For the dry rub:
– 2 tablespoons brown sugar
– 1 tablespoon smoked paprika
– 1 teaspoon garlic powder
– 1 teaspoon onion powder
– 1 teaspoon black pepper
– 1/2 teaspoon cayenne pepper
For serving:
– 1/4 cup ranch dressing
Instructions
1. Preheat your oven to 400°F and line a baking sheet with aluminum foil.
2. Pat the chicken wings completely dry with paper towels to ensure maximum crispiness.
3. Place the dried wings in a large bowl and toss with 1 tablespoon vegetable oil and 1 teaspoon kosher salt until evenly coated.
4. Arrange the wings in a single layer on the prepared baking sheet, making sure they don’t touch each other.
5. Bake the wings at 400°F for 25 minutes to render the fat and begin the cooking process.
6. While the wings bake, combine 2 tablespoons brown sugar, 1 tablespoon smoked paprika, 1 teaspoon garlic powder, 1 teaspoon onion powder, 1 teaspoon black pepper, and 1/2 teaspoon cayenne pepper in a small bowl to create the dry rub.
7. Remove the wings from the oven after 25 minutes and carefully flip each one using tongs.
8. Sprinkle the dry rub mixture evenly over both sides of all the wings, pressing gently to help it adhere.
9. Return the wings to the oven and continue baking at 400°F for another 20-25 minutes until the skin is crispy and the internal temperature reaches 165°F.
10. Transfer the finished wings to a serving platter and let them rest for 5 minutes before serving.
What makes these wings truly special is the contrast between the smoky, slightly sweet crust and the juicy interior. The careful drying and high-heat baking create that satisfying crackle when you bite into the perfectly crisp skin. Wonderful served with cool ranch dressing for dipping, these wings also pair beautifully with celery sticks or can be transformed into loaded wing nachos for a creative twist.
Conclusion
Seasoned chicken truly is the ultimate mealtime hero! With 29 delicious recipes for every occasion, you’ll never run out of inspiration. We hope you find new family favorites—give them a try, leave a comment with your top pick, and share this roundup on Pinterest to spread the chicken love!


