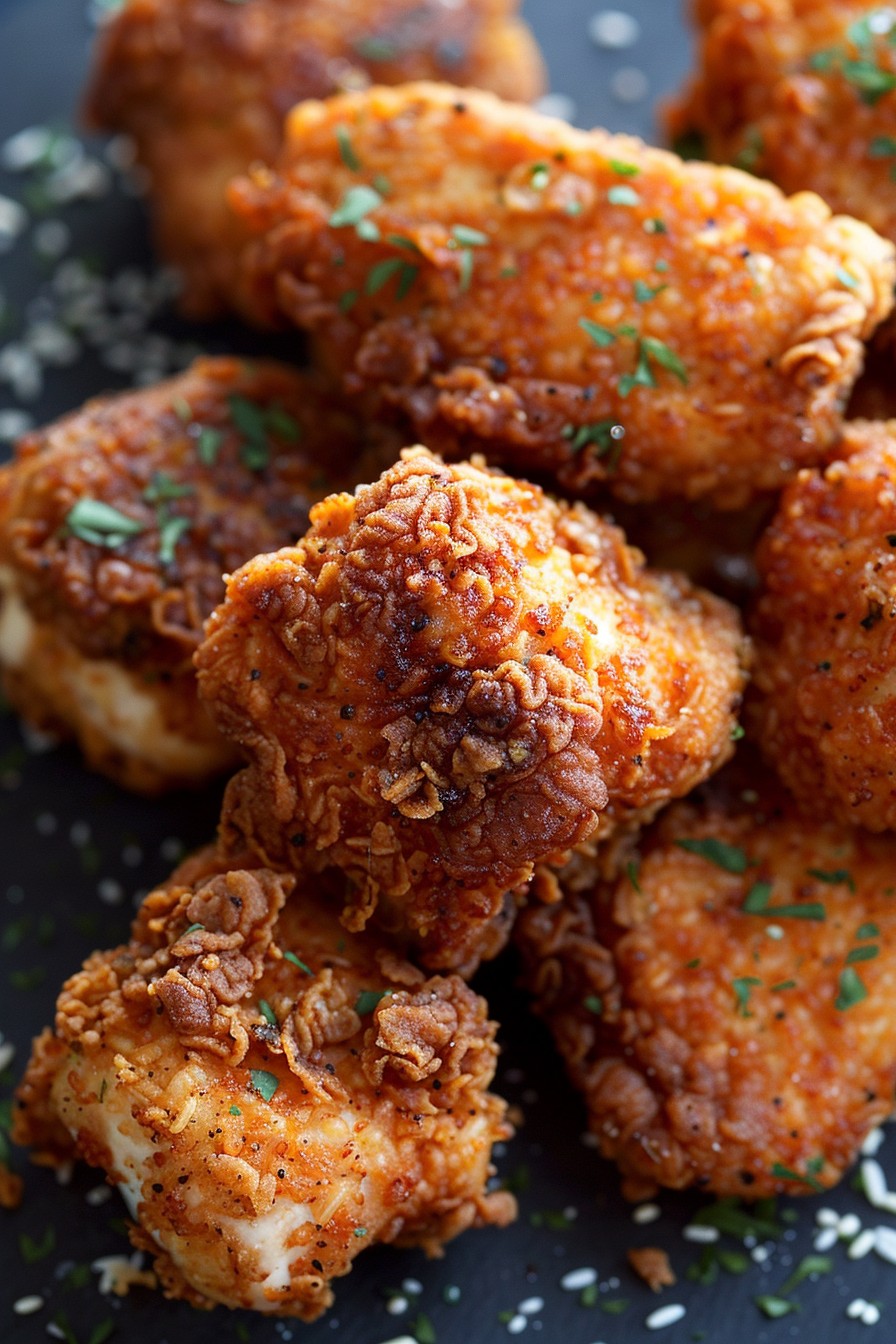
So, you’re craving fried chicken but want to keep it gluten-free? Look no further! This rice flour fried chicken recipe delivers all the crunch without the gluten, and trust me, it’s so good you won’t miss the traditional flour one bit.
Why This Recipe Works
- Rice flour creates an incredibly crispy coating that’s lighter than traditional wheat flour.
- Marinating the chicken in buttermilk ensures it’s juicy and flavorful inside.
- The double-dredging technique guarantees a thick, crunchy crust that stays put.
- Frying at the right temperature means no greasy chicken, just perfect crispiness.
- It’s a gluten-free option that doesn’t compromise on taste or texture.
Ingredients
- 2 lbs chicken pieces (your choice of cuts)
- 2 cups buttermilk
- 1 tbsp hot sauce
- 2 cups rice flour
- 1 tbsp garlic powder
- 1 tbsp paprika
- 1 tsp salt
- 1 tsp black pepper
- Oil for frying (enough to submerge chicken pieces)
Equipment Needed
- Deep fryer or large heavy-bottomed pot
- Thermometer
- Two large bowls
- Tongs
- Paper towels
Instructions
Step 1: Marinate the Chicken
Combine the chicken pieces, buttermilk, and hot sauce in a large bowl. Make sure each piece is well coated. Cover and refrigerate for at least 4 hours, or overnight for best results. This step is crucial for tender, flavorful chicken.
Step 2: Prepare the Dredge
In another large bowl, mix together the rice flour, garlic powder, paprika, salt, and pepper. This blend will give your chicken that signature crispy coating with a kick of flavor.
Step 3: Dredge the Chicken
Remove the chicken from the buttermilk, letting excess drip off. Dredge each piece in the rice flour mixture, pressing firmly to adhere. For extra crunch, dip the chicken back into the buttermilk and dredge in the flour mixture a second time.
Step 4: Heat the Oil
Fill your fryer or pot with enough oil to submerge the chicken pieces. Heat to 350°F. Maintaining this temperature is key to crispy, not greasy, chicken.
Step 5: Fry the Chicken
Carefully add the chicken to the hot oil, not overcrowding the pot. Fry for about 12-15 minutes, turning occasionally, until golden brown and the internal temperature reaches 165°F. Drain on paper towels.
Tips and Tricks
For the crispiest chicken, let the dredged pieces sit for 10 minutes before frying. This helps the coating adhere better. Always use a thermometer to monitor oil temperature; fluctuations can lead to uneven cooking. If you’re frying in batches, keep cooked chicken warm in a 200°F oven. For extra flavor, add a teaspoon of cayenne pepper to the dredge. And remember, safety first—never leave hot oil unattended.
Recipe Variations
- Spicy Version: Add more hot sauce to the buttermilk and cayenne to the flour mix.
- Herb-Infused: Mix dried herbs like thyme or oregano into the flour for an aromatic twist.
- Sweet and Spicy: Incorporate a tablespoon of honey into the buttermilk and a pinch of cinnamon into the flour.
- Asian-Inspired: Replace some of the salt with soy sauce in the buttermilk and add five-spice powder to the flour.
Frequently Asked Questions
Can I use boneless chicken? Absolutely! Boneless thighs or breasts will work, just adjust frying time to about 8-10 minutes.
Is there a substitute for buttermilk? You can make a quick substitute by adding a tablespoon of vinegar or lemon juice to a cup of milk and letting it sit for 5 minutes.
Can I bake this instead of frying? Yes, though the crust won’t be as crispy. Bake at 400°F for about 25-30 minutes, flipping halfway.
Summary
This rice flour fried chicken is a gluten-free delight that doesn’t skimp on flavor or crunch. Perfect for those with dietary restrictions or anyone looking for a lighter take on fried chicken.