
So you’ve got a can of chickpeas sitting in your pantry, just waiting to be transformed into something spectacular? You’re in luck! From quick weeknight dinners to satisfying comfort food, these versatile legumes are about to become your new kitchen superhero. Get ready to discover 24 delicious ways to turn humble chickpeas into extraordinary meals that will have everyone asking for seconds.
Chickpea and Spinach Stew
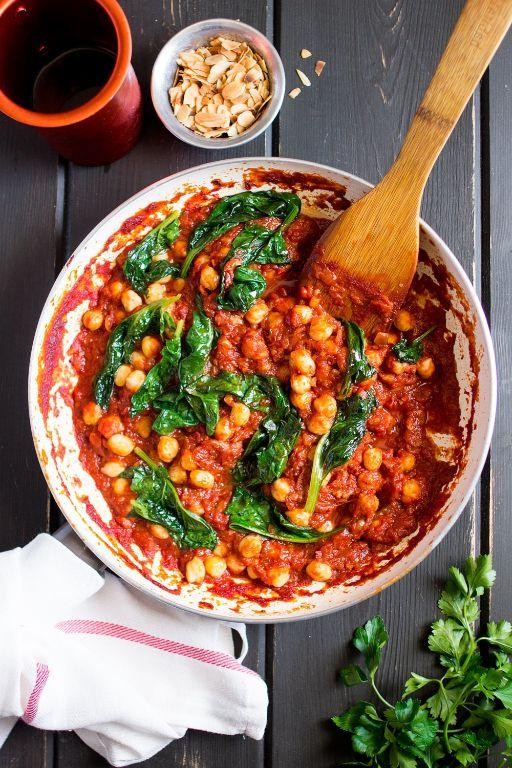
Gently simmering chickpeas and spinach creates a comforting stew that’s both nourishing and straightforward to prepare. Let’s walk through each step together to build layers of flavor in this satisfying one-pot meal. You’ll be amazed at how simple ingredients transform into something truly special.
3
servings15
minutes31
minutesIngredients
– A couple of tablespoons of olive oil
– One medium yellow onion, chopped
– Three garlic cloves, minced
– A teaspoon of smoked paprika
– A pinch of red pepper flakes
– Two 15-ounce cans of chickpeas, drained and rinsed
– One 14.5-ounce can of diced tomatoes
– Two cups of vegetable broth
– A big handful of fresh spinach
– A splash of lemon juice
– Salt and black pepper to season
Instructions
1. Heat 2 tablespoons of olive oil in a large pot over medium heat for about 2 minutes until it shimmers.
2. Add the chopped onion and cook for 5-7 minutes, stirring occasionally, until it becomes translucent and soft.
3. Stir in the minced garlic and cook for exactly 1 minute until fragrant but not browned.
4. Sprinkle in 1 teaspoon of smoked paprika and a pinch of red pepper flakes, toasting them for 30 seconds to release their oils.
5. Tip: Toasting spices briefly enhances their depth without burning them.
6. Add the drained chickpeas and stir to coat them evenly with the spice mixture.
7. Pour in the diced tomatoes with their juices and 2 cups of vegetable broth.
8. Bring the stew to a boil, then immediately reduce the heat to low.
9. Cover the pot and simmer for 20 minutes to allow the flavors to meld together.
10. Tip: Simmering with the lid on prevents too much liquid from evaporating.
11. Uncover the pot and stir in the fresh spinach by handfuls until it wilts, about 2-3 minutes.
12. Squeeze in a splash of lemon juice and season with salt and black pepper.
13. Tip: Adding lemon juice at the end brightens the stew without curdling.
14. Ladle the stew into bowls and serve immediately.
Just spooned into bowls, this stew boasts a creamy texture from the chickpeas against the tender spinach, with smoky paprika and bright lemon balancing each bite. Try serving it over couscous or with crusty bread to soak up the rich broth, making it a complete, cozy meal that welcomes customization with extra herbs or a dollop of yogurt.
Roasted Chickpea and Avocado Salad
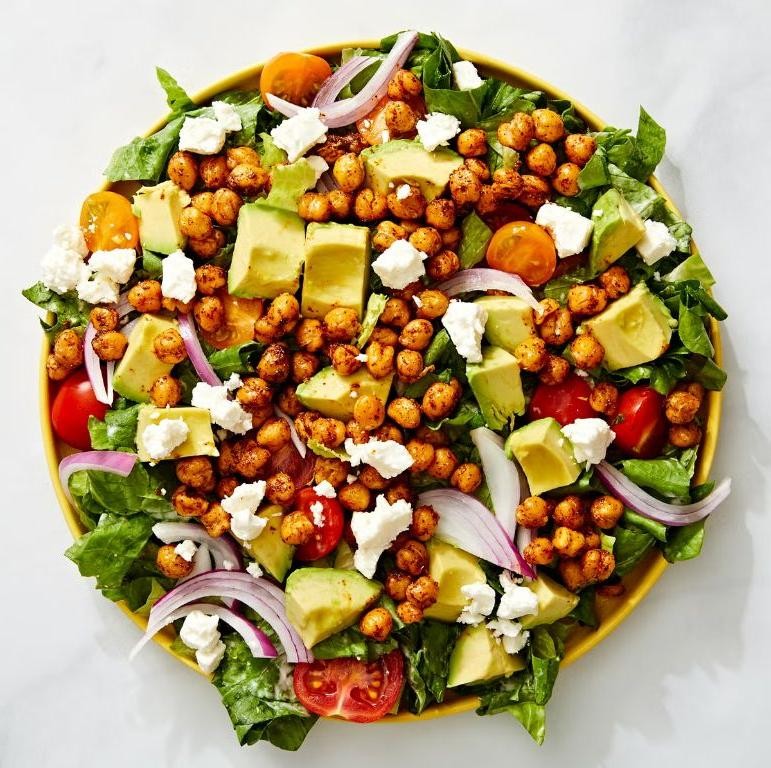
Now, let’s create a vibrant roasted chickpea and avocado salad that’s perfect for busy weeknights. This recipe builds layers of flavor and texture methodically, starting with crispy chickpeas and ending with a bright, creamy dressing. Follow each step carefully for a restaurant-quality result at home.
2
servings15
minutes25
minutesIngredients
– One 15-ounce can of chickpeas, drained and rinsed
– A couple of ripe avocados
– 2 tablespoons of olive oil
– 1 tablespoon of lemon juice
– A pinch of salt
– A sprinkle of black pepper
– A handful of fresh parsley leaves
Instructions
1. Preheat your oven to 400°F to ensure it’s hot enough for roasting.
2. Pat the drained chickpeas completely dry with paper towels—this helps them get extra crispy.
3. Toss the dried chickpeas with 1 tablespoon of olive oil, a pinch of salt, and a sprinkle of black pepper in a bowl.
4. Spread the chickpeas in a single layer on a baking sheet lined with parchment paper.
5. Roast the chickpeas in the preheated oven for 20–25 minutes, shaking the pan halfway through, until they’re golden brown and crisp.
6. While the chickpeas roast, halve the avocados, remove the pits, and scoop the flesh into a medium bowl.
7. Mash the avocado gently with a fork, leaving some chunks for texture.
8. Stir in 1 tablespoon of lemon juice immediately to prevent browning.
9. Add the remaining 1 tablespoon of olive oil to the avocado mixture and combine well.
10. Chop the fresh parsley leaves finely and set them aside.
11. Once the chickpeas are done roasting, let them cool for 5 minutes to avoid wilting the avocado.
12. Fold the roasted chickpeas and chopped parsley into the avocado mixture until evenly distributed.
13. Season the salad with another pinch of salt and black pepper if needed.
14. Serve the salad immediately to maintain the contrast between warm chickpeas and cool avocado.
So, you’ll love the creamy avocado against the crunchy chickpeas, with the lemon adding a zesty kick. Try scooping it up with pita chips or piling it onto toast for a satisfying lunch. This salad holds up well if you want to prep the components separately and assemble just before eating.
Spicy Chickpea and Tomato Curry
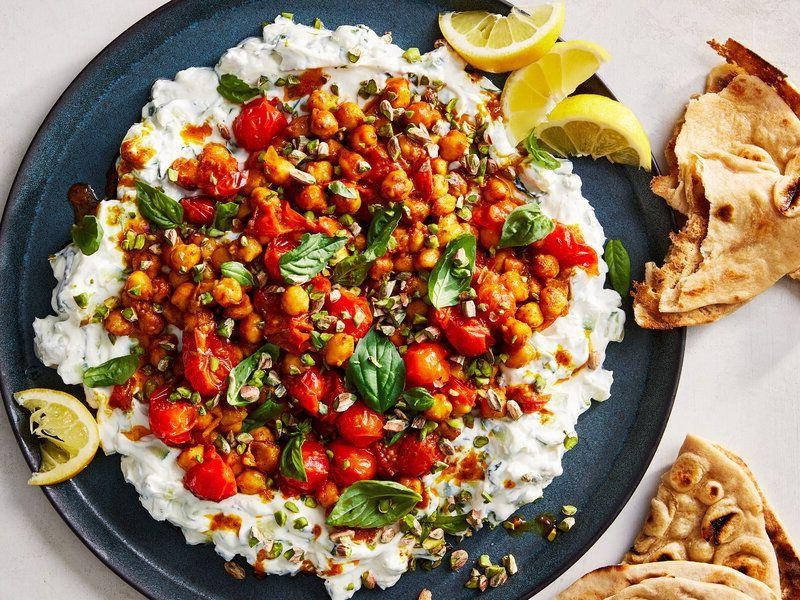
Zesty and satisfying, this spicy chickpea and tomato curry comes together with minimal effort but delivers maximum flavor. Let’s walk through each step methodically so you can create this comforting dish with confidence. You’ll be amazed at how simple ingredients transform into something truly special.
3
servings15
minutes30
minutesIngredients
– A couple of tablespoons of olive oil
– One medium yellow onion, chopped
– Three garlic cloves, minced
– A tablespoon of fresh ginger, grated
– Two 15-ounce cans of chickpeas, drained and rinsed
– One 28-ounce can of crushed tomatoes
– A cup of vegetable broth
– A tablespoon of curry powder
– A teaspoon of ground cumin
– Half a teaspoon of red pepper flakes
– A splash of lime juice
– A handful of fresh cilantro, chopped
– Salt to season
Instructions
1. Heat 2 tablespoons of olive oil in a large pot over medium heat until it shimmers.
2. Add the chopped onion and cook for 5-7 minutes, stirring occasionally, until translucent and soft.
3. Stir in the minced garlic and grated ginger, cooking for 1 minute until fragrant.
4. Sprinkle in 1 tablespoon of curry powder, 1 teaspoon of cumin, and 1/2 teaspoon of red pepper flakes, toasting for 30 seconds to release their oils.
5. Pour in the crushed tomatoes and 1 cup of vegetable broth, scraping the bottom of the pot to incorporate any browned bits.
6. Add the drained chickpeas and bring the mixture to a gentle boil.
7. Reduce the heat to low, cover the pot, and simmer for 20 minutes to allow the flavors to meld.
8. Stir in a splash of lime juice and season with salt until the flavors pop.
9. Fold in the chopped cilantro just before serving to keep it fresh and vibrant.
Just spoon this curry over fluffy rice or with warm naan for a complete meal. The chickpeas remain tender yet firm, while the tomatoes break down into a rich, slightly spicy sauce that’s balanced by the bright lime and cilantro. Try topping it with a dollop of yogurt to cool the heat, or pack leftovers for a next-day lunch that tastes even better.
Chickpea and Quinoa Burger
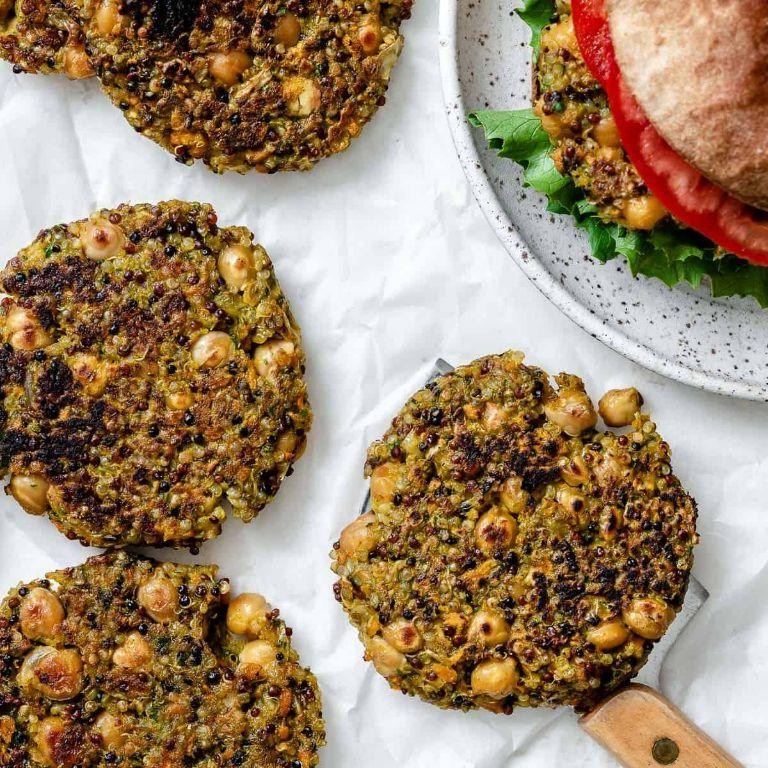
Burgers don’t always need meat to be satisfying, and this chickpea and quinoa version proves just how flavorful plant-based options can be. By combining pantry staples with fresh herbs, you’ll create a hearty patty that holds together beautifully and delivers great texture in every bite.
5
portions15
minutes12
minutesIngredients
– 1 can (15 oz) chickpeas, drained and rinsed
– 1 cup cooked quinoa
– 1/2 cup breadcrumbs
– 1/4 cup finely chopped red onion
– 2 cloves garlic, minced
– 1 large egg
– 2 tbsp olive oil
– 1 tbsp lemon juice
– A couple of fresh parsley sprigs, chopped
– A good pinch of salt
– A few cracks of black pepper
Instructions
1. Place the drained chickpeas in a medium bowl and mash them with a fork until mostly broken down but still slightly chunky.
2. Add the cooked quinoa, breadcrumbs, red onion, minced garlic, egg, lemon juice, chopped parsley, salt, and pepper to the bowl.
3. Mix everything together with your hands until well combined and the mixture holds together when pressed. Tip: If the mixture feels too wet, add another tablespoon of breadcrumbs.
4. Divide the mixture into 4 equal portions and shape each into a 1-inch thick patty about 3.5 inches wide.
5. Heat 2 tablespoons of olive oil in a large skillet over medium heat until shimmering, about 2 minutes.
6. Carefully place the patties in the hot skillet and cook for 5-6 minutes until the bottoms are golden brown and crisp.
7. Flip the patties using a spatula and cook for another 5-6 minutes until the second side is equally golden. Tip: Resist pressing down on the patties while cooking to maintain their texture.
8. Transfer the cooked burgers to a plate lined with paper towels to absorb excess oil. Tip: Let them rest for 2 minutes before serving to help them firm up.
These burgers develop a wonderfully crisp exterior while staying moist inside, with the quinoa adding pleasant chewiness against the creamy chickpeas. The lemon and parsley brighten each bite, making them perfect served on toasted buns with avocado slices or stacked over a fresh green salad for a lighter meal.
Chickpea and Sweet Potato Hash
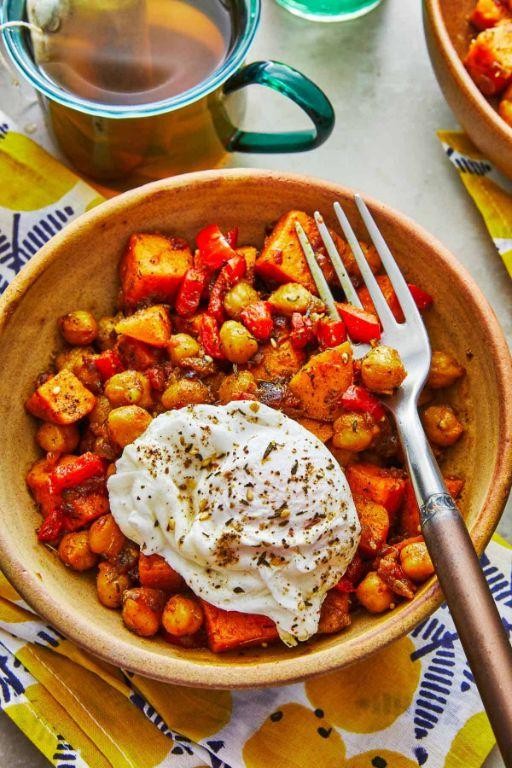
Let’s create a satisfying one-pan meal that’s perfect for any time of day. This chickpea and sweet potato hash comes together with minimal fuss and delivers maximum flavor, making it ideal for both busy weeknights and leisurely weekend brunches.
4
servings15
minutes34
minutesIngredients
– 2 medium sweet potatoes, peeled and diced into ½-inch cubes
– 1 can (15 oz) chickpeas, drained and rinsed
– 1 medium yellow onion, chopped
– 2 cloves garlic, minced
– 2 tablespoons olive oil
– 1 teaspoon smoked paprika
– ½ teaspoon ground cumin
– A pinch of red pepper flakes
– A couple of fresh parsley sprigs, chopped
– 4 large eggs
Instructions
1. Preheat your oven to 400°F and place a large oven-safe skillet over medium-high heat.
2. Add 2 tablespoons of olive oil to the hot skillet and swirl to coat the bottom evenly.
3. Add the diced sweet potatoes and cook for 8 minutes, stirring occasionally until they begin to soften around the edges.
4. Stir in the chopped onion and cook for 4 minutes until translucent and fragrant.
5. Add the minced garlic and cook for 1 minute until golden but not browned.
6. Mix in the drained chickpeas, smoked paprika, cumin, and red pepper flakes, coating everything evenly.
7. Transfer the skillet to the preheated oven and bake for 15 minutes until the sweet potatoes are fork-tender.
8. Remove the skillet from the oven and create 4 small wells in the hash mixture using the back of a spoon.
9. Crack one egg into each well, being careful not to break the yolks.
10. Return the skillet to the oven and bake for 6-8 minutes until the egg whites are set but yolks are still slightly runny.
11. Remove from the oven and sprinkle with chopped fresh parsley.
My favorite thing about this dish is the wonderful contrast between the creamy egg yolks and the crispy-edged sweet potatoes. The smoked paprika adds a subtle smokiness that complements the earthy chickpeas beautifully. Try serving it straight from the skillet with toasted crusty bread for scooping up every last bite.
Creamy Chickpea and Roasted Red Pepper Pasta
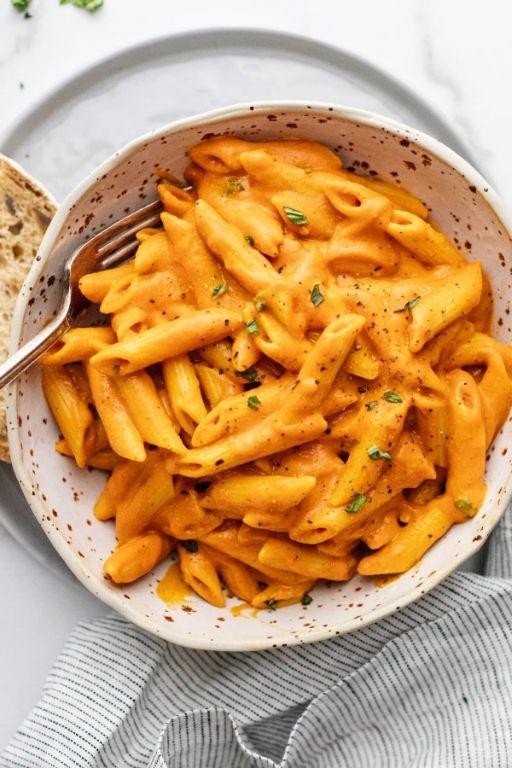
Developing a creamy pasta dish doesn’t require heavy cream or complicated techniques—this chickpea and roasted red pepper version comes together with simple ingredients and builds flavor through roasting and blending. During the cooler months, this comforting meal offers both warmth and nutrition, making it perfect for a cozy weeknight dinner that feels special without much effort.
3
servings15
minutes30
minutesIngredients
- 8 ounces of your favorite pasta shape
- 1 can (15 ounces) of chickpeas, drained and rinsed
- 2 large red bell peppers, sliced into strips
- 3 cloves of garlic, minced
- 1/4 cup of olive oil
- 1/2 cup of vegetable broth
- 2 tablespoons of lemon juice
- 1 teaspoon of smoked paprika
- 1/2 teaspoon of salt
- A handful of fresh basil leaves
- A sprinkle of red pepper flakes (optional)
Instructions
- Preheat your oven to 400°F and line a baking sheet with parchment paper.
- Toss the sliced red bell peppers and minced garlic with 2 tablespoons of olive oil on the baking sheet, spreading them in a single layer for even roasting.
- Roast the peppers and garlic in the oven for 20–25 minutes, until the peppers are soft and slightly charred at the edges.
- While the peppers roast, cook the pasta in a large pot of salted boiling water according to package directions until al dente, then drain and set aside.
- Transfer the roasted peppers and garlic to a blender, adding the chickpeas, vegetable broth, remaining 2 tablespoons of olive oil, lemon juice, smoked paprika, and salt.
- Blend the mixture on high speed for 1–2 minutes until completely smooth and creamy, scraping down the sides if needed.
- Pour the blended sauce into a large skillet and warm it over medium heat for 3–4 minutes, stirring occasionally until heated through.
- Add the cooked pasta to the skillet, tossing gently to coat every strand with the sauce.
- Fold in the fresh basil leaves and red pepper flakes (if using), stirring just until combined.
Vibrant and velvety, this pasta boasts a smoky-sweet flavor from the roasted peppers, balanced by the creamy texture from blended chickpeas. Serve it topped with extra basil or a drizzle of olive oil for a restaurant-worthy presentation, or pair it with a crisp green salad to contrast the richness.
Chickpea and Kale Stir-fry
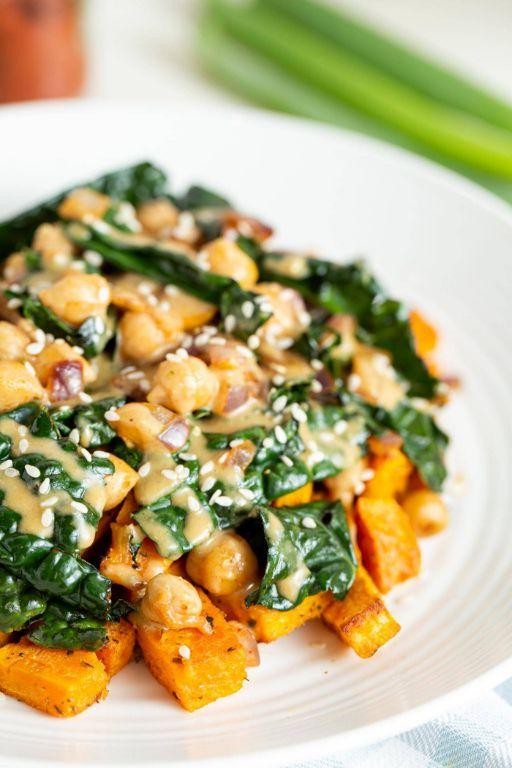
Unbelievably simple yet packed with nutrition, this chickpea and kale stir-fry comes together in under 20 minutes for a weeknight meal that feels both wholesome and satisfying. Using just a handful of pantry staples, you’ll create a vibrant dish that’s perfect for busy evenings when you want something healthy without the fuss.
3
servings10
minutes15
minutesIngredients
– 2 tablespoons of olive oil
– 1 medium yellow onion, thinly sliced
– 3 cloves of garlic, minced
– A 15-ounce can of chickpeas, drained and rinsed
– A big bunch of kale, stems removed and leaves chopped
– A splash of soy sauce (about 2 tablespoons)
– A squeeze of fresh lemon juice (about 1 tablespoon)
– A pinch of red pepper flakes
– Salt and black pepper to season
Instructions
1. Heat 2 tablespoons of olive oil in a large skillet over medium-high heat until it shimmers, about 1 minute.
2. Add 1 thinly sliced yellow onion and cook, stirring occasionally, until softened and lightly browned, about 5 minutes.
3. Stir in 3 minced garlic cloves and cook for 30 seconds until fragrant, being careful not to burn them.
4. Add the drained and rinsed chickpeas to the skillet, spreading them in an even layer.
5. Cook the chickpeas undisturbed for 2 minutes to lightly crisp one side, then stir and cook for another 2 minutes.
6. Tip: Letting chickpeas sit briefly creates a nice texture contrast with the softer vegetables.
7. Add the chopped kale in batches, stirring until each addition wilts slightly before adding more.
8. Cook, stirring frequently, until the kale is bright green and tender, about 3-4 minutes.
9. Pour in 2 tablespoons of soy sauce and 1 tablespoon of lemon juice, stirring to coat everything evenly.
10. Sprinkle in a pinch of red pepper flakes and season with salt and black pepper to your liking.
11. Tip: Adding acid like lemon juice at the end preserves its bright flavor.
12. Cook for 1 more minute to let the flavors meld, then remove from heat.
13. Tip: Taste and adjust seasoning before serving—this is your chance to make it perfect for you.
Zesty and textured, this stir-fry offers tender kale against slightly crisp chickpeas, with a savory soy-lemon balance that’s brightened by a hint of heat. Serve it over quinoa for a complete meal, or stuff it into warm pita bread with a dollop of tahini for a creative twist that makes leftovers exciting.
Chickpea and Cauliflower Tacos

Ready to transform humble vegetables into taco night superstars? These chickpea and cauliflower tacos deliver incredible flavor and texture with minimal effort, perfect for busy weeknights when you want something satisfying but simple. Let me walk you through each step methodically so you can create these delicious plant-based tacos with confidence.
8
tacos15
minutes30
minutesIngredients
– 1 can of chickpeas, drained and rinsed
– 1 small head of cauliflower, cut into bite-sized florets
– 2 tablespoons of olive oil
– 1 tablespoon of chili powder
– 1 teaspoon of cumin
– 1/2 teaspoon of garlic powder
– A generous pinch of salt
– 8 small corn tortillas
– A handful of fresh cilantro, chopped
– A squeeze of lime juice
– A dollop of sour cream or your favorite creamy sauce
Instructions
1. Preheat your oven to 400°F and line a baking sheet with parchment paper.
2. Pat the drained chickpeas completely dry with paper towels to ensure they crisp up nicely in the oven.
3. In a large bowl, combine the chickpeas and cauliflower florets with olive oil, chili powder, cumin, garlic powder, and salt.
4. Toss everything together until the vegetables are evenly coated with the spice mixture.
5. Spread the chickpea and cauliflower mixture in a single layer on your prepared baking sheet.
6. Roast for 25-30 minutes until the chickpeas are crispy and the cauliflower edges are golden brown.
7. While the vegetables roast, warm your corn tortillas one by one in a dry skillet over medium heat for about 30 seconds per side.
8. Keep the warmed tortillas wrapped in a clean kitchen towel to stay soft and pliable.
9. Once the chickpea and cauliflower mixture is done roasting, remove it from the oven and let it cool for 2 minutes.
10. Fill each warm tortilla with the roasted vegetable mixture.
11. Top each taco with chopped cilantro, a squeeze of lime juice, and a dollop of sour cream.
Zesty lime juice cuts through the earthy spices while the creamy sauce adds cooling contrast to the crispy chickpeas and tender cauliflower. For an extra crunch, try serving these with shredded cabbage or pickled red onions, and don’t be shy about doubling the recipe—the roasted vegetables make fantastic leftovers for grain bowls the next day.
Lemon and Herb Chickpea Soup
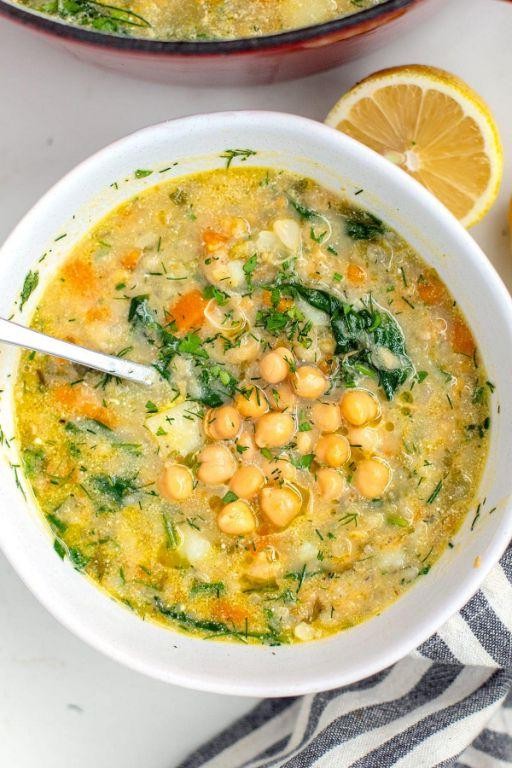
Perfect for those chilly autumn evenings, this lemon and herb chickpea soup comes together with minimal effort but delivers maximum comfort. Preparing this nourishing bowl requires just a few simple steps that even kitchen newcomers can master confidently.
2
servings15
minutes26
minutesIngredients
- 2 tablespoons of olive oil
- 1 medium yellow onion, chopped
- 3 cloves of garlic, minced
- 4 cups of vegetable broth
- 2 cans (15 oz each) of chickpeas, drained and rinsed
- 1 teaspoon of dried thyme
- 1 teaspoon of dried oregano
- Juice from 1 large lemon
- A generous handful of fresh parsley, chopped
- Salt and black pepper to season
Instructions
- Heat 2 tablespoons of olive oil in a large pot over medium heat until it shimmers.
- Add 1 chopped yellow onion and cook for 5-7 minutes, stirring occasionally, until translucent and fragrant.
- Stir in 3 minced garlic cloves and cook for 1 minute until aromatic but not browned.
- Pour in 4 cups of vegetable broth and bring to a gentle boil.
- Add 2 cans of drained chickpeas, 1 teaspoon of dried thyme, and 1 teaspoon of dried oregano.
- Reduce heat to low, cover the pot, and simmer for 15 minutes to allow flavors to meld.
- Using a potato masher or immersion blender, lightly crush about one-third of the chickpeas to thicken the soup slightly.
- Stir in the juice from 1 large lemon and a generous handful of chopped fresh parsley.
- Season with salt and black pepper, simmer for 2 more minutes, then remove from heat.
Just before serving, you’ll notice the soup has a lovely, slightly thickened texture from the mashed chickpeas. The bright lemon cuts through the earthy herbs beautifully, making each spoonful both comforting and refreshing. For a creative twist, top with extra parsley and a drizzle of olive oil, or serve alongside crusty bread for dipping.
Chickpea and Mushroom Risotto
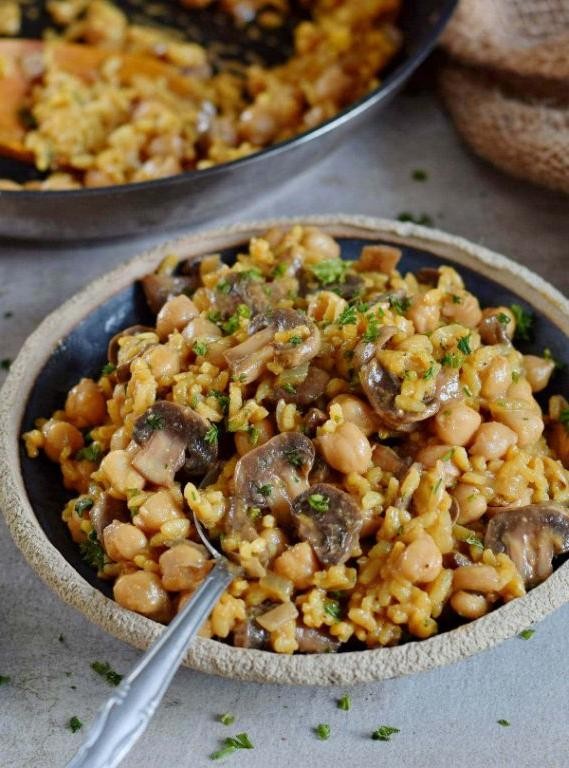
Once you master this creamy chickpea and mushroom risotto, you’ll have a comforting vegetarian dinner ready in under an hour. Our methodical approach ensures perfect results every time, even if you’re new to risotto-making. Let’s walk through each step together.
3
servings15
minutes45
minutesIngredients
– 1 cup of Arborio rice
– 8 ounces of cremini mushrooms, sliced
– 1 can (15 ounces) of chickpeas, drained and rinsed
– 1 medium yellow onion, finely chopped
– 3 cloves of garlic, minced
– 4 cups of vegetable broth, kept warm
– A generous splash of dry white wine
– A couple of tablespoons of olive oil
– A big handful of grated Parmesan cheese
– A pat of butter
– A sprinkle of fresh parsley, chopped
Instructions
1. Heat 2 tablespoons of olive oil in a large, heavy-bottomed pot over medium heat until shimmering.
2. Add the chopped onion and cook for 5 minutes, stirring occasionally, until translucent and fragrant.
3. Stir in the minced garlic and cook for 1 minute until aromatic but not browned.
4. Add the sliced mushrooms and cook for 8 minutes, stirring occasionally, until they release their liquid and turn golden brown.
5. Tip: Keep your vegetable broth warm in a separate saucepan—this helps the rice cook evenly and absorb liquid properly.
6. Add the Arborio rice to the pot and toast for 2 minutes, stirring constantly, until the grains look slightly translucent around the edges.
7. Pour in the splash of white wine and cook for 1 minute, scraping up any browned bits from the bottom of the pot.
8. Tip: Stir the risotto frequently but not constantly—this develops the creamy starch without making the rice mushy.
9. Add 1 cup of warm broth and stir until most liquid is absorbed, about 4-5 minutes.
10. Continue adding broth 1/2 cup at a time, stirring and waiting for absorption before each addition, for about 20 minutes total.
11. Stir in the drained chickpeas during the last 5 minutes of cooking to heat through.
12. Tip: Taste the rice at the 18-minute mark—it should be tender but still have a slight bite (al dente).
13. Remove from heat and stir in the Parmesan cheese, butter, and chopped parsley until creamy and combined.
14. Let stand for 2 minutes off heat before serving to allow flavors to meld.
Ultimately, this risotto achieves a luxurious creaminess with satisfying bites of earthy mushrooms and protein-packed chickpeas. The Parmesan adds a salty depth that balances the subtle sweetness from the slowly cooked onions. For a beautiful presentation, top with extra parsley and serve alongside a simple arugula salad with lemon vinaigrette.
Crispy Chickpea and Zucchini Fritters
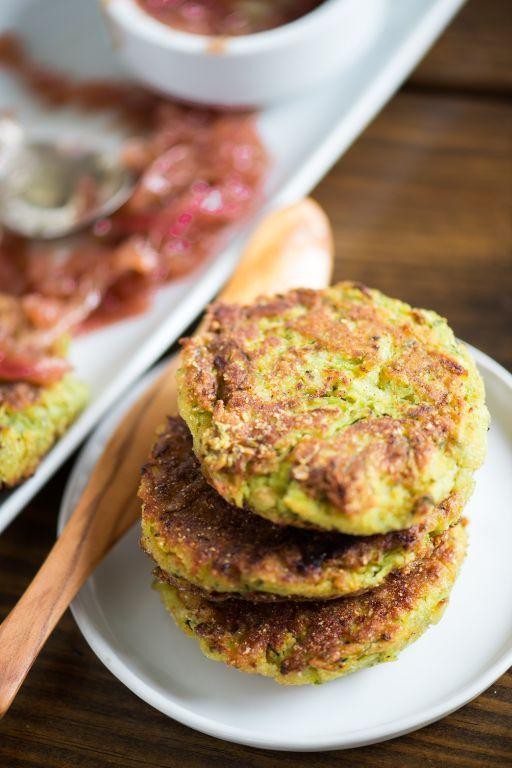
Often, the simplest ingredients create the most satisfying meals, and these crispy chickpea and zucchini fritters are a perfect example. Let me walk you through each step methodically so you can create perfectly golden, flavorful fritters every single time. We’ll start by preparing our ingredients and finish with a beautifully crisp result.
8
fritters15
minutes16
minutesIngredients
– 1 can (15 oz) chickpeas, drained and rinsed
– 1 medium zucchini, grated
– 1/2 cup all-purpose flour
– 1 large egg
– 2 tablespoons olive oil
– 1 teaspoon garlic powder
– 1/2 teaspoon salt
– A couple of tablespoons of chopped fresh parsley
– A splash of lemon juice (about 1 tablespoon)
– Additional olive oil for frying (about 1/4 cup)
Instructions
1. Place the grated zucchini in a clean kitchen towel and squeeze firmly over the sink to remove excess moisture.
2. Tip: Removing moisture prevents soggy fritters and ensures maximum crispiness.
3. Combine the drained chickpeas, squeezed zucchini, flour, egg, 2 tablespoons olive oil, garlic powder, salt, parsley, and lemon juice in a large mixing bowl.
4. Mash the mixture with a fork or potato masher until the chickpeas are broken down but some texture remains.
5. Heat 1/4 cup olive oil in a large skillet over medium heat until it shimmers (about 350°F).
6. Scoop 2 tablespoons of the fritter mixture and form into a patty about 1/2-inch thick.
7. Carefully place 3-4 patties in the hot oil, leaving space between them.
8. Cook for 3-4 minutes until the bottoms are deep golden brown and edges appear crisp.
9. Tip: Don’t overcrowd the pan—this maintains oil temperature for even cooking.
10. Flip each fritter using a spatula and cook another 3-4 minutes until both sides are evenly browned.
11. Transfer cooked fritters to a paper towel-lined plate to drain excess oil.
12. Tip: Let them rest for 2 minutes—this helps the interior set for perfect texture.
13. Repeat with remaining mixture, adding more oil if needed.
These fritters develop a wonderfully crisp exterior while staying tender inside, with the chickpeas providing earthy depth and zucchini adding fresh lightness. Serve them stacked with a dollop of Greek yogurt or tucked into pita pockets with sliced tomatoes for a complete meal that feels both wholesome and indulgent.
Mediterranean Chickpea and Couscous Bowls

Now, let’s create these vibrant Mediterranean chickpea and couscous bowls that come together in under 30 minutes – perfect for busy weeknights when you want something healthy and satisfying without the fuss.
2
bowls10
minutes20
minutesIngredients
– 1 cup of dry couscous
– A 15-ounce can of chickpeas, drained and rinsed
– A couple of tablespoons of olive oil
– A good squeeze of lemon juice (about 2 tablespoons)
– A couple of cloves of garlic, minced
– A generous pinch of salt
– A few cracks of black pepper
– A teaspoon of dried oregano
– A cup of cherry tomatoes, halved
– A handful of fresh parsley, chopped
– A quarter of a red onion, thinly sliced
– A couple of tablespoons of crumbled feta cheese
Instructions
1. Preheat your oven to 400°F and line a baking sheet with parchment paper.
2. Pat the drained chickpeas completely dry with paper towels – this helps them get crispy instead of steaming.
3. Toss the dried chickpeas with 1 tablespoon of olive oil, minced garlic, oregano, salt, and pepper on the baking sheet.
4. Roast the chickpeas for 15-20 minutes until golden brown and slightly crispy, shaking the pan halfway through.
5. While chickpeas roast, place the dry couscous in a medium bowl.
6. Pour 1 cup of boiling water over the couscous, cover the bowl tightly with plastic wrap, and let it steam for 5 minutes.
7. Fluff the couscous with a fork to separate the grains – this prevents clumping.
8. Whisk together the remaining olive oil, lemon juice, and a pinch of salt in a small bowl for the dressing.
9. Combine the fluffed couscous, roasted chickpeas, halved cherry tomatoes, red onion, and parsley in a large bowl.
10. Drizzle the lemon-olive oil dressing over everything and toss gently to combine.
11. Divide the mixture between bowls and top with crumbled feta cheese.
The fluffy couscous provides a soft base that contrasts beautifully with the crispy chickpeas, while the lemon dressing brightens all the earthy Mediterranean flavors. Try serving these bowls with warm pita bread for scooping, or pack them cold for a fantastic next-day lunch.
Chickpea and Beetroot Hummus
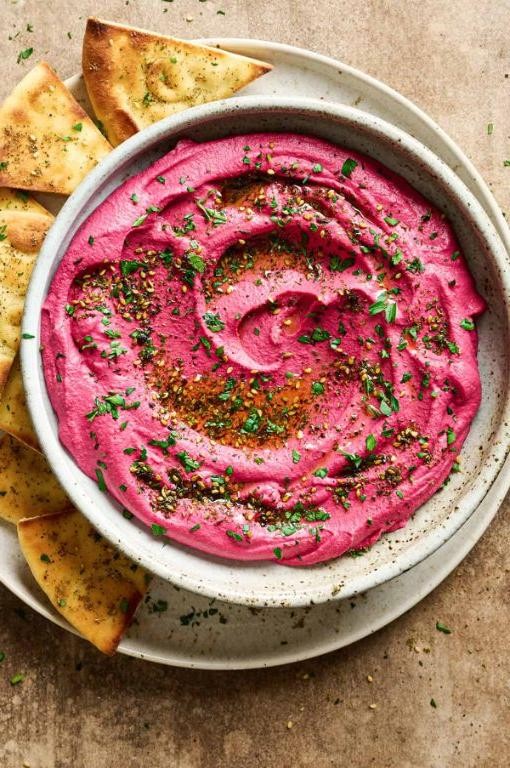
This vibrant chickpea and beetroot hummus is surprisingly simple to make from scratch. Transform basic pantry staples into a stunning pink dip that’s as nutritious as it is beautiful. You’ll be amazed at how a few simple ingredients create such an impressive appetizer.
5
servings20
minutes60
minutesIngredients
– A couple of medium beetroots (about 1 cup when roasted and chopped)
– One 15-ounce can of chickpeas, drained and rinsed
– A generous quarter cup of tahini
– A couple of tablespoons of fresh lemon juice
– A small garlic clove
– A splash of extra virgin olive oil (about 2 tablespoons)
– Half a teaspoon of ground cumin
– A pinch of salt
Instructions
1. Preheat your oven to 400°F and line a baking sheet with parchment paper.
2. Scrub the beetroots thoroughly under running water to remove any dirt.
3. Wrap each beetroot tightly in aluminum foil and place them on the baking sheet.
4. Roast the wrapped beetroots for 45-60 minutes until they’re tender when pierced with a fork.
5. Let the beetroots cool completely, then peel them by rubbing off the skins with your fingers (tip: wear gloves to prevent staining).
6. Chop the peeled beetroots into rough chunks.
7. Drain and rinse the canned chickpeas in a colander, shaking off excess water.
8. Combine the chickpeas, beetroot chunks, tahini, lemon juice, garlic clove, cumin, and salt in a food processor.
9. Pulse the mixture 10-12 times until the ingredients are roughly combined.
10. With the food processor running, slowly drizzle in the olive oil through the feed tube.
11. Continue processing for 2-3 minutes until the hummus becomes completely smooth and creamy (tip: scrape down the sides halfway through for even blending).
12. Taste the hummus and adjust seasoning if needed, adding more salt or lemon juice.
13. Transfer the finished hummus to a serving bowl and smooth the surface with a spoon.
14. Drizzle with an extra tablespoon of olive oil for serving (tip: let it rest 15 minutes before serving for flavors to meld).
Beyond its striking magenta color, this hummus has an earthy sweetness from the roasted beets that pairs beautifully with the nutty chickpeas. The texture should be luxuriously smooth and spreadable, perfect for pita chips or as a vibrant sandwich spread. Try serving it alongside crudité for a colorful platter that’s sure to impress guests.
Chickpea and Feta Stuffed Peppers

Just imagine coming home to the comforting aroma of roasted peppers filled with a savory Mediterranean-inspired mixture. These chickpea and feta stuffed peppers combine simple ingredients into a satisfying vegetarian meal that’s perfect for weeknight dinners. Let me walk you through creating this colorful dish step by step.
3
servings15
minutes40
minutesIngredients
– 4 large bell peppers (any color you like)
– 2 cups of cooked chickpeas
– 1 cup of crumbled feta cheese
– 1/2 cup of cooked quinoa
– 1/4 cup of chopped fresh parsley
– 2 tablespoons of olive oil
– 1 tablespoon of lemon juice
– 1 teaspoon of dried oregano
– 1/2 teaspoon of garlic powder
– A pinch of salt and black pepper
Instructions
1. Preheat your oven to 375°F.
2. Cut the bell peppers in half lengthwise and remove all seeds and membranes.
3. Place the pepper halves cut-side up in a baking dish that fits them snugly.
4. In a medium bowl, combine the chickpeas, feta cheese, quinoa, and parsley.
5. Add the olive oil, lemon juice, oregano, garlic powder, salt, and pepper to the bowl.
6. Mix all ingredients thoroughly until well combined.
7. Spoon the filling mixture evenly into each pepper half, packing it down lightly.
8. Pour 1/4 cup of water into the bottom of the baking dish around the peppers.
9. Cover the dish tightly with aluminum foil.
10. Bake at 375°F for 25 minutes.
11. Remove the foil and continue baking for another 15 minutes until the peppers are tender and the filling is heated through.
12. Let the stuffed peppers rest for 5 minutes before serving.
Gorgeous golden-brown tops give way to tender peppers bursting with creamy feta and hearty chickpeas. The quinoa adds a delightful nutty texture that complements the bright lemon notes beautifully. Try serving these over a bed of fresh greens or with a dollop of Greek yogurt for an extra creamy contrast.
Conclusion
Now you have 24 delicious ways to enjoy chickpeas! From hearty mains to satisfying snacks, this collection proves how versatile and budget-friendly this pantry staple can be. We’d love to hear which recipes you try—drop a comment with your favorites, and don’t forget to share this roundup on Pinterest so fellow home cooks can discover these tasty ideas too. Happy cooking!


