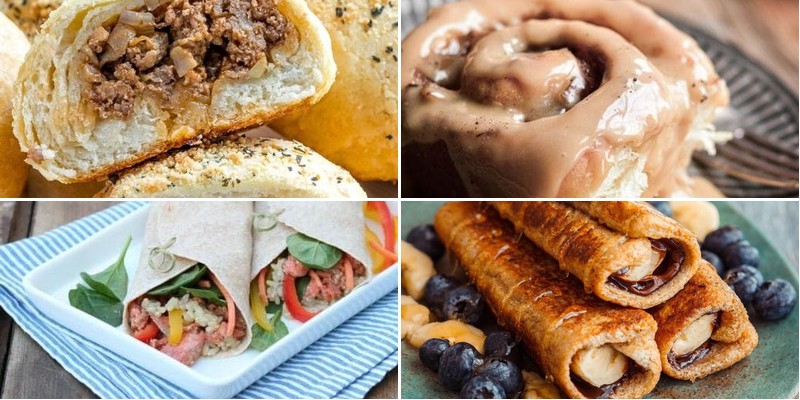
Versatile, delicious, and endlessly adaptable—buns are the unsung heroes of the kitchen! Whether you’re craving cozy comfort food, quick weeknight dinners, or something to wow at your next gathering, these 26 delightful recipes showcase just how creative you can get with bun variations. Get ready to roll up your sleeves and discover your new favorite meal—you won’t want to stop at just one!
Savory Sloppy Joe Buns
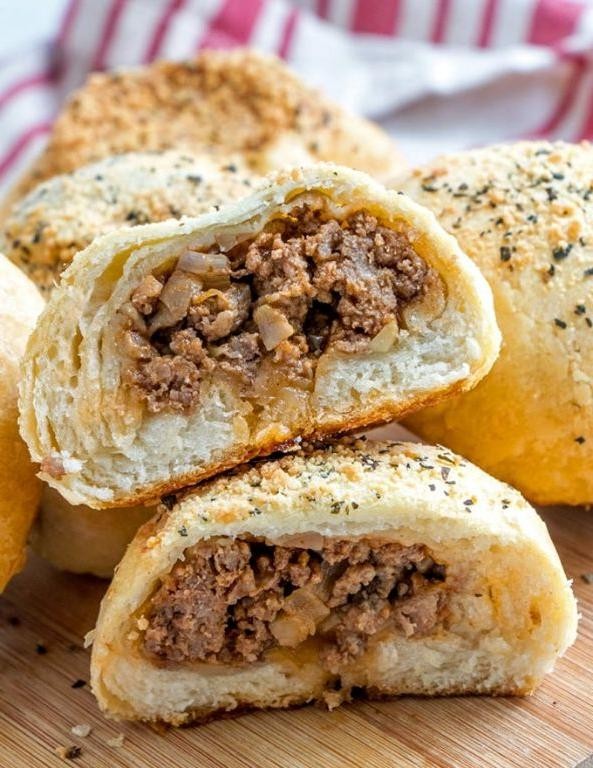
Remember those messy, glorious childhood sandwiches that somehow tasted better the more they dripped down your chin? Well, buckle up, buttercup, because we’re about to elevate that chaotic deliciousness into a handheld masterpiece: Savory Sloppy Joe Buns. It’s the saucy, savory filling you crave, all neatly (or not so neatly) tucked into a soft, golden bun for maximum enjoyment with slightly less laundry drama.
6
sandwiches15
minutes33
minutesIngredients
– 1 tbsp olive oil
– 1 lb ground beef (85/15)
– 1 medium yellow onion, finely diced
– 1 medium green bell pepper, finely diced
– 2 cloves garlic, minced
– 3/4 cup ketchup
– 1/4 cup tomato paste
– 2 tbsp Worcestershire sauce
– 1 tbsp yellow mustard
– 1 tbsp brown sugar
– 1 tsp chili powder
– 1/2 tsp smoked paprika
– 1/2 cup beef broth
– 6 brioche hamburger buns
– 2 tbsp unsalted butter, softened
Instructions
1. Heat 1 tbsp olive oil in a large skillet over medium-high heat until it shimmers.
2. Add 1 lb ground beef and cook for 5-7 minutes, breaking it apart with a wooden spoon until no pink remains.
3. Add the diced onion and bell pepper, cooking for 4-5 minutes until the onion becomes translucent.
4. Stir in the minced garlic and cook for 1 minute until fragrant.
5. Pour in 3/4 cup ketchup, 1/4 cup tomato paste, 2 tbsp Worcestershire sauce, 1 tbsp yellow mustard, 1 tbsp brown sugar, 1 tsp chili powder, and 1/2 tsp smoked paprika, stirring to coat everything evenly.
6. Tip: For a deeper flavor, let the tomato paste cook with the meat for 1 minute before adding the other sauces.
7. Pour in 1/2 cup beef broth, scraping any browned bits from the bottom of the skillet.
8. Reduce heat to low and simmer uncovered for 15-20 minutes, stirring occasionally, until the sauce has thickened significantly.
9. While the filling simmers, preheat your oven to 350°F.
10. Spread the softened butter on the cut sides of all 6 brioche buns.
11. Place the buns buttered-side up on a baking sheet and toast in the preheated oven for 5-7 minutes until golden brown.
12. Tip: Toasting the buns creates a barrier that helps prevent them from getting soggy too quickly.
13. Remove the buns from the oven and spoon the hot sloppy joe mixture generously into each one.
14. Tip: For a cheesier version, sprinkle shredded cheddar on top of the filling during the last 2 minutes of toasting the assembled buns.
15. Let the filled buns rest for 2-3 minutes before serving to allow the flavors to meld.
Get ready for a flavor explosion that’s both comforting and wildly satisfying. The tender, saucy beef mixture, packed with sweet and tangy notes, contrasts beautifully with the buttery, slightly crisp brioche bun. Serve these up with a side of crispy sweet potato fries or a simple coleslaw to cut through the richness for the ultimate weeknight win.
Cheesy Chicken Stuffed Buns
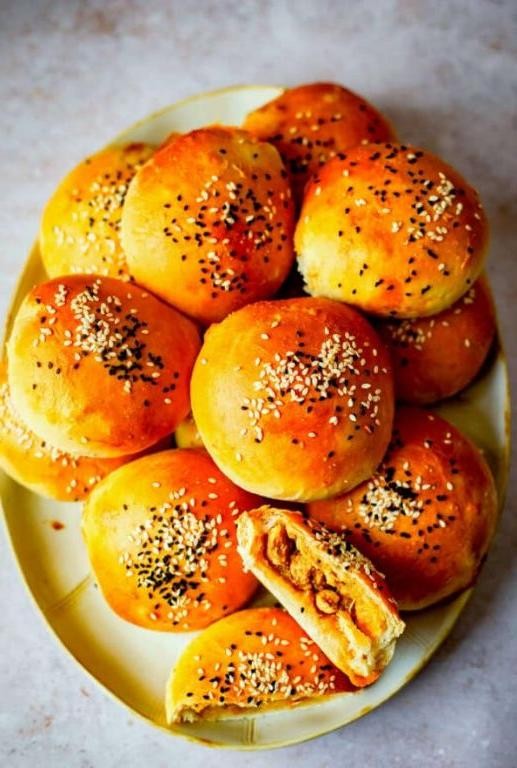
Yikes, have you ever had one of those days where only a warm, cheesy, chicken-stuffed bun could possibly solve all your problems? Welcome to your new favorite comfort food obsession that’s basically a hug in bread form. These buns are so ridiculously good, they might just upstage your main course—consider yourself warned!
8
rolls15
minutes20
minutesIngredients
– 2 cups cooked shredded chicken
– 1 cup shredded cheddar cheese
– 1/4 cup mayonnaise
– 1/4 cup finely chopped celery
– 2 tbsp finely chopped onion
– 1 tbsp Dijon mustard
– 1/2 tsp garlic powder
– 1/4 tsp black pepper
– 1 package (16 oz) refrigerated biscuit dough
– 1 tbsp melted butter
Instructions
1. Preheat your oven to 375°F and line a baking sheet with parchment paper.
2. In a large bowl, combine the shredded chicken, cheddar cheese, mayonnaise, celery, onion, Dijon mustard, garlic powder, and black pepper until fully mixed.
3. Separate the refrigerated biscuit dough into 8 individual biscuits.
4. Flatten each biscuit into a 4-inch circle using your hands or a rolling pin.
5. Place 2 tablespoons of the chicken mixture in the center of each flattened biscuit.
6. Pull the edges of the biscuit up and over the filling, pinching firmly to seal completely.
7. Arrange the stuffed buns seam-side down on the prepared baking sheet, spacing them 2 inches apart.
8. Brush the tops of each bun evenly with the melted butter using a pastry brush.
9. Bake at 375°F for 18–20 minutes, until the buns are golden brown and no doughy spots remain.
10. Remove from the oven and let cool on the baking sheet for 5 minutes before serving.
Know that glorious moment when you tear into one of these buns? The fluffy biscuit gives way to a creamy, savory chicken filling with just the right amount of crunch from the celery. Serve them alongside a zesty salad for balance, or honestly, just eat three in a row—we won’t judge!
Sweet S’mores Bun Skillet
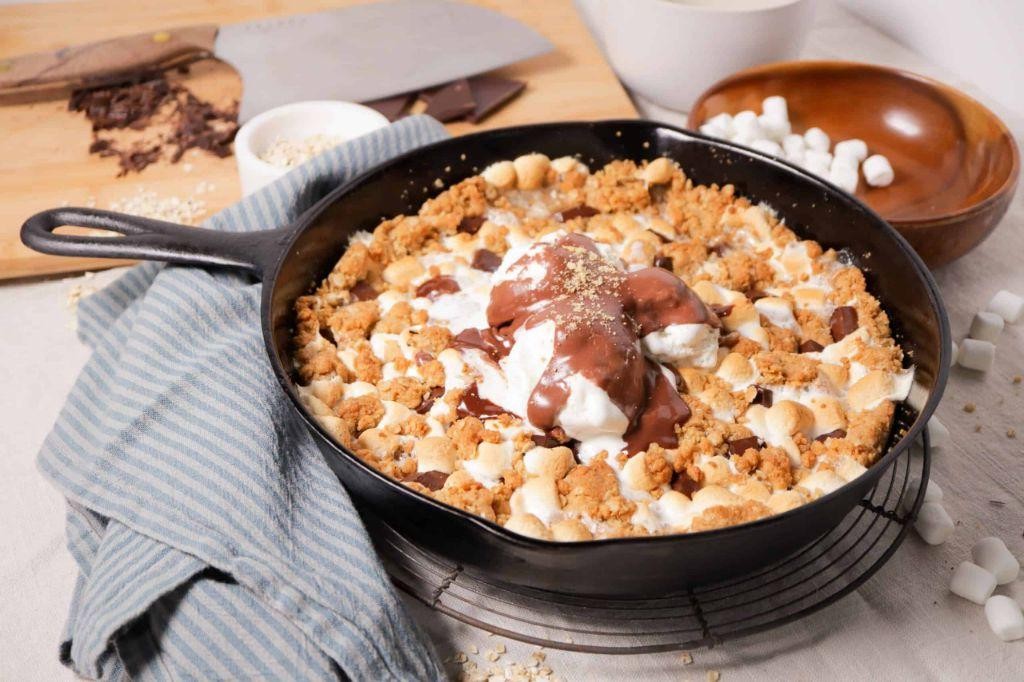
Never has a dessert so perfectly captured the spirit of a campfire while requiring exactly zero fire-building skills. This sweet s’mores bun skillet is basically summer vacation in a pan, minus the mosquito bites and questionable ghost stories. Get ready to transform your kitchen into the coziest campsite imaginable!
8
rolls10
minutes24
minutesIngredients
– 1 package refrigerated cinnamon roll dough (8 count)
– 1 cup mini marshmallows
– 1/2 cup semi-sweet chocolate chips
– 2 tbsp unsalted butter, melted
– 1/4 cup graham cracker crumbs
– 1/4 cup heavy cream
Instructions
1. Preheat your oven to 350°F and grease a 10-inch cast iron skillet with cooking spray.
2. Separate the 8 cinnamon rolls from the package and arrange them in a single layer in the prepared skillet.
3. Drizzle the melted butter evenly over the cinnamon rolls using a pastry brush for maximum coverage.
4. Bake at 350°F for 18-20 minutes until the rolls are golden brown and spring back when lightly pressed.
5. Remove the skillet from the oven and immediately sprinkle chocolate chips evenly over the hot buns.
6. Pour heavy cream over the chocolate chips to help them melt smoothly and create a silky texture.
7. Scatter mini marshmallows across the entire surface, creating an even layer.
8. Return the skillet to the oven and bake for 3-4 minutes until marshmallows are puffed and lightly toasted.
9. Switch your oven to broil and cook for 1-2 minutes until marshmallows develop golden-brown spots, watching constantly to prevent burning.
10. Remove from oven and immediately sprinkle graham cracker crumbs over the top for that classic s’mores crunch.
11. Let the skillet rest for 5 minutes before serving to allow the chocolate to set slightly.
Venture into dessert paradise where gooey marshmallows meet melty chocolate in the most comforting cinnamon bun base imaginable. The contrast between the warm, pillowy buns and the crisp graham cracker topping creates texture nirvana, while the rich chocolate sauce pools perfectly for dipping. Serve this beauty straight from the skillet with extra spoons for maximum sharing (or not sharing—we don’t judge!).
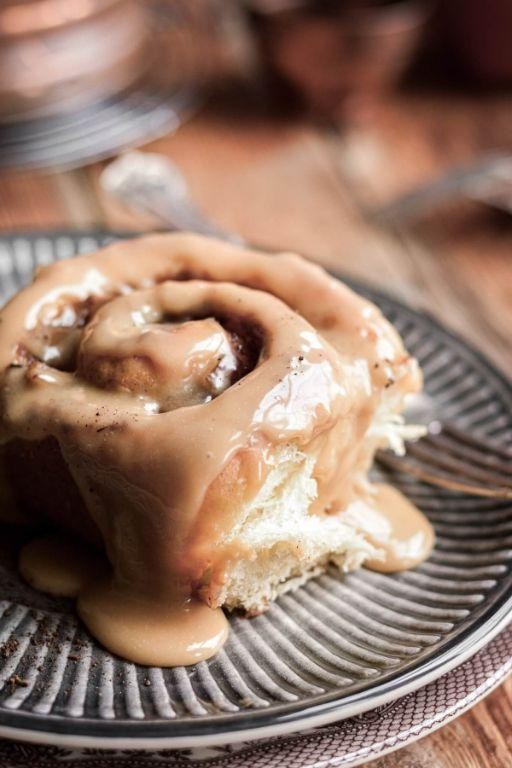
Cinnamon Roll Buns with Cream Cheese Frosting
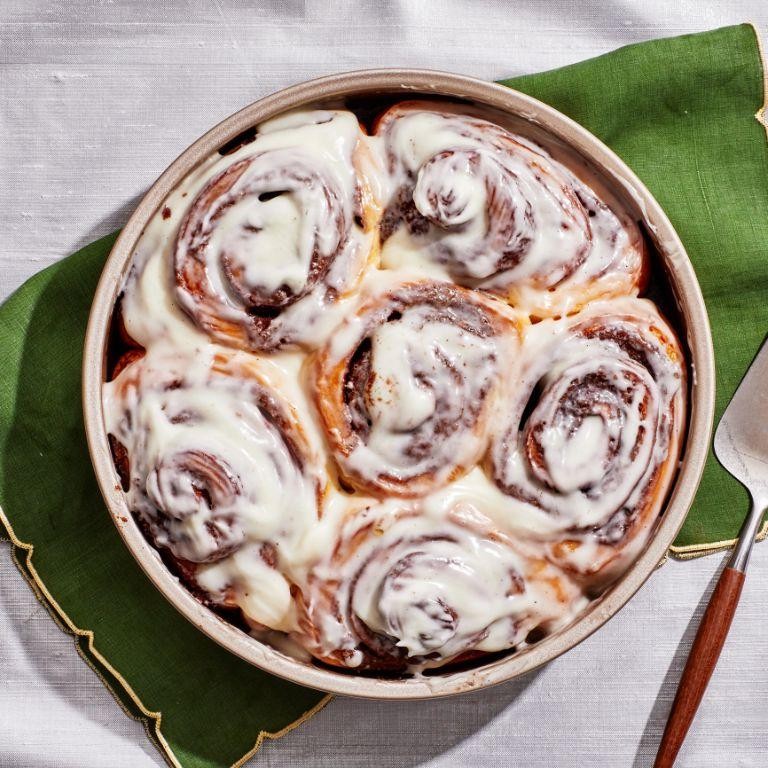
Yikes, did someone say freshly baked cinnamon roll buns with cream cheese frosting? Because we’re about to dive into a recipe that’ll make your kitchen smell like a cozy bakery and your taste buds throw a party. Get ready for swirls of cinnamon-sugar goodness and a frosting so dreamy, you’ll want to lick the bowl—no judgment here!
12
rolls95
minutes25
minutesIngredients
– 3 ½ cups all-purpose flour
– 1 cup warm whole milk (110°F)
– ½ cup granulated sugar
– ½ cup unsalted butter, melted
– 2 large eggs
– 2 ¼ tsp active dry yeast
– 1 tsp salt
– ½ cup light brown sugar
– 2 tbsp ground cinnamon
– 4 oz cream cheese, softened
– 1 cup powdered sugar
– 2 tbsp whole milk
– 1 tsp vanilla extract
Instructions
1. Combine 1 cup warm whole milk (110°F), ½ cup granulated sugar, and 2 ¼ tsp active dry yeast in a large bowl; let sit for 5 minutes until foamy.
2. Whisk in ½ cup melted unsalted butter, 2 large eggs, and 1 tsp salt until smooth.
3. Gradually stir in 3 ½ cups all-purpose flour until a soft dough forms.
4. Knead the dough on a floured surface for 5–7 minutes until smooth and elastic.
5. Place the dough in a greased bowl, cover with a damp cloth, and let rise in a warm place for 1 hour or until doubled in size.
6. Roll the dough into a 12×18-inch rectangle on a floured surface.
7. Sprinkle ½ cup light brown sugar and 2 tbsp ground cinnamon evenly over the dough.
8. Tightly roll the dough from the long side into a log, pinching the seam to seal.
9. Cut the log into 12 equal slices using a sharp knife or dental floss for clean cuts.
10. Arrange the slices in a greased 9×13-inch baking pan, cover, and let rise for 30 minutes.
11. Preheat the oven to 350°F and bake the buns for 20–25 minutes until golden brown.
12. Beat 4 oz softened cream cheese, 1 cup powdered sugar, 2 tbsp whole milk, and 1 tsp vanilla extract in a bowl until smooth.
13. Spread the frosting over the warm buns immediately after removing them from the oven.
14. Let the buns cool in the pan for 10 minutes before serving.
Whoa, these buns are pure magic—soft, pillowy layers with a gooey cinnamon swirl and a tangy cream cheese frosting that melts into every nook. Serve them warm with a drizzle of extra frosting or crumble them over vanilla ice cream for a next-level dessert that’ll have everyone begging for seconds!
Pulled Pork BBQ Bun Sliders
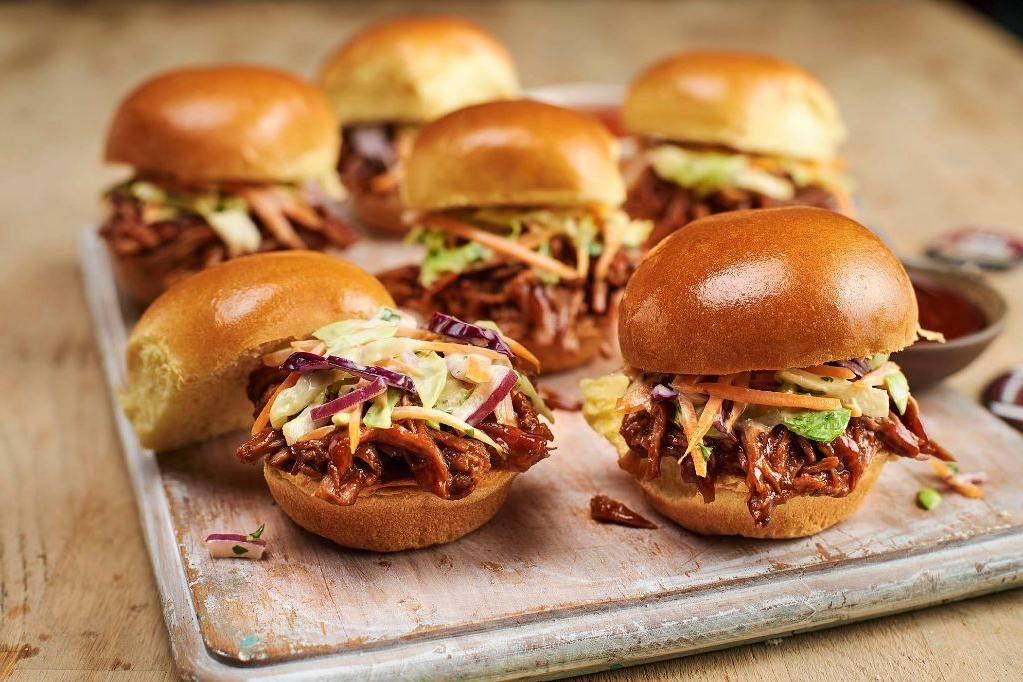
Every time I think about pulled pork, my stomach does a happy dance that would put TikTok to shame. These BBQ bun sliders are basically a flavor party where your mouth is the VIP guest—no velvet rope required.
12
sandwiches15
minutes300
minutesIngredients
- 3 lbs pork shoulder
- 1 tbsp olive oil
- 1 tsp salt
- 1 tsp black pepper
- 1 tsp garlic powder
- 1 tsp onion powder
- 1 cup BBQ sauce
- 12 slider buns
- 1 cup coleslaw
Instructions
- Preheat your oven to 300°F—low and slow is the name of the game here.
- Pat the pork shoulder completely dry with paper towels for better browning.
- Rub olive oil evenly over all surfaces of the pork shoulder.
- Combine salt, black pepper, garlic powder, and onion powder in a small bowl.
- Massage the spice mixture thoroughly into every nook of the pork shoulder.
- Place the seasoned pork shoulder in a Dutch oven or baking dish fat-side up.
- Cover tightly with a lid or aluminum foil to trap all that moisture.
- Roast for 4-5 hours until the pork shreds easily with two forks—don’t rush perfection!
- Transfer the pork to a cutting board, reserving ½ cup of cooking juices.
- Use two forks to shred the pork completely, discarding any large fat pieces.
- Mix the shredded pork with BBQ sauce and reserved cooking juices in a bowl.
- Split slider buns and lightly toast them cut-side down in a dry skillet for 1-2 minutes until golden.
- Spoon generous portions of pulled pork onto the bottom halves of toasted buns.
- Top each with a heaping tablespoon of coleslaw for that crunch factor.
- Cap with the top bun halves and serve immediately while everything’s still warm.
Oh my goodness, the tender pork practically melts while the slaw adds that perfect crisp contrast. These sliders are so addictive you might need to hide a few for yourself before your friends descend like hungry seagulls at the beach.
Spicy Korean Beef Bun Tacos

Mmm, get ready to have your taste buds do the cha-cha with these Spicy Korean Beef Bun Tacos—they’re the rebellious love child of fluffy bao buns and zesty Korean BBQ, here to shake up Taco Tuesday (or any day you crave delicious chaos).
5
buns10
minutes12
minutesIngredients
– 1 lb ground beef
– 1 tbsp vegetable oil
– 2 tbsp soy sauce
– 1 tbsp gochujang
– 1 tbsp brown sugar
– 2 cloves garlic, minced
– 1 tsp grated ginger
– 4 bao buns
– 1 cup shredded cabbage
– 2 tbsp chopped green onions
– 1 tbsp sesame seeds
Instructions
1. Heat 1 tbsp vegetable oil in a large skillet over medium-high heat until shimmering.
2. Add 1 lb ground beef to the skillet and cook for 5–7 minutes, breaking it into small crumbles with a spatula until no pink remains.
3. Stir in 2 tbsp soy sauce, 1 tbsp gochujang, 1 tbsp brown sugar, 2 cloves minced garlic, and 1 tsp grated ginger, and cook for 2 minutes until fragrant and well combined.
4. Steam 4 bao buns in a steamer basket over boiling water for 3–4 minutes until puffed and soft (tip: line the steamer with parchment to prevent sticking).
5. Fill each steamed bao bun with a generous scoop of the spicy beef mixture.
6. Top each bun with ¼ cup shredded cabbage, ensuring a crisp contrast to the savory filling.
7. Sprinkle ½ tbsp chopped green onions and ¼ tbsp sesame seeds over each bun for freshness and crunch (tip: toast sesame seeds in a dry pan first for extra nuttiness).
8. Serve immediately while the buns are warm and the beef is sizzling (tip: pair with a side of kimchi for a tangy kick).
These tacos deliver a riot of textures—tender beef nestled in pillowy buns, with cabbage adding a satisfying crunch. The gochujang brings a slow-building heat that dances with the sweet-savory glaze, making them perfect for stacking high or dunking into a cool yogurt sauce.
Vegetarian Mushroom and Cheese Stuffed Buns

Hang onto your aprons, folks, because we’re about to transform humble mushrooms and cheese into fluffy, golden pockets of pure joy that’ll make you forget meat ever existed. These vegetarian stuffed buns are the ultimate comfort food upgrade, perfect for when you want to impress your friends or just treat yourself to something spectacularly delicious.
8
portions30
minutes32
minutesIngredients
– 2 cups all-purpose flour
– 1 tsp active dry yeast
– 1 tsp granulated sugar
– 3/4 cup warm water (110°F)
– 2 tbsp olive oil
– 1/2 tsp salt
– 1 lb cremini mushrooms
– 1 medium yellow onion
– 2 cloves garlic
– 1 cup shredded mozzarella cheese
– 1/2 cup grated Parmesan cheese
– 1 tbsp fresh thyme leaves
– 1 egg
– 1 tbsp milk
Instructions
1. Combine 2 cups all-purpose flour, 1 tsp active dry yeast, and 1 tsp granulated sugar in a large mixing bowl.
2. Pour in 3/4 cup warm water (110°F) and 2 tbsp olive oil, then mix until a shaggy dough forms.
3. Knead the dough on a floured surface for 8 minutes until smooth and elastic.
4. Place the dough in a greased bowl, cover with a damp towel, and let rise in a warm place for 1 hour until doubled in size.
5. Meanwhile, finely chop 1 lb cremini mushrooms, 1 medium yellow onion, and 2 cloves garlic.
6. Heat 1 tbsp olive oil in a large skillet over medium heat and sauté the chopped onion for 3 minutes until translucent.
7. Add the mushrooms and cook for 8 minutes until they release their liquid and become golden brown.
8. Stir in the garlic and cook for 1 minute until fragrant, then remove from heat.
9. Mix in 1 cup shredded mozzarella, 1/2 cup grated Parmesan, and 1 tbsp fresh thyme leaves until well combined.
10. Punch down the risen dough and divide into 8 equal portions.
11. Roll each portion into a 5-inch circle on a floured surface.
12. Place 2 tbsp of the mushroom filling in the center of each dough circle.
13. Pinch the edges together firmly to seal, creating a bun shape.
14. Arrange the stuffed buns seam-side down on a parchment-lined baking sheet.
15. Whisk together 1 egg and 1 tbsp milk, then brush lightly over the buns.
16. Let the buns rest for 20 minutes while preheating your oven to 375°F.
17. Bake for 18-20 minutes until golden brown and puffed.
18. Cool on a wire rack for 5 minutes before serving.
Seriously, these buns are everything – the crust gives that satisfying crackle when you bite in, revealing a steaming, cheesy mushroom center that’s savory perfection. Try serving them alongside tomato soup for the ultimate cozy meal, or pack them cold for a picnic where they’ll be the undisputed star of the show.
Garlic Butter Herb Twist Buns
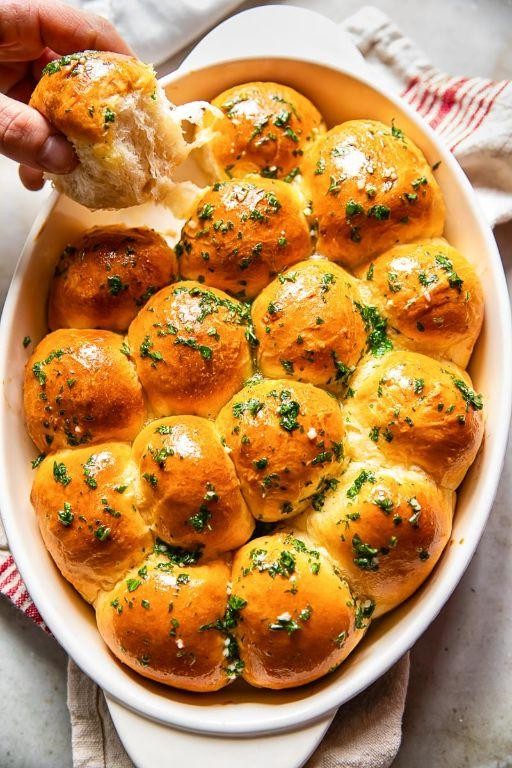
Hang onto your aprons, folks, because we’re about to transform your kitchen into a buttery, garlicky paradise that’ll make your taste buds do the cha-cha. These Garlic Butter Herb Twist Buns are the fluffy, fragrant answer to your carb-loaded prayers, guaranteed to disappear faster than your resolve to eat just one. Get ready to twist, bake, and devour your way to pure bliss.
12
rolls50
minutes20
minutesIngredients
– 3 ½ cups all-purpose flour
– 1 cup warm whole milk (110°F)
– ¼ cup granulated sugar
– 2 ¼ tsp active dry yeast
– 1 large egg
– 6 tbsp unsalted butter, softened
– 1 tsp salt
– 4 tbsp unsalted butter, melted
– 3 cloves garlic, minced
– 2 tbsp fresh parsley, finely chopped
– 1 tsp dried oregano
– ½ tsp salt
Instructions
1. Combine 1 cup warm whole milk (110°F), ¼ cup granulated sugar, and 2 ¼ tsp active dry yeast in a large bowl and let sit for 5 minutes until foamy.
2. Tip: Test milk temperature with a thermometer—too hot kills yeast, too cold slows rising.
3. Add 1 large egg, 6 tbsp softened unsalted butter, 1 tsp salt, and 3 ½ cups all-purpose flour to the yeast mixture.
4. Stir with a wooden spoon until a shaggy dough forms.
5. Knead dough on a floured surface for 8 minutes until smooth and elastic.
6. Place dough in a greased bowl, cover with a damp towel, and let rise in a warm spot for 1 hour until doubled in size.
7. Punch down dough and roll it out on a floured surface into a 12×16-inch rectangle.
8. Mix 4 tbsp melted unsalted butter, 3 cloves minced garlic, 2 tbsp chopped fresh parsley, 1 tsp dried oregano, and ½ tsp salt in a small bowl.
9. Tip: Use fresh garlic for maximum flavor punch—jarred just won’t cut it here.
10. Spread garlic-herb butter evenly over the dough rectangle, leaving a ½-inch border.
11. Fold dough in half lengthwise to enclose the filling, pressing edges to seal.
12. Cut folded dough crosswise into 12 equal strips with a sharp knife or pizza cutter.
13. Twist each strip 3–4 times and coil it into a spiral shape on a parchment-lined baking sheet.
14. Tip: Space buns 2 inches apart—they’ll puff up like proud little clouds.
15. Cover buns with a towel and let rise for 30 minutes until slightly puffed.
16. Preheat oven to 375°F while buns rise.
17. Bake buns for 18–20 minutes until golden brown and sound hollow when tapped.
18. Cool on a wire rack for 10 minutes before serving.
Glory awaits as you pull apart these golden spirals, revealing tender, feathery layers infused with garlicky herb butter. Each bite delivers a savory, aromatic punch that’s perfect for sopping up soup, accompanying pasta, or shamelessly devouring solo while hiding from your family.
Buffalo Chicken Ranch Buns
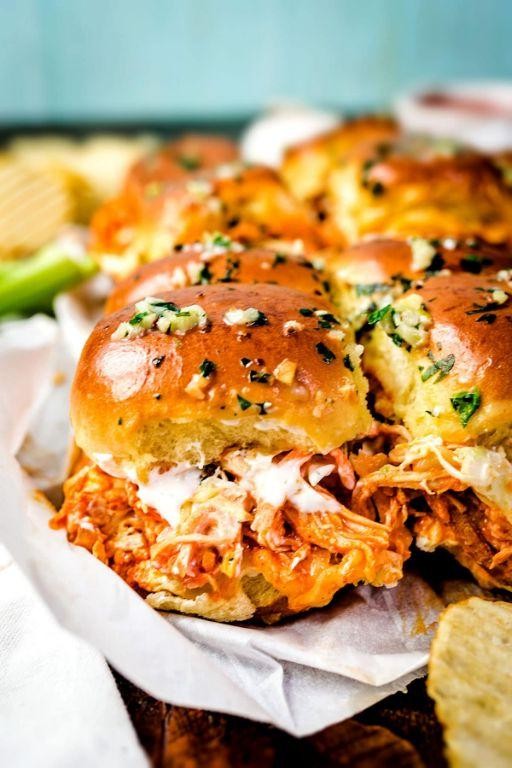
Fiercely flavorful and fabulously fuss-free, these Buffalo Chicken Ranch Buns are here to rescue your weeknight dinner routine from the doldrums. Imagine all the zesty, tangy goodness of buffalo wings cozying up with cool ranch in a soft, pull-apart bun—it’s a handheld hug for your taste buds that’s guaranteed to disappear faster than your resolve to eat just one.
16
sandwiches15
minutes15
minutesIngredients
– 2 cups shredded cooked chicken
– 1/2 cup buffalo sauce
– 1/4 cup ranch dressing
– 1 package (16 count) slider buns
– 1 cup shredded cheddar cheese
– 2 tbsp unsalted butter, melted
– 1/4 cup chopped celery
– 1/4 cup chopped carrots
Instructions
1. Preheat your oven to 350°F and line a baking sheet with parchment paper.
2. In a medium bowl, combine the shredded chicken, buffalo sauce, and ranch dressing until evenly coated.
3. Arrange the slider buns on the prepared baking sheet, keeping them connected if possible.
4. Spoon the chicken mixture evenly onto the bottom halves of the buns.
5. Sprinkle the shredded cheddar cheese over the chicken mixture.
6. Place the top halves of the buns over the filling.
7. Brush the tops of the buns with the melted butter for a golden finish.
8. Bake for 12–15 minutes, or until the cheese is fully melted and the buns are lightly toasted.
9. Remove from the oven and let cool for 2 minutes before separating the buns.
10. Top each bun with chopped celery and carrots for a fresh crunch.
Yum—these buns deliver a perfect combo of spicy, creamy, and crunchy in every bite. The soft buns soak up just enough sauce to stay moist without getting soggy, making them ideal for game day spreads or a fun twist on lunchbox sandwiches. Try serving them with extra ranch for dipping, or pile them high on a platter for a crowd-pleasing centerpiece that’s as easy to make as it is to devour.
Caramel Apple Pie Buns
Swooping in to save your autumn baking game with these Caramel Apple Pie Buns—imagine your favorite fall dessert decided to get cozy inside the fluffiest, most irresistible bun. These little pockets of joy combine the nostalgic comfort of apple pie with the gooey decadence of caramel, all wrapped up in a soft, golden-brown package that’s basically a hug for your taste buds. Trust me, your kitchen is about to smell like a crisp October day and pure happiness rolled into one.
8
buns40
minutes20
minutesIngredients
- 2 cups all-purpose flour
- 1/4 cup granulated sugar
- 1 packet active dry yeast
- 1/2 cup warm whole milk (110°F)
- 4 tbsp unsalted butter, melted
- 1 large egg
- 1/2 tsp salt
- 2 medium apples, peeled and diced
- 1/4 cup caramel sauce
- 1 tsp ground cinnamon
- 1 tbsp heavy cream
Instructions
- Combine 1/2 cup warm whole milk (110°F) with 1 packet active dry yeast in a large bowl, then let it sit for 5 minutes until foamy.
- Whisk in 1/4 cup granulated sugar, 4 tbsp melted unsalted butter, 1 large egg, and 1/2 tsp salt until fully incorporated.
- Gradually mix in 2 cups all-purpose flour with a wooden spoon until a shaggy dough forms, then knead on a floured surface for 8 minutes until smooth and elastic.
- Place the dough in a greased bowl, cover with a damp cloth, and let it rise in a warm spot for 1 hour or until doubled in size.
- While the dough rises, toss 2 peeled and diced apples with 1 tsp ground cinnamon in a bowl until evenly coated.
- Punch down the risen dough and divide it into 8 equal pieces, rolling each into a ball on a lightly floured surface.
- Flatten each dough ball into a 4-inch circle, then spoon 1 tbsp of the cinnamon-apple mixture and 1/2 tbsp caramel sauce into the center.
- Pinch the edges tightly to seal the filling inside, placing each bun seam-side down on a parchment-lined baking sheet.
- Cover the buns with the damp cloth again and let them rise for 30 minutes until puffy.
- Preheat your oven to 350°F and brush the risen buns with 1 tbsp heavy cream for a golden finish.
- Bake for 18–20 minutes until the tops are golden brown and the bottoms sound hollow when tapped.
- Drizzle the warm buns with extra caramel sauce and let them cool for 10 minutes before serving.
You’ll love the contrast between the soft, pillowy bun and the warm, spiced apple filling that oozes with caramel in every bite. Yes, they’re dangerously addictive served warm with a scoop of vanilla ice cream melting over the top, or simply enjoy them as a cozy breakfast treat that makes any morning feel like a celebration.
Teriyaki Salmon Bun Wraps
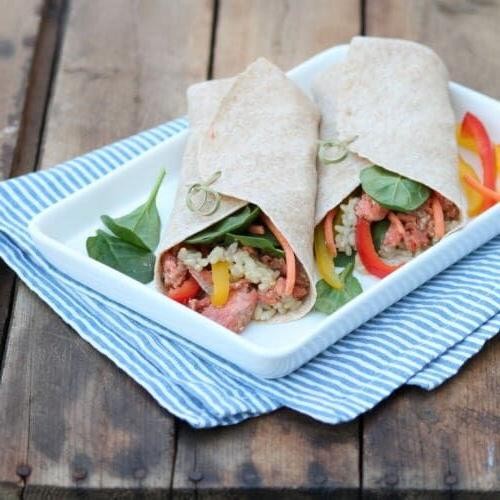
Let’s be real—most weeknight dinners are a sad desk salad of regret, but these Teriyaki Salmon Bun Wraps are here to rescue your taste buds from boredom. Imagine flaky, sweet-glazed salmon snuggled in a soft bun, creating a handheld masterpiece that’s basically a hug for your stomach. It’s the kind of meal that makes you feel like a culinary genius without needing a fancy degree or a kitchen the size of a studio apartment.
4
sandwiches15
minutes15
minutesIngredients
- 4 salmon fillets (6 oz each)
- 1/4 cup soy sauce
- 2 tbsp honey
- 1 tbsp rice vinegar
- 1 tsp grated ginger
- 2 cloves garlic, minced
- 1 tbsp olive oil
- 4 brioche buns
- 1 cup shredded cabbage
- 1/4 cup sliced green onions
- 1 tbsp sesame seeds
Instructions
- Preheat your oven to 400°F and line a baking sheet with parchment paper.
- Pat the salmon fillets dry with paper towels to ensure a crispier skin.
- Whisk together soy sauce, honey, rice vinegar, grated ginger, and minced garlic in a small bowl.
- Brush both sides of each salmon fillet generously with the teriyaki mixture.
- Heat olive oil in an oven-safe skillet over medium-high heat until shimmering.
- Sear salmon skin-side up for 2 minutes until a golden crust forms.
- Flip fillets and immediately transfer the skillet to the preheated oven.
- Bake for 8–10 minutes until the salmon flakes easily with a fork.
- Toast brioche buns in a dry pan over medium heat for 1–2 minutes per side until lightly golden.
- Place a salmon fillet on the bottom half of each toasted bun.
- Top with shredded cabbage, sliced green onions, and a sprinkle of sesame seeds.
- Drizzle with remaining teriyaki sauce from the bowl before serving.
Forget boring fish dinners—these wraps deliver a satisfying crunch from the toasted bun against the melt-in-your-mouth salmon, all soaked in that sticky-sweet teriyaki goodness. Serve them with extra napkins (trust me, it’s a messy joy) or pair with crispy sweet potato fries for the ultimate flavor fiesta.
Banana Nutella Breakfast Buns

Rise and shine, sleepyheads! If your morning routine feels more like a snooze-fest than a celebration, these Banana Nutella Breakfast Buns are about to become your new wake-up call. Imagine fluffy, swirled buns packed with gooey Nutella and sweet banana, basically giving your alarm clock a delicious reason to actually do its job. Let’s turn that kitchen into a bakery worthy of a standing ovation—or at least a second helping.
8
rolls30
minutes25
minutesIngredients
- 2 cups all-purpose flour
- 1/4 cup granulated sugar
- 1 packet active dry yeast
- 1/2 cup warm milk (110°F)
- 1 large egg
- 4 tbsp unsalted butter, melted
- 1/2 cup Nutella
- 1 ripe banana, mashed
- 1/2 cup powdered sugar
- 2 tbsp milk
Instructions
- Combine 2 cups all-purpose flour, 1/4 cup granulated sugar, and 1 packet active dry yeast in a large mixing bowl.
- Pour in 1/2 cup warm milk (110°F), 1 large egg, and 4 tbsp melted unsalted butter, then mix until a shaggy dough forms.
- Knead the dough on a floured surface for 8 minutes until smooth and elastic. (Tip: If the dough sticks to your hands, lightly flour them—no one wants a doughy mess!)
- Place the dough in a greased bowl, cover with a damp towel, and let rise in a warm spot for 1 hour until doubled in size.
- Roll the dough out on a floured surface into a 12×8-inch rectangle.
- Spread 1/2 cup Nutella evenly over the dough, leaving a 1-inch border around the edges.
- Spoon 1 mashed ripe banana over the Nutella layer, spreading it gently to avoid tearing the dough.
- Tightly roll the dough from the long side into a log, pinching the seam to seal.
- Slice the log into 8 equal pieces using a sharp knife. (Tip: For clean cuts, wipe the knife between slices—this keeps the swirls picture-perfect.)
- Arrange the slices in a greased 9-inch round baking pan, cover, and let rise for 30 minutes until puffy.
- Preheat the oven to 350°F and bake the buns for 20-25 minutes until golden brown. (Tip: Check for doneness by tapping the top—if it sounds hollow, they’re ready!)
- Whisk 1/2 cup powdered sugar with 2 tbsp milk to create a smooth glaze.
- Drizzle the glaze over the warm buns once they’ve cooled slightly.
Heavenly doesn’t even begin to cover it—these buns boast a soft, pillowy texture with swirls of melted Nutella and bursts of banana in every bite. Serve them warm with a drizzle of extra glaze for that “I-made-this-from-scratch” bragging rights, or pair with a cold glass of milk to balance the richness. Honestly, they might just become the reason you actually look forward to mornings.
Conclusion
Overall, these 26 bun recipes offer endless inspiration for your kitchen adventures! From sweet cinnamon rolls to savory sliders, there’s something for every taste and occasion. We hope you’ll try a few favorites, leave a comment sharing which ones you loved most, and pin this article to your Pinterest boards to save for future baking days. Happy cooking!


