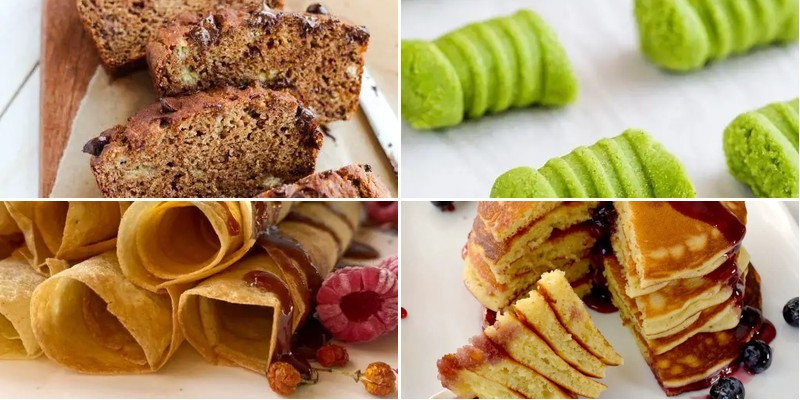
Now, let’s dive into the wonderful world of cassava flour! If you’re looking for gluten-free alternatives that don’t compromise on taste or texture, you’ve come to the right place. From fluffy pancakes to crispy pizza crusts, these 21 delicious recipes will transform your kitchen adventures. Get ready to discover how versatile and delightful cassava flour can be in your everyday cooking.
Cassava Flour Pancakes with Berries
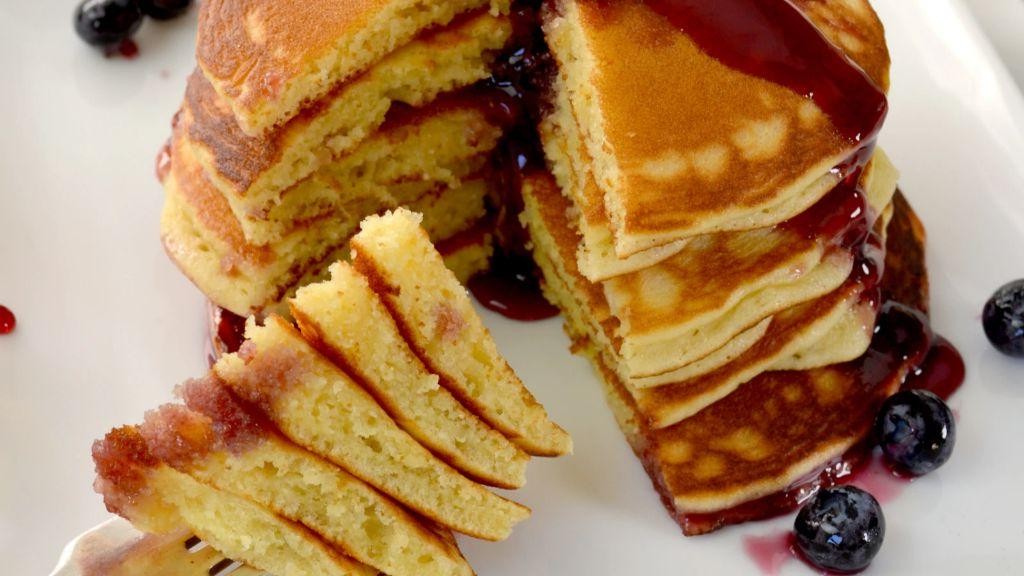
Every morning deserves a breakfast that doesn’t make your stomach stage a protest rally—enter these cassava flour pancakes that are basically edible sunshine with a berry sidekick. Seriously, these gluten-free fluff-stacks will have you questioning why you ever settled for sad, flat pancakes in the first place.
3
pancakes10
minutes16
minutesIngredients
– 1 cup cassava flour (scoop and level for accuracy)
– 2 tbsp coconut sugar (or maple syrup for liquid sweetener option)
– 1 tsp baking powder (fresh for maximum lift)
– 1/4 tsp salt (fine sea salt preferred)
– 1 cup unsweetened almond milk (or any plant-based milk)
– 1 large egg (room temperature blends smoother)
– 2 tbsp melted coconut oil (plus extra for greasing)
– 1 tsp vanilla extract (pure for best flavor)
– 1 cup mixed fresh berries (blueberries, raspberries, or sliced strawberries)
Instructions
1. Whisk cassava flour, coconut sugar, baking powder, and salt in a large bowl until no lumps remain.
2. Pour in almond milk, egg, melted coconut oil, and vanilla extract—mix until just combined (batter will be thick, don’t overmix!).
3. Heat a non-stick skillet over medium-low heat (325°F if using a griddle) and lightly grease with coconut oil.
4. Scoop 1/4 cup batter per pancake, spreading slightly with the back of the spoon—they won’t spread much on their own.
5. Immediately press 6-8 berries into each pancake surface before flipping (prevents berry juice explosions).
6. Cook for 2-3 minutes until edges look dry and bubbles form on top.
7. Flip carefully and cook another 2 minutes until golden brown—lower heat if browning too fast.
8. Transfer to a wire rack (avoids soggy bottoms) and repeat with remaining batter.
Yes, these emerge with crispy edges hugging a tender, cakey center that’s naturally sweet without the gluten-guilt. Drown them in maple syrup or stack them into a berry-loaded tower worthy of your fanciest brunch plate—they’re basically morning happiness you can chew.
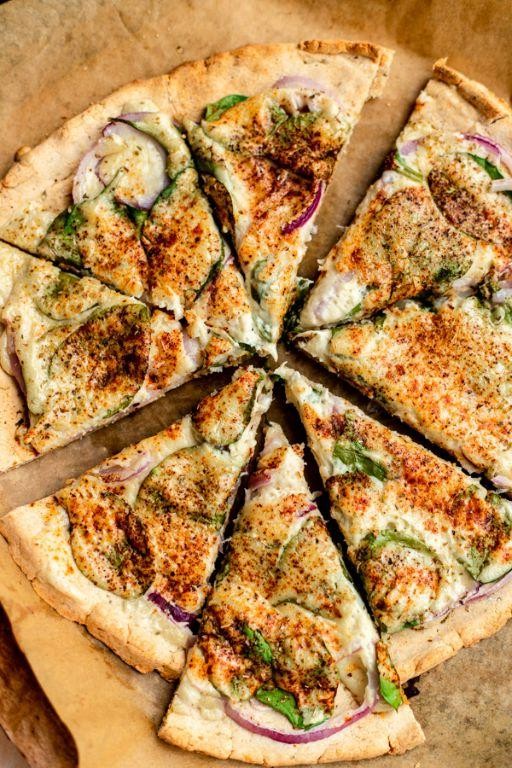
Gluten-Free Cassava Flour Pizza Crust
Miraculously, we’ve cracked the code to a gluten-free pizza crust that won’t leave you mourning your favorite Friday night tradition. This cassava flour version is so delightfully chewy and crisp, even your gluten-loving friends will be suspiciously asking for seconds. Say goodbye to cardboard imitations and hello to a crust that actually deserves your top-tier toppings.
1
pizza20
minutes20
minutesIngredients
– 2 cups cassava flour (scoop and level for accuracy)
– 1 tsp fine sea salt (or adjust to taste)
– 1 tbsp olive oil (or any neutral oil)
– 1 cup warm water (about 110°F—wrist-test warm)
– 1 tsp active dry yeast (check expiration date for best rise)
– 1 tsp honey (or maple syrup for vegan option)
Instructions
1. In a small bowl, combine 1 cup warm water (110°F), 1 tsp honey, and 1 tsp active dry yeast; let sit for 5–7 minutes until foamy.
2. Tip: If the yeast doesn’t bubble, it may be inactive—start fresh to avoid a dense crust.
3. In a large mixing bowl, whisk together 2 cups cassava flour and 1 tsp fine sea salt until no lumps remain.
4. Pour the yeast mixture and 1 tbsp olive oil into the dry ingredients; stir with a spatula until a shaggy dough forms.
5. Knead the dough on a lightly floured surface for 3–4 minutes until smooth and slightly elastic.
6. Tip: Cassava dough is less stretchy than wheat-based dough—don’t overwork it or it may crack.
7. Place the dough in a lightly oiled bowl, cover with a damp towel, and let rise in a warm spot for 45–60 minutes until doubled in size.
8. Preheat oven to 475°F with a pizza stone or baking sheet inside for at least 30 minutes.
9. Punch down the dough and roll it out on parchment paper to a 12-inch circle, about ¼-inch thick.
10. Tip: If the dough tears, patch it with wet fingers—it’s forgiving and won’t affect the final bake.
11. Par-bake the crust on the preheated stone/sheet for 6–8 minutes until the edges are lightly golden.
12. Remove from oven, add toppings, and bake for another 8–10 minutes until the crust is crisp and golden brown.
13. Let cool for 2–3 minutes before slicing to prevent soggy bottoms.
That crust boasts a satisfying chew with crispy edges, like a gluten-free tribute to your favorite pizzeria. Try it loaded with spicy pepperoni and a drizzle of hot honey, or keep it simple with fresh basil and mozzarella for a cozy night in.
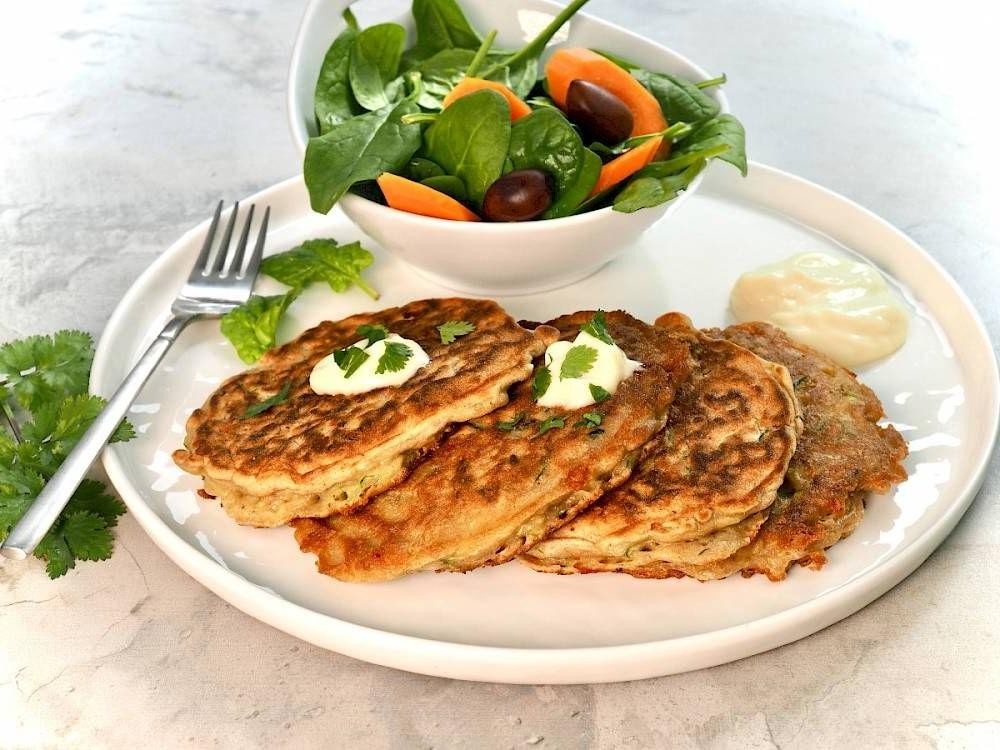
Savory Cassava Flour Fritters
Venture beyond your usual flour routine with these delightfully crispy cassava fritters that’ll make your taste buds do a happy dance—because who says gluten-free can’t be ridiculously fun? These golden pucks of savory goodness are about to become your new favorite snack obsession, perfect for when you want something crunchy without the carb coma. Get ready to impress your friends (and yourself) with these surprisingly simple yet utterly addictive bites!
2
portions15
minutes20
minutesIngredients
– 1 cup cassava flour (sifted to avoid lumps)
– 2 large eggs (room temperature for better mixing)
– 1/2 cup grated Parmesan cheese (the good stuff, not the green can)
– 1/4 cup finely chopped fresh parsley (or cilantro if you’re feeling adventurous)
– 1 tsp garlic powder (because fresh garlic can make the batter too wet)
– 1/2 tsp baking powder (for that perfect puff)
– 1/2 cup whole milk (or almond milk for dairy-free)
– 1/4 cup avocado oil (or any neutral high-heat oil)
– 1/2 tsp salt (adjust if your cheese is very salty)
– Avocado oil for frying (enough to reach 1-inch depth in your pan)
Instructions
1. In a large mixing bowl, whisk together 1 cup cassava flour, 1/2 tsp baking powder, 1 tsp garlic powder, and 1/2 tsp salt until fully combined.
2. Crack 2 large eggs into the dry ingredients and pour in 1/2 cup whole milk, then mix until just combined—don’t overmix or your fritters will be tough.
3. Fold in 1/2 cup grated Parmesan cheese and 1/4 cup chopped fresh parsley until evenly distributed throughout the batter.
4. Let the batter rest for 10 minutes—this allows the cassava flour to fully hydrate and prevents grittiness.
5. Pour avocado oil into a heavy-bottomed skillet until it reaches 1-inch depth and heat over medium-high heat to 350°F (use a thermometer for accuracy).
6. Drop tablespoon-sized portions of batter into the hot oil, being careful not to overcrowd the pan—leave about 1 inch between fritters.
7. Fry for 2-3 minutes until the bottoms are golden brown and edges look set, then flip using a slotted spoon.
8. Cook for another 2-3 minutes until both sides are evenly golden brown and crispy.
9. Remove fritters with a slotted spoon and drain on a paper towel-lined plate immediately—this keeps them crispy.
10. Repeat with remaining batter, checking oil temperature returns to 350°F between batches.
Golden and glorious straight from the fryer, these fritters boast a satisfying crunch that gives way to a tender, slightly chewy interior with savory Parmesan notes shining through. Serve them piled high with a zesty dipping sauce or crumbled over salads for instant texture upgrade—they’re so good, you might just hide the last few from your family.
Cassava Flour Cookies with Chocolate Chips
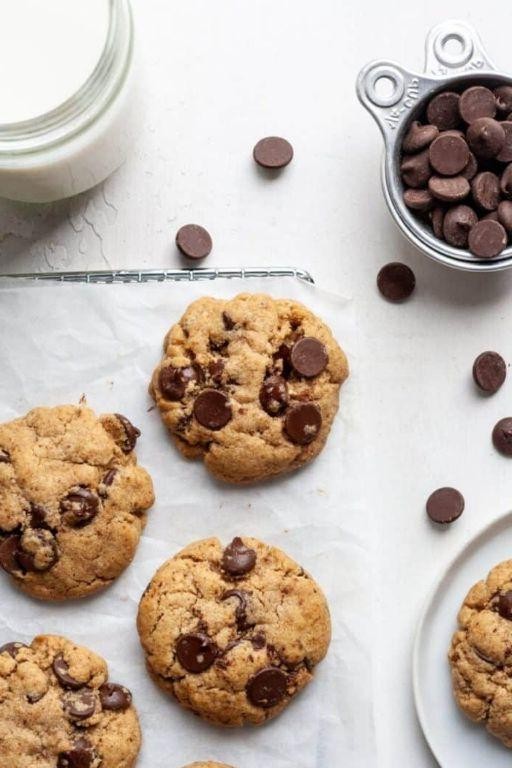
Oh, the gluten-free cookie game just got a major upgrade, folks! These cassava flour chocolate chip cookies are about to become your new baking obsession—they’re chewy, subtly sweet, and packed with melty chocolate pockets that’ll make you forget they’re grain-free. Seriously, even your gluten-loving friends will be begging for the recipe.
24
cookies15
minutes12
minutesIngredients
– 2 cups cassava flour (scoop and level for accuracy)
– 1 cup coconut sugar (or light brown sugar for a deeper flavor)
– ½ cup softened unsalted butter (or coconut oil for dairy-free)
– 2 large eggs, room temperature
– 1 tsp vanilla extract (pure adds the best flavor)
– 1 tsp baking soda
– ½ tsp fine sea salt
– 1 cup semi-sweet chocolate chips (dark or milk chocolate work too)
Instructions
1. Preheat your oven to 350°F and line two baking sheets with parchment paper.
2. In a medium bowl, whisk together the cassava flour, baking soda, and sea salt until no lumps remain.
3. In a separate large bowl, use an electric mixer on medium speed to cream the softened butter and coconut sugar for 2–3 minutes until light and fluffy.
4. Beat in the eggs one at a time, mixing just until incorporated after each addition.
5. Stir in the vanilla extract with a spatula until evenly combined.
6. Gradually add the dry flour mixture to the wet ingredients, mixing on low speed until a soft dough forms.
7. Fold in the chocolate chips by hand until they’re distributed throughout the dough.
8. Scoop 1½-tablespoon portions of dough onto the prepared baking sheets, spacing them 2 inches apart.
9. Bake for 10–12 minutes, or until the edges are lightly golden but the centers still look slightly soft.
10. Let the cookies cool on the baking sheet for 5 minutes before transferring them to a wire rack.
Not only do these cookies boast a tender, cake-like crumb with just the right amount of chew, but their rich chocolatey bursts make them perfect for dunking in almond milk or crumbling over dairy-free ice cream. Trust us, they’re the gluten-free treat you’ll want to whip up on repeat—no one will guess they’re made with cassava flour!
Cassava Flour Tortillas for Tacos
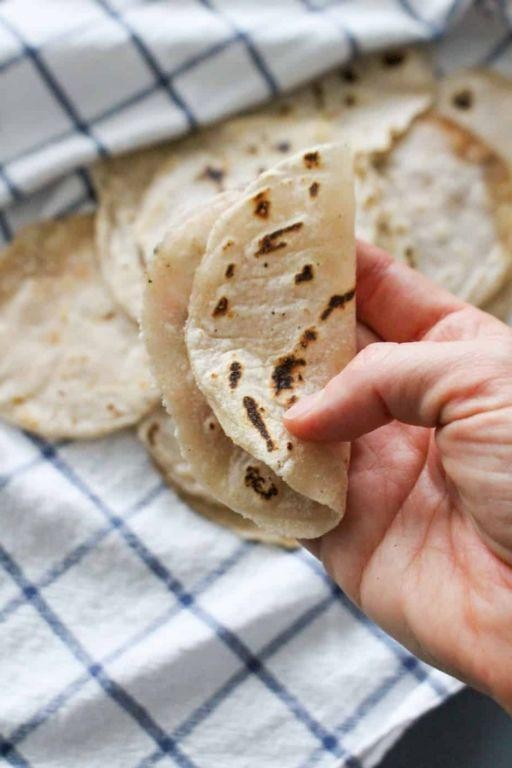
Nope, you haven’t been imagining that gluten-free tortilla struggle—those crumbly, cardboard-like discs masquerading as taco vehicles. But these cassava flour tortillas are about to become your taco Tuesday superheroes, flexing their bendy, pliable muscles without any of the usual grain-free drama. Get ready to fold, wrap, and devour without a single tear (except maybe happy ones).
8
portions15
minutes12
minutesIngredients
– 1 ½ cups cassava flour (scoop and level for accuracy)
– ½ tsp fine sea salt (or adjust to your savory preference)
– ⅓ cup avocado oil (or any neutral, high-heat oil like refined coconut)
– ¾ cup hot water (just off the boil, around 200°F)
Instructions
1. Whisk together 1 ½ cups cassava flour and ½ tsp fine sea salt in a medium bowl until fully combined.
2. Pour ⅓ cup avocado oil into the dry ingredients and mix with a fork until the mixture resembles coarse crumbs.
3. Gradually add ¾ cup hot water while stirring continuously, then switch to kneading by hand for 2 minutes until a smooth, pliable dough forms. Tip: If the dough feels sticky, dust with a teaspoon of extra cassava flour; if too dry, add water 1 tbsp at a time.
4. Divide the dough into 8 equal portions and roll each into a smooth ball between your palms.
5. Place one dough ball between two sheets of parchment paper and press with a flat plate to slightly flatten.
6. Roll out the dough with a rolling pin into a thin, 6-inch circle, applying even pressure. Tip: Rotate the tortilla 90 degrees after each roll to maintain a round shape.
7. Heat a dry cast-iron skillet over medium-high heat until a water droplet sizzles immediately (about 375°F).
8. Carefully peel the top parchment off one tortilla and invert it into the hot skillet, then remove the bottom parchment.
9. Cook for 45-60 seconds until the edges lift slightly and light brown spots appear on the bottom.
10. Flip the tortilla with a spatula and cook for another 30-45 seconds until puffed in spots and both sides have golden speckles. Tip: Keep cooked tortillas warm by stacking them in a clean kitchen towel—they’ll steam slightly and stay flexible.
11. Repeat with remaining dough balls, reusing parchment sheets.
Golden, speckled, and gloriously sturdy, these tortillas boast a subtly nutty flavor and chewy-yet-tender texture that stands up to saucy fillings without getting soggy. Go wild stacking them with spicy shrimp, crisp cabbage slaw, or even breakfast eggs for a taco transformation that’ll make every day feel like fiesta o’clock.
Crispy Cassava Flour Chicken Tenders
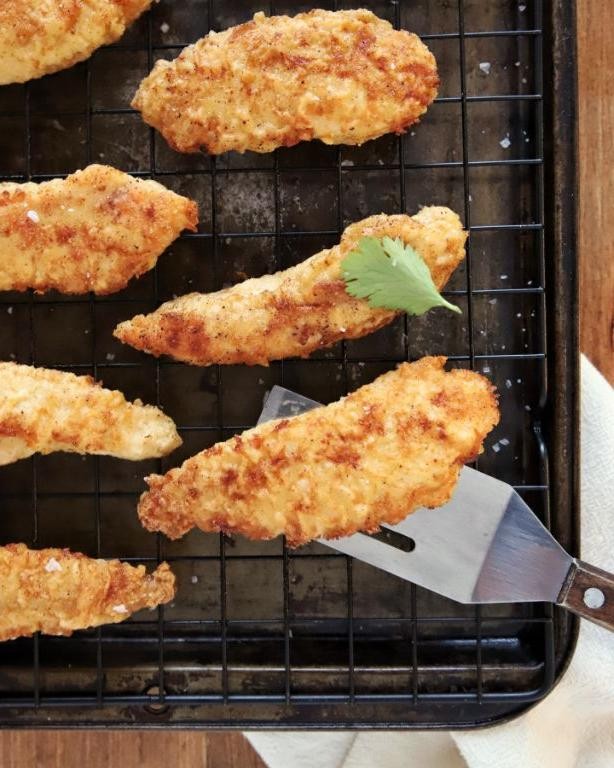
Gather ’round, fellow crispy-cravers! If you’ve ever dreamed of chicken tenders so delightfully crunchy they could solve world peace (or at least your Tuesday blues), you’re in for a treat. These cassava flour-coated wonders are about to become your new obsession—gluten-free, grain-free, and guaranteed to disappear faster than your resolve to eat just one.
2
portions15
minutes24
minutesIngredients
– 1 lb chicken tenders (or chicken breasts cut into strips)
– 1 cup cassava flour (for that perfect crispy coating)
– 2 large eggs (beaten until frothy)
– 1 cup avocado oil (or any high-heat neutral oil)
– 1 tsp garlic powder (for savory depth)
– 1 tsp paprika (adds a smoky kick)
– 1/2 tsp salt (adjust to taste)
– 1/4 tsp black pepper (freshly ground if possible)
Instructions
1. Pat the chicken tenders completely dry with paper towels to ensure maximum crispiness.
2. In a shallow bowl, whisk together cassava flour, garlic powder, paprika, salt, and black pepper until fully combined.
3. Crack the eggs into a separate shallow bowl and beat them vigorously with a fork until uniform and slightly frothy.
4. Dip each chicken tender first into the beaten eggs, coating all sides evenly.
5. Immediately transfer the egg-coated tender to the cassava flour mixture, pressing firmly to adhere a thick, even layer.
6. Place the breaded tenders on a wire rack for 5 minutes to help the coating set—this prevents falling-off breading during frying.
7. Pour avocado oil into a large skillet until it reaches 1/2 inch depth and heat over medium-high to 375°F (use a thermometer for accuracy).
8. Carefully place 4-5 tenders in the hot oil using tongs, making sure not to overcrowd the pan.
9. Fry for 3-4 minutes until the bottom is golden brown and crispy, then flip each tender.
10. Continue frying for another 3-4 minutes until the internal temperature reaches 165°F and the coating is deeply golden.
11. Transfer finished tenders to a paper towel-lined plate to drain excess oil.
12. Repeat the frying process with remaining tenders, checking oil temperature returns to 375°F between batches.
Yes, these tenders deliver that satisfying crackle with every bite! The cassava flour creates an unexpectedly light yet sturdy crust that shatters beautifully, while the juicy chicken inside stays remarkably tender. Try stacking them high with sweet potato fries or dunking in spicy honey mustard for a snack that’ll have everyone fighting over the last piece.
Cassava Flour Banana Bread
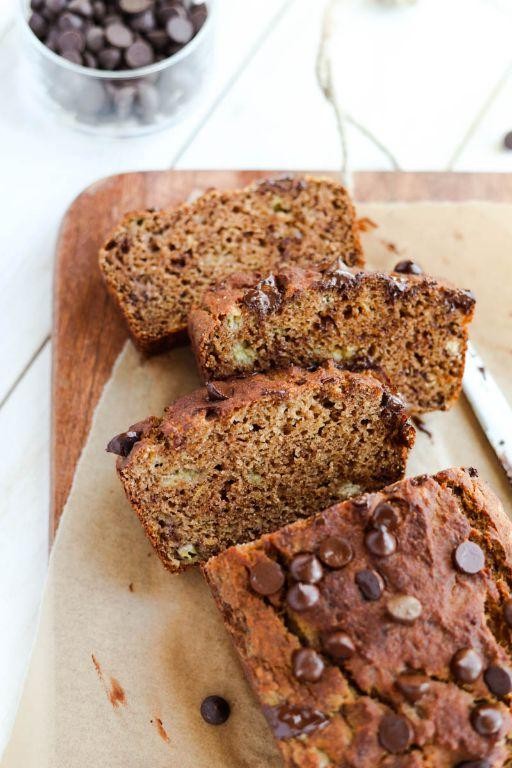
Finally, a banana bread that won’t leave you feeling like you swallowed a brick! This cassava flour version is the gluten-free, grain-free miracle your overripe bananas have been dreaming of—fluffy, moist, and packed with personality, just like your quirky aunt’s life advice.
1
loaf15
minutes60
minutesIngredients
– 3 medium overripe bananas, mashed (the spottier, the sweeter!)
– 2 large eggs, at room temperature (for better mixing)
– 1/3 cup melted coconut oil (or avocado oil for a neutral flavor)
– 1/2 cup pure maple syrup (adjust for sweetness preference)
– 1 tsp vanilla extract (the good stuff, not the imitation!)
– 2 cups cassava flour (scoop and level to avoid dense bread)
– 1 tsp baking soda (not baking powder—this isn’t a chemistry mix-up!)
– 1/2 tsp sea salt (balances the sweetness)
– 1/2 cup chopped walnuts (optional, for crunch lovers)
Instructions
1. Preheat your oven to 350°F and grease a 9×5-inch loaf pan with coconut oil or line it with parchment paper.
2. In a large bowl, mash the bananas with a fork until smooth, leaving a few small lumps for texture.
3. Crack the eggs into the banana mixture and whisk vigorously until fully combined and slightly frothy.
4. Pour in the melted coconut oil, maple syrup, and vanilla extract, then stir until the mixture is uniform and glossy.
5. In a separate bowl, whisk together the cassava flour, baking soda, and sea salt to ensure even distribution.
6. Gradually add the dry ingredients to the wet mixture, folding gently with a spatula until just combined—overmixing leads to toughness!
7. Fold in the chopped walnuts, if using, until evenly dispersed throughout the batter.
8. Pour the batter into the prepared loaf pan and smooth the top with the spatula.
9. Bake for 55–60 minutes, or until a toothpick inserted into the center comes out clean with no wet batter.
10. Let the bread cool in the pan for 15 minutes, then transfer it to a wire rack to cool completely—this prevents sogginess!
Heavenly when sliced warm, this bread boasts a tender crumb and subtle sweetness that pairs perfectly with a slather of almond butter or a drizzle of honey. Toast a slice for breakfast, or crumble it over yogurt for a decadent twist—your bananas will thank you for their glorious makeover.
Cassava Flour Crepes with Sweet Fillings
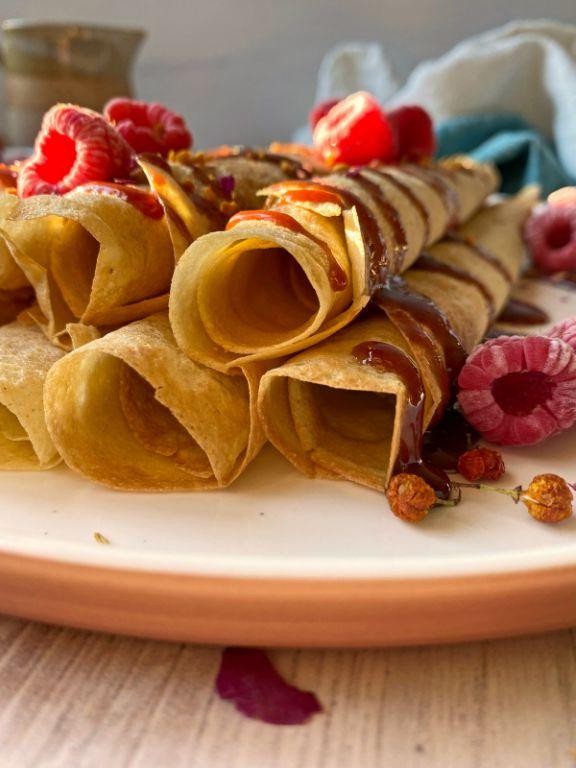
Whoever said gluten-free couldn’t be glorious clearly never tried flipping these cassava flour crepes—they’re so delightfully thin and flexible, you’ll forget all about wheat-based versions. Welcome to your new favorite sweet treat vehicle, ready to cradle everything from fruit to chocolate with effortless elegance. Let’s turn your kitchen into a creperie worthy of Parisian dreams!
8
crepes15
minutes20
minutesIngredients
– 1 cup cassava flour (sifted to avoid lumps)
– 2 large eggs (room temperature for better blending)
– 1 ¼ cups whole milk (or almond milk for dairy-free)
– 2 tbsp melted unsalted butter (or coconut oil for vegan option)
– 1 tbsp granulated sugar (adjust to desired sweetness)
– ¼ tsp salt (enhances flavor balance)
– ½ tsp vanilla extract (pure recommended for best aroma)
– Cooking spray or extra butter for greasing
Instructions
1. Whisk cassava flour, sugar, and salt in a medium bowl until fully combined.
2. Crack eggs into a separate bowl and beat lightly with a fork for 30 seconds.
3. Pour milk, melted butter, and vanilla into the eggs, whisking continuously.
4. Gradually add wet ingredients to dry ingredients, stirring until no lumps remain—let batter rest 10 minutes to hydrate flour (prevents tearing).
5. Heat a nonstick skillet over medium heat (350°F surface temperature) and lightly coat with cooking spray.
6. Ladle ¼ cup batter into the center of the skillet, immediately tilting to spread into a 7-inch circle.
7. Cook for 90 seconds until edges lift easily and surface appears matte.
8. Slide a thin spatula underneath and flip crepe in one confident motion—cook 60 seconds until golden spots form.
9. Transfer to a plate and repeat with remaining batter, stacking crepes with parchment between layers (avoids sticking).
Yield: These crepes boast a tender, slightly chewy texture that holds fillings without soggy surrender. Drizzle with honey and fresh berries for a sunrise-worthy breakfast, or go decadent with Nutella and sliced bananas for a dessert that’ll have you doing a happy dance.
Cassava Flour Flatbreads for Dipping
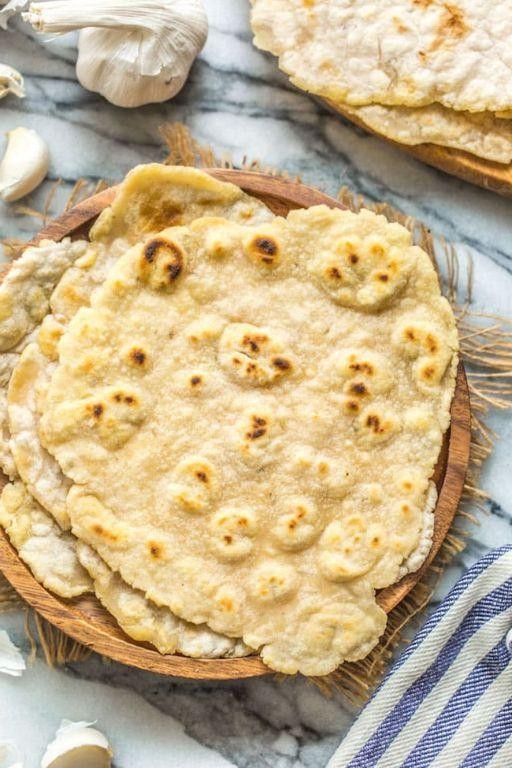
Wondering what to do with that bag of cassava flour staring at you from the pantry? These flatbreads are your gluten-free ticket to dip-worthy glory—soft, pliable, and ready to scoop up everything from hummus to spicy salsa without crumbling like your last attempt at small talk.
2
portions10
minutes10
minutesIngredients
– 1 cup cassava flour (scoop and level for accuracy)
– 1/2 tsp sea salt (adjust to taste)
– 1/2 cup warm water (about 110°F—wrist-test warm)
– 2 tbsp olive oil (or any neutral oil)
– 1 tbsp chopped fresh parsley (optional, for a herby kick)
Instructions
1. In a medium bowl, whisk together cassava flour and sea salt until fully combined.
2. Pour in warm water and olive oil, then mix with a fork until a shaggy dough forms.
3. Knead the dough by hand on a lightly floured surface for 2–3 minutes until smooth and no longer sticky. *Tip: If the dough feels dry, add water 1 tsp at a time.*
4. Divide the dough into 4 equal portions and roll each into a ball.
5. Place one ball between two sheets of parchment paper and roll into a 1/8-inch-thick circle. *Tip: Rotate the rolling pin for an even shape.*
6. Heat a non-stick skillet over medium heat (350°F if using a thermometer).
7. Carefully peel the parchment from one flatbread and cook for 90 seconds, or until bubbles form and the edges lift easily.
8. Flip the flatbread and cook for another 60 seconds until golden spots appear. *Tip: Press gently with a spatula to encourage puffing.*
9. Repeat with remaining dough, stacking cooked flatbreads under a clean towel to keep warm.
Zesty and slightly chewy, these flatbreads have a neutral canvas vibe that lets your dips shine. Tear them into rustic strips for group sharing, or use them as a sturdy base for open-faced veggie toppings—either way, they won’t last long.
Fluffy Cassava Flour Waffles
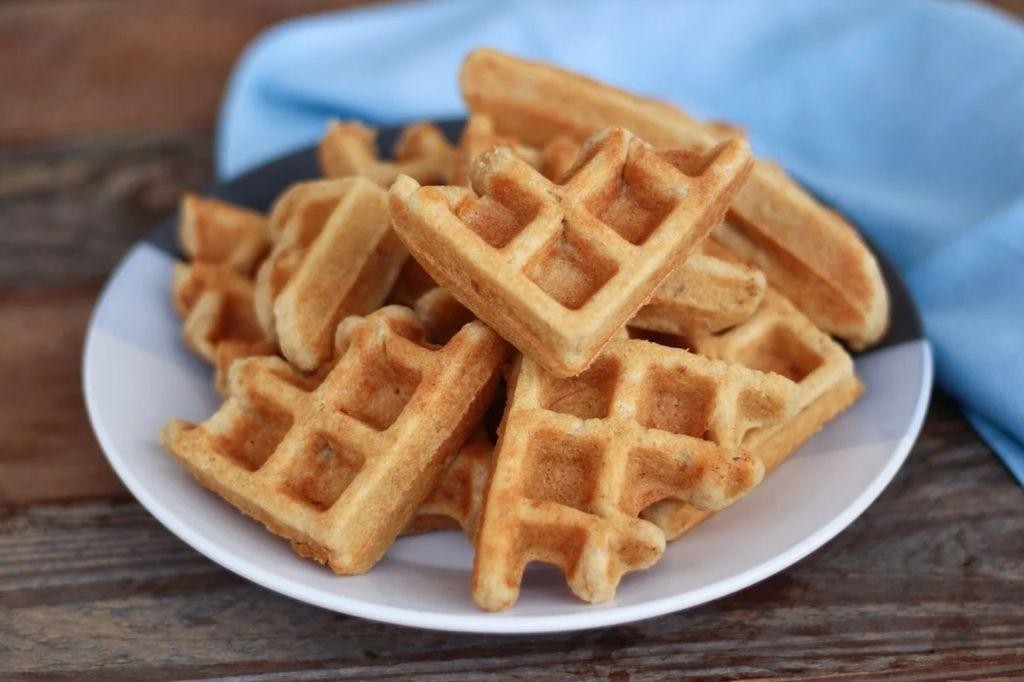
Zesty and utterly irresistible, these cassava flour waffles are about to become your breakfast BFF—they’re so fluffy, you’ll wonder if you’ve been cheating on pancakes all these years. With a gluten-free twist that doesn’t skimp on texture, they’re the golden ticket to a morning that feels like a cozy hug. Get ready to flip, stack, and devour your way to waffle nirvana!
4
waffles10
minutes20
minutesIngredients
– 1 ½ cups cassava flour (sift if lumpy for smoother batter)
– 2 tsp baking powder (check expiration for maximum fluff)
– ¼ tsp salt (or skip if using salted butter)
– 2 large eggs (room temperature for better blending)
– 1 ¼ cups whole milk (or dairy-free alternative like almond milk)
– ¼ cup melted butter (or coconut oil for a tropical twist)
– 2 tbsp maple syrup (adjust for sweetness preference)
– 1 tsp vanilla extract (pure for best flavor)
– Cooking spray (or extra butter for greasing)
Instructions
1. Preheat your waffle iron to 375°F, spraying both plates lightly with cooking spray to prevent sticking.
2. In a large bowl, whisk together the cassava flour, baking powder, and salt until no clumps remain.
3. Crack the eggs into a separate medium bowl, then add the whole milk, melted butter, maple syrup, and vanilla extract.
4. Whisk the wet ingredients vigorously for 30 seconds until fully combined and slightly frothy.
5. Pour the wet mixture into the dry ingredients, stirring gently with a spatula until just incorporated—don’t overmix to avoid tough waffles.
6. Let the batter rest for 5 minutes to allow the cassava flour to hydrate and thicken slightly.
7. Scoop ½ cup of batter onto the center of the preheated waffle iron, spreading it lightly with the back of a spoon.
8. Close the lid and cook for 4–5 minutes, or until steam stops rising and the waffle is deep golden brown.
9. Use tongs to carefully lift the waffle out, repeating with remaining batter and respraying iron as needed.
10. Serve immediately for the crispiest edges, or keep warm in a 200°F oven for up to 10 minutes.
Heavenly and crisp on the outside with a tender, airy crumb, these waffles boast a subtly sweet flavor that pairs perfectly with fresh berries or a drizzle of extra maple syrup. For a fun twist, crumble cooked bacon into the batter before cooking, or top with whipped coconut cream and toasted nuts for a brunch-worthy upgrade.
Cassava Flour Brownies with Nuts
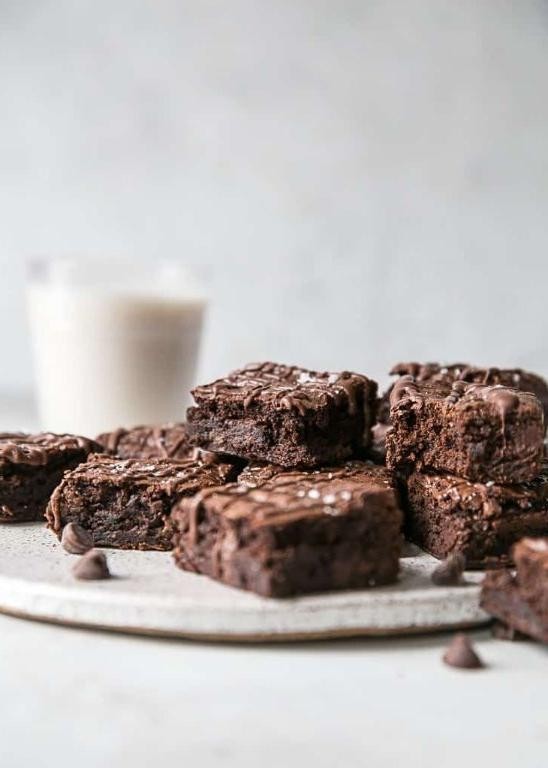
Jazzed about brownies but tired of the same old flour routine? Meet your new gluten-free best friend that’s about to rock your dessert world—cassava flour brownies loaded with crunchy nuts. Just when you thought brownies couldn’t get any more irresistible, we’re tossing in a nutty twist that’ll have you sneaking seconds (and thirds, no judgment!).
9
portions15
minutes25
minutesIngredients
– 1 cup cassava flour (sifted for fluffiness, or sub with almond flour for nuttier vibes)
– 3/4 cup unsalted butter, melted (or coconut oil for dairy-free delight)
– 1 cup granulated sugar (adjust to your sweet tooth’s demands)
– 2 large eggs, room temp (for smoother mixing, or flax eggs to go vegan)
– 1/2 cup cocoa powder, unsweetened (the darker, the better!)
– 1/2 cup chopped walnuts (or pecans for a buttery swap)
– 1 tsp vanilla extract (pure stuff, not the imitation kind)
– 1/2 tsp baking powder (for that lift-off rise)
– 1/4 tsp salt (to balance the sweetness, sea salt works wonders)
Instructions
1. Preheat your oven to 350°F and grease an 8×8-inch baking pan with butter or oil to prevent sticking.
2. In a large bowl, whisk together the melted butter and sugar until smooth and slightly glossy, about 1-2 minutes.
3. Crack in the eggs one at a time, whisking vigorously after each addition until fully incorporated and the mixture lightens in color.
4. Stir in the vanilla extract for that warm, aromatic kick—don’t skip this flavor booster!
5. Sift the cassava flour, cocoa powder, baking powder, and salt directly into the wet ingredients to avoid lumps.
6. Gently fold the dry ingredients into the wet mix using a spatula until just combined; overmixing can make brownies dense, so stop when no streaks remain.
7. Fold in the chopped walnuts evenly, reserving a handful to sprinkle on top for extra crunch.
8. Pour the batter into the prepared pan, spreading it evenly with the spatula and tapping the pan on the counter to release air bubbles.
9. Bake for 20-25 minutes, or until a toothpick inserted into the center comes out with a few moist crumbs (not wet batter)—this ensures fudgy perfection.
10. Let the brownies cool completely in the pan on a wire rack for at least 30 minutes before slicing; patience here prevents crumbly chaos!
Gloriously fudgy with a crackly top, these brownies boast a rich chocolate depth that’s perfectly balanced by the nutty crunch. Serve them warm with a scoop of vanilla ice cream for a decadent twist, or crumble them over yogurt for a breakfast-worthy treat—because who says brownies are just for dessert?
Cassava Flour Muffins with Blueberries
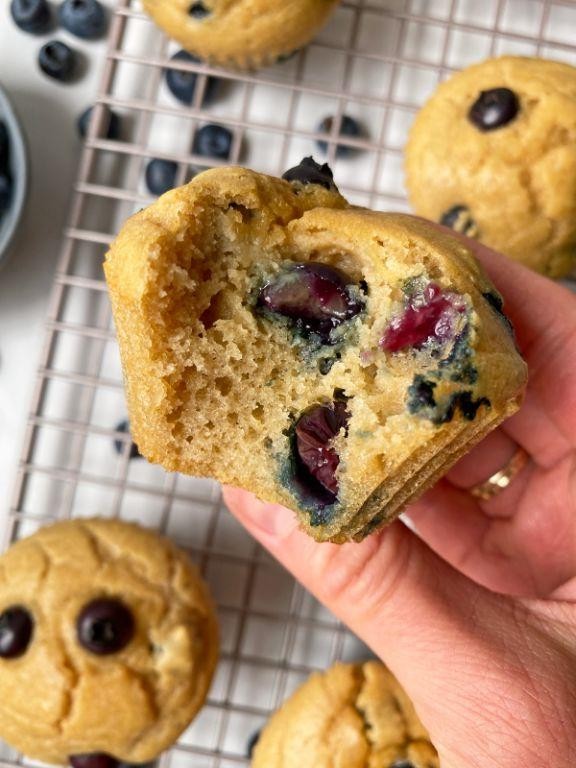
Sick of gluten-free baked goods that taste like cardboard? These cassava flour muffins are here to save your snack game with bursts of juicy blueberries in every single bite—no sad, dry muffins allowed!
12
muffins15
minutes22
minutesIngredients
– 2 cups cassava flour (scoop and level for accuracy)
– 1/2 cup coconut sugar (or maple sugar for similar flavor)
– 1/4 cup melted coconut oil (or any neutral oil like avocado)
– 2 large eggs, room temperature (for better mixing)
– 1 cup unsweetened almond milk (or any milk you prefer)
– 1 tsp baking powder (check it’s fresh for good rise)
– 1/2 tsp vanilla extract (pure for best flavor)
– 1/4 tsp salt (fine sea salt works well)
– 1 cup fresh blueberries (frozen work too—don’t thaw)
Instructions
1. Preheat your oven to 375°F and line a 12-cup muffin tin with paper liners or grease well.
2. In a large bowl, whisk together the cassava flour, coconut sugar, baking powder, and salt until no lumps remain.
3. In a separate medium bowl, whisk the eggs vigorously for 30 seconds until frothy.
4. Pour the melted coconut oil, almond milk, and vanilla extract into the eggs, and whisk until fully combined.
5. Tip: Pour the wet ingredients into the dry ingredients and stir gently—just until the flour disappears; overmixing makes muffins dense.
6. Gently fold in the blueberries with a spatula, being careful not to crush them.
7. Divide the batter evenly among the 12 muffin cups, filling each about 3/4 full.
8. Tip: For taller muffin tops, let the batter rest in the tin for 5 minutes before baking.
9. Bake at 375°F for 18–22 minutes, or until the tops are golden and a toothpick inserted comes out clean (avoid blueberry spots).
10. Tip: Cool muffins in the pan for 5 minutes, then transfer to a wire rack to prevent soggy bottoms.
11. Let cool completely before serving for the best texture.Yep, these muffins are tender, lightly sweet, and packed with berry goodness—perfect warm with a dab of coconut butter or crumbled over yogurt for a breakfast upgrade!
Vegan Cassava Flour Bread
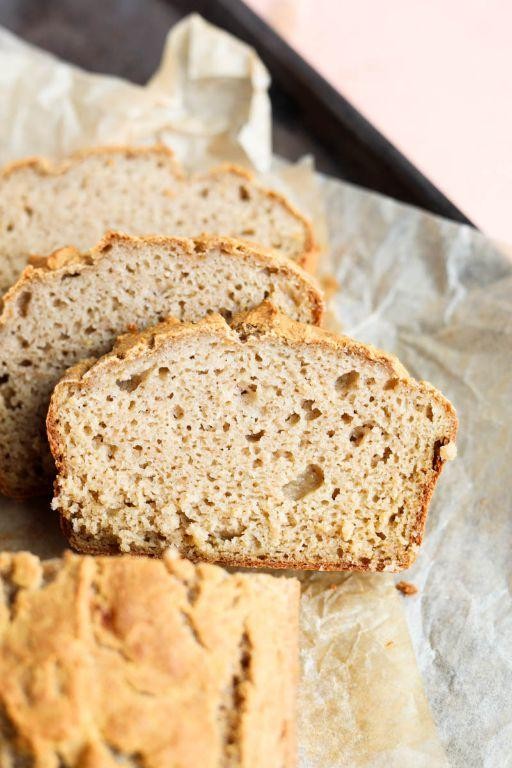
Yikes, who said gluten-free vegan bread has to taste like cardboard? This cassava flour loaf is about to become your new kitchen BFF—fluffy, versatile, and surprisingly easy to whip up without any weird ingredients.
1
loaf10
minutes45
minutesIngredients
– 2 cups cassava flour (scoop and level for accuracy)
– 1/4 cup coconut oil, melted (or avocado oil for neutral flavor)
– 1 tbsp apple cider vinegar (helps with rise)
– 1 tsp baking soda (check it’s fresh for best lift)
– 1/2 tsp sea salt (fine grain dissolves evenly)
– 1 cup warm water (about 110°F—warm to the touch)
Instructions
1. Preheat your oven to 350°F and lightly grease a standard 9×5-inch loaf pan with coconut oil.
2. In a large mixing bowl, whisk together 2 cups cassava flour, 1 tsp baking soda, and 1/2 tsp sea salt until no clumps remain.
3. Pour in 1/4 cup melted coconut oil, 1 tbsp apple cider vinegar, and 1 cup warm water all at once.
4. Stir vigorously with a spatula for about 60 seconds—the batter will thicken slightly but stay scoopable.
5. Scrape the batter into the prepared loaf pan and smooth the top with the spatula.
6. Bake at 350°F for 45 minutes, or until the top is golden and a toothpick inserted in the center comes out clean.
7. Let the bread cool in the pan for 10 minutes, then transfer to a wire rack to cool completely before slicing.
Knead-free and fuss-free, this bread boasts a soft, slightly chewy crumb with a mild, nutty flavor. Toast it up for avocado smash or use it as a sturdy base for epic vegan sandwiches—it won’t crumble under pressure!
Cassava Flour Gnocchi with Pesto
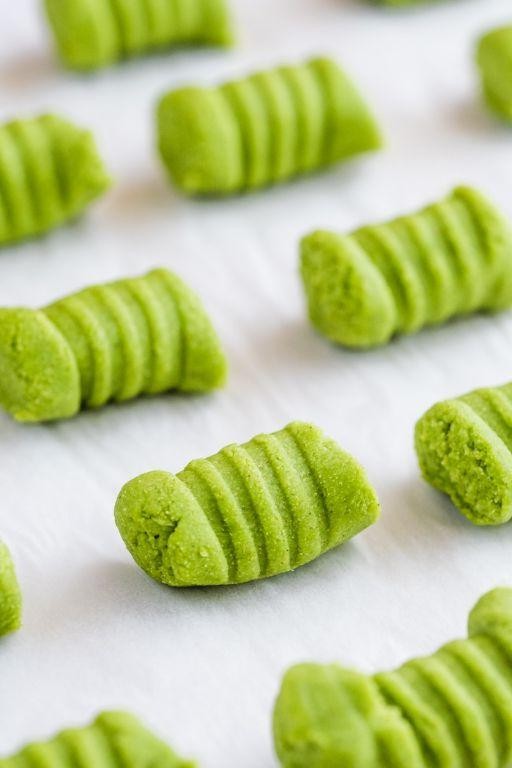
Eureka! We’ve cracked the code to pillowy-soft gnocchi that won’t leave you feeling like a overstuffed pasta pillow. This cassava flour version dances gracefully between gluten-free wizardry and downright deliciousness, proving that sometimes the best things in life are indeed little doughy clouds. Get ready to impress your taste buds (and maybe your mother-in-law) with this pesto-topped triumph.
2
portions30
minutes65
minutesIngredients
– 2 cups cassava flour (plus extra for dusting)
– 1 large russet potato, baked and peeled (about 1.5 cups mashed)
– 1 large egg, lightly beaten
– 1 tsp salt (adjust to preference)
– 2 tbsp olive oil (or avocado oil)
– 1 cup fresh basil leaves, packed
– 1/4 cup pine nuts (toasted)
– 1/2 cup grated Parmesan cheese
– 2 cloves garlic, peeled
– 1/4 cup extra virgin olive oil
– 1 tbsp lemon juice (fresh squeezed)
Instructions
1. Preheat your oven to 400°F and bake the russet potato for 45-60 minutes until fork-tender.
2. While the potato bakes, combine basil, pine nuts, Parmesan, and garlic in a food processor and pulse until finely chopped.
3. Slowly drizzle in the 1/4 cup extra virgin olive oil while the processor runs until the pesto becomes smooth.
4. Stir lemon juice into the pesto mixture and set aside.
5. Once the potato is cool enough to handle, peel it and mash it thoroughly in a large bowl until no lumps remain.
6. Add cassava flour, egg, salt, and 2 tbsp olive oil to the mashed potato and mix until a dough forms.
7. Lightly dust your work surface with cassava flour and knead the dough for 2-3 minutes until smooth but not sticky.
8. Divide the dough into 4 equal portions and roll each into a 1-inch thick rope on your floured surface.
9. Cut each rope into 1-inch pieces and use a fork to create those classic gnocchi ridges by gently pressing each piece against the tines.
10. Bring a large pot of salted water to a rolling boil and carefully drop in the gnocchi in batches.
11. Cook for 2-3 minutes until the gnocchi float to the surface, then wait 30 seconds before removing with a slotted spoon.
12. Toss the cooked gnocchi with your prepared pesto sauce until evenly coated.
Know that you’ve created something magical when those little dumplings hit your bowl. The cassava flour gives them an almost ethereal lightness while maintaining that satisfying chew, and the vibrant pesto clings to every nook and cranny like it was made for this moment. Try serving these beauties with extra toasted pine nuts scattered on top or alongside grilled chicken for a meal that’ll have everyone asking for seconds (and the recipe).
Cassava Flour Doughnuts with Glaze
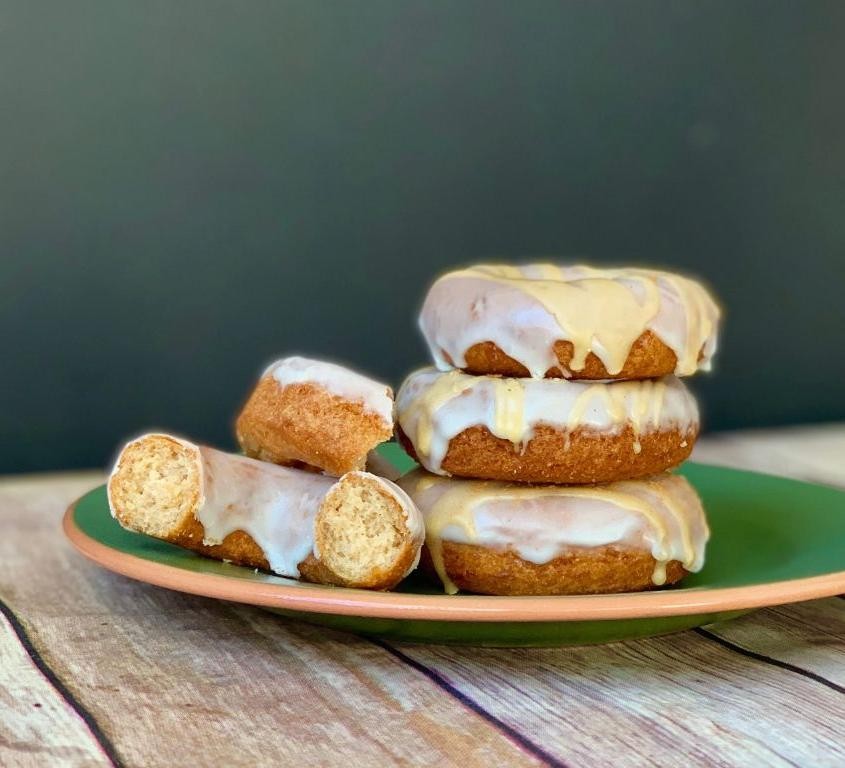
Unbelievably, we’ve cracked the code to gluten-free doughnuts that actually taste like the real deal! These cassava flour wonders are about to become your new obsession—fluffy, golden, and ready to dunk in whatever glaze your heart desires. Forget everything you thought you knew about gluten-free baking, because these little rings of joy are here to party.
12
doughnuts25
minutes18
minutesIngredients
- 2 cups cassava flour (scoop and level for accuracy)
- 1/2 cup granulated sugar (or coconut sugar for deeper flavor)
- 2 tsp baking powder (make sure it’s fresh for maximum rise)
- 1/2 tsp salt (fine sea salt works best)
- 2 large eggs, room temperature (they’ll incorporate better)
- 3/4 cup whole milk, 70°F (or almond milk for dairy-free)
- 1/4 cup melted coconut oil (or any neutral oil like avocado)
- 1 tsp vanilla extract (pure vanilla for best flavor)
- 4 cups vegetable oil for frying (enough for 2-inch depth in pot)
- 1 cup powdered sugar for glaze (sifted to avoid lumps)
- 2-3 tbsp whole milk for glaze (adjust for desired thickness)
Instructions
- Whisk together cassava flour, granulated sugar, baking powder, and salt in a large bowl until no lumps remain.
- In a separate bowl, vigorously whisk eggs for 45 seconds until pale and slightly frothy.
- Pour 70°F milk, melted coconut oil, and vanilla extract into the eggs, whisking continuously for 30 seconds.
- Combine wet ingredients with dry ingredients, stirring with a spatula just until no dry spots remain—do not overmix.
- Cover dough with plastic wrap and refrigerate for 25 minutes to firm up (this prevents sticking).
- While dough chills, heat 4 cups vegetable oil in a heavy-bottomed pot to 350°F, using a candy thermometer for accuracy.
- Lightly dust work surface with cassava flour and roll chilled dough to 1/2-inch thickness.
- Cut dough into rings using a 3-inch round cutter and 1-inch cutter for centers, dipping cutters in flour between uses.
- Carefully slide 3-4 doughnuts into 350°F oil, frying for 90 seconds per side until deep golden brown.
- Remove doughnuts with a slotted spoon and drain on a wire rack set over baking sheet for 3 minutes per side.
- Whisk powdered sugar and 2 tablespoons milk in a shallow bowl until smooth, adding more milk 1 teaspoon at a time if too thick.
- Dip slightly cooled doughnuts into glaze, twisting as you lift to create even coverage, then return to rack.
- Let glaze set for 15 minutes before serving—the wait will test your willpower!
Marvel at that crackly glaze giving way to an impossibly tender crumb that’s neither dense nor gritty. These doughnuts boast a subtle sweetness that lets the cassava’s slightly nutty flavor shine through. Serve them stacked high on a vintage plate for maximum Instagram appeal, or hide them in your pantry for a secret midnight snack—we won’t judge!
Conclusion
These cassava flour recipes truly showcase how versatile and delicious gluten-free baking can be. From fluffy pancakes to chewy cookies, there’s something for every craving. I’d love to hear which recipes you try—drop a comment with your favorites below! Don’t forget to pin this article to your Pinterest boards so you can easily find these tasty creations again.


