Feeling overwhelmed by bland, restrictive diets for blood pressure? Fear not! We’ve gathered 26 delicious, heart-healthy recipes that are as flavorful as they are good for you. From quick weeknight dinners to cozy comfort food, these dishes prove eating well can be a true joy. Let’s dive into a world of tasty, natural solutions that your whole family will love.
Garlic and Lemon Roasted Salmon
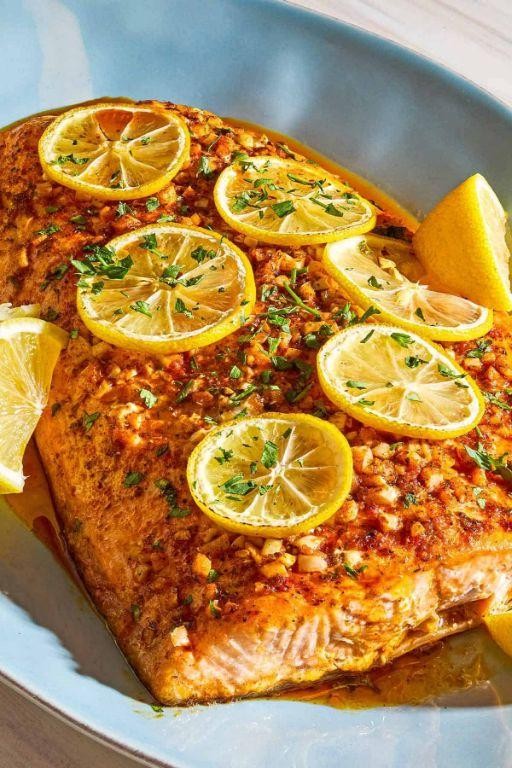
Raising the bar for weeknight dinners just got deliciously easy with this zesty, garlicky salmon that practically cooks itself while you pretend to be a culinary genius. It’s the perfect solution for when you want something fancy without the fuss, because let’s be honest, we’re all about that effortless elegance. Get ready to impress your taste buds (and maybe your dinner guests) with minimal effort and maximum flavor.
Serving: 4 | Pre Time: 10 minutes | Cooking Time: 15 minutes
Ingredients
– 1.5 lbs wild-caught salmon fillet, skin-on
– 4 large garlic cloves, finely minced
– 2 tbsp extra-virgin olive oil
– 1 large lemon, zested and juiced
– 1 tsp kosher salt
– 1/2 tsp freshly cracked black pepper
– 1 tbsp unsalted butter, melted
– 2 tbsp fresh parsley, finely chopped
Instructions
1. Preheat your oven to 400°F and line a rimmed baking sheet with parchment paper.
2. Pat the salmon fillet completely dry with paper towels to ensure a crisp exterior.
3. In a small bowl, whisk together the minced garlic, olive oil, lemon zest, lemon juice, kosher salt, and black pepper until emulsified.
4. Place the salmon skin-side down on the prepared baking sheet and brush the garlic-lemon mixture evenly over the top and sides.
5. Drizzle the melted butter over the salmon for added richness and to promote browning.
6. Roast the salmon in the preheated oven for 12-15 minutes, or until the internal temperature reaches 125°F for medium-rare or 135°F for medium, checking with an instant-read thermometer.
7. Remove the salmon from the oven and let it rest for 5 minutes on the baking sheet to allow the juices to redistribute.
8. Garnish the roasted salmon with the chopped fresh parsley just before serving.
Unbelievably moist and flaky, this salmon boasts a vibrant, tangy punch from the lemon that perfectly cuts through the rich, savory garlic notes. For a creative twist, serve it over a bed of creamy polenta or alongside roasted asparagus spears to soak up every last bit of that delicious pan sauce.
Spinach and Avocado Green Smoothie
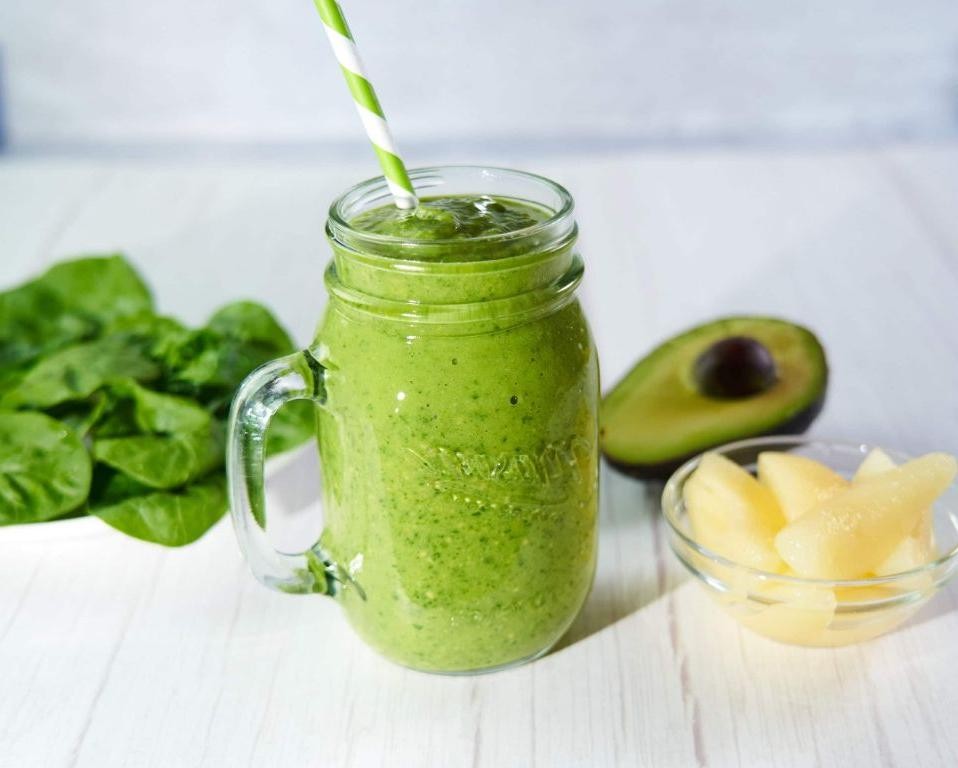
Just when you thought your blender was destined for eternal margarita duty, we’re throwing a vibrant, nutrient-packed party with this Spinach and Avocado Green Smoothie. It’s the ultimate morning reboot that’ll make you feel like a superhero—no cape required, but a fun straw is highly encouraged. Seriously, this green elixir is so good, even your kale-averse friends might just ask for seconds.
Serving: 2 | Pre Time: 10 minutes | Cooking Time: 0 minutes
Ingredients
– 2 cups fresh baby spinach leaves, tightly packed
– 1 ripe Hass avocado, pitted and peeled
– 1 cup unsweetened almond milk
– 1 frozen ripe banana, sliced
– 2 tablespoons fresh lime juice
– 1 tablespoon pure maple syrup
– 1 teaspoon freshly grated ginger root
– ½ teaspoon pure vanilla extract
– ¼ teaspoon fine sea salt
– 1 cup ice cubes
Instructions
1. Add 2 cups of fresh baby spinach leaves, tightly packed, to the base of a high-speed blender.
2. Scoop the flesh from 1 ripe Hass avocado, pitted and peeled, directly into the blender with the spinach.
3. Pour 1 cup of unsweetened almond milk into the blender to help the ingredients blend smoothly.
4. Add 1 frozen ripe banana, sliced, to the blender for natural sweetness and a creamy texture.
5. Squeeze 2 tablespoons of fresh lime juice into the mixture to brighten the flavors and prevent browning.
6. Drizzle 1 tablespoon of pure maple syrup into the blender for a subtle, caramel-like sweetness.
7. Grate 1 teaspoon of fresh ginger root directly into the blender to add a zesty, aromatic kick.
8. Measure ½ teaspoon of pure vanilla extract and ¼ teaspoon of fine sea salt, adding both to the blender to enhance depth and balance.
9. Tip: For an extra-smooth consistency, blend the spinach and liquids first on high speed for 30 seconds before adding the remaining ingredients.
10. Add 1 cup of ice cubes to the blender to chill and thicken the smoothie.
11. Securely fasten the blender lid and blend on high speed for 45-60 seconds, or until the mixture is completely smooth and uniform with no visible chunks.
12. Tip: Pause blending after 30 seconds to scrape down the sides with a spatula, ensuring all ingredients are fully incorporated.
13. Immediately pour the smoothie into two chilled glasses to maintain its frosty temperature.
14. Tip: For a decorative touch, garnish each glass with a thin lime wheel or a sprinkle of chia seeds before serving.
15. Offer this vibrant creation right away for the best texture and flavor. It boasts a luxuriously creamy, velvety mouthfeel from the avocado, balanced by the bright, tangy notes of lime and ginger. Get creative by serving it in a hollowed-out pineapple for a tropical twist, or layer it with granola and fresh berries for a stunning smoothie bowl that’s almost too pretty to sip.
Quinoa and Black Bean Salad
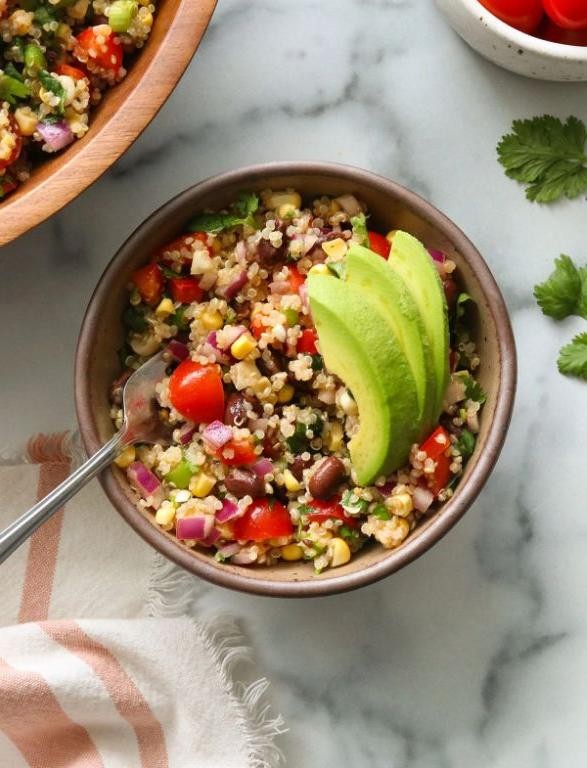
Get ready to ditch those sad desk lunches—this quinoa and black bean salad is about to become your new go-to for vibrant, feel-good fuel that’s as easy to make as it is delicious. Packed with protein, fiber, and a serious pop of color, it’s the kind of meal that makes you feel like a wellness guru without any of the pretentious vibes.
Serving: 4 | Pre Time: 15 minutes | Cooking Time: 20 minutes
Ingredients
– 1 cup tri-color quinoa, rinsed
– 2 cups filtered water
– 1 (15-ounce) can black beans, drained and rinsed
– 1 large ripe avocado, diced
– 1 cup cherry tomatoes, halved
– ½ cup finely diced red onion
– ¼ cup fresh cilantro leaves, chopped
– 3 tablespoons extra-virgin olive oil
– 2 tablespoons freshly squeezed lime juice
– 1 teaspoon ground cumin
– ½ teaspoon smoked paprika
– ¼ teaspoon fine sea salt
Instructions
1. In a medium saucepan, combine the rinsed tri-color quinoa and filtered water. Bring to a boil over high heat.
2. Reduce the heat to low, cover the saucepan, and simmer the quinoa for 15 minutes, or until all the water is absorbed and the grains are tender with visible spirals.
3. Tip: Fluff the cooked quinoa immediately with a fork to prevent clumping and spread it on a baking sheet to cool completely—this stops it from becoming mushy when mixed.
4. While the quinoa cools, drain and rinse the black beans thoroughly in a fine-mesh sieve to remove excess sodium and starch.
5. In a large mixing bowl, combine the cooled quinoa, black beans, diced avocado, halved cherry tomatoes, diced red onion, and chopped cilantro leaves.
6. In a small bowl, whisk together the extra-virgin olive oil, freshly squeezed lime juice, ground cumin, smoked paprika, and fine sea salt until fully emulsified.
7. Tip: For a smoother dressing, slowly drizzle the olive oil into the lime juice while whisking vigorously to create a stable emulsion.
8. Pour the dressing over the quinoa mixture and gently toss with a large spoon or spatula until all ingredients are evenly coated.
9. Tip: Let the salad rest at room temperature for 10 minutes before serving to allow the flavors to meld and the quinoa to absorb the dressing.
10. Transfer the salad to a serving bowl or individual plates.
Now, marvel at the delightful contrast of fluffy quinoa against the creamy avocado and firm black beans, all brightened by that zesty lime-cumin dressing. For a creative twist, scoop it into crisp romaine leaves for a handheld lunch or top it with a sprinkle of crumbled cotija cheese for an extra savory kick.
Baked Sweet Potato Fries with Herbs
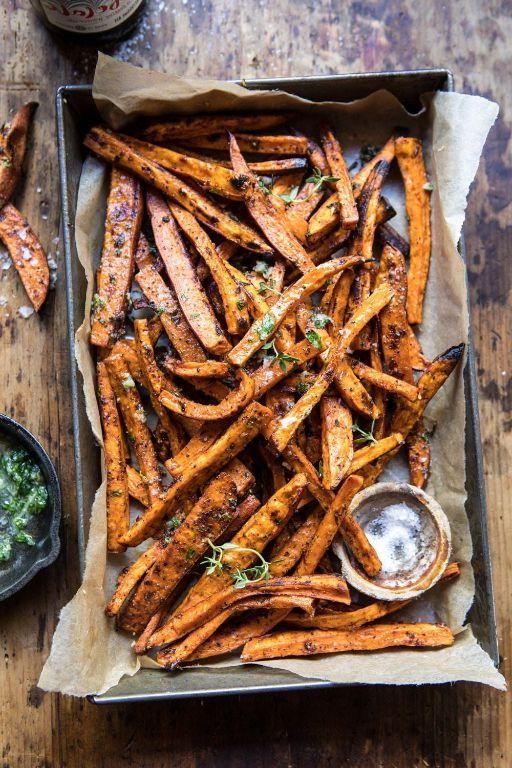
Let’s be real: sometimes you want fries, but you also want to feel virtuous. Enter these baked sweet potato fries, which are basically the superhero version of your favorite sidekick—crispy, herby, and ready to save dinner from boredom. They’re so good, you might forget they’re (mostly) good for you.
Serving: 4 | Pre Time: 15 minutes | Cooking Time: 25 minutes
Ingredients
– 2 large sweet potatoes, peeled and cut into 1/4-inch thick batons
– 2 tablespoons extra-virgin olive oil
– 1 teaspoon garlic powder
– 1 teaspoon smoked paprika
– 1/2 teaspoon dried rosemary, finely crushed
– 1/2 teaspoon dried thyme
– 1/2 teaspoon fine sea salt
– 1/4 teaspoon freshly ground black pepper
Instructions
1. Preheat your oven to 425°F and line a large baking sheet with parchment paper.
2. In a large mixing bowl, combine the sweet potato batons with the extra-virgin olive oil, tossing thoroughly to coat each piece evenly.
3. Sprinkle the garlic powder, smoked paprika, dried rosemary, dried thyme, fine sea salt, and freshly ground black pepper over the potatoes.
4. Toss the mixture again until the spices are uniformly distributed, ensuring no baton is left unseasoned.
5. Arrange the seasoned sweet potato batons in a single layer on the prepared baking sheet, leaving space between each to promote even crisping.
6. Place the baking sheet in the preheated oven and bake for 15 minutes.
7. After 15 minutes, remove the baking sheet and carefully flip each baton using tongs to expose the other side to heat.
8. Return the baking sheet to the oven and bake for an additional 10 minutes, or until the fries are golden brown and crispy at the edges.
9. Transfer the baked sweet potato fries to a serving platter immediately to prevent sogginess.
Perfectly crispy on the outside with a tender, sweet interior, these fries offer a smoky, herbal kick that’s downright addictive. Serve them alongside a creamy aioli or crumbled over a fresh salad for a playful twist that’ll have everyone asking for seconds.
Grilled Chicken with Balsamic Glaze
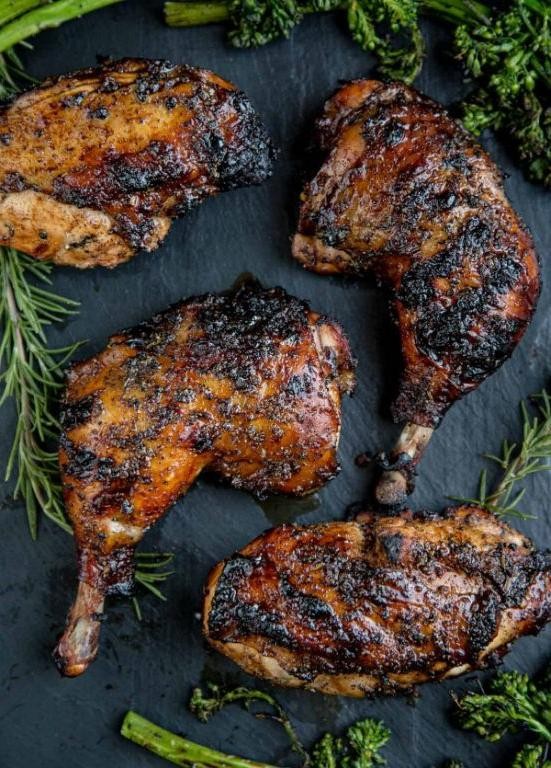
Hold onto your aprons, folks, because we’re about to transform the humble chicken breast from a weeknight yawn into a show-stopping, flavor-packed masterpiece that’ll have you questioning every bland grilled chicken of your past. This isn’t just dinner; it’s a culinary glow-up.
Serving: 4 | Pre Time: 15 minutes | Cooking Time: 20 minutes
Ingredients
- 4 boneless, skinless chicken breasts (about 6 oz each), patted dry
- 2 tbsp extra-virgin olive oil
- 3 cloves garlic, minced
- 1 tsp fresh rosemary, finely chopped
- 1 tsp fresh thyme leaves
- 1/2 tsp kosher salt
- 1/4 tsp freshly cracked black pepper
- 1 cup balsamic vinegar
- 2 tbsp honey
Instructions
- In a small bowl, whisk together the extra-virgin olive oil, minced garlic, chopped rosemary, thyme leaves, kosher salt, and black pepper to create a marinade.
- Coat the patted-dry chicken breasts evenly with the marinade and let them rest at room temperature for 10 minutes to allow the flavors to penetrate. Tip: Patting the chicken dry first ensures the marinade adheres properly and promotes better browning.
- While the chicken rests, combine the balsamic vinegar and honey in a small saucepan over medium-high heat.
- Bring the balsamic mixture to a boil, then immediately reduce the heat to maintain a gentle simmer.
- Simmer the glaze, stirring occasionally, until it has reduced by about half and coats the back of a spoon, approximately 10-12 minutes. It should be thick and syrupy. Remove from heat and set aside. Tip: Watch the glaze closely in the final minutes, as it can go from perfectly reduced to burnt very quickly.
- Preheat a grill or grill pan to medium-high heat (approximately 400°F).
- Place the marinated chicken breasts on the hot grill. Cook for 6-7 minutes without moving them to achieve defined grill marks.
- Flip the chicken breasts and continue cooking for another 6-7 minutes, or until the internal temperature reaches 165°F when checked with an instant-read thermometer. Tip: Avoid pressing down on the chicken while it cooks, as this squeezes out precious juices.
- During the last minute of cooking, brush the top of each chicken breast generously with the prepared balsamic glaze.
- Transfer the glazed chicken to a clean plate or cutting board and let it rest for 5 minutes before slicing.
Finally, slice the rested chicken against the grain and drizzle with any remaining warm glaze. The result is chicken with a perfectly caramelized, slightly sticky-sweet crust that gives way to incredibly juicy, herb-infused meat. For a stunning presentation, fan the slices over a bed of creamy polenta or a crisp arugula salad—the tangy glaze makes a fantastic dressing, too.
Oatmeal with Blueberries and Walnuts
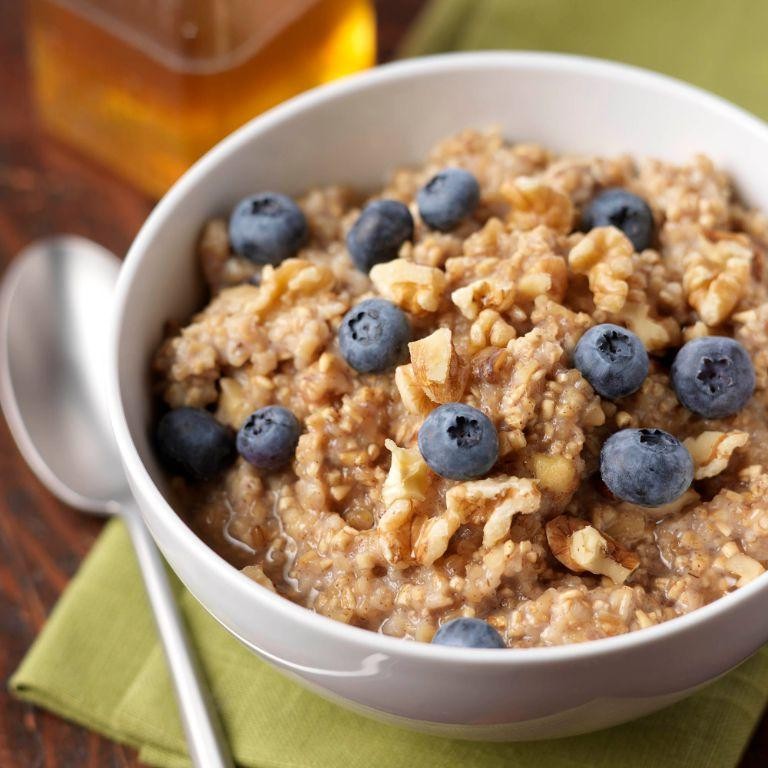
Gather ’round, breakfast enthusiasts, because we’re about to transform your morning routine from a groggy slog into a glorious, spoon-clinking celebration. This isn’t just oatmeal; it’s a warm, hearty hug in a bowl, packed with juicy bursts and nutty crunch to make your taste buds do a happy dance. Forget the bland mush of yesteryear—this is a masterpiece of texture and flavor that will have you leaping out of bed (or at least crawling with more enthusiasm).
Serving: 2 | Pre Time: 5 minutes | Cooking Time: 10 minutes
Ingredients
– 1 cup old-fashioned rolled oats
– 2 cups whole milk
– 1/4 teaspoon fine sea salt
– 1 cup fresh blueberries
– 1/2 cup raw walnut halves, roughly chopped
– 2 tablespoons pure maple syrup
– 1/2 teaspoon ground cinnamon
Instructions
1. Combine 1 cup of old-fashioned rolled oats, 2 cups of whole milk, and 1/4 teaspoon of fine sea salt in a medium saucepan over medium-high heat.
2. Bring the mixture to a gentle boil, stirring occasionally with a wooden spoon to prevent sticking, which should take about 3–4 minutes.
3. Reduce the heat to low and simmer uncovered for 5–7 minutes, stirring every minute, until the oats have absorbed most of the liquid and achieved a creamy, porridge-like consistency.
4. While the oatmeal simmers, place a small skillet over medium heat and toast 1/2 cup of roughly chopped raw walnut halves for 3–4 minutes, shaking the pan frequently, until fragrant and lightly golden.
5. Gently fold 1 cup of fresh blueberries and 1/2 teaspoon of ground cinnamon into the cooked oatmeal, allowing the berries to warm through for about 1 minute without breaking them down.
6. Remove the saucepan from the heat and stir in 2 tablespoons of pure maple syrup until fully incorporated.
7. Divide the oatmeal evenly between two serving bowls and top generously with the toasted walnut halves.
Perfectly creamy oats cradle those plump, warm blueberries that burst with tangy sweetness, while the toasted walnuts add a satisfying, earthy crunch. For a decadent twist, drizzle with an extra swirl of maple syrup or a dollop of Greek yogurt to create a delightful contrast of temperatures and textures.
Lentil and Vegetable Soup
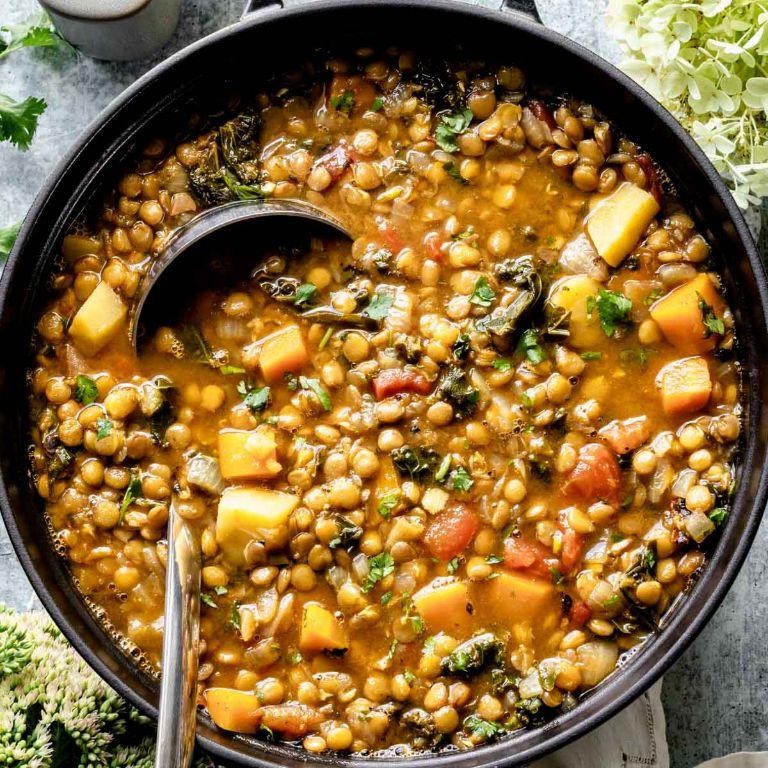
Zesty and brimming with wholesome goodness, this Lentil and Vegetable Soup is the culinary equivalent of a cozy hug on a brisk day—simple, satisfying, and secretly packed with enough vibrant veggies to make your taste buds do a happy dance. Let’s turn those pantry staples into a soul-warming masterpiece that’s as easy to make as it is delicious to devour!
Serving: 6 | Pre Time: 15 minutes | Cooking Time: 45 minutes
Ingredients
– 2 tablespoons extra-virgin olive oil
– 1 large yellow onion, finely diced
– 3 cloves garlic, minced
– 2 large carrots, peeled and cut into ½-inch rounds
– 2 stalks celery, finely chopped
– 1 cup dried green lentils, rinsed and drained
– 6 cups low-sodium vegetable broth
– 1 (14.5-ounce) can diced tomatoes, with juices
– 1 teaspoon dried thyme
– ½ teaspoon smoked paprika
– 1 bay leaf
– 1 teaspoon fine sea salt
– ½ teaspoon freshly ground black pepper
– 2 cups fresh baby spinach, loosely packed
– 2 tablespoons freshly squeezed lemon juice
– ¼ cup fresh flat-leaf parsley, finely chopped
Instructions
1. In a large Dutch oven or heavy-bottomed pot, heat the extra-virgin olive oil over medium heat until shimmering, about 2 minutes.
2. Add the finely diced yellow onion and cook, stirring occasionally, until translucent and lightly golden, 5–7 minutes.
3. Stir in the minced garlic and cook until fragrant, 30 seconds, being careful not to let it brown.
4. Add the carrot rounds and finely chopped celery, cooking until slightly softened, 4–5 minutes.
5. Tip in the rinsed green lentils, stirring to coat them in the oil and vegetable mixture for 1 minute.
6. Pour in the low-sodium vegetable broth and diced tomatoes with their juices, scraping up any browned bits from the bottom of the pot.
7. Stir in the dried thyme, smoked paprika, bay leaf, fine sea salt, and freshly ground black pepper.
8. Increase the heat to high and bring the mixture to a boil, then reduce to a low simmer, partially covering the pot with a lid.
9. Simmer gently until the lentils are tender but not mushy, 30–35 minutes, stirring occasionally to prevent sticking.
10. Remove the pot from the heat and discard the bay leaf.
11. Stir in the fresh baby spinach until just wilted, about 1 minute.
12. Finish by stirring in the freshly squeezed lemon juice and finely chopped flat-leaf parsley.
Extraordinarily velvety with a hearty bite from the lentils, this soup boasts a deep, smoky undertone from the paprika that plays beautifully against the bright acidity of lemon. Serve it piping hot with a crusty baguette for dipping, or get creative by topping it with a dollop of tangy Greek yogurt and a sprinkle of red pepper flakes for an extra kick!
Turmeric and Ginger Tea

Yikes, it’s that time of year when sniffles sneak in and cozy cravings kick into high gear—but fear not, because this golden-hued, spice-packed elixir is here to save the day with a wink and a warm hug. Turmeric and Ginger Tea isn’t just a drink; it’s a vibrant, zesty potion that’ll make you feel like a wellness wizard, all while tasting like a hug from the inside out.
Serving: 2 | Pre Time: 5 minutes | Cooking Time: 10 minutes
Ingredients
– 2 cups filtered water
– 1 tablespoon fresh ginger root, finely grated
– 1 teaspoon ground turmeric
– 1 tablespoon raw honey
– 1 tablespoon fresh lemon juice
– 1/4 teaspoon freshly ground black pepper
– 1 cinnamon stick
Instructions
1. In a small saucepan, combine 2 cups of filtered water and 1 tablespoon of finely grated fresh ginger root over medium-high heat.
2. Bring the mixture to a gentle boil, then reduce the heat to low and simmer for 5 minutes to infuse the water with the ginger’s spicy essence.
3. Stir in 1 teaspoon of ground turmeric and 1/4 teaspoon of freshly ground black pepper—the pepper enhances turmeric’s bioavailability, so don’t skip it!
4. Add 1 cinnamon stick to the saucepan and continue simmering for an additional 3 minutes, allowing the spices to meld and deepen in flavor.
5. Remove the saucepan from the heat and strain the liquid through a fine-mesh sieve into two heatproof mugs, discarding the solids.
6. While the tea is still hot, whisk in 1 tablespoon of raw honey until fully dissolved, adjusting the sweetness to your preference.
7. Stir in 1 tablespoon of fresh lemon juice just before serving to brighten the flavor and add a tangy kick.
8. Serve immediately, garnishing with an extra cinnamon stick or a slice of lemon if desired.
Cheerfully, this tea boasts a velvety, smooth texture with a bold, earthy warmth from the turmeric, balanced by the zingy kick of ginger and a hint of citrusy brightness. For a creative twist, try serving it over ice with a sprig of fresh mint or blending it into a latte with frothy almond milk for a decadent treat that’s as Instagram-worthy as it is delicious.
Roasted Beet and Arugula Salad
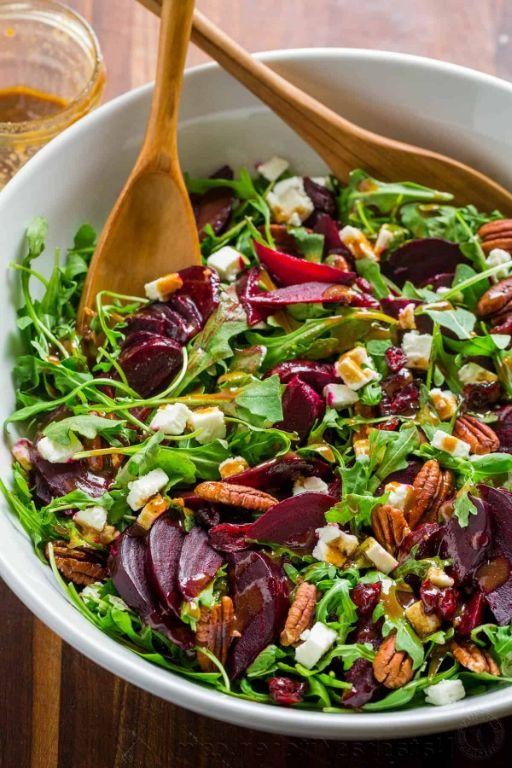
Get ready to ditch those sad desk salads, because this roasted beet and arugula number is about to become your new lunchtime (or dinnertime, no judgment) obsession. It’s a vibrant, flavor-packed masterpiece that proves healthy eating doesn’t have to be boring—just wait until you see those jewel-toned beets!
Serving: 4 | Pre Time: 15 minutes | Cooking Time: 45 minutes
Ingredients
– 4 medium red beets, trimmed and scrubbed
– 2 tablespoons extra-virgin olive oil, divided
– 1 teaspoon kosher salt, divided
– ½ teaspoon freshly cracked black pepper, divided
– 5 ounces (about 5 packed cups) baby arugula
– ¼ cup raw walnut halves, roughly chopped
– 2 ounces crumbled goat cheese
– 3 tablespoons aged balsamic vinegar
Instructions
1. Preheat your oven to 400°F (200°C) and line a small rimmed baking sheet with parchment paper.
2. Pat the scrubbed beets completely dry with a clean kitchen towel.
3. Place the beets on the prepared baking sheet, drizzle with 1 tablespoon of the extra-virgin olive oil, and season with ½ teaspoon of the kosher salt and ¼ teaspoon of the black pepper, tossing to coat evenly.
4. Roast the beets for 45 minutes, or until a paring knife inserts into the center of the largest beet with little to no resistance.
5. Remove the baking sheet from the oven and let the beets cool until they are safe to handle, about 15 minutes.
6. While the beets cool, place the raw walnut halves in a dry skillet over medium-low heat.
7. Toast the walnuts for 3-5 minutes, shaking the pan frequently, until fragrant and lightly golden, then transfer them to a plate to cool completely. Tip: Toasting nuts unlocks their oils and deepens their flavor dramatically.
8. Once the beets are cool, use a paper towel to gently rub away and discard the skins; the skins should slip off easily.
9. Cut the peeled beets into ½-inch cubes.
10. In a large serving bowl, combine the baby arugula, cubed roasted beets, toasted walnuts, and crumbled goat cheese.
11. In a small bowl, whisk together the remaining 1 tablespoon of extra-virgin olive oil, the aged balsamic vinegar, the remaining ½ teaspoon of kosher salt, and the remaining ¼ teaspoon of black pepper until emulsified.
12. Drizzle the dressing over the salad and toss gently but thoroughly to combine, ensuring every leaf is lightly coated. Tip: Always dress arugula salads just before serving to prevent wilting.
13. Serve immediately on chilled plates for the best texture contrast.
Every bite delivers a fantastic play of textures: the earthy, tender sweetness of the beets against the peppery crunch of the arugula, all tied together with creamy goat cheese and a tangy balsamic punch. For a show-stopping presentation, arrange the components in layers on a large platter or serve individual portions in wide, shallow bowls to showcase the vibrant colors.
Whole Grain Pasta with Tomato and Basil
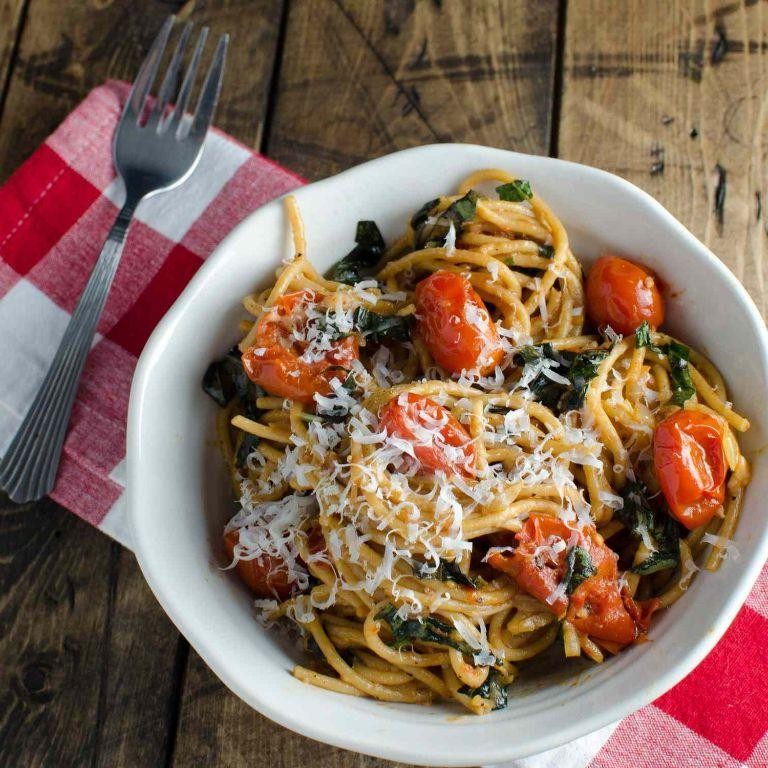
Brace yourselves, pasta lovers, because we’re about to turn your ordinary weeknight into a whole-grain wonderland that’s as wholesome as it is delicious. This isn’t just another noodle dish—it’s a vibrant, herb-kissed hug in a bowl that’ll have you questioning why you ever settled for plain old spaghetti. Get ready to twirl your fork with gusto and maybe even impress that one friend who thinks they’re a Michelin-starred critic.
Serving: 4 | Pre Time: 10 minutes | Cooking Time: 20 minutes
Ingredients
– 12 ounces whole grain pasta (such as fusilli or penne)
– 3 tablespoons extra-virgin olive oil
– 4 garlic cloves, finely minced
– 1 (28-ounce) can San Marzano tomatoes, crushed by hand
– 1/4 cup fresh basil leaves, chiffonade-cut
– 1/2 teaspoon red pepper flakes
– 1/2 cup Parmigiano-Reggiano cheese, freshly grated
– Kosher salt, to season
– Freshly ground black pepper, to season
Instructions
1. Bring a large pot of generously salted water to a rolling boil over high heat.
2. Add the whole grain pasta to the boiling water and cook according to package directions until al dente, stirring occasionally to prevent sticking.
3. While the pasta cooks, heat the extra-virgin olive oil in a large skillet over medium heat until shimmering, about 2 minutes.
4. Add the finely minced garlic to the skillet and sauté until fragrant and lightly golden, approximately 1 minute, being careful not to burn it.
5. Stir in the hand-crushed San Marzano tomatoes and red pepper flakes, then reduce the heat to medium-low.
6. Simmer the tomato sauce uncovered for 15 minutes, stirring occasionally, until it thickens slightly and the flavors meld.
7. Drain the cooked pasta, reserving 1/2 cup of the starchy pasta water.
8. Transfer the drained pasta directly into the skillet with the tomato sauce.
9. Toss the pasta and sauce together over low heat for 1-2 minutes, adding splashes of the reserved pasta water as needed to create a glossy, cohesive coating.
10. Remove the skillet from the heat and fold in the chiffonade-cut fresh basil leaves.
11. Season the dish generously with kosher salt and freshly ground black pepper, adjusting to your preference.
12. Divide the pasta among serving bowls and top each portion with freshly grated Parmigiano-Reggiano cheese.
Now, let’s talk about that glorious final act. The whole grain pasta offers a satisfying, nutty chew that stands up beautifully to the bright, tangy tomato sauce, while the basil infuses every bite with a fresh, aromatic punch. For a fun twist, try serving it alongside grilled garlic bread or topping it with a drizzle of chili oil for an extra kick—because why should your taste buds ever be bored?
Steamed Broccoli with Garlic and Olive Oil
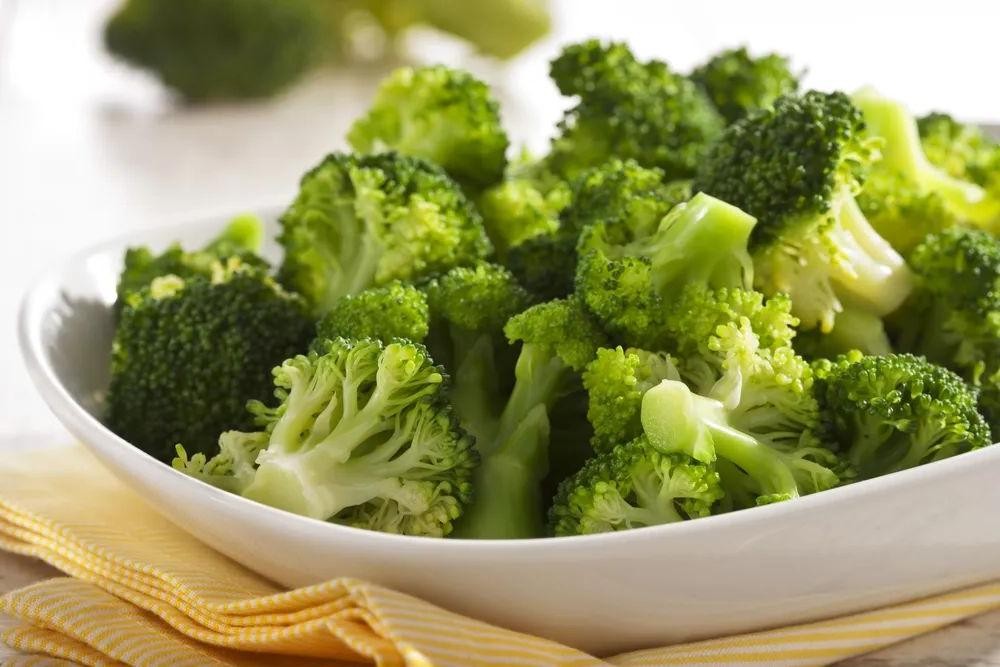
Yep, you’ve probably steamed broccoli before, but have you ever given it the garlicky, olive oil-drenched glow-up it truly deserves? This isn’t just a side dish—it’s a vibrant, flavor-packed revelation that’s about to become your weeknight MVP. Let’s turn that humble green into something downright irresistible.
Serving: 4 | Pre Time: 10 minutes | Cooking Time: 10 minutes
Ingredients
– 1 large head of fresh broccoli, cut into uniform florets (about 4 cups)
– 3 tablespoons extra-virgin olive oil, divided
– 4 large garlic cloves, thinly sliced
– ½ teaspoon fine sea salt
– ¼ teaspoon freshly cracked black pepper
– 1 tablespoon fresh lemon juice
– 1 teaspoon lemon zest
Instructions
1. Fill a large pot with 1 inch of water and bring it to a rolling boil over high heat.
2. Place the broccoli florets in a steamer basket and set it over the boiling water, ensuring the florets are in a single layer for even cooking.
3. Cover the pot tightly and steam the broccoli for 5–6 minutes, until the florets are bright green and tender-crisp when pierced with a fork.
4. Immediately transfer the steamed broccoli to a large bowl of ice water to halt the cooking process and preserve its vibrant color and crisp texture—this quick chill is your secret weapon for perfect texture.
5. Drain the broccoli thoroughly and pat it dry with a clean kitchen towel to remove excess moisture, which ensures the oil and garlic will cling beautifully.
6. In a large skillet, heat 2 tablespoons of extra-virgin olive oil over medium-low heat until it shimmers, about 1 minute.
7. Add the thinly sliced garlic to the skillet and sauté for 2–3 minutes, stirring constantly, until the slices are fragrant and just beginning to turn golden brown—watch closely to avoid burning, as garlic can go from perfect to bitter in seconds.
8. Increase the heat to medium-high and add the dried broccoli florets to the skillet, tossing to coat them evenly in the garlic-infused oil.
9. Season the broccoli with fine sea salt and freshly cracked black pepper, then cook for 2–3 minutes, stirring occasionally, until the florets are lightly seared and heated through.
10. Remove the skillet from the heat and drizzle the broccoli with the remaining 1 tablespoon of extra-virgin olive oil, fresh lemon juice, and lemon zest, tossing gently to combine.
11. Transfer the broccoli to a serving platter and serve immediately while warm.
Mmm, the result is a symphony of textures: crisp-tender florets with a subtle char, all bathed in that aromatic garlic oil. The bright lemon zest cuts through the richness, making each bite pop with freshness. Try piling it over creamy polenta or alongside a juicy grilled chicken breast for a meal that’s anything but ordinary.
Chia Seed Pudding with Almond Milk

Gather ’round, breakfast rebels and snack-time schemers, because we’re about to transform your morning routine from a frantic scramble into a zen-like, spoonable dream. This chia seed pudding with almond milk is the culinary equivalent of hitting the snooze button—effortless, rewarding, and guaranteed to make you feel like a meal-prep genius. Forget the blender; the only tool you’ll need is a little patience and a sturdy jar.
Serving: 2 | Pre Time: 5 minutes | Cooking Time: 0 minutes
Ingredients
– 1/2 cup whole chia seeds
– 1 1/2 cups unsweetened almond milk
– 2 tbsp pure maple syrup
– 1 tsp pure vanilla extract
– 1/4 tsp fine sea salt
Instructions
1. In a medium mixing bowl, combine 1/2 cup of whole chia seeds and 1 1/2 cups of unsweetened almond milk.
2. Vigorously whisk the mixture for 60 seconds to prevent the chia seeds from clumping together, ensuring a smooth, uniform texture.
3. Add 2 tablespoons of pure maple syrup, 1 teaspoon of pure vanilla extract, and 1/4 teaspoon of fine sea salt to the bowl.
4. Whisk again for 30 seconds until all ingredients are fully incorporated and the maple syrup has dissolved.
5. Divide the mixture evenly between two 12-ounce jars or airtight containers.
6. Seal the containers tightly and refrigerate them for a minimum of 4 hours, or ideally overnight for 8 hours, to allow the chia seeds to fully hydrate and gel.
7. After the chilling period, remove the puddings from the refrigerator and stir each one thoroughly with a spoon to break up any settled seeds and achieve a consistent, creamy texture.
8. Serve the pudding immediately directly from the jar.
Dive into a spoonful of this creamy, tapioca-like delight, where the subtle nuttiness of almond milk perfectly complements the gentle sweetness of maple. For a textural contrast, top it with a handful of toasted almond slivers or a drizzle of salted caramel before serving straight from the jar for maximum convenience and charm.
Herb-Crusted Tilapia
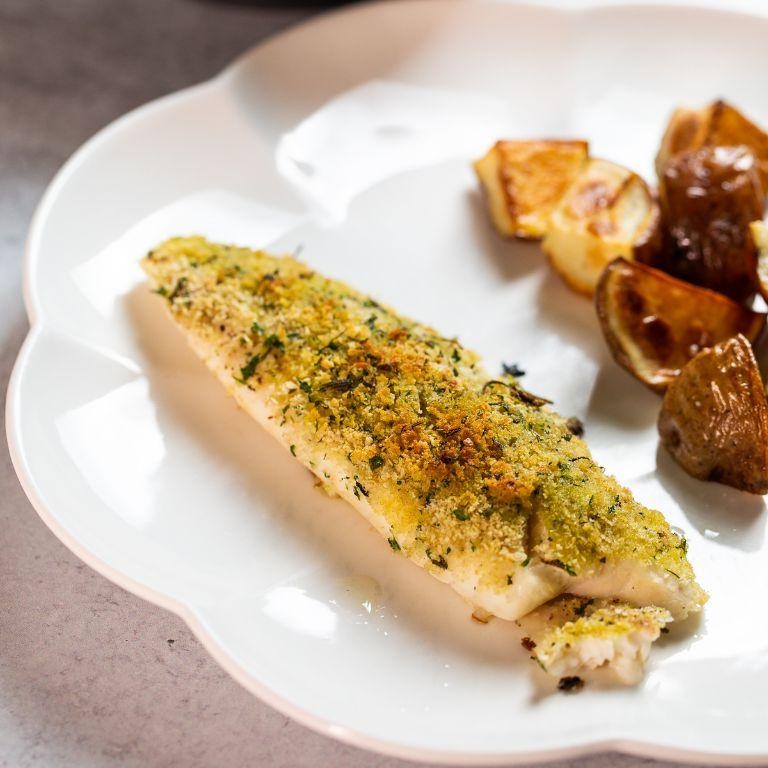
Ever had a fish so fancy it practically wears a tuxedo of herbs? Meet herb-crusted tilapia—the weeknight dinner that’s about to make you feel like a gourmet chef without the fuss. It’s crispy, herby, and ready to rescue you from boring meals in under 30 minutes!
Serving: 4 | Pre Time: 10 minutes | Cooking Time: 15 minutes
Ingredients
– 4 (6-ounce) tilapia fillets, patted dry
– 1/2 cup panko breadcrumbs
– 1/4 cup finely grated Parmigiano-Reggiano cheese
– 2 tablespoons fresh flat-leaf parsley, minced
– 1 tablespoon fresh thyme leaves, stripped from stems
– 1 teaspoon lemon zest, finely grated
– 1/2 teaspoon garlic powder
– 1/4 teaspoon freshly ground black pepper
– 1/4 teaspoon kosher salt
– 2 large pasture-raised eggs, lightly beaten
– 1/4 cup all-purpose flour
– 3 tablespoons clarified butter
– 1 tablespoon extra-virgin olive oil
– 1 lemon, cut into wedges
Instructions
1. Preheat your oven to 400°F and line a baking sheet with parchment paper.
2. In a shallow dish, combine panko breadcrumbs, Parmigiano-Reggiano cheese, minced flat-leaf parsley, thyme leaves, lemon zest, garlic powder, black pepper, and kosher salt until evenly mixed.
3. Place all-purpose flour in a separate shallow dish and lightly beaten pasture-raised eggs in a third dish, arranging them in an assembly line.
4. Dredge each patted-dry tilapia fillet first in flour, shaking off any excess, then dip fully into the eggs, allowing excess to drip off.
5. Press each fillet firmly into the herb-breadcrumb mixture, coating both sides evenly, and transfer to the prepared baking sheet.
6. Heat clarified butter and extra-virgin olive oil in a large oven-safe skillet over medium-high heat until shimmering, about 2 minutes.
7. Carefully add the coated tilapia fillets to the skillet and sear for 2–3 minutes per side, until the crust is golden brown and crisp.
8. Transfer the skillet to the preheated oven and bake for 8–10 minutes, until the internal temperature of the tilapia reaches 145°F on an instant-read thermometer.
9. Remove from the oven and let rest for 3 minutes on a wire rack to preserve crispiness.
10. Serve immediately with lemon wedges for squeezing.
Crunchy on the outside and tender within, this tilapia delivers a vibrant herb punch that’s brightened by lemon zest. Try it over a bed of lemony orzo or alongside roasted asparagus for a plate that’s as colorful as it is delicious!
Kale and Pineapple Juice
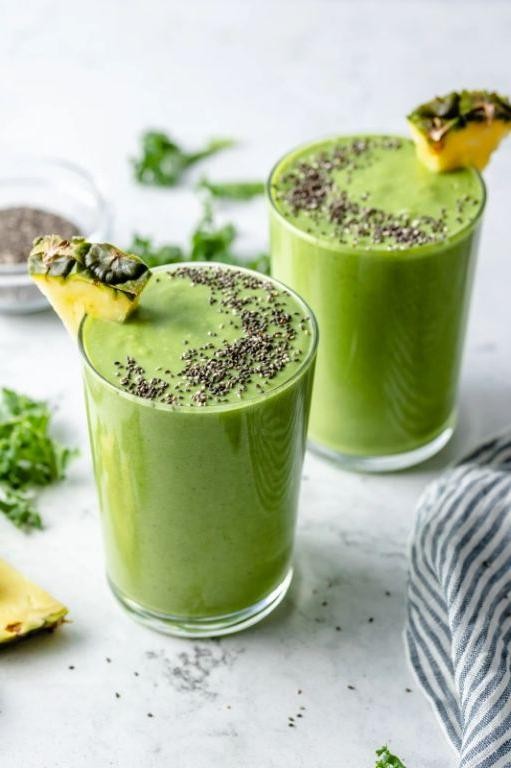
Tired of the same old green juice that tastes like a lawn mower’s leftovers? This kale and pineapple juice is the vibrant, sweet-tart superhero your mornings have been craving, packing a punch of nutrients with a flavor that’s anything but boring. It’s the liquid sunshine you can actually enjoy, no grimacing required.
Serving: 2 | Pre Time: 10 minutes | Cooking Time: 0 minutes
Ingredients
– 4 cups fresh curly kale leaves, stems removed and tightly packed
– 3 cups fresh pineapple chunks, chilled
– 1 cup cold filtered water
– 1 tablespoon fresh lime juice, freshly squeezed
– 1-inch piece fresh ginger root, peeled
– 1 tablespoon pure maple syrup (optional)
Instructions
1. Thoroughly rinse 4 cups of fresh curly kale leaves under cold running water to remove any grit, then pat them completely dry with a clean kitchen towel to prevent a watery juice.
2. Using a sharp chef’s knife, carefully remove and discard the tough central stems from all the kale leaves, reserving only the tender leafy portions.
3. Peel the 1-inch piece of fresh ginger root with a vegetable peeler or the edge of a spoon to efficiently remove the skin without wasting the flesh.
4. Cut 3 cups of fresh pineapple into uniform 1-inch chunks, ensuring they are chilled to help produce a colder, more refreshing final juice.
5. Add the prepared kale leaves, pineapple chunks, peeled ginger, 1 cup of cold filtered water, and 1 tablespoon of freshly squeezed lime juice into the pitcher of a high-speed blender.
6. Secure the blender lid tightly and blend on high speed for exactly 60 seconds, or until the mixture is completely smooth with no visible fibrous pieces, stopping to scrape down the sides once if necessary.
7. Taste the juice and, if a sweeter profile is desired, incorporate 1 tablespoon of pure maple syrup by blending on low speed for an additional 10 seconds to integrate fully.
8. Place a fine-mesh strainer over a large glass measuring cup or pitcher and pour the blended mixture through it, using a rubber spatula to press gently and extract all the liquid while leaving the pulp behind for a silky texture.
9. Immediately divide the strained juice evenly between two tall glasses filled with ice to serve it chilled and at its peak freshness.
Gloriously smooth and brilliantly green, this juice boasts a vibrant, tropical sweetness from the pineapple that perfectly balances the earthy depth of the kale, with a zesty ginger kick that lingers pleasantly. Serve it over ice with a pineapple wedge garnish for a spa-day vibe, or pour it into a to-go bottle for a portable burst of energy that’s far superior to any coffee run.
Cucumber and Mint Yogurt Dip
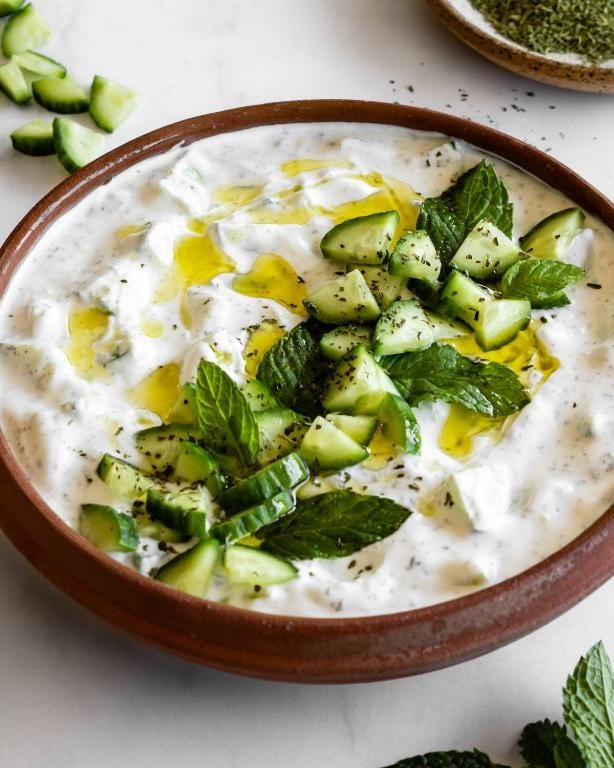
Ever found yourself staring at a veggie platter, wondering why the dip looks so…sad? Let’s fix that with a cucumber and mint yogurt dip that’s so refreshing, it might just become your new kitchen MVP. This creamy, herby delight is the ultimate crowd-pleaser for any gathering, from backyard barbecues to last-minute snack attacks.
Serving: 6 | Pre Time: 15 minutes | Cooking Time: 0 minutes
Ingredients
– 2 cups full-fat Greek yogurt
– 1 English cucumber, finely grated and squeezed dry
– 1/4 cup fresh mint leaves, finely chopped
– 2 tbsp extra-virgin olive oil
– 1 tbsp fresh lemon juice
– 1 tsp kosher salt
– 1/2 tsp freshly ground black pepper
– 1 small garlic clove, minced
Instructions
1. Place 2 cups of full-fat Greek yogurt in a medium mixing bowl.
2. Finely grate 1 English cucumber using a box grater, then squeeze it firmly in a clean kitchen towel to remove excess moisture—this prevents a watery dip.
3. Add the grated, dried cucumber to the bowl with the yogurt.
4. Finely chop 1/4 cup of fresh mint leaves, ensuring no stems are included for a smooth texture.
5. Incorporate the chopped mint into the yogurt and cucumber mixture.
6. Drizzle 2 tbsp of extra-virgin olive oil over the ingredients.
7. Squeeze 1 tbsp of fresh lemon juice directly into the bowl to brighten the flavors.
8. Add 1 tsp of kosher salt and 1/2 tsp of freshly ground black pepper.
9. Mince 1 small garlic clove finely and mix it in for a subtle kick—tip: let the dip sit for 10 minutes after combining to allow the garlic flavor to mellow.
10. Stir all ingredients thoroughly until fully integrated, using a folding motion to maintain a light, airy consistency.
11. Transfer the dip to a serving bowl and refrigerate for at least 30 minutes to chill and let the flavors meld, which enhances the overall taste.
12. Before serving, give the dip a final stir and adjust seasoning if needed, tasting with a clean spoon to avoid contamination.
Here’s the scoop: this dip boasts a luxuriously creamy texture with crisp cucumber bits and vibrant mint notes, making it a refreshing counterpoint to spicy dishes. Try it as a spread on grilled pita or dolloped over roasted vegetables for an instant flavor upgrade—it’s so versatile, you might just skip the main course altogether!
Zucchini Noodles with Avocado Pesto
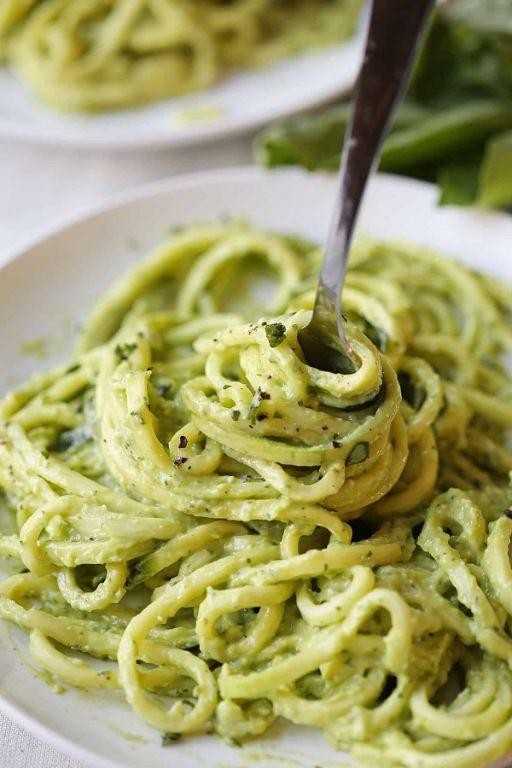
Let’s be real—some days you want pasta, but your waistline says, “Nice try.” Enter zucchini noodles with avocado pesto: the guilt-free, flavor-packed hero that’ll make you forget all about those carb-heavy cravings. It’s fresh, vibrant, and ready to dazzle in under 30 minutes, because who has time to slave over a stove when hunger strikes?
Serving: 4 | Pre Time: 15 minutes | Cooking Time: 10 minutes
Ingredients
– 4 medium zucchini, spiralized into noodles
– 2 ripe avocados, pitted and peeled
– 1/2 cup fresh basil leaves, packed
– 1/4 cup raw pine nuts
– 2 cloves garlic, minced
– 1/4 cup extra-virgin olive oil
– 2 tbsp freshly squeezed lemon juice
– 1/4 cup grated Parmigiano-Reggiano cheese
– 1/2 tsp fine sea salt
– 1/4 tsp freshly cracked black pepper
– 1 tbsp unsalted butter
Instructions
1. Place the pine nuts in a dry skillet over medium heat and toast for 3–4 minutes, shaking the pan frequently, until golden brown and fragrant. Tip: Toasting unlocks the nuts’ oils for a richer pesto—don’t skip this step!
2. In a food processor, combine the avocados, basil leaves, toasted pine nuts, minced garlic, lemon juice, and Parmigiano-Reggiano cheese.
3. Pulse the mixture 5–6 times until coarsely chopped, then with the processor running, slowly drizzle in the extra-virgin olive oil until a smooth, creamy pesto forms.
4. Season the pesto with fine sea salt and freshly cracked black pepper, then set aside.
5. Heat the unsalted butter in a large skillet over medium-high heat until it melts and begins to foam slightly, about 1 minute.
6. Add the spiralized zucchini noodles to the skillet and sauté for 2–3 minutes, tossing gently with tongs, until just tender but still al dente. Tip: Overcooking turns zucchini soggy—aim for a slight crunch!
7. Remove the skillet from the heat and immediately fold in the avocado pesto, ensuring the noodles are evenly coated.
8. Divide the zucchini noodles among four plates and garnish with additional basil leaves if desired. Tip: For extra protein, top with grilled shrimp or pan-seared scallops.
Remarkably creamy yet light, this dish boasts a velvety pesto that clings to each noodle without weighing it down. The bright lemon and garlic notes cut through the richness, while the zucchini offers a satisfying, toothsome bite. Serve it chilled for a refreshing lunch or warm it slightly and crown with a soft-boiled egg for a decadent twist.
Conclusion
Nourishing your body has never been easier or more delicious. This roundup proves that heart-healthy eating is full of flavor and variety. We hope you find new favorites to add to your weekly rotation! Give a recipe a try, then let us know which one you loved in the comments below. If you found this helpful, please share it on Pinterest to help others discover these tasty, healthy options.


