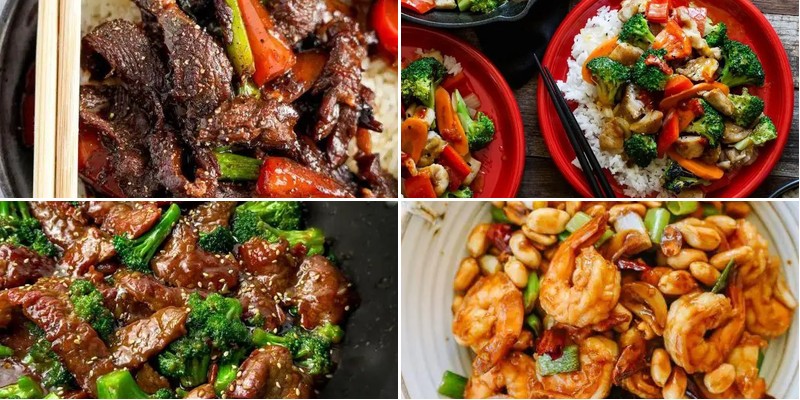
There’s something magical about the sizzle of a hot wok that transforms simple ingredients into extraordinary meals in minutes. Whether you’re craving quick weeknight dinners, vibrant vegetable dishes, or comforting classics with an Asian twist, these 18 incredible stir-fry recipes will become your new kitchen favorites. Get ready to discover mouthwatering dishes that will have everyone asking for seconds!
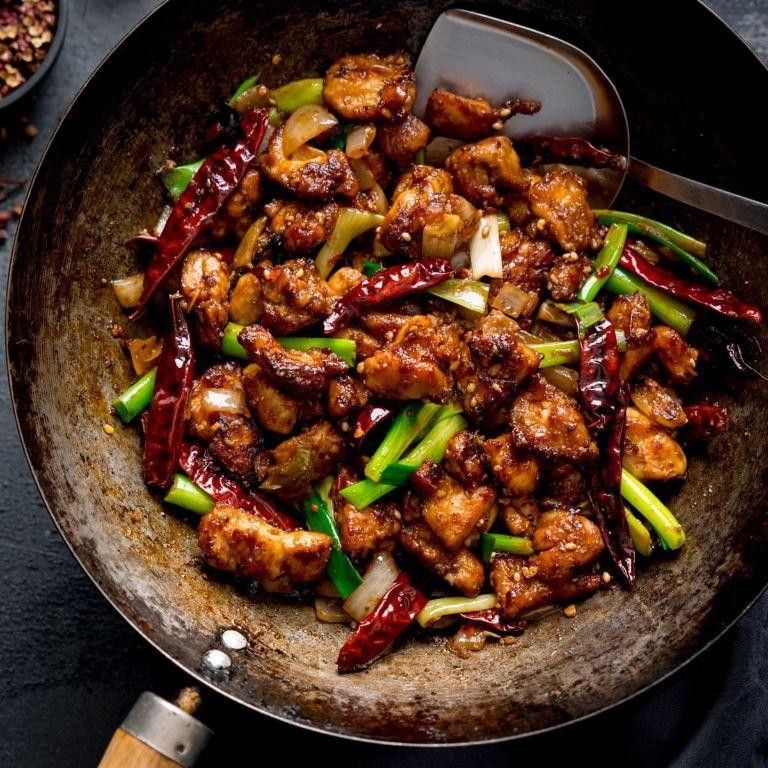
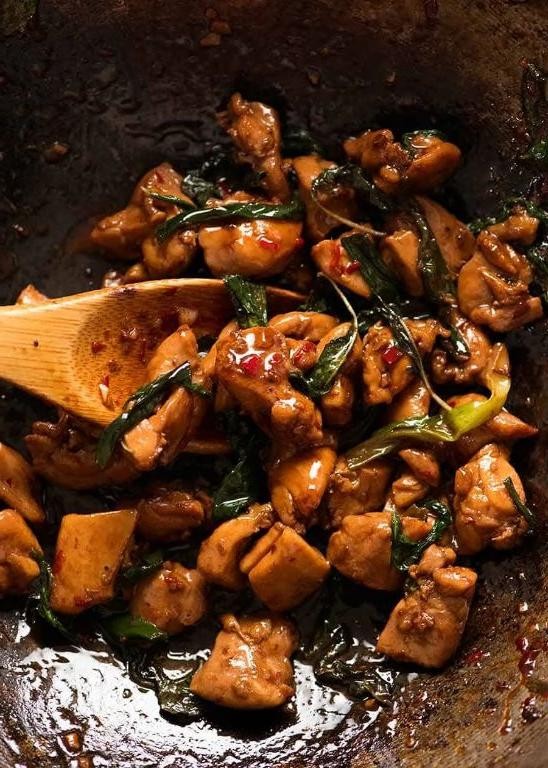
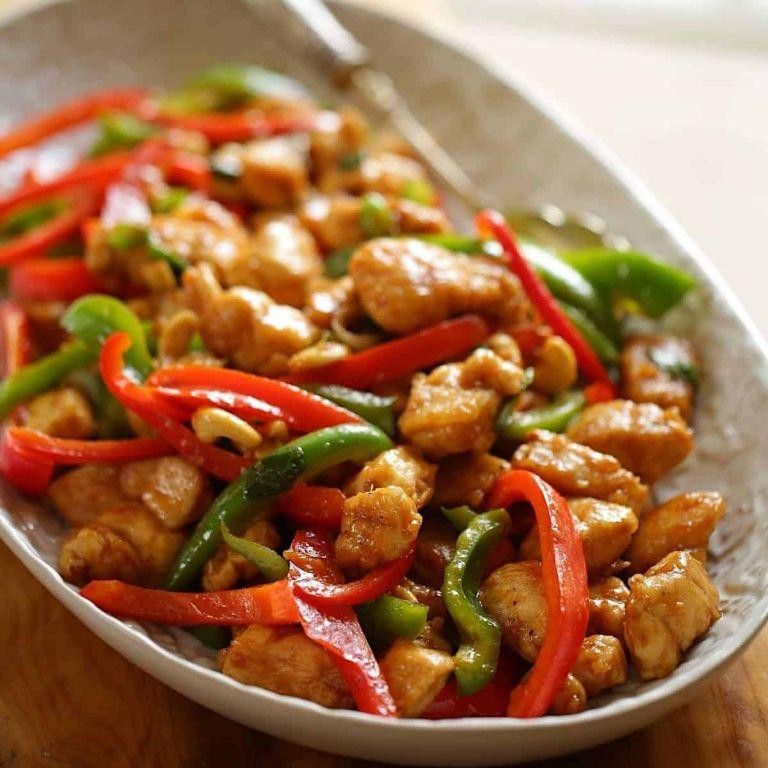
Spicy Szechuan Chicken Stir Fry
T
here’s something about that numbing Szechuan heat that just hits differently on a busy weeknight—I first fell in love with this dish during a rainy takeout binge, and after countless attempts to recreate that magic at home, this version has become my go-to. It’s fiery, fast, and packed with the kind of bold flavor that makes you forget you’re eating something you whipped up in under 30 minutes.
3
servings15
minutes10
minutesIngredients
– 1 lb boneless, skinless chicken thighs, cut into 1-inch pieces (I always keep these slightly frozen for easier slicing)
– 2 tbsp vegetable oil (my trusty neutral oil for high-heat stir-frying)
– 3 cloves garlic, minced (fresh is non-negotiable here—it makes all the difference)
– 1 tbsp fresh ginger, grated (I keep a peeled knob in the freezer for quick grating)
– 2 tbsp Szechuan peppercorns, lightly crushed (toast them first for that signature tingly aroma)
– 1/4 cup low-sodium soy sauce (this balances the saltiness without overpowering)
– 1 tbsp rice vinegar (a splash at the end brightens everything up)
– 1 tsp granulated sugar (just a pinch to round out the spice)
– 1/2 tsp crushed red pepper flakes (adjust based on your heat tolerance—I lean generous)
– 1 red bell pepper, thinly sliced (for color and a sweet crunch)
– 4 green onions, cut into 1-inch pieces (save the green tops for garnish)
– Cooked white rice, for serving (I always make extra—it’s perfect for soaking up the sauce)
Instructions
1. Heat 2 tbsp vegetable oil in a large wok or skillet over medium-high heat until it shimmers, about 1 minute.
2. Add 1 lb chicken pieces in a single layer and cook undisturbed for 3 minutes to develop a golden sear.
3. Flip the chicken and cook for another 2 minutes until no pink remains, then transfer to a clean plate.
4. Reduce heat to medium and add 3 cloves minced garlic, 1 tbsp grated ginger, and 2 tbsp crushed Szechuan peppercorns to the same pan.
5. Stir constantly for 45 seconds until fragrant—be careful not to burn the garlic.
6. Pour in 1/4 cup soy sauce, 1 tbsp rice vinegar, 1 tsp sugar, and 1/2 tsp red pepper flakes, scraping up any browned bits from the pan bottom.
7. Add 1 sliced red bell pepper and cook for 2 minutes until slightly softened but still crisp.
8. Return the cooked chicken to the pan along with any accumulated juices, tossing to coat in the sauce.
9. Stir in 4 green onion pieces and cook for 1 final minute until the onions are just wilted.
Just
serve this immediately over fluffy rice—the chicken stays wonderfully tender against the punchy, tingly sauce, and those crisp peppers add a refreshing contrast. I love doubling the Szechuan peppercorns for an extra lip-tingling kick, or even tossing in some roasted peanuts for crunch if I’m feeling fancy.
Ginger Soy Tofu and Veggie Stir Fry
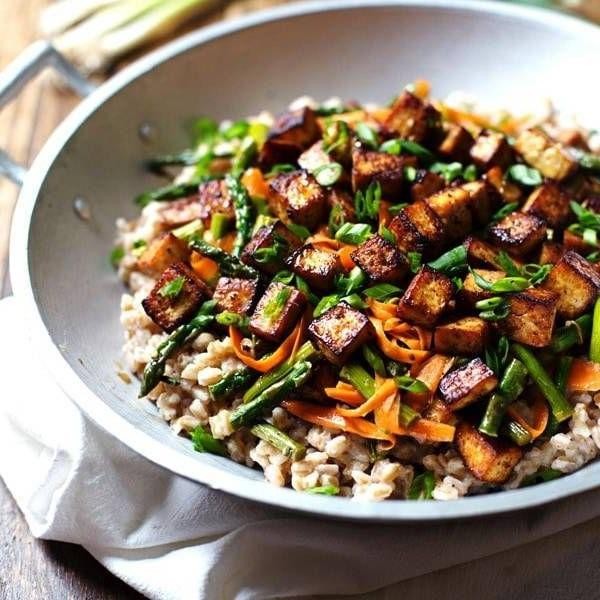
Unbelievably, this ginger soy tofu and veggie stir fry has become my go-to weeknight dinner—it’s the perfect solution for those evenings when I’m racing against the clock but still want something nourishing and delicious. I first stumbled upon this combination during a particularly hectic work week when my fridge was looking sparse, and now it’s in regular rotation at our house. There’s something so satisfying about transforming simple ingredients into a vibrant, flavor-packed meal in under 30 minutes.
2
servings15
minutes15
minutesIngredients
– 1 block (14 oz) extra firm tofu, pressed for at least 15 minutes—I find this makes all the difference in getting that perfect crispy texture
– 2 tbsp avocado oil, my preferred high-heat oil that doesn’t smoke up my kitchen
– 3 cloves garlic, minced—I always use fresh garlic here for that aromatic punch
– 1 tbsp fresh ginger, grated (I keep ginger frozen for easy grating)
– 1 red bell pepper, sliced into thin strips—the vibrant color makes the dish pop
– 1 cup broccoli florets, cut into bite-sized pieces
– 1 medium carrot, julienned—I love the sweet crunch it adds
– 3 tbsp low-sodium soy sauce, which lets me control the saltiness better
– 1 tbsp rice vinegar for that essential tang
– 1 tsp sesame oil, added at the very end for maximum flavor impact
– 2 green onions, sliced diagonally for garnish
Instructions
1. Press the tofu between paper towels with a heavy pan for 15 minutes to remove excess moisture.
2. Cut the pressed tofu into 1-inch cubes and pat completely dry with fresh paper towels.
3. Heat 1 tablespoon avocado oil in a large wok or skillet over medium-high heat until shimmering, about 2 minutes.
4. Add tofu cubes in a single layer and cook undisturbed for 4 minutes until golden brown on the bottom.
5. Flip each tofu piece and cook for another 4 minutes until all sides are crispy and golden.
6. Transfer tofu to a plate and set aside, keeping the wok on the heat.
7. Add remaining 1 tablespoon avocado oil to the hot wok and immediately add minced garlic and grated ginger.
8. Stir constantly for exactly 30 seconds until fragrant but not browned.
9. Add bell pepper strips and cook while stirring for 2 minutes until slightly softened.
10. Add broccoli florets and julienned carrot, stirring continuously for 3 minutes until vegetables are bright and crisp-tender.
11. Return tofu to the wok and pour in soy sauce and rice vinegar.
12. Toss everything together for 1 minute until well coated and heated through.
13. Remove from heat and drizzle with sesame oil, tossing once more to combine.
14. Transfer to serving plates and garnish with sliced green onions.
Beyond just being quick to prepare, this stir fry delivers incredible texture contrasts—the crispy tofu against the tender-crisp vegetables creates such satisfying mouthfeel. I love how the ginger really shines through without overpowering the other flavors, and the soy sauce creates that beautiful glossy coating that makes every bite irresistible. Sometimes I’ll serve it over brown rice for a heartier meal, or wrap it in lettuce cups for a lighter option that still feels substantial.
Sweet and Sour Pork Stir Fry

Perfectly balancing that tangy-sweet combo we all crave, this Sweet and Sour Pork Stir Fry has become my go-to weeknight hero. I first fell for it during a busy season when takeout was tempting, but homemade just hits different—plus, I love how the colors pop in my trusty wok. It’s the kind of dish that makes you feel like a kitchen rockstar without the fuss.
3
servings15
minutes15
minutesIngredients
- 1 lb pork tenderloin, cubed (I trim any silverskin for tenderness)
- 1/4 cup cornstarch (this creates that crispy coating we adore)
- 2 tbsp vegetable oil (a high-smoke point oil is key here)
- 1 red bell pepper, chopped (I grab the firmest one for crunch)
- 1 green bell pepper, chopped (adds vibrant color and freshness)
- 1/2 cup pineapple chunks (canned works, but fresh is my summer favorite)
- 1/3 cup rice vinegar (the tangy backbone of the sauce)
- 1/4 cup ketchup (sounds odd, but it’s the secret sweet base)
- 2 tbsp brown sugar (for that caramelized depth)
- 1 tbsp soy sauce (I use low-sodium to control saltiness)
- 1 tsp grated ginger (freshly grated makes all the difference)
- 2 cloves garlic, minced (because more garlic is always better)
- 1/4 cup water (to thin the sauce just right)
Instructions
- Pat the cubed pork dry with paper towels—this helps the cornstarch stick evenly for maximum crispiness.
- Toss the pork with 1/4 cup cornstarch until fully coated, shaking off any excess to avoid clumping.
- Heat 2 tbsp vegetable oil in a large wok or skillet over medium-high heat until it shimmers, about 1-2 minutes.
- Add the pork in a single layer and cook for 3-4 minutes per side until golden brown and crispy.
- Transfer the pork to a plate using a slotted spoon, leaving any oil in the wok.
- Add the chopped red and green bell peppers to the hot wok and stir-fry for 2 minutes until slightly softened but still crisp.
- Push the peppers to the sides of the wok and add the minced garlic and grated ginger to the center, cooking for 30 seconds until fragrant—don’t let them burn!
- Pour in 1/3 cup rice vinegar, 1/4 cup ketchup, 2 tbsp brown sugar, 1 tbsp soy sauce, and 1/4 cup water, stirring to combine.
- Bring the sauce to a simmer and let it bubble for 1-2 minutes until slightly thickened.
- Return the cooked pork to the wok along with 1/2 cup pineapple chunks, tossing everything to coat in the sauce.
- Cook for another 2 minutes, stirring constantly, until the pork is heated through and the pineapple is warm.
Unbelievably vibrant, this stir fry delivers tender pork with a crispy edge, soaked in a glossy sauce that’s tangy upfront and sweet on the finish. I love serving it over fluffy jasmine rice to soak up every drop, or for a fun twist, stuff it into lettuce cups for a low-carb crunch that feels fresh and light.
Beef and Broccoli Stir Fry with Garlic Sauce
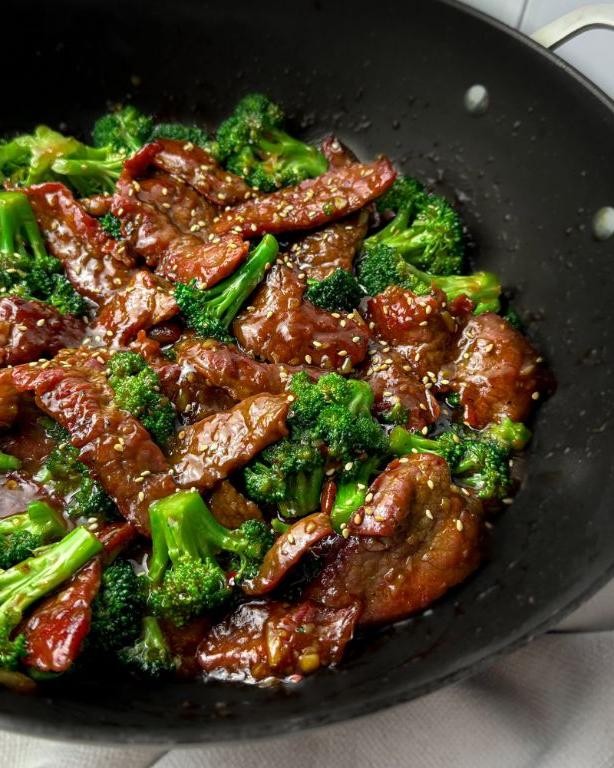
My family’s Tuesday nights used to be takeout chaos until I perfected this beef and broccoli stir fry—now it’s our go-to comfort meal that comes together faster than delivery. The garlic sauce is so good my kids actually ask for extra vegetables!
3
servings15
minutes10
minutesIngredients
– 1 lb flank steak, thinly sliced against the grain (I always freeze it for 20 minutes first for easier slicing)
– 4 cups broccoli florets (my secret—I save the stems for slaw)
– 3 tbsp vegetable oil (divided, because nobody likes soggy beef)
– 5 garlic cloves, minced (fresh only—jarred garlic just doesn’t hit the same)
– 1/3 cup low-sodium soy sauce
– 2 tbsp brown sugar (pack it tight like I do for that caramelized depth)
– 1 tbsp cornstarch mixed with 2 tbsp water (my “no-lump” slurry method)
– 1 tsp sesame oil (the finishing drizzle that makes everything sing)
Instructions
1. Pat the sliced flank steak completely dry with paper towels—this ensures a proper sear instead of steaming.
2. Heat 2 tablespoons of vegetable oil in a large wok or skillet over high heat until shimmering, about 1 minute.
3. Add the beef in a single layer and cook undisturbed for 90 seconds to develop a golden-brown crust.
4. Flip the beef and cook for another 60 seconds until no longer pink, then transfer to a clean plate.
5. Reduce heat to medium-high and add remaining 1 tablespoon oil to the same pan.
6. Add broccoli florets and stir-fry for 3 minutes until bright green with slight charring on edges.
7. Push broccoli to one side and add minced garlic to the empty space, cooking for 30 seconds until fragrant.
8. Pour in soy sauce and brown sugar, stirring constantly until sugar dissolves, about 1 minute.
9. Return beef to the pan along with any accumulated juices.
10. Give the cornstarch slurry a quick stir and drizzle it into the center of the pan.
11. Cook for 2 minutes, tossing continuously, until sauce thickens and coats everything evenly.
12. Remove from heat and stir in sesame oil.
Keep those leftovers—the flavors meld beautifully overnight, and I love serving it over crispy rice cakes for next-day texture contrast. That glossy garlic sauce clinging to tender beef and crisp-tender broccoli makes every bite better than the last.
Kung Pao Shrimp with Peanuts
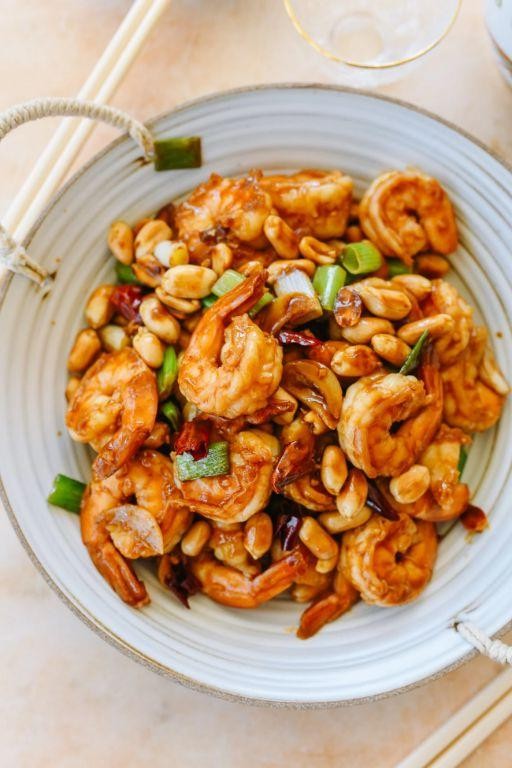
Every time I make this Kung Pao Shrimp, I’m transported back to that tiny Szechuan restaurant in Chicago where I first fell in love with the perfect balance of spicy, sweet, and nutty flavors—it’s become my go-to weeknight dinner when I’m craving something restaurant-quality but want to keep things simple at home.
4
servings15
minutes10
minutesIngredients
– 1 lb large shrimp, peeled and deveined (I always buy wild-caught when possible for better flavor)
– 1/2 cup dry roasted peanuts (I keep these in my pantry specifically for Asian dishes)
– 2 tbsp vegetable oil (my trusty workhorse for high-heat cooking)
– 3 cloves garlic, minced (fresh is non-negotiable here)
– 1 tsp grated ginger (I keep frozen ginger cubes for convenience)
– 2 dried red chilies, broken in half (adjust based on your heat tolerance)
– 1/2 cup bell peppers, diced (I use whatever color looks freshest at the market)
– 2 tbsp soy sauce (I prefer low-sodium to control saltiness)
– 1 tbsp rice vinegar (this brightens everything up perfectly)
– 1 tsp sugar (just enough to balance without being sweet)
– 1 tsp cornstarch mixed with 2 tbsp water (my secret for that glossy restaurant-style sauce)
– 2 green onions, sliced (I save the green parts for garnish)
Instructions
1. Pat the shrimp completely dry with paper towels—this ensures they’ll get a nice sear instead of steaming.
2. Heat vegetable oil in a large skillet or wok over medium-high heat until it shimmers, about 1 minute.
3. Add shrimp in a single layer and cook for 2 minutes per side until they turn pink and opaque.
4. Transfer shrimp to a clean plate using tongs—don’t overcrowd the pan or they won’t brown properly.
5. Add garlic, ginger, and dried chilies to the same pan and cook for 30 seconds until fragrant.
6. Toss in bell peppers and cook for 2 minutes until slightly softened but still crisp.
7. Return shrimp to the pan along with any accumulated juices.
8. Pour in soy sauce and rice vinegar, stirring to coat everything evenly.
9. Sprinkle sugar over the mixture and stir until dissolved, about 30 seconds.
10. Add the cornstarch slurry and cook for 1 minute until the sauce thickens and coats the shrimp.
11. Stir in peanuts and most of the green onions, reserving some for garnish.
12. Cook for 1 final minute to warm everything through.During those final minutes of cooking, the aroma will have your whole kitchen smelling incredible—the shrimp stay wonderfully tender while the peanuts add that essential crunch. I love serving this over jasmine rice to soak up every bit of the spicy sauce, and sometimes I’ll add extra chilies for friends who really want to feel the heat.
Lemon Grass Chicken Stir Fry
Gosh, I still remember the first time I tried making lemon grass chicken stir fry after that incredible meal at a tiny Vietnamese spot in Seattle—I’ve been perfecting my version ever since! It’s become my go-to weeknight dinner when I want something fresh, zesty, and ready in under 30 minutes. Honestly, the aroma of lemon grass sizzling in the pan instantly transports me back to that cozy restaurant booth.
5
servings15
minutes12
minutesIngredients
– 1.5 lbs boneless, skinless chicken thighs, cut into 1-inch pieces (I find thighs stay juicier than breasts)
– 3 stalks fresh lemon grass, tender inner parts only, finely minced (don’t skip the fresh stuff—it makes all the difference!)
– 4 cloves garlic, minced (I always use my garlic press for this)
– 1 medium yellow onion, thinly sliced
– 1 red bell pepper, sliced into strips (adds such a nice crunch)
– 2 tbsp vegetable oil (my trusty neutral oil for high-heat cooking)
– 3 tbsp fish sauce (the good quality kind—it shouldn’t smell overly fishy)
– 2 tbsp fresh lime juice (about 1 large lime, and I always zest it first for garnish)
– 1 tbsp brown sugar (balances the tang perfectly)
– 1 tsp red pepper flakes (adjust based on your heat preference)
– 1/4 cup fresh cilantro, chopped (I grow mine in a little kitchen herb garden)
Instructions
1. Heat 2 tbsp vegetable oil in a large wok or skillet over medium-high heat until it shimmers, about 2 minutes.
2. Add the minced lemon grass and garlic to the hot oil and stir-fry for 1 minute until fragrant but not browned.
3. Tip: To prevent garlic from burning, keep the stir-fry moving constantly with a spatula.
4. Add the chicken pieces in a single layer and cook undisturbed for 2 minutes to develop a golden sear.
5. Flip the chicken and continue cooking for 3 more minutes until all pieces are opaque and lightly browned.
6. Add the sliced onion and red bell pepper to the skillet and stir-fry for 4 minutes until vegetables are slightly softened but still crisp.
7. Tip: Cutting vegetables uniformly ensures they cook at the same rate.
8. In a small bowl, whisk together fish sauce, lime juice, brown sugar, and red pepper flakes until the sugar dissolves.
9. Pour the sauce mixture over the chicken and vegetables, stirring to coat everything evenly.
10. Continue cooking for 2 more minutes until the sauce thickens slightly and clings to the ingredients.
11. Tip: For maximum flavor, let the finished stir-fry rest off heat for 2 minutes before serving.
12. Stir in the fresh cilantro just before removing from heat.
You’ll love how the tender chicken soaks up that bright, citrusy sauce while the vegetables retain just enough crunch. I sometimes serve this over jasmine rice with extra lime wedges, or wrap it in crisp lettuce leaves for a low-carb option that still feels indulgent.
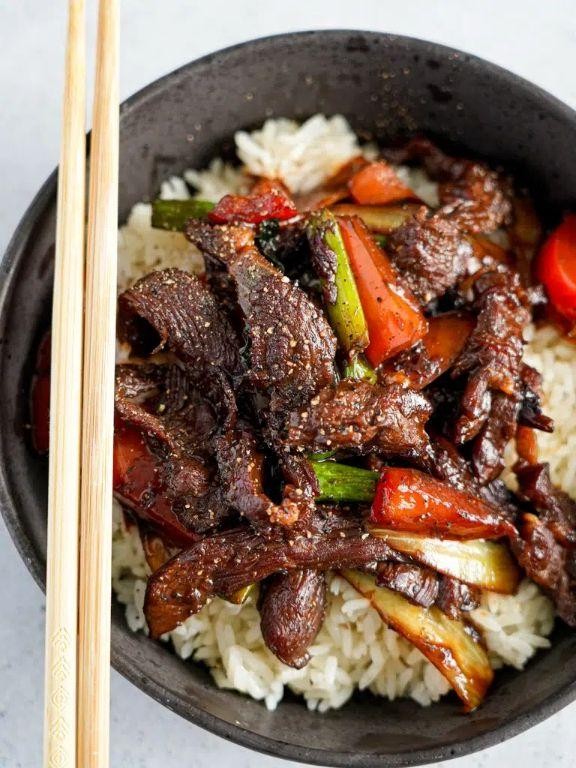
Mongolian Beef Stir Fry
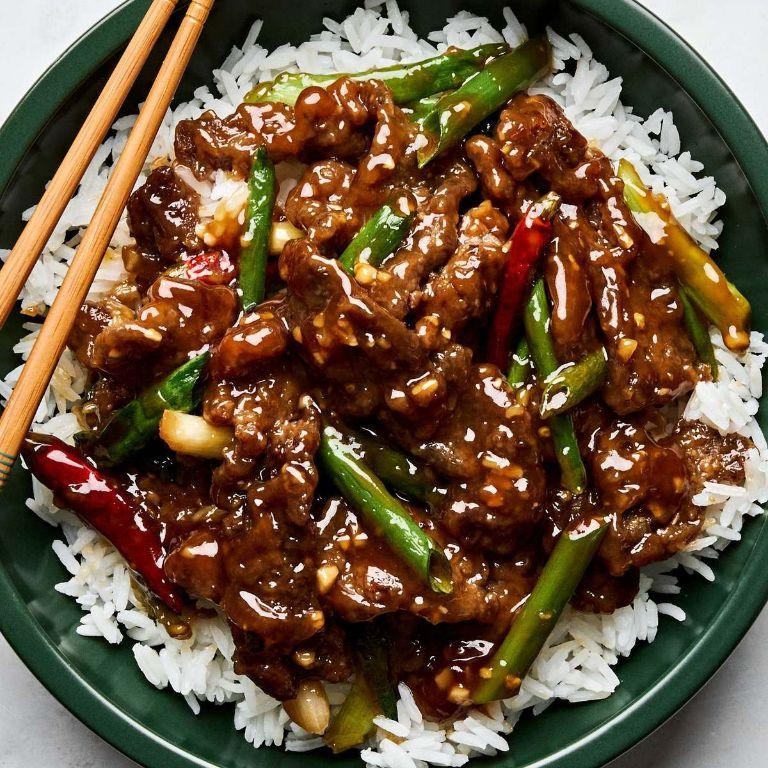
Just last Tuesday, I was craving something savory with that perfect balance of sweet and salty, and this Mongolian Beef Stir Fry hit the spot—it’s become my go-to for busy weeknights when I want restaurant-quality flavor without the fuss.
2
servings15
minutes10
minutesIngredients
– 1 lb flank steak, thinly sliced against the grain (I pop it in the freezer for 15 minutes first to make slicing easier)
– ¼ cup cornstarch, for that crispy coating we all love
– 3 tbsp vegetable oil, divided (I always keep extra nearby in case the pan gets dry)
– 4 cloves garlic, minced (fresh is best—my grandma taught me to smash them with the flat of a knife to peel quickly)
– 1 tsp fresh ginger, grated (I keep a knob in the freezer and grate it frozen—no mess!)
– ½ cup low-sodium soy sauce (this is my pantry staple for controlling saltiness)
– ¼ cup brown sugar, packed (don’t skimp—it gives the sauce that glossy depth)
– 2 green onions, sliced on the diagonal (I save the green tops for garnish to make it pretty)
– 1 tsp sesame oil, for finishing (a drizzle at the end makes all the difference)
Instructions
1. Pat the sliced flank steak completely dry with paper towels to help the cornstarch stick evenly.
2. Toss the steak with ¼ cup cornstarch in a bowl until each piece is lightly coated, shaking off any excess.
3. Heat 2 tbsp vegetable oil in a large skillet or wok over medium-high heat until it shimmers, about 1-2 minutes.
4. Add the coated steak in a single layer, working in batches if needed to avoid crowding, and cook for 2-3 minutes per side until browned and crispy.
5. Transfer the cooked steak to a plate and set aside.
6. Reduce the heat to medium and add the remaining 1 tbsp vegetable oil to the same skillet.
7. Sauté the minced garlic and grated ginger for 30-45 seconds until fragrant but not browned.
8. Pour in ½ cup low-sodium soy sauce and ¼ cup packed brown sugar, stirring constantly until the sugar dissolves and the sauce bubbles lightly, about 1-2 minutes.
9. Return the steak to the skillet and toss to coat evenly in the sauce for 1 minute.
10. Remove from heat and stir in 2 sliced green onions and 1 tsp sesame oil. Never skip the crispy edges on the beef—they soak up the sauce beautifully. Now, this dish shines with its tender beef and sticky-sweet glaze; I love serving it over fluffy jasmine rice with extra green onions scattered on top for a pop of color.
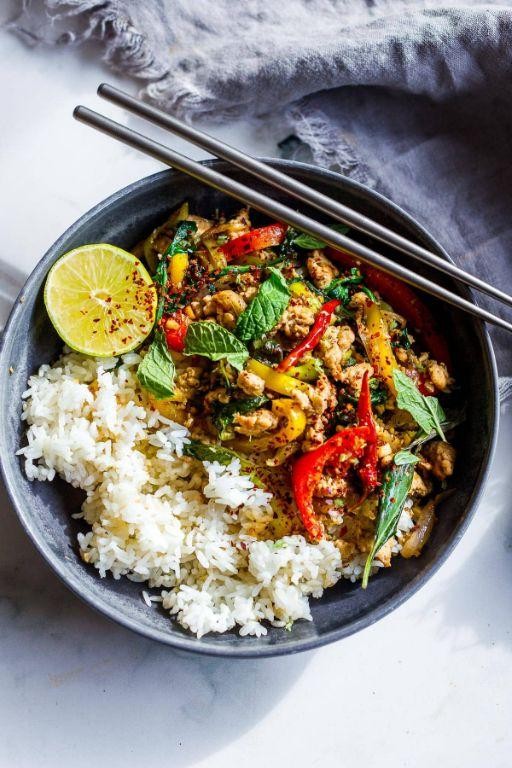
Thai Basil Chicken Stir Fry
Browsing through my local farmer’s market last weekend, I spotted the most vibrant bunches of Thai basil, their purple stems and licorice-scented leaves immediately transporting me back to that incredible street food stall in Bangkok. This Thai Basil Chicken Stir Fry has become my go-to weeknight dinner—it comes together faster than ordering takeout and fills my kitchen with those incredible Southeast Asian aromas that make everyone come running. I love how the spicy, savory sauce clings to every bite of chicken and rice.
5
servings15
minutes9
minutesIngredients
– 1 lb boneless, skinless chicken thighs, cut into bite-sized pieces (I find thighs stay juicier than breast meat)
– 2 tablespoons vegetable oil (my trusty wok loves a high smoke point oil)
– 4 cloves garlic, minced (fresh is essential here—no jarred stuff!)
– 2 Thai chilies, thinly sliced (remove seeds if you’re heat-sensitive like my husband)
– 1 tablespoon fish sauce (this is the umami backbone—don’t skip it)
– 1 tablespoon soy sauce (I use regular, but low-sodium works too)
– 1 teaspoon sugar (just enough to balance the saltiness)
– 1 cup fresh Thai basil leaves (pack them in—they wilt down significantly)
– 1 red bell pepper, thinly sliced (adds beautiful color and crunch)
– Cooked jasmine rice for serving (the fragrant rice soaks up the sauce perfectly)
Instructions
1. Heat vegetable oil in a large wok or skillet over high heat until shimmering, about 1 minute.
2. Add chicken pieces in a single layer and cook undisturbed for 2 minutes to develop a golden sear.
3. Flip chicken and continue cooking until no pink remains, about 3 more minutes.
4. Push chicken to one side of the wok and add minced garlic and sliced Thai chilies to the empty space.
5. Cook garlic and chilies for 30 seconds until fragrant but not browned.
6. Add sliced red bell pepper and stir everything together.
7. Cook for 2 minutes until peppers begin to soften but still retain some crunch.
8. Pour fish sauce and soy sauce directly around the edges of the wok so they sizzle and caramelize.
9. Sprinkle sugar evenly over the mixture and stir to combine.
10. Remove wok from heat and immediately stir in Thai basil leaves until just wilted, about 30 seconds.
11. Serve immediately over hot jasmine rice.
Seriously, the way the fragrant basil perfumes the tender chicken and crisp-tender peppers creates this incredible texture contrast in every bite. I sometimes top it with a fried egg for extra richness, or pack the leftovers cold for lunch—the flavors actually deepen overnight. This dish never fails to satisfy that craving for bold, authentic Thai flavors without ever leaving my kitchen.
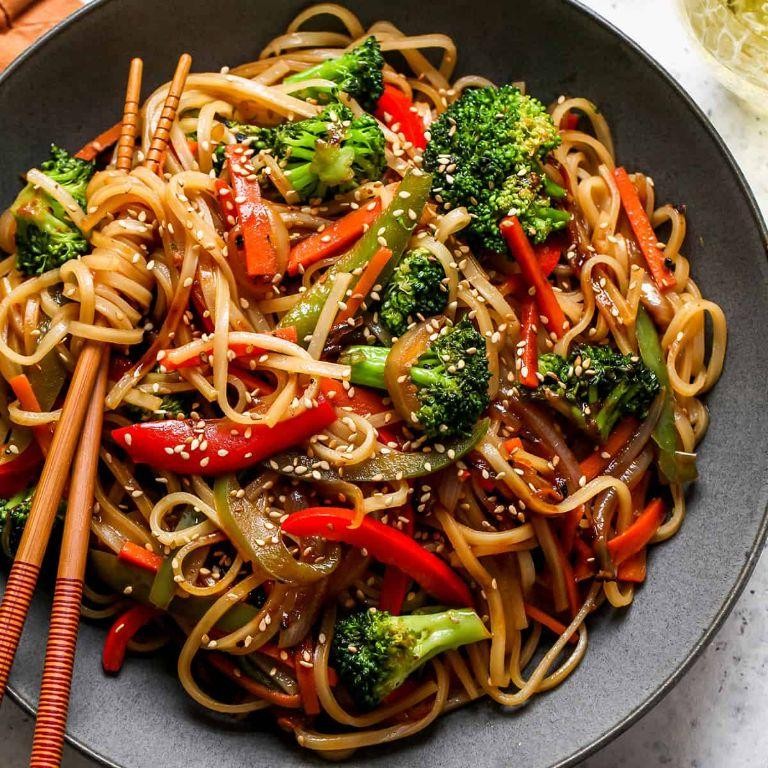
Teriyaki Noodle Stir Fry
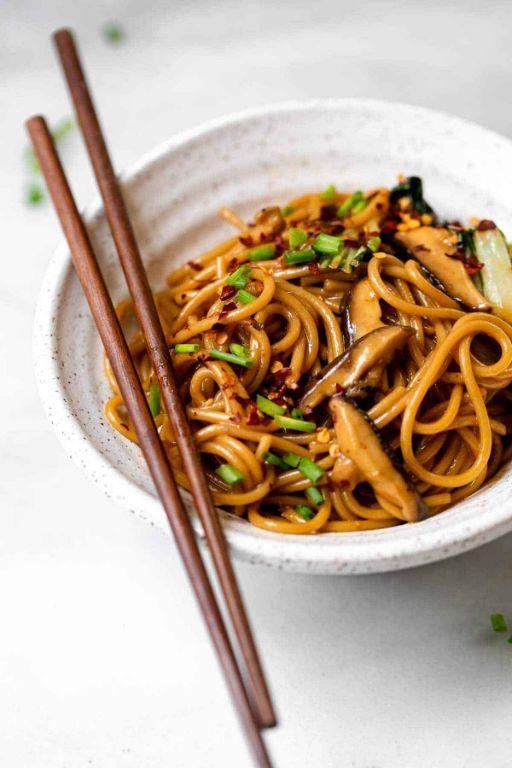
Just last Tuesday, I found myself staring into my nearly empty fridge, wondering what magical dinner I could whip up with the random ingredients staring back at me. That’s when this incredibly easy and satisfying Teriyaki Noodle Stir Fry was born, and it’s become a weekly staple ever since.
3
servings15
minutes20
minutesIngredients
- 8 oz dried udon noodles – I love how chewy these get compared to other noodles
- 2 tbsp vegetable oil – my trusty wok needs a good slick to prevent sticking
- 1 lb chicken breast, cut into 1-inch cubes – I always slice against the grain for maximum tenderness
- 2 cloves garlic, minced – fresh is non-negotiable in my kitchen
- 1 tbsp fresh ginger, grated – I keep mine frozen for easy grating
- 1 red bell pepper, sliced into thin strips – the color makes the dish pop
- 1 cup broccoli florets – I chop them small so they cook quickly
- 1/2 cup teriyaki sauce – I prefer the thicker, glaze-style sauce
- 2 green onions, sliced – saved for that fresh finish at the end
- 1 tbsp sesame seeds – for that perfect nutty crunch
Instructions
- Bring 4 quarts of water to a rolling boil in a large pot.
- Add udon noodles and cook for 8 minutes exactly, stirring occasionally to prevent sticking.
- Drain noodles thoroughly in a colander and rinse with cold water to stop the cooking process.
- Heat vegetable oil in a large wok or skillet over medium-high heat until it shimmers, about 2 minutes.
- Add chicken cubes in a single layer and cook undisturbed for 3 minutes to develop a golden sear.
- Flip chicken pieces and cook for another 3 minutes until cooked through and no pink remains.
- Push chicken to one side of the wok and add garlic and ginger to the empty space, cooking for 30 seconds until fragrant.
- Add bell pepper and broccoli, stirring constantly for 4 minutes until vegetables are bright and slightly tender.
- Combine everything in the wok and add the cooked noodles.
- Pour teriyaki sauce over the mixture and toss continuously for 2 minutes until everything is evenly coated and heated through.
- Remove from heat and garnish with green onions and sesame seeds.
What I love most about this stir fry is how the chewy noodles soak up that sweet-savory teriyaki glaze while the vegetables retain just enough crunch. The sesame seeds add this wonderful textural contrast that makes every bite interesting. Sometimes I’ll serve it in shallow bowls with extra sauce on the side for dipping, or pack it cold for lunch the next day – it’s surprisingly delicious either way.
Orange Chicken and Vegetable Stir Fry
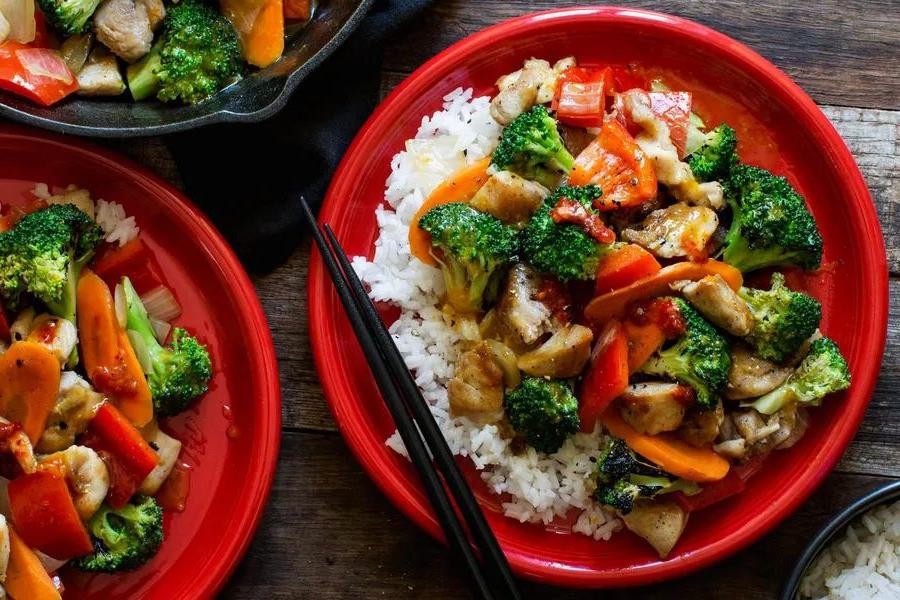
Bustling weeknights call for something quick yet satisfying, and this Orange Chicken and Vegetable Stir Fry has become my go-to rescue meal. I first whipped it up during a particularly chaotic Tuesday when takeout wasn’t an option, and now it’s in our regular rotation—my husband even requests it!
5
servings15
minutes15
minutesIngredients
– 1 lb boneless, skinless chicken breasts, cut into 1-inch cubes (I always pat them dry with paper towels first—it helps with browning)
– 2 tbsp vegetable oil (I keep mine by the stove for easy access)
– 1 red bell pepper, sliced into thin strips (the vibrant color makes the dish pop)
– 1 cup broccoli florets (fresh is my preference, but frozen works in a pinch)
– 1/2 cup orange juice (I squeeze it fresh when I have time)
– 2 tbsp soy sauce (low-sodium is my usual pick)
– 1 tbsp cornstarch (this creates that lovely glossy sauce)
– 2 cloves garlic, minced (I press mine—it’s faster than chopping)
– 1 tsp grated ginger (I keep a knob in the freezer and grate it frozen)
Instructions
1. Heat 1 tablespoon of vegetable oil in a large skillet or wok over medium-high heat until it shimmers, about 1 minute.
2. Add the cubed chicken in a single layer and cook undisturbed for 3 minutes to develop a golden-brown crust.
3. Flip the chicken pieces and cook for another 3 minutes until fully cooked through (internal temperature should reach 165°F).
4. Transfer the cooked chicken to a clean plate using a slotted spoon.
5. Add the remaining 1 tablespoon of vegetable oil to the same skillet.
6. Toss in the sliced bell pepper and broccoli florets, stirring constantly for 4 minutes until slightly softened but still crisp.
7. Push vegetables to one side of the skillet and add minced garlic and grated ginger to the empty space.
8. Cook the garlic and ginger for 30 seconds until fragrant (be careful not to burn them).
9. In a small bowl, whisk together orange juice, soy sauce, and cornstarch until no lumps remain.
10. Pour the sauce mixture into the skillet, stirring continuously as it thickens and bubbles, about 1-2 minutes.
11. Return the cooked chicken to the skillet, tossing everything together until well coated and heated through, about 1 minute.
12. Remove from heat immediately. Really, the magic here is in the contrast—tender chicken with crisp-tender vegetables swimming in that sweet-tangy orange glaze. I love serving it over jasmine rice to soak up every last drop of sauce, or sometimes wrapping it in warm tortillas for a fun twist.
Sesame Ginger Tofu Stir Fry
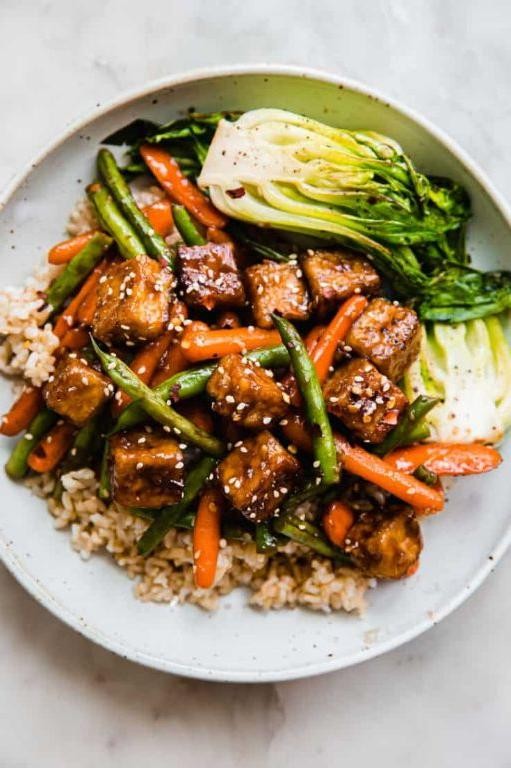
Craving something that’s both healthy and bursting with flavor? I found myself in that exact situation last Tuesday after a particularly long workday, and this sesame ginger tofu stir fry became my instant go-to comfort meal. There’s something magical about how the ginger and sesame mingle together that just makes everything better.
5
servings40
minutes20
minutesIngredients
– 14 oz extra firm tofu (I always press mine for 30 minutes to get that perfect texture)
– 2 tbsp toasted sesame oil (this makes all the difference compared to regular sesame oil)
– 3 cloves garlic, minced (fresh is best here, trust me)
– 1 tbsp freshly grated ginger (I keep mine frozen for easy grating)
– 1/4 cup low-sodium soy sauce
– 2 tbsp rice vinegar
– 1 tbsp honey
– 1 tsp cornstarch
– 1 red bell pepper, sliced (I love the color contrast)
– 1 cup broccoli florets
– 2 green onions, chopped
– 1 tbsp sesame seeds for garnish
Instructions
1. Press the tofu between paper towels with a heavy pan for 30 minutes to remove excess water.
2. Cut the pressed tofu into 1-inch cubes.
3. Heat 1 tablespoon of sesame oil in a large skillet over medium-high heat until shimmering.
4. Add tofu cubes and cook for 6-8 minutes, turning occasionally until golden brown on all sides.
5. Remove tofu from skillet and set aside on a plate.
6. Add remaining 1 tablespoon of sesame oil to the same skillet.
7. Add minced garlic and grated ginger, cooking for exactly 1 minute until fragrant.
8. Whisk together soy sauce, rice vinegar, honey, and cornstarch in a small bowl until smooth.
9. Pour the sauce mixture into the skillet and cook for 2 minutes until slightly thickened.
10. Add sliced bell pepper and broccoli florets to the skillet.
11. Stir-fry the vegetables for 5-6 minutes until crisp-tender.
12. Return the cooked tofu to the skillet and toss to coat with sauce.
13. Cook everything together for 2 more minutes to heat through.
14. Remove from heat and stir in chopped green onions.
15. Sprinkle with sesame seeds before serving.
Nothing beats the combination of crispy tofu edges with that glossy, ginger-infused sauce clinging to every bite. The vegetables maintain just enough crunch to contrast the tender tofu perfectly. Next time you make this, try serving it over cauliflower rice for a low-carb option that still feels incredibly satisfying.
Honey Garlic Shrimp Stir Fry
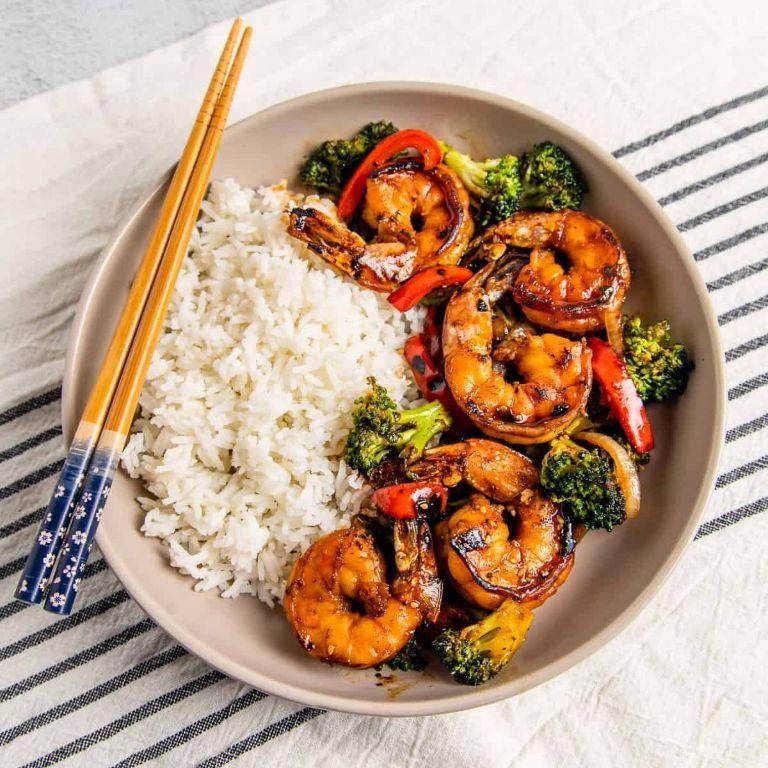
Honey Garlic Shrimp Stir Fry has become my go-to weeknight hero—the kind of dish that feels fancy but comes together faster than ordering takeout. I first stumbled upon this combination during a frantic “what’s in the fridge” moment, and now my family requests it weekly, especially when we’re craving something sweet, savory, and satisfyingly quick.
3
servings10
minutes9
minutesIngredients
– 1 lb large raw shrimp, peeled and deveined (I always keep a bag in the freezer for last-minute dinners)
– 3 tbsp honey (local if you have it—it makes the sauce shine)
– 4 cloves garlic, minced (fresh is key here, no jarred stuff!)
– 2 tbsp soy sauce (I use low-sodium to control the saltiness)
– 1 tbsp olive oil (extra virgin is my pantry staple)
– 1 red bell pepper, thinly sliced (adds a sweet crunch)
– 1 cup broccoli florets (fresh or frozen both work)
– 1 tsp cornstarch (for that glossy, restaurant-style sauce)
– 2 green onions, sliced (for a fresh finish)
Instructions
1. Pat the shrimp completely dry with paper towels—this ensures they get a nice sear instead of steaming.
2. In a small bowl, whisk together honey, minced garlic, soy sauce, and cornstarch until smooth.
3. Heat olive oil in a large skillet or wok over medium-high heat until it shimmers, about 1 minute.
4. Add shrimp in a single layer and cook for 1–2 minutes per side until pink and slightly curled.
5. Remove shrimp from skillet and set aside on a plate.
6. Add sliced bell pepper and broccoli to the same skillet, stirring frequently for 3–4 minutes until slightly tender but still crisp.
7. Pour the honey garlic sauce into the skillet, stirring constantly as it thickens and bubbles, about 1 minute.
8. Return shrimp to the skillet, tossing to coat evenly in the sauce for 30 seconds.
9. Sprinkle with sliced green onions and remove from heat.
What I love most is how the shrimp stay juicy while the sauce caramelizes into a sticky glaze. We often serve it over fluffy jasmine rice to soak up every last drop, but it’s equally fantastic tucked into lettuce wraps for a lighter twist.
Cashew Chicken with Bell Peppers
Finally, after testing countless cashew chicken recipes, I’ve landed on this version that’s become my family’s Tuesday night staple – it’s the perfect balance of savory, slightly sweet, and has just enough crunch to keep things interesting.
4
servings15
minutes21
minutesIngredients
– 1.5 lbs boneless, skinless chicken thighs (I prefer thighs over breasts for better flavor)
– 1 red bell pepper and 1 green bell pepper, sliced (the color contrast makes the dish pop)
– 1 cup raw cashews (toasting them first is my secret weapon)
– 3 cloves garlic, minced (fresh only – no jarred stuff here)
– 1/4 cup low-sodium soy sauce
– 2 tbsp honey (local if you can find it)
– 1 tbsp rice vinegar
– 1 tsp cornstarch
– 2 tbsp vegetable oil
– 1/2 tsp red pepper flakes (adjust based on your heat preference)
Instructions
1. Preheat a large skillet or wok over medium-high heat for 2 minutes until hot.
2. Add raw cashews to the dry skillet and toast for 3-4 minutes, stirring constantly, until golden brown and fragrant.
3. Remove cashews from skillet and set aside in a small bowl.
4. Cut chicken thighs into 1-inch cubes, patting them dry with paper towels first (this helps with browning).
5. Add 1 tablespoon vegetable oil to the hot skillet and swirl to coat the surface.
6. Add chicken pieces in a single layer, working in batches if needed to avoid overcrowding.
7. Cook chicken for 5-6 minutes, turning occasionally, until all sides are golden brown and internal temperature reaches 165°F.
8. Remove chicken from skillet and set aside with the cashews.
9. Add remaining 1 tablespoon vegetable oil to the same skillet.
10. Add sliced bell peppers and cook for 4 minutes, stirring occasionally, until slightly softened but still crisp.
11. Add minced garlic and red pepper flakes, cooking for 30 seconds until fragrant.
12. In a small bowl, whisk together soy sauce, honey, rice vinegar, and cornstarch until smooth.
13. Pour the sauce mixture into the skillet with the peppers.
14. Cook for 2 minutes, stirring constantly, until the sauce thickens and becomes glossy.
15. Return the cooked chicken and toasted cashews to the skillet.
16. Toss everything together for 1-2 minutes until heated through and evenly coated with sauce.
Perfectly balanced between tender chicken and crisp vegetables, this dish delivers that satisfying crunch from the cashews against the silky sauce. Personally, I love serving it over jasmine rice to soak up every last drop of that savory-sweet glaze, or wrapping it in lettuce cups for a lighter meal that still feels indulgent.
Vegetable Lo Mein Stir Fry
Yesterday evening, after a particularly hectic workday, I found myself craving something comforting yet healthy—something that would fill my kitchen with the most incredible aromas. That’s when I decided to whip up my go-to Vegetable Lo Mein Stir Fry, a dish that never fails to hit the spot and use up whatever veggies are lurking in my crisper drawer.
2
servings15
minutes10
minutesIngredients
- 8 oz lo mein noodles (I always keep a pack in the pantry for last-minute dinners)
- 2 tbsp vegetable oil (my trusty bottle lives right next to the stove)
- 3 cloves garlic, minced (fresh is best—I press mine with the side of a knife for maximum flavor)
- 1 tbsp fresh ginger, grated (I keep a knob in the freezer and grate it frozen—no peeling needed!)
- 1 cup sliced bell peppers (I love using a mix of red and yellow for color)
- 1 cup shredded carrots (pre-shredded saves me so much time on busy nights)
- 1 cup snap peas (their crisp texture holds up perfectly in the stir-fry)
- 3 tbsp soy sauce (I use reduced-sodium so I can control the saltiness)
- 1 tbsp sesame oil (this is non-negotiable for that authentic finish)
- 2 green onions, sliced (I save the green tops for garnish)
Instructions
- Bring a large pot of salted water to a rolling boil over high heat.
- Add lo mein noodles and cook for exactly 4 minutes, stirring occasionally to prevent sticking.
- Drain noodles immediately and rinse with cold water to stop the cooking process—this prevents them from becoming mushy later.
- Heat vegetable oil in a large wok or skillet over medium-high heat until it shimmers, about 1 minute.
- Add minced garlic and grated ginger, stirring constantly for 30 seconds until fragrant but not browned.
- Toss in bell peppers and carrots, stirring frequently for 2 minutes until they begin to soften.
- Add snap peas and continue cooking for another 2 minutes until all vegetables are crisp-tender.
- Push vegetables to one side of the pan and pour soy sauce directly onto the hot surface—it will sizzle and caramelize slightly.
- Add cooked noodles to the pan, tossing everything together until evenly coated with sauce.
- Drizzle sesame oil over the noodles and toss once more to combine.
- Remove from heat and stir in green onions, reserving some for garnish.
Here’s what makes this dish special: the noodles stay wonderfully chewy while the vegetables retain just enough crunch. That hit of ginger and sesame oil makes it taste like takeout, but better because you made it yourself. I love serving this straight from the wok with extra green onions scattered over the top—sometimes I’ll even add a sprinkle of crushed red pepper for those who like a little heat.
Black Pepper Beef Stir Fry
Wandering through my local farmer’s market last weekend, I spotted the most beautiful flank steak that immediately inspired me to create this comforting stir fry. There’s something about the bold aroma of black pepper that makes this dish feel both sophisticated and completely approachable. I’ve been making variations of this recipe for years, and it’s become my go-to weeknight dinner when I want something satisfying without spending hours in the kitchen.
5
servings20
minutes9
minutesIngredients
- 1 lb flank steak, sliced against the grain (I always look for good marbling – it makes such a difference in tenderness)
- 2 tbsp freshly cracked black pepper (don’t use pre-ground – the flavor difference is incredible)
- 3 tbsp soy sauce (I prefer low-sodium so I can control the salt level)
- 1 tbsp oyster sauce (this is my secret ingredient for that restaurant-quality depth)
- 2 tsp brown sugar
- 3 cloves garlic, minced (I always use fresh – the jarred stuff just doesn’t compare)
- 1 medium onion, sliced (yellow onions work best for their sweetness when cooked)
- 1 bell pepper, any color, sliced (I love using red for the pop of color)
- 2 tbsp vegetable oil (use one with high smoke point for perfect searing)
- 1 tsp cornstarch mixed with 2 tbsp water (my trick for getting that glossy sauce)
Instructions
- Combine the sliced flank steak with 1 tablespoon of black pepper, 2 tablespoons of soy sauce, and cornstarch mixture in a medium bowl, then let it marinate for exactly 15 minutes at room temperature.
- Heat 1 tablespoon of vegetable oil in a large wok or skillet over high heat until it shimmers, about 2 minutes.
- Add the marinated steak in a single layer and cook undisturbed for 90 seconds to develop a good sear.
- Flip the steak pieces and cook for another 60 seconds until browned but still slightly pink inside, then transfer to a clean plate.
- Add the remaining 1 tablespoon of vegetable oil to the same wok and heat for 30 seconds.
- Add the sliced onion and bell pepper, stirring constantly for 3 minutes until they begin to soften but still have some crunch.
- Push vegetables to the sides of the wok and add minced garlic to the center, cooking for exactly 30 seconds until fragrant.
- Return the cooked steak to the wok along with any accumulated juices.
- Add the remaining 1 tablespoon of black pepper, 1 tablespoon of soy sauce, oyster sauce, and brown sugar, then toss everything together for 1 minute.
- Cook for 2 more minutes, stirring constantly, until the sauce thickens and coats all ingredients evenly.
Really, what makes this dish special is how the cracked black pepper creates this warm, aromatic crust on the tender beef. The vegetables maintain just enough crunch to contrast beautifully with the silky sauce. I love serving this over jasmine rice to soak up every last drop, or sometimes I’ll wrap it in crisp lettuce leaves for a lighter meal that still feels indulgent.
Pineapple Pork Stir Fry
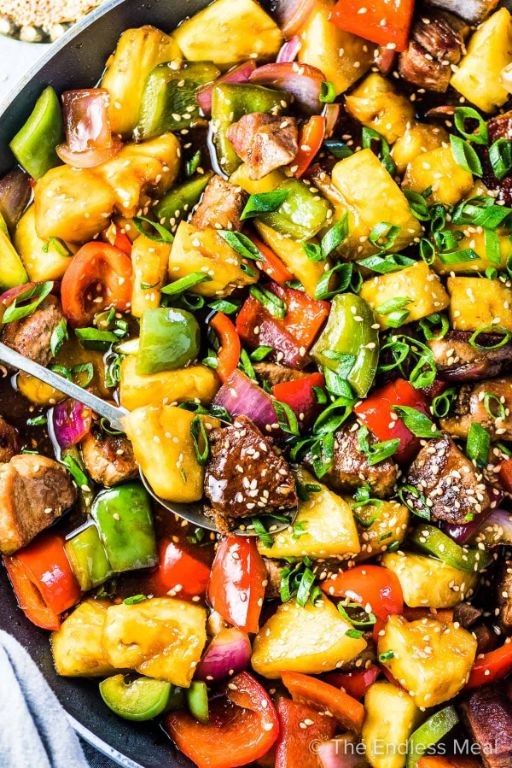
Keeping my kitchen organized while whipping up quick dinners is my secret to surviving busy weeknights, and this pineapple pork stir fry has become my go-to solution when I need something flavorful on the table fast—it’s the perfect balance of sweet, savory, and satisfying that my whole family craves.
4
servings15
minutes10
minutesIngredients
– 1 lb pork tenderloin, sliced thin against the grain (this makes it extra tender)
– 1 tbsp cornstarch, which I always keep handy for that perfect stir-fry coating
– 2 tbsp soy sauce, my favorite brand for its rich, salty depth
– 1 tbsp rice vinegar, for a subtle tang that brightens everything up
– 1 tbsp brown sugar, because a little sweetness balances the savory notes
– 1 tbsp vegetable oil, my trusty high-heat cooking staple
– 2 cloves garlic, minced (fresh is best—I press mine right into the pan)
– 1 red bell pepper, sliced into strips for color and crunch
– 1 cup fresh pineapple chunks, the star that brings tropical vibes to the dish
– ½ cup sliced green onions, saved for garnish to add a fresh finish
Instructions
1. Place the sliced pork in a medium bowl and toss with cornstarch until evenly coated. Tip: Coating the pork in cornstarch first helps create a light crust and keeps the meat juicy.
2. In a small bowl, whisk together soy sauce, rice vinegar, and brown sugar until the sugar dissolves completely.
3. Heat vegetable oil in a large skillet or wok over medium-high heat until it shimmers, about 1 minute.
4. Add the pork to the hot skillet in a single layer and cook for 3–4 minutes, stirring once, until the edges turn golden brown.
5. Push the pork to one side of the skillet and add minced garlic to the empty space, sautéing for 30 seconds until fragrant.
6. Add sliced bell pepper to the skillet and stir everything together, cooking for 2 minutes until the pepper softens slightly.
7. Pour the soy sauce mixture over the pork and vegetables, stirring to coat evenly.
8. Add pineapple chunks and continue cooking for 2 more minutes, until the pineapple is warmed through and the sauce thickens. Tip: Don’t overcook the pineapple—it should stay tender but not mushy.
9. Remove the skillet from heat and sprinkle with sliced green onions. Tip: Let it rest for a minute off the heat so the flavors meld together beautifully.
Amazingly tender pork mingles with juicy pineapple in every bite, creating a sweet-savory sauce that clings perfectly to steamed rice. I love serving this over jasmine rice with a side of quick-pickled cucumbers for a refreshing crunch that cuts through the richness.
Conclusion
Mastering wok stir-fry is easier than ever with these 18 incredible recipes! Whether you’re craving classic favorites or bold new flavors, this collection has something for every home cook. We’d love to hear which dishes become your go-to meals—drop a comment with your favorites and share these delicious ideas on Pinterest to inspire fellow cooking enthusiasts!


