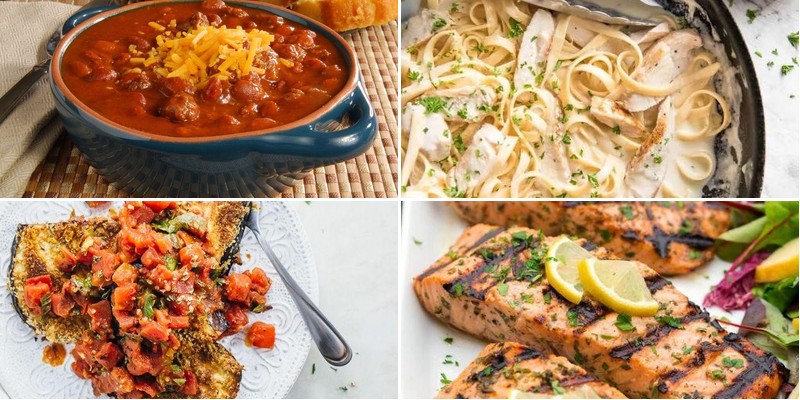
Whether you’re juggling busy weeknights or planning a leisurely weekend feast, finding meals that please everyone at the table can be a challenge. That’s why we’ve gathered 35 delicious, family-friendly recipes—from quick comfort classics to fresh seasonal favorites—that are sure to become new staples in your kitchen. Dive in and discover your next go-to dish!
Hearty Beef Stew with Root Vegetables
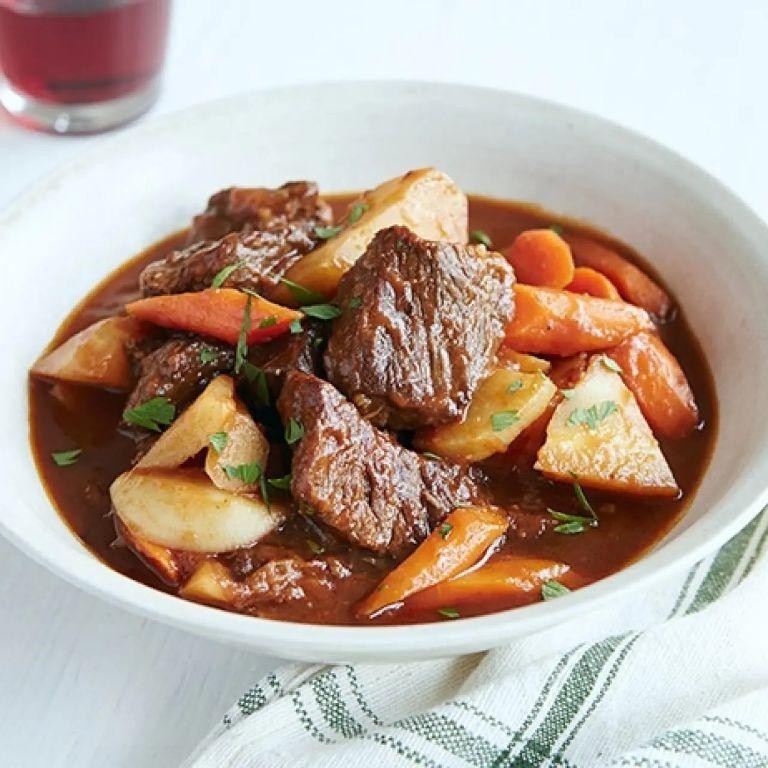
On a crisp autumn day, nothing warms the soul quite like a simmering pot of hearty beef stew. This classic recipe breaks down the process into simple, manageable steps, perfect for first-time cooks. Let’s build layers of flavor together, starting with browning the beef to create a rich foundation.
6
servings25
minutes165
minutesIngredients
– 2 lbs beef chuck roast, cut into 1-inch cubes (I prefer chuck for its excellent marbling and tenderness when slow-cooked)
– 3 tbsp extra virgin olive oil (my go-to for its fruity notes that complement the beef)
– 1 large yellow onion, diced (room temperature onions release their sweetness more readily)
– 3 cloves garlic, minced (freshly minced garlic provides the most vibrant flavor)
– 4 cups beef broth (I always use low-sodium to better control the seasoning)
– 1 cup dry red wine (a robust Cabernet adds wonderful depth)
– 3 large carrots, cut into 1-inch chunks
– 2 parsnips, cut into 1-inch chunks
– 1 lb Yukon Gold potatoes, cut into 1-inch cubes (their creamy texture holds up beautifully in stew)
– 2 tbsp tomato paste
– 1 tsp dried thyme
– 2 bay leaves
– 1 tsp kosher salt
– ½ tsp freshly ground black pepper
– 2 tbsp all-purpose flour
Instructions
1. Pat the beef cubes completely dry with paper towels.
2. Season the beef evenly with kosher salt and black pepper.
3. Heat 2 tablespoons of olive oil in a large Dutch oven over medium-high heat until shimmering.
4. Working in two batches to avoid crowding, brown the beef cubes for 3-4 minutes per side until deeply caramelized.
5. Transfer the browned beef to a clean plate using tongs.
6. Reduce the heat to medium and add the remaining 1 tablespoon of olive oil to the pot.
7. Add the diced onion and cook for 5 minutes, stirring occasionally, until softened and translucent.
8. Add the minced garlic and cook for 1 minute until fragrant.
9. Stir in the tomato paste and cook for 2 minutes until it darkens slightly in color.
10. Sprinkle the flour over the onion mixture and cook for 1 minute, stirring constantly.
11. Pour in the red wine, scraping the bottom of the pot to release any browned bits.
12. Simmer the wine for 2 minutes until reduced by half.
13. Return the browned beef and any accumulated juices to the pot.
14. Add the beef broth, dried thyme, and bay leaves.
15. Bring the stew to a gentle boil, then immediately reduce to a low simmer.
16. Cover the pot and simmer for 1 hour and 30 minutes, stirring occasionally.
17. Add the carrot chunks, parsnip chunks, and potato cubes to the pot.
18. Continue simmering covered for 45-60 minutes until the vegetables are fork-tender.
19. Remove and discard the bay leaves.
20. Let the stew rest off the heat for 15 minutes before serving.
Unbelievably tender beef practically melts in your mouth, while the root vegetables maintain just enough structure to provide satisfying texture. The rich, savory broth carries hints of sweet onion and earthy thyme that deepen overnight. Serve this stew in shallow bowls with crusty bread for dipping, or spoon it over creamy polenta for a comforting twist.
Creamy Chicken Alfredo Pasta
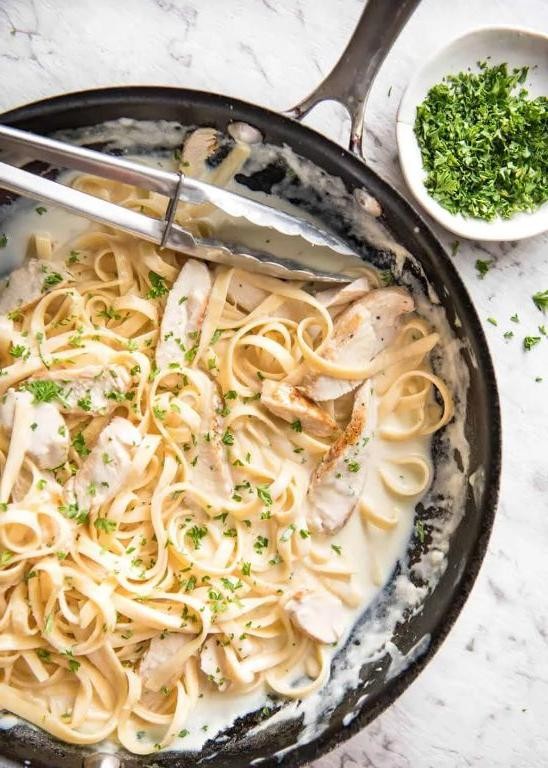
Sometimes you just need that perfect comfort meal that feels like a warm hug in a bowl. Creamy chicken Alfredo pasta delivers exactly that—rich, satisfying, and surprisingly simple to make from scratch, even if you’re new to cooking. Let’s walk through it together, step by step, so you can create a restaurant-quality dish right in your own kitchen.
5
servings15
minutes25
minutesIngredients
– 8 ounces fettuccine pasta (I always keep a good-quality brand on hand for that perfect al dente bite)
– 2 boneless, skinless chicken breasts (about 1 pound total, I prefer to slice them evenly for consistent cooking)
– 2 tablespoons extra virgin olive oil (my go-to for its fruity notes)
– 3 cloves garlic, minced (freshly minced makes all the difference in flavor)
– 1 cup heavy cream (this creates the luxurious base for our sauce)
– 1/2 cup grated Parmesan cheese (I like to use freshly grated—it melts so much smoother)
– 2 tablespoons unsalted butter (room temperature butter blends into the sauce more easily)
– 1/4 teaspoon salt (just enough to enhance without overpowering)
– 1/4 teaspoon black pepper (freshly cracked adds a nice little kick)
– 2 tablespoons chopped fresh parsley (for a bright, fresh finish)
Instructions
1. Bring a large pot of salted water to a rolling boil over high heat.
2. Add the fettuccine pasta to the boiling water and cook for 10-12 minutes until al dente (the pasta should still have a slight bite to it).
3. While the pasta cooks, slice the chicken breasts into 1/2-inch thick strips.
4. Heat the olive oil in a large skillet over medium-high heat until it shimmers.
5. Add the chicken strips to the hot skillet in a single layer, making sure they’re not crowded.
6. Cook the chicken for 6-7 minutes per side until golden brown and the internal temperature reaches 165°F on an instant-read thermometer.
7. Remove the cooked chicken from the skillet and set aside on a plate.
8. Reduce the skillet heat to medium and add the minced garlic.
9. Cook the garlic for 1 minute until fragrant but not browned (watch carefully as burnt garlic turns bitter).
10. Pour the heavy cream into the skillet and bring it to a gentle simmer.
11. Whisk in the Parmesan cheese until completely melted and the sauce is smooth.
12. Stir in the butter until it’s fully incorporated into the sauce.
13. Season the sauce with salt and black pepper, tasting to ensure the balance is right.
14. Drain the cooked pasta, reserving 1/4 cup of the pasta water.
15. Add the drained pasta and cooked chicken to the sauce in the skillet.
16. Toss everything together, adding a splash of the reserved pasta water if the sauce needs thinning.
17. Sprinkle with chopped parsley just before serving.
The finished dish should have pasta that’s perfectly coated in that velvety, rich sauce with tender chicken pieces throughout. That creamy Parmesan flavor pairs beautifully with the slight peppery kick, making each bite deeply satisfying. Try serving it alongside a simple green salad or with some garlic bread to soak up every last bit of that delicious sauce.
Classic Meatloaf with Mashed Potatoes
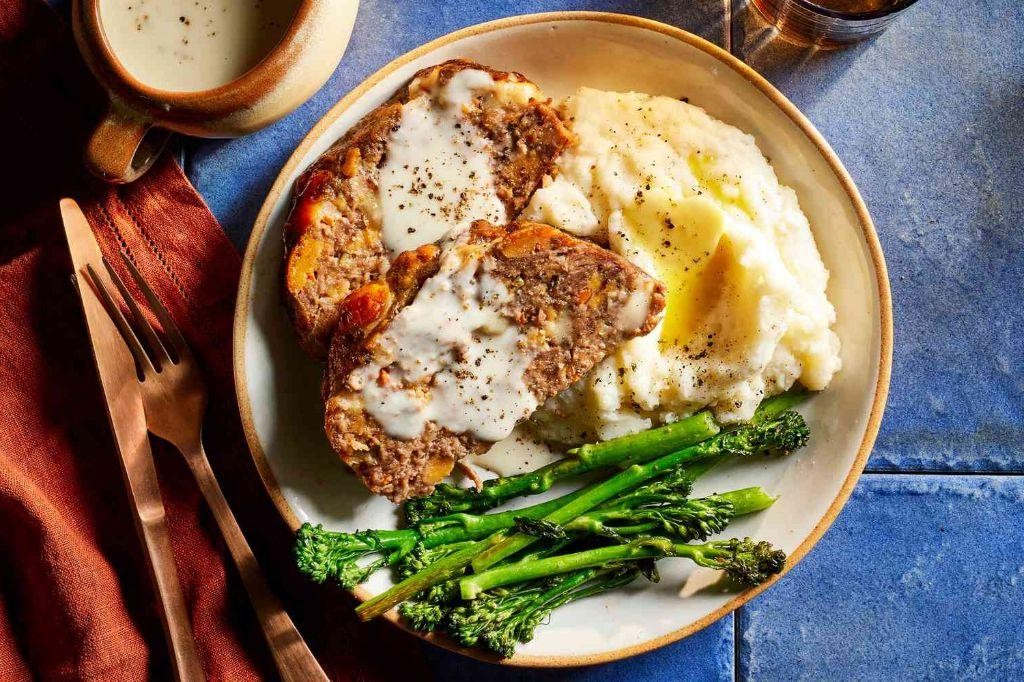
Developing the perfect comfort meal starts with mastering the fundamentals, and this classic meatloaf paired with creamy mashed potatoes delivers that nostalgic satisfaction every home cook craves. During cooler months, I find this combination particularly comforting—the savory meatloaf baking while the potatoes simmer creates an aroma that fills your kitchen with warmth.
6
servings20
minutes75
minutesIngredients
- 2 lbs ground beef (80/20 blend gives the best moisture)
- 1 cup breadcrumbs (I prefer panko for lighter texture)
- 1 large yellow onion, finely diced (sweet varieties work beautifully)
- 2 large eggs, at room temperature for better binding
- 1/2 cup whole milk (the fat content makes a difference)
- 1/4 cup ketchup plus 2 tbsp for glazing
- 1 tbsp Worcestershire sauce (my secret flavor booster)
- 2 tsp garlic powder
- 1 1/2 tsp salt
- 1 tsp black pepper
- 2 lbs russet potatoes, peeled and quartered
- 1/2 cup unsalted butter, cubed
- 1/2 cup warm whole milk
- 1/2 cup sour cream (makes them extra creamy)
Instructions
- Preheat your oven to 375°F and lightly grease a 9×5-inch loaf pan.
- Combine ground beef, breadcrumbs, diced onion, eggs, 1/2 cup milk, 1/4 cup ketchup, Worcestershire sauce, garlic powder, salt, and pepper in a large mixing bowl.
- Use your hands to gently mix the ingredients until just combined—overmixing makes tough meatloaf.
- Transfer the mixture to the prepared loaf pan and shape it into an even loaf.
- Spread the remaining 2 tablespoons of ketchup evenly over the top of the meatloaf.
- Bake at 375°F for 55-65 minutes, until the internal temperature reaches 160°F on an instant-read thermometer.
- While the meatloaf bakes, place peeled potatoes in a large pot and cover with cold water by 2 inches.
- Bring the potatoes to a boil over high heat, then reduce to a simmer and cook for 15-20 minutes until fork-tender.
- Drain the potatoes thoroughly and return them to the hot pot for 1 minute to evaporate excess moisture.
- Add butter, warm milk, and sour cream to the potatoes, then mash until smooth and creamy.
- Let the meatloaf rest for 10 minutes before slicing to allow juices to redistribute.
Looking at your finished dish, you’ll notice the meatloaf develops a caramelized crust while staying remarkably moist inside, complemented by the velvety mashed potatoes that soak up the savory juices. Leftovers make fantastic sandwiches the next day, or try serving slices over the mashed potatoes with a generous drizzle of pan drippings for an elevated presentation.
Homemade Margherita Pizza

Using your hands to craft a perfect Homemade Margherita Pizza brings such satisfaction—there’s nothing quite like that first bite of warm, cheesy goodness straight from your own oven. Let’s walk through this classic recipe together, step by careful step.
1
pizza73
minutes14
minutesIngredients
– 2 cups all-purpose flour (I always use King Arthur for its consistent quality)
– 1 teaspoon active dry yeast (check the expiration date—fresh yeast makes all the difference)
– ¾ cup warm water (around 110°F, which should feel comfortably warm to your wrist)
– 1 teaspoon salt (I prefer fine sea salt for even distribution)
– 1 tablespoon extra virgin olive oil (this is my go-to for both dough and drizzling)
– ½ cup crushed San Marzano tomatoes (the gold standard for authentic pizza sauce)
– 8 ounces fresh mozzarella cheese (sliced into ¼-inch rounds—the wetter, the better for that classic stretch)
– 10 fresh basil leaves (torn by hand right before using to prevent bruising)
Instructions
1. Combine 2 cups all-purpose flour, 1 teaspoon active dry yeast, and 1 teaspoon salt in a large mixing bowl.
2. Pour in ¾ cup warm water (110°F) and 1 tablespoon extra virgin olive oil, then mix with a wooden spoon until a shaggy dough forms.
3. Turn the dough onto a lightly floured surface and knead for 8 minutes until smooth and elastic. Tip: The dough should spring back slowly when poked with your finger.
4. Place the dough in a lightly oiled bowl, cover with a damp kitchen towel, and let rise in a warm spot for 1 hour until doubled in size.
5. Preheat your oven to 475°F with a pizza stone or baking sheet inside for at least 30 minutes.
6. Punch down the risen dough and roll it into a 12-inch circle on a floured surface.
7. Spread ½ cup crushed San Marzano tomatoes evenly over the dough, leaving a ½-inch border around the edges.
8. Arrange 8 ounces of fresh mozzarella slices evenly over the tomato sauce.
9. Transfer the pizza to the preheated baking surface and bake for 12-14 minutes until the crust is golden brown and cheese is bubbly with brown spots.
10. Remove the pizza from the oven and immediately top with 10 torn fresh basil leaves. Tip: Adding basil after baking preserves its vibrant color and fresh flavor.
11. Let the pizza rest for 3 minutes before slicing to allow the cheese to set. Tip: Use a pizza wheel for clean cuts through the crispy crust.
Really notice how the crisp, chewy crust contrasts with the creamy melted mozzarella and bright tomato sauce. The fresh basil adds that final aromatic touch that makes this pizza truly special. Try serving it alongside a simple arugula salad dressed with lemon vinaigrette for a complete meal that highlights the pizza’s simplicity.
Grilled Lemon Herb Salmon

First, let’s walk through how to create perfectly grilled lemon herb salmon that’s moist, flavorful, and impressive enough for any occasion. Follow each step carefully, and you’ll master this restaurant-quality dish right in your own backyard. I’ll guide you through the entire process from prep to plate.
5
servings20
minutes10
minutesIngredients
– 4 salmon fillets (6 oz each), skin-on for better grilling
– 3 tbsp extra virgin olive oil (my go-to for its fruity notes)
– 2 lemons (one for juice, one for slices)
– 3 garlic cloves, minced (freshly minced releases more flavor)
– 2 tbsp fresh dill, chopped (I prefer fresh over dried for brightness)
– 1 tbsp fresh parsley, chopped
– 1 tsp kosher salt (it dissolves better than table salt)
– ½ tsp black pepper, freshly ground
Instructions
1. Pat the salmon fillets completely dry with paper towels to ensure a crisp exterior.
2. In a small bowl, whisk together the olive oil, juice from one lemon, minced garlic, chopped dill, chopped parsley, kosher salt, and black pepper.
3. Brush the herb mixture evenly over both sides of each salmon fillet, coating thoroughly.
4. Let the salmon marinate at room temperature for 15 minutes to allow flavors to penetrate.
5. Preheat your grill to medium-high heat, approximately 400°F, and lightly oil the grates.
6. Place the salmon skin-side down on the grill and cook undisturbed for 4-6 minutes.
7. Flip the salmon carefully using a spatula and grill for another 3-4 minutes until internal temperature reaches 145°F.
8. During the last 2 minutes of cooking, add lemon slices to the grill and cook until lightly charred.
9. Remove the salmon and grilled lemon slices from the grill, then let the salmon rest for 3 minutes before serving.
Evenly cooked salmon should flake easily with a fork yet remain moist throughout. The lemon-herb crust provides a zesty contrast to the rich, buttery fish. For a beautiful presentation, serve over quinoa with those charred lemon slices and extra fresh dill scattered on top.
Chili Con Carne with Cheddar Cheese

Brimming with rich, savory flavors and comforting warmth, this chili con carne is the perfect dish for cozy evenings or game day gatherings. Let me walk you through each step methodically so you can create this crowd-pleasing meal with confidence. You’ll be amazed at how simple techniques build layers of flavor that taste like you spent all day cooking.
2
servings15
minutes50
minutesIngredients
– 1 tablespoon vegetable oil (I find this creates the perfect sear without burning)
– 1 pound ground beef, 80/20 blend (the extra fat adds wonderful richness)
– 1 medium yellow onion, diced (I always chop mine fairly small for even distribution)
– 2 cloves garlic, minced (fresh garlic makes all the difference here)
– 1 tablespoon chili powder (my secret is to use a combination of ancho and regular)
– 1 teaspoon ground cumin (toasting whole seeds and grinding them elevates the flavor)
– 1 (15-ounce) can kidney beans, drained and rinsed (I prefer the dark red variety for color)
– 1 (14.5-ounce) can diced tomatoes, undrained (fire-roasted add nice smoky notes)
– 1 cup beef broth (homemade if you have it, but store-bought works fine)
– 1 cup shredded cheddar cheese (I recommend sharp cheddar for maximum flavor impact)
Instructions
1. Heat 1 tablespoon vegetable oil in a large Dutch oven or heavy-bottomed pot over medium-high heat until shimmering, about 2 minutes.
2. Add 1 pound ground beef to the hot oil, breaking it apart with a wooden spoon into small crumbles.
3. Cook the beef undisturbed for 3 minutes to develop a golden-brown crust on one side before stirring.
4. Continue cooking while stirring occasionally until the beef is fully browned, about 5 more minutes.
5. Add the diced onion to the pot and cook until translucent and softened, about 4 minutes.
6. Stir in the minced garlic and cook until fragrant, exactly 1 minute to prevent burning.
7. Sprinkle 1 tablespoon chili powder and 1 teaspoon ground cumin over the meat mixture, stirring constantly for 30 seconds to toast the spices.
8. Pour in the undrained diced tomatoes, drained kidney beans, and 1 cup beef broth, scraping the bottom of the pot to release any browned bits.
9. Bring the mixture to a boil, then immediately reduce heat to maintain a gentle simmer.
10. Cover the pot partially and simmer for 25 minutes, stirring every 8-10 minutes to prevent sticking.
11. Uncover and continue simmering for 10 more minutes until the chili has thickened to your desired consistency.
12. Remove from heat and let stand for 5 minutes to allow flavors to meld together.
13. Ladle the chili into bowls and immediately top each serving with 1/4 cup shredded cheddar cheese.
The finished chili should have a thick, spoonable consistency with tender beef and beans swimming in a richly spiced tomato broth. As the cheddar cheese melts into the hot chili, it creates creamy pockets that contrast beautifully with the slight heat from the chili powder. For a fun twist, try serving it over crispy tortilla chips or baked potatoes for a complete meal that will have everyone asking for seconds.
Baked Ziti with Homemade Marinara Sauce
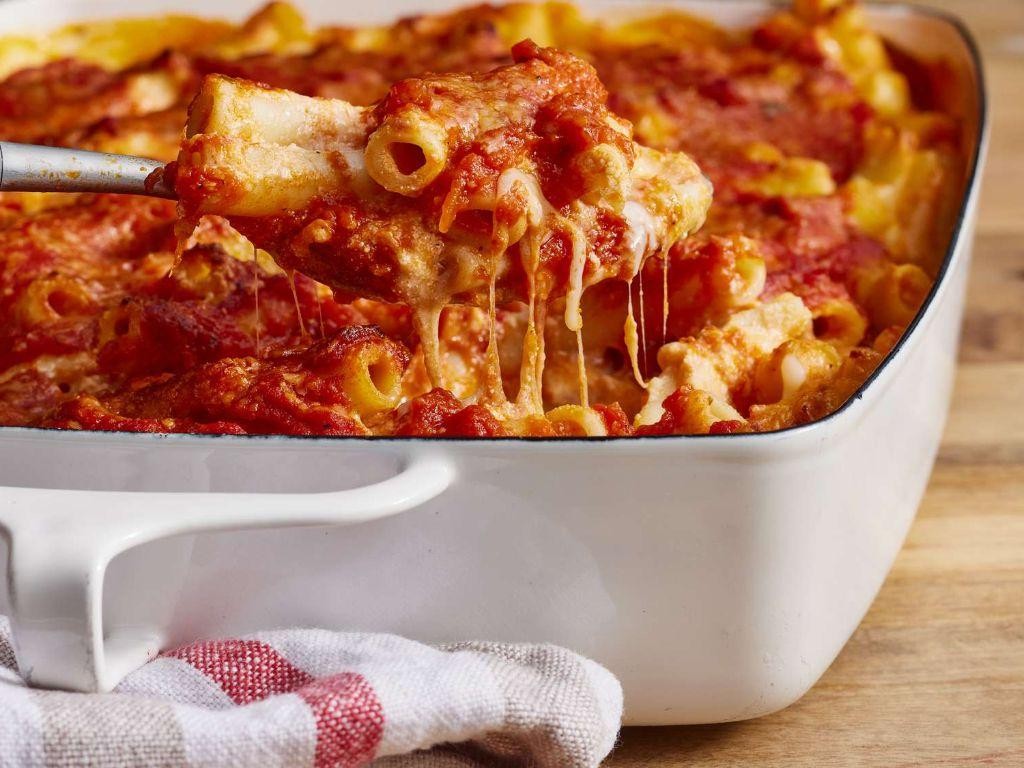
Very few dishes deliver the comforting satisfaction of baked ziti with homemade marinara sauce—a classic Italian-American favorite that’s perfect for weeknight dinners or feeding a crowd. Let’s walk through each step together, starting with a from-scratch sauce that fills your kitchen with the most incredible aroma. You’ll be amazed at how simple it is to create this hearty, cheesy masterpiece from beginning to end.
8
servings20
minutes54
minutesIngredients
- 1 lb ziti pasta (I always keep a box in my pantry for last-minute meals)
- 2 tbsp extra virgin olive oil (my go-to for its fruity depth)
- 4 cloves garlic, minced (freshly minced makes all the difference)
- 1 (28 oz) can crushed tomatoes (San Marzano are my favorite for their sweetness)
- 1 tsp dried oregano (rubbed between your palms to wake up the oils)
- 1/2 tsp red pepper flakes (adjust if you prefer less heat)
- 1 tsp kosher salt (I find it dissolves more evenly than table salt)
- 16 oz whole milk ricotta cheese (room temperature blends smoother)
- 1 large egg (room temperature helps prevent curdling)
- 1/4 cup fresh parsley, chopped (adds a bright, fresh finish)
- 2 cups shredded mozzarella cheese (I like a low-moisture block I shred myself)
- 1/2 cup grated Parmesan cheese (freshly grated melts beautifully)
Instructions
- Preheat your oven to 375°F to ensure it’s perfectly heated when your ziti is ready to bake.
- Bring a large pot of salted water to a rolling boil over high heat.
- Add the ziti pasta and cook for 8 minutes until al dente (it should still have a slight bite since it will cook further in the oven).
- Drain the pasta thoroughly in a colander, but do not rinse (the starch helps the sauce cling better).
- Heat the olive oil in a large saucepan over medium heat until it shimmers.
- Add the minced garlic and sauté for 1 minute until fragrant but not browned.
- Pour in the crushed tomatoes, then stir in the oregano, red pepper flakes, and kosher salt.
- Simmer the sauce uncovered for 15 minutes, stirring occasionally, until it thickens slightly.
- In a medium bowl, combine the ricotta, egg, and chopped parsley with a fork until smooth.
- Tip: Mixing the egg into the ricotta first prevents scrambling when heated.
- Spread 1/2 cup of the marinara sauce evenly across the bottom of a 9×13-inch baking dish.
- Add the drained ziti to the remaining sauce in the saucepan, stirring to coat every piece.
- Spoon half of the sauced pasta into the baking dish, spreading it into an even layer.
- Dollop the ricotta mixture over the pasta, then sprinkle with 1 cup of the mozzarella.
- Top with the remaining sauced pasta, spreading it gently to avoid disturbing the layers.
- Sprinkle the remaining 1 cup mozzarella and the Parmesan evenly over the top.
- Cover the dish tightly with aluminum foil and bake for 20 minutes.
- Remove the foil and bake for another 10 minutes until the cheese is golden and bubbly.
- Let the baked ziti rest for 5 minutes before serving to allow the layers to set.
Nothing compares to that first scoop revealing the creamy ricotta pockets and tangled pasta coated in robust marinara. The top forms a beautifully browned, cheesy crust that gives way to tender ziti underneath. For a fun twist, serve individual portions in ramekins topped with extra Parmesan and a sprinkle of fresh basil.
Vegetable Stir Fry with Tofu

This simple vegetable stir fry with tofu is a perfect weeknight meal that comes together in under 30 minutes. The key is prepping all your ingredients before you start cooking, which makes the actual stir-frying process smooth and stress-free.
4
servings15
minutes15
minutesIngredients
– 14 oz extra-firm tofu, pressed for at least 30 minutes (I find this removes excess moisture better than quick pressing)
– 2 tbsp cornstarch for that perfect crispy coating
– 3 tbsp vegetable oil, divided (I prefer avocado oil for its high smoke point)
– 1 red bell pepper, sliced into thin strips
– 1 cup broccoli florets, cut into bite-sized pieces
– 1 medium carrot, julienned (I like using a mandoline for uniform slices)
– 3 cloves garlic, minced (fresh garlic makes all the difference here)
– 1 tbsp fresh ginger, grated
– ¼ cup low-sodium soy sauce
– 1 tbsp rice vinegar
– 1 tsp sesame oil for that nutty finish
– 2 green onions, sliced on the diagonal
Instructions
1. Cut the pressed tofu into 1-inch cubes and toss with cornstarch until evenly coated.
2. Heat 2 tablespoons of vegetable oil in a large skillet or wok over medium-high heat until shimmering, about 2 minutes.
3. Add tofu cubes in a single layer and cook for 4-5 minutes until golden brown on the bottom.
4. Flip each tofu piece and cook for another 4-5 minutes until all sides are crispy and browned.
5. Transfer tofu to a plate lined with paper towels to drain excess oil.
6. Add remaining 1 tablespoon of vegetable oil to the same skillet over medium-high heat.
7. Add bell pepper, broccoli, and carrot, stirring constantly for 3 minutes until vegetables are brightened in color but still crisp.
8. Add minced garlic and grated ginger, cooking for 30 seconds until fragrant but not browned.
9. Return tofu to the skillet and pour in soy sauce and rice vinegar.
10. Toss everything together for 1 minute until sauce coats all ingredients evenly.
11. Remove from heat and drizzle with sesame oil, then sprinkle with green onions.
Each bite offers a satisfying contrast between the crispy tofu and vibrant, crisp-tender vegetables. The savory soy-ginger sauce clings perfectly to every component, making this stir fry excellent served over jasmine rice or tucked into lettuce cups for a lighter option.
Slow-Cooked Pulled Pork Sandwiches
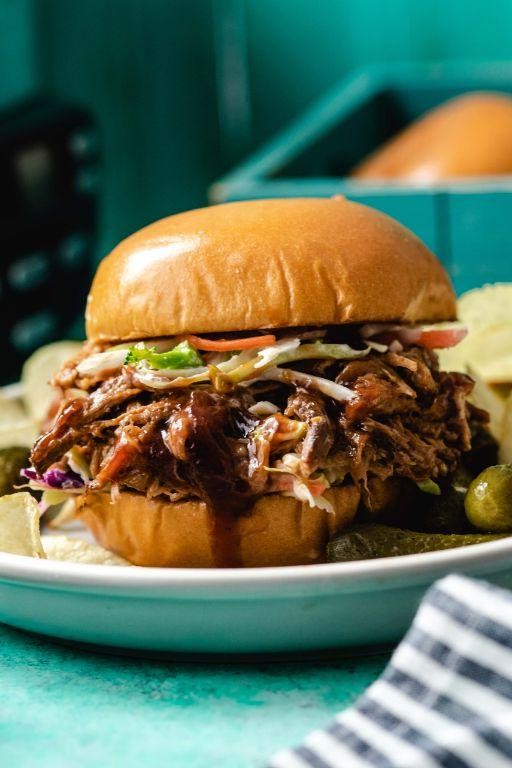
Whether you’re feeding a crowd or just craving some serious comfort food, slow-cooked pulled pork sandwiches deliver that melt-in-your-mouth tenderness we all love. With just a few simple ingredients and some patience, you’ll have the most flavorful pulled pork that practically falls apart on its own.
6
sandwiches15
minutes485
minutesIngredients
– 4 lb pork shoulder (I always look for one with good marbling)
– 1 cup ketchup (my secret is using the organic kind for better flavor)
– 1/2 cup apple cider vinegar (this adds the perfect tangy kick)
– 1/4 cup brown sugar (pack it firmly for maximum caramelization)
– 2 tbsp Worcestershire sauce (this umami booster is non-negotiable)
– 1 tbsp smoked paprika (the smoked variety gives that authentic barbecue flavor)
– 1 tsp garlic powder (I prefer this over fresh for even distribution)
– 1 tsp onion powder
– 1/2 tsp black pepper (freshly ground makes all the difference)
– 6 hamburger buns (I like brioche for that buttery richness)
Instructions
1. Trim any large pieces of fat from the pork shoulder, leaving about 1/4 inch for flavor.
2. In a medium bowl, whisk together ketchup, apple cider vinegar, brown sugar, Worcestershire sauce, smoked paprika, garlic powder, onion powder, and black pepper until fully combined.
3. Place the pork shoulder in your slow cooker and pour the sauce mixture evenly over the top.
4. Use tongs to flip the pork shoulder once, ensuring it’s completely coated in sauce.
5. Cover the slow cooker and cook on LOW for 8 hours exactly – don’t peek during cooking as this releases heat.
6. After 8 hours, carefully remove the lid and test the pork by inserting two forks – it should pull apart easily with no resistance.
7. Transfer the pork to a large cutting board, reserving the cooking liquid in the slow cooker.
8. Use two forks to shred the pork completely, discarding any large pieces of fat or gristle.
9. Return the shredded pork to the slow cooker and stir to combine with the remaining sauce.
10. Let the pork sit in the warm slow cooker for 15 minutes to absorb the flavors.
11. While the pork rests, lightly toast the hamburger bins in a 350°F oven for 5 minutes until golden.
12. Use a slotted spoon to portion the pulled pork onto the bottom halves of the toasted buns.
Velvety strands of pork soak up that sweet and tangy sauce, creating the perfect texture contrast against the soft, toasted bun. For a creative twist, try serving these sandwiches with a crunchy coleslaw right on top, or use the leftover pork for amazing breakfast hash the next morning.
Chicken Pot Pie with Flaky Crust

Nothing beats the comforting aroma of a homemade chicken pot pie wafting through your kitchen on a crisp autumn day. Now, let’s create this classic dish with a flaky, golden crust that will have everyone asking for seconds. Follow these steps carefully for perfect results every time.
6
portions30
minutes51
minutesIngredients
– 2 cups all-purpose flour (I always spoon and level mine for accuracy)
– 1 cup cold unsalted butter, cubed (keep it chilled until the last moment)
– 1/2 cup ice water (measure with ice cubes still floating)
– 1 lb cooked chicken, shredded (rotisserie chicken saves so much time)
– 2 cups frozen mixed vegetables (I love the peas-carrots-corn-green beans blend)
– 1 medium onion, diced (yellow onions work beautifully here)
– 2 cloves garlic, minced (fresh makes all the difference)
– 3 cups chicken broth (homemade if you have it)
– 1/2 cup heavy cream (this creates the richest sauce)
– 1/4 cup all-purpose flour (for thickening the filling)
– 1 tsp dried thyme (crush it between your fingers to release the oils)
– 1 egg, beaten (room temperature eggs brush on more evenly)
Instructions
1. Combine 2 cups flour and 1/2 teaspoon salt in a large bowl.
2. Cut in 1 cup cold butter cubes using a pastry cutter until mixture resembles coarse crumbs.
3. Gradually add 1/2 cup ice water, mixing with a fork until dough just comes together.
4. Divide dough in half, shape into discs, wrap in plastic, and refrigerate for 30 minutes.
5. Preheat your oven to 400°F and position rack in the center.
6. Sauté 1 diced onion in 2 tablespoons butter over medium heat for 5 minutes until translucent.
7. Add 2 minced garlic cloves and cook for 1 minute until fragrant.
8. Sprinkle 1/4 cup flour over the onion mixture and cook for 2 minutes, stirring constantly.
9. Slowly whisk in 3 cups chicken broth until smooth and bubbly.
10. Stir in 1 lb shredded chicken, 2 cups frozen vegetables, and 1 tsp dried thyme.
11. Simmer for 8 minutes until vegetables are tender and sauce has thickened.
12. Remove from heat and stir in 1/2 cup heavy cream.
13. Roll out one dough disc to fit your 9-inch pie dish with 1-inch overhang.
14. Transfer filling to the crust-lined dish.
15. Roll out second dough disc and place over filling.
16. Crimp edges together and cut 4 slits in the top crust for steam.
17. Brush entire top crust with 1 beaten egg using a pastry brush.
18. Bake at 400°F for 35 minutes until crust is golden brown and filling is bubbly.
19. Let rest on a wire rack for 15 minutes before serving.
Here’s what makes this pot pie special: the flaky crust shatters beautifully with each forkful, revealing a creamy filling where the thyme-infused sauce clings perfectly to tender chicken and vegetables. Serve individual portions in shallow bowls to catch every bit of the rich sauce, or pair with a simple green salad to cut through the richness.
Broccoli and Cheddar Soup

Broccoli and cheddar soup brings cozy comfort to any chilly day, with its creamy texture and rich cheese flavor that feels like a warm hug in a bowl. This methodical approach ensures even beginners can create this classic favorite with perfect results every single time.
3
servings15
minutes18
minutesIngredients
– 4 tablespoons unsalted butter (I always use unsalted to control the salt level)
– 1 medium yellow onion, finely diced (yellow onions have the perfect sweetness when cooked)
– 2 cloves garlic, minced (fresh garlic makes all the difference)
– ¼ cup all-purpose flour (this creates our thickening roux)
– 4 cups chicken broth (homemade broth elevates the flavor, but store-bought works great)
– 4 cups fresh broccoli florets (I chop them into bite-sized pieces for even cooking)
– 1 cup heavy cream (this creates that luxurious creamy texture)
– 2 cups shredded sharp cheddar cheese (sharp cheddar gives the best flavor punch)
– ½ teaspoon black pepper (freshly ground pepper adds wonderful aroma)
Instructions
1. Melt 4 tablespoons of unsalted butter in a large pot over medium heat.
2. Add 1 finely diced yellow onion and cook for 5 minutes, stirring occasionally, until translucent.
3. Stir in 2 minced garlic cloves and cook for 1 minute until fragrant.
4. Sprinkle ¼ cup all-purpose flour over the onion mixture and cook for 2 minutes, stirring constantly to create a roux.
5. Gradually whisk in 4 cups chicken broth until smooth and lump-free.
6. Bring the mixture to a gentle boil, then reduce heat to maintain a simmer.
7. Add 4 cups broccoli florets and simmer for 8 minutes until tender but still bright green.
8. Stir in 1 cup heavy cream and heat through for 2 minutes without boiling.
9. Remove the pot from heat and gradually stir in 2 cups shredded cheddar cheese until fully melted.
10. Season with ½ teaspoon black pepper and let the soup rest for 5 minutes before serving.
Perfectly creamy with tender broccoli pieces throughout, this soup boasts a rich cheddar flavor that’s neither too sharp nor too mild. Pour it into bread bowls for an edible container, or top with extra shredded cheese and crumbled bacon for a decadent twist that makes ordinary weeknights feel special.
Parmesan-Crusted Chicken Tenders

When you want crispy, flavorful chicken that feels fancy but comes together in minutes, these Parmesan-crusted tenders deliver restaurant-quality results right in your own kitchen. We’ll walk through each step methodically so even first-time cooks can achieve that perfect golden crust and juicy interior. Working with simple ingredients and straightforward techniques ensures success every time you make this family favorite.
2
servings15
minutes27
minutesIngredients
– 1 ½ pounds chicken tenders (I find fresh rather than frozen gives the best texture)
– 1 cup all-purpose flour (spoon and level it for accuracy)
– 2 large eggs, beaten (room temperature helps the coating adhere better)
– 1 ½ cups panko breadcrumbs (the Japanese-style crumbs create exceptional crunch)
– 1 cup freshly grated Parmesan cheese (please don’t use the canned stuff—it makes all the difference)
– 1 teaspoon garlic powder
– 1 teaspoon dried oregano
– ½ teaspoon black pepper (freshly cracked adds nice flecks of flavor)
– ½ teaspoon salt
– ¼ cup olive oil (extra virgin is my go-to for its fruity notes)
– Cooking spray
Instructions
1. Preheat your oven to 400°F and line a baking sheet with parchment paper.
2. Pat the chicken tenders completely dry with paper towels—this crucial step helps the coating stick.
3. Combine the flour, salt, black pepper, garlic powder, and dried oregano in a shallow bowl.
4. Place the beaten eggs in a second shallow bowl.
5. Mix the panko breadcrumbs and freshly grated Parmesan in a third bowl.
6. Dredge each chicken tender first in the flour mixture, shaking off any excess.
7. Dip the floured tender into the egg mixture, letting the excess drip back into the bowl.
8. Press the tender firmly into the panko-Parmesan mixture, ensuring full coverage on all sides.
9. Arrange the coated tenders in a single layer on your prepared baking sheet.
10. Lightly spray the tops of the tenders with cooking spray—this helps them brown evenly.
11. Drizzle the olive oil evenly over all the tenders.
12. Bake for 15 minutes at 400°F until the bottoms are golden brown.
13. Flip each tender carefully using tongs and bake for another 10-12 minutes.
14. Check for doneness—the internal temperature should reach 165°F and the crust should be deep golden brown.
15. Remove from oven and let rest on the baking sheet for 5 minutes before serving.
Serve these tenders immediately to experience the wonderful contrast between the shatteringly crisp Parmesan crust and the tender, juicy chicken inside. Slice them over a bed of fresh greens for a main-dish salad, or pair with marinara sauce for dipping—the salty, cheesy coating stands up beautifully to the bright tomato flavor. Somehow these simple ingredients transform into something far greater than the sum of their parts.
Stuffed Bell Peppers with Ground Turkey
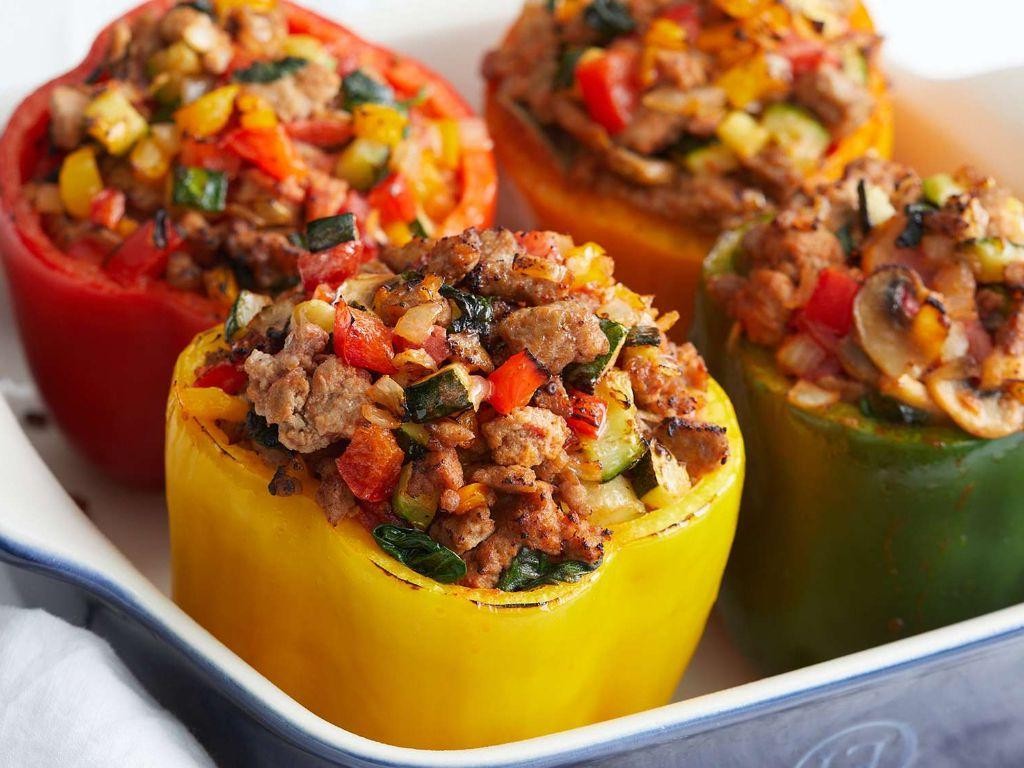
Stuffed bell peppers make for such a satisfying weeknight meal that feels fancy but is surprisingly simple to pull together. Sometimes, I’ll prep the filling in advance so all I have to do is stuff and bake when I get home from work—it’s a real lifesaver on busy evenings.
5
portions20
minutes43
minutesIngredients
– 4 large bell peppers, any color—I love using a mix for visual appeal
– 1 lb ground turkey, 93% lean works best for flavor without being too greasy
– 1 cup cooked rice, I usually have leftover jasmine rice on hand
– 1/2 cup diced yellow onion, finely chopped so it blends seamlessly
– 2 cloves garlic, minced—fresh is always my preference here
– 1 cup marinara sauce, I opt for a low-sugar variety
– 1/2 cup shredded mozzarella cheese, part-skim melts beautifully
– 1 tbsp olive oil, extra virgin is my go-to for sautéing
– 1 tsp dried oregano, rubbed between my palms to wake up the oils
– 1/2 tsp salt, I use fine sea salt for even distribution
– 1/4 tsp black pepper, freshly ground if possible
Instructions
1. Preheat your oven to 375°F and lightly grease a baking dish just large enough to hold the peppers upright.
2. Slice the tops off the bell peppers and remove all seeds and membranes from inside.
3. Bring a large pot of salted water to a boil and blanch the hollowed peppers for 3 minutes to soften slightly.
4. Drain the peppers thoroughly and stand them upright in the prepared baking dish.
5. Heat olive oil in a large skillet over medium heat until it shimmers, about 1 minute.
6. Add diced onion and cook for 4 minutes, stirring occasionally, until translucent.
7. Stir in minced garlic and cook for 30 seconds until fragrant but not browned.
8. Add ground turkey, breaking it up with a wooden spoon, and cook for 6-7 minutes until no pink remains.
9. Tip: If excess liquid accumulates, drain it off for a firmer filling texture.
10. Mix in cooked rice, marinara sauce, oregano, salt, and pepper until fully combined.
11. Spoon the turkey mixture evenly into the prepared bell peppers, pressing down gently.
12. Tip: Leave about 1/4 inch space at the top to prevent bubbling over during baking.
13. Cover the dish tightly with foil and bake for 25 minutes until peppers are tender.
14. Remove foil, sprinkle mozzarella cheese over each pepper, and bake uncovered for 5 more minutes.
15. Tip: For extra browning, switch to broil for the final 1-2 minutes, watching closely.
16. Let rest for 5 minutes before serving to allow filling to set.
These peppers emerge with a wonderful contrast between the tender-crisp vegetable shell and the savory, well-seasoned filling. The melted cheese forms a golden cap that gives way to the aromatic turkey and rice mixture inside. Try serving them alongside a simple arugula salad dressed with lemon vinaigrette to cut through the richness.
Eggplant Parmesan with Fresh Basil
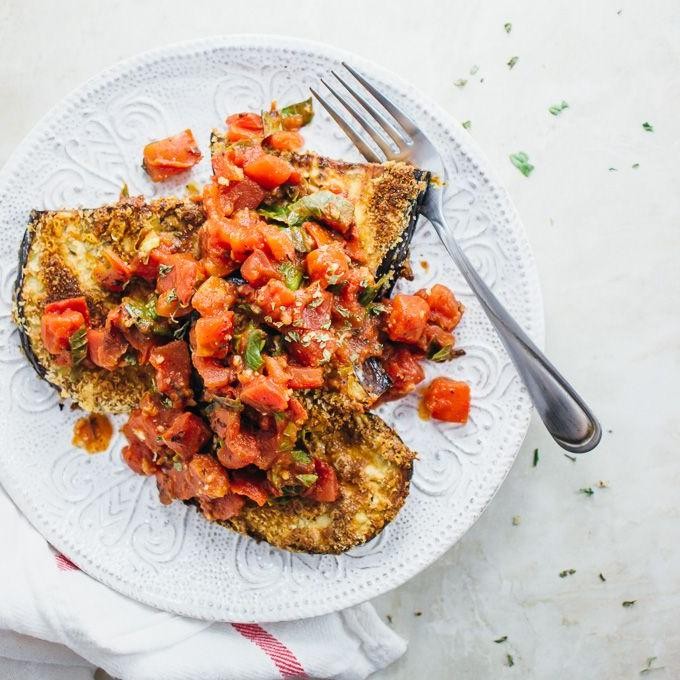
A perfectly layered eggplant parmesan with fresh basil makes for a comforting meal that’s surprisingly straightforward to prepare. This classic Italian-American dish combines crispy breaded eggplant with rich tomato sauce and melted cheese for a satisfying vegetarian dinner. Let me walk you through each step to ensure your eggplant parmesan turns out beautifully every time.
6
servings35
minutes47
minutesIngredients
– 2 medium eggplants, sliced into 1/2-inch rounds (I look for firm, glossy eggplants without soft spots)
– 1 cup all-purpose flour for dredging
– 3 large eggs, beaten (room temperature eggs coat more evenly)
– 2 cups Italian-style breadcrumbs
– 1/2 cup extra virgin olive oil, my go-to for frying
– 3 cups marinara sauce (I prefer a chunky homemade-style sauce)
– 2 cups shredded mozzarella cheese
– 1 cup freshly grated Parmesan cheese
– 1/2 cup fresh basil leaves, torn (fresh makes all the difference)
– 1 tsp salt
– 1/2 tsp black pepper
Instructions
1. Preheat your oven to 375°F and lightly grease a 9×13-inch baking dish.
2. Arrange eggplant slices in a single layer on paper towels and sprinkle both sides with salt.
3. Let the eggplant sit for 20 minutes to draw out excess moisture, then pat completely dry with paper towels.
4. Set up three shallow bowls: one with flour, one with beaten eggs, and one with breadcrumbs mixed with black pepper.
5. Dredge each eggplant slice first in flour, shaking off excess, then dip in egg, and finally coat thoroughly with breadcrumbs.
6. Heat olive oil in a large skillet over medium heat until it shimmers, about 350°F.
7. Fry breaded eggplant slices in batches for 3-4 minutes per side until golden brown and crispy.
8. Drain fried eggplant on a wire rack instead of paper towels to keep them crisp.
9. Spread 1/2 cup marinara sauce evenly across the bottom of your prepared baking dish.
10. Arrange a single layer of fried eggplant slices over the sauce.
11. Sprinkle with 1/3 of the mozzarella and Parmesan cheeses, then scatter fresh basil leaves over the cheese.
12. Repeat layers two more times, ending with a final layer of sauce and cheese.
13. Cover the dish with foil and bake for 25 minutes at 375°F.
14. Remove foil and bake uncovered for another 15 minutes until cheese is bubbly and lightly browned.
15. Let the eggplant parmesan rest for 10 minutes before slicing to allow layers to set.
Outstanding textures await with crispy edges giving way to tender eggplant and gooey cheese pockets. The fresh basil adds a bright, herbal note that cuts through the richness beautifully. For a creative twist, serve individual portions in shallow bowls with garlic bread for dipping into any extra sauce.
Conclusion
Joyful family meals await with these 35 delicious recipes! From quick weeknight dinners to special weekend treats, there’s something for every taste and occasion. We hope you’ll try a few favorites, leave a comment sharing which recipes your family loved most, and pin this collection to your Pinterest boards to save for future meal inspiration. Happy cooking!