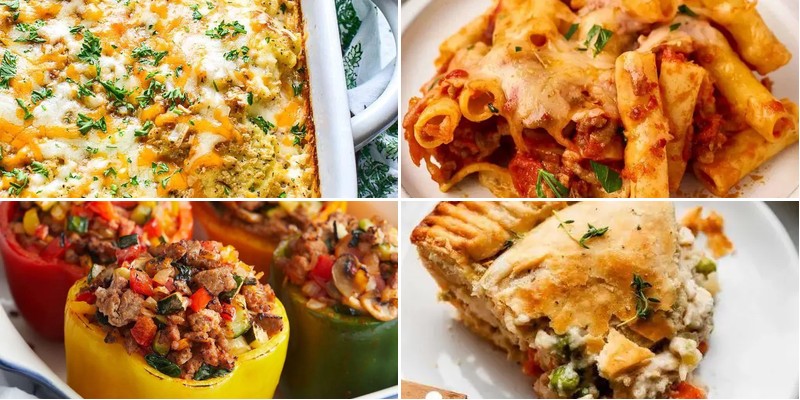
Remember those moments when a warm, home-cooked meal meant everything? When you’re organizing a meal train for friends or family, thoughtful dishes can provide comfort during challenging times. We’ve gathered 32 heartwarming recipes that are perfect for sharing—easy to transport, reheat beautifully, and deliver genuine comfort. From cozy casseroles to nourishing soups, these dishes will bring warmth and care to those who need it most.
Cheesy Chicken and Rice Casserole

Brace yourselves, comfort food enthusiasts, because we’re about to transform your humble chicken and rice into a glorious, cheese-pull-inducing masterpiece that will have your family fighting for the last spoonful. This casserole is the culinary equivalent of a warm hug on a chaotic Tuesday, proving that simple ingredients can create pure magic with minimal effort. Get ready to make your oven the star of the show!
6
servings20
minutes65
minutesIngredients
– 1.5 lbs boneless, skinless chicken breasts
– 1 tbsp olive oil
– 1 medium yellow onion, diced
– 2 cloves garlic, minced
– 1.5 cups long-grain white rice
– 3 cups chicken broth
– 1 cup heavy cream
– 2 cups shredded cheddar cheese
– 1 tsp salt
– 0.5 tsp black pepper
– 0.5 tsp paprika
Instructions
1. Preheat your oven to 375°F and grease a 9×13 inch baking dish with non-stick spray.
2. Heat 1 tbsp olive oil in a large skillet over medium-high heat until shimmering.
3. Season 1.5 lbs chicken breasts with 1 tsp salt, 0.5 tsp black pepper, and 0.5 tsp paprika on both sides.
4. Cook chicken in the hot skillet for 6-7 minutes per side until golden brown and internal temperature reaches 165°F.
5. Transfer chicken to a cutting board and let rest for 5 minutes before dicing into bite-sized pieces.
6. In the same skillet, sauté 1 diced onion for 4-5 minutes until translucent, scraping up the browned bits from the chicken.
7. Add 2 minced garlic cloves and cook for 1 minute until fragrant.
8. Stir in 1.5 cups rice and toast for 2 minutes, coating each grain in the oil and onion mixture.
9. Pour in 3 cups chicken broth and 1 cup heavy cream, bringing the mixture to a simmer.
10. Transfer the rice mixture to the prepared baking dish and spread evenly.
11. Arrange the diced chicken evenly over the rice layer.
12. Cover tightly with aluminum foil and bake at 375°F for 30 minutes.
13. Remove foil and sprinkle 2 cups shredded cheddar cheese over the entire surface.
14. Return to oven uncovered and bake for 10-15 minutes until cheese is bubbly and lightly browned.
15. Let the casserole rest for 10 minutes before serving to allow the rice to absorb remaining liquid.
Absolutely divine! The rice emerges perfectly tender, each grain separate yet creamy from its broth bath, while the golden cheese crust gives way to juicy chicken chunks beneath. For a next-level experience, top individual servings with crispy fried onions or serve alongside a bright, acidic salad to cut through the richness.
Hearty Beef Stew with Vegetables
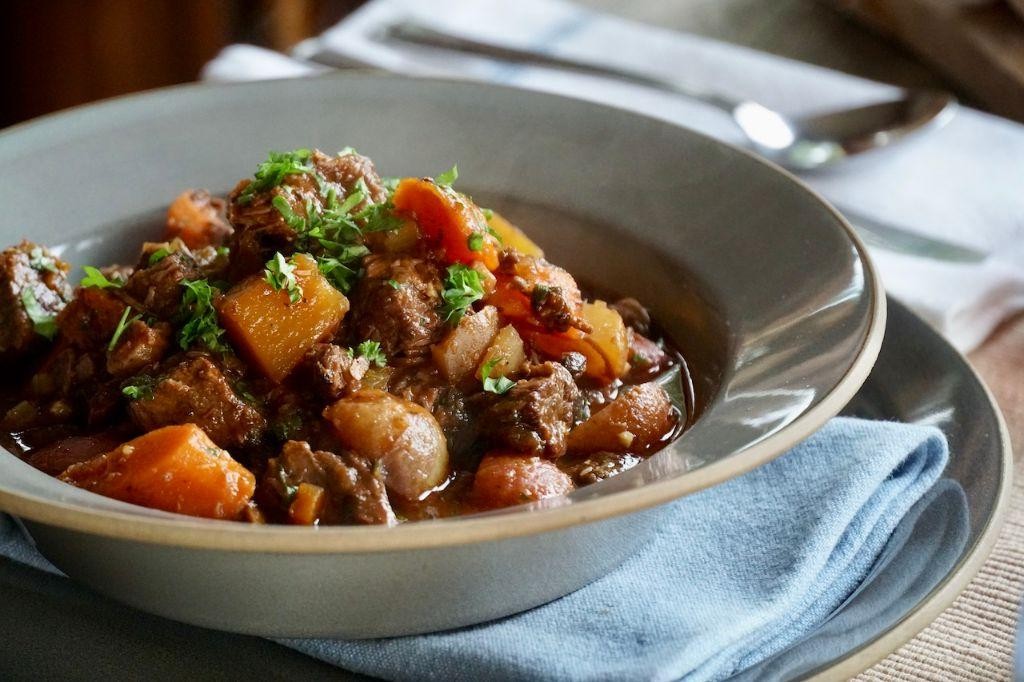
Crisp autumn days practically demand this soul-warming hug in a bowl—our hearty beef stew with vegetables is here to rescue you from bland dinners and chilly evenings with zero apologies for its deliciousness. This one-pot wonder transforms humble ingredients into a flavor explosion that’ll have your family begging for seconds (and maybe thirds). Let’s dive in!
6
servings25
minutes155
minutesIngredients
– 2 lbs beef chuck, cut into 1-inch cubes
– 2 tbsp olive oil
– 1 large yellow onion, chopped
– 3 cloves garlic, minced
– 4 cups beef broth
– 1 cup red wine
– 2 tbsp tomato paste
– 1 tsp dried thyme
– 2 bay leaves
– 4 large carrots, sliced into 1/2-inch rounds
– 3 medium potatoes, peeled and cubed
– 2 stalks celery, sliced
– 1 cup frozen peas
– Salt and black pepper to taste
Instructions
1. Pat the beef cubes completely dry with paper towels and season generously with salt and pepper on all sides.
2. Heat 2 tablespoons of olive oil in a large Dutch oven over medium-high heat until shimmering.
3. Sear the beef in a single layer, working in batches to avoid crowding, until deeply browned on all sides—about 3-4 minutes per batch.
4. Transfer all seared beef to a clean plate, leaving any drippings in the pot.
5. Add the chopped onion to the pot and sauté for 5 minutes until softened and translucent.
6. Stir in the minced garlic and cook for 1 minute until fragrant.
7. Pour in 1 cup of red wine, scraping the bottom of the pot vigorously to lift all the browned bits.
8. Simmer the wine for 2 minutes until reduced by half.
9. Stir in 2 tablespoons of tomato paste and cook for 1 minute until it darkens slightly.
10. Return the seared beef and any accumulated juices to the pot.
11. Add 4 cups of beef broth, 1 teaspoon of dried thyme, and 2 bay leaves.
12. Bring the stew to a boil, then immediately reduce heat to low, cover, and simmer for 1.5 hours.
13. Add the sliced carrots, cubed potatoes, and sliced celery to the pot.
14. Cover and continue simmering for 45 minutes until the vegetables are fork-tender.
15. Stir in 1 cup of frozen peas and cook uncovered for 5 minutes until heated through.
16. Remove and discard the bay leaves before serving.
Unbelievably tender beef practically melts alongside sweet carrots and creamy potatoes in this rich, wine-kissed broth. Serve it over creamy polenta for extra comfort points, or dunk thick slices of crusty bread to soak up every last drop—your taste buds will throw a party.
Classic Lasagna with Homemade Sauce

Fabulous food fanatics, gather ’round! We’re diving fork-first into that glorious, cheese-layered, soul-warming masterpiece we all secretly crave—classic lasagna with a sauce so homemade, it might just hug you back. Forget those sad, soupy versions; this one stands tall, proud, and packed with personality, just like your favorite aunt after her third espresso.
12
portions25
minutes70
minutesIngredients
– 1 lb ground beef
– 1/2 cup diced yellow onion
– 2 cloves minced garlic
– 28 oz crushed tomatoes
– 6 oz tomato paste
– 2 tbsp olive oil
– 1 tsp dried oregano
– 1/2 tsp salt
– 1/4 tsp black pepper
– 12 no-boil lasagna noodles
– 16 oz ricotta cheese
– 1 large egg
– 1/4 cup chopped fresh parsley
– 3 cups shredded mozzarella cheese
– 1 cup grated Parmesan cheese
Instructions
1. Heat 2 tbsp olive oil in a large skillet over medium heat until shimmering.
2. Add 1/2 cup diced yellow onion and cook for 4 minutes, stirring occasionally, until translucent.
3. Add 2 cloves minced garlic and cook for 1 minute until fragrant.
4. Add 1 lb ground beef, breaking it up with a spoon, and cook for 6–8 minutes until no pink remains.
5. Stir in 28 oz crushed tomatoes, 6 oz tomato paste, 1 tsp dried oregano, 1/2 tsp salt, and 1/4 tsp black pepper.
6. Simmer the sauce uncovered for 20 minutes, stirring occasionally, until slightly thickened.
7. Preheat your oven to 375°F while the sauce simmers.
8. In a medium bowl, mix 16 oz ricotta cheese, 1 large egg, and 1/4 cup chopped fresh parsley until fully combined.
9. Spread 1 cup of the meat sauce evenly in the bottom of a 9×13-inch baking dish.
10. Arrange 4 no-boil lasagna noodles in a single layer over the sauce.
11. Spread half of the ricotta mixture over the noodles using a spatula.
12. Sprinkle 1 cup shredded mozzarella cheese over the ricotta layer.
13. Repeat the layers: sauce, noodles, remaining ricotta, and 1 cup mozzarella.
14. Top with the final 4 noodles, remaining sauce, 1 cup mozzarella, and 1 cup grated Parmesan cheese.
15. Cover the dish tightly with foil and bake at 375°F for 25 minutes.
16. Remove the foil and bake for another 15 minutes until the cheese is golden and bubbly.
17. Let the lasagna rest on a wire rack for 10 minutes before slicing to set the layers. That cheesy, saucy, carb-loaded beauty is pure comfort in every forkful—firm enough to hold a square, yet tender enough to melt on the tongue. Try serving it with a crisp arugula salad to cut through the richness, or go full indulgence and pair it with garlic bread for a carb-on-carb celebration.
Comforting Baked Ziti with Sausage
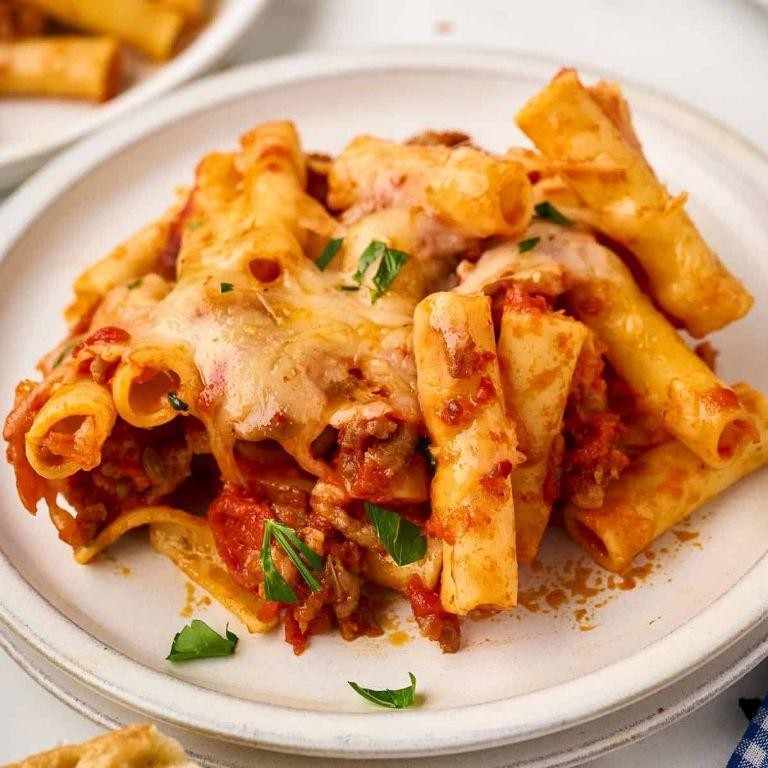
Hang onto your oven mitts, folks, because we’re diving fork-first into the ultimate cozy carb-load that’ll have your taste buds doing the happy dance! This baked ziti is basically a warm hug for your soul, with savory sausage and melty cheese creating the kind of comfort food magic that makes Tuesday feel like a weekend celebration. Get ready to become the neighborhood’s pasta hero—no cape required.
8
servings25
minutes68
minutesIngredients
– 1 pound sweet Italian sausage
– 1 tablespoon olive oil
– 1 medium yellow onion
– 3 cloves garlic
– 24 ounces marinara sauce
– 1 pound ziti pasta
– 15 ounces ricotta cheese
– 1 large egg
– 2 cups shredded mozzarella cheese
– 1/2 cup grated Parmesan cheese
– 1 teaspoon dried basil
– 1/2 teaspoon salt
– 1/4 teaspoon black pepper
Instructions
1. Preheat your oven to 375°F and grease a 9×13-inch baking dish with cooking spray.
2. Bring a large pot of salted water to a rolling boil over high heat.
3. Add ziti pasta to the boiling water and cook for 8 minutes until al dente (it should still have a slight bite).
4. Drain the pasta in a colander but don’t rinse it—the starch helps the sauce cling better.
5. While pasta cooks, heat olive oil in a large skillet over medium-high heat.
6. Remove sausage from casings and crumble into the hot skillet.
7. Cook sausage for 6-8 minutes, breaking it into small pieces, until browned and no longer pink.
8. Dice the yellow onion and mince the garlic cloves while the sausage cooks.
9. Transfer cooked sausage to a plate, leaving 1 tablespoon of drippings in the skillet.
10. Add diced onion to the skillet and sauté for 4 minutes until translucent.
11. Stir in minced garlic and cook for 1 minute until fragrant—don’t let it burn!
12. Return sausage to the skillet and pour in marinara sauce, stirring to combine.
13. Simmer the sauce for 5 minutes to let flavors meld together.
14. In a medium bowl, whisk the egg until smooth.
15. Mix ricotta cheese, 1 cup mozzarella, Parmesan, dried basil, salt, and pepper into the beaten egg.
16. Spread 1 cup of the meat sauce evenly across the bottom of the prepared baking dish.
17. Add half of the cooked ziti in an even layer over the sauce.
18. Dollop half of the ricotta mixture over the pasta and spread gently.
19. Repeat layers with remaining pasta and ricotta mixture.
20. Pour the remaining meat sauce over the top and spread to cover completely.
21. Sprinkle the remaining 1 cup mozzarella cheese evenly over the surface.
22. Cover the dish tightly with aluminum foil and bake for 25 minutes.
23. Remove foil and bake uncovered for 15 more minutes until cheese is golden and bubbly.
24. Let the baked ziti rest for 10 minutes before serving—this helps the layers set perfectly.
Seriously, that first bite of this baked ziti delivers the most glorious textural symphony—tender pasta tubes cradling creamy ricotta pockets, all swaddled in robust sausage-studded sauce. The crispy, bronzed cheese crust gives way to steaming, cheesy layers that make every forkful pure comfort heaven. Try serving it with garlic bread soldiers for dipping into those saucy edges, or pack the leftovers for lunch and watch your coworkers turn green with envy!
Slow-Cooker Pulled Pork Sandwiches
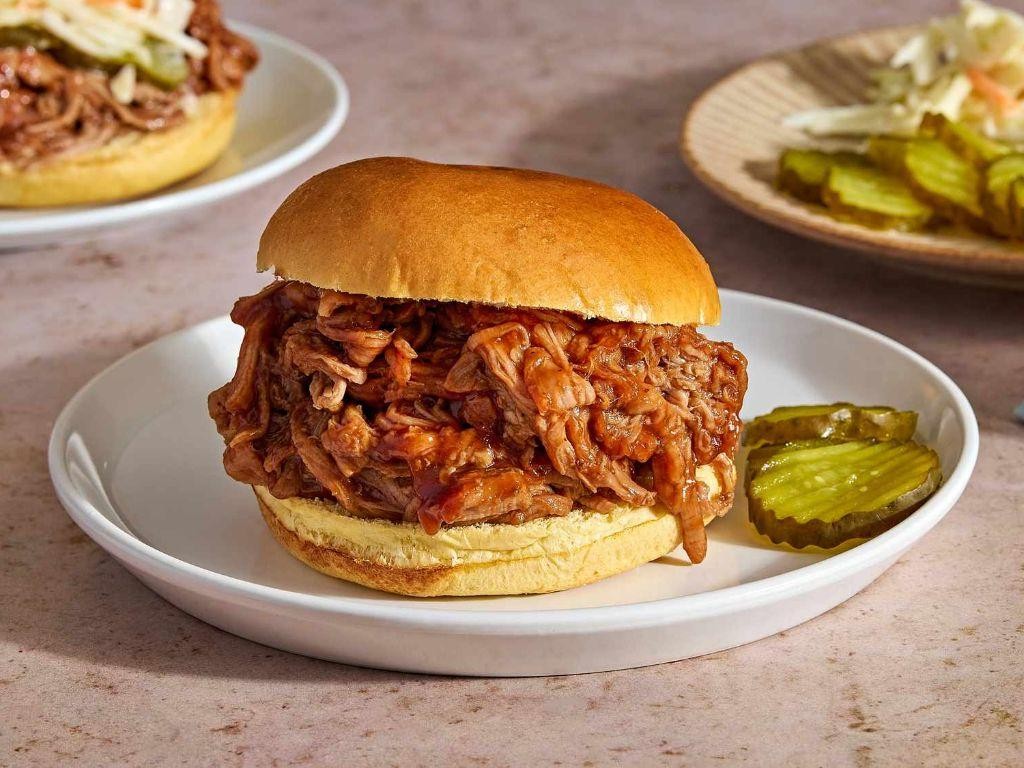
Brace yourselves, pork lovers—your slow cooker is about to become the MVP of your kitchen with this ridiculously easy pulled pork that practically makes itself while you binge-watch your favorite shows. This saucy, tender masterpiece transforms humble pork shoulder into sandwich royalty with minimal effort and maximum flavor payoff.
6
sandwiches15
minutes485
minutesIngredients
– 4 lbs pork shoulder roast
– 1 tbsp olive oil
– 1 cup barbecue sauce
– 1/2 cup chicken broth
– 1/4 cup apple cider vinegar
– 2 tbsp brown sugar
– 1 tbsp Worcestershire sauce
– 1 tsp garlic powder
– 1 tsp smoked paprika
– 1/2 tsp black pepper
– 6 hamburger buns
Instructions
1. Pat the 4 lbs pork shoulder roast completely dry with paper towels to ensure proper browning.
2. Heat 1 tbsp olive oil in a large skillet over medium-high heat until shimmering, about 2 minutes.
3. Sear the pork shoulder on all sides until deeply browned, approximately 4-5 minutes per side.
4. Transfer the seared pork to your slow cooker insert.
5. In a medium bowl, whisk together 1 cup barbecue sauce, 1/2 cup chicken broth, 1/4 cup apple cider vinegar, 2 tbsp brown sugar, 1 tbsp Worcestershire sauce, 1 tsp garlic powder, 1 tsp smoked paprika, and 1/2 tsp black pepper until fully combined.
6. Pour the sauce mixture over the pork shoulder in the slow cooker, ensuring it’s evenly coated.
7. Cover and cook on LOW for 8 hours until the pork shreds easily with two forks.
8. Carefully remove the pork from the slow cooker and place it on a large cutting board.
9. Using two forks, shred the entire pork shoulder, discarding any large fat pieces.
10. Return the shredded pork to the slow cooker and stir to coat with the remaining sauce.
11. Let the pork sit in the warm sauce for 15 minutes to absorb maximum flavor.
12. Lightly toast 6 hamburger buns in a 350°F oven for 5 minutes until golden.
13. Pile the saucy pulled pork generously onto the toasted buns.
Oh my goodness, that magical slow cooker transformation gives you pork so tender it practically melts between those toasted buns, with a perfect balance of smoky sweetness and tangy vinegar kick that’ll have everyone fighting for seconds. Try piling it high with crunchy coleslaw for texture contrast, or stuff it into baked potatoes for the ultimate comfort food upgrade that proves great things come to those who wait (or rather, to those whose appliances do all the work).
Creamy Tomato Basil Soup with Grilled Cheese

Dare we suggest there’s a more perfect pairing than creamy tomato basil soup and grilled cheese? This dynamic duo isn’t just comfort food—it’s a warm, cheesy hug in a bowl that’s ready to rescue even the dreariest of days. Let’s turn simple ingredients into something spectacularly soothing.
5
servings15
minutes30
minutesIngredients
- 2 tbsp olive oil
- 1 medium yellow onion
- 2 cloves garlic
- 28 oz canned crushed tomatoes
- 2 cups vegetable broth
- 1/2 cup heavy cream
- 1/4 cup fresh basil leaves
- 1 tsp sugar
- 1/2 tsp salt
- 1/4 tsp black pepper
- 8 slices sourdough bread
- 4 tbsp unsalted butter
- 8 slices cheddar cheese
Instructions
- Heat 2 tbsp olive oil in a large pot over medium heat until shimmering.
- Dice 1 medium yellow onion and sauté in the oil for 5 minutes until translucent.
- Mince 2 cloves garlic and add to the pot, cooking for 1 minute until fragrant.
- Pour in 28 oz canned crushed tomatoes and 2 cups vegetable broth, stirring to combine.
- Bring the mixture to a boil, then reduce heat to low and simmer uncovered for 15 minutes.
- While soup simmers, spread 1 tbsp unsalted butter on one side of each of 8 slices sourdough bread.
- Place 4 slices bread buttered-side down in a cold skillet, topping each with 2 slices cheddar cheese.
- Cover with remaining bread slices, buttered-side up, and cook over medium-low heat for 4 minutes.
- Flip sandwiches carefully using a spatula and cook for another 4 minutes until golden brown and cheese is melted.
- Remove grilled cheese sandwiches from skillet and let rest for 2 minutes before cutting diagonally.
- Stir 1/2 cup heavy cream, 1/4 cup fresh basil leaves, 1 tsp sugar, 1/2 tsp salt, and 1/4 tsp black pepper into the soup.
- Use an immersion blender to puree the soup directly in the pot until completely smooth, about 2 minutes.
- Ladle the hot soup into bowls and serve immediately with grilled cheese sandwiches on the side.
Nothing beats the velvety smooth texture against the crisp, buttery crunch of that sandwich. The soup’s bright acidity mellows into creamy richness, while fresh basil adds a garden-fresh pop that makes each spoonful sing. Next time, try dunking your grilled cheese right into the bowl for the ultimate comfort food experience!
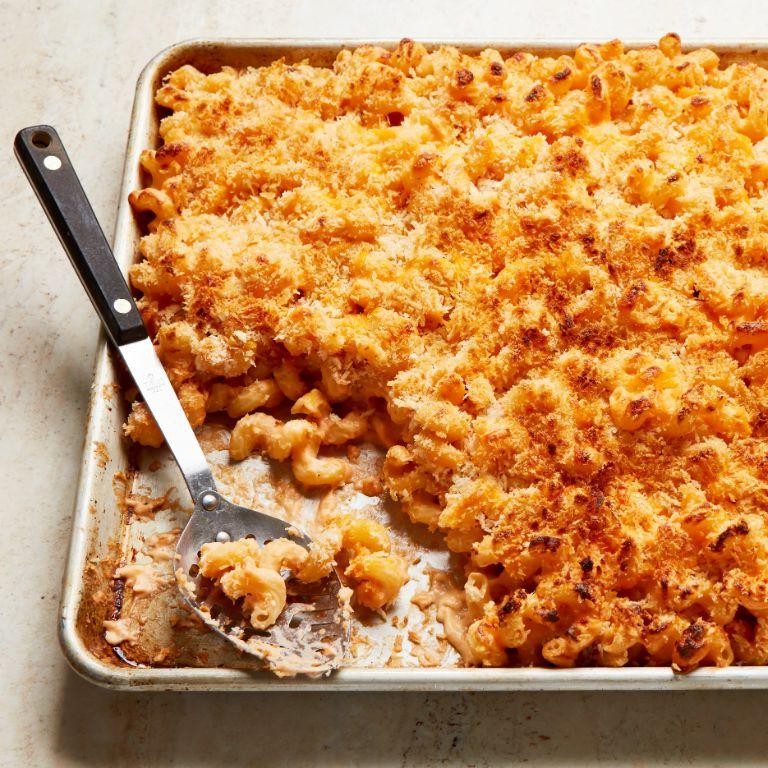
Baked Macaroni and Cheese with Crunchy Topping
Heavenly, cheesy, and unapologetically indulgent—this baked macaroni and cheese is the cozy hug your taste buds have been dreaming of, complete with a golden, crunchy topping that’ll make you forget all about the boxed stuff. Seriously, it’s so good, you might just start a family feud over the last scoop. Let’s dive into this carb-loaded masterpiece that’s guaranteed to steal the spotlight at any potluck or weeknight dinner.
6
servings15
minutes40
minutesIngredients
- 8 ounces elbow macaroni
- 4 tablespoons unsalted butter
- 1/4 cup all-purpose flour
- 2 cups whole milk
- 1 teaspoon Dijon mustard
- 1/2 teaspoon garlic powder
- 1/2 teaspoon smoked paprika
- 2 cups shredded sharp cheddar cheese
- 1 cup shredded Gruyère cheese
- 1 cup panko breadcrumbs
- 2 tablespoons grated Parmesan cheese
- 1 tablespoon olive oil
Instructions
- Preheat your oven to 375°F and grease a 9×13-inch baking dish lightly with butter or non-stick spray.
- Bring a large pot of salted water to a rolling boil over high heat.
- Add the elbow macaroni to the boiling water and cook for 7-8 minutes, stirring occasionally, until al dente (it should still have a slight bite). Tip: Don’t overcook the pasta—it’ll soften further in the oven.
- Drain the macaroni in a colander and set it aside; do not rinse.
- In a large saucepan, melt the unsalted butter over medium heat until bubbly.
- Whisk in the all-purpose flour and cook for 1-2 minutes, stirring constantly, until the mixture turns light golden and smells nutty. Tip: This roux is the base for your sauce, so keep it moving to avoid burning.
- Gradually pour in the whole milk while whisking continuously to prevent lumps.
- Add the Dijon mustard, garlic powder, and smoked paprika, then simmer the sauce for 3-5 minutes, whisking often, until it thickens enough to coat the back of a spoon.
- Remove the saucepan from the heat and stir in the shredded sharp cheddar and Gruyère cheeses until fully melted and smooth.
- Fold the drained macaroni into the cheese sauce until evenly coated.
- Transfer the macaroni mixture to the prepared baking dish and spread it into an even layer.
- In a small bowl, combine the panko breadcrumbs, grated Parmesan cheese, and olive oil, mixing until the breadcrumbs are lightly coated.
- Sprinkle the breadcrumb mixture evenly over the macaroni. Tip: For extra crunch, press the topping gently into the surface before baking.
- Bake in the preheated oven for 20-25 minutes, or until the topping is golden brown and the edges are bubbly.
- Let the baked macaroni and cheese rest for 5-10 minutes before serving to allow the sauce to set. Oh, the glorious contrast of that crispy, buttery topping against the velvety, cheesy pasta is pure comfort food magic. Serve it alongside a crisp green salad to cut through the richness, or go all-in and top it with crispy bacon bits for a next-level twist that’ll have everyone begging for seconds.
Chicken Pot Pie with Flaky Crust
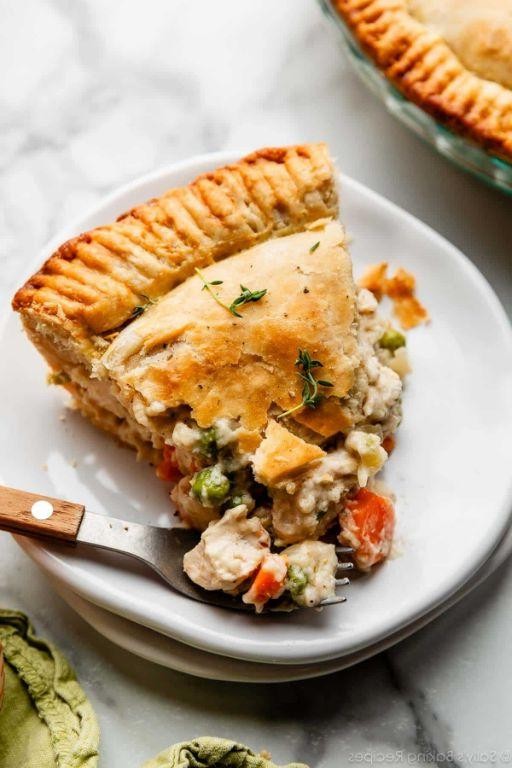
Gosh, is there anything more comforting than cracking through that golden, flaky crust to reveal a steamy, savory chicken pot pie filling? This isn’t just dinner; it’s a warm, buttery hug for your soul, the kind of meal that makes you forget all about that mountain of laundry waiting for you. Let’s get that oven preheated and dive into the coziest project you’ll tackle all week.
5
servings20
minutes55
minutesIngredients
– 1/4 cup unsalted butter
– 1 medium yellow onion, diced
– 2 medium carrots, diced
– 2 stalks celery, diced
– 1/3 cup all-purpose flour
– 2 cups chicken broth
– 1/2 cup heavy cream
– 3 cups cooked chicken, shredded
– 1 cup frozen peas
– 1 tsp dried thyme
– 1/2 tsp black pepper
– 1/2 tsp salt
– 1 package (14.1 oz) refrigerated pie crusts
– 1 large egg
– 1 tbsp water
Instructions
1. Preheat your oven to 400°F (200°C).
2. Melt 1/4 cup unsalted butter in a large, oven-safe skillet over medium heat.
3. Add the diced yellow onion, carrots, and celery to the skillet.
4. Sauté the vegetables for 8-10 minutes, until the onions are translucent and the carrots have softened slightly.
5. Sprinkle 1/3 cup all-purpose flour over the vegetables and stir continuously for 1 minute to cook out the raw flour taste.
6. Gradually pour in 2 cups chicken broth while whisking constantly to prevent lumps from forming.
7. Whisk in 1/2 cup heavy cream until the sauce is smooth.
8. Stir in 3 cups shredded cooked chicken, 1 cup frozen peas, 1 tsp dried thyme, 1/2 tsp black pepper, and 1/2 tsp salt.
9. Bring the filling to a simmer, then cook for 3-5 minutes until thickened, stirring occasionally.
10. Remove the skillet from the heat and let the filling cool for 10 minutes.
11. Unroll one refrigerated pie crust and carefully place it over the filling in the skillet, trimming any excess dough hanging over the edge.
12. In a small bowl, whisk together 1 large egg and 1 tbsp water to create an egg wash.
13. Brush the top of the pie crust evenly with the egg wash.
14. Cut 4-5 small slits in the center of the crust with a sharp knife to allow steam to escape during baking.
15. Place the skillet in the preheated oven and bake for 25-30 minutes, until the crust is golden brown and flaky.
16. Remove the pot pie from the oven and let it rest for 10 minutes before serving.
Let’s be real, the true magic happens when your spoon shatters that impossibly flaky, golden crust and plunges into the creamy, herb-kissed filling. The tender chicken and sweet peas create a symphony of comfort in every bite. Serve it right from the skillet for maximum rustic charm, or pair it with a simple arugula salad to cut through the richness.
Vegetarian Chili with Cornbread Muffins
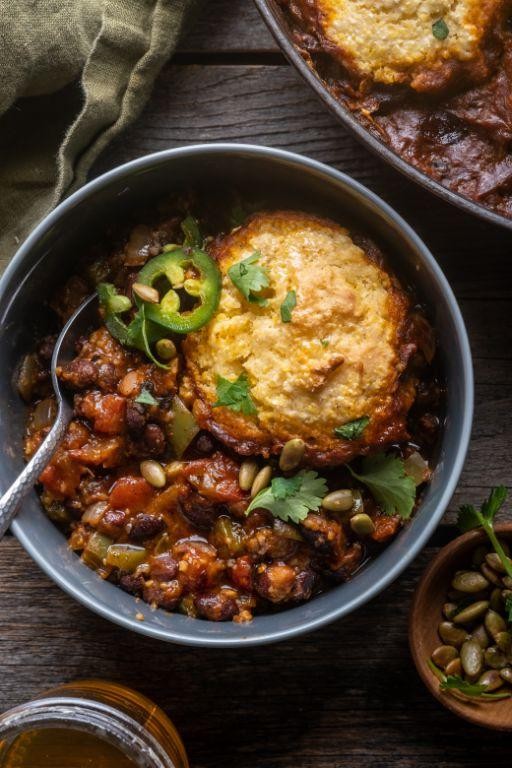
Just when you thought comfort food couldn’t get cozier, this dynamic duo arrives to save dinner from the doldrums. Vegetarian chili and cornbread muffins are basically the culinary equivalent of your favorite sweatpants—unexpectedly stylish, ridiculously comfortable, and guaranteed to make everything better. Get ready to wow your taste buds without ever missing the meat!
12
portions15
minutes50
minutesIngredients
– 2 tbsp olive oil
– 1 medium onion, diced
– 2 cloves garlic, minced
– 1 bell pepper, diced
– 2 tbsp chili powder
– 1 tsp cumin
– 1 can (15 oz) kidney beans, drained
– 1 can (15 oz) black beans, drained
– 1 can (28 oz) crushed tomatoes
– 1 cup vegetable broth
– 1 cup corn kernels
– 1 cup all-purpose flour
– 1 cup cornmeal
– 1/4 cup sugar
– 1 tbsp baking powder
– 1/2 tsp salt
– 1 cup milk
– 1/4 cup vegetable oil
– 1 large egg
Instructions
1. Heat 2 tbsp olive oil in a large pot over medium heat for 2 minutes until shimmering.
2. Add diced onion and cook for 5 minutes, stirring occasionally, until translucent.
3. Stir in minced garlic and diced bell pepper, cooking for 3 more minutes until fragrant.
4. Sprinkle in 2 tbsp chili powder and 1 tsp cumin, toasting for 1 minute to deepen flavors.
5. Pour in drained kidney beans, black beans, crushed tomatoes, and 1 cup vegetable broth.
6. Bring chili to a boil, then reduce heat to low and simmer uncovered for 30 minutes.
7. While chili simmers, preheat oven to 400°F and line a muffin tin with paper liners.
8. Whisk together 1 cup all-purpose flour, 1 cup cornmeal, 1/4 cup sugar, 1 tbsp baking powder, and 1/2 tsp salt in a large bowl.
9. In a separate bowl, combine 1 cup milk, 1/4 cup vegetable oil, and 1 large egg until smooth.
10. Pour wet ingredients into dry ingredients, stirring just until combined—don’t overmix for tender muffins.
11. Divide batter evenly among 12 muffin cups, filling each about 2/3 full.
12. Bake at 400°F for 15-18 minutes until golden brown and a toothpick inserted comes out clean.
13. Stir 1 cup corn kernels into the chili during the last 5 minutes of cooking to maintain crunch.
14. Remove cornbread muffins from oven and let cool in pan for 5 minutes before transferring to a wire rack.
15. Ladle hot chili into bowls and serve immediately with warm cornbread muffins.
Velvety beans swim in a rich, tomatoey broth that’s perfectly spiced, while the cornbread muffins provide sweet, crumbly contrast that soaks up every last drop. Try serving this in individual cast-iron skillets for a rustic presentation that’ll have everyone reaching for seconds before they’ve finished firsts!
Roasted Veggie and Quinoa Salad
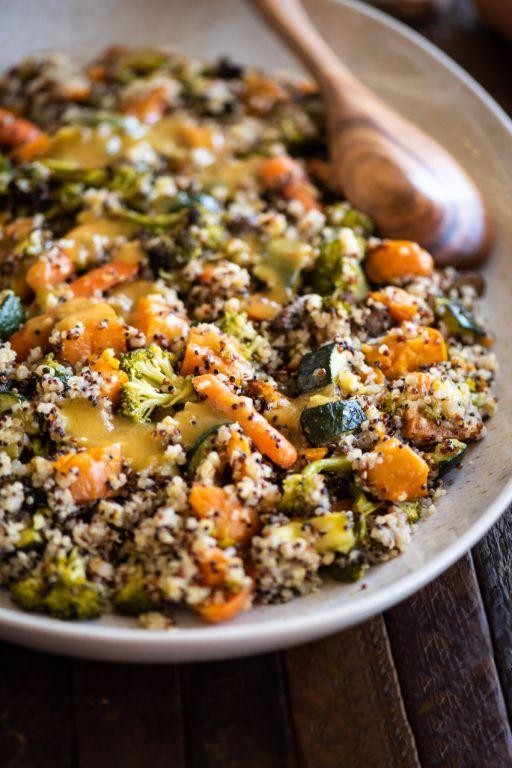
Tired of salads that taste like punishment? This roasted veggie and quinoa salad is the vibrant, satisfying bowl that actually makes you excited about eating your vegetables—no sad desk lunch vibes here, just pure flavor fireworks and enough crunch to keep things interesting.
2
servings15
minutes45
minutesIngredients
– 1 cup quinoa
– 2 cups water
– 1 large sweet potato, peeled and cubed into 1-inch pieces
– 2 cups broccoli florets
– 1 red bell pepper, sliced
– 1 yellow onion, sliced
– 3 tablespoons olive oil
– 1 teaspoon salt
– 1/2 teaspoon black pepper
– 1/2 teaspoon garlic powder
– 1/4 cup lemon juice
– 2 tablespoons chopped fresh parsley
Instructions
1. Preheat your oven to 400°F.
2. Rinse 1 cup quinoa thoroughly in a fine-mesh strainer until the water runs clear.
3. Combine the rinsed quinoa and 2 cups water in a medium saucepan, bring to a boil over high heat, then reduce heat to low, cover, and simmer for 15 minutes.
4. Remove the quinoa from heat, let it stand covered for 5 minutes, then fluff with a fork.
5. Spread 1 large sweet potato (peeled and cubed), 2 cups broccoli florets, 1 red bell pepper (sliced), and 1 yellow onion (sliced) in a single layer on a large baking sheet.
6. Drizzle the vegetables with 3 tablespoons olive oil and sprinkle with 1 teaspoon salt, 1/2 teaspoon black pepper, and 1/2 teaspoon garlic powder; toss to coat evenly.
7. Roast the vegetables at 400°F for 20–25 minutes, until the sweet potato is tender and the broccoli edges are lightly browned.
8. Transfer the roasted vegetables to a large bowl.
9. Add the cooked quinoa to the bowl with the roasted vegetables.
10. Pour 1/4 cup lemon juice over the salad and toss to combine.
11. Stir in 2 tablespoons chopped fresh parsley.
12. Serve immediately or chill for 1 hour before serving for a cooler salad. But honestly, this salad is a texture dream—the fluffy quinoa soaks up the zesty lemon dressing while the roasted veggies add a caramelized sweetness and satisfying crunch. Try piling it into a wrap with some hummus or topping it with a fried egg for a next-level meal that’s anything but boring.
Tender Lemon Herb Baked Salmon

Pucker up, buttercup, because we’re about to transform that gorgeous salmon fillet from fridge-fresh to fork-tender perfection with a zesty lemon herb hug that’ll make your taste buds do a happy dance.
5
servings10
minutes15
minutesIngredients
– 1.5 lbs salmon fillet
– 2 tbsp olive oil
– 1 lemon
– 2 tbsp fresh parsley
– 1 tbsp fresh dill
– 3 cloves garlic
– 1 tsp salt
– 1/2 tsp black pepper
Instructions
1. Preheat your oven to 400°F and line a baking sheet with parchment paper.
2. Pat the 1.5 lbs salmon fillet completely dry with paper towels to ensure crispy skin.
3. Drizzle 2 tbsp olive oil evenly over both sides of the salmon.
4. Squeeze the juice from 1 lemon directly onto the salmon flesh.
5. Mince 3 cloves garlic and sprinkle evenly over the salmon.
6. Chop 2 tbsp fresh parsley and 1 tbsp fresh dill, then scatter over the fillet.
7. Season the salmon with 1 tsp salt and 1/2 tsp black pepper, rubbing gently into the flesh.
8. Place the salmon skin-side down on the prepared baking sheet.
9. Bake at 400°F for 12-15 minutes until the internal temperature reaches 145°F.
10. Let the salmon rest for 5 minutes before serving to allow juices to redistribute.
Seriously, that flaky texture practically melts on your tongue while the bright lemon cuts through the richness in the most delightful way. Serve it over a bed of quinoa with extra lemon wedges for squeezing, or flake it into tacos for a seriously upgrade Tuesday night.
Savory Shepherd’s Pie with Mashed Potato Crust

Kick your comfort food game up a notch with this cozy masterpiece that’ll have your taste buds doing a happy dance. This isn’t your grandma’s shepherd’s pie (though she’d definitely approve) – it’s a flavor-packed upgrade that transforms humble ingredients into pure deliciousness.
8
servings30
minutes65
minutesIngredients
– 2 lbs ground beef
– 1 large onion, diced
– 2 carrots, diced
– 2 celery stalks, diced
– 3 cloves garlic, minced
– 2 tbsp tomato paste
– 1 cup beef broth
– 1 cup frozen peas
– 1 tsp Worcestershire sauce
– 2 lbs russet potatoes, peeled and quartered
– 1/2 cup heavy cream
– 4 tbsp unsalted butter
– 1/2 cup shredded cheddar cheese
– 1 tsp salt
– 1/2 tsp black pepper
– 1/4 tsp paprika
Instructions
1. Preheat your oven to 400°F and grease a 9×13 inch baking dish.
2. Place peeled, quartered potatoes in a large pot and cover with cold water by 1 inch.
3. Bring potatoes to a boil over high heat, then reduce to medium and cook for 15-20 minutes until fork-tender.
4. While potatoes cook, brown 2 lbs ground beef in a large skillet over medium-high heat, breaking it into small pieces, for 6-8 minutes until no pink remains.
5. Drain excess fat from the beef, leaving about 1 tablespoon in the skillet.
6. Add diced onion, carrots, and celery to the skillet and cook for 5-7 minutes until vegetables soften.
7. Stir in minced garlic and cook for 1 minute until fragrant.
8. Mix in tomato paste and cook for 2 minutes until it darkens slightly.
9. Pour in beef broth and Worcestershire sauce, scraping up any browned bits from the bottom of the pan.
10. Simmer the mixture for 5 minutes until slightly thickened.
11. Stir in frozen peas and season with 1/2 tsp salt and 1/4 tsp black pepper.
12. Transfer the beef mixture to the prepared baking dish and spread evenly.
13. Drain the cooked potatoes and return them to the hot pot for 1 minute to evaporate excess moisture.
14. Mash the potatoes with a potato ricer or masher until smooth.
15. Heat heavy cream and butter in a small saucepan until butter melts, then stir into the mashed potatoes.
16. Fold shredded cheddar cheese into the potatoes until just combined.
17. Season potatoes with remaining 1/2 tsp salt and 1/4 tsp black pepper.
18. Spoon the mashed potatoes over the beef mixture and spread to cover completely.
19. Create decorative peaks in the potato topping using a fork.
20. Sprinkle paprika evenly over the potato crust.
21. Bake for 25-30 minutes until the filling is bubbly and the potato crust is golden brown.
22. Let the shepherd’s pie rest for 10 minutes before serving to allow the filling to set.
Zesty and utterly satisfying, this shepherd’s pie delivers a perfect textural contrast between the creamy potato blanket and the savory, chunky filling beneath. The cheesy mashed potato crust forms golden peaks that cradle the rich beef and vegetable medium in cozy comfort. Serve it straight from the baking dish for maximum rustic appeal, or portion it into individual ramekins for a charming dinner party presentation that’ll have everyone asking for seconds.
Stuffed Bell Peppers with Ground Turkey
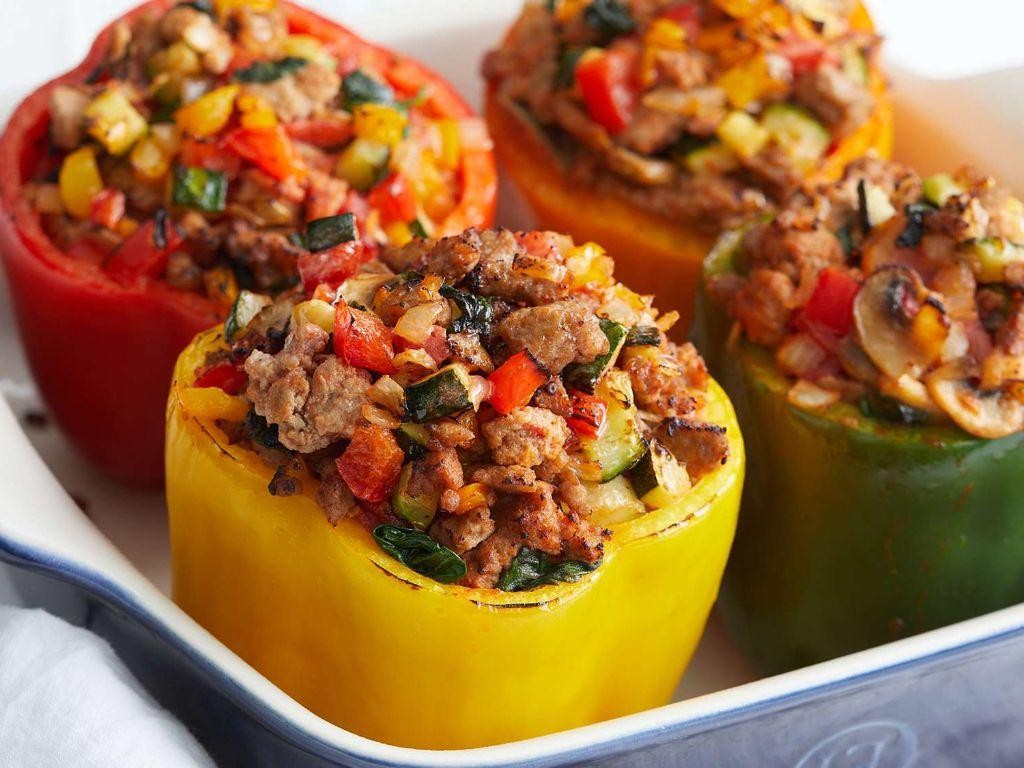
Unbelievably delicious and deceptively simple, these stuffed bell peppers will have your family thinking you secretly attended culinary school. Forget boring weeknight dinners—this vibrant dish brings the wow factor with minimal effort, proving that healthy eating doesn’t have to taste like punishment. Get ready to stuff, bake, and devour your way to dinnertime glory!
4
servings15
minutes46
minutesIngredients
– 4 large bell peppers
– 1 lb ground turkey
– 1 cup cooked rice
– 1/2 cup diced onion
– 2 cloves minced garlic
– 1 cup marinara sauce
– 1/2 cup shredded mozzarella cheese
– 1 tbsp olive oil
– 1 tsp dried oregano
– 1/2 tsp salt
– 1/4 tsp black pepper
Instructions
1. Preheat your oven to 375°F and lightly grease a baking dish.
2. Slice the tops off all 4 bell peppers and remove the seeds and membranes.
3. Heat 1 tablespoon of olive oil in a large skillet over medium-high heat.
4. Add 1/2 cup diced onion and cook for 3-4 minutes until translucent.
5. Stir in 2 cloves minced garlic and cook for 1 minute until fragrant.
6. Add 1 pound ground turkey to the skillet, breaking it up with a spoon.
7. Cook the turkey for 6-8 minutes until no pink remains, stirring occasionally.
8. Mix in 1 cup cooked rice, 1 cup marinara sauce, 1 teaspoon dried oregano, 1/2 teaspoon salt, and 1/4 teaspoon black pepper.
9. Simmer the filling for 2 minutes to combine flavors, then remove from heat.
10. Stand the prepared bell peppers upright in the greased baking dish.
11. Spoon the turkey mixture evenly into each bell pepper cavity, pressing down gently.
12. Top each stuffed pepper with 2 tablespoons of shredded mozzarella cheese.
13. Cover the baking dish with aluminum foil and bake at 375°F for 25 minutes.
14. Remove the foil and bake for another 10 minutes until cheese is golden and peppers are tender.
15. Let the peppers rest for 5 minutes before serving to allow filling to set.
Looking at these beauties fresh from the oven, you’ll notice the peppers have softened to a perfect tender-crisp texture while maintaining their structural integrity. The savory turkey filling absorbs just enough moisture from the peppers during baking, creating a wonderfully cohesive bite that’s neither too dry nor soggy. For a fun twist, try serving them sliced horizontally into colorful rings that showcase the beautiful layered filling—perfect for Instagram and even better for your taste buds!
Conclusion
These 32 heartwarming recipes make meal train giving simple and meaningful. Whether you’re cooking for a friend in need or your own family, these dishes bring comfort and connection. Try your favorites, leave a comment sharing which recipes you loved most, and don’t forget to pin this article on Pinterest to spread the kindness!


