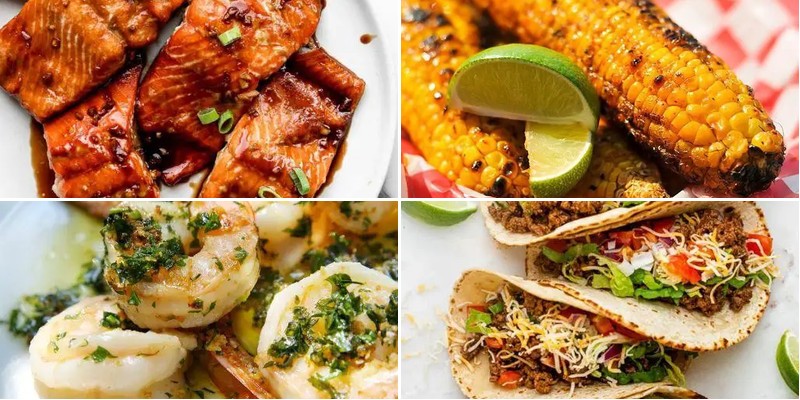
Whether you’re staring at that lonely ingredient in your pantry or craving fresh culinary inspiration, you’ve come to the right place. This collection of 21 diverse recipes celebrates the magic of cooking by ingredient—transforming simple staples into delicious meals that will excite your taste buds and simplify your meal planning. Get ready to discover new favorites and fall in love with your kitchen all over again!
Simple Mac and Cheese with Pantry Ingredients

Just when I thought my pantry was looking bare, I remembered this simple mac and cheese recipe that saved dinner more times than I can count—it’s the kind of comfort food that feels like a warm hug after a long day, especially when you’re short on groceries but big on cravings.
3
servings10
minutes17
minutesIngredients
- For the pasta:
- 8 ounces elbow macaroni
- 4 quarts water
- 1 tablespoon salt
- For the cheese sauce:
- 4 tablespoons unsalted butter
- 1/4 cup all-purpose flour
- 2 cups whole milk
- 2 cups shredded sharp cheddar cheese
- 1/2 teaspoon garlic powder
- 1/4 teaspoon black pepper
Instructions
- Bring 4 quarts of water to a rolling boil in a large pot over high heat.
- Add 1 tablespoon of salt to the boiling water.
- Stir in 8 ounces of elbow macaroni and cook for 8 minutes, stirring occasionally to prevent sticking.
- Drain the pasta in a colander and set it aside. Tip: Reserve 1/4 cup of pasta water—it can help thin the sauce if needed later.
- Melt 4 tablespoons of unsalted butter in the same pot over medium heat.
- Whisk in 1/4 cup of all-purpose flour and cook for 1 minute until golden and bubbly.
- Gradually pour in 2 cups of whole milk, whisking constantly to avoid lumps.
- Cook the sauce for 3–5 minutes, stirring frequently, until it thickens enough to coat the back of a spoon. Tip: Don’t rush this step—a properly thickened roux ensures a creamy, not gritty, sauce.
- Remove the pot from heat and stir in 2 cups of shredded sharp cheddar cheese until fully melted.
- Mix in 1/2 teaspoon garlic powder and 1/4 teaspoon black pepper.
- Fold the drained macaroni into the cheese sauce until evenly coated. Tip: For extra creaminess, add a splash of reserved pasta water if the sauce seems too thick.
Rich and velvety, this mac and cheese boasts a smooth texture with a subtle sharpness from the cheddar. I love serving it straight from the pot for maximum comfort, or topping it with crispy breadcrumbs for a bit of crunch—either way, it’s a cozy meal that never disappoints.
Garlic Butter Shrimp with Fresh Parsley
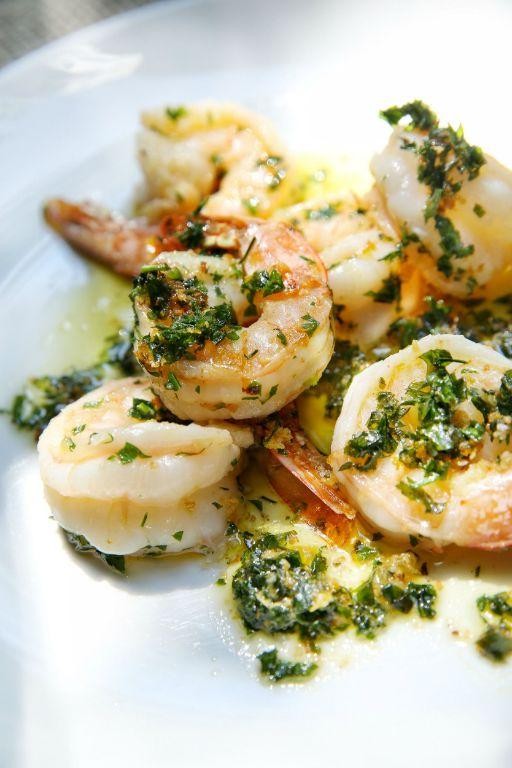
Over the years, I’ve learned that the simplest dishes often become family favorites, and this garlic butter shrimp is no exception—it’s what I whip up when I want something impressive but effortless, reminding me of cozy dinners with friends where the conversation flows as freely as the wine.
2
servings10
minutes7
minutesIngredients
- For the shrimp:
- 1 lb large raw shrimp, peeled and deveined
- 2 tbsp olive oil
- 1/2 tsp salt
- 1/4 tsp black pepper
- For the garlic butter sauce:
- 4 tbsp unsalted butter
- 4 cloves garlic, minced
- 1/4 cup fresh parsley, chopped
- 1 tbsp lemon juice
Instructions
- Pat the shrimp completely dry with paper towels to ensure a good sear.
- Season the shrimp evenly with 1/2 tsp salt and 1/4 tsp black pepper.
- Heat 2 tbsp olive oil in a large skillet over medium-high heat until it shimmers.
- Add the shrimp in a single layer, cooking for 2 minutes until the bottoms turn pink.
- Flip each shrimp and cook for another 1–2 minutes until opaque throughout.
- Transfer the shrimp to a plate, leaving any oil in the skillet.
- Reduce the heat to medium and melt 4 tbsp unsalted butter in the same skillet.
- Add 4 cloves minced garlic, sautéing for 1 minute until fragrant but not browned.
- Stir in 1 tbsp lemon juice and 1/4 cup chopped fresh parsley.
- Return the shrimp to the skillet, tossing to coat in the sauce for 30 seconds.
Heavenly is the only word for that first bite—tender shrimp bathed in rich, garlicky butter with a bright parsley finish. I love serving this over creamy polenta to soak up every drop of sauce, or tossing it with linguine for a quick pasta night that feels anything but ordinary.
Classic Caprese Salad with Garden Tomatoes
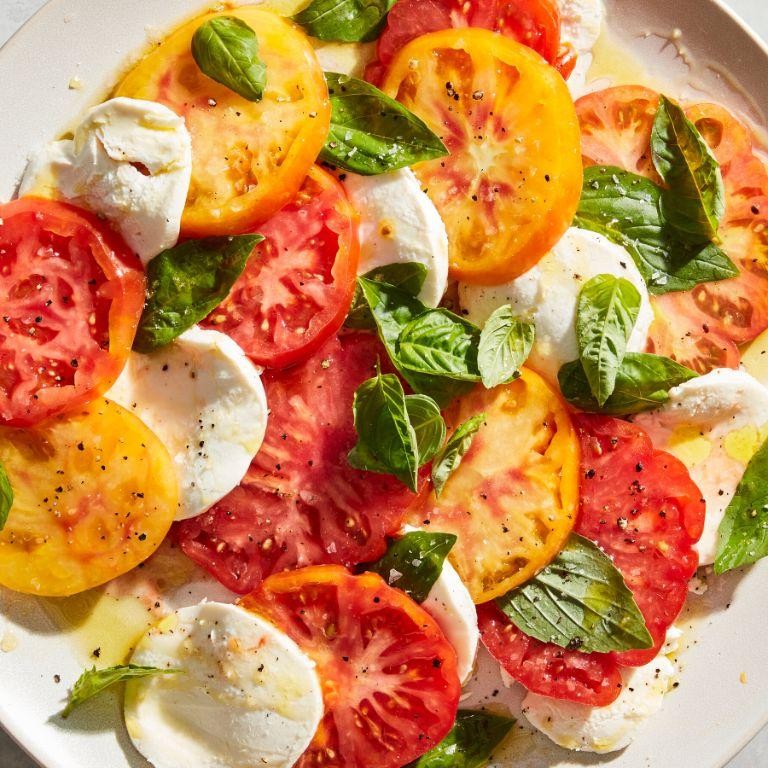
Just yesterday, I found myself with a basket overflowing with sun-ripened tomatoes from my little backyard patch, and I knew immediately what I had to make—this simple, stunning salad that always tastes like summer on a plate. It’s the kind of effortless dish I turn to when I want something fresh and beautiful without spending hours in the kitchen.
5
servings15
minutesIngredients
- For the salad assembly:
- 4 large ripe garden tomatoes
- 8 ounces fresh mozzarella cheese
- 1/4 cup fresh basil leaves
- For the dressing:
- 2 tablespoons extra virgin olive oil
- 1 tablespoon balsamic glaze
- 1/4 teaspoon sea salt
- 1/8 teaspoon black pepper
Instructions
- Wash the 4 large ripe garden tomatoes under cool running water.
- Pat the tomatoes completely dry with paper towels.
- Slice each tomato into 1/4-inch thick rounds using a sharp serrated knife.
- Slice the 8 ounces fresh mozzarella cheese into 1/4-inch thick rounds.
- Arrange the tomato and mozzarella slices in an alternating, overlapping pattern on a serving platter.
- Tuck the 1/4 cup fresh basil leaves between the tomato and mozzarella slices.
- Drizzle the 2 tablespoons extra virgin olive oil evenly over the arranged salad.
- Drizzle the 1 tablespoon balsamic glaze in a zigzag pattern across the salad.
- Sprinkle the 1/4 teaspoon sea salt uniformly over the entire salad.
- Sprinkle the 1/8 teaspoon black pepper evenly over the salad.
- Let the salad rest at room temperature for 10 minutes before serving to allow flavors to meld.
During those 10 minutes of resting, the salt works its magic, drawing out the tomato juices to mingle with the olive oil and balsamic. Digging in, you get that wonderful contrast between the juicy, sweet tomatoes and the creamy, mild mozzarella, with the basil adding a fresh, peppery kick. For a fun twist, I sometimes stack the components on skewers for easy, portable Caprese bites—perfect for summer picnics.
Lemon Herb Chicken with Pantry Spices

Now, I’ll confess—I used to be intimidated by cooking chicken until I discovered this foolproof method using spices I always have on hand. Nothing beats coming home after a long day and knowing dinner can be ready in under 30 minutes with minimal effort, especially when it turns out this flavorful.
3
servings10
minutes20
minutesIngredients
For the chicken:
– 4 boneless, skinless chicken breasts (about 1.5 lbs)
– 2 tbsp olive oil
– 1 tsp salt
– 1/2 tsp black pepper
For the spice rub:
– 1 tsp garlic powder
– 1 tsp dried oregano
– 1/2 tsp paprika
– 1/4 tsp red pepper flakes
For the lemon herb finish:
– 2 tbsp fresh lemon juice
– 1 tbsp unsalted butter
– 1 tbsp fresh parsley, chopped
Instructions
1. Pat the chicken breasts completely dry with paper towels to ensure even browning.
2. Rub both sides of each chicken breast with olive oil using your hands.
3. Combine salt, black pepper, garlic powder, dried oregano, paprika, and red pepper flakes in a small bowl.
4. Sprinkle the spice mixture evenly over both sides of each chicken breast, pressing gently to adhere.
5. Heat a large skillet over medium-high heat for 2 minutes until hot.
6. Place chicken breasts in the hot skillet and cook for 6-7 minutes without moving them to develop a golden crust.
7. Flip each chicken breast using tongs and cook for another 6-7 minutes until the internal temperature reaches 165°F on an instant-read thermometer.
8. Transfer chicken to a plate and cover loosely with foil to rest for 5 minutes—this keeps the juices inside.
9. Reduce skillet heat to low and add lemon juice, scraping up any browned bits from the bottom of the pan.
10. Add butter to the skillet and swirl until melted and incorporated into the lemon juice.
11. Stir in chopped parsley and cook for 30 seconds until fragrant.
12. Pour the lemon herb butter sauce over the rested chicken breasts before serving. Getting that perfect golden crust while keeping the chicken incredibly juicy is what makes this dish special. The bright lemon cuts through the earthy spices beautifully, and I love serving it over rice to soak up every bit of that pan sauce.
Chili Lime Grilled Corn on the Cob

My family’s summer barbecues just wouldn’t be complete without this zesty twist on classic corn on the cob. I first discovered this chili lime version at a beachside food truck years ago and have been perfecting my own recipe ever since. There’s something magical about that smoky, spicy, tangy combination that makes ordinary corn extraordinary.
4
servings10
minutes15
minutesIngredients
For the corn and grilling
– 4 ears of fresh corn, husks removed
– 2 tablespoons olive oil
– 1/2 teaspoon kosher salt
For the chili lime butter
– 4 tablespoons unsalted butter, softened
– 1 tablespoon fresh lime juice
– 1 teaspoon chili powder
– 1/4 teaspoon garlic powder
– 1/4 teaspoon smoked paprika
– 1/4 teaspoon cayenne pepper
Instructions
1. Preheat your outdoor grill to medium-high heat (400°F).
2. Brush each ear of corn evenly with olive oil using a pastry brush.
3. Sprinkle kosher salt evenly over all sides of the oiled corn.
4. Place corn directly on the grill grates and close the lid.
5. Grill corn for 12-15 minutes, turning every 3-4 minutes with tongs until kernels are tender and lightly charred in spots.
6. While corn grills, combine softened butter, lime juice, chili powder, garlic powder, smoked paprika, and cayenne pepper in a small bowl.
7. Mix the butter mixture vigorously with a fork until fully combined and creamy.
8. Transfer grilled corn to a serving platter using tongs.
9. Immediately brush the hot corn generously with the chili lime butter mixture using a clean pastry brush.
10. Serve the corn while still warm.
Creamy, spicy, and bursting with bright citrus notes, this corn delivers incredible texture contrast between the smoky grilled kernels and the zesty butter coating. The charred bits provide wonderful depth against the lively chili lime flavors. For an extra festive presentation, I love serving these standing upright in a bed of coarse salt or with extra lime wedges for squeezing over individual portions.
Savory Mushroom Risotto with Arborio Rice
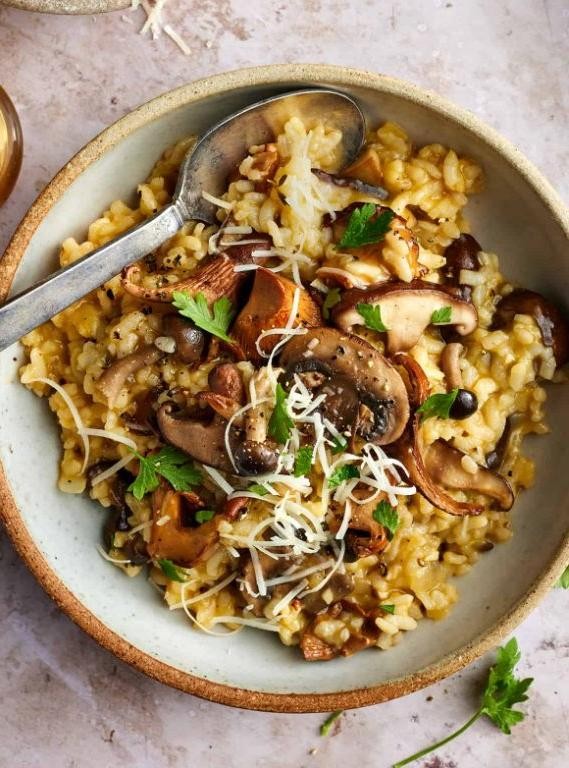
Zesty aromas of garlic and earthy mushrooms always transport me back to that cozy Italian restaurant where I first fell in love with risotto—now I make this comforting version weekly, tweaking it with whatever mushrooms look freshest at the market. There’s something magical about stirring that creamy rice while sipping wine, turning simple ingredients into pure comfort.
2
servings15
minutes45
minutesIngredients
For sautéing aromatics and mushrooms:
– 2 tbsp olive oil
– 1 medium yellow onion, finely chopped
– 3 cloves garlic, minced
– 8 oz cremini mushrooms, sliced
For the risotto base:
– 1 ½ cups Arborio rice
– ½ cup dry white wine
– 4 cups chicken broth, kept warm in a separate pot
– ½ cup grated Parmesan cheese
– 2 tbsp unsalted butter
– Salt and black pepper to season
Instructions
1. Heat 2 tbsp olive oil in a large, heavy-bottomed pot over medium heat for 1 minute.
2. Add 1 finely chopped yellow onion and cook for 4–5 minutes until translucent, stirring occasionally.
3. Stir in 3 minced garlic cloves and cook for 1 minute until fragrant.
4. Add 8 oz sliced cremini mushrooms and cook for 6–7 minutes until browned and tender.
5. Tip: Keep your broth warm in a separate saucepan—adding hot liquid helps the rice cook evenly without cooling the pot.
6. Pour in 1 ½ cups Arborio rice and stir constantly for 2 minutes to toast the grains.
7. Add ½ cup dry white wine and cook while stirring until fully absorbed, about 2 minutes.
8. Ladle in 1 cup warm chicken broth and stir continuously until the liquid is absorbed, about 5 minutes.
9. Repeat adding broth ½ cup at a time, stirring until each addition is absorbed before adding the next—this process takes 20–25 minutes total.
10. Tip: Don’t rush the stirring! Constant motion releases the rice’s starch, creating that signature creamy texture without needing cream.
11. Test the rice for doneness—it should be tender but slightly firm at the center (al dente).
12. Remove the pot from heat and stir in ½ cup grated Parmesan cheese and 2 tbsp unsalted butter until melted and creamy.
13. Tip: Let the risotto rest off heat for 2 minutes before serving—this allows the flavors to meld and the texture to perfect itself.
14. Season with salt and black pepper to taste.
Creamy and luxurious, this risotto boasts a velvety texture with firm mushroom bites that melt into each forkful. I love topping it with extra Parmesan and a drizzle of truffle oil for special occasions, or serving it alongside grilled asparagus for a complete meal that feels both rustic and elegant.
Creamy Tomato Basil Soup with Fresh Produce

Ooh, there’s something so comforting about a bowl of creamy tomato basil soup, especially when you can make it with fresh, vibrant produce from the farmer’s market. I always pick up extra tomatoes and basil during my weekend trips—they make all the difference in flavor. This recipe has become my go-to for cozy evenings, and I love how the simple ingredients come together into something truly special.
2
servings15
minutes31
minutesIngredients
For the vegetable base:
- 2 tablespoons olive oil
- 1 medium yellow onion, chopped
- 2 cloves garlic, minced
- 2 pounds fresh Roma tomatoes, quartered
- 1/2 cup fresh basil leaves
For the creamy finish:
- 2 cups vegetable broth
- 1/2 cup heavy cream
- 1 teaspoon salt
- 1/2 teaspoon black pepper
Instructions
- Heat 2 tablespoons olive oil in a large pot over medium heat for 2 minutes until shimmering.
- Add 1 chopped yellow onion and cook for 5 minutes, stirring occasionally, until translucent.
- Stir in 2 minced garlic cloves and cook for 1 minute until fragrant. Tip: Don’t let the garlic brown or it will turn bitter.
- Add 2 pounds quartered Roma tomatoes and 1/2 cup fresh basil leaves to the pot.
- Pour in 2 cups vegetable broth and bring to a boil over high heat.
- Reduce heat to low, cover the pot, and simmer for 20 minutes until tomatoes are completely soft.
- Remove the pot from heat and let cool for 5 minutes. Tip: Letting it cool slightly prevents splattering when blending.
- Carefully transfer the mixture to a blender and blend on high speed for 1 minute until completely smooth.
- Return the blended soup to the pot over low heat.
- Stir in 1/2 cup heavy cream, 1 teaspoon salt, and 1/2 teaspoon black pepper.
- Heat for 3 minutes, stirring constantly, until warmed through but not boiling. Tip: Avoid boiling after adding cream to prevent curdling.
The finished soup has a velvety texture that’s rich without being heavy, with the bright acidity of tomatoes balanced by the sweet creaminess. I love serving it with a drizzle of olive oil and extra basil leaves on top, or sometimes with a grilled cheese sandwich for dipping—the combination is pure comfort food magic.
One-Pan Chicken Alfredo Pasta with Leftover Rotisserie Chicken
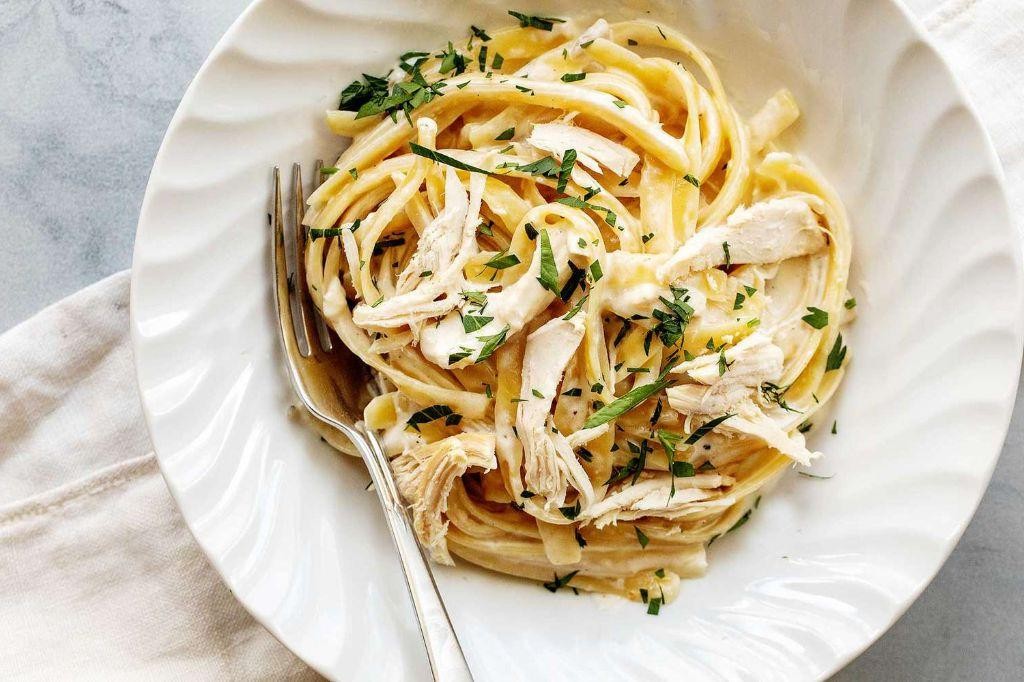
Busy weeknights call for simple solutions, and this one-pan chicken Alfredo pasta has become my go-to rescue meal. Between juggling work deadlines and my kids’ soccer practices, I’ve perfected this recipe using leftover rotisserie chicken that would otherwise sit forgotten in the fridge. Honestly, the best part is that everything comes together in one pan—meaning less cleanup and more time to actually enjoy dinner with my family.
3
servings5
minutes20
minutesIngredients
For the pasta and chicken
- 8 ounces fettuccine pasta
- 2 cups shredded rotisserie chicken
For the sauce
- 2 tablespoons unsalted butter
- 3 cloves garlic, minced
- 1 cup heavy cream
- 1/2 cup grated Parmesan cheese
- 1/4 teaspoon salt
- 1/4 teaspoon black pepper
- 1/4 teaspoon nutmeg
For finishing
- 2 tablespoons chopped fresh parsley
Instructions
- Break the fettuccine pasta in half so it fits better in your skillet.
- Place the broken pasta in a large skillet and add exactly 4 cups of water.
- Bring the water to a boil over high heat, which should take about 5-7 minutes.
- Reduce heat to medium and cook the pasta for 9 minutes, stirring occasionally to prevent sticking.
- Test pasta doneness by biting one piece—it should be al dente with a slight firmness.
- Drain any remaining water, leaving about 1/4 cup in the skillet with the pasta.
- Add 2 tablespoons unsalted butter to the skillet with the pasta.
- Stir in 3 cloves of minced garlic and cook for exactly 1 minute until fragrant.
- Pour in 1 cup heavy cream and bring to a gentle simmer over medium heat.
- Sprinkle in 1/2 cup grated Parmesan cheese while continuously stirring.
- Add 1/4 teaspoon salt, 1/4 teaspoon black pepper, and 1/4 teaspoon nutmeg to the sauce.
- Stir the sauce constantly for 2-3 minutes until it thickens enough to coat the back of a spoon.
- Fold in 2 cups shredded rotisserie chicken and heat through for 2 minutes.
- Garnish with 2 tablespoons chopped fresh parsley before serving.
You’ll love how the creamy sauce clings to every strand of pasta while the rotisserie chicken stays wonderfully tender. The nutmeg adds this subtle warmth that makes the dish feel fancier than its 20-minute prep time suggests. Yesterday, I served it with garlic bread for dipping, and my kids declared it better than any restaurant version.
Honey Garlic Baked Salmon with Soy Sauce
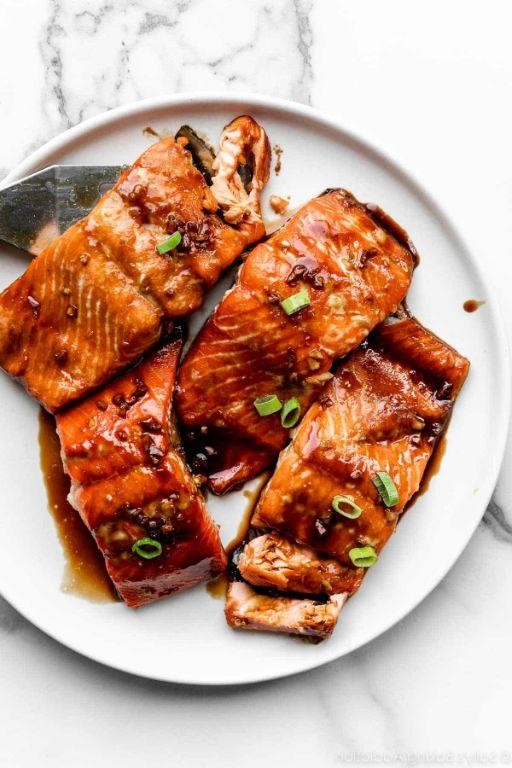
Last week, I was rushing to get dinner on the table after a long workday when I remembered this honey garlic baked salmon recipe—it’s become my go-to for busy nights because it’s so simple yet feels fancy. I love how the soy sauce and honey create this glossy, savory-sweet glaze that makes even my picky eater ask for seconds.
3
servings10
minutes15
minutesIngredients
For the sauce:
– 1/4 cup soy sauce
– 3 tbsp honey
– 4 garlic cloves, minced
– 1 tbsp olive oil
– 1 tsp grated fresh ginger
For the salmon:
– 4 (6 oz) salmon fillets, skin-on
– 1 lemon, sliced into thin rounds
– 2 tbsp chopped fresh parsley
Instructions
1. Preheat your oven to 400°F and line a baking sheet with parchment paper.
2. In a small bowl, whisk together 1/4 cup soy sauce, 3 tbsp honey, 4 minced garlic cloves, 1 tbsp olive oil, and 1 tsp grated ginger until well combined.
3. Pat 4 salmon fillets dry with paper towels to help the sauce adhere better.
4. Place the salmon skin-side down on the prepared baking sheet.
5. Spoon the sauce evenly over each fillet, coating the tops completely.
6. Arrange thin lemon slices over the salmon to infuse citrus flavor as it bakes.
7. Bake at 400°F for 12–15 minutes, until the salmon flakes easily with a fork and the glaze is bubbly.
8. Check for doneness by inserting a fork into the thickest part—it should separate into large flakes.
9. Remove from the oven and let rest for 2 minutes to allow the juices to redistribute.
10. Sprinkle with 2 tbsp chopped parsley before serving.
Nothing beats the tender, flaky texture of this salmon paired with that sticky, savory-sweet glaze. I love serving it over a bed of jasmine rice to soak up the extra sauce, or flaking it into tacos with a crunchy cabbage slaw for a fun twist.
Vegetable Stir-Fry with Seasonal Vegetables
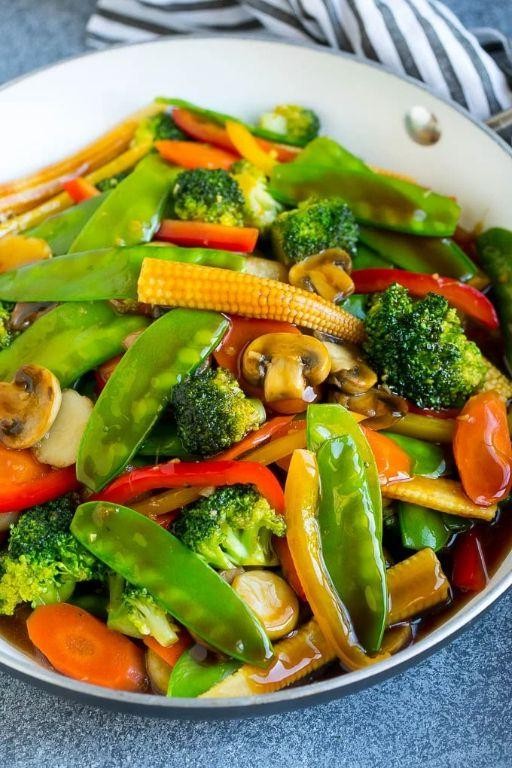
Yesterday, I was staring at my overflowing vegetable drawer, wondering how to use up all those seasonal gems before they went bad. That’s when I remembered my go-to weeknight lifesaver – this vibrant vegetable stir-fry that comes together in minutes but tastes like you spent hours in the kitchen. Honestly, it’s the perfect way to celebrate whatever looks freshest at the market while clearing out your fridge guilt-free.
5
servings15
minutes12
minutesIngredients
For the stir-fry base
- 2 tablespoons vegetable oil
- 1 medium yellow onion, thinly sliced
- 3 cloves garlic, minced
- 1 tablespoon fresh ginger, grated
For the main vegetables
- 2 cups broccoli florets
- 1 red bell pepper, sliced into strips
- 1 cup sliced carrots
- 1 cup snap peas
- 2 cups chopped seasonal vegetables (zucchini, mushrooms, or corn)
For the sauce
- 3 tablespoons soy sauce
- 2 tablespoons rice vinegar
- 1 tablespoon sesame oil
- 1 teaspoon cornstarch
- 1/4 cup vegetable broth
Instructions
- Heat 2 tablespoons vegetable oil in a large wok or skillet over medium-high heat until it shimmers, about 1 minute.
- Add 1 thinly sliced yellow onion and cook for 2 minutes, stirring constantly with a wooden spoon until slightly softened.
- Stir in 3 minced garlic cloves and 1 tablespoon grated ginger, cooking for exactly 30 seconds until fragrant but not browned.
- Add 2 cups broccoli florets and 1 cup sliced carrots, stir-frying for 3 minutes until edges begin to brighten.
- Tip: Cut harder vegetables like carrots into thin, uniform slices so they cook at the same rate as softer veggies.
- Mix in 1 sliced red bell pepper, 1 cup snap peas, and 2 cups chopped seasonal vegetables, tossing continuously for 2 minutes.
- In a small bowl, whisk together 3 tablespoons soy sauce, 2 tablespoons rice vinegar, 1 tablespoon sesame oil, 1 teaspoon cornstarch, and 1/4 cup vegetable broth until smooth.
- Pour the sauce mixture over the vegetables in the wok, stirring immediately to coat everything evenly.
- Cook for 2-3 minutes until the sauce thickens and bubbles form around the edges of the pan.
- Tip: Have all your ingredients prepped and within reach before heating the oil – stir-frying happens fast!
- Reduce heat to low and continue stirring for 1 minute until vegetables are tender-crisp but still vibrant in color.
- Tip: Don’t overcrowd the pan – if your skillet seems full, cook in two batches to ensure proper searing and avoid steaming.
- Remove from heat and let rest for 1 minute before serving.
But what I love most about this stir-fry is how the vegetables maintain their distinct textures while the savory sauce clings to every surface. The snap peas stay delightfully crisp against the tender broccoli, and that hint of sesame oil adds this wonderful nutty depth that makes the whole dish feel luxurious. Try serving it over quinoa for extra protein, or spoon it into lettuce cups for a light, refreshing twist that’s perfect for warmer evenings.
Easy Beef Tacos with Ground Beef and Spices

Sometimes the best meals are the ones that come together in minutes but taste like you spent hours in the kitchen. I first fell in love with these beef tacos during a busy weeknight when my pantry was looking sparse, and now they’re my go-to comfort food that never disappoints. There’s something magical about how simple spices can transform ground beef into something truly special.
8
tacos10
minutes16
minutesIngredients
For the beef filling:
– 1 lb ground beef (80/20 blend)
– 1 tbsp olive oil
– 1 medium yellow onion, finely diced
– 2 cloves garlic, minced
– 1 tbsp chili powder
– 1 tsp ground cumin
– 1/2 tsp paprika
– 1/4 tsp cayenne pepper
– 1/2 tsp salt
– 1/4 tsp black pepper
– 1/2 cup beef broth
For serving:
– 8 small corn tortillas
– 1 cup shredded lettuce
– 1/2 cup diced tomatoes
– 1/2 cup shredded cheddar cheese
– 1/4 cup sour cream
Instructions
1. Heat 1 tbsp olive oil in a large skillet over medium-high heat for 1 minute until shimmering.
2. Add 1 finely diced yellow onion and cook for 3-4 minutes until translucent and slightly golden around the edges.
3. Add 2 minced garlic cloves and cook for 30 seconds until fragrant, being careful not to burn them.
4. Add 1 lb ground beef to the skillet, breaking it up with a wooden spoon into small crumbles.
5. Cook the beef for 5-6 minutes until no pink remains, stirring occasionally to ensure even browning.
6. Drain any excess grease from the skillet, leaving about 1 tbsp behind for flavor.
7. Sprinkle 1 tbsp chili powder, 1 tsp cumin, 1/2 tsp paprika, 1/4 tsp cayenne, 1/2 tsp salt, and 1/4 tsp black pepper over the beef.
8. Stir the spices into the beef mixture and cook for 1 minute to toast the spices and deepen their flavor.
9. Pour in 1/2 cup beef broth, scraping any browned bits from the bottom of the skillet.
10. Reduce heat to medium-low and simmer for 3-4 minutes until the liquid has mostly evaporated, leaving a moist but not soupy filling.
11. While the beef simmers, warm 8 corn tortillas in a dry skillet over medium heat for 30 seconds per side until pliable and lightly toasted.
12. Spoon the beef filling evenly into the warm tortillas.
13. Top each taco with shredded lettuce, diced tomatoes, shredded cheddar cheese, and a dollop of sour cream.
Zesty and satisfying, these tacos deliver a perfect balance of savory beef with just the right kick of heat from the spices. The corn tortillas provide a slightly chewy texture that holds up beautifully against the moist filling, while the cool toppings create refreshing contrast. Try serving them with a squeeze of fresh lime or some pickled jalapeños for an extra flavor boost that’ll make your taste buds dance.
Hearty Black Bean Soup with Spicy Chipotle Peppers
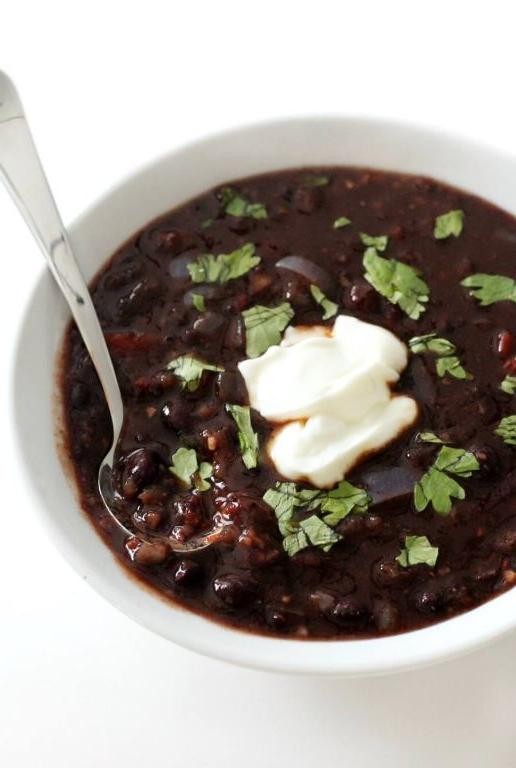
Huddled in my kitchen during last week’s unexpected chilly evening, I found myself craving something warm and substantial. Having made this black bean soup countless times for family gatherings and cozy weeknight dinners, it’s become my go-to comfort food that never fails to satisfy. Honestly, the way the spicy chipotle peppers mingle with the hearty black beans creates magic in a bowl that even my picky nephew devours without complaint.
4
servings15
minutes37
minutesIngredients
For the Base:
– 2 tablespoons olive oil
– 1 large yellow onion, diced
– 3 cloves garlic, minced
– 2 medium carrots, diced
– 2 celery stalks, diced
For the Soup:
– 4 cups vegetable broth
– 3 (15-ounce) cans black beans, rinsed and drained
– 2 chipotle peppers in adobo sauce, minced
– 1 tablespoon adobo sauce from the can
– 1 teaspoon ground cumin
– 1 teaspoon dried oregano
– 1 bay leaf
For Serving:
– 1/4 cup fresh cilantro, chopped
– 1 lime, cut into wedges
– 1 avocado, diced
Instructions
1. Heat 2 tablespoons olive oil in a large Dutch oven over medium heat until shimmering.
2. Add 1 diced yellow onion and cook for 5 minutes, stirring occasionally, until translucent.
3. Stir in 3 minced garlic cloves and cook for 1 minute until fragrant.
4. Add 2 diced carrots and 2 diced celery stalks, cooking for 6 minutes until slightly softened.
5. Pour in 4 cups vegetable broth, scraping any browned bits from the bottom of the pot.
6. Add 3 cans of rinsed black beans, 2 minced chipotle peppers, 1 tablespoon adobo sauce, 1 teaspoon cumin, 1 teaspoon oregano, and 1 bay leaf.
7. Bring the soup to a boil, then reduce heat to low and simmer uncovered for 25 minutes.
8. Remove the bay leaf and use an immersion blender to partially blend the soup, leaving some beans whole for texture.
9. Ladle the soup into bowls and top with 1/4 cup chopped cilantro, diced avocado, and a squeeze of fresh lime juice.
10. Serve immediately while hot.
Gloriously thick and smoky, this soup achieves the perfect balance between creamy blended beans and satisfying whole beans. The chipotle peppers provide a warm, lingering heat that builds with each spoonful, while the fresh lime and avocado brighten every bite. I love serving this in hollowed-out bread bowls for an extra cozy presentation that makes cleanup a breeze.
Greek Quinoa Salad with Feta and Olives
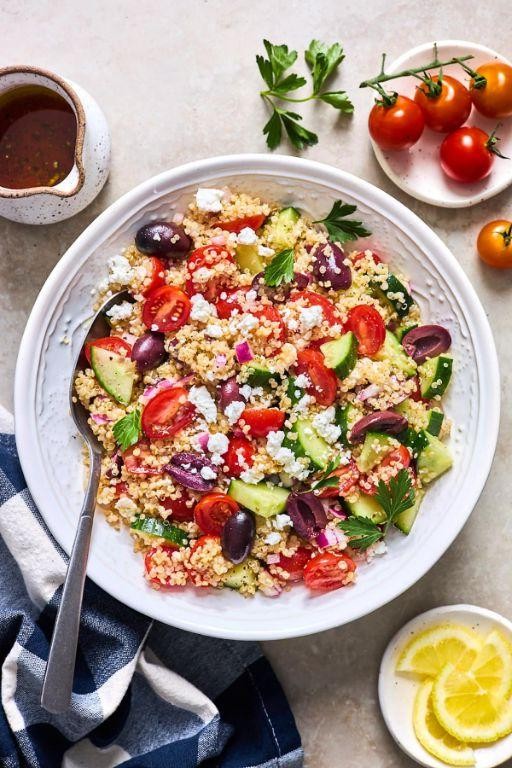
Just last week, I found myself staring at a fridge full of random veggies and that lonely container of quinoa, wondering how to turn it all into something delicious. This Greek quinoa salad has become my go-to solution for those “what should I make?” moments—it’s the perfect balance of fresh, tangy, and satisfying that keeps me coming back for more.
5
servings25
minutes25
minutesIngredients
For the quinoa:
– 1 cup quinoa
– 2 cups water
– 1/2 teaspoon salt
For the salad:
– 1 English cucumber, diced
– 1 pint cherry tomatoes, halved
– 1/2 red onion, finely chopped
– 1/2 cup Kalamata olives, pitted and halved
– 4 ounces feta cheese, crumbled
– 1/4 cup fresh parsley, chopped
For the dressing:
– 1/4 cup extra virgin olive oil
– 3 tablespoons red wine vinegar
– 1 teaspoon dried oregano
– 1/2 teaspoon black pepper
– 1 garlic clove, minced
Instructions
1. Rinse 1 cup quinoa thoroughly in a fine-mesh strainer under cold running water for 1 minute to remove the natural bitterness.
2. Combine rinsed quinoa, 2 cups water, and 1/2 teaspoon salt in a medium saucepan.
3. Bring the quinoa mixture to a boil over high heat, then immediately reduce heat to low and cover the pan.
4. Simmer quinoa for 15 minutes until all liquid is absorbed and you see little spirals separating from the grains.
5. Remove cooked quinoa from heat and let it sit covered for 10 minutes to steam and fluff up properly.
6. Spread quinoa in a thin layer on a baking sheet and refrigerate for 30 minutes to cool completely.
7. While quinoa cools, dice 1 English cucumber into 1/2-inch pieces.
8. Cut 1 pint cherry tomatoes in half lengthwise.
9. Finely chop 1/2 red onion into small dice.
10. Pit and halve 1/2 cup Kalamata olives.
11. Crumble 4 ounces feta cheese into small chunks.
12. Chop 1/4 cup fresh parsley leaves, discarding the tough stems.
13. In a small bowl, whisk together 1/4 cup olive oil, 3 tablespoons red wine vinegar, 1 teaspoon dried oregano, 1/2 teaspoon black pepper, and 1 minced garlic clove until emulsified.
14. Combine cooled quinoa, prepared vegetables, olives, feta, and parsley in a large mixing bowl.
15. Pour dressing over the salad mixture and toss gently until everything is evenly coated.
16. Let the salad rest at room temperature for 15 minutes before serving to allow flavors to meld.
Keep this salad in mind for your next picnic or potluck—the crunchy cucumbers and juicy tomatoes play beautifully against the creamy feta and briny olives, while the quinoa adds a satisfying nuttiness that makes it substantial enough for a main course. I love serving it in lettuce cups for a low-carb option or alongside grilled chicken for a complete meal that always gets compliments.
Quick Veggie Omelette with Fresh Herbs
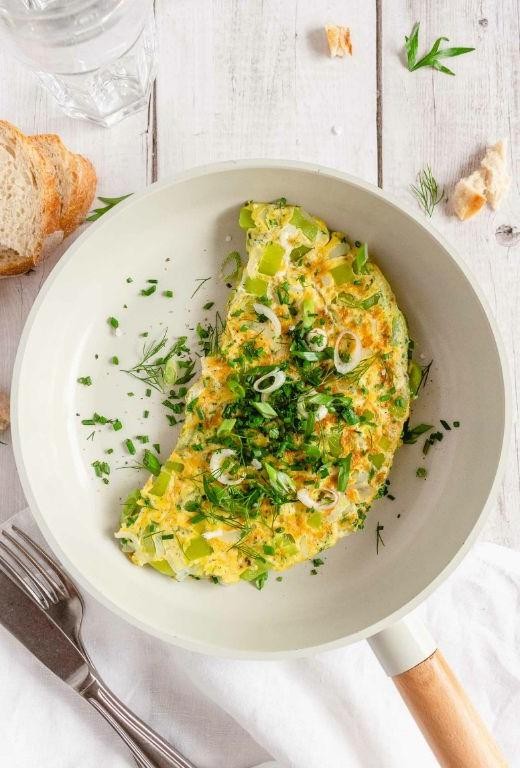
Yesterday morning, I found myself staring into the fridge with that familiar “what’s for breakfast” panic—until I spotted those colorful bell peppers and fresh herbs calling my name. This quick veggie omelette has become my go-to solution for busy mornings when I want something satisfying but don’t have time for elaborate cooking, and I love how the fresh herbs really brighten up the whole dish.
1
servings10
minutes10
minutesIngredients
For the egg base
– 3 large eggs
– 2 tablespoons whole milk
– 1/4 teaspoon salt
– 1/8 teaspoon black pepper
For the vegetable filling
– 1 tablespoon olive oil
– 1/4 cup diced red bell pepper
– 1/4 cup diced onion
– 1/4 cup sliced mushrooms
For finishing
– 2 tablespoons chopped fresh parsley
– 1 tablespoon chopped fresh chives
– 1/4 cup shredded cheddar cheese
Instructions
1. Crack 3 large eggs into a medium bowl. 2. Add 2 tablespoons whole milk, 1/4 teaspoon salt, and 1/8 teaspoon black pepper to the eggs. 3. Whisk the egg mixture vigorously for 30 seconds until fully combined and slightly frothy. 4. Heat 1 tablespoon olive oil in a 10-inch non-stick skillet over medium heat for 2 minutes. 5. Add 1/4 cup diced red bell pepper, 1/4 cup diced onion, and 1/4 cup sliced mushrooms to the hot skillet. 6. Sauté the vegetables for 4-5 minutes until softened and the onions become translucent. 7. Pour the egg mixture evenly over the vegetables in the skillet. 8. Cook the omelette for 2-3 minutes until the edges begin to set. 9. Use a spatula to gently lift the edges and tilt the pan to allow uncooked egg to flow underneath. 10. Sprinkle 1/4 cup shredded cheddar cheese evenly over one half of the omelette. 11. Cook for 1 more minute until the bottom is golden brown but the top is still slightly wet. 12. Fold the empty half of the omelette over the cheese-covered half using your spatula. 13. Slide the folded omelette onto a plate. 14. Top the omelette with 2 tablespoons chopped fresh parsley and 1 tablespoon chopped fresh chives. Creamy melted cheese binds the tender vegetables together while the fresh herbs provide a bright, garden-fresh contrast that cuts through the richness perfectly. I sometimes serve it with a dollop of salsa or avocado slices for extra freshness, and the fluffy texture makes it feel indulgent despite being so quick to prepare.
Classic Spaghetti Carbonara with Pancetta
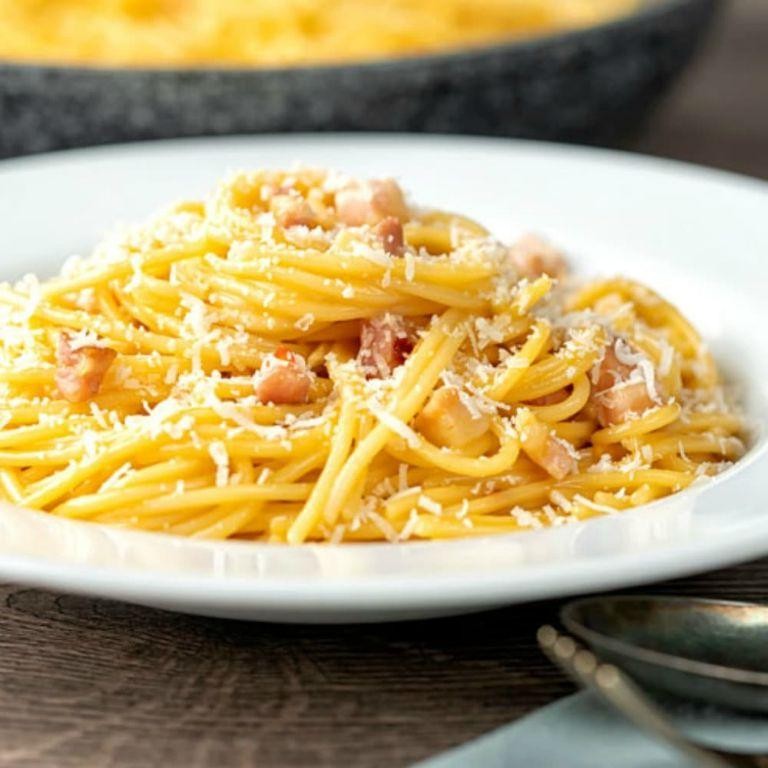
Unbelievably creamy and satisfying, this spaghetti carbonara has been my go-to comfort meal since my college days in Rome, where I learned the secret to that perfect silky sauce from a tiny trattoria owner who insisted on using only the freshest eggs. There’s something magical about how just a few simple ingredients come together to create such a luxurious dish that always reminds me of those cobblestone streets and late-night dinners.
3
servings15
minutes18
minutesIngredients
- For the pasta:
- 1 pound spaghetti
- 1 tablespoon kosher salt
- For the pancetta and sauce base:
- 8 ounces pancetta, diced into 1/4-inch cubes
- 2 large eggs
- 3 large egg yolks
- 1 cup freshly grated Pecorino Romano cheese
- 1/2 cup freshly grated Parmigiano-Reggiano cheese
- 1 teaspoon freshly ground black pepper
Instructions
- Bring 4 quarts of water to a rolling boil in a large pot over high heat.
- Add 1 tablespoon kosher salt to the boiling water, then add 1 pound spaghetti, stirring immediately to prevent sticking.
- Cook spaghetti for 8-10 minutes until al dente, testing a strand at 8 minutes for the perfect bite.
- While pasta cooks, heat a large skillet over medium heat and add 8 ounces diced pancetta.
- Cook pancetta for 6-8 minutes, stirring occasionally, until crispy and golden brown but not burnt.
- Remove skillet from heat and let pancetta cool slightly in its rendered fat for 2 minutes.
- In a medium bowl, whisk together 2 whole eggs, 3 egg yolks, 1 cup Pecorino Romano, 1/2 cup Parmigiano-Reggiano, and 1 teaspoon black pepper until smooth.
- Reserve 1 cup of hot pasta water before draining the cooked spaghetti.
- Working quickly, add hot drained spaghetti directly to the pancetta skillet.
- Toss spaghetti with pancetta and rendered fat until evenly coated.
- Remove skillet from heat completely and let cool for 1 minute to prevent eggs from scrambling.
- Pour egg and cheese mixture over the pasta, tossing continuously with tongs for 30 seconds.
- Add 1/4 cup of reserved pasta water and continue tossing until sauce becomes creamy and coats every strand.
- Add more pasta water 1 tablespoon at a time if needed until sauce reaches desired consistency.
But what truly makes this carbonara special is that velvety texture that clings to each strand of pasta, with the salty crunch of pancetta cutting through the richness. I love serving it in warmed bowls with an extra sprinkle of black pepper and a simple arugula salad on the side to balance the creaminess – it’s the kind of meal that makes any Tuesday feel like a special occasion.
Italian Bruschetta with Fresh Basil

Savoring the taste of summer doesn’t require fancy techniques or hard-to-find ingredients—just some crusty bread, ripe tomatoes, and a handful of fresh basil from my little windowsill garden. I first fell in love with bruschetta during a trip to Tuscany, and now I make it almost weekly when tomatoes are at their peak. There’s something magical about how these simple components come together to create such vibrant flavor.
1
baguette15
minutes10
minutesIngredients
For the bread:
– 1 French baguette
– 3 tablespoons olive oil
– 2 cloves garlic
For the topping:
– 4 medium ripe tomatoes
– 1/4 cup fresh basil leaves
– 1 tablespoon balsamic vinegar
– 1/2 teaspoon salt
– 1/4 teaspoon black pepper
Instructions
1. Preheat your oven to 400°F.
2. Slice the baguette diagonally into 1/2-inch thick pieces.
3. Arrange the bread slices in a single layer on a baking sheet.
4. Brush both sides of each bread slice with olive oil using a pastry brush.
5. Bake the bread for 8-10 minutes until the edges turn golden brown and the surface becomes crisp.
6. Remove the baking sheet from the oven using oven mitts.
7. Cut one garlic clove in half and rub the cut side over the warm toasted bread.
8. Dice the tomatoes into 1/4-inch pieces and place them in a medium bowl.
9. Chop the fresh basil leaves into thin ribbons.
10. Add the chopped basil to the tomatoes in the bowl.
11. Pour the balsamic vinegar over the tomato mixture.
12. Sprinkle the salt and black pepper over the ingredients.
13. Gently toss everything together with a spoon until well combined.
14. Let the tomato mixture sit for 5 minutes to allow the flavors to meld.
15. Spoon the tomato mixture generously onto each piece of toasted bread.
16. Drizzle any remaining juices from the bowl over the assembled bruschetta.
What makes this bruschetta truly special is the contrast between the crunchy, garlic-rubbed toast and the juicy, vibrant tomato topping that bursts with fresh flavor. The basil adds that unmistakable herbal note that transports me right back to Italian countryside kitchens. I love serving these on a large wooden board for casual gatherings—they disappear faster than I can make them!
Zesty Lemon Garlic Asparagus with Parmesan
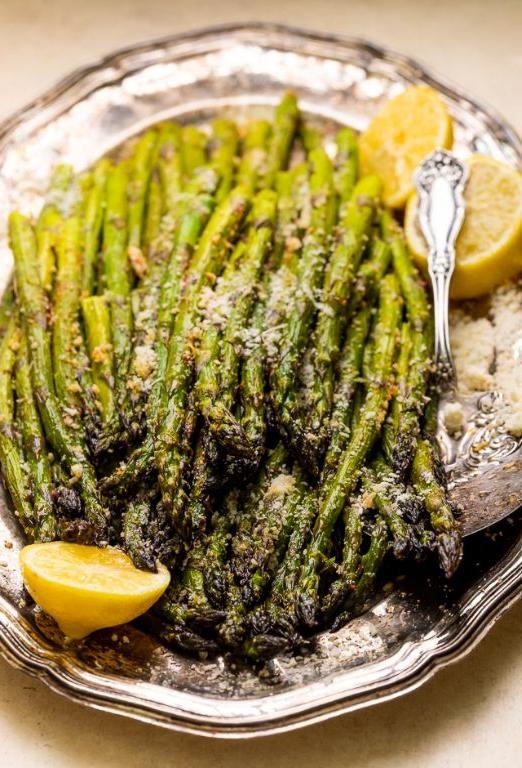
As someone who’s always looking for quick yet impressive side dishes, I’ve found that this zesty lemon garlic asparagus has become my go-to for everything from weeknight dinners to holiday gatherings. There’s something magical about how these simple ingredients transform into such an elegant dish.
5
servings10
minutes15
minutesIngredients
- For the asparagus:
- 1 pound fresh asparagus spears
- 1 tablespoon olive oil
- For the seasoning:
- 3 cloves garlic, minced
- 1 teaspoon lemon zest
- 1/4 teaspoon salt
- 1/4 teaspoon black pepper
- For finishing:
- 2 tablespoons fresh lemon juice
- 1/4 cup grated Parmesan cheese
Instructions
- Preheat your oven to 400°F and line a baking sheet with parchment paper.
- Wash the asparagus spears and trim off the tough, woody ends by snapping them where they naturally break.
- Pat the asparagus completely dry with paper towels to ensure proper roasting.
- Arrange the asparagus in a single layer on the prepared baking sheet.
- Drizzle the olive oil evenly over the asparagus spears.
- Use your hands to toss the asparagus, making sure each spear is lightly coated with oil.
- Sprinkle the minced garlic, lemon zest, salt, and black pepper evenly over the asparagus.
- Roast in the preheated oven for 12-15 minutes until the asparagus is tender-crisp and lightly browned at the tips.
- Remove the baking sheet from the oven and immediately drizzle the fresh lemon juice over the hot asparagus.
- Sprinkle the grated Parmesan cheese evenly over the asparagus while it’s still hot.
Out of the oven, this asparagus has the perfect tender-crisp texture with those beautifully caramelized tips that add wonderful depth. The garlic becomes mellow and sweet during roasting, while the lemon keeps everything bright and fresh. I love serving this alongside grilled chicken or tossing it into pasta for an instant upgrade – sometimes I even top it with toasted pine nuts for extra crunch!
Chocolate Chip Cookies with Pantry Staples

As I was craving something sweet yesterday but didn’t want to run to the store, I realized I had everything needed for classic chocolate chip cookies right in my pantry—sometimes the best recipes come from what’s already on hand.
24
cookies15
minutes11
minutesIngredients
For the Cookie Dough:
– 2 1/4 cups all-purpose flour
– 1 teaspoon baking soda
– 1 teaspoon salt
– 1 cup unsalted butter, softened to room temperature
– 3/4 cup granulated sugar
– 3/4 cup packed brown sugar
– 2 large eggs
– 2 teaspoons vanilla extract
– 2 cups semi-sweet chocolate chips
Instructions
1. Preheat your oven to 375°F and line two baking sheets with parchment paper.
2. In a medium bowl, whisk together 2 1/4 cups all-purpose flour, 1 teaspoon baking soda, and 1 teaspoon salt until fully combined.
3. In a separate large bowl, use an electric mixer to cream 1 cup softened unsalted butter, 3/4 cup granulated sugar, and 3/4 cup packed brown sugar on medium speed for 2 minutes until light and fluffy.
4. Add 2 large eggs one at a time to the butter mixture, mixing on low speed after each addition until just incorporated.
5. Mix in 2 teaspoons vanilla extract on low speed for 10 seconds.
6. Gradually add the flour mixture to the wet ingredients, mixing on low speed until no dry streaks remain.
7. Fold in 2 cups semi-sweet chocolate chips with a spatula until evenly distributed.
8. Scoop rounded tablespoons of dough onto the prepared baking sheets, spacing them 2 inches apart.
9. Bake at 375°F for 9–11 minutes, or until the edges are golden brown but the centers still look slightly soft.
10. Let the cookies cool on the baking sheet for 5 minutes before transferring to a wire rack.
Buttery and rich with melty chocolate pockets, these cookies have that perfect crisp edge and chewy center we all love. Break one in half while it’s still warm for an irresistible pull, or crumble them over vanilla ice cream for an easy dessert upgrade.
Conclusion
Perfect for any home cook, this diverse recipe collection makes meal planning effortless and exciting. Whether you’re using up pantry staples or craving something new, these dishes offer endless inspiration. We’d love to hear which recipes become your favorites—drop a comment below and share this roundup on Pinterest to spread the culinary joy!


