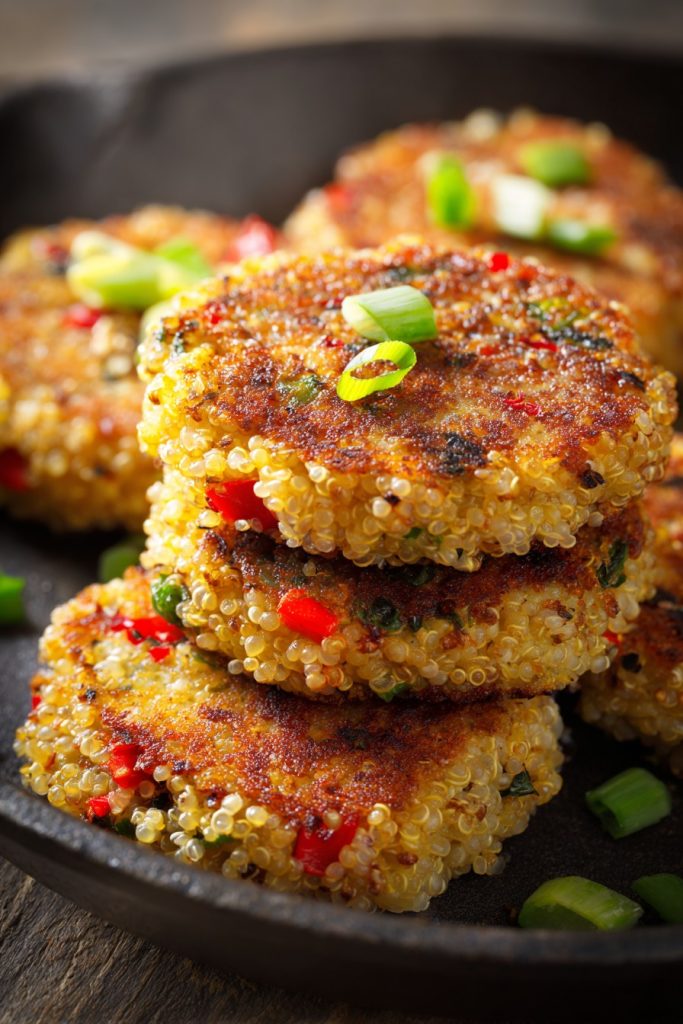
Keeping dinner simple while still getting healthy food on the table feels like an impossible task most nights. These quinoa cakes solve that problem by turning leftover quinoa into crispy, protein-packed patties that both kids and adults will love, all while using just one bowl and one pan.
Why This Recipe Works
- Uses leftover quinoa you probably already have sitting in your fridge, turning what might go to waste into a delicious meal
- One-bowl mixing means fewer dishes to wash later when you’re exhausted from the day
- Pan-frying creates that satisfying crispy exterior without needing to turn on the oven and heat up the whole kitchen
- Freezer-friendly for those nights when you need dinner in under 10 minutes flat
- Customizable with whatever vegetables or seasonings your family prefers, making it easy to please picky eaters
Ingredients
- 3 cups cooked quinoa, cooled completely
- 2 large eggs, lightly beaten
- 1/2 cup grated Parmesan cheese
- 1/4 cup all-purpose flour
- 2 green onions, finely chopped (both white and green parts)
- 2 cloves garlic, minced
- 1/2 teaspoon salt
- 1/4 teaspoon black pepper
- 1/4 teaspoon paprika
- 3 tablespoons olive oil, divided for cooking
- Optional: 1/4 cup finely chopped red bell pepper for color and crunch
Equipment Needed
- Large mixing bowl
- Measuring cups and spoons
- Large non-stick skillet
- Spatula
- 1/4 cup measuring cup or ice cream scoop for portioning
- Paper towels for draining
Instructions
Mix Your Quinoa Base
Start by grabbing that large mixing bowl and adding your 3 cups of cooled cooked quinoa. The quinoa needs to be completely cool or it will make the mixture too sticky to handle. Add the 2 beaten eggs, 1/2 cup grated Parmesan cheese, 1/4 cup all-purpose flour, those finely chopped green onions, minced garlic, 1/2 teaspoon salt, 1/4 teaspoon black pepper, and 1/4 teaspoon paprika. If you’re using the optional red bell pepper, add that now too. Use your hands or a spatula to mix everything together until well combined. You’ll know it’s ready when you can press a small amount between your fingers and it holds its shape without crumbling apart. This is your one-bowl moment – everything comes together here so you’re not washing multiple containers later.
Form Uniform Patties
Now take your 1/4 cup measuring cup or ice cream scoop and portion out the quinoa mixture. You should get about 8 patties from this recipe. Wet your hands slightly with water – this prevents the mixture from sticking to your palms. Take each portion and gently press it into a patty about 1/2-inch thick and 3 inches in diameter. Make sure all your patties are roughly the same size so they cook evenly in the pan. If the mixture feels too wet and won’t hold its shape, you can add another tablespoon of flour to help bind it. Place the formed patties on a plate or baking sheet as you work. This step goes quickly once you get the rhythm, and having them all formed before cooking means you’re not rushing while managing the hot pan.
Heat Your Skillet Properly
Place your large non-stick skillet over medium heat and add 2 tablespoons of the olive oil. Let the oil heat for about 2 minutes until it shimmers when you tilt the pan. To test if it’s ready, drop a tiny bit of the quinoa mixture into the oil – if it sizzles immediately, you’re good to go. Medium heat is crucial here because too hot will burn the outside before the inside heats through, while too low will make them greasy. If you’re using an electric stove, give it an extra minute to reach proper temperature. This initial heating step ensures your first batch of quinoa cakes gets that perfect golden crust rather than soaking up oil.
Cook to Golden Perfection
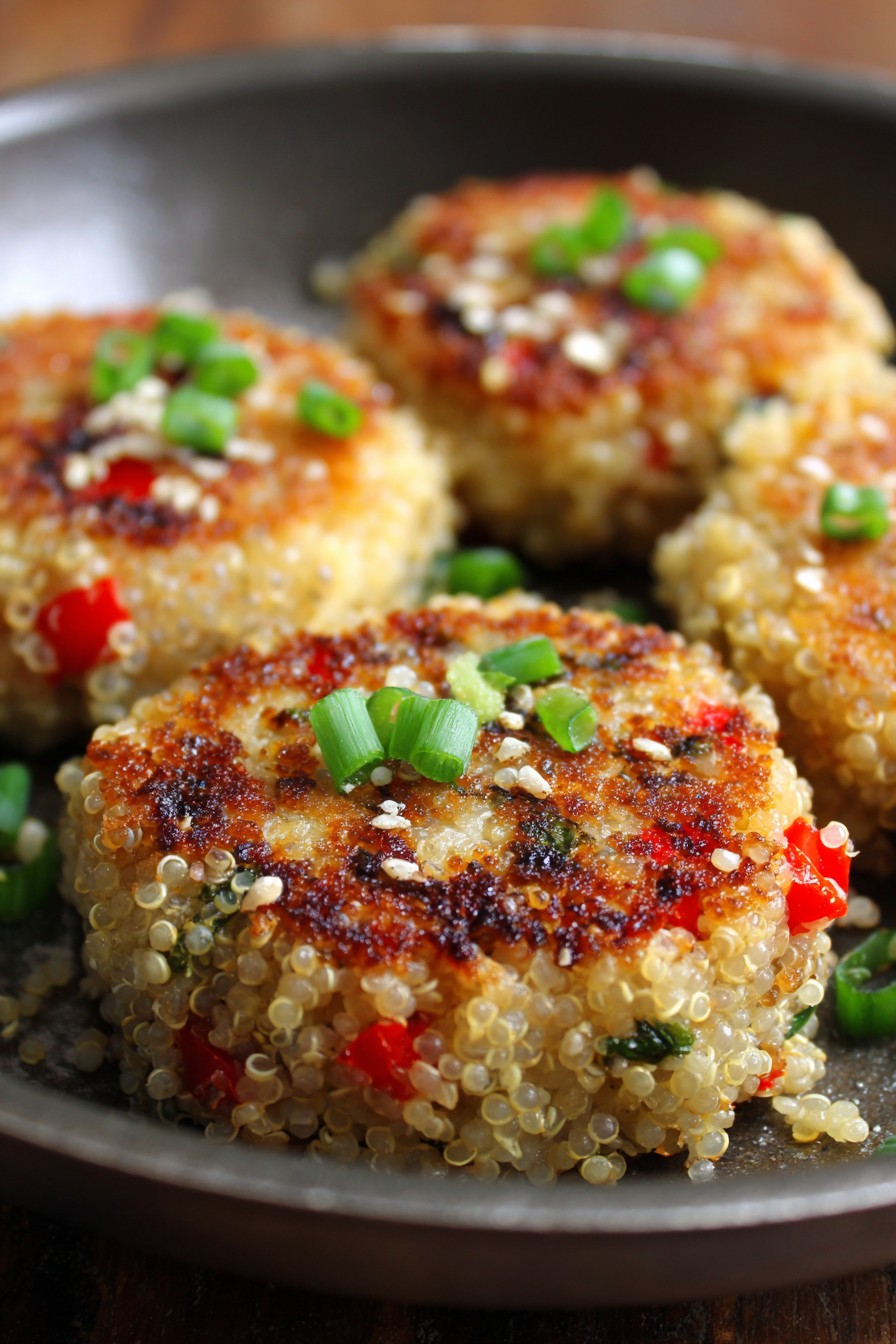
Carefully place 4 patties into the hot oil, making sure they don’t touch each other in the pan. Cook for 4-5 minutes on the first side until you see the edges turning golden brown and the bottom develops a crisp crust. Don’t be tempted to move them around – let them develop that beautiful sear. After 4-5 minutes, use your spatula to gently lift one edge and check for that deep golden color. When ready, flip each patty and cook for another 3-4 minutes on the second side. You’ll know they’re done when both sides are evenly browned and the centers are heated through. Transfer to a plate lined with paper towels to drain any excess oil.
Finish and Serve Immediately
Add the remaining 1 tablespoon of olive oil to the skillet and repeat the cooking process with the remaining 4 patties. While the second batch cooks, you can keep the first batch warm in a 200°F oven if needed, but these are best served straight from the pan when they’re at their crispiest. Serve them as a main dish with a simple side salad, as burger alternatives on buns, or even as appetizers with dipping sauces. The beauty of these is they don’t need fancy accompaniments – a dollop of Greek yogurt or sour cream and some extra green onions make them feel special without extra work.
Tips and Tricks
If your quinoa mixture seems too wet to form proper patties, don’t panic – this usually happens when the quinoa was still warm when you mixed everything. Spread the mixture on a baking sheet and pop it in the freezer for 10-15 minutes to firm up. The cold will make it much easier to handle. For even crispier cakes, you can press a tablespoon of panko breadcrumbs onto each side before cooking – this creates an extra crunchy exterior that kids particularly love. When cooking multiple batches, wipe out the skillet between batches with a paper towel to remove any burnt bits, then add fresh oil. This prevents those black specks from transferring to your next batch and keeps the flavor clean.
If you’re making these for meal prep, cook them completely, let them cool to room temperature, then freeze in a single layer on a baking sheet before transferring to freezer bags. They’ll keep for up to 3 months and can go straight from freezer to toaster oven or air fryer at 375°F for 10-12 minutes. For families with different spice preferences, cook the patties plain and set up a “sauce bar” with various options like ranch, sriracha mayo, barbecue sauce, or tzatziki so everyone can customize their own. If you’re short on time in the evening, mix the quinoa mixture in the morning and store it covered in the refrigerator – the flavors will meld together even better, and you’ll have dinner ready in 15 minutes flat after work.
When measuring cooked quinoa, don’t pack it down in the measuring cup – use the spoon-and-level method for accuracy. If you find your patties breaking when flipping, they might be too thick – aim for that 1/2-inch thickness for the perfect balance of crispy exterior and tender interior. For extra insurance against breaking, you can chill the formed patties for 20 minutes before cooking, which helps them hold their shape better. Cleanup is easiest if you let your mixing bowl and skillet soak in warm soapy water for 10 minutes before washing – the residue comes right off without scrubbing.
Recipe Variations
- Mediterranean Style: Swap the Parmesan for feta cheese crumbles, add 1/4 cup chopped Kalamata olives and 1 tablespoon chopped fresh dill. Serve with tzatziki sauce and a Greek salad for a complete meal that feels fancy but comes together just as quickly as the basic version.
- Southwest Fiesta: Mix in 1/2 cup corn kernels (thawed if frozen), 1/4 cup chopped cilantro, 1 teaspoon cumin, and 1/2 teaspoon chili powder. Top with avocado slices and a dollop of sour cream for a Tex-Mex twist that makes Tuesday night feel like a celebration without the cleanup headache.
- Asian Fusion: Replace Parmesan with 2 tablespoons soy sauce and 1 teaspoon sesame oil, add 1/4 cup shredded carrots and 2 tablespoons chopped water chestnuts for crunch. Serve with a quick dipping sauce of soy sauce, rice vinegar, and a pinch of red pepper flakes for an easy fake-out takeout night.
- Pizza Lovers: Stir in 1/4 cup chopped pepperoni or cooked Italian sausage, 2 tablespoons grated mozzarella, and 1 teaspoon Italian seasoning. Top with marinara sauce and extra cheese for a pizza-inspired version that satisfies those cravings without dealing with dough or waiting for delivery.
Frequently Asked Questions
Can I make these quinoa cakes ahead of time?
Absolutely, and this is one of their biggest advantages for busy families. You can prepare the mixture up to 24 hours in advance and store it covered in the refrigerator – the flavors actually improve as they meld together. Formed patties can be refrigerated for up to 2 days on a parchment-lined baking sheet covered with plastic wrap. For longer storage, freeze the uncooked patties in a single layer before transferring to freezer bags, where they’ll keep for 3 months. When ready to cook, there’s no need to thaw – just add an extra 1-2 minutes per side to account for the frozen center.
What’s the best way to reheat leftover quinoa cakes?
While you can microwave them for about 30 seconds, they’ll lose their crispy texture. For best results, use a toaster oven or conventional oven at 375°F for 8-10 minutes until heated through and crisp. If you have an air fryer, that’s actually ideal – 5 minutes at 375°F brings them back to near-perfect freshness. For stovetop reheating, use a non-stick skillet over medium heat for 2-3 minutes per side. The key is using dry heat rather than moist heat to preserve that satisfying crunch that makes these so appealing.
My quinoa cakes are falling apart when I flip them – what am I doing wrong?
This usually comes down to three common issues: the quinoa was too warm when mixed (causing the eggs to cook slightly and lose binding power), not enough binding agents, or flipping too early. Make sure your cooked quinoa is completely cooled before mixing. If your mixture seems loose, add another tablespoon of flour or an extra egg yolk. Most importantly, wait until you see the edges turning golden brown and the bottom has formed a proper crust before attempting to flip – this usually takes the full 4-5 minutes. A thin, flexible spatula also helps immensely compared to bulky turners.
Can I make these gluten-free or dairy-free for dietary restrictions?
Yes to both! For gluten-free, simply replace the all-purpose flour with an equal amount of gluten-free flour blend or almond flour. For dairy-free, omit the Parmesan cheese and add 2 tablespoons nutritional yeast for that cheesy flavor, or increase the flour by 1 tablespoon to maintain the proper texture. You can also use a flax egg (1 tablespoon ground flaxseed mixed with 3 tablespoons water per egg) for egg-free versions, though the texture will be slightly more delicate. These adaptations make the recipe flexible for various dietary needs while maintaining the quick preparation time that makes it so valuable for busy weeknights.
Summary
These quinoa cakes transform simple ingredients into a family-friendly meal that’s both nutritious and quick to prepare. With minimal cleanup and maximum flexibility, they solve the nightly dinner dilemma while pleasing both kids and adults alike.
Quinoa Cakes
5
servings15
minutes15
minutesIngredients
Instructions
- 1 In large bowl, mix quinoa, eggs, Parmesan, flour, green onions, garlic, salt, pepper, and paprika until combined
- 2 Form mixture into 8 patties about 1/2-inch thick using 1/4 cup measure
- 3 Heat 2 tablespoons oil in skillet over medium heat until shimmering
- 4 Cook 4 patties for 4-5 minutes per side until golden brown
- 5 Repeat with remaining oil and patties, serve immediately