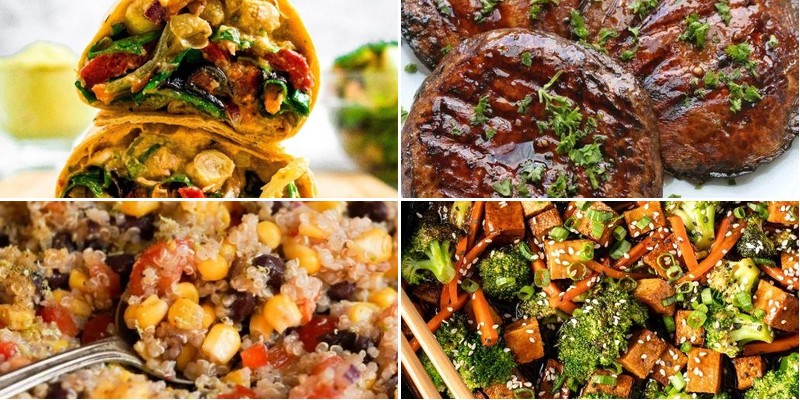
Feeling stuck in a dinner rut? We’ve got you covered with 27 mouthwatering vegetarian recipes that come together in a flash! From cozy comfort bowls to vibrant seasonal salads, these quick and healthy dishes will transform your weeknight cooking. Get ready to discover your new go-to meals—let’s dive into these delicious ideas that prove eating well doesn’t have to be complicated or time-consuming.
Mediterranean Veggie Wraps with Hummus

Veggie lovers, rejoice! These Mediterranean wraps are about to become your new lunchtime obsession, delivering a flavor vacation without requiring a passport. Imagine all the vibrant, sun-kissed goodness of the Mediterranean coast, conveniently rolled up and ready to rescue you from sad desk lunches everywhere.
3
wraps15
minutesIngredients
– 4 large flour tortillas (10-inch)
– 1 cup hummus (store-bought or homemade)
– 2 cups chopped romaine lettuce
– 1 medium cucumber, thinly sliced
– 1 large tomato, diced
– 1/2 red onion, thinly sliced
– 1/2 cup Kalamata olives, pitted and halved
– 4 oz feta cheese, crumbled
– 2 tbsp olive oil
– 1 tbsp lemon juice
– 1 tsp dried oregano
– 1/4 tsp salt
– 1/4 tsp black pepper
Instructions
1. Lay all 4 flour tortillas flat on your clean work surface.
2. Spread 1/4 cup of hummus evenly across each tortilla, leaving a 1-inch border around the edges.
3. In a medium bowl, combine the chopped romaine lettuce, sliced cucumber, diced tomato, sliced red onion, and halved Kalamata olives.
4. Drizzle 2 tablespoons of olive oil and 1 tablespoon of lemon juice over the vegetable mixture.
5. Sprinkle 1 teaspoon of dried oregano, 1/4 teaspoon of salt, and 1/4 teaspoon of black pepper over the vegetables.
6. Toss the vegetable mixture gently with clean hands or tongs until all ingredients are evenly coated.
7. Divide the vegetable mixture evenly among the 4 tortillas, placing it in a horizontal line slightly below the center of each tortilla.
8. Sprinkle 1 ounce of crumbled feta cheese over the vegetables on each tortilla.
9. Fold the bottom edge of each tortilla up over the filling, tucking it snugly.
10. Fold the left and right sides of each tortilla inward toward the center.
11. Roll each tortilla tightly away from you to form a secure wrap.
12. Cut each wrap in half diagonally using a sharp serrated knife.
Deliciously crisp vegetables mingle with creamy hummus and tangy feta in every bite, creating a texture party that’ll make your taste buds dance. Serve these wraps with extra hummus for dipping or pack them for a picnic that’ll have everyone asking for your “secret” recipe.
Zesty Quinoa and Black Bean Salad
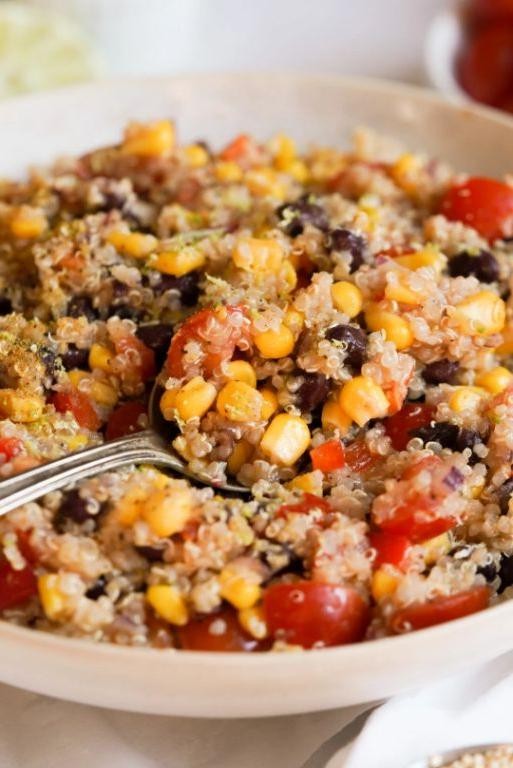
Nailed that perfect lunch that won’t leave you in a 3 PM food coma? Neither had we—until this zesty quinoa and black bean salad barged into our lives, waving a flag of freshness and demanding a spot in your meal prep lineup. It’s the kind of dish that makes you feel virtuous without tasting like punishment, and honestly, it’s about time your taste buds got this excited about something so good for you.
5
servings15
minutes15
minutesIngredients
- 1 cup quinoa, rinsed well (to avoid bitterness)
- 1 (15 oz) can black beans, drained and rinsed (or sub with kidney beans for a twist)
- 1 large red bell pepper, diced (any color works, but red adds sweetness)
- 1/2 cup fresh cilantro, chopped (omit if you’re in the cilantro-haters club)
- 1/4 cup red onion, finely diced (soak in cold water for 5 minutes to mellow the bite)
- 1/4 cup olive oil (or any neutral oil like avocado)
- 2 tbsp lime juice, freshly squeezed (bottled works in a pinch, but fresh is zingier)
- 1 tsp ground cumin
- 1/2 tsp chili powder (adjust to your preferred spice level)
- 1/2 tsp salt
Instructions
- Combine 1 cup rinsed quinoa with 2 cups water in a medium saucepan and bring to a boil over high heat.
- Reduce heat to low, cover the saucepan, and simmer for exactly 15 minutes, or until all water is absorbed and quinoa grains have sprouted little tails.
- Spread the cooked quinoa in a thin layer on a baking sheet to cool completely to room temperature, which prevents it from getting mushy when mixed with other ingredients.
- In a large mixing bowl, whisk together 1/4 cup olive oil, 2 tbsp lime juice, 1 tsp ground cumin, 1/2 tsp chili powder, and 1/2 tsp salt until emulsified.
- Add the cooled quinoa, 1 can drained and rinsed black beans, 1 diced red bell pepper, 1/2 cup chopped cilantro, and 1/4 cup finely diced red onion to the bowl.
- Toss all ingredients gently but thoroughly until the dressing coats everything evenly and no dry spots remain.
- Let the salad sit for at least 10 minutes before serving to allow the flavors to meld together beautifully.
Seriously, this salad is a texture dream—fluffy quinoa, creamy beans, and crunchy peppers all doing a happy dance in your mouth. Serve it scooped into crisp lettuce cups for a low-carb lunch, or pile it onto tortilla chips for a next-level nacho situation that’ll make your weeknight dinners feel like a fiesta.
Creamy Avocado and Chickpea Sandwiches
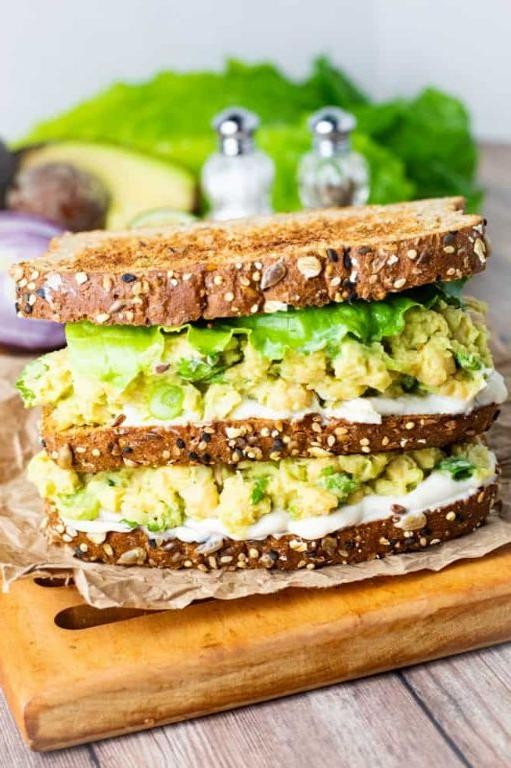
Zesty, zippy, and downright zany—these creamy avocado and chickpea sandwiches are the lunchtime hero you never knew you needed, turning basic ingredients into a flavor fiesta that’ll make your taste buds do a happy dance. Forget boring desk lunches; this mash-up is so dreamy, it’s basically a hug in handheld form, perfect for those days when you crave something fresh yet filling without the fuss. Trust me, it’s the kind of easy win that’ll have you wondering why you ever settled for sad, soggy alternatives.
2
sandwiches15
minutes5
minutesIngredients
– 1 can (15 oz) chickpeas, drained and rinsed (or sub with cooked lentils for variety)
– 2 ripe avocados, pitted and peeled (choose ones that yield slightly to gentle pressure)
– 1/4 cup plain Greek yogurt (or vegan mayo for a dairy-free twist)
– 1 tbsp fresh lemon juice (about half a lemon, squeezed fresh for zing)
– 1/4 cup finely chopped red onion (soak in cold water for 5 minutes to mellow the bite)
– 2 tbsp chopped fresh cilantro (or parsley if you’re cilantro-averse)
– 1/2 tsp garlic powder (or 1 small garlic clove, minced for extra punch)
– 1/4 tsp smoked paprika (adds a subtle smoky depth)
– 4 slices whole-grain bread (toasted sturdy bread works best to hold the filling)
– Salt and black pepper to taste (start with 1/4 tsp salt and adjust as needed)
Instructions
1. Place the drained chickpeas in a medium bowl and mash them with a fork or potato masher until about half are broken down, leaving some texture for bite.
2. Add the pitted and peeled avocados to the bowl with the chickpeas, and mash everything together until mostly smooth but with small chunks remaining for variety.
3. Stir in the Greek yogurt, fresh lemon juice, finely chopped red onion, chopped cilantro, garlic powder, smoked paprika, salt, and black pepper until well combined and creamy.
4. Taste the mixture and adjust seasoning if needed, adding more salt, pepper, or lemon juice for balance—this is your chance to tailor it to your preferences.
5. Toast the 4 slices of whole-grain bread in a toaster or oven at 375°F for 3-5 minutes until golden and crisp, which helps prevent sogginess when assembling.
6. Divide the avocado-chickpea mixture evenly between 2 slices of toasted bread, spreading it thickly to cover the surface from edge to edge.
7. Top each with the remaining 2 slices of toasted bread, press down gently to secure, and slice each sandwich in half diagonally for easy handling.
8. Let’s just luxuriate in that creamy, chunky texture and smoky-savory flavor—it’s like a party in your mouth with every bite. Serve these beauties with a side of crisp veggie sticks or pile on extra greens for a crunchier twist; either way, they’re guaranteed to disappear faster than you can say “lunchtime victory.”
Spicy Roasted Cauliflower Tacos

Oh, the humble cauliflower—forever trying to prove it’s more than just a sad, pale cousin to broccoli. But toss it with some sass and spice, roast it until it’s gloriously crispy, and suddenly it’s the star of taco night, ready to make your taste buds do a happy dance.
8
tacos15
minutes25
minutesIngredients
– 1 large head cauliflower, cut into bite-sized florets (about 4 cups)
– 2 tbsp olive oil, or any neutral oil
– 1 tsp chili powder
– 1/2 tsp smoked paprika
– 1/4 tsp cayenne pepper, adjust to spice preference
– 1/2 tsp garlic powder
– 1/2 tsp cumin
– 1/2 tsp salt
– 8 small corn tortillas
– 1/2 cup sour cream, or Greek yogurt for a lighter option
– 1/4 cup chopped fresh cilantro
– 1 lime, cut into wedges
Instructions
1. Preheat your oven to 425°F and line a baking sheet with parchment paper.
2. In a large bowl, toss the cauliflower florets with olive oil until evenly coated.
3. Sprinkle chili powder, smoked paprika, cayenne pepper, garlic powder, cumin, and salt over the cauliflower, then toss again to coat every floret thoroughly.
4. Spread the seasoned cauliflower in a single layer on the prepared baking sheet, ensuring pieces aren’t crowded for optimal crispiness.
5. Roast in the preheated oven for 20–25 minutes, flipping halfway through, until edges are browned and crispy.
6. While cauliflower roasts, warm the corn tortillas in a dry skillet over medium heat for 30 seconds per side, or until pliable and lightly toasted.
7. Divide the roasted cauliflower evenly among the warmed tortillas.
8. Top each taco with a dollop of sour cream and a sprinkle of chopped cilantro.
9. Squeeze fresh lime juice over the tacos just before serving to brighten the flavors.
Unbelievably, these tacos deliver a satisfying crunch from the roasted cauliflower against the soft, warm tortillas, with a smoky-spicy kick that’s balanced by the cool, tangy sour cream. Try stacking them high for a colorful dinner centerpiece or serve them alongside a zesty slaw for extra texture—either way, they’re bound to disappear fast!
Fresh Tomato and Basil Bruschetta

Brace yourselves, tomato lovers—this bruschetta is about to become your new summer obsession. Imagine juicy, sun-ripened tomatoes mingling with fragrant basil on crispy, garlic-rubbed toast. It’s the kind of effortless appetizer that makes you look like a culinary rockstar with minimal effort.
12
servings15
minutes10
minutesIngredients
– 4 ripe medium tomatoes, diced (about 2 cups total)
– 1/4 cup fresh basil leaves, thinly sliced (plus extra for garnish)
– 2 tbsp extra virgin olive oil (or any high-quality olive oil)
– 1 tbsp balsamic vinegar (aged for deeper flavor)
– 1/2 tsp salt (adjust to taste)
– 1/4 tsp black pepper, freshly ground
– 1 baguette, sliced into 1/2-inch thick pieces (about 12 slices)
– 2 garlic cloves, peeled and halved
Instructions
1. Preheat your oven to 375°F (190°C) using the bake setting.
2. Arrange the baguette slices in a single layer on a baking sheet.
3. Brush both sides of each baguette slice lightly with 1 tablespoon of olive oil.
4. Bake for 8–10 minutes until the edges are golden and the centers are crisp.
5. Remove the baking sheet from the oven and let the toasts cool for 2 minutes.
6. Rub the cut side of a garlic clove firmly over the top of each warm toast—this infuses flavor without overpowering.
7. In a medium bowl, combine the diced tomatoes, sliced basil, remaining 1 tablespoon olive oil, and balsamic vinegar.
8. Sprinkle the salt and black pepper over the tomato mixture.
9. Gently toss everything together with a spoon, being careful not to crush the tomatoes.
10. Let the tomato mixture sit at room temperature for 5 minutes to allow the flavors to meld.
11. Use a slotted spoon to scoop the tomato-basil mixture onto the garlic-rubbed toasts, leaving excess liquid behind.
12. Garnish each bruschetta with an extra basil leaf if desired.
Ready to impress? The crisp, garlicky toast contrasts beautifully with the juicy, tangy tomatoes, while the fresh basil adds a fragrant punch. Serve these immediately for maximum crunch, or layer them on a platter with prosciutto for a next-level appetizer spread.
Easy Vegetable Stir-Fry with Tofu
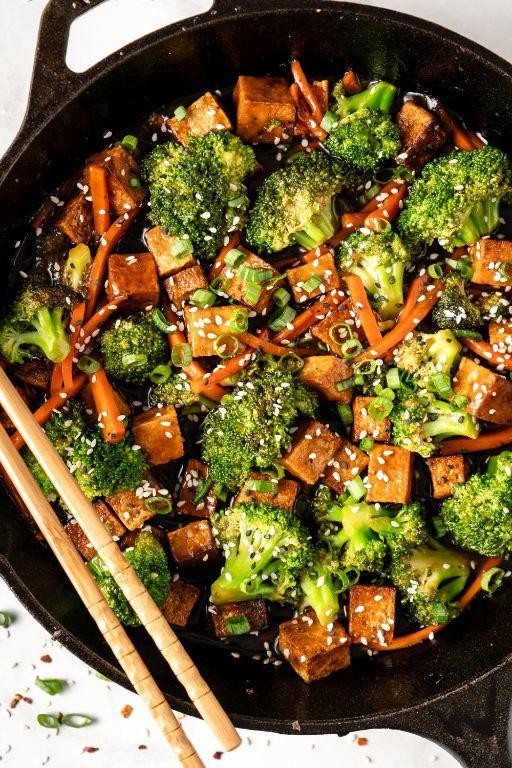
Oh, the eternal struggle of wanting something delicious without the whole “actually cooking” ordeal—we feel you! This vegetable stir-fry with tofu is here to save your Tuesday (and your taste buds) with minimal effort and maximum flavor. It’s so easy, you’ll wonder why you ever ordered takeout.
4
servings20
minutes15
minutesIngredients
– 1 block (14 oz) firm tofu, pressed and cubed (or extra-firm for crispier results)
– 2 tbsp vegetable oil (or any neutral oil like canola)
– 1 red bell pepper, sliced into thin strips (for a sweet crunch)
– 1 cup broccoli florets (fresh or frozen, thawed)
– 1 carrot, julienned (or pre-shredded to save time)
– 3 cloves garlic, minced (more if you’re feeling bold)
– 1 tbsp fresh ginger, grated (or 1 tsp ground ginger in a pinch)
– 3 tbsp soy sauce (low-sodium works too)
– 1 tbsp rice vinegar (for a tangy kick)
– 1 tsp sesame oil (don’t skip—it’s flavor magic!)
– ½ tsp red pepper flakes (optional, for heat lovers)
Instructions
1. Press the tofu block between paper towels with a heavy pan for 15 minutes to remove excess water, then cut into 1-inch cubes.
2. Heat 1 tablespoon of vegetable oil in a large skillet or wok over medium-high heat until it shimmers.
3. Add tofu cubes in a single layer and cook for 4–5 minutes per side until golden brown and crisp.
4. Transfer tofu to a plate and set aside—this prevents sogginess when mixed back in later.
5. Add remaining 1 tablespoon of oil to the same skillet and heat for 30 seconds.
6. Toss in minced garlic and grated ginger, stirring for 1 minute until fragrant but not browned.
7. Add sliced bell pepper, broccoli florets, and julienned carrot, stirring constantly for 4–5 minutes until veggies are tender-crisp.
8. Pour in soy sauce and rice vinegar, scraping any browned bits from the pan for extra flavor.
9. Return tofu to the skillet, drizzle with sesame oil, and sprinkle red pepper flakes if using.
10. Toss everything together for 2 minutes until heated through and evenly coated.
Get ready for a texture party—crisp-tender veggies meet golden tofu in a savory-sweet sauce that clings to every bite. Serve it over fluffy rice, stuff it into lettuce wraps for a low-carb twist, or devour it straight from the pan (no judgment here).
Light Lemon Garlic Asparagus Pasta
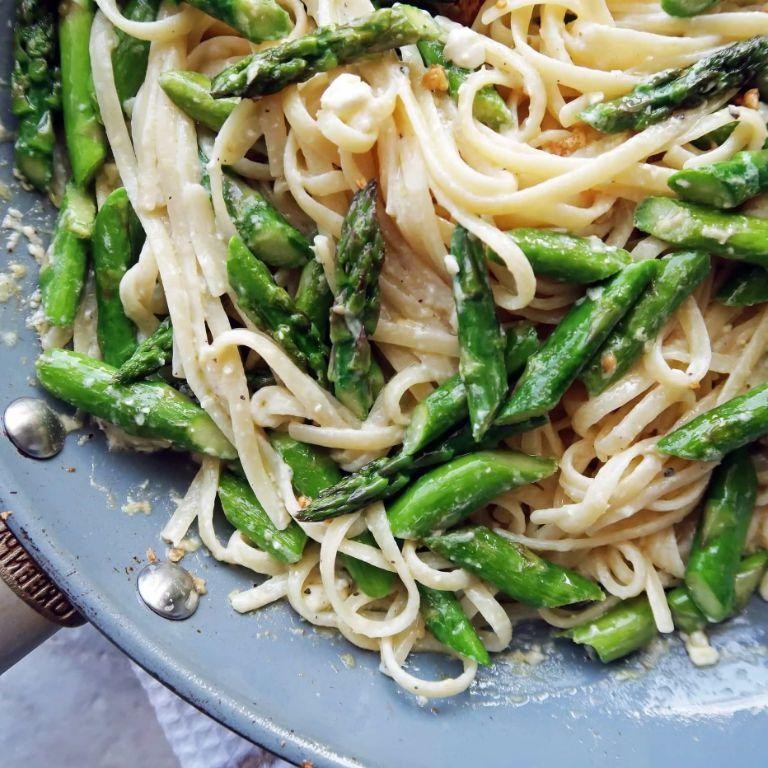
Nothing says “I’ve got my life together” like twirling pasta that tastes like sunshine and sophistication. This Light Lemon Garlic Asparagus Pasta is your ticket to feeling fancy without the fuss—it’s basically a spa day for your taste buds, minus the overpriced cucumber water.
2
servings15
minutes15
minutesIngredients
- 8 oz pasta (linguine or fettuccine work great for clinging to that lemony sauce)
- 1 lb asparagus, trimmed and cut into 2-inch pieces (snap off the woody ends—they’ll tell you where to break!)
- 3 tbsp olive oil (or any neutral oil, but extra virgin adds fruity flair)
- 4 cloves garlic, minced (fresh is best, but 1 tsp jarred minced garlic in a pinch)
- 1 lemon, zested and juiced (about 3 tbsp juice—roll it first to maximize yield)
- 1/4 cup grated Parmesan cheese (plus extra for serving, because cheese is life)
- 1/4 tsp red pepper flakes (optional, for a subtle kick—adjust to your heat tolerance)
- Salt and black pepper (start with 1/2 tsp salt, 1/4 tsp pepper, and adjust later)
- 1/4 cup pasta water (reserved from boiling—it’s liquid gold for sauciness)
Instructions
- Bring a large pot of salted water to a rolling boil over high heat—it should taste like the sea.
- Add the pasta and cook for 8–10 minutes, stirring occasionally, until al dente (check a strand a minute early to avoid mush).
- Reserve 1/4 cup of the starchy pasta water, then drain the pasta and set it aside.
- While the pasta cooks, heat olive oil in a large skillet over medium heat until it shimmers.
- Add the asparagus and sauté for 4–5 minutes, until bright green and slightly tender but still crisp.
- Stir in the minced garlic and red pepper flakes, cooking for 1 minute until fragrant (don’t let the garlic brown—bitterness is not invited).
- Pour in the lemon juice and zest, stirring to coat the asparagus evenly.
- Add the drained pasta to the skillet, tossing to combine with the asparagus mixture.
- Sprinkle in the Parmesan cheese and reserved pasta water, stirring vigorously until the cheese melts and coats the pasta in a light, glossy sauce.
- Season with salt and black pepper, tasting and adjusting as needed (tip: undersalt initially—you can always add more).
Marvel at the vibrant green spears tangled in glossy noodles, each bite bursting with zesty lemon and savory garlic. The asparagus stays crisp-tender, adding a fresh crunch that plays perfectly against the silky pasta. Serve it straight from the skillet for maximum drama, or top with extra Parmesan and a squeeze of lemon for an instant restaurant-worthy upgrade.
Grilled Portobello Mushrooms with Balsamic Glaze
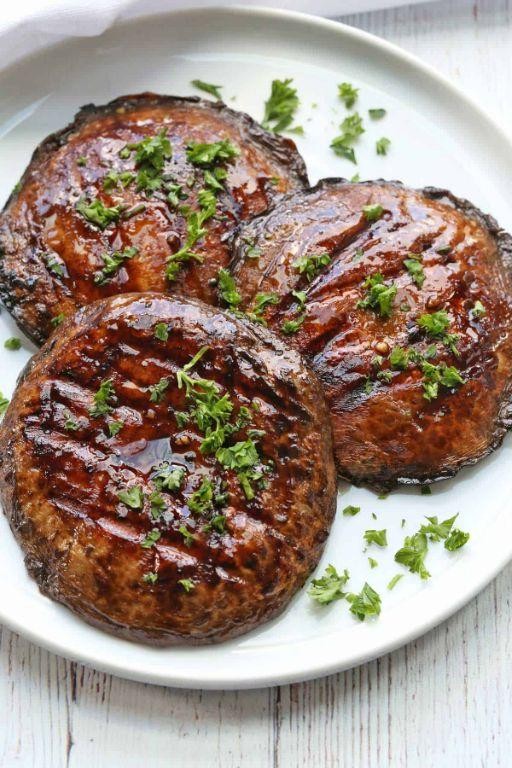
Alright, mushroom lovers, gather ’round! Are you tired of pretending that grilled vegetables are just a side dish? These grilled portobello mushrooms are about to steal the spotlight with their meaty texture and tangy-sweet glaze that’ll make you forget all about that sad-looking burger patty.
4
servings10
minutes10
minutesIngredients
- 4 large portobello mushrooms, stems removed (about 4-5 inches wide for maximum meatiness)
- 3 tbsp olive oil (or any neutral oil you have on hand)
- 2 tbsp balsamic vinegar (the good stuff makes a difference)
- 1 tbsp soy sauce (for that umami boost)
- 2 cloves garlic, minced (fresh is best, but 1 tsp jarred works in a pinch)
- 1 tsp dried thyme (or 1 tbsp fresh if you’re feeling fancy)
- 1/2 tsp black pepper (freshly ground if possible)
- 1/4 tsp salt (adjust based on your soy sauce’s saltiness)
Instructions
- Preheat your grill to medium-high heat, aiming for 400°F – you want those beautiful grill marks without burning.
- Whisk together olive oil, balsamic vinegar, soy sauce, minced garlic, thyme, black pepper, and salt in a small bowl until fully combined.
- Brush both sides of each portobello mushroom cap generously with the marinade mixture, using about half of it for this step.
- Place mushrooms gill-side up on the preheated grill and cook for 5 minutes without moving them – this ensures those perfect char lines develop.
- Flip mushrooms carefully using tongs and cook for another 4-5 minutes until tender but still firm to the touch.
- Brush the remaining marinade over the mushrooms during the last 2 minutes of cooking, being careful not to drip too much into the flames.
- Remove mushrooms from grill when they’re deeply browned and release liquid when pressed gently with tongs.
- Let mushrooms rest for 3 minutes before slicing to allow juices to redistribute evenly.
Heavenly doesn’t begin to describe these beauties – they emerge from the grill with an almost steak-like chewiness that contrasts beautifully with the sticky-sweet glaze. Serve them sliced over creamy polenta, stuffed between crusty bread with melted provolone, or chop them up to elevate your next pizza night beyond basic toppings.
Savory Spinach and Feta Stuffed Peppers

Who says vegetables can’t be the life of the party? These Savory Spinach and Feta Stuffed Peppers are basically bell peppers dressed to impress, stuffed with a cheesy, herby filling that’ll make even the pickiest eaters do a happy dance. They’re the ultimate weeknight hero—easy, vibrant, and packed with flavor that feels fancy without the fuss.
5
portions15
minutes40
minutesIngredients
– 4 large bell peppers, any color (halved lengthwise, seeds removed)
– 1 tbsp olive oil (or any neutral oil, for drizzling)
– 1 small yellow onion, finely chopped (about 1 cup)
– 2 cloves garlic, minced (adjust to taste)
– 5 oz fresh spinach (roughly chopped)
– 1 cup cooked quinoa (or rice, for a swap)
– 4 oz feta cheese, crumbled (plus extra for topping, if desired)
– 1 tsp dried oregano (or 1 tbsp fresh, chopped)
– 1/2 tsp salt (adjust to taste)
– 1/4 tsp black pepper
– 1/4 cup vegetable broth (or water, to moisten filling)
Instructions
1. Preheat your oven to 375°F and lightly grease a baking dish with olive oil.
2. Slice the bell peppers in half lengthwise and remove all seeds and membranes.
3. Arrange the pepper halves cut-side up in the prepared baking dish.
4. Heat 1 tablespoon of olive oil in a large skillet over medium heat until shimmering, about 1 minute.
5. Add the chopped onion and cook, stirring occasionally, until softened and translucent, about 5–7 minutes.
6. Stir in the minced garlic and cook for 30 seconds until fragrant—don’t let it brown!
7. Add the chopped spinach and cook, stirring constantly, until wilted and most liquid has evaporated, about 3–4 minutes.
8. Remove the skillet from heat and stir in the cooked quinoa, crumbled feta, oregano, salt, and black pepper.
9. Pour in the vegetable broth and mix until the filling is moist and well-combined.
10. Spoon the filling evenly into each pepper half, pressing down gently to pack it in.
11. Bake at 375°F for 25–30 minutes, until the peppers are tender and the filling is lightly golden on top.
12. Let the stuffed peppers cool for 5 minutes before serving to allow the flavors to meld.
Look at those beauties—tender peppers hugging a fluffy, savory filling that’s studded with tangy feta and earthy spinach. Serve them alongside a crisp salad for a light dinner, or top with a dollop of Greek yogurt and fresh herbs to really make them sing.
Classic Caprese Salad with a Twist
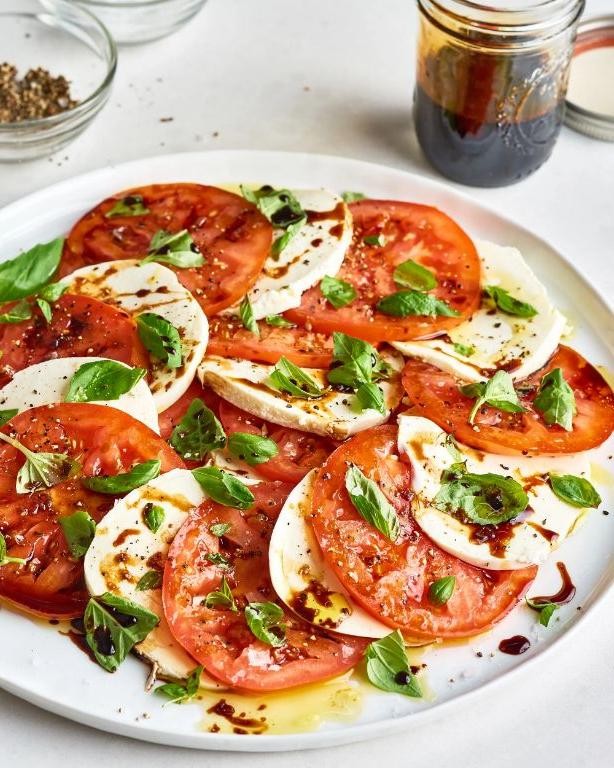
Now, let’s be real—sometimes even the classics need a little shake-up to keep things interesting in the kitchen. This isn’t your nonna’s Caprese salad; we’re adding a zesty twist that’ll make your taste buds do a happy dance while keeping that fresh, Italian soul intact.
2
servings15
minutesIngredients
– 2 large ripe tomatoes, sliced 1/4-inch thick (heirlooms add gorgeous color)
– 8 oz fresh mozzarella cheese, sliced 1/4-inch thick (the wet, ball-shaped kind works best)
– 1/4 cup fresh basil leaves (tear if large, or use whole if small)
– 2 tbsp extra virgin olive oil (or any high-quality olive oil)
– 1 tbsp balsamic glaze (not vinegar—the thick, syrupy kind)
– 1/2 tsp flaky sea salt (Maldon salt adds nice crunch)
– 1/4 tsp freshly ground black pepper
– 1 small avocado, sliced (choose one that’s ripe but still firm)
Instructions
1. Arrange tomato slices in a single layer on a large serving platter.
2. Place one slice of mozzarella cheese directly on top of each tomato slice.
3. Tuck fresh basil leaves between the tomato and mozzarella layers.
4. Arrange avocado slices throughout the platter, spacing them evenly.
5. Drizzle olive oil evenly over the entire arrangement.
6. Drizzle balsamic glaze in zigzag patterns across the salad.
7. Sprinkle flaky sea salt uniformly over all ingredients.
8. Finish by grinding black pepper over the top.
And just like that, you’ve got a showstopper that’s as pretty as it is delicious. The creamy avocado melts into the juicy tomatoes and pillowy mozzarella, while the balsamic glaze adds a sweet-tart punch that cuts through the richness. Serve this beauty with crusty bread to sop up every last drop of that glorious dressing—your guests will be fighting over the last bite.
Hearty Sweet Potato and Lentil Curry

Gosh, if your taste buds could cozy up in a warm blanket, this would be it—a sweet potato and lentil curry that’s basically a hug in a bowl, ready to rescue you from even the most dramatic hunger pangs with zero judgment.
3
servings15
minutes35
minutesIngredients
– 1 tbsp coconut oil (or any neutral oil, for sautéing)
– 1 large onion, diced (yellow or white works best)
– 3 cloves garlic, minced (fresh is ideal, but jarred in a pinch)
– 1 tbsp fresh ginger, grated (peel first for smoother texture)
– 2 medium sweet potatoes, peeled and cubed (about 3 cups total)
– 1 cup red lentils, rinsed (they cook faster than brown!)
– 1 can (13.5 oz) coconut milk, full-fat for creaminess
– 2 cups vegetable broth (low-sodium if you’re watching salt)
– 1 tbsp curry powder (mild or hot, your call)
– 1 tsp turmeric (for color and earthy notes)
– ½ tsp cayenne pepper (optional, for a spicy kick)
– Salt, to taste (start with ½ tsp and adjust)
– Fresh cilantro, chopped (for garnish, or skip if you hate it)
Instructions
1. Heat 1 tbsp coconut oil in a large pot over medium heat until it shimmers, about 1 minute.
2. Add the diced onion and cook, stirring occasionally, until softened and lightly golden, 5–7 minutes.
3. Stir in the minced garlic and grated ginger, cooking for 1 minute until fragrant (don’t let it burn!).
4. Add the cubed sweet potatoes and rinsed red lentils, tossing to coat in the aromatics.
5. Pour in the coconut milk and vegetable broth, scraping the bottom of the pot to lift any browned bits.
6. Sprinkle in the curry powder, turmeric, and cayenne pepper (if using), stirring to combine evenly.
7. Bring the mixture to a boil, then reduce heat to low, cover, and simmer for 20–25 minutes until the sweet potatoes are fork-tender and lentils have broken down.
8. Season with salt, starting with ½ tsp and adding more if needed, then simmer uncovered for 5 minutes to thicken slightly.
9. Remove from heat and stir in half of the chopped cilantro.
10. Ladle into bowls and garnish with the remaining cilantro.
Seriously, this curry is a textural dream—creamy from the lentils, tender sweet potatoes, and just enough spice to keep things interesting. Serve it over fluffy rice, scoop it up with naan, or even stuff it into a wrap for a next-level lunch that’ll make your coworkers jealous.
Crispy Baked Zucchini Fries

Now, let’s be honest—when was the last time you successfully convinced anyone (including yourself) that vegetables are the most exciting part of dinner? Never fear, because these Crispy Baked Zucchini Fries are about to become your kitchen’s new MVP, delivering all the crunch without the guilt-trip grease.
3
servings15
minutes22
minutesIngredients
– 2 medium zucchinis, sliced into ¼-inch sticks (go for uniformity to avoid uneven cooking)
– ½ cup all-purpose flour (or gluten-free blend if needed)
– 2 large eggs, lightly beaten (room temp helps coating stick better)
– 1 cup panko breadcrumbs (regular works, but panko = extra crisp)
– ¼ cup grated Parmesan cheese (the powdery kind clings best)
– 1 tsp garlic powder (not garlic salt—trust me)
– 1 tsp paprika (for color and a smoky hint)
– 2 tbsp olive oil (or avocado oil for higher smoke point)
– ½ tsp salt (adjust if your Parmesan is salty)
– ¼ tsp black pepper (freshly cracked adds zing)
Instructions
1. Preheat your oven to 425°F and line a baking sheet with parchment paper.
2. Slice zucchinis into ¼-inch thick sticks, patting them completely dry with paper towels (this is crucial—soggy zucchinis = sad fries).
3. Place flour in a shallow bowl, beaten eggs in another, and combine panko, Parmesan, garlic powder, paprika, salt, and pepper in a third bowl.
4. Dredge each zucchini stick in flour, shaking off excess.
5. Dip floured sticks into the egg, letting any drip-off happen.
6. Press each stick firmly into the panko mixture, coating all sides (pro tip: use one hand for dry steps, one for wet to avoid clumpy fingers).
7. Arrange coated zucchini in a single layer on the baking sheet, not touching.
8. Drizzle or spray olive oil evenly over the fries.
9. Bake for 18–22 minutes, flipping halfway, until golden brown and crisp (no pale spots allowed!).
10. Let them rest 2 minutes on the sheet—they’ll crisp up more as they cool. You’ll marvel at that golden, shatter-crisp exterior giving way to tender zucchini inside. Dunk them in zesty ranch or spicy marinara, or crumble them over salads for a crunch that’ll make you forget kale chips ever existed.
Conclusion
Here’s a fantastic collection of 27 quick, healthy vegetarian recipes perfect for busy weeknights. We hope these ideas inspire you to cook something delicious and nourishing. Give them a try, and let us know your favorites in the comments! Don’t forget to share this roundup on Pinterest to help other home cooks discover these tasty meals. Happy cooking!


