Let’s face it, sometimes life gets crazy and you need a quick, delicious snack without the fuss. Luckily, I’ve perfected the art of transforming frozen hot wings into crispy, saucy perfection that’ll make you forget they ever came from the freezer. This recipe is your secret weapon for impromptu gatherings or those late-night cravings that demand immediate satisfaction.
Why This Recipe Works
- Starting with frozen wings eliminates the need for thawing, saving you precious time when hunger strikes unexpectedly. The direct-from-freezer method actually helps create a crispier exterior as the cold surface reacts beautifully with the hot oven air.
- The double baking technique ensures maximum crispiness – first we bake them plain to achieve that perfect golden-brown texture, then we sauce and finish them to create that sticky, caramelized coating we all crave.
- Using a wire rack set over a baking sheet allows hot air to circulate completely around each wing, preventing sogginess and ensuring every single piece gets evenly crispy without needing to flip them constantly.
- The simple three-ingredient sauce combination of hot sauce, butter, and honey creates the perfect balance of heat, richness, and subtle sweetness that clings beautifully to each wing without making them soggy.
- This method works reliably with any brand of frozen wings, giving you consistent results whether you’re using budget options or premium varieties from your local grocery store.
Ingredients
- 1 package (24 ounces) frozen fully cooked chicken wings
- 1/2 cup Frank’s RedHot Original Cayenne Pepper Sauce
- 1/4 cup unsalted butter, melted
- 2 tablespoons honey
- 1 teaspoon garlic powder
- 1/2 teaspoon smoked paprika
- 1/4 teaspoon cayenne pepper (optional, for extra heat)
- Blue cheese or ranch dressing for serving
- Celery sticks and carrot sticks for serving
Equipment Needed
- Rimmed baking sheet
- Wire cooling rack that fits inside baking sheet
- Medium mixing bowl
- Whisk
- Tongs
- Measuring cups and spoons
- Pastry brush (optional but helpful)
Instructions
Preheat and Prepare Your Baking Setup
Preheat your oven to 425°F and position one rack in the center of the oven. Take your rimmed baking sheet and place a wire cooling rack inside it – this elevated setup is crucial for achieving crispy wings because it allows hot air to circulate completely around each piece. If you don’t have a wire rack, you can place the wings directly on a parchment-lined baking sheet, but they won’t get quite as crispy on the bottom. Lightly spray the wire rack with cooking spray to prevent sticking, though most frozen wings have enough fat content that they usually release easily. This initial preparation takes about two minutes but makes all the difference in your final results.
Arrange Frozen Wings on Rack
Remove the frozen wings directly from the freezer package and arrange them in a single layer on the prepared wire rack, making sure they aren’t touching each other. Leave about half an inch of space between each wing to ensure proper air circulation and even cooking. Don’t worry if there’s some frost or ice crystals on the wings – this will actually help create steam that contributes to a crispier exterior. If you’re cooking a larger batch and need to use two baking sheets, make sure to position them on different oven racks and rotate them halfway through cooking. The wings should still be completely frozen at this stage – no thawing required!
Initial Baking for Crispiness
Place the baking sheet with the arranged frozen wings in the preheated 425°F oven and bake for 25-30 minutes. You’ll know they’re ready for saucing when the skin appears golden brown and crispy, and they reach an internal temperature of 165°F when checked with an instant-read thermometer. The high initial temperature is key here – it quickly renders out fat from the skin while creating that desirable crispy texture. About halfway through this initial bake, you might notice some rendered fat accumulating in the bottom of the baking sheet; this is normal and actually helps prevent smoking. Tip: For extra crispy wings, you can switch your oven to broil for the last 2-3 minutes, but watch carefully to prevent burning.
Prepare the Signature Hot Sauce Mixture
Coat Wings and Final Bake
Using tongs, carefully transfer the baked wings from the wire rack to the bowl with your prepared sauce. Gently toss them until each wing is evenly coated with the sauce mixture – be thorough but gentle to avoid breaking the crispy skin you worked so hard to achieve. Return the sauced wings to the wire rack, arranging them again in a single layer. Place them back in the 425°F oven for another 5-7 minutes until the sauce is bubbly and slightly caramelized around the edges. This second bake helps the sauce adhere properly and intensifies the flavors. Tip: For extra saucy wings, you can brush additional sauce over them during the last 2 minutes of baking.
Serve Immediately with Traditional Accompaniments
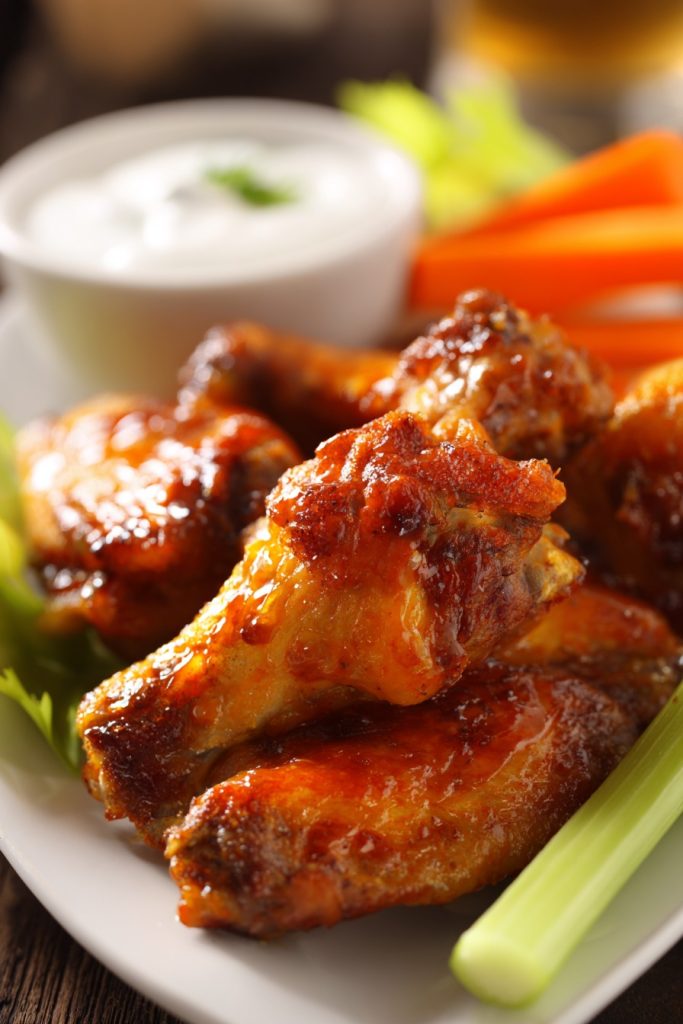
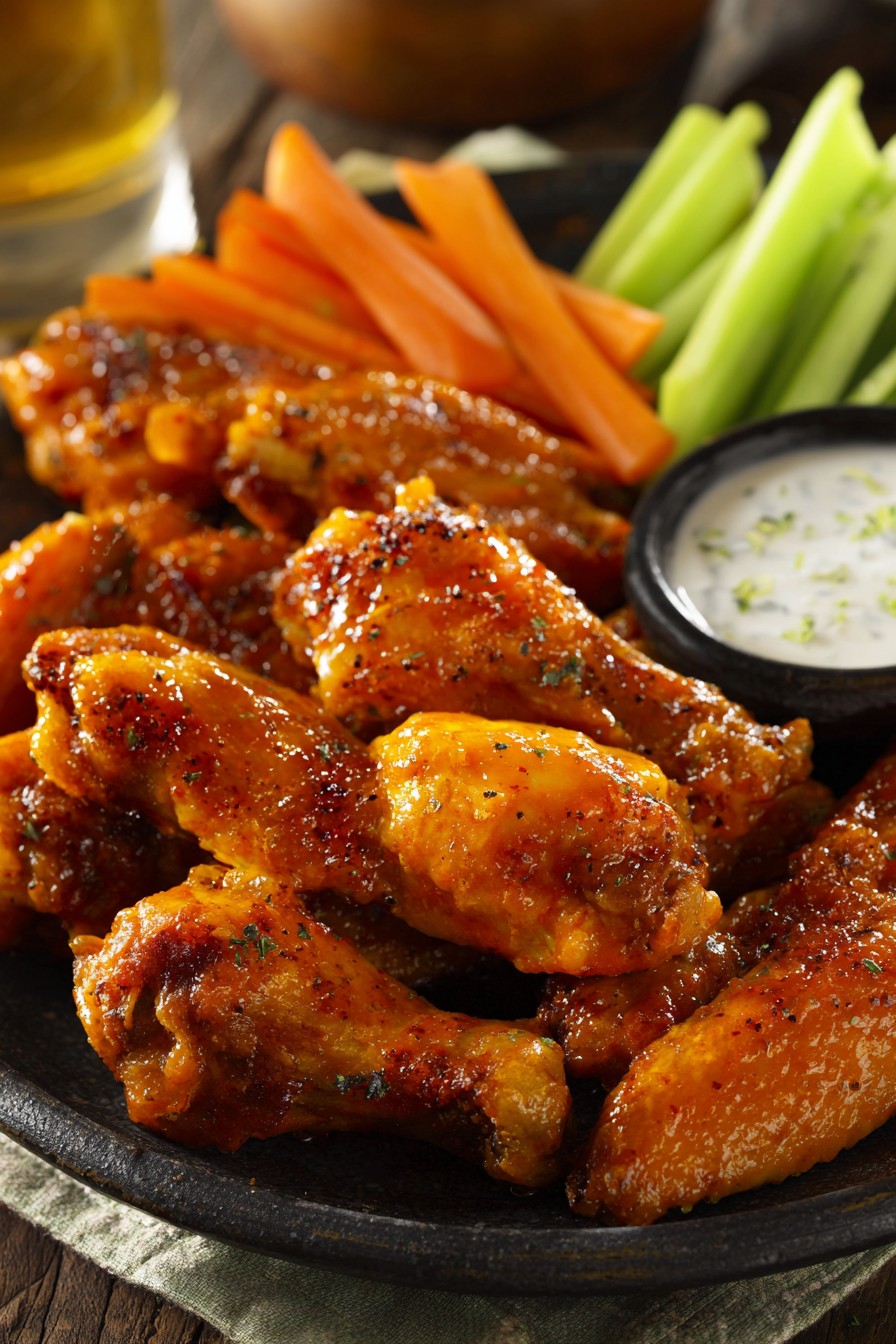
Remove the wings from the oven and let them rest on the wire rack for about 2-3 minutes – this allows the sauce to set slightly so it doesn’t immediately run off when you pick them up. Transfer to a serving platter and serve immediately while still piping hot, accompanied by celery sticks, carrot sticks, and your choice of blue cheese or ranch dressing. The contrast between the spicy, crispy wings and the cool, creamy dressing is what makes this combination classic. If you’re serving a crowd, you can keep finished wings warm in a 200°F oven for up to 20 minutes, though they’re best enjoyed straight from the oven when the texture is at its peak.
Tips and Tricks
If you want to take your frozen wing game to the next level, consider patting the frozen wings very lightly with a paper towel before baking to remove any large ice crystals – this can help them crisp up even faster. For those who love extra crispy skin, try sprinkling a very light dusting of baking powder (about 1/2 teaspoon for the whole batch) over the frozen wings before the initial bake – this alters the pH of the skin and promotes incredible crispiness without affecting flavor. When making your sauce, consider melting the butter with the garlic powder and smoked paprika first to bloom the spices and deepen their flavor before adding the hot sauce and honey.
For cleanup ease, line your baking sheet with aluminum foil before placing the wire rack – this catches all the rendered fat and makes post-cooking cleanup a breeze. If you’re sensitive to spice levels, remember that you can control the heat by adjusting the ratio of hot sauce to butter – more butter means milder wings, while more hot sauce increases the heat factor. Don’t forget that the carryover heat will continue cooking the wings slightly after removal from the oven, so it’s better to pull them out when they’re at about 160°F rather than waiting for exactly 165°F.
If you’re cooking for a crowd and need to make multiple batches, keep the first batch warm in a 200°F oven while subsequent batches cook – just place them on a clean wire rack so they don’t get soggy. For extra flavor infusion, you can add a tablespoon of Worcestershire sauce or a teaspoon of apple cider vinegar to your sauce mixture to add complexity to the flavor profile. Always use an instant-read thermometer to check for doneness rather than relying solely on timing, as oven temperatures can vary significantly and different brands of frozen wings may have different cooking requirements.
If you find your wings aren’t as crispy as you’d like, try increasing the initial bake time by 5-minute increments until you achieve the desired texture. For those who want to minimize mess, you can toss the wings in the sauce right on the baking sheet using tongs rather than transferring to a bowl – just be careful not to tear the aluminum foil if you’re using it. Remember that the sauce will thicken and darken during the second bake, so don’t worry if it looks a bit thin when you first mix it – the honey and butter will caramelize beautifully in the oven’s heat.
Recipe Variations
- For Asian-inspired wings, replace the hot sauce mixture with 1/2 cup soy sauce, 1/4 cup honey, 2 tablespoons rice vinegar, 1 tablespoon sesame oil, and 1 teaspoon grated fresh ginger. Add a tablespoon of cornstarch dissolved in 2 tablespoons of water to help the sauce thicken and cling to the wings during the final bake. Garnish with toasted sesame seeds and sliced green onions for an authentic touch that will transport your taste buds straight to your favorite Asian restaurant.
- Create barbecue-style wings by substituting your favorite barbecue sauce for the hot sauce mixture – use about 3/4 cup of barbecue sauce mixed with 2 tablespoons of melted butter and 1 tablespoon of apple cider vinegar. For smoky depth, add a teaspoon of liquid smoke to the sauce mixture before tossing with the wings. The sweetness of the barbecue sauce caramelizes beautifully in the oven, creating that classic sticky-sweet exterior that barbecue wing lovers crave.
- For garlic Parmesan wings, skip the saucy step entirely and instead toss the baked wings with 3 tablespoons of melted butter, 1/2 cup grated Parmesan cheese, 1 teaspoon garlic powder, 1/2 teaspoon dried parsley, and 1/4 teaspoon black pepper. Return to the oven for just 2-3 minutes to melt the cheese slightly. Finish with an extra sprinkle of fresh Parmesan and chopped fresh parsley for a sophisticated twist that’s perfect for when you want something rich and cheesy rather than spicy.
- Try a sweet chili variation by combining 1/2 cup sweet chili sauce with 2 tablespoons lime juice, 1 tablespoon fish sauce, and 1 teaspoon sriracha for heat. The combination of sweet, sour, salty, and spicy creates complex flavors that make these wings incredibly addictive. Garnish with chopped cilantro and crushed peanuts for texture contrast that elevates this variation from simple snack to impressive appetizer.
Frequently Asked Questions
Can I use different types of frozen wings?
Absolutely! This method works with any brand of frozen fully cooked chicken wings, whether they’re plain, pre-seasoned, or even breaded varieties. For breaded wings, you might need to reduce the oven temperature to 400°F to prevent the coating from burning while ensuring the interior heats through completely. The cooking time may vary slightly depending on the size and thickness of the wings, so always check for an internal temperature of 165°F rather than relying solely on the timer. Even vegetarian cauliflower wings can be prepared using this method, though you’ll want to reduce the initial baking time since they cook faster than chicken.
How do I prevent the sauce from making the wings soggy?
The key to avoiding sogginess is the two-step baking process – the initial bake without sauce creates a crispy foundation that can withstand the moisture from the sauce. Using a wire rack ensures air circulates around the entire wing during both baking stages, preventing steam from accumulating underneath. Also, make sure your sauce isn’t too thin – the butter and honey help create a thicker consistency that clings rather than pools. If you’re concerned about sogginess, you can also broil the sauced wings for the final 2-3 minutes instead of baking them, which helps evaporate excess moisture quickly while caramelizing the sauce.
Can I prepare these wings ahead of time?
While these wings are best served immediately after cooking, you can partially prepare them ahead by mixing the sauce ingredients and storing them in the refrigerator for up to 3 days. When ready to serve, proceed with the recipe as written. You can also bake the wings through the first stage, let them cool completely, then refrigerate for up to 2 days. When ready to serve, reheat them in a 400°F oven for 10 minutes before saucing and finishing with the final bake. I don’t recommend freezing already cooked and sauced wings as the texture will suffer significantly upon reheating.
What if I don’t have a wire rack?
If you don’t have a wire rack, you can still achieve decent results by placing the frozen wings directly on a parchment-lined baking sheet. Just be sure to flip them halfway through the initial baking time to help both sides crisp up evenly. The bottoms might not get quite as crispy as when using a rack, but they’ll still be delicious. Another option is to create a makeshift rack by crumpling aluminum foil into long strips and placing them on the baking sheet to elevate the wings slightly – this isn’t as effective as a proper wire rack but does allow for some air circulation.
Summary
This quick baked frozen hot wings recipe transforms ordinary freezer finds into game-day worthy delights with minimal effort. The two-step baking method ensures maximum crispiness while the simple three-ingredient sauce delivers classic buffalo flavor that everyone loves.
Quick Baked Frozen Hot Wings
5
servings5
minutes35
minutesIngredients
Instructions
- 1 Preheat oven to 425°F and place wire rack in rimmed baking sheet.
- 2 Arrange frozen wings in single layer on rack, bake 25-30 minutes until crispy.
- 3 Whisk together hot sauce, butter, honey, and spices in medium bowl.
- 4 Toss baked wings in sauce mixture until evenly coated.
- 5 Return to rack, bake 5-7 minutes until sauce is bubbly and caramelized.
- 6 Serve immediately with celery, carrots, and dressing of choice.


