Veteran parents know holiday baking can turn into a stress-fest, but this pumpkin pie recipe changes everything. Very few ingredients, minimal cleanup, and maximum flavor make this the perfect solution for feeding your family during the busy holiday season without losing your mind in the kitchen.
Why This Recipe Works
- Uses store-bought pie crust because let’s be real – you don’t have time to make pastry from scratch when you’re managing kids, school schedules, and holiday chaos. The frozen crust works perfectly and saves you at least 30 minutes of prep time and cleanup.
- Simple ingredient list means you probably have most items in your pantry already. No fancy spices or hard-to-find components that require special trips to the store when you’re already stretched thin.
- One-bowl mixing eliminates multiple dirty dishes. You can literally mix everything in one large bowl, pour it into the crust, and be done. The cleanup takes less than five minutes, which is crucial when you’re balancing family demands.
- Forgiving baking time means if you get distracted by kids needing help with homework or dealing with sibling arguments, the pie still comes out perfectly. The custard sets beautifully even with minor timing variations.
- Make-ahead friendly so you can bake it the night before when the kids are asleep and have one less thing to worry about on the actual holiday. The flavor actually improves after resting overnight in the refrigerator.
Ingredients
- 1 (9-inch) frozen deep-dish pie crust, thawed according to package directions
- 1 (15-ounce) can pure pumpkin puree (not pumpkin pie filling)
- 1 (14-ounce) can sweetened condensed milk
- 2 large eggs, lightly beaten
- 1 teaspoon ground cinnamon
- 1/2 teaspoon ground ginger
- 1/2 teaspoon ground nutmeg
- 1/2 teaspoon salt
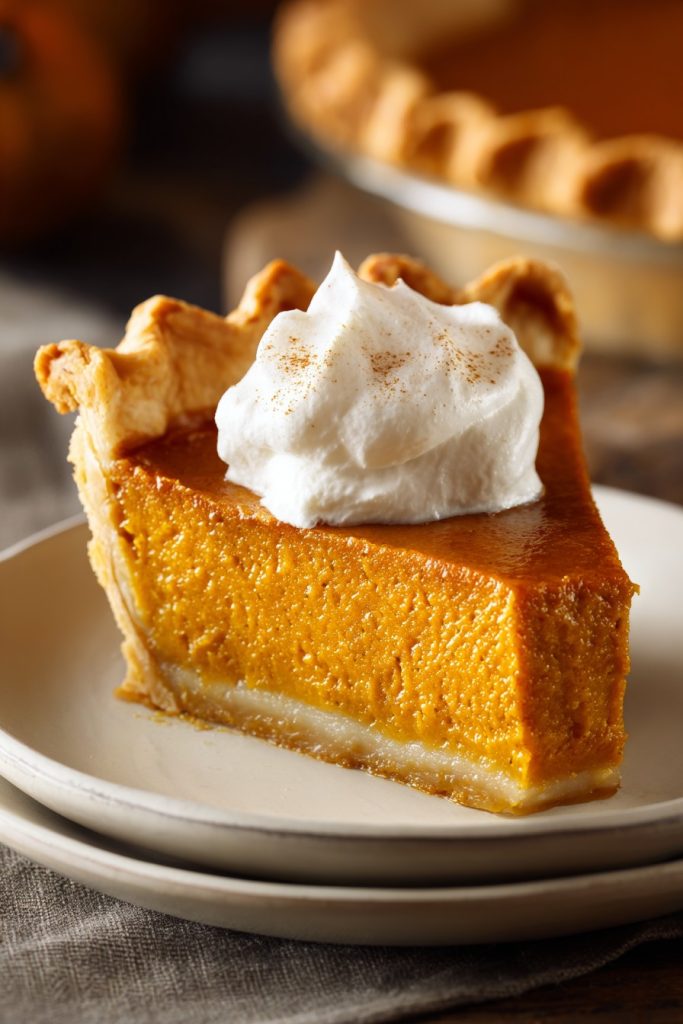
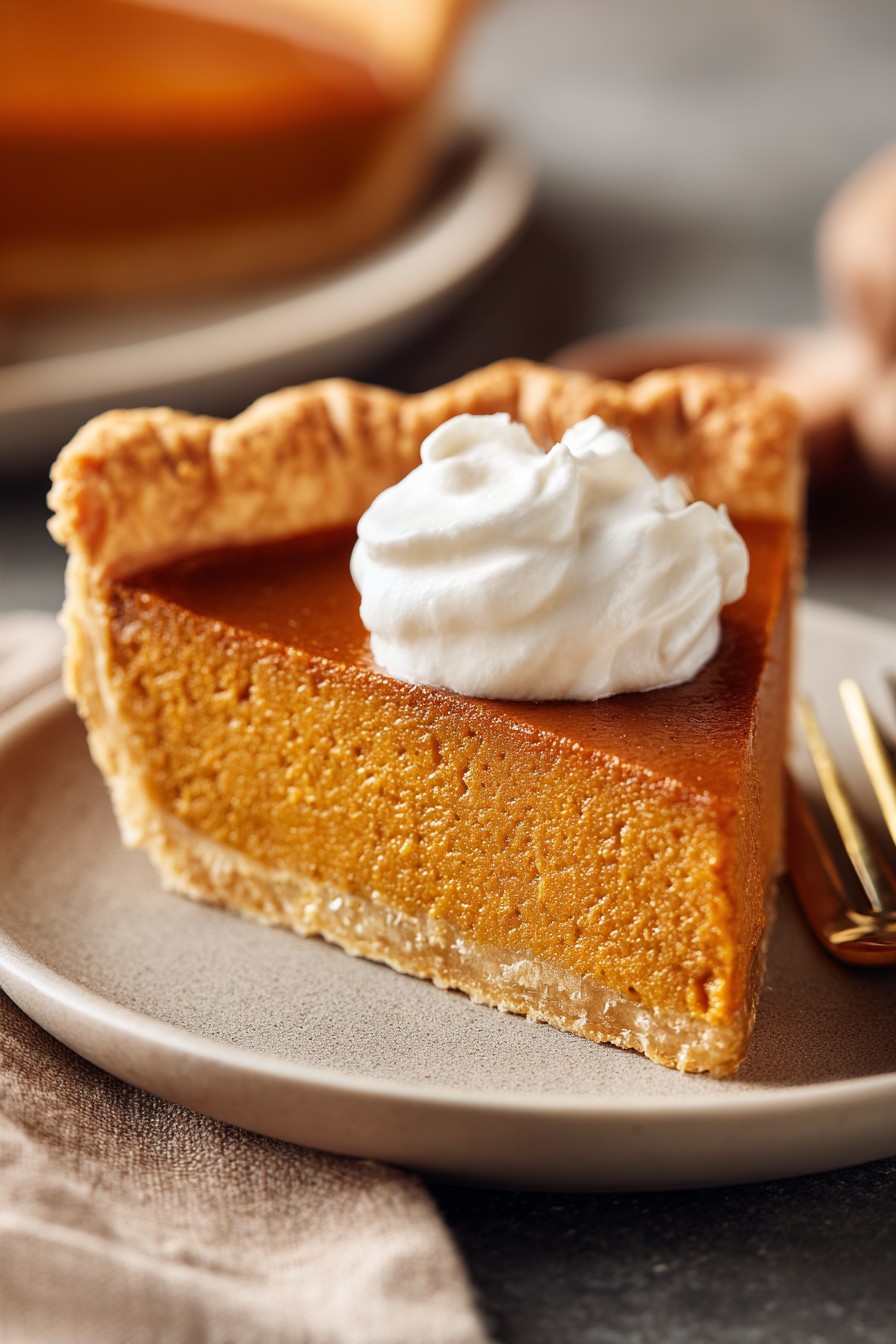
- Whipped cream for serving (optional but highly recommended)
Equipment Needed
- 9-inch pie plate
- Large mixing bowl
- Whisk or electric mixer
- Measuring spoons
- Oven
- Cooling rack
Instructions
Prepare Your Workspace and Preheat Oven
Before you even think about mixing ingredients, get your kitchen organized for maximum efficiency. Clear a counter space large enough for your mixing bowl and pie plate. Take your frozen pie crust out of the freezer and let it sit on the counter while you gather other ingredients – it should be thawed but still cool to the touch. Preheat your oven to 425°F and position your oven rack in the center position. This preheating step is crucial because starting with a hot oven helps set the crust quickly and prevents a soggy bottom. While the oven heats, measure out all your spices and have your canned goods ready to open. This mise en place approach might sound fancy, but it’s really just about preventing that mid-recipe panic when you realize you’re out of cinnamon while your hands are covered in pumpkin goo.
Mix the Filling in One Bowl
Grab your largest mixing bowl – I mean the big one you usually save for holiday salads or mixing cookie dough. Dump in the entire can of pumpkin puree first, then add the sweetened condensed milk. Use a whisk or electric mixer on low speed to combine these two ingredients until they’re completely smooth with no streaks. Now crack your two eggs into a small separate bowl first (trust me, this saves you from fishing out eggshells later), then add them to the pumpkin mixture. Sprinkle in all your spices – the cinnamon, ginger, nutmeg, and salt. Here’s a crucial tip: if you’re short on time or spices, you can substitute 2 teaspoons of pumpkin pie spice for all the individual spices. Mix everything on medium speed for about 2 minutes until the filling is completely uniform in color and texture. You shouldn’t see any egg streaks or spice clumps.
Pour and Smooth the Filling
Take your thawed pie crust and place it on a baking sheet – this makes it much easier to handle and prevents spills in your oven. Slowly pour the pumpkin filling into the crust, stopping when you’re about 1/4 inch from the top edge. Use a spatula to scrape every last bit of filling from the bowl. Now gently tilt and rotate the pie plate to distribute the filling evenly. If you notice any air bubbles, gently tap the bottom of the pie plate against the counter a few times to release them. The filling should be smooth and level across the entire surface. Don’t worry if it looks very liquid – that’s exactly how it should be before baking. The custard will set beautifully in the oven as the eggs cook and proteins coagulate.
Bake with the Two-Temperature Method
Carefully place the baking sheet with your pie into the preheated 425°F oven. Set your timer for 15 minutes exactly – this initial high heat helps the crust get crispy and starts setting the edges of the filling. When the timer goes off, without opening the oven door, reduce the temperature to 350°F. Continue baking for another 35-40 minutes. Here’s how to test for doneness without fancy equipment: gently jiggle the baking sheet. The edges of the filling should look set while the center still has a slight wobble, similar to Jell-O when you tap the bowl. The crust should be golden brown, and if you insert a knife about 1 inch from the edge, it should come out clean. Don’t overbake waiting for the very center to firm up completely – it will continue setting as it cools.
Cool Completely Before Serving
Once baked, carefully remove the pie from the oven using oven mitts – remember the baking sheet is hot too! Place the entire baking sheet on a cooling rack and let the pie cool completely, which will take about 2 hours at room temperature. This cooling period is non-negotiable for the custard to set properly. If you cut into it while warm, you’ll have pumpkin soup instead of pie slices. After it reaches room temperature, cover it loosely with plastic wrap and refrigerate for at least 4 hours or overnight. The flavor actually improves after chilling, and the texture becomes perfectly sliceable. When ready to serve, add a dollop of whipped cream to each slice if desired.
Tips and Tricks
Let’s talk about the real secrets that make holiday baking manageable when you’re juggling family life. First, regarding pie crusts: if you’re really pressed for time, the refrigerated roll-out crusts work just as well as frozen. Just make sure to press them firmly into your pie plate and crimp the edges. If you notice your crust browning too quickly during baking, create a simple foil shield by cutting a circle of aluminum foil and placing it over the crust edges during the last 20 minutes of baking. For storage, this pie keeps beautifully in the refrigerator for up to 4 days covered with plastic wrap. You can also freeze the baked pie for up to 2 months – just wrap it tightly in plastic wrap followed by aluminum foil. Thaw overnight in the refrigerator before serving. If you’re making this for Thanksgiving or other holidays, consider baking it two days ahead. The flavors meld and improve, plus you free up precious oven space on the big day. When serving to kids who might be skeptical about pumpkin pie, try letting them add their own whipped cream toppings or sprinkle with cinnamon sugar. For cleanup efficiency, immediately fill your mixing bowl with hot soapy water after pouring the filling – the residue will wipe right out. If you’re transporting this pie to a gathering, place it in a cardboard box slightly larger than the pie plate and secure with towels to prevent sliding. Remember that ovens vary, so if yours runs hot or cold, you might need to adjust baking times by 5-10 minutes. The visual cues are more reliable than strict timing. Finally, don’t stress about a perfectly beautiful pie – homemade character and delicious flavor matter far more than appearance when you’re feeding a hungry family.
Recipe Variations
- For a ginger snap crust variation, replace the standard pie crust with one made from crushed ginger snap cookies. Simply pulse about 2 cups of ginger snap cookies in a food processor until fine crumbs form, then mix with 1/4 cup melted butter and press into your pie plate. Bake at 350°F for 8 minutes before adding the filling. This adds wonderful spice flavor and eliminates the need to worry about soggy bottom crust.
- Create a streusel topping by mixing 1/2 cup flour, 1/4 cup brown sugar, 1/4 cup cold butter cubed, and 1/2 teaspoon cinnamon until crumbly. Sprinkle this over the pie during the last 15 minutes of baking. The crunchy texture contrast appeals to kids who might otherwise avoid pumpkin pie, and it hides any surface cracks that might develop.
- Make individual mini pies using muffin tins and refrigerated pie crust rounds. Press the crust into greased muffin cups, fill 3/4 full with pumpkin mixture, and bake at 350°F for 20-25 minutes. These are perfect for portion control and eliminate the mess of slicing. Kids love having their own personal pie, and they bake faster than a full-sized pie.
- Add chocolate chips to the filling for a crowd-pleasing twist that makes the pie more appealing to younger family members. Simply fold 1/2 cup of semi-sweet chocolate chips into the pumpkin mixture before pouring into the crust. The chocolate melts into pockets of goodness throughout the pie and makes it feel more like a treat than a traditional dessert.
- For a dairy-free version that accommodates food allergies, replace the sweetened condensed milk with one 13.5-ounce can of full-fat coconut milk mixed with 3/4 cup maple syrup. The coconut flavor complements the pumpkin beautifully, and you’ll still get that creamy custard texture that makes pumpkin pie so satisfying.
Frequently Asked Questions
Can I make this pumpkin pie ahead of time?
Absolutely, and I highly recommend it for busy parents! This pie actually tastes better when made 1-2 days in advance because the flavors have time to meld and develop. After baking and cooling completely, simply cover it tightly with plastic wrap and refrigerate until ready to serve. The texture firms up beautifully during this resting period, making for cleaner slices when you cut into it. This advance preparation is a game-changer during the holidays when oven space and time are at a premium. You can even freeze the baked pie for up to 2 months if you need to prepare further ahead.
Why did my pumpkin pie crack on top?
Surface cracks usually occur from overbaking or cooling too quickly. Remember that pumpkin pie continues to cook after removal from the oven, so you want to take it out when the center still has a slight jiggle. If cracks do appear, don’t stress – they’re purely cosmetic and won’t affect the taste. You can easily disguise them with whipped cream before serving. To prevent cracking in the future, make sure your oven temperature is accurate (consider using an oven thermometer) and avoid opening the oven door frequently during baking, as temperature fluctuations can cause the custard to contract.
Can I use fresh pumpkin instead of canned?
While you certainly can use fresh pumpkin, I don’t recommend it for busy parents because it adds significant time and effort. Canned pumpkin puree is consistently textured and reliably moist, whereas fresh pumpkin can vary in water content, leading to unpredictable results. If you do use fresh, you’ll need to roast, puree, and strain a sugar pumpkin to get the right consistency, which adds at least an hour of active time. For family cooking efficiency, stick with canned puree and save the fresh pumpkin experiments for when you have more leisure time.
How do I know when the pumpkin pie is done baking?
The most reliable method for busy cooks is the jiggle test. When the baking time is complete, gently shake the baking sheet – the edges of the filling should look set while the center still has a slight wobble, similar to set Jell-O. The crust should be golden brown, and a knife inserted about 1 inch from the edge should come out clean. Remember that the pie continues to set as it cools, so taking it out at the perfect moment means it will be perfectly textured after cooling. Overbaking leads to rubbery texture and surface cracks.
Can I make this recipe without eggs for allergies?
While eggs are crucial for the structure of traditional pumpkin pie, you can try substitutions if needed. For each egg, you can use 1/4 cup of canned pumpkin or sweet potato puree, though the texture will be denser. Another option is commercial egg replacer following package directions. However, these substitutions will alter the final texture, so I recommend doing a test batch first if serving to guests. For family meals, most kids won’t notice the texture difference, especially if you add the streusel topping variation to distract from any denseness.
Summary
This streamlined pumpkin pie saves busy parents time and stress during the holidays. Using simple ingredients and efficient methods, it delivers classic flavor with minimal cleanup. Perfect for making ahead when life gets chaotic.
Easy Pumpkin Pie
6
servings15
minutes50
minutesIngredients
Instructions
- 1 Preheat oven to 425°F. Place thawed pie crust on baking sheet.
- 2 In large bowl, whisk pumpkin puree and sweetened condensed milk until smooth. Add eggs and spices, mix until completely combined.
- 3 Pour filling into pie crust, smooth top. Tap gently to release air bubbles.
- 4 Bake at 425°F for 15 minutes, then reduce temperature to 350°F and bake 35-40 minutes until edges are set and center jiggles slightly.
- 5 Cool completely on wire rack (2 hours), then refrigerate at least 4 hours before serving.