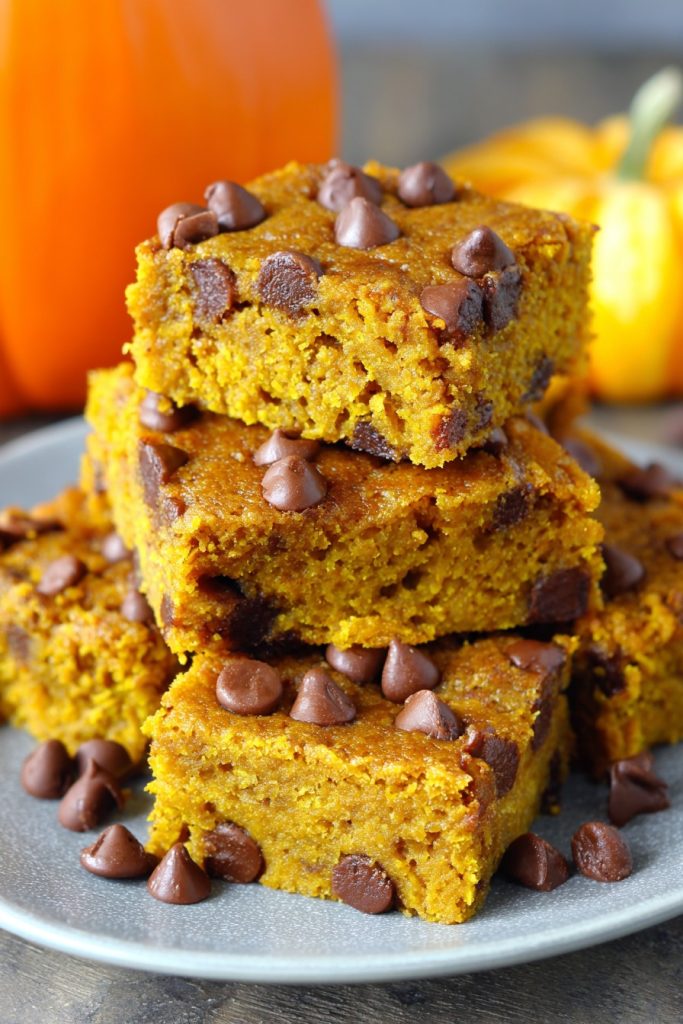
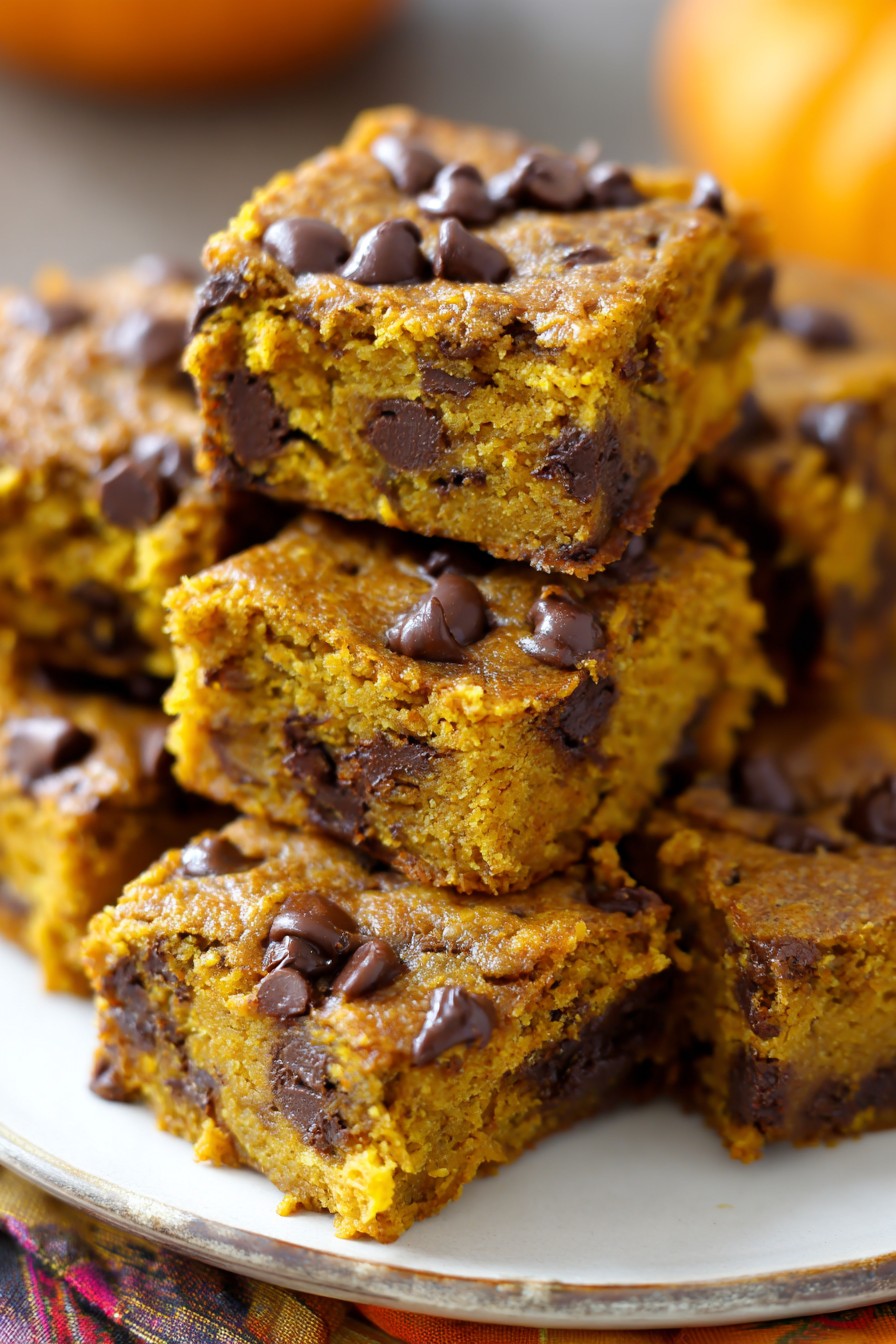
Zany as it sounds, these pumpkin chocolate chip bars might just be the only thing standing between you and a full-blown autumn meltdown. Zero excuses needed when you’ve got pumpkin puree and chocolate chips conspiring to create the most addictive dessert known to humankind. Zap your basic pumpkin bread expectations because these bars are about to stage a delicious coup in your kitchen.
Why This Recipe Works
- The pumpkin puree acts like a culinary superhero, keeping these bars moist for days while simultaneously convincing yourself you’re eating vegetables
- We use both brown and white sugar because commitment issues can be delicious when they result in the perfect caramelized crust and tender interior
- The chocolate chips aren’t just sprinkled on top – they’re mixed throughout because surface-level relationships with chocolate are for amateurs
- Baking at 350°F creates that magical golden-brown top while ensuring the center cooks through without turning into pumpkin-flavored cardboard
- Letting them cool completely before cutting is the ultimate test of willpower that separates the dessert novices from the baking pros
Ingredients
- 2 cups all-purpose flour (the reliable foundation of all good decisions)
- 1 teaspoon baking soda (the tiny chemical reaction that makes magic happen)
- 1/2 teaspoon salt (because even sweet things need a little contrast)
- 1 tablespoon pumpkin pie spice (autumn in a bottle, basically)
- 1 cup unsalted butter, softened (the rich, creamy backbone of deliciousness)
- 3/4 cup granulated sugar (for that crisp, sweet exterior)
- 3/4 cup packed brown sugar (bringing the molasses mojo to the party)
- 1 large egg (the binding agent that holds our dreams together)
- 1 teaspoon vanilla extract (the aromatic whisper of sophistication)
- 1 cup pumpkin puree (not pie filling – we’re not heathens)
- 2 cups semi-sweet chocolate chips (because more is more when it comes to chocolate)
Equipment Needed
- 9×13 inch baking pan
- Parchment paper
- Mixing bowls
- Electric mixer or strong whisking arm
- Measuring cups and spoons
- Spatula (for scraping every last bit of batter)
- Wire cooling rack
- Sharp knife for cutting clean bars
Instructions
Prep Your Pan and Preheat the Oven
First things first – let’s get that oven preheated to 350°F because nobody likes a cold reception. While it’s warming up, grab your 9×13 inch baking pan and line it with parchment paper, leaving some overhang on the sides like little paper handles. This isn’t just for easy removal later – it’s your insurance policy against bar-stuck-to-pan disasters. Lightly grease any exposed parts of the pan because we’re thorough like that. Now, in a medium bowl, whisk together your 2 cups of flour, 1 teaspoon baking soda, 1/2 teaspoon salt, and that glorious 1 tablespoon of pumpkin pie spice. Whisk until they’re all best friends – you shouldn’t see any white streaks of flour or suspicious spice clumps. This dry ingredient mingling session ensures every bite gets the perfect flavor distribution, like a well-orchestrated symphony of autumn flavors.
Cream the Butter and Sugars
Now for the main event: in a large mixing bowl, take your 1 cup of softened unsalted butter and combine it with 3/4 cup granulated sugar and 3/4 cup packed brown sugar. Use an electric mixer on medium speed to beat them together for about 2-3 minutes until the mixture becomes light, fluffy, and pale in color. This isn’t just mixing – it’s incorporating tiny air bubbles that will give your bars that perfect tender texture. The butter should be soft enough that when you press it with your finger, it leaves an indent but doesn’t feel greasy or melted. If your butter is too cold, you’ll end up with lumpy batter, and if it’s too warm, you’ll get greasy bars. Once it’s properly creamed, add your 1 large egg and 1 teaspoon vanilla extract, beating just until combined. The mixture might look slightly curdled at this point – that’s perfectly normal and will fix itself when we add the pumpkin.
Incorporate Pumpkin and Dry Ingredients
Here comes the star of the show: add your 1 cup of pumpkin puree to the butter-sugar mixture and mix on low speed until just combined. Don’t overmix here – we want to maintain that lovely fluffiness we worked so hard to create. Now, with your mixer on the lowest setting, gradually add the dry ingredients you whisked together earlier. Mix just until the flour disappears – we’re talking 30-45 seconds maximum. Overmixing at this stage is the quickest way to tough, dense bars, and nobody wants that. The batter will be thick but spreadable, like the consistency of wet sand that holds its shape when you make a sandcastle. Finally, fold in your 2 cups of chocolate chips using a spatula, making sure they’re evenly distributed throughout the batter. This is where patience pays off – take your time to gently incorporate them without deflating the batter.
Spread and Bake to Perfection
Transfer your beautiful orange-speckled batter to your prepared pan and use a spatula to spread it into an even layer, making sure to get into all the corners. The batter will be thick, so you might need to use a slightly wet spatula or your fingers to press it evenly across the pan. Pop it into your preheated 350°F oven and set your timer for 25 minutes. When the timer goes off, rotate the pan 180 degrees to ensure even baking and continue baking for another 10-15 minutes. The bars are done when the edges are golden brown and pulling away from the sides of the pan, and a toothpick inserted into the center comes out with just a few moist crumbs (not wet batter). The top should spring back lightly when touched. Remember, these continue cooking as they cool, so don’t wait for that toothpick to come out completely clean.
Cool and Cut Like a Pro
This is the hardest part of the entire recipe: patience. Remove the pan from the oven and place it on a wire cooling rack. Let the bars cool completely in the pan – we’re talking 2-3 hours of pure torture while that amazing aroma taunts you. Trying to cut warm bars is like trying to slice through warm pudding – you’ll end up with a mess. Once completely cool, use the parchment paper handles to lift the entire slab out of the pan onto a cutting board. Use a sharp knife to cut into 24 bars, wiping the knife clean between cuts for those perfect, clean edges. If you want super sharp corners, you can even chill the bars in the refrigerator for 30 minutes before cutting. Store them in an airtight container at room temperature for up to 5 days, though let’s be real – they probably won’t last that long.
Tips and Tricks
Let’s talk about the art of bar perfection, because anyone can follow a recipe, but true baking mastery comes from understanding the why behind the what. First up: pumpkin puree selection. Always, and I mean always, check that you’re grabbing pumpkin puree and not pumpkin pie filling. The latter comes pre-spiced and sweetened, which will throw off our carefully balanced flavor profile and likely result in bars that are too sweet and potentially soggy. If you’re feeling extra ambitious, you can make your own pumpkin puree by roasting sugar pumpkins, but honestly, the canned stuff works beautifully and saves you approximately three hours of your life.
Now let’s discuss chocolate chip distribution science. If you find your chocolate chips sinking to the bottom during baking, here’s a pro trick: toss them in about a tablespoon of flour from your measured amount before folding them into the batter. This creates a light coating that helps them stay suspended throughout the bars rather than congregating at the bottom like chocolate chip rebels. Also, consider using a mix of chocolate chip sizes – maybe some regular semi-sweet chips along with mini chips for maximum chocolate coverage in every single bite.
Temperature control is your secret weapon here. If your bars are baking too quickly on the edges while the center remains underdone, try lowering your oven temperature by 25 degrees and extending the baking time slightly. Oven thermostats can be notoriously inaccurate, so investing in an inexpensive oven thermometer can revolutionize your baking game. Another game-changer: if you have convection bake, use it! The circulating air helps bake the bars more evenly, though you may need to reduce the temperature by 25 degrees and check for doneness a few minutes early.
For those who want next-level bar texture, consider this: after spreading the batter in the pan, tap the pan firmly on the counter a few times to release any air bubbles and help settle the batter evenly. And if you’re serving these for a special occasion, you can sprinkle a few extra chocolate chips on top right after they come out of the oven – they’ll melt slightly and create that professional bakery look. Finally, for the cleanest cuts imaginable, use a plastic knife rather than metal – it sounds counterintuitive, but plastic knives glide through without dragging the chocolate chips and creating messy edges.
Recipe Variations
- For the nut enthusiasts, swap out 1 cup of the chocolate chips for chopped pecans or walnuts to add that delightful crunch and toasty flavor that pairs so beautifully with pumpkin. You could even do half chocolate chips, half nuts if you’re feeling particularly indecisive but want the best of both worlds. Toasting the nuts first in a 350°F oven for 5-7 minutes will elevate their flavor from “nice addition” to “where have you been all my life” status.
- Transform these into pumpkin blondies by eliminating the chocolate chips entirely and adding 1 cup of white chocolate chips and 1/2 cup of dried cranberries. The tartness of the cranberries cuts through the sweetness beautifully, creating a more sophisticated flavor profile that might just impress your mother-in-law. You could even add a teaspoon of orange zest to really make those cranberry flavors pop like fireworks on the Fourth of July.
- Create a streusel-topped version that will make you feel fancy without the effort of making two separate recipes. Simply reserve about 1/2 cup of the batter before adding the chocolate chips, mix it with 2 tablespoons of flour, 2 tablespoons of brown sugar, and 1/4 cup of rolled oats until crumbly, then sprinkle over the top before baking. The result is a textural masterpiece that’s part bar, part coffee cake, and entirely addictive.
- For the spice adventurers, amplify the warmth by adding 1/2 teaspoon of ground ginger, 1/4 teaspoon of ground cloves, and maybe even a pinch of black pepper to really make those flavors sing. If you’re feeling particularly bold, a tablespoon of instant espresso powder will deepen the chocolate flavor without making the bars taste like coffee, creating a more complex, grown-up dessert that pairs beautifully with your afternoon tea or evening wine.
- Make them gluten-free by substituting the all-purpose flour with your favorite 1:1 gluten-free flour blend. Just be sure to let the batter rest for 30 minutes before baking to allow the flours to properly hydrate, which prevents that gritty texture that sometimes plagues gluten-free baked goods. You might need to add an extra tablespoon of pumpkin puree if the batter seems too thick, as gluten-free flours often absorb more moisture than their wheat-based counterparts.
Frequently Asked Questions
Can I use fresh pumpkin instead of canned pumpkin puree?
Absolutely, though it requires a bit more effort and precision. You’ll need to start with a sugar pumpkin (not the giant carving kind), cut it in half, scoop out the seeds, and roast it cut-side down at 375°F for about 45-60 minutes until completely tender. Once cool enough to handle, scoop out the flesh and puree it in a food processor or blender until smooth. The crucial step here is straining the puree through cheesecloth to remove excess moisture – fresh pumpkin contains significantly more water than canned, which can lead to soggy bars. You’ll need about 2 cups of fresh pumpkin to yield 1 cup of properly drained puree.
Why did my bars turn out cakey instead of dense and fudgy?
This usually comes down to two potential culprits: overmixing or inaccurate measuring. When you overmix the batter after adding the flour, you develop the gluten proteins, creating a more bread-like texture. The second common issue is measuring flour by scooping directly from the bag with the measuring cup, which can pack in up to 50% more flour than intended. Instead, spoon the flour into your measuring cup and level it off with a knife. Also, make sure your baking soda is fresh – old leavening agents can produce inconsistent results. The ideal texture should be moist and dense, similar to brownies but with that distinctive pumpkin flavor shining through.
Can I make these bars ahead of time and freeze them?
These bars freeze beautifully, making them perfect for emergency dessert situations (which, let’s be honest, happen more often than we’d like to admit). Once completely cooled and cut, arrange them in a single layer on a parchment-lined baking sheet and flash freeze for about 2 hours until firm. Then transfer them to an airtight container or freezer bag with parchment between layers to prevent sticking. They’ll keep for up to 3 months in the freezer. To serve, simply thaw at room temperature for a few hours, or if you’re impatient like me, microwave individual bars for 15-20 seconds until just warmed through. The texture remains perfect, and nobody will ever know they weren’t fresh from the oven.
My chocolate chips all sank to the bottom – what did I do wrong?
This is the baking equivalent of all your friends gathering in one corner at a party – frustrating but fixable! Heavy mix-ins like chocolate chips tend to sink when the batter is too thin or when you overmix after adding them. To prevent this, make sure your butter isn’t too soft or melted, as this creates a thinner batter. Also, toss your chocolate chips with about a tablespoon of the measured flour before folding them in – this creates a light coating that helps them stay suspended throughout the bars. Fold them in gently and just until distributed, then get the batter into the oven promptly. If all else fails, you can also try using mini chocolate chips, which are lighter and less likely to make that downward journey.
Can I reduce the sugar in this recipe for a less sweet version?
You can certainly experiment with reducing the sugar, but proceed with caution as sugar does more than just sweeten – it contributes to texture, moisture retention, and browning. I wouldn’t recommend reducing the total sugar by more than 1/4 cup, and I’d suggest taking it primarily from the granulated sugar rather than the brown sugar, as the brown sugar contributes more moisture and flavor complexity. The bars will be slightly less tender and may not develop that beautiful golden crust, but they’ll still be delicious. If you’re looking for a significantly less sweet option, you might be better off finding a recipe specifically designed that way rather than modifying this one, as baking is essentially edible chemistry and changing one element affects everything else.
Summary
These pumpkin chocolate chip bars combine autumn’s favorite squash with everyone’s favorite chocolate in a perfect marriage of flavors and textures. They’re moist, generously studded with chocolate, and deliver that warm spice flavor we all crave when leaves start turning. Simple to make but impressive enough for company, they might just become your new seasonal tradition.
Pumpkin Chocolate Chip Bars
4
servings15
minutes35
minutesIngredients
Instructions
- 1 Preheat oven to 350°F. Line 9x13 inch baking pan with parchment paper.
- 2 Whisk flour, baking soda, salt, and pumpkin pie spice in medium bowl.
- 3 Cream butter and both sugars until light and fluffy, about 2-3 minutes.
- 4 Beat in egg and vanilla, then mix in pumpkin puree until combined.
- 5 Gradually mix in dry ingredients until just combined, then fold in chocolate chips.
- 6 Spread batter evenly in prepared pan and bake 35-40 minutes until golden and set.
- 7 Cool completely in pan before cutting into 24 bars.


