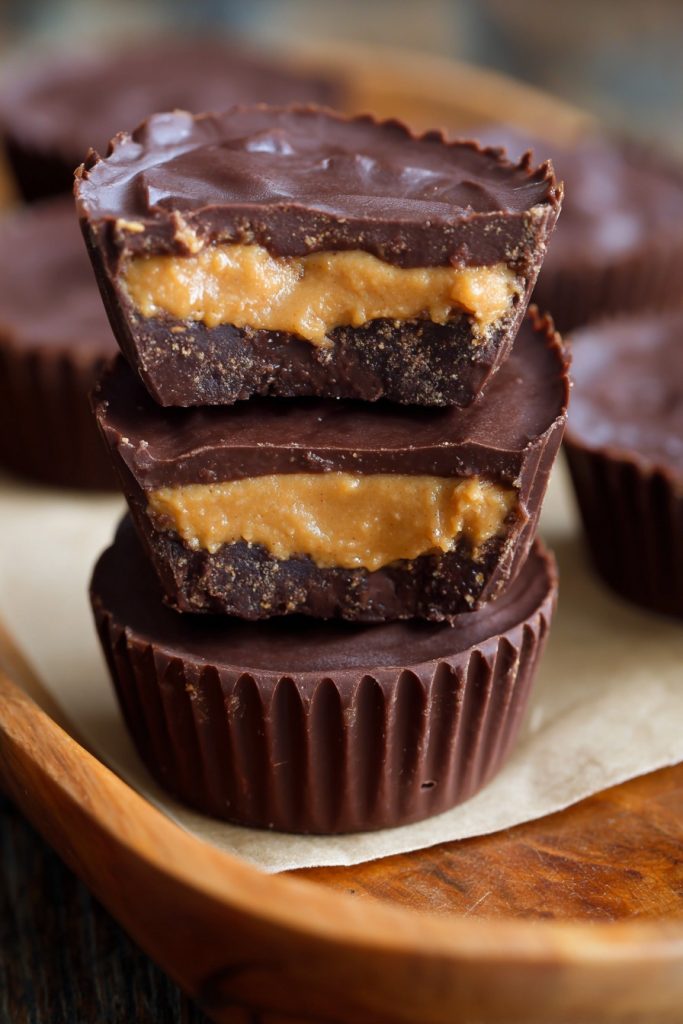
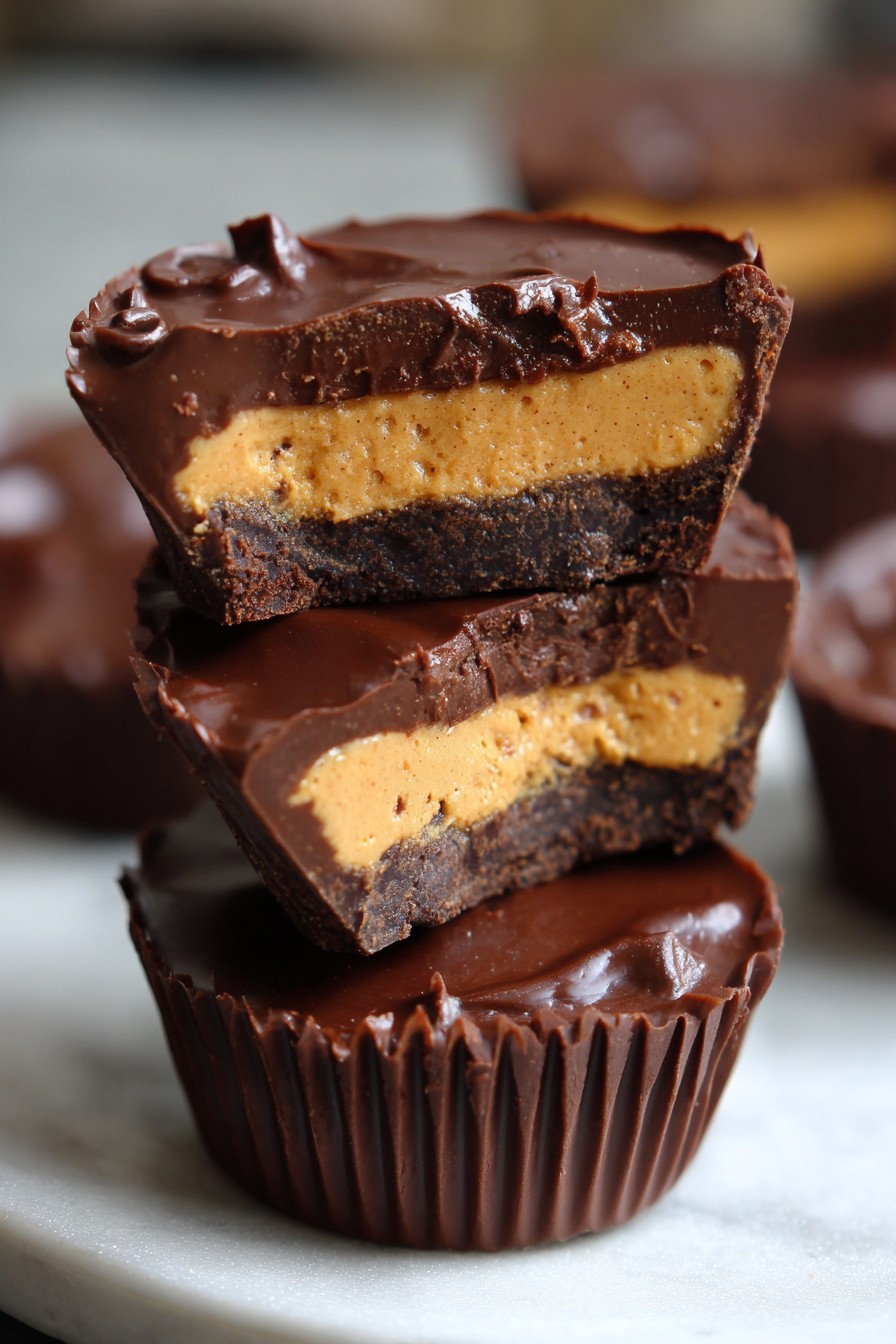
Just when you thought peanut butter cups couldn’t get any better, this protein-packed version proves otherwise. Juggling work, kids, and household responsibilities means I’m always looking for nutritious snacks that actually get eaten. These homemade protein peanut butter cups deliver that classic candy satisfaction while packing a serious nutritional punch your whole family will love.
Why This Recipe Works
- These protein peanut butter cups come together in under 20 minutes of active time, making them perfect for squeezing into packed schedules between school pickups and extracurricular activities. You don’t need special baking skills or complicated equipment – just a microwave, a bowl, and a muffin tin. The hands-off freezing time means you can prep these while helping with homework or folding laundry, then simply pop them out when solid.
- With 8 grams of protein per serving, these treats actually help keep everyone full and satisfied between meals instead of causing the sugar crash that store-bought versions often trigger. The combination of protein powder and natural peanut butter provides lasting energy that helps kids power through afternoon activities and gives parents the boost needed to tackle dinner prep and evening routines.
- Cleanup is minimal since you’re only using a few bowls and a muffin tin, and the silicone liners mean no scrubbing stuck-on chocolate. The recipe uses simple ingredients you likely already have in your pantry, eliminating extra grocery store trips during already busy weeks. Plus, making a batch means you have healthy snacks ready for lunchboxes, after-school hunger, or your own midday slump for days to come.
- You control the sweetness level completely, allowing you to adjust based on your family’s preferences and reducing the refined sugar content significantly compared to commercial versions. The recipe is flexible enough to accommodate different dietary needs while still delivering that irresistible peanut butter and chocolate combination everyone craves.
Ingredients
- 1 cup dark chocolate chips
- 1 teaspoon coconut oil
- 1/2 cup creamy peanut butter
- 1/4 cup vanilla protein powder
- 2 tablespoons maple syrup
- 1/4 teaspoon sea salt
- 12 silicone muffin liners
Equipment Needed
- Standard 12-cup muffin tin
- Silicone muffin liners
- Medium microwave-safe bowl
- Small mixing bowl
- Measuring cups and spoons
- Rubber spatula
- Tablespoon measuring spoon or cookie scoop
Instructions
Prepare Your Workstation and Melt the Chocolate Base
Start by placing your silicone muffin liners in the muffin tin – this keeps everything stable and prevents spills during assembly. Measure out exactly 1 cup of dark chocolate chips into your microwave-safe bowl and add 1 teaspoon of coconut oil. The coconut oil helps create a smoother, more fluid chocolate that’s easier to work with and gives your finished cups that professional snap. Microwave the chocolate mixture on high power for 30 seconds, then remove and stir thoroughly with your rubber spatula. Continue microwaving in 15-second intervals, stirring after each burst, until the chocolate is completely smooth and liquid. This gradual approach prevents the chocolate from seizing or burning, which can happen if you try to melt it all at once. The total melting time should be around 60-90 seconds depending on your microwave’s power. You’ll know it’s ready when no solid chocolate pieces remain and the mixture pours smoothly off your spatula.
Create the Chocolate Layer Foundation
Using your tablespoon measure, carefully portion about 1 tablespoon of melted chocolate into the bottom of each silicone liner. Gently lift and tilt the muffin tin to spread the chocolate evenly across the bottom of each cup, creating a uniform base layer. Aim for coverage that’s thick enough to provide structural support but thin enough that you still have plenty of chocolate for the top layer. The chocolate should cover the entire bottom surface without pooling too heavily in the center. Once all cups have their base layer, transfer the muffin tin to your freezer and set a timer for exactly 10 minutes. This initial freezing step is crucial because it creates a solid foundation that prevents the peanut butter filling from sinking through to the bottom. While the chocolate hardens, you can quickly wash your chocolate bowl or move on to preparing the filling.
Mix the Protein-Packed Peanut Butter Filling
While the chocolate base sets in the freezer, combine 1/2 cup of creamy peanut butter, 1/4 cup of vanilla protein powder, 2 tablespoons of maple syrup, and 1/4 teaspoon of sea salt in your small mixing bowl. Use your rubber spatula to mix everything together until completely smooth and well-combined. The mixture should be thick but spreadable – if it seems too dry or crumbly, add another teaspoon of maple syrup. If it’s too runny, add an additional tablespoon of protein powder. The sea salt enhances the peanut butter flavor and balances the sweetness, creating that perfect sweet-salty combination that makes these treats irresistible. Mix for at least 1-2 minutes to ensure the protein powder is fully incorporated without any dry pockets, which could create a gritty texture in your finished cups.
Assemble the Peanut Butter Layer
Remove the muffin tin from the freezer after exactly 10 minutes – the chocolate base should be firm to the touch but not rock-hard. Using a clean tablespoon measure or small cookie scoop, portion about 1 heaping tablespoon of the peanut butter mixture into the center of each chocolate base. Gently press and spread the filling toward the edges, leaving about 1/8-inch border of exposed chocolate around the perimeter. This border is important because it allows the top chocolate layer to seal completely around the edges, creating that classic peanut butter cup appearance and preventing the filling from leaking out. The peanut butter layer should be slightly mounded in the center but evenly distributed. Work relatively quickly during this step since the cold chocolate base will begin to soften if left at room temperature too long.
Complete with the Final Chocolate Layer
Return to your remaining melted chocolate – if it has thickened or begun to set, microwave it for another 15 seconds to return it to pouring consistency. Carefully spoon or pour the remaining chocolate over each peanut butter center, using the back of your spoon to spread it evenly to the edges. Make sure the chocolate completely covers the peanut butter filling and connects with the exposed border from the previous step, creating a complete seal. Tap the muffin tin gently on your countertop a few times to remove any air bubbles and ensure the top chocolate layer is smooth and even. The chocolate should be thick enough to completely encapsulate the filling but thin enough that you can still see the peanut butter layer beneath. If you run short on chocolate, you can melt an additional 1/4 cup to ensure proper coverage.
Set and Finalize Your Protein Cups
Once all cups have their top chocolate layer, carefully transfer the muffin tin back to the freezer. Set a timer for 20 minutes – this is the minimum time needed for the cups to set completely and develop that satisfying snap when you bite into them. After 20 minutes, test one cup by gently pressing the top – it should feel completely firm with no give. If needed, continue freezing for another 5-10 minutes until fully set. Once solid, remove the cups from the silicone liners – they should pop out easily without sticking. For best texture and flavor, let the cups sit at room temperature for 2-3 minutes before serving to take the chill off. Store any remaining cups in an airtight container in the refrigerator for up to two weeks, though they rarely last that long in most households.
Tips and Tricks
If you find yourself making these protein peanut butter cups regularly (and you probably will), consider doubling the batch and storing extras in freezer-safe containers. They keep beautifully frozen for up to three months and can be grabbed straight from the freezer for lunchboxes – they’ll thaw perfectly by snack time. When measuring sticky ingredients like peanut butter and maple syrup, lightly spray your measuring cups with cooking spray first. This creates a non-stick surface that allows the ingredients to slide out cleanly, reducing waste and cleanup time. For families with varying taste preferences, you can create a custom batch by using different protein powder flavors in separate small bowls. Try chocolate protein powder for serious chocolate lovers or unflavored protein powder mixed with a teaspoon of cinnamon for a different twist. If your peanut butter filling seems too thick to spread easily, don’t add more liquid – instead, warm the bowl slightly by placing it in a larger bowl of warm water for 30-60 seconds. This gentle warming makes the filling more pliable without altering the recipe ratios. When working with melted chocolate, always ensure your bowls and utensils are completely dry, as even a small amount of moisture can cause the chocolate to seize and become grainy. If this happens, you can sometimes rescue it by stirring in an additional teaspoon of coconut oil. For easier portioning of the peanut butter filling, use a small cookie scoop or melon baller rather than trying to spoon it evenly. This creates uniform layers and speeds up the assembly process significantly. If you’re making these with kids, assign age-appropriate tasks like placing the liners in the tin, stirring the peanut butter mixture, or portioning the filling. This turns snack prep into quality time while teaching valuable kitchen skills. For a professional presentation, you can sprinkle a tiny pinch of flaky sea salt on top of each cup after adding the final chocolate layer but before freezing. This enhances flavor and makes them look store-bought. If your chocolate begins to harden while you’re working with it, don’t re-microwave the entire batch – instead, transfer what you need to a smaller bowl and reheat just that portion to maintain the proper consistency for the remaining cups.
Recipe Variations
- For a nut-free version that’s school-safe, substitute sunflower seed butter for the peanut butter and use sunflower seed butter cups instead of peanut butter cups in your mind when assembling. The flavor profile is remarkably similar, and most people can’t tell the difference. You might need to reduce the maple syrup slightly since sunflower seed butter is often sweeter than natural peanut butter. This variation allows you to send these protein-packed treats in lunchboxes to schools with nut restrictions while still providing that satisfying protein boost.
- Create a double chocolate version by adding 2 tablespoons of cocoa powder to the peanut butter filling mixture and using chocolate protein powder instead of vanilla. This intensifies the chocolate flavor for true chocolate enthusiasts and makes the cups even more decadent-tasting while maintaining the protein content. You may need to add an extra teaspoon of maple syrup to balance the additional cocoa’s bitterness. This variation works particularly well for disguising the protein powder taste if you have family members who are skeptical about protein-enhanced treats.
- Incorporate crunch by mixing 2 tablespoons of crushed rice cereal or chopped roasted peanuts into the peanut butter filling. The textural contrast makes these even more interesting to eat and mimics the experience of more elaborate gourmet candy. For rice cereal, crush it lightly so it incorporates evenly without making the filling too difficult to spread. For peanuts, chop them fairly fine to prevent tearing the chocolate layers when you bite into the finished cups. This variation adds about 5 minutes to your prep time but delivers significant payoff in eating experience.
- Make them vegan by using dairy-free chocolate chips and plant-based protein powder. Many dark chocolate chips are naturally vegan, but always check the label to be sure. For the protein powder, pea protein or brown rice protein blends work well and provide similar texture and binding properties. You might need to adjust the maple syrup quantity slightly depending on the sweetness of your protein powder. This variation ensures everyone can enjoy these treats regardless of dietary preferences or restrictions.
- Create a swirled effect by reserving 2 tablespoons of the peanut butter filling and dropping small dollops onto the top chocolate layer before freezing. Use a toothpick to gently swirl the peanut butter into the chocolate, creating a marbled appearance that looks professional and fancy. This doesn’t change the flavor significantly but makes the cups more visually appealing for special occasions or when you want to impress guests with minimal extra effort.
Frequently Asked Questions
Can I use a different type of protein powder in this recipe?
Absolutely, you can substitute different protein powders, but the results may vary slightly depending on the type you choose. Whey protein isolate tends to create the smoothest texture and mixes well with the peanut butter without making the filling too dry. Plant-based proteins like pea, brown rice, or hemp may absorb more liquid, so you might need to add an extra teaspoon of maple syrup or peanut butter to maintain the proper consistency. Casein protein can make the filling quite thick and may require additional liquid. The key is to mix thoroughly and adjust the wet ingredients if needed to achieve a spreadable but not runny filling. Avoid protein powders with added gums or thickeners as they can create an unpleasant gummy texture in the finished cups.
How should I store these protein peanut butter cups and how long do they last?
Store your completed protein peanut butter cups in an airtight container in the refrigerator for up to two weeks. The cold temperature helps maintain their shape and prevents the chocolate from becoming too soft. If you need to store them longer, they freeze exceptionally well for up to three months. When freezing, place them in a single layer on a baking sheet until solid, then transfer to a freezer-safe container with parchment paper between layers to prevent sticking. To serve frozen cups, let them sit at room temperature for 5-7 minutes to take the chill off. Avoid storing them at room temperature for extended periods, as the chocolate may become soft and the protein filling could potentially spoil, especially in warmer environments.
Can I make these without a microwave or silicone liners?
Yes, you can adapt this recipe if you don’t have these specific tools. For melting chocolate without a microwave, use a double boiler method: place a heatproof bowl over a saucepan with 1-2 inches of simmering water, making sure the bottom of the bowl doesn’t touch the water. Stir the chocolate and coconut oil until melted and smooth. If you don’t have silicone liners, use paper muffin liners lightly sprayed with cooking spray, though the removal process may be slightly more difficult. Alternatively, you can create free-form cups on a parchment-lined baking sheet by spreading small circles of chocolate, adding the filling, then topping with more chocolate. This method requires a bit more skill but produces equally delicious results with equipment you likely already have in your kitchen.
Are these protein peanut butter cups actually healthy compared to store-bought versions?
While I hesitate to call any candy “healthy,” these homemade protein peanut butter cups are certainly a more nutritious option than most commercial versions. Store-bought peanut butter cups typically contain high fructose corn syrup, hydrogenated oils, and significantly more sugar with little to no protein. Our version uses natural peanut butter, controlled sweetening, and adds 8 grams of protein per serving, which helps with satiety and blood sugar stability. You’re also avoiding artificial flavors, preservatives, and other additives common in mass-produced candy. However, they’re still a treat and should be enjoyed in moderation as part of a balanced diet. The protein content makes them more satisfying, so you’re likely to eat fewer than you might with conventional candy.
My chocolate seized and became grainy – can I fix it?
Chocolate seizing is frustrating but often fixable. If your melted chocolate becomes thick, grainy, or clumpy, it usually means moisture has gotten into it. Immediately remove it from the heat and stir in one additional teaspoon of coconut oil at a time until the chocolate becomes smooth again. Sometimes adding a tablespoon of warm water or milk while stirring vigorously can also rescue seized chocolate, though this may affect the final texture slightly. If neither method works, it’s better to start over with fresh chocolate rather than proceeding with grainy chocolate that won’t set properly. To prevent seizing in the future, always ensure your bowls, utensils, and work surface are completely dry, and avoid covering the bowl while melting as condensation can form and drip into the chocolate.
Summary
These protein peanut butter cups deliver classic candy satisfaction with nutritional benefits that busy families need. The 20-minute active preparation fits perfectly into packed schedules, while the protein content provides lasting energy between meals. Simple ingredients and minimal cleanup make this recipe a practical solution for healthy homemade treats.
Protein Peanut Butter Cups
6
servings15
minutes5
minutesIngredients
Instructions
- 1 Place silicone liners in muffin tin. Melt chocolate chips with coconut oil in microwave-safe bowl, stirring every 15 seconds until smooth.
- 2 Spoon 1 tablespoon melted chocolate into each liner, spread evenly, and freeze for 10 minutes until firm.
- 3 Mix peanut butter, protein powder, maple syrup, and sea salt until smooth and spreadable.
- 4 Remove chocolate bases from freezer. Spoon 1 tablespoon peanut butter mixture into center of each, leaving 1/8-inch border.
- 5 Top with remaining melted chocolate, spreading to edges to seal. Tap pan to remove air bubbles.
- 6 Freeze for 20 minutes until completely set. Remove from liners and let sit at room temperature for 2-3 minutes before serving.