Running out of time but need to satisfy those sweet cravings? These banana desserts are your new best friend for busy weeknights when the kids are begging for something sweet but you’ve barely got energy left. Really, who has hours to spend in the kitchen after work, homework help, and the endless cycle of laundry? These recipes transform those spotty bananas on your counter into magical treats with minimal effort and maximum payoff.
Why This Recipe Works
- Five-minute prep time means you can go from zero to dessert while the kids are brushing their teeth, using ingredients you likely already have in your pantry without special trips to the store
- Single-bowl mixing cuts cleanup down to practically nothing – just one bowl and a spoon to wash instead of multiple measuring cups and mixing tools scattered across your counter
- Uses overripe bananas that would otherwise go to waste, saving you money while reducing food waste in your household budget
- Flexible baking times accommodate unpredictable family schedules – if soccer practice runs late, the dessert won’t suffer
- Kid-friendly assembly means even little hands can help without creating massive messes that take longer to clean up than the actual cooking
Ingredients
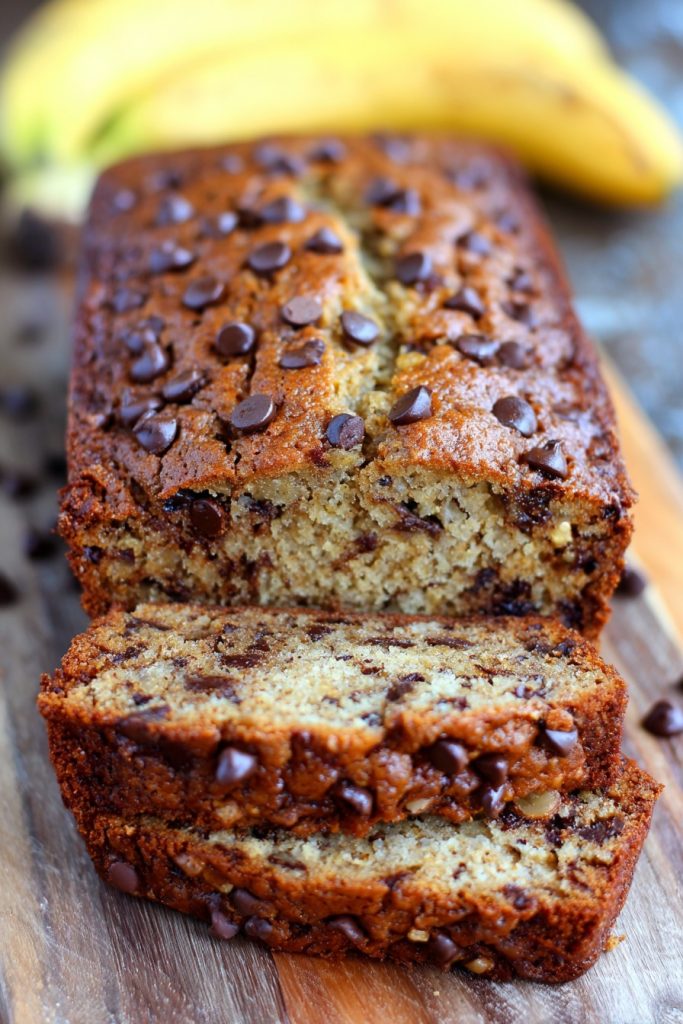
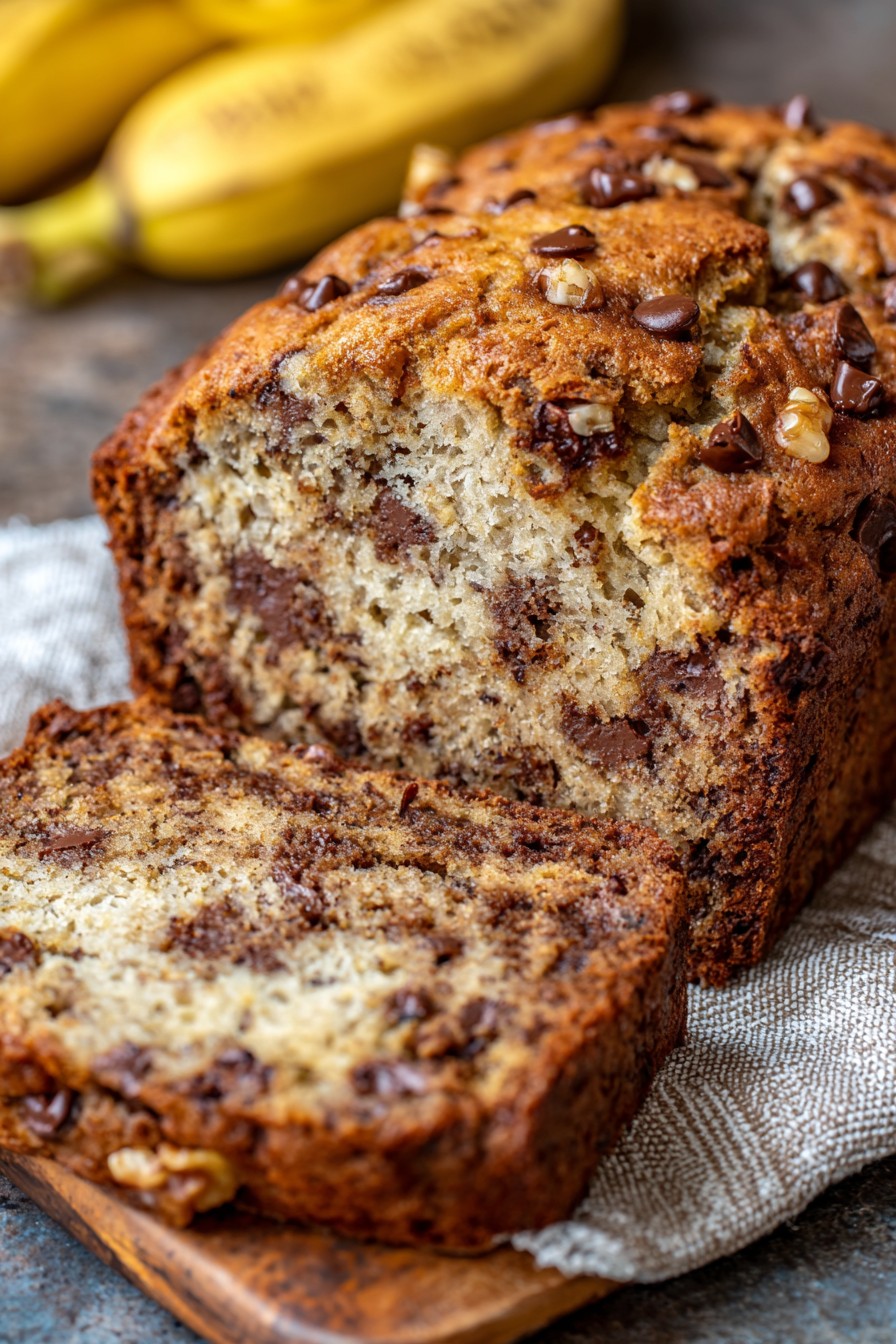
- 3 very ripe medium bananas, mashed with brown spots (about 1 1/2 cups)
- 1/2 cup unsalted butter, melted and slightly cooled
- 3/4 cup packed light brown sugar
- 1 large egg at room temperature
- 1 teaspoon pure vanilla extract
- 1 1/2 cups all-purpose flour, spooned and leveled
- 1 teaspoon baking soda
- 1/2 teaspoon ground cinnamon
- 1/4 teaspoon salt
- 1 cup semi-sweet chocolate chips
- Optional: 1/2 cup chopped walnuts for crunch
Equipment Needed
- 1 large mixing bowl
- Standard 9×5 inch loaf pan
- Fork or potato masher
- Measuring cups and spoons
- Rubber spatula
- Wire rack for cooling
Instructions
Prep Your Bananas and Wet Ingredients
Start by peeling those three ripe bananas and dropping them directly into your large mixing bowl. Use a fork or potato masher to thoroughly mash them until no large chunks remain – you’re aiming for a relatively smooth consistency with just small bits of banana texture. The riper your bananas, the easier they’ll mash and the sweeter your dessert will taste naturally. Now pour in that melted butter that’s had a minute to cool down (so it doesn’t cook your egg), followed by the packed brown sugar. Use your fork or a spoon to stir everything together until the sugar begins to dissolve into the banana mixture. Crack in your room temperature egg and add the vanilla extract, then mix until everything is fully incorporated and you have a uniform wet mixture. Pro tip: If your butter is too hot, it will scramble the egg, so always let it cool for about 5 minutes after melting.
Combine Dry Ingredients
Now it’s time to add your dry ingredients directly to the same bowl – no separate mixing bowl needed here. Measure out your flour by spooning it into the measuring cup and leveling it off with a knife (this prevents packing too much flour). Add the baking soda, cinnamon, and salt right on top of the flour. Before you start mixing, use your fork or spoon to gently stir the dry ingredients together right there in the bowl – this helps distribute the baking soda evenly. Once they’re lightly combined, make a well in the center of your wet ingredients and pour the dry mixture in. Use a folding motion with your spatula to combine everything, being careful not to overmix. Stop as soon as you no longer see dry flour patches – a few small lumps are perfectly fine and actually better for texture.
Add Mix-ins and Prepare Pan
Now for the fun part that kids love to help with – adding the chocolate chips! Measure out one cup of semi-sweet chocolate chips and sprinkle them over your batter. If you’re using walnuts, add those now too. Use your spatula to gently fold them in until they’re evenly distributed throughout the batter. While you’re doing this, take your 9×5 inch loaf pan and give it a quick spray with non-stick cooking spray or brush it with a little extra melted butter. You don’t need to line it with parchment paper unless you really want easy removal – the spray works just fine. Pro tip: Reserve a tablespoon of chocolate chips to sprinkle on top before baking for a prettier finished product that looks like you spent more time than you actually did.
Bake to Perfection
Pour your completed batter into the prepared loaf pan and use your spatula to spread it evenly into all corners. If you saved those extra chocolate chips, now’s the time to sprinkle them across the top. Place the pan in the center rack of your preheated 350°F oven and set your timer for 50 minutes. Resist the urge to open the oven door during the first 40 minutes of baking – that rush of cold air can cause your dessert to fall. At the 50-minute mark, insert a toothpick into the center – it should come out with just a few moist crumbs attached, not wet batter. If needed, bake for another 5-10 minutes until done. The top should be golden brown and spring back when lightly touched.
Cool and Serve
Once baked, remove your banana dessert from the oven and place the pan on a wire rack to cool for at least 30 minutes. This cooling time is crucial – if you try to remove it from the pan too soon, it might break apart. After 30 minutes, run a butter knife around the edges to loosen it, then carefully invert the pan to release your dessert onto the wire rack. Let it cool completely before slicing – I know it’s tempting to cut into it warm, but waiting ensures clean slices that won’t crumble. If you absolutely can’t wait, serve it warm with a scoop of vanilla ice cream and accept that it might be a bit messy. Pro tip: For extra neat slices, use a serrated knife and wipe it clean between cuts.
Tips and Tricks
Freezing bananas at their peak ripeness is your secret weapon for always having dessert-ready fruit. When your bananas develop those perfect brown spots, simply peel them, place them in a freezer bag, and freeze for up to 3 months. Thaw them in the refrigerator overnight or microwave in 30-second bursts when you’re ready to bake. The freezing process actually makes them even sweeter and easier to mash. For measuring flour accurately without a kitchen scale, always use the spoon-and-level method: spoon flour into your measuring cup until heaping, then level off with a straight edge. Never scoop directly from the bag with your measuring cup – this can pack in up to 25% more flour and result in dry, dense baked goods. If you find yourself without brown sugar, you can make your own by mixing 1 cup white sugar with 1 tablespoon molasses – stir vigorously until fully combined and no streaks remain. For busy mornings, mix the dry ingredients the night before and store in an airtight container, then just combine with the wet ingredients when you’re ready to bake. If your family has different preferences, consider baking in muffin tins instead of a loaf pan – reduce baking time to 20-25 minutes and you’ll have individual portions that are perfect for lunchboxes. Store leftovers wrapped tightly at room temperature for 3 days or freeze individual slices for up to 3 months – just pop frozen slices in the toaster for a quick warm treat. For easier cleanup, consider using disposable aluminum loaf pans when you’re really pressed for time – they’re inexpensive and eliminate pan washing entirely.
Recipe Variations
- Chocolate Banana Swirl: Reserve 1/4 cup of batter before adding chocolate chips, mix the reserved batter with 2 tablespoons cocoa powder, then swirl through the main batter with a knife for marbled effect that looks fancy but takes seconds
- Peanut Butter Banana: Swirl in 1/2 cup of creamy peanut butter into the batter before baking, or for peanut butter chips lovers, substitute chocolate chips with peanut butter chips for that classic flavor combination kids adore
- Healthy Morning Version: Reduce brown sugar to 1/2 cup, add 1/2 cup old-fashioned oats, and use whole wheat flour instead of all-purpose for a breakfast-approved treat that still satisfies sweet cravings
- Tropical Twist: Add 1/2 cup shredded coconut and 1/4 cup crushed pineapple (well-drained) to the batter, perfect for summer months when you want something lighter and fruitier
- Spiced Apple Banana: Replace chocolate chips with 1 cup finely chopped apples and add 1/2 teaspoon additional cinnamon plus 1/4 teaspoon nutmeg, creating a fall-inspired dessert that makes your kitchen smell amazing
Frequently Asked Questions
Can I make this recipe without eggs?
Absolutely! For egg-free versions, you can substitute with 1/4 cup unsweetened applesauce or 1/4 cup plain yogurt. The applesauce will make your dessert slightly denser but equally moist, while yogurt adds a subtle tang that complements the banana flavor beautifully. Another option is using a “flax egg” by mixing 1 tablespoon ground flaxseed with 3 tablespoons water, letting it sit for 5 minutes until gelatinous. All these substitutions work well and won’t significantly alter the baking time, though the texture might be slightly different from the original version.
How do I know when my bananas are ripe enough?
Your bananas are perfect when they’re covered in brown spots and feel soft to the touch – this indicates the starches have converted to sugars, giving you natural sweetness without needing extra sugar. If your bananas are still mostly yellow with just a few spots, they’ll work but your dessert might be less sweet and more dense. Never use green bananas as they lack the necessary sweetness and moisture content. If you need to ripen bananas quickly, place them in a brown paper bag with an apple overnight – the ethylene gas from the apple accelerates ripening dramatically.
Can I double this recipe for a crowd?
Doubling works beautifully for serving larger groups or for meal prepping. Simply double all ingredients exactly and divide between two 9×5 inch loaf pans or use one 9×13 inch baking pan. The baking time will be similar for loaf pans but may need 5-10 minutes longer if using a single larger pan. Doubled recipes also freeze excellently – wrap cooled slices individually in plastic wrap then place in freezer bags for up to 3 months. This makes holiday preparation or busy week planning much easier when you can grab ready-made desserts from the freezer.
Why did my dessert sink in the middle?
Sinking usually occurs from overmixing the batter or opening the oven door too early. When you overmix, you develop too much gluten, creating a structure that can’t support itself as it cools. Opening the oven door before the structure has set causes temperature fluctuations that collapse the delicate air bubbles. Other causes include underbaking or using expired baking soda. To prevent sinking, mix just until combined, avoid peeking during the first 40 minutes of baking, and test your baking soda freshness by adding a pinch to vinegar – it should bubble vigorously immediately.
Can I make this recipe gluten-free?
Yes, you can successfully make this gluten-free by using a 1:1 gluten-free flour blend that contains xanthan gum. I’ve had great results with Bob’s Red Mill and King Arthur blends. The texture will be slightly more delicate and may require 5-10 minutes less baking time, so start checking at 45 minutes. Don’t use single flours like almond or coconut flour alone as they behave very differently. Gluten-free versions may be more crumbly when warm but firm up nicely once completely cooled. Store gluten-free versions in the refrigerator for best texture.
Summary
This five-minute prep banana dessert transforms overripe fruit into family-friendly treats with minimal cleanup. Using one bowl and pantry staples, it delivers sweet satisfaction without stressing busy schedules. Perfect for last-minute cravings or using up bananas that would otherwise go to waste.
Easy Banana Dessert
6
servings5
minutes50
minutesIngredients
Instructions
- 1 Preheat oven to 350°F. Mash bananas in large bowl, then mix in melted butter, brown sugar, egg, and vanilla until combined.
- 2 Add flour, baking soda, cinnamon, and salt to wet ingredients. Stir until just combined without overmixing.
- 3 Fold in chocolate chips and walnuts if using. Transfer to greased 9x5 inch loaf pan.
- 4 Bake 50-60 minutes until toothpick inserted comes out clean. Cool in pan 30 minutes before transferring to wire rack.
- 5 Cool completely before slicing for clean cuts. Store covered at room temperature up to 3 days.


