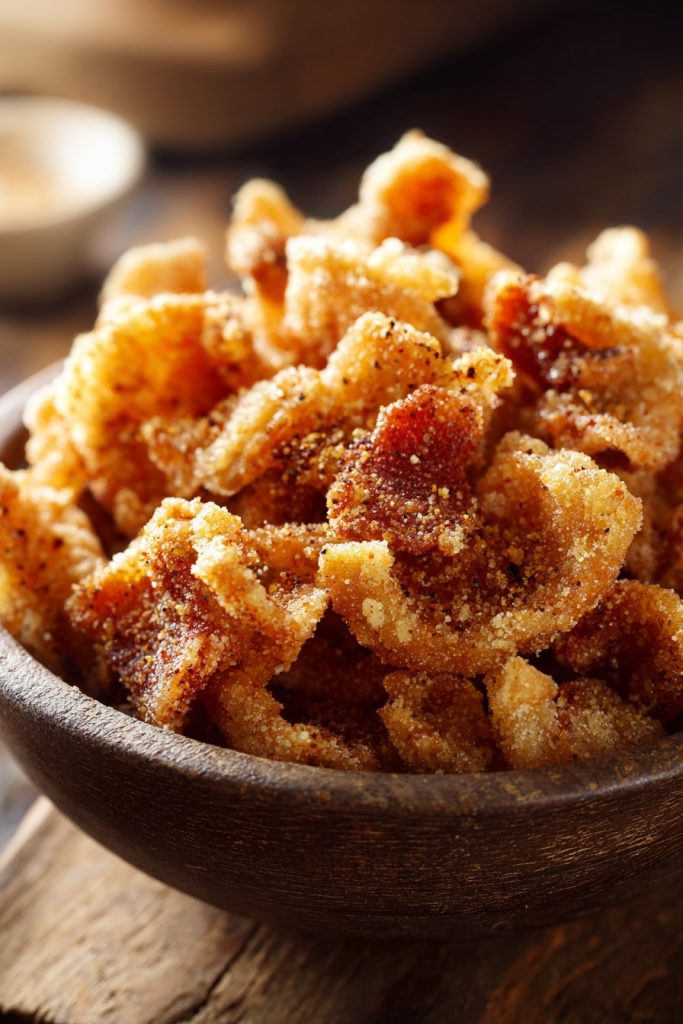
Every time someone tells me they’re cutting carbs, I secretly suspect they’re just looking for an excuse to eat more pork rinds. Embrace your inner carnivore because today we’re transforming humble pork skin into golden, airy clouds of pure joy that’ll make potato chips weep with envy.
Why This Recipe Works
- The double-cooking method (boiling then frying) ensures maximum puffiness while eliminating any lingering chewiness that might haunt your snacking dreams
- Proper drying time transforms rubbery skin into brittle canvases ready to explode into crispy perfection when they meet hot oil
- Strategic temperature control prevents burnt offerings while guaranteeing that satisfying crackle that sounds like tiny fireworks in your mouth
- The optional baking powder trick creates microscopic air pockets that turn your rinds into pork-flavored popcorn clouds
- Salting after frying means every crystal sticks perfectly without dissolving into the oil like disappointed dreams
Ingredients
- 2 pounds pork skin with about 1/4 inch fat attached, cut into 1-inch strips
- 1 tablespoon kosher salt for boiling water
- 2 quarts vegetable oil for frying
- 1 teaspoon baking powder (optional, for extra puff)
- 2 tablespoons seasoning blend of your choice (I’m partial to smoked paprika and garlic powder)
Equipment Needed
- Large stockpot with lid
- Deep fryer or heavy-bottomed Dutch oven
- Candy/deep fry thermometer
- Spider strainer or slotted spoon
- Wire cooling racks
- Baking sheets
- Paper towels
Instructions
Step 1: The Great Pork Skin Prep
Let’s start by giving our pork skin the spa treatment it deserves. Place those pale, flabby strips into your stockpot and cover them with cold water by about two inches—think of it as giving them a swimming lesson before their oil diving debut. Add the tablespoon of kosher salt like you’re seasoning the ocean for these little pork swimmers. Bring this to a boil over high heat, then reduce to a simmer and let them bubble happily for about 90 minutes until they transform from tough contenders into tender, gelatin-rich beauties. You’ll know they’re ready when you can pierce them easily with a fork but they haven’t completely fallen apart—we’re going for al dente, not mush. Pro tip: Skim off any foam that rises to the surface; we’re making pork rinds, not pork scum art.
Step 2: The Patience-Testing Dry Out
Now comes the part where we test your willpower—the drying phase. Carefully remove your now-tender pork skins from their hot tub and arrange them in a single layer on wire racks set over baking sheets. Pat them dry with paper towels like you’re tucking them in for a long nap, then let them air dry for at least 4 hours or, even better, overnight in the refrigerator. During this beauty sleep, the moisture evaporates while the fat firms up, creating the perfect conditions for explosive puffing later. If you’re feeling fancy and want extra lift, this is when you’d lightly dust the skins with that optional baking powder—think of it as giving them little trampolines for their oil bath. The skins should feel leathery and slightly stiff when properly dried, not moist or flexible.
Step 3: The Chop Shop Transformation
Once your pork skins have completed their drying marathon, it’s time for their makeover. Using a sharp knife or kitchen shears, cut the dried strips into bite-sized pieces about 1-inch square—small enough to pop in your mouth but large enough to make a satisfying crunch statement. As you’re cutting, you might notice some pieces still have significant fat attached; feel free to trim this down to about 1/8 inch, as too much fat can prevent proper puffing and leave you with greasy rather than crispy results. Arrange your pork puzzle pieces in a single layer on fresh baking sheets, making sure they’re not touching—these divas need their personal space before their hot oil debut. This cutting process is oddly therapeutic, like solving a pork-based jigsaw puzzle where every piece leads to deliciousness.
Step 4: The Main Event – Oil Plunge Extravaganza
Heat your oil in a deep fryer or heavy Dutch oven to 375°F—use that candy thermometer religiously because oil temperature is the difference between puffy perfection and sad, deflated pork chips. Working in small batches (don’t crowd the oil—these need room to puff up and do their magical transformation), carefully lower the pork skin pieces into the hot oil using your spider strainer. Almost immediately, they’ll begin to bubble and dance like they’re at a pork disco. Within 30-60 seconds, they should fully puff up and float to the surface, turning a beautiful golden brown. Watch them closely—when they stop bubbling aggressively and achieve that perfect tan, they’re ready to come out. Drain each batch on fresh paper towels or wire racks, listening to that satisfying sizzle fade into crispy silence.
Step 5: The Flavor Finale and Serving Spectacle
While your pork rinds are still warm but not hot enough to melt your seasoning, transfer them to a large bowl and sprinkle with your chosen seasoning blend. Toss them gently like you’re mixing precious gems—aggressive tossing might break these delicate puffs. I recommend starting with smoked paprika, garlic powder, and a touch of cayenne for that classic flavor, but feel free to get creative here. Let them cool completely before serving—this final cooling period allows the flavors to settle and the texture to achieve maximum crispiness. Store any leftovers (ha!) in an airtight container, though they’re best consumed within a day or two before they start getting nostalgic about their crispy youth.
Tips and Tricks
If you really want to elevate your pork rind game beyond mere mortal snacking, consider these pro-level maneuvers. First, the source of your pork skin matters more than your mother’s opinion about your life choices—look for skins with consistent fat thickness, as uneven fat can lead to spotty puffing. Asian markets often have fantastic pork skin selections, frequently sold as “pork crackling” ready for your culinary magic. Second, temperature control during frying isn’t just a suggestion—it’s the holy grail. If your oil drops below 350°F, your rinds will absorb oil like sponges and emerge greasy rather than airy. If it climbs above 400°F, they’ll brown too quickly without proper puffing, leaving you with burnt-tasting hockey pucks.
Third, consider experimenting with different drying methods. While air drying works beautifully, you can speed up the process by placing your boiled skins in a 170°F oven for 2-3 hours with the door slightly ajar. This low-and-slow approach can yield even more consistent results, especially in humid climates where air drying might take longer than your patience can handle. Fourth, don’t discard the boiling liquid! That collagen-rich pork water makes incredible soup bases or can be reduced into a gelatinous gold that adds body to sauces and stews—waste not, want not, as your grandmother probably said while making something equally fabulous.
Fifth, seasoning timing is crucial. Adding salt or spices before frying makes them bitter as they burn in the hot oil, while waiting until they’re completely cool means the seasoning won’t adhere properly. The sweet spot is when they’re warm enough to make the seasoning stick but cool enough not to cook it. Finally, if you’re making large batches, keep finished rinds in a 200°F oven while you fry subsequent batches—this keeps them warm and crisp without continuing to cook. Remember, perfect pork rinds are equal parts science and art, with a healthy dose of patience mixed in for good measure.
Recipe Variations
- Spicy Chili Lime: Toss warm rinds with chili powder, cayenne, lime zest, and a touch of sugar for that sweet-heat balance that’ll make your taste buds do the tango
- Everything Bagel: Channel your inner New Yorker by mixing sesame seeds, poppy seeds, dried garlic, dried onion, and salt for that iconic flavor profile on a pork-based canvas
- Maple Bacon: Brush lightly with maple syrup during the last minute of frying (carefully—it can splatter) and sprinkle with cooked bacon bits for the ultimate pork-on-pork experience
- Ranch Revolution: Buttermilk powder, dill, parsley, garlic powder, and onion powder create that classic ranch flavor that makes everything better, especially fried pork skin
- Korean BBQ: Gochugaru (Korean chili flakes), soy powder, ginger powder, and a hint of brown sugar will transport your snacking straight to Seoul’s street food scene
Frequently Asked Questions
Can I bake pork rinds instead of frying them?
While baking might seem like a healthier alternative, it’s like trying to teach a fish to ride a bicycle—theoretically possible but missing the point entirely. The rapid, intense heat of frying is what creates the steam explosion inside the pork skin that leads to proper puffing. Baking typically results in tougher, chewier textures rather than that light, airy crispiness we’re chasing. If you must bake, try placing your dried pork skins on a rack over a baking sheet and baking at 400°F, but don’t be surprised when they emerge more like pork chips than proper rinds. The oil bath is non-negotiable for authentic texture.
Why did some of my pork rinds not puff up properly?
This culinary disappointment usually stems from one of three culprits: insufficient drying, incorrect oil temperature, or too much residual fat. If your skins weren’t completely dry before frying, the moisture turns to steam too slowly, resulting in dense rather than puffy rinds. If your oil temperature dropped below 350°F, they absorbed oil instead of puffing. And if you left too much fat attached, it acts like a weighted blanket preventing the magical expansion. The solution? Patience during drying, vigilant temperature monitoring, and proper trimming—the holy trinity of pork rind perfection.
How long do homemade pork rinds stay fresh?
Homemade pork rinds are the divas of the snack world—they peak early and fade fast. At room temperature in an airtight container, they’ll maintain their perfect crispiness for about 2-3 days before starting to develop that sad, stale texture. Don’t even think about refrigerating them unless you enjoy the taste of disappointment with a side of condensation sogginess. For longer storage, you can freeze them in vacuum-sealed bags for up to a month, but honestly, they’re so delicious they rarely last long enough to require preservation strategies beyond immediate consumption.
Can I use this method with other animal skins?
Absolutely! Chicken skin makes fantastic “chicharrones de pollo” with a lighter, more delicate crunch—just reduce boiling time to 45 minutes since chicken skin is thinner. Duck skin yields incredibly rich, luxurious rinds that pair beautifully with fruit-based seasonings. Even salmon skin can be transformed using this method, though you’ll want to skip the boiling step and go straight to drying and frying for that seafood crunch. Each skin type brings its unique flavor profile and texture characteristics to the party, so experiment away—just adjust cooking times based on thickness and fat content.
Summary
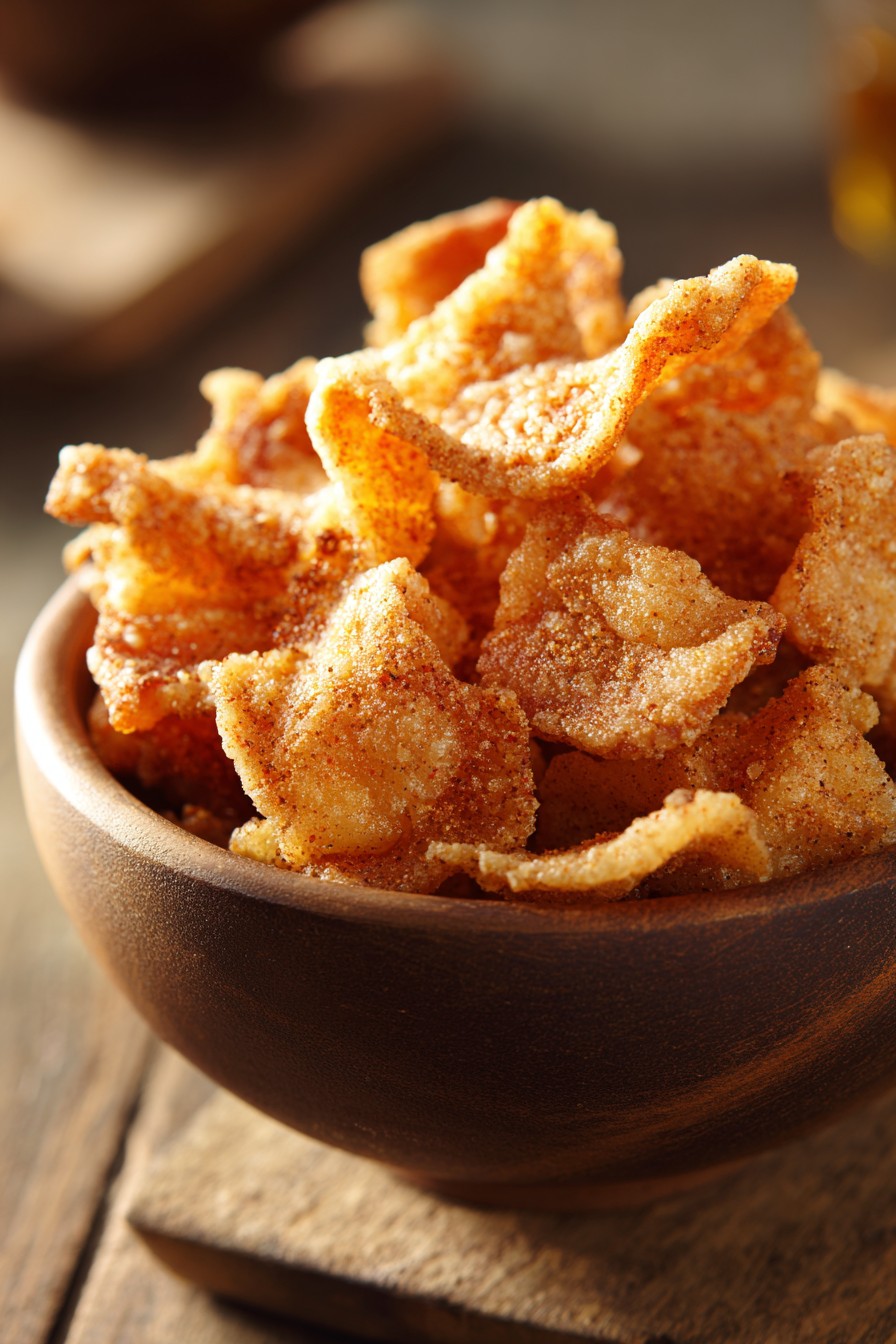
Transform humble pork skin into crispy, airy perfection through boiling, thorough drying, and hot oil frying. The result? Irresistible homemade pork rinds that put store-bought versions to shame with their superior texture and custom seasoning possibilities.
Crispy Pork Rinds
5
servings20
minutes15
minutesIngredients
Instructions
- 1 Boil pork skin in salted water for 90 minutes until tender
- 2 Dry completely on racks for 4+ hours until leathery
- 3 Cut dried skin into 1-inch pieces
- 4 Fry in 375°F oil in batches until puffed and golden
- 5 Season while warm and cool completely before serving


