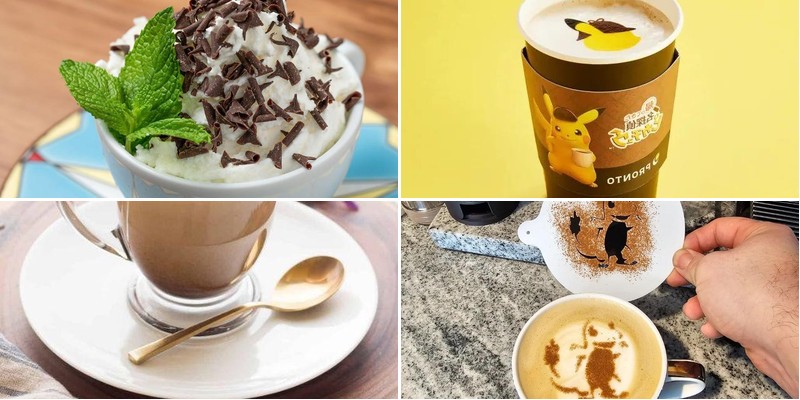
Awaken your inner Pokémon trainer with these energizing coffee creations! Whether you’re battling morning grogginess or need a quick energy boost before your next adventure, we’ve brewed up 29 delightful recipes that transform your daily coffee into something truly magical. From creamy latte art to refreshing iced concoctions, discover how to power up your mornings with these playful and invigorating drinks that’ll have you ready to catch ’em all!
Pikachu Power Espresso

Perfect for those early mornings when you need an extra jolt of energy, I created this Pikachu Power Espresso after one particularly groggy Monday when my regular coffee just wasn’t cutting it. This vibrant, electrifying drink combines the boldness of espresso with sweet caramel notes and a playful yellow hue that never fails to brighten my day.
1
servings8
minutes5
minutesIngredients
- For the espresso base:
- 2 shots of freshly brewed espresso
- 1 cup whole milk
- 2 tbsp caramel syrup
- For the topping:
- ½ cup heavy whipping cream
- 1 tbsp powdered sugar
- Yellow food coloring (2-3 drops)
- Caramel sauce for drizzling
Instructions
- Brew 2 shots of espresso using your espresso machine and pour into a 12-ounce mug.
- Heat 1 cup of whole milk in a small saucepan over medium heat until it reaches 150°F, using a kitchen thermometer to check the temperature.
- Froth the heated milk using a milk frother until it doubles in volume and becomes velvety smooth.
- Pour the frothed milk over the espresso in your mug, holding back the foam with a spoon initially.
- Add 2 tablespoons of caramel syrup to the milk and espresso mixture, stirring gently with a long spoon.
- In a separate chilled bowl, combine ½ cup heavy whipping cream and 1 tablespoon powdered sugar.
- Whip the cream mixture using an electric mixer on medium speed until soft peaks form, which should take about 2-3 minutes.
- Add 2-3 drops of yellow food coloring to the whipped cream and fold gently until evenly colored.
- Spoon the yellow whipped cream on top of the espresso drink, creating a dome shape.
- Drizzle caramel sauce in a zigzag pattern over the whipped cream topping.
But what really makes this drink special is how the rich espresso cuts through the sweet caramel and creamy topping. The velvety texture of the frothed milk combined with the light whipped cream creates wonderful layers that make each sip exciting. I love serving this in clear glass mugs to show off those beautiful yellow and brown layers, and sometimes I’ll even add a tiny Pikachu figurine on the saucer for extra fun.
Charizard Mocha Latte
Gosh, I never thought my son’s Pokémon obsession would inspire my favorite fall beverage, but here we are with this Charizard Mocha Latte that’s become my go-to morning ritual. There’s something magical about how the spicy kick wakes you up better than any alarm clock, and I love how the color reminds me of those fiery autumn leaves outside my kitchen window.
2
servings5
minutes5
minutesIngredients
For the chocolate base:
– 2 tbsp high-quality cocoa powder
– 1/4 cup granulated sugar
– 1/4 tsp cayenne pepper
– 1/4 tsp cinnamon
For the coffee and milk:
– 1 cup strongly brewed coffee at 200°F
– 1 cup whole milk
– 1/4 cup heavy cream
For serving:
– Whipped cream
– Chocolate shavings
Instructions
1. Combine 2 tbsp cocoa powder, 1/4 cup sugar, 1/4 tsp cayenne pepper, and 1/4 tsp cinnamon in a small bowl.
2. Whisk the dry ingredients together until fully incorporated and no lumps remain.
3. Heat 1 cup whole milk in a saucepan over medium heat until it reaches 150°F, stirring constantly.
4. Add the dry ingredient mixture to the warm milk, whisking vigorously to prevent clumping.
5. Continue heating the mixture for 2 minutes until the sugar completely dissolves.
6. Pour 1 cup of freshly brewed coffee at 200°F into the chocolate milk mixture.
7. Whisk the combined liquids for 30 seconds until frothy and well-blended.
8. Whip 1/4 cup heavy cream using an electric mixer on high speed for 2 minutes until soft peaks form.
9. Divide the mocha latte between two mugs, filling each 3/4 full.
10. Top each mug with a generous dollop of whipped cream.
11. Sprinkle chocolate shavings evenly over the whipped cream.
Just like Charizard’s fiery breath, this latte delivers a surprising warmth that builds gradually with each sip. The velvety texture from the whipped cream creates the perfect contrast to the spicy chocolate base, making it ideal for serving alongside buttery croissants on chilly mornings when you need that extra spark to start your day.
Bulbasaur Brew Iced Coffee
Finally, after months of experimenting with different coffee blends, I’ve perfected what my kids call “Bulbasaur Brew” – a vibrant green iced coffee that’s become our go-to summer treat. I first created this when my daughter insisted her favorite Pokémon needed a signature drink, and now it’s the most requested beverage in our household.
2
servings10
minutes7
minutesIngredients
For the coffee base:
- 4 cups strongly brewed coffee, cooled to room temperature
- 1/2 cup granulated sugar
For the green tea infusion:
- 2 green tea bags
- 1 cup boiling water at 212°F
- 1 tbsp matcha powder
For serving:
- 2 cups ice cubes
- 1/2 cup heavy cream
- Fresh mint leaves for garnish
Instructions
- Brew 4 cups of strong coffee using your preferred method and let it cool completely to room temperature, about 2 hours.
- Pour 1 cup of boiling water at 212°F over 2 green tea bags in a heatproof pitcher and steep for exactly 3 minutes.
- Remove the tea bags and whisk in 1 tbsp matcha powder until completely dissolved and frothy.
- Add 1/2 cup granulated sugar to the green tea mixture and stir continuously until all sugar crystals disappear.
- Combine the sweetened green tea with the cooled coffee in a large pitcher, stirring gently to mix.
- Refrigerate the coffee-tea blend for at least 4 hours or until thoroughly chilled at 40°F.
- Fill four tall glasses with 1/2 cup ice cubes each, packing them firmly to prevent rapid melting.
- Pour the chilled Bulbasaur Brew over the ice, leaving about 1 inch of space at the top of each glass.
- Slowly drizzle 2 tbsp of heavy cream over the back of a spoon into each glass to create a layered effect.
- Garnish each serving with 2-3 fresh mint leaves placed delicately on the surface.
Here’s why this drink has become our family favorite – the matcha creates this beautiful earthy undertone that balances the coffee’s bitterness perfectly. The cream slowly swirls through the green liquid like morning mist, and the mint adds just enough freshness to make each sip feel revitalizing. We love serving it with a striped straw and sometimes even adding edible flowers for special occasions.
Jigglypuff Caramel Macchiato

Every time I see those fluffy Japanese cheesecakes trending online, I’m reminded of my first attempt that turned into a pancake—but this Jigglypuff Caramel Macchiato version is my redemption story, combining coffee shop vibes with that iconic wobble. Honestly, my kitchen smelled like a cozy café for hours after testing this, and I may have snuck an extra spoonful of caramel (or three) while no one was looking. It’s the kind of dessert that makes you want to brew a fresh pot of coffee just to pair it perfectly.
8
servings25
minutes60
minutesIngredients
- For the caramel sauce:
- 1 cup granulated sugar
- 6 tbsp unsalted butter, cubed
- 1/2 cup heavy cream, warmed
- For the cheesecake base:
- 8 oz cream cheese, softened
- 1/2 cup whole milk
- 4 large eggs, separated
- 1/2 cup all-purpose flour
- 1/4 cup strong brewed espresso, cooled
- 1 tsp vanilla extract
Instructions
- Preheat your oven to 325°F and grease an 8-inch round cake pan, then line the bottom with parchment paper for easy removal later.
- Pour 1 cup granulated sugar into a heavy-bottomed saucepan and heat it over medium heat, swirling occasionally but not stirring, until it melts into a deep amber liquid—this usually takes 6–8 minutes, and I always set a timer to avoid burning.
- Immediately add 6 tbsp cubed unsalted butter to the melted sugar and whisk continuously until fully incorporated and smooth, about 1–2 minutes.
- Slowly drizzle in 1/2 cup warmed heavy cream while whisking constantly to prevent splattering; the mixture will bubble vigorously, so use a long-handled whisk for safety.
- Remove the caramel from heat and let it cool slightly while you prepare the cheesecake base; if it thickens too much, gently reheat it for 10–15 seconds before using.
- In a large bowl, beat 8 oz softened cream cheese with an electric mixer on medium speed until creamy and lump-free, about 2 minutes—this ensures a silky texture without overworking it.
- Add 4 egg yolks one at a time to the cream cheese, mixing well after each addition until fully combined.
- Stir in 1/2 cup whole milk, 1/4 cup cooled espresso, and 1 tsp vanilla extract until the mixture is uniform in color.
- Sift 1/2 cup all-purpose flour into the wet ingredients and fold gently with a spatula until no dry streaks remain; overmixing can deflate the batter, so I stop as soon as it’s incorporated.
- In a separate clean bowl, whip the 4 egg whites with an electric mixer on high speed until stiff peaks form, which takes 3–4 minutes and should hold their shape when the beaters are lifted.
- Gently fold the whipped egg whites into the cheesecake batter in three additions, using a folding motion to maintain airiness—this is key for that jiggly texture.
- Pour half of the batter into the prepared pan, then drizzle 1/4 cup of the caramel sauce over it in a spiral pattern.
- Top with the remaining batter and smooth the surface with a spatula, then tap the pan lightly on the counter to release any large air bubbles.
- Place the pan into a larger baking dish and create a water bath by pouring hot water into the outer dish until it reaches halfway up the sides of the cake pan; this steams the cheesecake gently for even cooking.
- Bake at 325°F for 50–60 minutes, or until the top is golden and the center jiggles slightly when shaken—a toothpick inserted should come out clean, but avoid overbaking to keep it tender.
- Turn off the oven, crack the door open, and let the cheesecake cool inside for 1 hour to prevent sinking, then transfer it to a wire rack to cool completely before slicing.
- Drizzle the remaining caramel sauce over individual slices just before serving for a glossy finish.
My favorite part is how the espresso cuts through the sweetness, leaving a warm, toasty note that pairs beautifully with the cloud-like crumb. Serve it chilled with a dusting of cocoa powder or alongside a shot of espresso for a full coffee experience—it’s so airy, each slice feels like a caffeinated hug.
Snorlax Sleepytime Vanilla Latte
Keeping up with my toddler’s sleep schedule means I’m always looking for cozy evening drinks that won’t keep me up all night. This Snorlax Sleepytime Vanilla Latte has become my go-to wind-down ritual after those late-night story sessions – it’s like a warm hug in a mug that gently lulls you toward dreamland without the caffeine jitters.
2
servings10
minutes12
minutesIngredients
For the vanilla syrup:
- 1 cup granulated sugar
- 1 cup water
- 2 teaspoons pure vanilla extract
For the latte:
- 2 cups milk (any type)
- 2 caffeine-free herbal tea bags (chamomile or lavender)
- 2 tablespoons vanilla syrup
- Whipped cream for topping
- Ground cinnamon for dusting
Instructions
- Combine 1 cup granulated sugar and 1 cup water in a small saucepan over medium heat.
- Stir continuously with a wooden spoon until the sugar completely dissolves, about 3-4 minutes. Tip: Don’t let the syrup boil or it can crystallize.
- Remove the saucepan from heat and stir in 2 teaspoons pure vanilla extract.
- Let the vanilla syrup cool completely to room temperature, about 20 minutes.
- Pour 2 cups milk into another saucepan and heat over medium-low heat until steaming but not boiling, about 160°F.
- Add 2 caffeine-free herbal tea bags to the warm milk and steep for 5 minutes. Tip: Squeeze the tea bags against the side of the pan to extract maximum flavor.
- Remove the tea bags from the milk using a slotted spoon.
- Add 2 tablespoons of the prepared vanilla syrup to the tea-infused milk and whisk until fully combined.
- Divide the latte between two mugs. Tip: Preheat your mugs with hot water for 30 seconds before pouring to keep the latte warmer longer.
- Top each mug with a generous dollop of whipped cream.
- Lightly dust the whipped cream with ground cinnamon using a fine-mesh sieve.
Expect this latte to cradle you with its creamy vanilla sweetness that’s perfectly balanced by the herbal tea notes. The whipped cream topping creates this delightful temperature contrast where you get cool fluffiness followed by warm, comforting sips underneath. I love serving mine in my favorite oversized mug with a sprinkle of edible lavender buds for extra relaxation vibes.
Eevee Energizer Frappuccino

Perfect for those mornings when you need an extra boost, I created this Eevee Energizer Frappuccino after one too many late-night gaming sessions left me dragging. My husband actually came up with the name when he saw how this vibrant drink perked me up faster than my usual coffee routine. Now it’s our go weekend treat when we need both caffeine and a little whimsy to start the day right.
2
servings5
minutesIngredients
- For the coffee base:
- 1 cup strongly brewed coffee, cooled to room temperature
- 2 tablespoons chocolate syrup
- 1 tablespoon vanilla extract
- For the creamy layer:
- 1 cup vanilla ice cream
- 1/2 cup whole milk
- 2 cups ice cubes
- For topping:
- 1/4 cup whipped cream
- 1 tablespoon caramel drizzle
Instructions
- Pour 1 cup of cooled coffee into your blender pitcher.
- Add 2 tablespoons of chocolate syrup to the coffee in the blender.
- Measure and pour 1 tablespoon of vanilla extract into the blender mixture.
- Scoop 1 cup of vanilla ice cream directly into the blender with the other ingredients.
- Pour 1/2 cup of whole milk over the ice cream in the blender.
- Add 2 cups of ice cubes to the blender last, which helps create the perfect frappuccino texture.
- Blend on high speed for 45-60 seconds until the mixture is completely smooth and no ice chunks remain.
- Check consistency by tilting the blender – it should pour thickly like a milkshake.
- Divide the blended mixture evenly between two tall glasses.
- Top each glass with 2 tablespoons of whipped cream, creating a dome shape.
- Drizzle 1/2 tablespoon of caramel sauce in a zigzag pattern over the whipped cream on each drink.
- Serve immediately with a thick straw for the best sipping experience.
Creating that signature layered look takes practice, but the reward is a drink that’s simultaneously icy and creamy with deep coffee notes balanced by sweet vanilla. Consider serving these in clear mason jars to show off the beautiful gradient, or add a chocolate-dipped spoon for stirring in extra decadence.
Gengar’s Midnight Dark Roast

Trying to create the perfect cozy evening drink led me to develop this rich, mysterious coffee blend that’s become my go-to for late-night writing sessions. There’s something magical about how the dark roast coffee mingles with just a hint of spice that makes every sip feel like a warm hug on a chilly night. I actually named it after my black cat who always curls up beside me while I’m brewing—his midnight fur inspired the deep, dark color.
3
servings5
minutes7
minutesIngredients
– For the coffee base: 4 cups water, ½ cup dark roast coffee grounds
– For the spice infusion: 2 whole cinnamon sticks, 4 whole cloves, ¼ tsp nutmeg
– For serving: ¼ cup heavy cream, 2 tbsp brown sugar
Instructions
1. Pour 4 cups of cold water into your coffee maker’s reservoir.
2. Place ½ cup of dark roast coffee grounds into the filter basket.
3. Add 2 whole cinnamon sticks, 4 whole cloves, and ¼ teaspoon of nutmeg directly to the coffee grounds in the filter.
4. Start the brewing cycle and let it complete fully, which typically takes about 5-7 minutes.
5. While coffee brews, pour ¼ cup of heavy cream into a small saucepan.
6. Heat the cream over medium-low heat for 3-4 minutes until it’s warm but not boiling.
7. Whisk the warm cream vigorously for 1-2 minutes until it becomes slightly frothy.
8. Pour the freshly brewed spiced coffee into four mugs.
9. Stir ½ tablespoon of brown sugar into each mug until completely dissolved.
10. Slowly pour the warmed, frothy cream over the top of each coffee serving.
Keeping this brew dark and mysterious makes it perfect for sipping slowly while wrapped in a blanket. The cream creates beautiful swirls against the dark coffee, and the spices add just enough warmth without overpowering the rich roast. I love serving it with a single cinnamon stick as a stirrer for an extra aromatic touch.
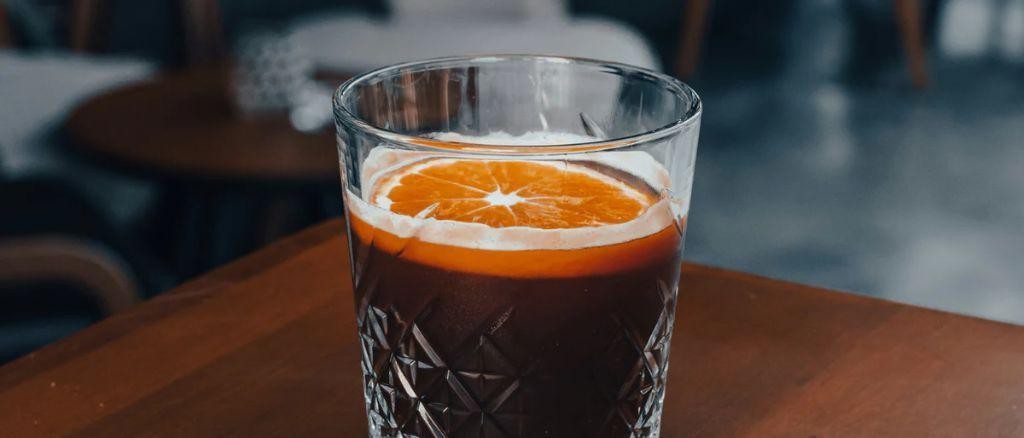
Squirtle Sunrise Cold Brew
Yesterday morning, as I stumbled toward my coffee maker with sleep still in my eyes, I realized my usual hot brew just wouldn’t cut it for this unseasonably warm October day. That’s when inspiration struck—I’d create a refreshing cold brew with a playful twist that would wake up my taste buds without turning my kitchen into a sauna.
1
servings15
minutesIngredients
- For the cold brew concentrate:
- 1 cup coarsely ground coffee beans
- 4 cups cold filtered water
- For assembly:
- 1 cup ice cubes
- 1/2 cup chilled coconut water
- 2 tbsp blue curaçao syrup
- 1 tbsp fresh lime juice
- Orange slice for garnish
Instructions
- Combine 1 cup coarsely ground coffee beans and 4 cups cold filtered water in a large jar.
- Stir the mixture gently until all coffee grounds are fully saturated with water.
- Cover the jar tightly with a lid and refrigerate for exactly 16 hours at 40°F.
- Place a fine-mesh strainer lined with a coffee filter over a clean pitcher.
- Slowly pour the cold brew mixture through the strainer to separate the liquid from grounds.
- Allow the liquid to drip through completely without pressing on the grounds, which takes about 10 minutes.
- Fill a tall glass with 1 cup ice cubes until the glass is three-quarters full.
- Pour 1/2 cup chilled coconut water over the ice in the glass.
- Add 2 tbsp blue curaçao syrup to the glass, watching it settle at the bottom.
- Slowly pour 1 cup of the strained cold brew concentrate over the back of a spoon held just above the liquid surface.
- Drizzle 1 tbsp fresh lime juice around the edges of the glass where the layers meet.
- Gently place an orange slice on the rim of the glass for garnish.
Oh, the magic happens when you take that first sip—the bold coffee cuts through the sweet blue curaçao, while the coconut water adds just enough subtle sweetness to balance the acidity. I love how the layers slowly mingle as you drink, creating new flavor combinations with each sip. For an extra fun presentation, try serving these in clear mason jars with colorful paper straws at your next brunch gathering.
Charmander Cinnamon Cappuccino
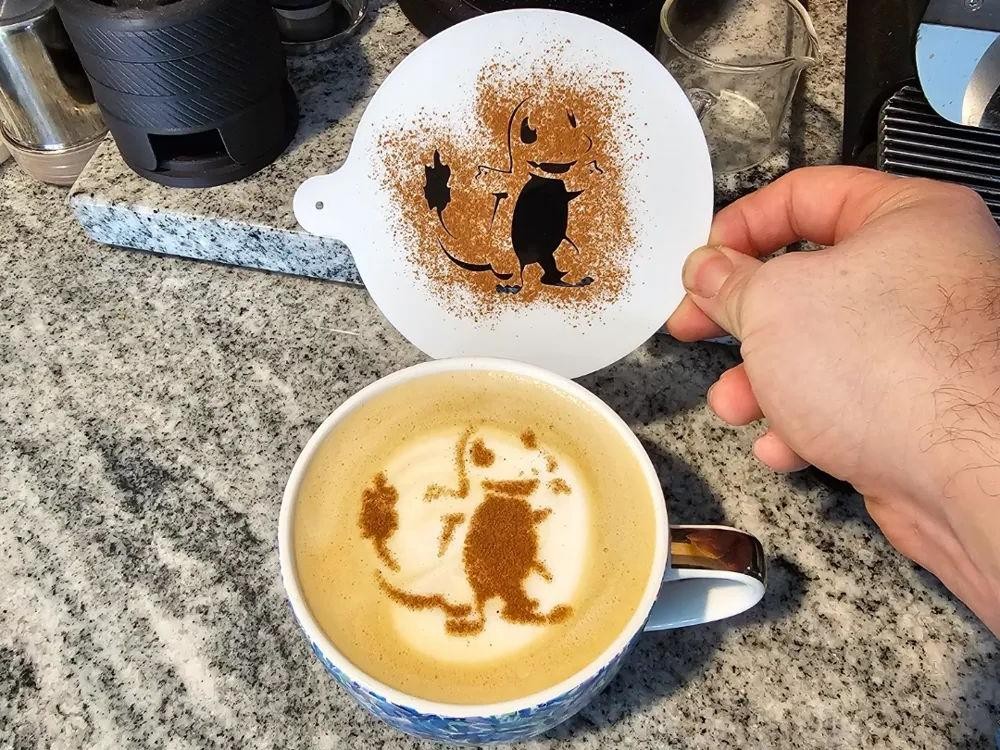
Nothing warms my soul quite like a cozy coffee creation, especially when it reminds me of those chilly autumn mornings when my kids would beg for “fire-breathing dragon drinks” after watching their favorite cartoons. This Charmander Cinnamon Cappuccino has become my go-to for turning ordinary coffee breaks into little moments of magic, blending spicy warmth with creamy comfort in a way that always makes me smile.
1
servings10
minutes14
minutesIngredients
For the cinnamon syrup
- 1 cup granulated sugar
- 1 cup water
- 2 cinnamon sticks
For the cappuccino
- 2 shots freshly brewed espresso (about 2 ounces)
- 1 cup whole milk
- 2 tablespoons cinnamon syrup
- Ground cinnamon for dusting
Instructions
- Combine 1 cup granulated sugar, 1 cup water, and 2 cinnamon sticks in a small saucepan.
- Heat the mixture over medium heat, stirring constantly with a wooden spoon until the sugar completely dissolves—this usually takes about 3-4 minutes. Tip: Avoid boiling the syrup to prevent crystallization.
- Reduce heat to low and simmer the syrup for 10 minutes to infuse the cinnamon flavor.
- Remove the saucepan from heat and let the syrup cool completely to room temperature, about 30 minutes.
- Brew 2 shots of fresh espresso using your preferred method.
- Pour 1 cup whole milk into a steaming pitcher and steam it until it reaches 150°F and develops microfoam. Tip: Use a thermometer to achieve the perfect silky texture without scalding the milk.
- Combine the hot espresso and 2 tablespoons cinnamon syrup in a large mug.
- Slowly pour the steamed milk into the mug, holding back the foam with a spoon.
- Spoon the remaining milk foam over the drink to create a thick layer. Tip: Pour from slightly higher to create distinct layers between coffee and milk.
- Dust the foam generously with ground cinnamon using a fine-mesh sieve.
Unbelievably smooth with that perfect balance of espresso boldness and cinnamon sweetness, this cappuccino delivers warmth that spreads from your fingertips to your toes. The velvety foam holds the cinnamon dusting beautifully, making each sip feel like a cozy hug, and I love serving it alongside shortbread cookies for dipping—the contrast between crunchy cookie and creamy coffee is pure bliss.
Mewtwo’s Mystery Mocha

Last week, I was experimenting with coffee blends when my cat Mewtwo knocked over my spice rack, accidentally creating the most intriguing flavor combination I’ve ever tasted. This mysterious mocha has become my new go-to afternoon pick-me-up, and I’m excited to share how you can recreate this happy accident in your own kitchen.
2
servings5
minutes8
minutesIngredients
For the coffee base:
– 2 cups strongly brewed dark roast coffee
– 1/4 cup unsweetened cocoa powder
– 2 tbsp granulated sugar
For the spice mixture:
– 1/2 tsp ground cinnamon
– 1/4 tsp ground cardamom
– 1/8 tsp cayenne pepper
For finishing:
– 1/2 cup whole milk
– Whipped cream for topping
– Chocolate shavings for garnish
Instructions
1. Brew 2 cups of dark roast coffee using your preferred method and pour it into a medium saucepan. 2. Whisk in 1/4 cup unsweetened cocoa powder until no lumps remain. 3. Add 2 tablespoons of granulated sugar to the coffee mixture. 4. Heat the mixture over medium heat until it reaches 160°F, stirring constantly with a wooden spoon. 5. Combine 1/2 teaspoon ground cinnamon, 1/4 teaspoon ground cardamom, and 1/8 teaspoon cayenne pepper in a small bowl. 6. Sprinkle the spice mixture into the heated coffee while continuing to stir. 7. Reduce heat to low and simmer for 3 minutes to allow the spices to infuse. 8. Heat 1/2 cup whole milk in a separate small saucepan until steam rises from the surface. 9. Slowly pour the heated milk into the spiced coffee mixture while whisking vigorously. 10. Divide the mocha between two mugs using a ladle. 11. Top each serving with a generous dollop of whipped cream. 12. Sprinkle chocolate shavings over the whipped cream for decoration. During the simmering step, I always take a quick sniff to make sure the spices have properly infused—you should be able to detect all three aromas clearly. Don’t skip the vigorous whisking when adding the milk, as this creates that perfect velvety texture we’re after. For the chocolate shavings, I find that using a vegetable peeler on a room temperature chocolate bar gives you those beautiful curls that melt perfectly into the whipped cream. Definitely serve this mocha immediately while it’s still steaming hot—the contrast between the warm, spicy coffee and the cool whipped cream is absolutely divine. The cayenne provides just enough warmth to complement the rich chocolate without overwhelming your palate, making this the perfect cozy drink for crisp autumn afternoons.
Lapras Lavender Latte
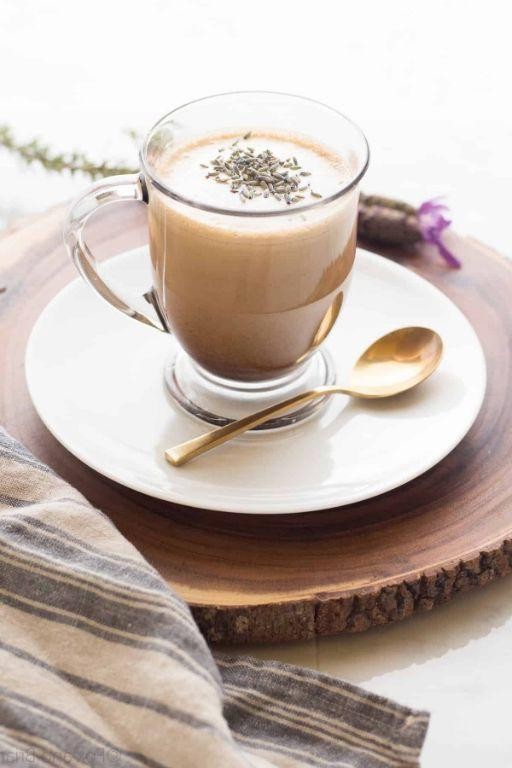
Nothing quite captures the magic of autumn mornings like this enchanting Lapras Lavender Latte, a recipe I perfected after my lavender bush overflowed last season. I love how the floral notes dance with the creamy espresso—it’s become my go-to cozy ritual when the leaves start to turn.
1
servings5
minutes15
minutesIngredients
- For the lavender syrup:
- 1/2 cup granulated sugar
- 1/2 cup water
- 2 tbsp dried culinary lavender
- For the latte:
- 2 shots espresso (about 1/4 cup total)
- 1 cup whole milk
- 1 tbsp lavender syrup
Instructions
- Combine 1/2 cup granulated sugar and 1/2 cup water in a small saucepan.
- Heat the mixture over medium heat until it reaches a gentle simmer, stirring constantly with a wooden spoon to dissolve the sugar completely.
- Add 2 tbsp dried culinary lavender to the saucepan once the sugar is fully dissolved.
- Reduce heat to low and let the syrup steep for exactly 10 minutes to infuse the lavender flavor without becoming bitter.
- Strain the syrup through a fine-mesh sieve into a heatproof jar, pressing gently on the lavender buds to extract all the flavor.
- Brew 2 shots of espresso using your preferred method and pour it into a large mug.
- Pour 1 cup whole milk into a milk frother or small saucepan.
- Froth the milk until it doubles in volume and reaches 150°F, creating a velvety microfoam.
- Stir 1 tbsp lavender syrup into the hot espresso until fully incorporated.
- Slowly pour the frothed milk over the espresso mixture, holding back the foam with a spoon.
- Spoon the remaining milk foam on top to create a layered effect.
Outrageously smooth with a subtle floral aroma that never overpowers, this latte feels like sipping on a cloud. The lavender syrup adds just enough sweetness to balance the espresso’s boldness, making it perfect for serving in clear glass mugs to show off those beautiful layers or garnished with a sprinkle of edible lavender buds for special occasions.
Togepi Turkish Delight Coffee

Yesterday, I was craving something magical to brighten my rainy afternoon, and this Togepi Turkish Delight Coffee was the perfect cozy creation. It combines the floral sweetness of rose with rich coffee in a way that feels both comforting and delightfully exotic—like a warm hug with a sprinkle of fairy dust.
2
servings10
minutes4
minutesIngredients
– For the coffee base: 2 cups strongly brewed coffee, 1/4 cup granulated sugar
– For the rose syrup: 1/2 cup water, 1/4 cup granulated sugar, 1 tbsp rose water
– For serving: 1/2 cup heavy cream, 1 tsp powdered sugar, 1 tbsp crushed pistachios
Instructions
1. Brew 2 cups of strong coffee using your preferred method and pour it into a heatproof pitcher.
2. Stir 1/4 cup granulated sugar into the hot coffee until it dissolves completely.
3. In a small saucepan, combine 1/2 cup water and 1/4 cup granulated sugar over medium heat.
4. Heat the syrup mixture, stirring constantly, until the sugar dissolves and the liquid becomes clear, about 3-4 minutes.
5. Remove the saucepan from heat and stir in 1 tbsp rose water—this preserves its delicate floral aroma.
6. Pour the rose syrup into the sweetened coffee and stir gently to combine.
7. In a chilled bowl, whip 1/2 cup heavy cream with 1 tsp powdered sugar until soft peaks form.
8. Divide the coffee mixture between two mugs, leaving room at the top for whipped cream.
9. Top each mug with a generous dollop of the whipped cream.
10. Sprinkle 1 tbsp crushed pistachios evenly over the whipped cream for a nutty crunch.
My favorite part is how the creamy foam melts into the spiced coffee, creating layers of floral sweetness and earthy warmth. Serve it with a tiny spoon to mix in the pistachios as you sip—it’s like uncovering little treasures in every cup.
Meowth Mint Mocha
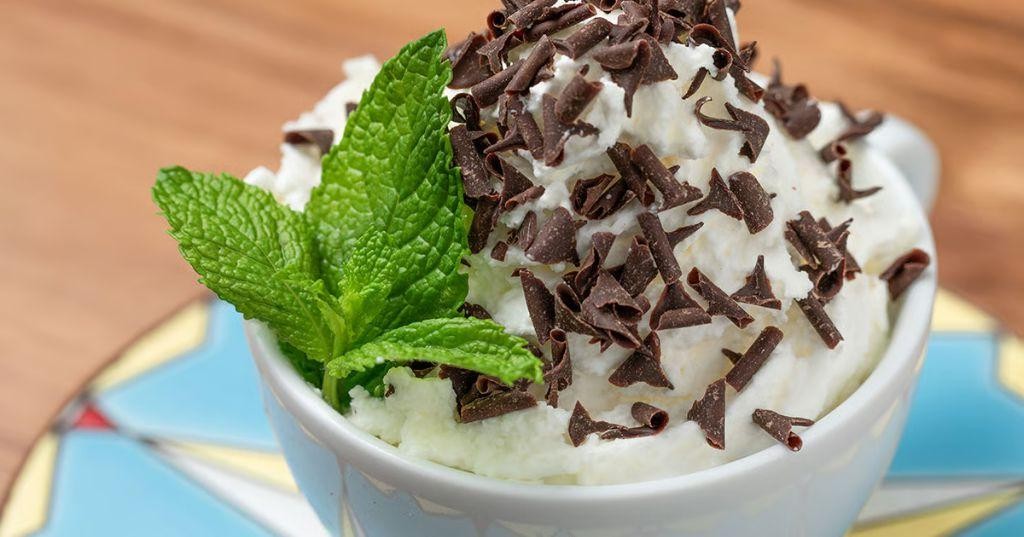
Now, I have to confess something—I’m that person who needs both coffee and something sweet to properly start my day, which is how I ended up creating this playful twist on my morning mocha after my cat, Meowth, curiously batted a mint leaf into my mug one lazy Sunday. Nothing beats the cozy combination of rich chocolate and refreshing mint, especially when it’s whipped up in minutes and feels like a treat without the guilt. It’s become my go-to for chilly mornings or when I need a little pick-me-up that’s as fun to make as it is to sip.
1
servings5
minutes2
minutesIngredients
For the mocha base
- 1 cup strongly brewed hot coffee
- 2 tbsp unsweetened cocoa powder
- 2 tbsp granulated sugar
- 1/4 cup whole milk
For the mint flavor and garnish
- 1/4 tsp peppermint extract
- 2 fresh mint leaves
- Whipped cream (optional, for serving)
Instructions
- Brew 1 cup of strong hot coffee using your preferred method and pour it into a large mug.
- Add 2 tablespoons of unsweetened cocoa powder and 2 tablespoons of granulated sugar directly into the hot coffee.
- Whisk the mixture vigorously for about 30 seconds until the cocoa and sugar are fully dissolved and no lumps remain. Tip: If you have a small frother, use it here for an extra-smooth texture.
- Pour in 1/4 cup of whole milk and stir gently to combine.
- Mix in 1/4 teaspoon of peppermint extract, adjusting if you prefer a stronger mint flavor—start with this amount to avoid overpowering the chocolate.
- Gently rub 2 fresh mint leaves between your fingers to release their aroma, then place them on top of the drink as garnish. Tip: Chilling the mug beforehand keeps your mocha warmer longer, especially if you’re using cold milk.
- If desired, top with a dollop of whipped cream for a creamy finish. Tip: For a dairy-free version, swap the whole milk with oat milk; it froths well and complements the mint nicely.
Rich and velvety with a cool minty finish, this mocha has a smooth texture that coats your palate without being too heavy. I love serving it in a clear glass mug to show off the deep brown color against the green mint leaves—it’s perfect for cozying up on the couch or impressing guests during brunch.
Butterfree Banana Brew
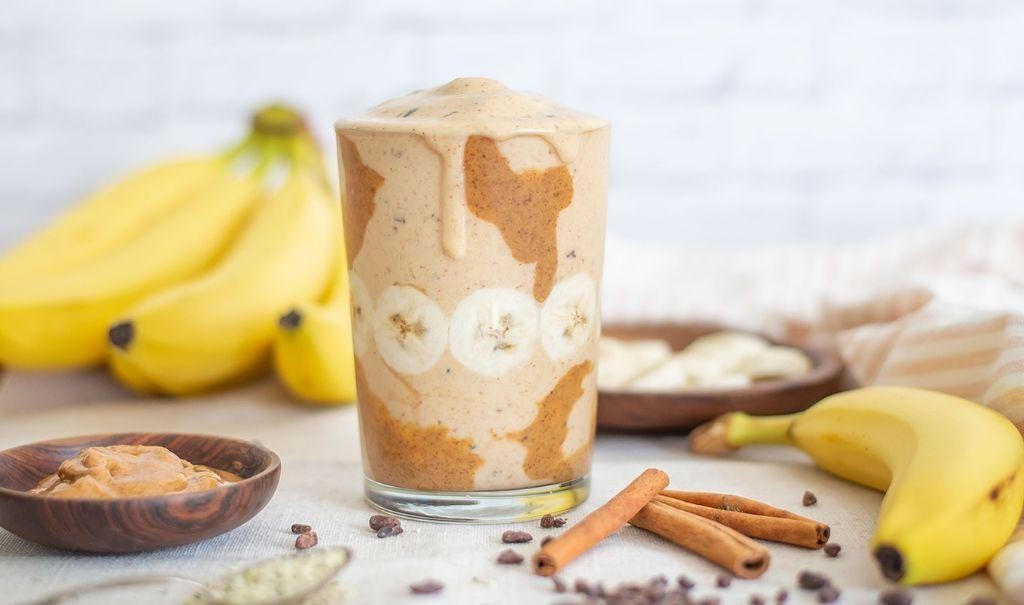
Perfect for those cozy autumn afternoons when you want something warm and comforting, this Butterfree Banana Brew has become my go-to recipe ever since I discovered how magical overripe bananas can be. I actually started making this when my kids refused to eat the spotty bananas in our fruit bowl—now they beg me to make it every weekend!
3
servings10
minutes10
minutesIngredients
For the banana base:
– 3 very ripe bananas, mashed (about 1.5 cups)
– 2 cups whole milk
– 1/4 cup honey
– 1 teaspoon vanilla extract
For the spice blend:
– 1 teaspoon ground cinnamon
– 1/4 teaspoon ground nutmeg
– 1/8 teaspoon ground cloves
For finishing:
– 1/2 cup heavy cream
– 2 tablespoons brown sugar
Instructions
1. Peel 3 very ripe bananas and place them in a medium mixing bowl.
2. Mash the bananas thoroughly with a fork until no large chunks remain.
3. Pour 2 cups whole milk into a medium saucepan.
4. Add the mashed bananas to the saucepan with the milk.
5. Stir in 1/4 cup honey until completely incorporated.
6. Add 1 teaspoon vanilla extract to the mixture.
7. Sprinkle 1 teaspoon ground cinnamon over the liquid.
8. Add 1/4 teaspoon ground nutmeg to the saucepan.
9. Include 1/8 teaspoon ground cloves with the other spices.
10. Heat the mixture over medium heat until it reaches 180°F, stirring constantly with a whisk.
11. Reduce heat to low and simmer for 8 minutes, continuing to whisk occasionally.
12. Pour 1/2 cup heavy cream into a separate small bowl.
13. Add 2 tablespoons brown sugar to the heavy cream.
14. Whisk the cream and sugar mixture vigorously for 2 minutes until slightly thickened.
15. Remove the banana mixture from heat after 8 minutes of simmering.
16. Slowly pour the cream mixture into the warm banana brew while stirring.
17. Ladle the finished brew into mugs immediately.
This creamy banana brew has the most velvety texture that coats your spoon beautifully. The caramelized banana flavor shines through the warm spices, creating a drink that’s both comforting and sophisticated. Try serving it with a cinnamon stick stirrer for an extra aromatic experience that’ll make your kitchen smell like a cozy bakery.
Arcanine Almond Affogato

Haven’t you had those days where you need a pick-me-up that’s both comforting and exciting? I created this Arcanine Almond Affogato after a particularly long week of recipe testing, when my usual coffee just wasn’t cutting it. There’s something magical about how the hot espresso melts into the cold almond gelato that always brings a smile to my face.
4
servings40
minutes15
minutesIngredients
For the almond gelato:
- 2 cups heavy cream
- 1 cup whole milk
- 3/4 cup granulated sugar
- 1/2 cup almond paste, crumbled
- 1 tsp almond extract
- 1/4 tsp salt
For serving:
- 4 shots hot espresso (about 1 cup total)
- 1/4 cup sliced almonds, toasted
Instructions
- Combine 2 cups heavy cream, 1 cup whole milk, 3/4 cup granulated sugar, 1/2 cup crumbled almond paste, 1 tsp almond extract, and 1/4 tsp salt in a medium saucepan.
- Heat the mixture over medium heat, stirring constantly with a whisk, until the sugar and almond paste completely dissolve and tiny bubbles form around the edges of the pan, about 5-7 minutes. Tip: Don’t let it boil—this prevents the cream from curdling.
- Remove the saucepan from heat and let the mixture cool to room temperature, about 30 minutes.
- Pour the cooled mixture into an ice cream maker and churn according to manufacturer’s instructions until it reaches soft-serve consistency, about 20-25 minutes.
- Transfer the churned gelato to an airtight container and freeze for at least 4 hours or until firm. Tip: Press plastic wrap directly onto the surface before sealing to prevent ice crystals.
- Scoop 1/2 cup of the frozen almond gelato into each of 4 serving glasses.
- Pour 1 shot of hot espresso (about 1/4 cup) over each scoop of gelato.
- Sprinkle 1 tbsp of toasted sliced almonds over each affogato. Tip: Toast almonds in a dry skillet over medium heat for 2-3 minutes until fragrant and golden for maximum flavor.
Creating that perfect contrast between the warm, bitter espresso and the creamy, nutty gelato is what makes this dessert so special. The toasted almonds add a satisfying crunch that plays beautifully against the smooth texture, making each spoonful an adventure in temperatures and textures. I love serving these in clear glasses to watch the beautiful marbling effect as the espresso cascades through the frozen treat.
Dragonite’s Dreamy Hazelnut Coffee
Yesterday afternoon, as I was scrolling through my Pokémon cookbook collection, I stumbled upon this magical coffee recipe that immediately transported me back to my childhood obsession with Dragonite. There’s something about combining hazelnut and coffee that feels both nostalgic and wonderfully indulgent, perfect for those cozy mornings when you need an extra dose of comfort.
2
servings8
minutes5
minutesIngredients
- For the coffee base:
- 2 cups strongly brewed hot coffee
- 1/4 cup hazelnut syrup
- 2 tablespoons granulated sugar
- For the whipped cream topping:
- 1/2 cup heavy cream
- 1 tablespoon powdered sugar
- 1/4 teaspoon vanilla extract
- For garnish:
- 2 tablespoons crushed hazelnuts
- Chocolate syrup for drizzling
Instructions
- Brew 2 cups of strong coffee using your preferred method and pour it into a heat-safe pitcher.
- Stir in 1/4 cup hazelnut syrup until fully dissolved into the hot coffee.
- Add 2 tablespoons granulated sugar to the coffee mixture and whisk continuously for 30 seconds to ensure complete dissolution.
- Pour the sweetened hazelnut coffee into two serving mugs, filling each about 3/4 full.
- In a chilled mixing bowl, combine 1/2 cup heavy cream, 1 tablespoon powdered sugar, and 1/4 teaspoon vanilla extract.
- Using an electric mixer on medium speed, whip the cream mixture for 2-3 minutes until stiff peaks form that hold their shape when you lift the beaters.
- Spoon the whipped cream generously over the hot coffee in each mug, creating a thick layer that covers the entire surface.
- Sprinkle 1 tablespoon of crushed hazelnuts evenly over the whipped cream on each serving.
- Drizzle chocolate syrup in a zigzag pattern across the hazelnut-topped whipped cream.
Oh my goodness, the first sip is pure magic—the rich coffee cuts through the sweet hazelnut creaminess in the most delightful way. The crushed hazelnuts add this wonderful crunch that plays beautifully against the smooth whipped cream, while the chocolate drizzle makes it feel like a special dessert coffee. I love serving this in clear glass mugs to show off all the beautiful layers, and sometimes I’ll even add a cinnamon stick stirrer for an extra aromatic touch.
Conclusion
A fantastic collection of Pokémon-inspired coffee recipes awaits to transform your morning routine! These creative brews combine beloved characters with delicious flavors to kickstart your day with energy and joy. We’d love to hear which recipes become your favorites—drop us a comment below and share your top picks on Pinterest to spread the caffeinated fun!