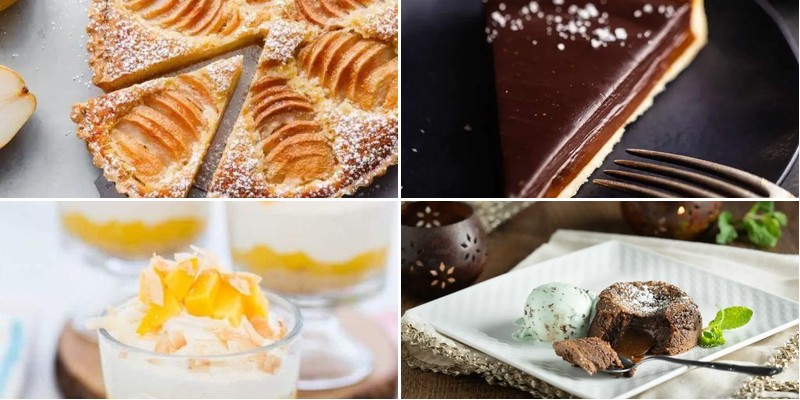
Just imagine presenting a restaurant-worthy dessert that dazzles your guests and elevates any meal into a gourmet dining experience. We’ve curated 21 exquisite plated dessert recipes perfect for home cooks who want to create stunning finales that look as incredible as they taste. From elegant chocolate creations to fruit-forward masterpieces, these desserts will transform your dinner parties into unforgettable culinary events. Get ready to impress!
Lavender Honey Panna Cotta with Fresh Berries
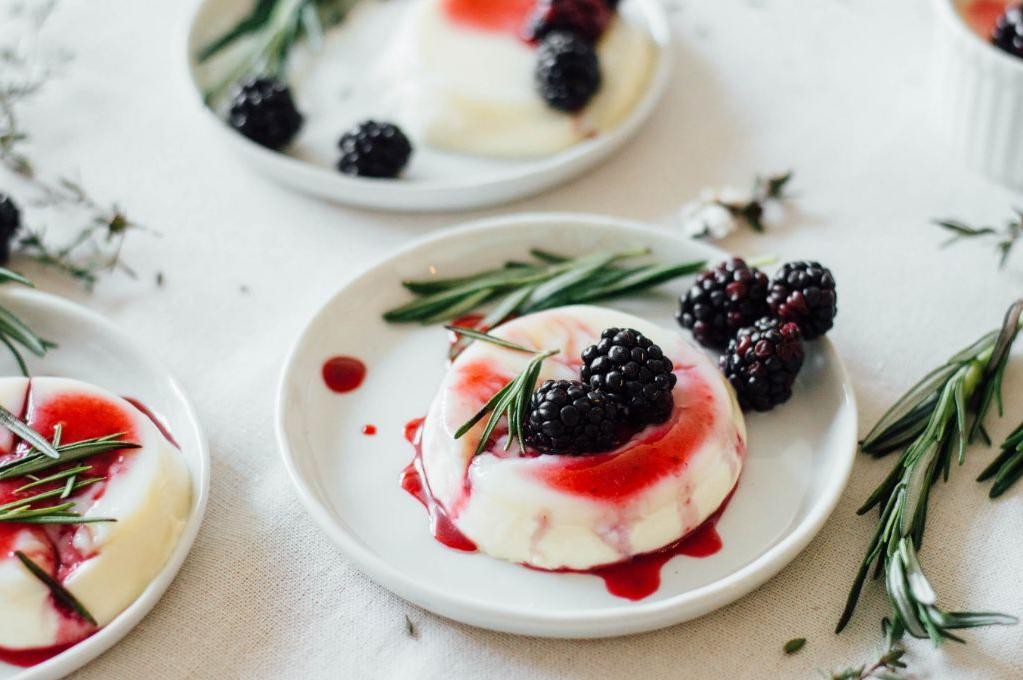
Often overlooked in home kitchens, panna cotta is actually one of the simplest yet most elegant desserts you can master. Our lavender honey version requires just a few ingredients and minimal effort, yielding a creamy, floral treat that’s perfect for any occasion. Once you try this method, you’ll wonder why you ever hesitated to make it yourself.
6
portions15
minutes10
minutesIngredients
– 2 cups of heavy cream
– 1/4 cup of honey
– 1 packet of unflavored gelatin (about 2 1/4 teaspoons)
– 1/4 cup of cold water
– 1 teaspoon of culinary lavender buds
– A splash of vanilla extract
– A couple of cups of mixed fresh berries
Instructions
1. Sprinkle the gelatin packet over the 1/4 cup of cold water in a small bowl and let it sit for 5 minutes until it becomes spongy.
2. Heat 1/2 cup of the heavy cream in a saucepan over medium heat until small bubbles form around the edges (about 3-4 minutes).
3. Remove the saucepan from heat and stir in the lavender buds, letting them steep for exactly 10 minutes to extract their floral flavor without becoming bitter.
4. Strain the lavender-infused cream through a fine-mesh sieve into a clean bowl, pressing gently on the buds to extract all the flavorful cream.
5. Return the strained cream to the saucepan and whisk in the remaining 1 1/2 cups of heavy cream and 1/4 cup of honey.
6. Heat the mixture over medium-low heat, stirring constantly, until the honey fully dissolves and tiny steam wisps appear (about 2-3 minutes).
7. Remove from heat and whisk in the bloomed gelatin mixture until completely dissolved and no white specks remain.
8. Stir in a splash of vanilla extract for depth of flavor.
9. Divide the mixture evenly among 6 ramekins or serving glasses.
10. Cover each ramekin with plastic wrap, making sure the wrap touches the surface to prevent skin formation.
11. Refrigerate for at least 6 hours, or overnight for best results, until completely set and firm to the touch.
12. Top each serving with a generous handful of fresh mixed berries just before serving.
Remarkably silky with a subtle floral aroma, this panna cotta melts on your tongue while the honey provides just enough sweetness to balance the lavender. The fresh berries add a bright, juicy contrast that cuts through the richness beautifully. For an extra special presentation, try serving these in clear glasses layered with berry compote at the bottom before pouring the cream mixture.
Dark Chocolate Tart with Sea Salt Caramel
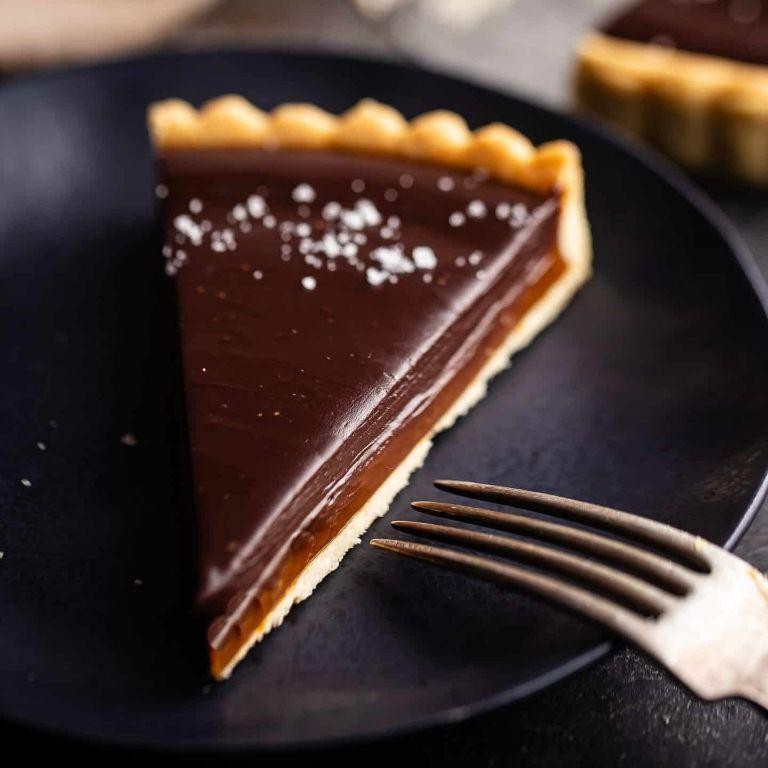
Oozing with decadent layers of flavor, this dark chocolate tart with sea salt caramel transforms simple ingredients into an elegant dessert that will impress any guest. Once you master the buttery crust and silky filling, you’ll find yourself making this showstopper for every special occasion.
8
portions30
minutes20
minutesIngredients
– A sleeve and a half of graham crackers (about 1½ cups crushed)
– A stick of unsalted butter (½ cup), melted
– A generous pinch of salt
– A cup of granulated sugar
– A quarter cup of water
– A half cup of heavy cream
– A couple tablespoons of unsalted butter
– A teaspoon of vanilla extract
– A good pinch of flaky sea salt
– A cup and a half of dark chocolate chips
– Another half cup of heavy cream
Instructions
1. Preheat your oven to 350°F.
2. Crush the graham crackers into fine crumbs using a food processor or rolling pin.
3. Mix the graham cracker crumbs with the melted butter and salt until the mixture resembles wet sand.
4. Press the crumb mixture firmly into a 9-inch tart pan, making sure to create an even layer across the bottom and up the sides.
5. Bake the crust for 10 minutes until lightly golden and fragrant, then let it cool completely.
6. Combine the granulated sugar and water in a heavy-bottomed saucepan over medium heat.
7. Cook the sugar mixture without stirring until it turns a deep amber color, about 8-10 minutes.
8. Carefully pour in the half cup of heavy cream while whisking constantly – the mixture will bubble vigorously.
9. Remove the caramel from heat and whisk in the 2 tablespoons of butter, vanilla extract, and flaky sea salt until smooth.
10. Pour the warm caramel over the cooled crust and spread it into an even layer.
11. Place the dark chocolate chips in a heatproof bowl.
12. Heat the remaining half cup of heavy cream in a small saucepan until it just begins to simmer.
13. Pour the hot cream over the chocolate chips and let it sit for 2 minutes to melt the chocolate.
14. Whisk the chocolate and cream together until completely smooth and glossy.
15. Pour the chocolate ganache over the caramel layer and gently tilt the pan to spread it evenly.
16. Refrigerate the tart for at least 4 hours, or until completely set.
Rich with contrasting textures and flavors, this tart delivers a perfect balance between bitter dark chocolate, sweet caramel, and salty crunch. The silky ganache layer gives way to a chewy caramel center that makes each bite complex and satisfying. Try serving thin slices with fresh berries or a dollop of whipped cream to cut through the richness.
Raspberry Coulis with Vanilla Bean Cheesecake
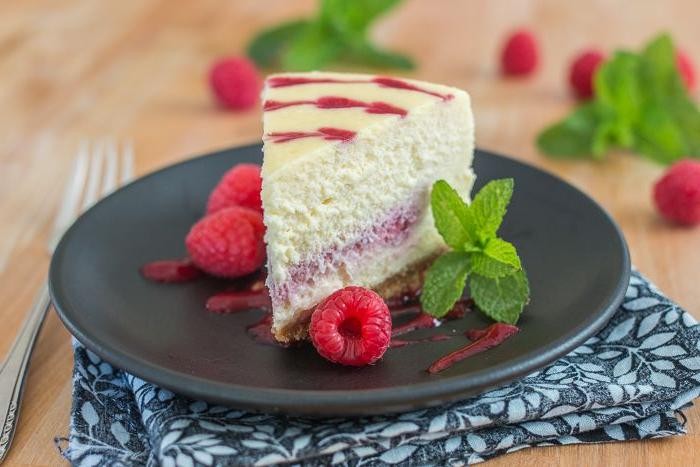
Now, let’s create a stunning dessert that combines the tangy brightness of raspberries with the creamy richness of cheesecake. This raspberry coulis with vanilla bean cheesesake is surprisingly straightforward to make, even for beginners, and delivers restaurant-quality results right in your own kitchen.
8
servings30
minutes60
minutesIngredients
– 2 cups of fresh or frozen raspberries
– 1/4 cup of granulated sugar
– A good squeeze of fresh lemon juice (about 1 tablespoon)
– 1 1/2 cups of graham cracker crumbs
– 1/3 cup of melted butter
– 2 packages (16 ounces total) of cream cheese, softened at room temperature
– 3/4 cup of granulated sugar
– 2 large eggs
– 1 teaspoon of vanilla extract
– The seeds scraped from 1 vanilla bean
– A pinch of salt
Instructions
1. Preheat your oven to 325°F and grease a 9-inch springform pan.
2. Combine the graham cracker crumbs with the melted butter until the mixture resembles wet sand.
3. Press the crumb mixture firmly into the bottom of the prepared pan using the bottom of a measuring cup to create an even layer.
4. Bake the crust for 10 minutes at 325°F until lightly golden, then remove from oven and let cool completely.
5. In a large mixing bowl, beat the softened cream cheese with an electric mixer on medium speed until completely smooth and free of lumps.
6. Gradually add the 3/4 cup of sugar while continuing to mix until fully incorporated.
7. Add the eggs one at a time, mixing just until combined after each addition to avoid overbeating.
8. Scrape the seeds from the vanilla bean and add them to the mixture along with the vanilla extract and pinch of salt.
9. Mix on low speed until the vanilla is evenly distributed throughout the batter.
10. Pour the cheesecake batter over the cooled crust and smooth the top with a spatula.
11. Bake at 325°F for 45-50 minutes until the edges are set but the center still has a slight jiggle when gently shaken.
12. Turn off the oven and prop the door open slightly, allowing the cheesecake to cool slowly in the oven for 1 hour to prevent cracking.
13. Remove the cheesecake from the oven and let it cool completely at room temperature, then refrigerate for at least 4 hours or overnight.
14. While the cheesecake chills, combine the raspberries, 1/4 cup of sugar, and lemon juice in a small saucepan.
15. Cook over medium heat for 8-10 minutes, stirring frequently, until the raspberries break down and release their juices.
16. Strain the mixture through a fine-mesh sieve into a bowl, pressing with a spatula to extract all the liquid while leaving the seeds behind.
17. Let the coulis cool to room temperature, then refrigerate until ready to serve.
Moment you slice into this dessert reveals the perfect contrast between the velvety cheesecake and the vibrant raspberry coulis. The vanilla bean specks throughout the creamy filling create visual appeal while the tart coulis cuts through the richness beautifully. Try drizzling the coulis in artistic swirls over individual slices or serve it alongside for dipping—either way, the combination of textures and flavors makes this dessert truly memorable.
Mango Mousse with Coconut Sorbet

Finally, let’s create a tropical dessert that feels both elegant and approachable. This mango mousse with coconut sorbet combines creamy texture with refreshing flavors, perfect for warm evenings or special occasions. Follow these steps carefully for a foolproof result that will impress your guests.
4
servings30
minutes2
minutesIngredients
– 2 ripe mangoes, peeled and cubed
– 1 cup heavy cream, chilled
– 1/4 cup granulated sugar
– 1 tablespoon fresh lime juice
– 1 teaspoon unflavored gelatin
– 2 tablespoons cold water
– 1 can (13.5 oz) coconut milk, refrigerated overnight
– 3 tablespoons powdered sugar
– A pinch of salt
Instructions
1. Place your mixing bowl and beaters in the freezer for 15 minutes to chill thoroughly before whipping cream.
2. Puree the mango cubes in a blender until completely smooth, scraping down the sides as needed.
3. Sprinkle gelatin over cold water in a small bowl and let it bloom for 5 minutes until the texture resembles applesauce.
4. Warm the bloomed gelatin in a double boiler over medium heat for 2 minutes, stirring constantly until completely dissolved and clear.
5. Combine mango puree, granulated sugar, and lime juice in a medium bowl, whisking until the sugar dissolves completely.
6. Stir the warm gelatin mixture into the mango mixture until fully incorporated with no streaks remaining.
7. Whip the chilled heavy cream in your pre-chilled bowl on medium-high speed for 3-4 minutes until soft peaks form that hold their shape when the beaters are lifted.
8. Gently fold the whipped cream into the mango mixture using a rubber spatula, making sure to scrape from the bottom to incorporate evenly without deflating the cream.
9. Divide the mousse among 4 serving glasses and refrigerate for at least 4 hours, or until firmly set when gently shaken.
10. For the sorbet, scoop the solidified coconut cream from the top of the chilled can into a clean bowl, leaving the watery liquid behind.
11. Whip the coconut cream with powdered sugar and salt for 2-3 minutes until light and fluffy with stiff peaks.
12. Spoon the coconut sorbet over the chilled mousse just before serving.
What makes this dessert special is the contrast between the airy, tropical mousse and the creamy coconut sorbet melting together. The vibrant mango flavor shines through while the coconut provides a cooling counterpoint that makes each bite refreshing. Try garnishing with toasted coconut flakes or fresh mint leaves for extra texture and visual appeal.
Lemon Basil Sorbet with Candied Zest

On a hot day, nothing beats the refreshing zing of homemade sorbet. Our lemon basil sorbet with candied zest combines bright citrus with herbal notes for a sophisticated yet simple frozen treat that’s perfect for beginners to master.
2
servings20
minutes12
minutesIngredients
– 2 cups of fresh lemon juice (about 8-10 lemons)
– 1 cup of granulated sugar
– 1 cup of water
– A big handful of fresh basil leaves
– The zest from 4 lemons
– An extra 1/4 cup of sugar for the candied zest
– A splash of water for the syrup
Instructions
1. Combine 1 cup of sugar and 1 cup of water in a saucepan over medium heat, stirring until the sugar completely dissolves to create a simple syrup.
2. Remove the syrup from heat and stir in the fresh basil leaves, letting them steep for 15 minutes to infuse the herbal flavor.
3. Strain the basil-infused syrup into a large bowl, pressing on the leaves to extract all the flavorful liquid.
4. Stir in the 2 cups of fresh lemon juice until fully combined with the syrup.
5. Pour the lemon-basil mixture into an ice cream maker and churn according to manufacturer’s instructions, about 20-25 minutes until it reaches a soft-serve consistency.
6. While the sorbet churns, combine the lemon zest, 1/4 cup of sugar, and a splash of water in a small skillet over medium-low heat.
7. Cook the zest mixture for 5-7 minutes, stirring frequently, until the sugar melts and coats the zest in a translucent, candied shell.
8. Spread the candied zest on parchment paper to cool completely and harden, about 10 minutes.
9. Transfer the churned sorbet to a freezer-safe container and fold in half of the cooled candied zest.
10. Freeze the sorbet for at least 4 hours, or until firm enough to scoop.
Now you have a beautifully textured sorbet with icy crystals that melt instantly on the tongue. The candied zest provides delightful crunch against the smooth frozen base, while the basil adds an unexpected herbal complexity. Try serving it in chilled lemon halves for an elegant presentation that highlights the citrus theme.
Classic French Opera Cake with Espresso Buttercream
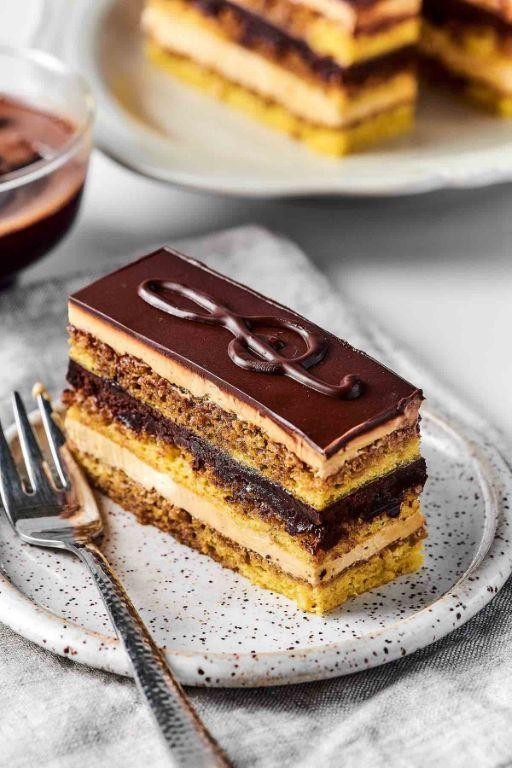
Unlocking the secrets to this elegant French pastry is easier than you might think, even for baking beginners. This classic opera cake combines delicate almond sponge layers with rich coffee buttercream and a glossy chocolate ganache, creating a dessert that looks impressive but follows a straightforward methodical process. Let’s walk through each component step by step to build this beautiful layered cake together.
9
portions45
minutes25
minutesIngredients
– 1 cup of all-purpose flour
– A couple of large eggs
– 1/2 cup of granulated sugar
– A splash of vanilla extract
– 1/2 cup of unsalted butter, softened
– 1 cup of strong brewed espresso, cooled
– 2 cups of powdered sugar
– 4 ounces of dark chocolate chips
– 1/4 cup of heavy cream
– A pinch of salt
Instructions
1. Preheat your oven to 350°F and grease an 8-inch square baking pan.
2. Whisk together 1 cup of all-purpose flour and a pinch of salt in a medium bowl.
3. Beat 2 large eggs with 1/2 cup of granulated sugar in a separate bowl for 3-4 minutes until pale and fluffy.
4. Gently fold the flour mixture into the egg mixture until just combined, being careful not to deflate the batter.
5. Pour the batter into the prepared pan and bake for 20-25 minutes until golden and a toothpick inserted comes out clean.
6. Cool the cake completely on a wire rack, then slice it horizontally into three even layers using a serrated knife for clean cuts.
7. Beat 1/2 cup of softened unsalted butter with 2 cups of powdered sugar for 5 minutes until light and creamy.
8. Gradually mix in 1 cup of cooled brewed espresso and a splash of vanilla extract until the buttercream is smooth.
9. Place one cake layer on a serving plate and spread a thin, even layer of espresso buttercream over it.
10. Repeat with the second cake layer and more buttercream, then top with the final cake layer.
11. Heat 1/4 cup of heavy cream in a small saucepan until it just begins to simmer, then pour it over 4 ounces of dark chocolate chips.
12. Let the mixture sit for 2 minutes, then stir until the chocolate is fully melted and the ganache is glossy.
13. Pour the warm ganache over the top cake layer, using an offset spatula to spread it evenly to the edges.
14. Chill the assembled cake in the refrigerator for at least 2 hours to set the layers before slicing.
You’ll love how the moist almond sponge contrasts with the silky espresso buttercream, while the dark chocolate ganache adds a bittersweet finish. Serve thin slices with a dusting of cocoa powder or alongside a shot of espresso to highlight the coffee notes—it’s perfect for elegant gatherings or as a special weekend treat.
Tiramisu Parfait with Chocolate Shavings
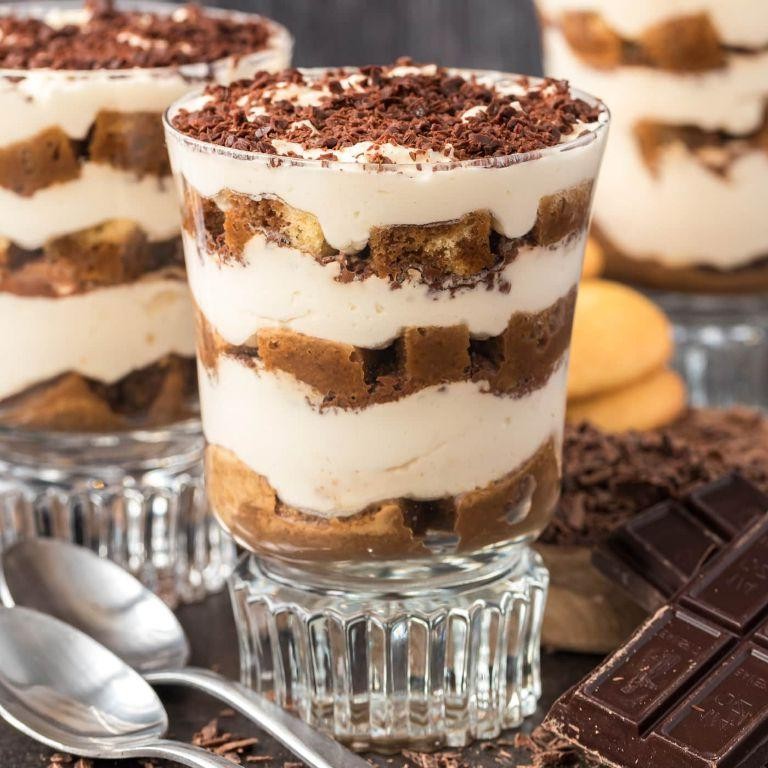
Baking a classic dessert doesn’t have to be intimidating, especially when we transform traditional tiramisu into individual parfaits that are perfect for beginners. These elegant glasses layer coffee-soaked ladyfingers with creamy mascarpone filling and delicate chocolate shavings, creating a dessert that’s both impressive and approachable.
3
portions25
minutesIngredients
- 1 cup of strong brewed coffee, cooled to room temperature
- 2 tablespoons of coffee liqueur (optional but lovely)
- 1 package of ladyfinger cookies
- 8 ounces of mascarpone cheese at room temperature
- 1/2 cup of heavy cream
- 1/4 cup of granulated sugar
- 1 teaspoon of pure vanilla extract
- A good handful of dark chocolate, for shaving
- Cocoa powder for dusting
Instructions
- Combine the cooled coffee and coffee liqueur in a shallow bowl.
- Quickly dip each ladyfinger into the coffee mixture for about 2 seconds per side—they should be moist but not falling apart.
- Place 2-3 soaked ladyfingers at the bottom of each parfait glass, breaking them to fit if needed.
- In a large mixing bowl, beat the mascarpone cheese with an electric mixer on medium speed until smooth and creamy, about 1 minute.
- Add the heavy cream, granulated sugar, and vanilla extract to the mascarpone.
- Beat the mixture on medium-high speed until soft peaks form and the cream holds its shape, about 2-3 minutes.
- Spoon half of the mascarpone cream evenly over the ladyfinger layer in each glass.
- Use a vegetable peeler to shave the dark chocolate bar, creating delicate curls.
- Sprinkle a generous layer of chocolate shavings over the cream.
- Repeat the layers: add another layer of coffee-dipped ladyfingers, followed by the remaining mascarpone cream.
- Dust the top of each parfait lightly with cocoa powder using a fine-mesh sieve.
- Garnish with the remaining chocolate shavings.
- Cover the parfaits with plastic wrap and refrigerate for at least 4 hours, or ideally overnight, to allow the flavors to meld.
Perfectly chilled tiramisu parfaits offer a delightful contrast between the soft, coffee-infused cookies and the rich, velvety mascarpone cream. The dark chocolate shavings provide little bursts of intense flavor that complement the subtle sweetness beautifully. For a festive twist, serve these in clear mason jars with long spoons for easy layering enjoyment.
Warm Apple Galette with Cinnamon Ice Cream
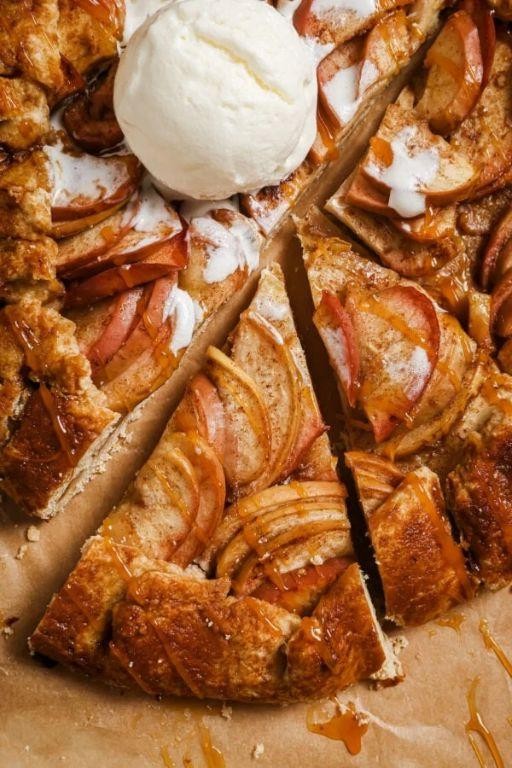
A warm apple galette with cinnamon ice cream is the perfect cozy dessert that feels fancy but is surprisingly simple to make. Anyone can master this rustic free-form tart with just a few basic ingredients and some patience. Let’s walk through each step together so you can create this beautiful dessert with confidence.
6
portions40
minutes40
minutesIngredients
– 1 ½ cups of all-purpose flour
– A couple of tablespoons of granulated sugar
– A pinch of salt
– ½ cup of cold unsalted butter, cut into small cubes
– 3-4 tablespoons of ice water
– 3 medium apples, peeled and sliced
– A generous sprinkle of ground cinnamon
– A splash of lemon juice
– 1 egg for that golden finish
– A dusting of coarse sugar for crunch
Instructions
1. Combine 1 ½ cups of all-purpose flour, 1 tablespoon of granulated sugar, and a pinch of salt in a large bowl.
2. Cut in ½ cup of cold cubed butter using a pastry cutter or your fingers until the mixture resembles coarse crumbs.
3. Gradually add 3-4 tablespoons of ice water, mixing just until the dough comes together.
4. Tip: Handle the dough minimally to keep it tender and avoid toughness.
5. Shape the dough into a disk, wrap in plastic, and refrigerate for 30 minutes.
6. Preheat your oven to 375°F and line a baking sheet with parchment paper.
7. Toss 3 peeled and sliced apples with a splash of lemon juice, 1 tablespoon of granulated sugar, and a generous sprinkle of ground cinnamon.
8. Roll the chilled dough into a 12-inch circle on a floured surface.
9. Arrange the apple slices in the center, leaving a 2-inch border around the edges.
10. Fold the dough edges over the apples, pleating as you go.
11. Tip: Don’t worry about perfection—rustic folds add charm to your galette.
12. Beat 1 egg and brush it over the dough crust for a shiny finish.
13. Sprinkle coarse sugar over the crust for extra crunch.
14. Bake at 375°F for 35-40 minutes until the crust is golden brown and the apples are tender.
15. Tip: Check for doneness by inserting a knife into an apple slice—it should slide in easily.
16. Let the galette cool on the baking sheet for 10 minutes before slicing.
Serve this warm galette with a scoop of cinnamon ice cream for the ultimate fall treat. The flaky, buttery crust contrasts beautifully with the soft, spiced apples, while the cold ice cream melts into every bite. Try drizzling with caramel sauce or topping with toasted pecans for an extra special presentation.
Peach Melba with Raspberry Sauce
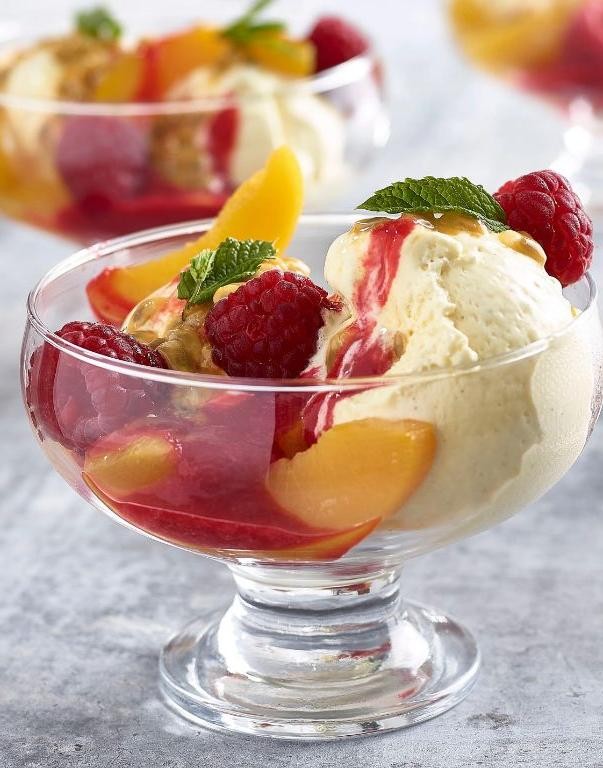
Savoring the perfect balance of sweet peaches and tart raspberries is easier than you might think with this classic dessert. Sometimes you want something elegant but don’t have hours to spend in the kitchen, which is exactly why Peach Melba remains a timeless favorite. Let me walk you through creating this beautiful dessert that looks impressive but comes together with simple, methodical steps.
5
servings15
minutes7
minutesIngredients
- 4 ripe but firm peaches
- 2 cups of fresh raspberries
- 1/4 cup of granulated sugar
- 1 tablespoon of fresh lemon juice
- A splash of vanilla extract
- A couple of scoops of vanilla ice cream
- A handful of sliced almonds for crunch
Instructions
- Bring a large pot of water to a rolling boil over high heat.
- Carefully lower the peaches into the boiling water using a slotted spoon and blanch for exactly 45 seconds.
- Immediately transfer the peaches to a bowl of ice water to stop the cooking process.
- Gently peel the skins from the peaches, which should slip off easily thanks to the blanching.
- Slice each peach in half and remove the pits, creating 8 beautiful peach halves.
- Combine the raspberries, sugar, and lemon juice in a small saucepan over medium heat.
- Cook the raspberry mixture for 5-7 minutes, stirring frequently until the berries break down and release their juices.
- Press the raspberry sauce through a fine-mesh strainer into a bowl to remove the seeds, using the back of a spoon to extract all the liquid.
- Stir the vanilla extract into the strained raspberry sauce until fully incorporated.
- Place two scoops of vanilla ice cream in each serving bowl.
- Arrange two peach halves around the ice cream in each bowl.
- Drizzle the warm raspberry sauce generously over the peaches and ice cream.
- Sprinkle the sliced almonds over each serving for added texture and nutty flavor.
Remarkably, the warm peach halves and raspberry sauce create a beautiful contrast with the cold ice cream that melts just enough to create a creamy sauce at the bottom of the bowl. The sliced almonds provide that essential crunch against the soft fruit and smooth ice cream, making each bite a textural adventure. For a creative twist, try serving these in individual mason jars for a portable summer treat that’s perfect for picnics or backyard gatherings.
Pistachio Crusted Creme Brulee
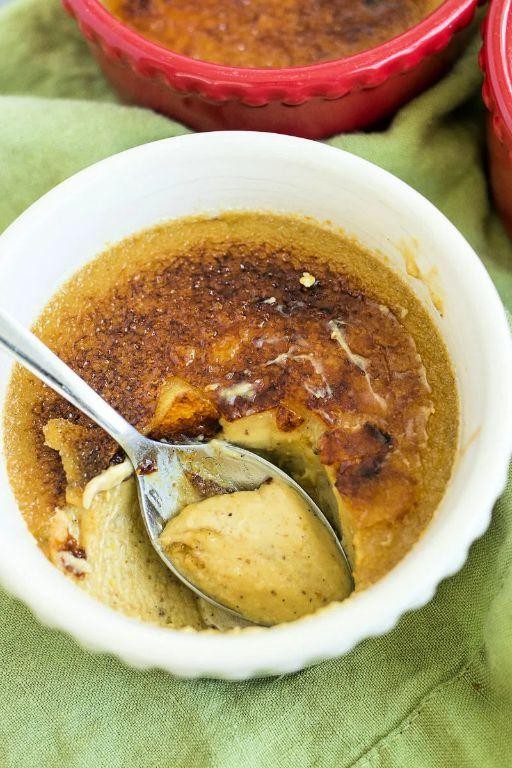
Perfecting a classic dessert with a nutty twist requires careful attention to technique, but the results are absolutely worth it. Pistachio crusted crème brûlée combines creamy custard with crunchy, caramelized pistachios for a textural masterpiece that will impress any dinner guest.
3
portions20
minutes40
minutesIngredients
- 1 cup of heavy cream
- 4 large egg yolks
- 1/3 cup of granulated sugar, plus extra for topping
- A splash of pure vanilla extract
- A pinch of fine sea salt
- A couple of tablespoons of finely chopped pistachios
Instructions
- Preheat your oven to 325°F and place four 4-ounce ramekins in a large baking dish.
- Heat 1 cup of heavy cream in a saucepan over medium heat until small bubbles form around the edges, about 180°F.
- Whisk 4 large egg yolks with 1/3 cup of granulated sugar in a medium bowl until pale and slightly thickened.
- Slowly pour the hot cream into the egg mixture while whisking constantly to prevent curdling.
- Stir in a splash of pure vanilla extract and a pinch of fine sea salt until fully combined.
- Divide the custard mixture evenly among the four ramekins.
- Carefully pour hot water into the baking dish until it reaches halfway up the sides of the ramekins.
- Bake for 35-40 minutes until the edges are set but the centers still jiggle slightly when shaken.
- Remove ramekins from the water bath and cool completely on a wire rack for 1 hour.
- Refrigerate the custards for at least 4 hours, or preferably overnight, until thoroughly chilled.
- Sprinkle a thin, even layer of granulated sugar over each chilled custard.
- Use a kitchen torch to caramelize the sugar, moving constantly until golden brown and bubbly.
- Immediately sprinkle a couple of tablespoons of finely chopped pistachios over the hot caramelized sugar.
- Allow the sugar to harden for 1-2 minutes before serving.
Breaking through that glass-like caramelized sugar reveals the silkiest custard beneath, with the toasted pistachios adding delightful crunch and earthy flavor. Serve it immediately after torching for maximum textural contrast, or try garnishing with fresh berries for a colorful presentation that complements the rich, nutty notes.
White Chocolate Mousse with Passion Fruit Reduction
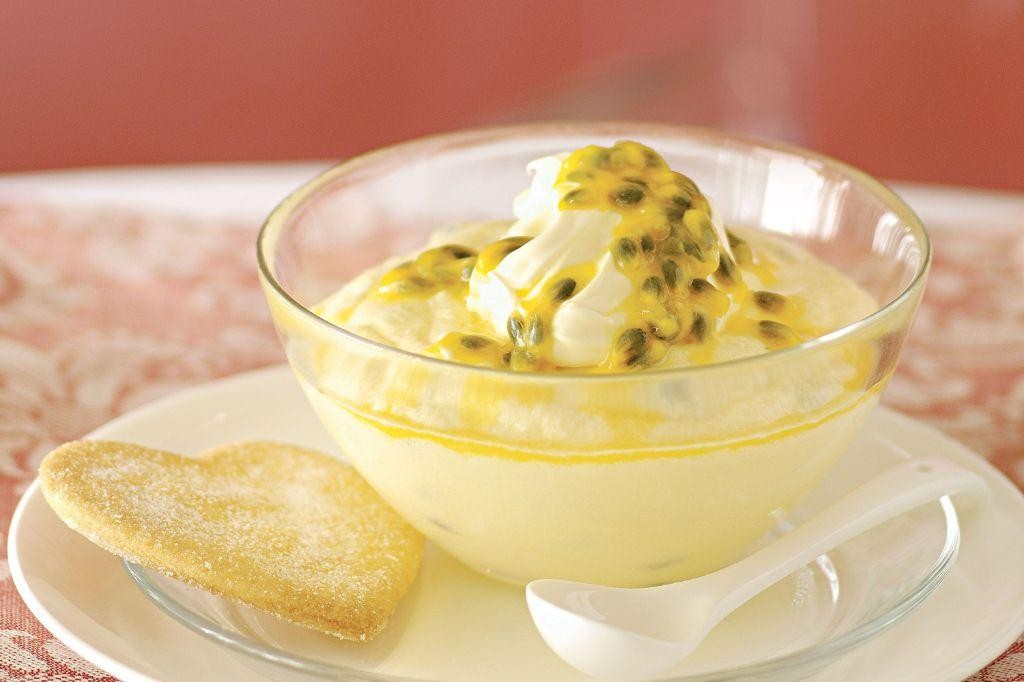
Getting this elegant dessert just right is easier than you might think, especially when we break it down step by step. Today I’ll walk you through creating a silky white chocolate mousse topped with a tangy passion fruit reduction that will impress any dinner guest. Let’s start with gathering our ingredients before diving into the methodical process.
4
portions25
minutes12
minutesIngredients
– 8 ounces of good quality white chocolate, chopped into small pieces
– 1 cup of heavy cream, nice and cold
– 2 passion fruits, you’ll need about ¼ cup of pulp
– A couple of tablespoons of granulated sugar
– A splash of fresh lemon juice
– 3 large egg whites, at room temperature
– A pinch of cream of tartar
Instructions
1. Place your chopped white chocolate in a heatproof bowl and set it over a saucepan of gently simmering water, making sure the bottom of the bowl doesn’t touch the water.
2. Stir the chocolate constantly with a spatula until it’s completely melted and smooth, then remove the bowl from the heat and let it cool to room temperature, about 15 minutes.
3. While the chocolate cools, scoop the pulp from your passion fruits into a small saucepan and add the sugar and lemon juice.
4. Cook the passion fruit mixture over medium heat, stirring frequently, until it thickens to a syrupy consistency that coats the back of a spoon, about 5-7 minutes.
5. Strain the passion fruit reduction through a fine-mesh sieve to remove the seeds, then set it aside to cool completely.
6. In a clean, dry mixing bowl, whip the cold heavy cream with an electric mixer on medium-high speed until it forms stiff peaks that hold their shape when you lift the beaters.
7. Gently fold one-third of the whipped cream into the cooled white chocolate using a rubber spatula to lighten the mixture before adding the rest.
8. In a separate bowl, whisk the egg whites with the cream of tartar until they form soft peaks that curl over when you lift the whisk.
9. Carefully fold the whipped egg whites into the chocolate mixture until no white streaks remain, being careful not to deflate the air bubbles.
10. Divide the mousse between 4 serving glasses and chill in the refrigerator for at least 4 hours, or until set.
11. Just before serving, drizzle the cooled passion fruit reduction over each mousse portion.
Looking at the finished dessert, you’ll notice how the creamy, cloud-like mousse contrasts beautifully with the vibrant, tart reduction. The white chocolate provides a sweet richness that’s perfectly balanced by the passion fruit’s tropical acidity. For an elegant presentation, try layering the mousse and reduction in clear glasses or garnishing with fresh mint leaves.
Spiced Chai Pudding with Caramelized Bananas

Warm up your autumn afternoons with this comforting spiced chai pudding topped with caramelized bananas. We’ll walk through each step together, from steeping the tea to creating that perfect golden banana topping. You’ll be amazed at how simple it is to create this restaurant-worthy dessert at home.
4
servings15
minutes15
minutesIngredients
– 2 cups of whole milk
– 4 chai tea bags
– 1/2 cup of granulated sugar
– 1/4 cup of cornstarch
– A pinch of salt
– 1 teaspoon of vanilla extract
– 2 ripe bananas
– 2 tablespoons of unsalted butter
– 2 tablespoons of brown sugar
– A sprinkle of cinnamon
Instructions
1. Pour 2 cups of whole milk into a medium saucepan and heat over medium heat until small bubbles form around the edges (about 180°F).
2. Remove the saucepan from heat and steep 4 chai tea bags in the warm milk for exactly 5 minutes to extract maximum flavor.
3. Squeeze and discard the tea bags, then return the chai-infused milk to medium heat.
4. Whisk together 1/2 cup granulated sugar, 1/4 cup cornstarch, and a pinch of salt in a separate bowl until no lumps remain.
5. Gradually whisk the sugar mixture into the warm chai milk until completely smooth.
6. Cook the pudding mixture over medium heat, stirring constantly with a wooden spoon, until it thickens and large bubbles break the surface (about 5-7 minutes).
7. Remove from heat and stir in 1 teaspoon vanilla extract until fully incorporated.
8. Pour the hot pudding through a fine-mesh strainer into a clean bowl to ensure silky texture.
9. Press plastic wrap directly onto the pudding surface to prevent skin formation and refrigerate for at least 2 hours until completely chilled.
10. Slice 2 ripe bananas into 1/2-inch thick rounds while the pudding chills.
11. Melt 2 tablespoons unsalted butter in a skillet over medium-high heat until foamy.
12. Arrange banana slices in a single layer and sprinkle with 2 tablespoons brown sugar and a sprinkle of cinnamon.
13. Cook bananas undisturbed for 2 minutes until the bottoms caramelize to deep golden brown.
14. Flip each banana slice carefully and cook for 1 more minute until caramelized on both sides.
15. Remove bananas from heat and let cool slightly before assembling.
16. Divide chilled pudding among serving bowls and top with warm caramelized bananas.
Creamy and aromatic, this pudding develops richer chai flavors as it chills, while the caramelized bananas add contrasting warmth and texture. Try layering it in glasses with crushed ginger snaps for an elegant parfait, or serve it warm for immediate comfort on chilly evenings.
Caramelized Pear Tart with Almond Frangipane
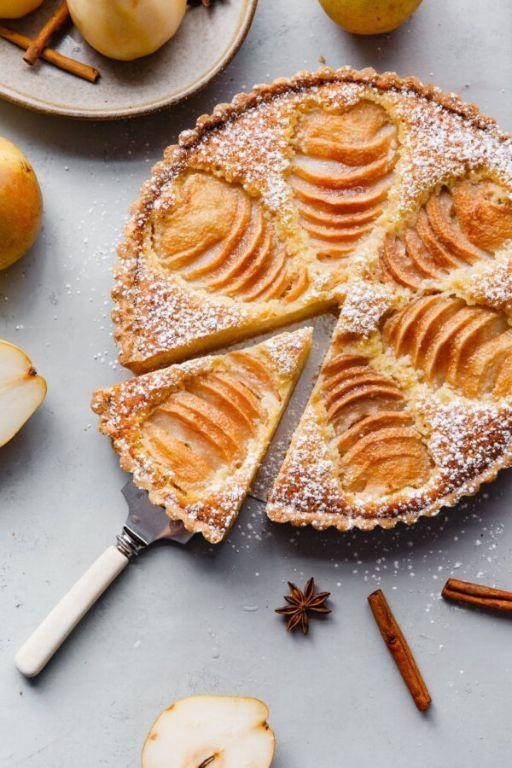
Let’s create a stunning fall dessert that combines sweet pears with nutty almond filling. This caramelized pear tart with almond frangipane is surprisingly approachable, even for baking beginners, and fills your kitchen with the most wonderful autumn aromas.
8
portions25
minutes35
minutesIngredients
– 1 sheet of frozen puff pastry, thawed
– 2 ripe but firm pears
– 1/2 cup of granulated sugar
– 1/4 cup of unsalted butter
– 1 cup of almond flour
– 1/2 cup of powdered sugar
– 1 large egg
– 1 teaspoon of vanilla extract
– A pinch of salt
– A splash of heavy cream for brushing
Instructions
1. Preheat your oven to 400°F and line a baking sheet with parchment paper.
2. Unfold the thawed puff pastry sheet onto the prepared baking sheet.
3. Core and slice the pears into 1/4-inch thick slices, keeping the shape intact for pretty arrangement.
4. Melt the butter in a large skillet over medium heat.
5. Sprinkle the granulated sugar evenly over the melted butter.
6. Arrange the pear slices in a single layer and cook for 5-7 minutes until the bottoms are golden brown and caramelized.
7. Carefully flip each pear slice and cook for another 3-4 minutes until both sides are caramelized.
8. Remove the pears from the skillet and let them cool slightly on a plate.
9. In a medium bowl, whisk together the almond flour, powdered sugar, egg, vanilla extract, and salt until smooth.
10. Spread the almond frangipane mixture evenly over the puff pastry, leaving a 1-inch border around the edges.
11. Arrange the caramelized pear slices in a decorative pattern over the frangipane layer.
12. Fold the edges of the puff pastry up and over the filling to create a rustic border.
13. Brush the pastry edges lightly with heavy cream for a golden finish.
14. Bake for 20-25 minutes until the pastry is puffed and golden brown, and the frangipane is set.
15. Let the tart cool on the baking sheet for 15 minutes before slicing.
Really, the magic happens when you take that first bite—the buttery, flaky crust gives way to the creamy almond filling and tender, caramel-kissed pears. Serve it warm with a dollop of vanilla ice cream melting over the top, or enjoy it at room temperature with your afternoon coffee for the perfect autumn treat.
Chocolate Lava Cake with Fresh Mint Gelato
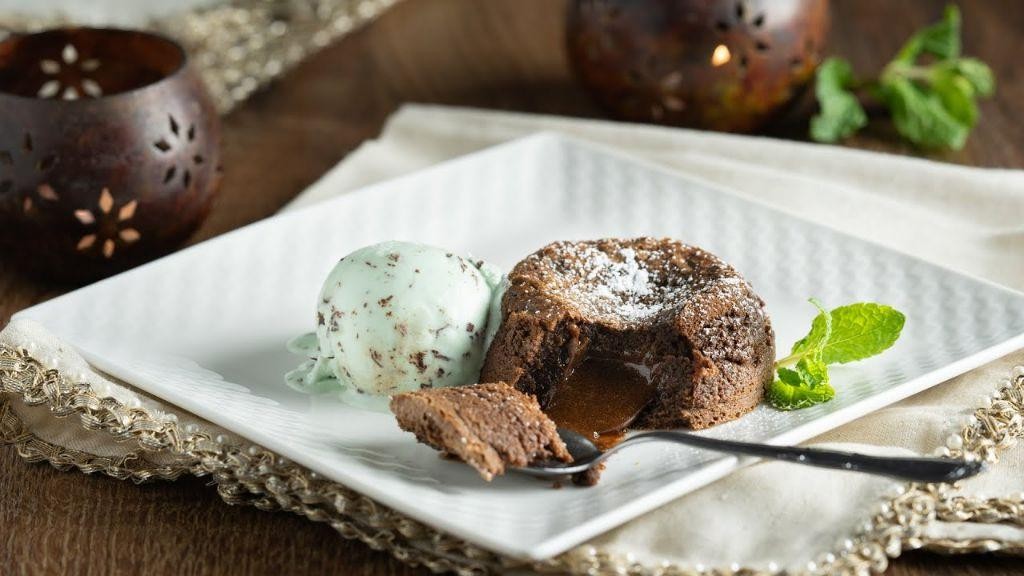
Sometimes the most impressive desserts are surprisingly simple to make at home, and this chocolate lava cake with fresh mint gelato is the perfect example of restaurant-quality elegance you can achieve in your own kitchen. Start by gathering your ingredients and preheating your oven to 425°F – this high temperature is crucial for creating that molten center while baking a perfectly set exterior.
3
portions15
minutes14
minutesIngredients
– 4 ounces of good quality dark chocolate, chopped
– 1/2 cup of unsalted butter, plus a little extra for greasing
– 2 large eggs
– 2 large egg yolks
– 1/4 cup of granulated sugar
– 2 tablespoons of all-purpose flour
– A pinch of fine sea salt
– A splash of pure vanilla extract
– A couple of ramekins for baking
– Your favorite store-bought mint gelato for serving
Instructions
1. Preheat your oven to 425°F and generously butter four 6-ounce ramekins, making sure to coat all sides evenly.
2. Combine the chopped dark chocolate and 1/2 cup butter in a microwave-safe bowl.
3. Microwave the chocolate-butter mixture in 30-second intervals, stirring between each, until completely smooth and melted.
4. In a separate bowl, whisk together the 2 whole eggs, 2 egg yolks, and 1/4 cup sugar until pale and slightly thickened.
5. Slowly pour the warm chocolate mixture into the egg mixture while continuously whisking.
6. Add the 2 tablespoons flour, pinch of salt, and splash of vanilla extract to the batter.
7. Whisk gently until all ingredients are just combined and no flour streaks remain.
8. Divide the batter evenly among the four prepared ramekins, filling each about 3/4 full.
9. Place the ramekins on a baking sheet and bake for 12-14 minutes until the edges are set but the centers still jiggle slightly.
10. Remove the cakes from the oven and let them rest for exactly 1 minute before serving.
11. Run a knife around the edge of each ramekin to loosen the cakes.
12. Invert each ramekin onto individual serving plates and carefully lift to reveal the cake.
13. Immediately place a scoop of mint gelato beside each warm cake.Finally, serve these beauties right away while the centers are still gloriously molten. The contrast between the warm, flowing chocolate center and the cool, creamy mint gelato creates an unforgettable temperature play, while the fresh mint cuts through the richness of the dark chocolate in the most refreshing way.
Roasted Fig and Honey Tart with Mascarpone Cream
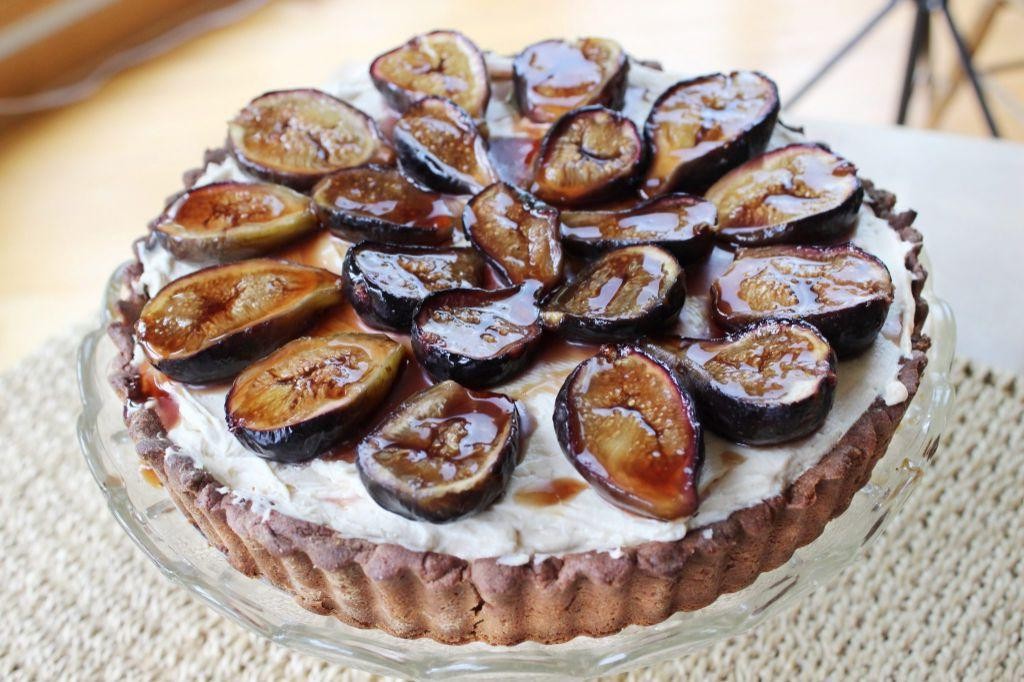
Fragrant roasted figs nestled in a buttery crust and drizzled with honey make this tart an unforgettable autumn treat. Following these clear steps will guide you to a stunning dessert that looks impressive but is surprisingly approachable for home bakers. Let’s walk through each stage together to ensure your tart turns out perfectly.
8
portions25
minutes35
minutesIngredients
For the crust: 1 ¼ cups all-purpose flour, ½ cup cold unsalted butter cut into cubes, a couple of tablespoons of ice water, and a pinch of salt.
For the filling: about 10 fresh figs halved, ¼ cup honey, ½ cup mascarpone cheese, a splash of vanilla extract, and 1 tablespoon powdered sugar.
Instructions
- Preheat your oven to 375°F to ensure it’s ready for baking.
- Combine 1 ¼ cups all-purpose flour, ½ cup cold cubed butter, and a pinch of salt in a bowl.
- Use your fingertips to rub the butter into the flour until the mixture resembles coarse crumbs.
- Add a couple of tablespoons of ice water and mix just until the dough comes together.
- Tip: Handle the dough minimally to keep it tender and avoid a tough crust.
- Press the dough evenly into a 9-inch tart pan, covering the bottom and sides.
- Prick the crust all over with a fork to prevent air bubbles during baking.
- Bake the crust for 15 minutes at 375°F until it’s lightly golden.
- Arrange about 10 halved figs cut-side up in the baked crust.
- Drizzle ¼ cup honey evenly over the figs.
- Return the tart to the oven and bake for 20 minutes at 375°F until the figs are soft and caramelized.
- Tip: Rotate the tart halfway through baking for even browning.
- While the tart cools, whisk together ½ cup mascarpone cheese, a splash of vanilla extract, and 1 tablespoon powdered sugar until smooth.
- Spread the mascarpone cream over the cooled tart.
- Tip: Let the tart cool completely before adding the cream to prevent it from melting.
- Slice and serve the tart at room temperature.
Rich, caramelized figs contrast beautifully with the creamy, slightly tangy mascarpone layer, while the crisp crust adds a satisfying crunch. Serve each slice with an extra drizzle of honey for added sweetness, or pair it with a cup of espresso to balance the flavors. This tart shines as a centerpiece for dinner parties or a cozy weekend dessert.
Blood Orange Granita with Whipped Greek Yogurt
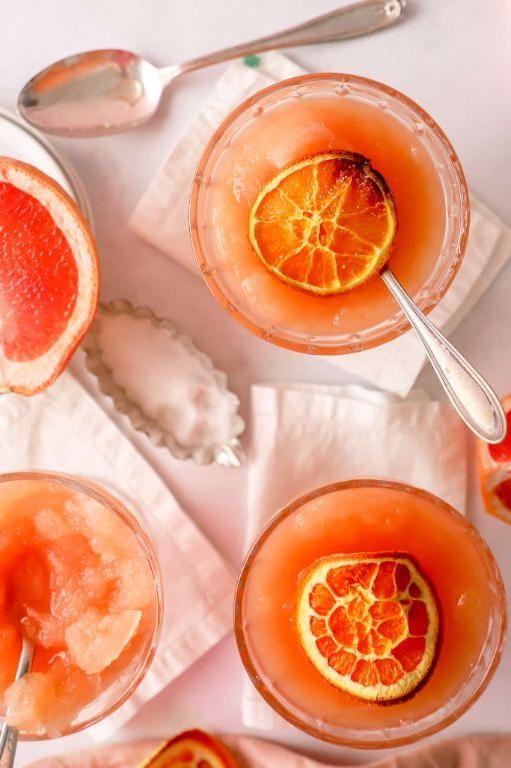
Let’s create a stunning frozen dessert that captures the vibrant essence of winter citrus. This blood orange granita with whipped Greek yogurt combines sweet-tart flavors with creamy textures for a refreshing treat that’s surprisingly simple to make from scratch.
2
servings15
minutes4
minutesIngredients
– 4 cups of freshly squeezed blood orange juice (about 8-10 medium oranges)
– 1/2 cup of granulated sugar
– A splash of fresh lemon juice (about 1 tablespoon)
– 2 cups of plain Greek yogurt
– A couple of tablespoons of honey
– 1 teaspoon of vanilla extract
Instructions
1. Combine the blood orange juice, sugar, and lemon juice in a medium saucepan over medium heat.
2. Heat the mixture while stirring constantly until the sugar completely dissolves, about 3-4 minutes. Tip: Don’t let it boil – you just want to dissolve the sugar without cooking the fresh juice flavor away.
3. Remove the saucepan from heat and let the syrup cool to room temperature, about 20 minutes.
4. Pour the cooled blood orange mixture into a 9×13-inch metal baking pan.
5. Place the pan in your freezer on a level surface.
6. Freeze for 30 minutes until ice crystals begin forming around the edges.
7. Use a fork to scrape and stir the frozen edges into the center. Tip: Metal pans freeze faster than glass, giving you better texture control.
8. Return the pan to the freezer and repeat the scraping process every 30 minutes for 3-4 hours until you have uniform, fluffy ice crystals.
9. While the granita freezes, combine the Greek yogurt, honey, and vanilla extract in a medium bowl.
10. Whisk the yogurt mixture vigorously for 2-3 minutes until it becomes light and slightly aerated. Tip: For best results, make sure your yogurt is cold but not straight from the refrigerator.
11. Scoop the finished granita into serving glasses.
12. Top each serving with a generous dollop of the whipped Greek yogurt.
Nothing beats the crystalline texture of this granita as it melts on your tongue, releasing bursts of citrus that play beautifully against the creamy yogurt. Try layering it in parfait glasses with fresh mint leaves for an elegant presentation, or serve it alongside almond biscotti for contrasting crunch.
Toasted Almond and Apricot Clafoutis
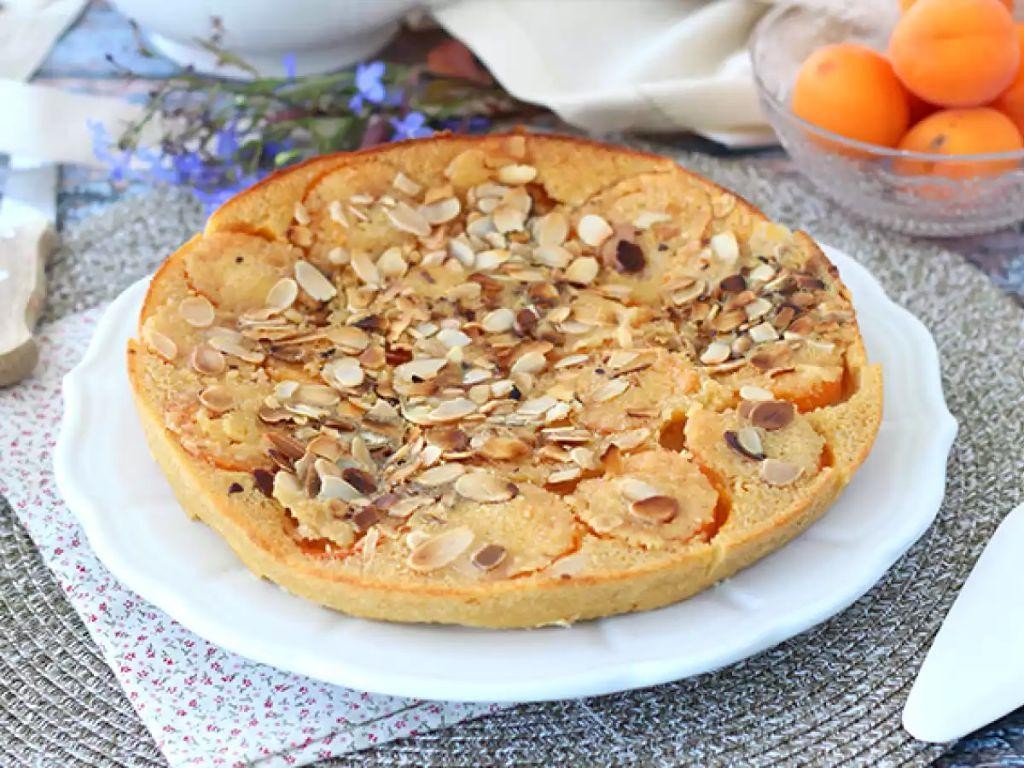
Baking this delightful dessert transforms simple pantry staples into an elegant French-inspired treat that’s surprisingly easy to master. Let’s walk through each step together to create a golden, custardy clafoutis studded with sweet apricots and nutty toasted almonds. You’ll be amazed at how effortlessly it comes together for a cozy breakfast or impressive dessert.
6
servings20
minutes50
minutesIngredients
– A couple of ripe apricots, pitted and sliced
– A handful of raw almonds
– 3 large eggs
– 1/2 cup of granulated sugar
– A splash of vanilla extract
– 3/4 cup of all-purpose flour
– A pinch of salt
– 1 cup of whole milk
– 2 tablespoons of unsalted butter
Instructions
1. Preheat your oven to 375°F and place a 9-inch pie dish inside to warm for 5 minutes.
2. Spread the raw almonds in a single layer on a baking sheet and toast them in the preheating oven for 8–10 minutes, until fragrant and lightly golden.
3. Remove the toasted almonds from the oven, let them cool completely, then chop them roughly.
4. Tip: Toasting the almonds deepens their flavor and adds a delightful crunch to the finished clafoutis.
5. Take the warmed pie dish out of the oven and add the 2 tablespoons of unsalted butter, swirling until melted and coating the bottom and sides.
6. Arrange the sliced apricots evenly over the bottom of the buttered dish and sprinkle the chopped toasted almonds on top.
7. In a medium bowl, whisk the 3 large eggs and 1/2 cup of granulated sugar together for about 2 minutes, until pale and slightly thickened.
8. Tip: Whisking the eggs and sugar thoroughly ensures a light, airy texture in the baked custard.
9. Add the splash of vanilla extract, a pinch of salt, and the 3/4 cup of all-purpose flour, whisking just until no dry streaks remain.
10. Gradually pour in the 1 cup of whole milk while whisking continuously to form a smooth, thin batter.
11. Pour the batter evenly over the apricots and almonds in the prepared dish.
12. Bake in the preheated 375°F oven for 35–40 minutes, until the edges are set and the center jiggles slightly when shaken.
13. Tip: Avoid overbaking—the clafoutis will continue to set as it cools, resulting in a tender, custardy interior.
14. Let the clafoutis cool on a wire rack for at least 20 minutes before slicing.
A warm slice of this clafoutis offers a creamy, pudding-like texture with bursts of juicy apricot and the satisfying crunch of almonds. Serve it dusted with powdered sugar for breakfast or topped with a dollop of whipped cream as a simple yet elegant dessert that highlights the harmony of fruit and nut.
Conclusion
Delightful desserts await in this collection, perfect for elevating any special occasion or gourmet dinner at home. We hope these 21 exquisite recipes inspire your culinary creativity. Try one (or several!), then share your favorites in the comments below. Loved this roundup? Help fellow food lovers discover it by sharing on Pinterest!


