
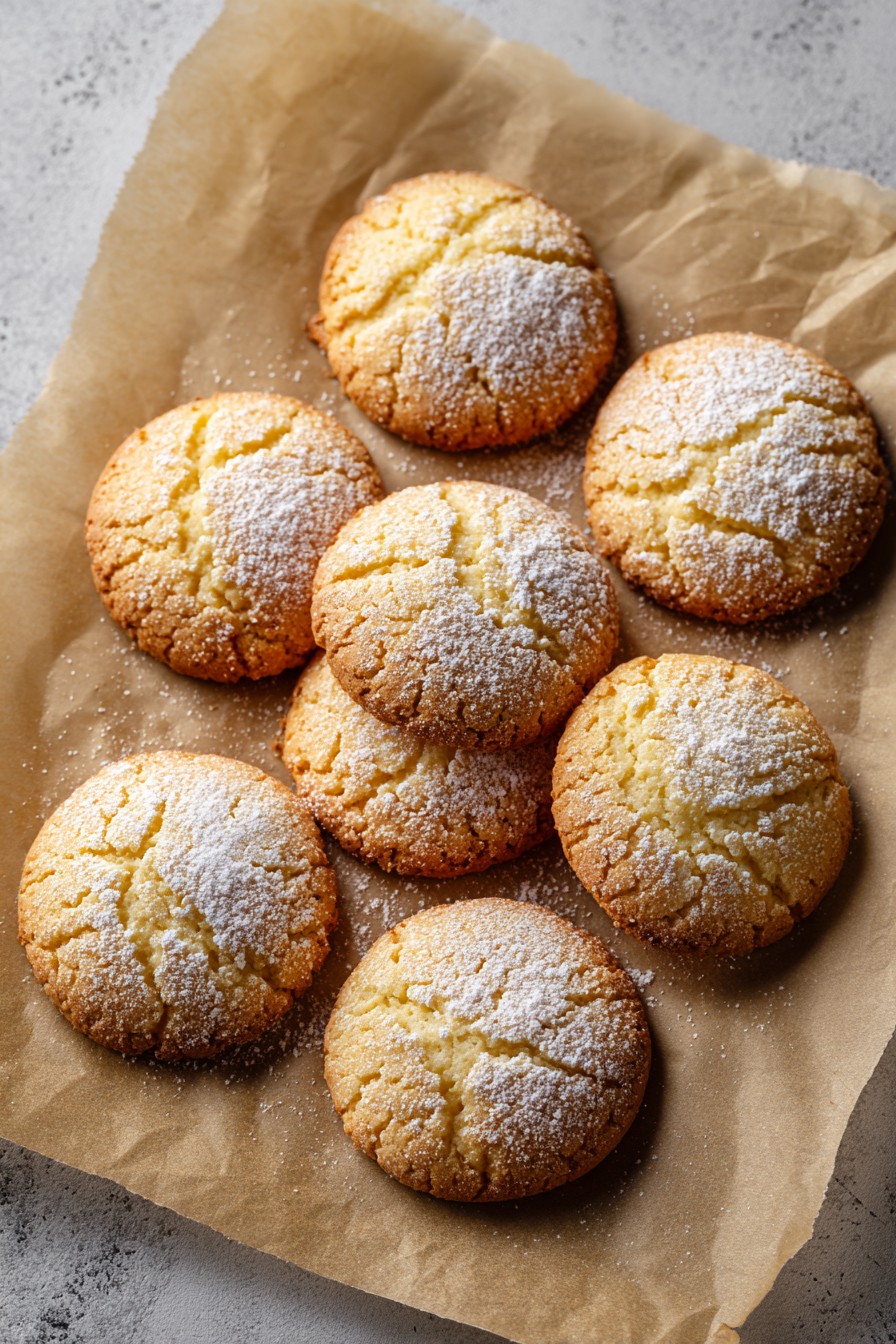
Our butter-free Plätzchen deliver classic German cookie texture using smart oil substitutions. These crisp, lightly sweetened treats maintain traditional appeal while accommodating dairy restrictions. You get authentic results without compromising on flavor or texture.
Why This Recipe Works
- Neutral vegetable oil replaces butter while maintaining proper fat content for tender crumb structure. The oil distributes evenly throughout the dough, preventing dry spots and ensuring consistent baking.
- Combining granulated and powdered sugars creates ideal texture balance. Granulated sugar provides structure and slight crunch, while powdered sugar contributes to melt-in-your-mouth quality without overwhelming sweetness.
- Chilling the dough thoroughly prevents spreading during baking. This crucial step allows the flour to fully hydrate and the fats to solidify, resulting in cookies that hold their shape and develop perfect edges.
- Simple flavorings like vanilla and lemon zest enhance without dominating. These subtle additions complement the cookie base rather than masking it, allowing the buttery flavor perception to come through despite the absence of dairy.
- The dough handles beautifully for rolling and cutting. Despite containing oil instead of solid fat, the chilled dough maintains excellent workability for creating detailed shapes that preserve their definition through the baking process.
Ingredients
- 2 ½ cups all-purpose flour, spooned and leveled
- ¾ cup granulated sugar
- ¼ cup powdered sugar, sifted
- ½ cup neutral vegetable oil (such as canola or grapeseed)
- 1 large egg, at room temperature
- 2 teaspoons vanilla extract
- 1 teaspoon lemon zest, finely grated
- ½ teaspoon baking powder
- ¼ teaspoon salt
Equipment Needed
- Mixing bowls
- Measuring cups and spoons
- Whisk
- Rubber spatula
- Plastic wrap
- Rolling pin
- Cookie cutters
- Baking sheets
- Parchment paper
- Wire cooling rack
Instructions
Combine Dry Ingredients
Measure 2 ½ cups all-purpose flour using the spoon-and-level method to ensure accuracy. Add ¾ cup granulated sugar, ¼ cup powdered sugar that has been sifted to remove lumps, ½ teaspoon baking powder, and ¼ teaspoon salt to the flour. Whisk these dry ingredients together for approximately 45 seconds until fully incorporated and any clumps are broken up. This thorough mixing distributes leavening agents evenly throughout the flour, which prevents uneven rising during baking. The combination of granulated and powdered sugars works particularly well in oil-based doughs because the different sugar crystals interact with the liquid components differently, creating a more complex texture. Make sure your work surface is clear and you have all tools within reach before proceeding to the next step.
Mix Wet Ingredients
In a separate bowl, combine ½ cup neutral vegetable oil, 1 large room-temperature egg, 2 teaspoons vanilla extract, and 1 teaspoon finely grated lemon zest. Whisk vigorously for about 60 seconds until the mixture appears slightly thickened and fully emulsified. The emulsion process is critical when working with oil-based doughs because it helps bind the water-based and oil-based components together. Room temperature egg incorporates more easily than cold egg, which helps create a smoother dough texture. The lemon zest adds bright notes that complement the vanilla without overpowering the cookie’s delicate flavor profile. Tip: If your kitchen is particularly warm, consider chilling the mixing bowl for 15 minutes before combining wet ingredients to help maintain optimal dough temperature.
Combine Dough Mixtures
Pour the wet ingredients into the dry ingredient bowl and mix with a rubber spatula until a shaggy dough begins to form. Switch to using your hands to knead the dough gently for about 2 minutes until it comes together into a smooth, cohesive ball. The dough should feel slightly soft but not sticky, and it should hold together without cracking at the edges. If the dough feels too dry, add water ½ teaspoon at a time until the proper consistency is achieved. If it feels too sticky, add flour 1 tablespoon at a time. Proper dough consistency is crucial for successful rolling and cutting later. The kneading process develops just enough gluten to provide structure without making the cookies tough.
Chill the Dough
Divide the dough into two equal portions and flatten each into a disk about 1-inch thick. Wrap each disk tightly in plastic wrap, pressing out any air pockets before sealing. Refrigerate the dough for at least 2 hours, though overnight chilling yields even better results. The chilling process serves multiple purposes: it allows the flour to fully hydrate, solidifies the oil for better handling, and prevents the cookies from spreading excessively during baking. Well-chilled dough will feel firm to the touch but still pliable enough to roll. Tip: If chilling overnight, let the dough sit at room temperature for 10-15 minutes before rolling to prevent cracking. Proper chilling is non-negotiable for successful butter-free cookie dough.
Roll and Cut Cookies
Preheat your oven to 350°F and line baking sheets with parchment paper. Remove one dough disk from refrigeration and place it between two sheets of parchment paper. Roll to ¼-inch thickness using even pressure, rotating the dough occasionally to maintain consistent thickness. Peel off the top parchment layer and use cookie cutters to create shapes, dipping cutters in flour between uses to prevent sticking. Transfer cut cookies to prepared baking sheets, spacing them about 1 inch apart. Gather dough scraps, re-roll once, and continue cutting. The second rolling may produce slightly tougher cookies, so use these for less prominent shapes. Work efficiently to prevent the dough from warming up too much during handling.
Bake to Perfection
Place baking sheets in the preheated 350°F oven and bake for 10-12 minutes. Rotate sheets front to back halfway through baking to ensure even browning. The cookies are done when the edges show light golden coloring while the centers remain pale. They will feel soft when pressed but firm up as they cool. Avoid overbaking, as these cookies continue to cook slightly on the hot baking sheet after removal from the oven. The perfect bake time creates cookies with crisp edges and slightly tender centers. Watch carefully during the final 2 minutes of baking, as oven temperatures can vary significantly. Tip: For consistently sized cookies, bake one test batch first to determine your oven’s exact timing before committing to multiple sheets.
Cool and Store
Remove baking sheets from the oven and let cookies rest on the hot sheets for 3 minutes before transferring to wire cooling racks. This resting period allows the cookies to set properly and prevents breakage during transfer. Cool completely for at least 30 minutes before storing or decorating. Store cooled cookies in an airtight container at room temperature for up to 2 weeks. For longer storage, freeze baked cookies in single layers separated by parchment paper for up to 3 months. The cookies maintain their texture well when properly stored, though they may soften slightly in humid conditions. These butter-free cookies actually improve in flavor after 24 hours as the ingredients continue to meld together.
Tips and Tricks
For optimal results with butter-free cookie dough, several techniques can elevate your baking experience. When measuring flour, always use the spoon-and-level method rather than scooping directly from the container. Scooping packs flour into the measuring cup, resulting in up to 25% more flour than intended, which creates dry, crumbly cookies. Instead, spoon flour lightly into the measuring cup until heaping, then level off with a straight edge. For the oil selection, choose neutral-flavored options like grapeseed, canola, or light olive oil. Avoid strongly flavored oils like extra virgin olive oil or coconut oil unless specifically desired for flavor profile. The oil temperature matters significantly – use room temperature oil rather than chilled for better emulsion with other wet ingredients.
When working with the dough, if it becomes too soft during rolling, return it to the refrigerator for 15-minute intervals as needed. Warm dough spreads excessively during baking and loses definition in cut-out shapes. For intricate cookie cutters, chill the cut shapes on the baking sheet for 10 minutes before baking to help them maintain sharp edges. If your kitchen is particularly warm, consider working with smaller portions of dough while keeping the remainder refrigerated. For consistent thickness when rolling, use rolling pin guides or place two ¼-inch thick dowels on either side of your dough as you roll. This technique ensures every cookie bakes evenly regardless of its position on the baking sheet.
Baking sheet preparation significantly impacts cookie results. Always use light-colored aluminum baking sheets rather than dark metal, which can cause overbrowning on the bottoms. Parchment paper is superior to silicone mats for these cookies because it allows slight airflow underneath, promoting even browning. For the most consistent results, bake one sheet at a time in the center oven rack position. If baking multiple sheets simultaneously, rotate them top to bottom and front to back halfway through baking. Oven thermometer verification is crucial since most home ovens run 25-50°F hotter or cooler than their displays indicate. Test your oven’s actual temperature and adjust baking times accordingly for perfect results every time.
Recipe Variations
- Citrus Variation: Replace vanilla extract with 2 teaspoons orange extract and add 2 tablespoons finely grated orange zest to the dough. The bright citrus flavor complements the neutral oil base beautifully and creates refreshing cookies perfect for holiday gatherings. For enhanced citrus notes, add ½ teaspoon of lemon extract along with the orange components. This variation works particularly well with simple round or star-shaped cutters that allow the flavor to shine without competing with elaborate designs.
- Spiced Variation: Add 2 teaspoons ground cinnamon, ½ teaspoon ground nutmeg, ¼ teaspoon ground cloves, and ¼ teaspoon ground ginger to the dry ingredients. These warming spices create cookies reminiscent of German Lebkuchen but with the characteristic Plätzchen texture. The spices mask any slight oil flavor while adding depth and complexity. This variation pairs excellently with coffee or tea and maintains its flavor well during storage. Consider using autumn-themed cutters like leaves or acorns for seasonal appeal.
- Chocolate Dip Variation: Prepare the basic recipe but reduce vanilla extract to 1 teaspoon. After baking and cooling, dip half of each cookie into melted dark chocolate and place on parchment-lined sheets to set. The chocolate adds richness that compensates for the missing butter flavor while creating visually appealing treats. Use high-quality chocolate with 60-70% cocoa content for the best results. This variation transforms simple cookies into elegant dessert offerings suitable for special occasions or gift-giving.
- Almond Variation: Replace ½ cup of the all-purpose flour with finely ground almond flour and add 1 teaspoon almond extract to the wet ingredients. The almond flour contributes natural oils that enhance the cookie’s tenderness while adding nutty flavor complexity. This variation produces slightly more fragile cookies that benefit from simpler, sturdier cutter shapes. The almond flavor pairs wonderfully with the lemon zest, creating sophisticated cookies that feel more indulgent than the basic version.
Frequently Asked Questions
Can I substitute coconut oil for vegetable oil in this recipe?
Yes, coconut oil can work as a substitute, but several considerations apply. Use refined coconut oil rather than unrefined to avoid strong coconut flavor unless that’s desirable for your variation. Coconut oil solidifies at cooler temperatures than vegetable oil, so your dough may require slightly longer chilling time and could become quite firm in the refrigerator. When rolling, you might need to let the dough warm up slightly more than with vegetable oil-based dough. The baking results will be similar, though cookies made with coconut oil may spread slightly less and have a subtly different texture. Melt the coconut oil completely before measuring and mixing to ensure accurate proportions and even distribution throughout the dough.
Why do my butter-free cookies spread too much during baking?
Excessive spreading typically results from insufficient dough chilling or oven temperature issues. The dough must chill for at least 2 hours to allow the flour to fully hydrate and the oil to solidify properly. If your kitchen is warm, extend chilling time to 3-4 hours or until the dough feels firm. Oven temperature accuracy is crucial – use an oven thermometer to verify your oven reaches exactly 350°F. Baking sheets that are too dark or placed too close to oven walls can cause uneven heating and spreading. Also ensure you’re not overworking the dough during rolling, as this develops more gluten than necessary. If problems persist, try adding 1-2 additional tablespoons of flour to absorb excess moisture.
How can I make these cookies vegan-friendly?
To create vegan Plätzchen, replace the egg with a flax egg or commercial egg replacer. For a flax egg, mix 1 tablespoon ground flaxseed with 3 tablespoons water and let it gel for 10 minutes before using. This substitution works well because the gel-like consistency mimics egg’s binding properties. Ensure your sugars are vegan-certified, as some conventional sugars use bone char in processing. The recipe otherwise contains no animal products, making it easily adaptable for vegan diets. Vegan versions may spread slightly more during baking, so consider adding an extra 2-3 minutes of chilling time for the cut shapes before baking. The resulting cookies will have similar texture and flavor to the original recipe.
Can I freeze the dough instead of baking immediately?
Yes, this dough freezes exceptionally well for up to 3 months. Prepare the dough through the chilling stage, then wrap the disks tightly in plastic wrap followed by aluminum foil or place in freezer bags. Label with the date and contents. When ready to use, thaw the dough in the refrigerator overnight rather than at room temperature to prevent condensation and sticking. The thawed dough may need 5-10 minutes at room temperature before rolling if it feels too firm. Frozen dough actually produces excellent results because the extended resting time allows flavors to develop more fully. You can also freeze cut-out shapes on baking sheets before transferring to freezer containers, allowing you to bake small batches as needed.
Why do my cookies have a slight oil sheen or greasy feel?
A greasy appearance or texture usually indicates improper ingredient ratios or mixing technique. First, verify your flour measurement method – too little flour relative to oil will create greasy cookies. Always use the spoon-and-level method for accuracy. Overmixing can cause the oil to separate from other ingredients, creating greasy spots. Mix just until the dough comes together, then stop. Baking at too low a temperature can prevent proper oil absorption during cooking – verify your oven temperature with a thermometer. If using a particularly heavy baking sheet, consider reducing oven temperature by 25°F and extending baking time slightly to allow thorough cooking without overbrowning. Proper cooling completely on racks also helps excess oil evaporate rather than being reabsorbed.
Summary
These butter-free German cookies achieve traditional texture through careful ingredient balance and technique. The recipe delivers crisp, well-defined cut-out cookies using vegetable oil instead of dairy. Proper chilling and baking methods ensure success for bakers of all experience levels.
Butter-Free German Plätzchen
6
servings20
minutes12
minutesIngredients
Instructions
- 1 Whisk flour, sugars, baking powder, and salt in a large bowl
- 2 In separate bowl, whisk oil, egg, vanilla, and lemon zest until emulsified
- 3 Combine wet and dry ingredients, knead into smooth dough
- 4 Divide dough, wrap tightly, chill for 2 hours minimum
- 5 Roll dough to ¼-inch thickness, cut shapes, place on parchment-lined sheets
- 6 Bake at 350°F for 10-12 minutes until edges are light golden
- 7 Cool on sheets for 3 minutes, transfer to racks to cool completely


