Forget the fuss—these 24 effortless pie recipes are your ticket to homemade goodness without the stress. Whether you’re craving a quick weeknight dessert or a comforting seasonal favorite, we’ve got you covered with simple techniques and delicious results. Perfect for busy bakers, these pies prove that impressive treats don’t require hours in the kitchen. Ready to bake smarter? Let’s dive into these deliciously easy ideas!
Classic Apple Pie with a Twist
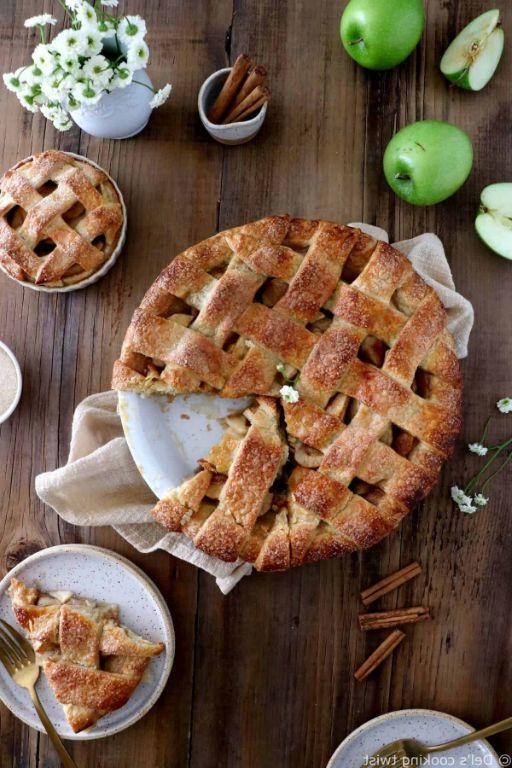
Dare we mess with a classic? Absolutely—because this isn’t your grandma’s apple pie (no offense, Grandma). We’re giving the all-American favorite a playful upgrade that’ll have everyone asking for seconds before the first slice is even plated.
Serving: 8 | Pre Time: 30 minutes | Cooking Time: 50 minutes
Ingredients
– 2 9-inch refrigerated pie crusts
– 6 cups thinly sliced Granny Smith apples (about 6 medium apples)
– 3/4 cup granulated sugar
– 1/4 cup packed light brown sugar
– 3 tbsp all-purpose flour
– 1 tsp ground cinnamon
– 1/4 tsp ground nutmeg
– 1/4 tsp salt
– 1 tbsp fresh lemon juice
– 2 tbsp unsalted butter, cut into small pieces
– 1 large egg
– 1 tbsp whole milk
– 1 tbsp coarse sugar
Instructions
1. Preheat your oven to 425°F and place one pie crust in a 9-inch pie dish, pressing it gently into the bottom and sides.
2. In a large bowl, combine the sliced Granny Smith apples, granulated sugar, light brown sugar, all-purpose flour, ground cinnamon, ground nutmeg, salt, and fresh lemon juice. Toss until the apples are evenly coated—this mixture will look like a sweet, spiced hug for the fruit.
3. Pour the apple filling into the pie crust-lined dish and dot the top evenly with the pieces of unsalted butter.
4. Place the second pie crust over the filling. Trim any excess dough from the edges, then crimp the edges together with your fingers or a fork to seal. Tip: For a golden, flaky crust, chill the assembled pie in the refrigerator for 15 minutes before baking—this keeps the butter firm.
5. In a small bowl, whisk together the large egg and whole milk to create an egg wash. Brush this mixture lightly over the top crust.
6. Sprinkle the coarse sugar evenly over the brushed crust. Use a sharp knife to cut 4-5 small slits in the center of the top crust to allow steam to escape during baking.
7. Place the pie on a baking sheet (to catch any drips) and bake at 425°F for 20 minutes. Tip: If the edges start browning too quickly, cover them loosely with aluminum foil to prevent burning.
8. Reduce the oven temperature to 375°F and continue baking for 30-35 minutes, or until the crust is deep golden brown and the filling is bubbling through the slits.
9. Remove the pie from the oven and let it cool on a wire rack for at least 2 hours before slicing. Tip: Resist the urge to cut in early—this cooling time lets the juicy filling set perfectly, so your slices hold their shape.
Now, nothing beats the first bite of this pie: the crust shatters with a buttery crunch, giving way to tender, spiced apples that are just sweet enough without being cloying. Serve it warm with a scoop of vanilla ice cream for that classic à la mode moment, or get creative by drizzling it with salted caramel for an extra indulgent twist.
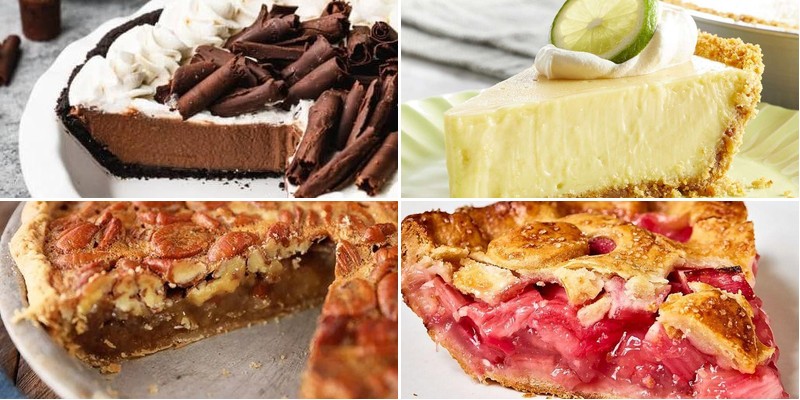
Simple Chocolate Cream Pie
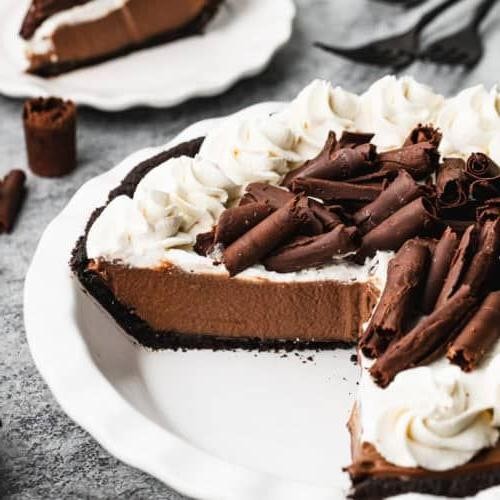
Oh, the glorious chocolate cream pie—it’s the dessert that whispers sweet nothings to your soul while shamelessly demanding you eat the whole thing in one sitting. Forget fussy pastries; this beauty is all about velvety, dreamy filling and a buttery crust that’ll make you want to write it a love letter. Let’s dive in and whip up some magic without any of the kitchen drama!
Serving: 8 | Pre Time: 20 minutes | Cooking Time: 10 minutes
Ingredients
– 1 9-inch pre-made graham cracker crust
– 1 cup granulated sugar
– 1/3 cup cornstarch
– 1/4 teaspoon salt
– 3 cups whole milk
– 4 large egg yolks
– 6 ounces semi-sweet chocolate, chopped
– 2 tablespoons unsalted butter
– 1 teaspoon vanilla extract
– 1 cup heavy cream
– 2 tablespoons powdered sugar
Instructions
1. In a medium saucepan, whisk together 1 cup granulated sugar, 1/3 cup cornstarch, and 1/4 teaspoon salt until fully combined.
2. Gradually pour in 3 cups whole milk while whisking continuously to prevent lumps from forming.
3. Place the saucepan over medium heat and cook, stirring constantly with a spatula, until the mixture thickens and bubbles gently, about 8–10 minutes.
4. Remove the saucepan from the heat and quickly whisk in 4 large egg yolks until smooth and incorporated.
5. Return the saucepan to low heat and cook for 2 more minutes, stirring constantly, to ensure the eggs are fully cooked—this prevents a scrambled texture.
6. Off the heat, add 6 ounces chopped semi-sweet chocolate, 2 tablespoons unsalted butter, and 1 teaspoon vanilla extract, stirring until melted and glossy.
7. Pour the warm chocolate filling into the 9-inch pre-made graham cracker crust, smoothing the top with a spatula.
8. Press plastic wrap directly onto the surface of the filling to prevent a skin from forming, then refrigerate for at least 4 hours or until fully set.
9. In a chilled bowl, beat 1 cup heavy cream and 2 tablespoons powdered sugar with an electric mixer on medium-high speed until stiff peaks form, about 3–4 minutes—chilling the bowl first helps the cream whip faster.
10. Spread or pipe the whipped cream over the chilled pie just before serving.
This pie emerges from the fridge with a silky, pudding-like texture that melts on your tongue, balanced by the rich, deep chocolate flavor that’s not overly sweet. For a fun twist, sprinkle crushed peppermint candies on top during the holidays or drizzle with caramel sauce for an extra indulgent touch—it’s so good, you might just hide it from your family!
Quick and Easy Lemon Meringue Pie
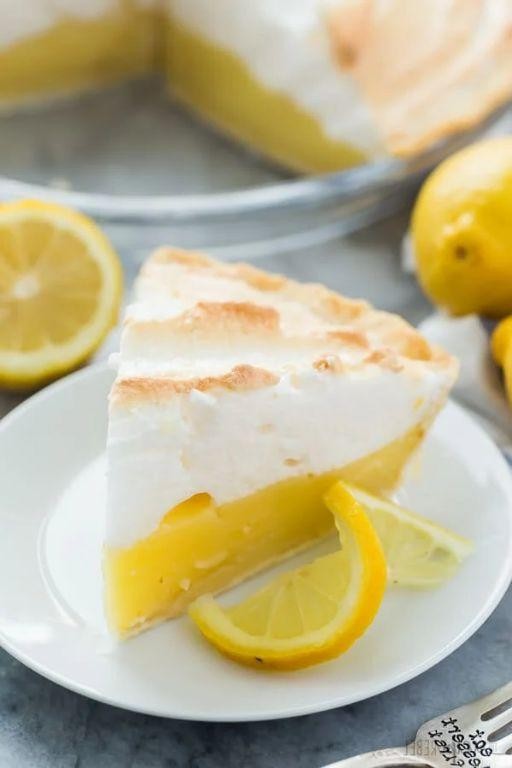
Ever had one of those days where you need a dessert that screams ‘I’m fancy!’ but whispers ‘I took zero effort’? Enter this lemon meringue pie—it’s the citrusy, cloud-topped hero your taste buds deserve, and it won’t have you slaving in the kitchen like a contestant on a baking show gone wrong.
Serving: 8 | Pre Time: 25 minutes | Cooking Time: 15 minutes
Ingredients
– 1 9-inch pre-made pie crust
– 1 14-ounce can sweetened condensed milk
– 3 large egg yolks
– 1/2 cup fresh lemon juice
– 1 tablespoon lemon zest
– 4 large egg whites
– 1/4 teaspoon cream of tartar
– 1/2 cup granulated sugar
Instructions
1. Preheat your oven to 350°F (175°C).
2. Place the pre-made pie crust in a 9-inch pie dish and press it firmly into the edges.
3. Bake the pie crust for 10 minutes, or until it turns a light golden brown, then remove it from the oven and let it cool completely on a wire rack. Tip: Prick the bottom with a fork before baking to prevent air bubbles.
4. In a medium bowl, whisk together the sweetened condensed milk, egg yolks, lemon juice, and lemon zest until smooth and well combined.
5. Pour the lemon filling into the cooled pie crust and spread it evenly with a spatula.
6. In a large, clean bowl, use an electric mixer on medium speed to beat the egg whites and cream of tartar until soft peaks form, about 2-3 minutes. Tip: Ensure the bowl is grease-free for the best meringue volume.
7. Gradually add the granulated sugar to the egg whites while continuing to beat on high speed until stiff, glossy peaks form, about 3-4 more minutes.
8. Spoon the meringue over the lemon filling, spreading it to the edges of the crust to seal it completely.
9. Bake the pie in the preheated oven for 15 minutes, or until the meringue peaks are lightly browned. Tip: Watch closely to avoid over-browning—it can happen fast!
10. Remove the pie from the oven and let it cool at room temperature for 2 hours, then refrigerate for at least 4 hours before serving.
Oh, the joy of slicing into this pie! You’ll get a creamy, tangy lemon filling that’s perfectly set against a crisp crust, topped with a fluffy, sweet meringue that melts in your mouth. Serve it chilled with a dollop of whipped cream or garnish with extra lemon zest for a zesty kick that’ll have everyone asking for seconds.
Southern Pecan Pie Simplified
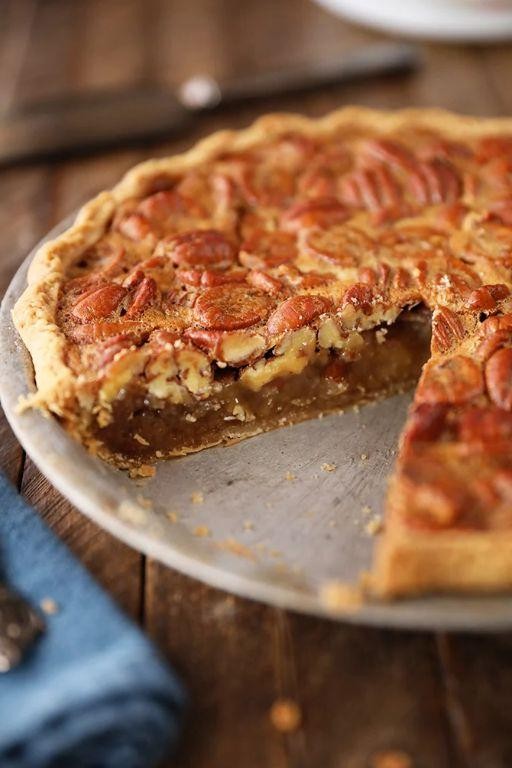
Alright, y’all, gather ’round because we’re about to make pecan pie the easy way—no fancy chef skills required, just a love for all things sweet, sticky, and nutty. This simplified version ditches the fuss but keeps every bit of that classic Southern charm, so you can whip up a show-stopping dessert without breaking a sweat (or your mixing bowls). Serving: 8 | Pre Time: 15 minutes | Cooking Time: 50 minutes
Ingredients
– 1 9-inch unbaked pie crust
– 1 cup light corn syrup
– 1 cup granulated sugar
– 3 large eggs
– 2 tbsp unsalted butter, melted
– 1 tsp vanilla extract
– 1/4 tsp salt
– 2 cups pecan halves
Instructions
1. Preheat your oven to 350°F (175°C) and place the unbaked pie crust in a 9-inch pie dish, crimping the edges decoratively.
2. In a large mixing bowl, whisk together 1 cup light corn syrup and 1 cup granulated sugar until fully combined. Tip: Use room-temperature ingredients to prevent the sugar from clumping.
3. Crack 3 large eggs into the bowl and whisk vigorously until the mixture is smooth and slightly frothy, about 1 minute.
4. Pour in 2 tbsp melted unsalted butter, 1 tsp vanilla extract, and 1/4 tsp salt, whisking again to incorporate everything evenly.
5. Gently fold in 2 cups pecan halves with a spatula, ensuring they’re coated in the filling without crushing them.
6. Carefully pour the pecan mixture into the prepared pie crust, spreading it out evenly with the spatula. Tip: Arrange a few extra pecans on top for a prettier presentation before baking.
7. Bake the pie in the preheated oven for 45–50 minutes, or until the center is set and no longer jiggles when shaken lightly. Tip: If the crust edges brown too quickly, cover them loosely with aluminum foil halfway through baking.
8. Remove the pie from the oven and let it cool completely on a wire rack for at least 2 hours before slicing. Here’s the scoop: this pie boasts a gooey, caramel-like filling that’s perfectly sweet, paired with crunchy pecans in every bite. Serve it warm with a dollop of whipped cream or a scoop of vanilla ice cream for an extra indulgent treat that’ll have everyone asking for seconds.
No-Bake Peanut Butter Pie
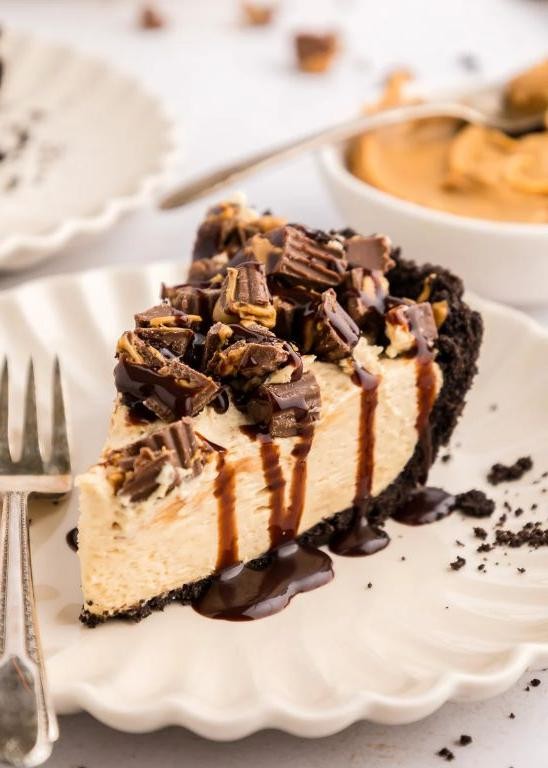
Tired of turning your kitchen into a sauna just for dessert? This no-bake peanut butter pie is your cool, creamy savior—no oven required, just pure bliss in a crust. Think of it as a hug for your taste buds, with a texture so dreamy it’ll make you forget all about sweating over a hot stove.
Serving: 8 | Pre Time: 25 minutes | Cooking Time: 0 minutes
Ingredients
– 1 9-inch graham cracker crust
– 1 cup creamy peanut butter
– 8 oz cream cheese, softened to room temperature
– 1 cup powdered sugar
– 1 tsp vanilla extract
– 1 8 oz container frozen whipped topping, thawed
– 1/2 cup semi-sweet chocolate chips
– 1 tbsp unsalted butter
Instructions
1. In a large mixing bowl, combine 1 cup creamy peanut butter and 8 oz softened cream cheese using an electric mixer on medium speed until smooth and fully incorporated, about 2 minutes.
2. Gradually add 1 cup powdered sugar to the peanut butter mixture, mixing on low speed to avoid a powdered sugar cloud, then increase to medium until fluffy, about 1 minute.
3. Mix in 1 tsp vanilla extract until just combined, scraping down the sides of the bowl with a spatula to ensure no streaks remain.
4. Gently fold in the entire 8 oz container of thawed whipped topping with the spatula until the filling is uniform and no white streaks are visible, being careful not to overmix to keep it light.
5. Spoon the filling into the 9-inch graham cracker crust, spreading it evenly with the spatula and smoothing the top.
6. Place the pie in the refrigerator to chill and set for at least 4 hours, or until firm to the touch.
7. In a microwave-safe bowl, combine 1/2 cup semi-sweet chocolate chips and 1 tbsp unsalted butter, microwaving on high in 30-second intervals, stirring after each, until melted and smooth, about 1-2 minutes total.
8. Drizzle the melted chocolate over the chilled pie in a zigzag pattern for a decorative finish.
9. Return the pie to the refrigerator for 10 minutes to allow the chocolate to set slightly before serving.
Lusciously smooth and rich, this pie boasts a velvety peanut butter filling that melts on your tongue, balanced by the crunchy graham cracker base. For a fun twist, top slices with crushed peanuts or a scoop of vanilla ice cream to elevate the creamy texture—it’s so indulgent, you might just skip dinner and head straight for dessert!
Effortless Pumpkin Pie

A pumpkin pie so easy, it practically bakes itself while you nap on the couch. Forget the stress of holiday baking—this recipe is your secret weapon for a dessert that looks like you slaved for hours, but really just required you to stir a few things together and then scroll through your phone. It’s the culinary equivalent of finding money in a coat pocket: unexpectedly delightful and ridiculously simple.
Serving: 8 | Pre Time: 15 minutes | Cooking Time: 55 minutes
Ingredients
– 1 (9-inch) unbaked pie crust
– 1 (15-ounce) can pumpkin puree
– 3/4 cup granulated sugar
– 1/2 teaspoon salt
– 1 teaspoon ground cinnamon
– 1/2 teaspoon ground ginger
– 1/4 teaspoon ground cloves
– 2 large eggs
– 1 (12-ounce) can evaporated milk
Instructions
1. Preheat your oven to 425°F (218°C) and place a baking sheet on the middle rack to heat up—this helps cook the bottom crust evenly.
2. In a large mixing bowl, whisk together the pumpkin puree, granulated sugar, salt, ground cinnamon, ground ginger, and ground cloves until smooth.
3. Crack the 2 large eggs into the bowl and whisk vigorously until fully incorporated and the mixture is uniform in color.
4. Slowly pour in the can of evaporated milk while whisking continuously to prevent lumps from forming.
5. Place the unbaked pie crust in a 9-inch pie dish on a flat surface.
6. Carefully pour the pumpkin filling mixture into the pie crust, filling it to just below the rim.
7. Place the filled pie dish on the preheated baking sheet in the oven and bake at 425°F (218°C) for 15 minutes.
8. Reduce the oven temperature to 350°F (177°C) without opening the door, and bake for 40 minutes more. Tip: The pie is done when the center jiggles slightly like set gelatin when gently shaken.
9. Remove the pie from the oven using oven mitts and place it on a wire cooling rack. Let it cool completely at room temperature for at least 4 hours before slicing—this allows the filling to fully set for clean cuts.
Perfectly spiced and velvety smooth, this pie boasts a custard-like texture that melts on the tongue with every forkful. Serve each slice with a dollop of freshly whipped cream or a scoop of vanilla ice cream for a cozy, crowd-pleasing finish that screams autumn comfort.
Easy Cherry Crumble Pie
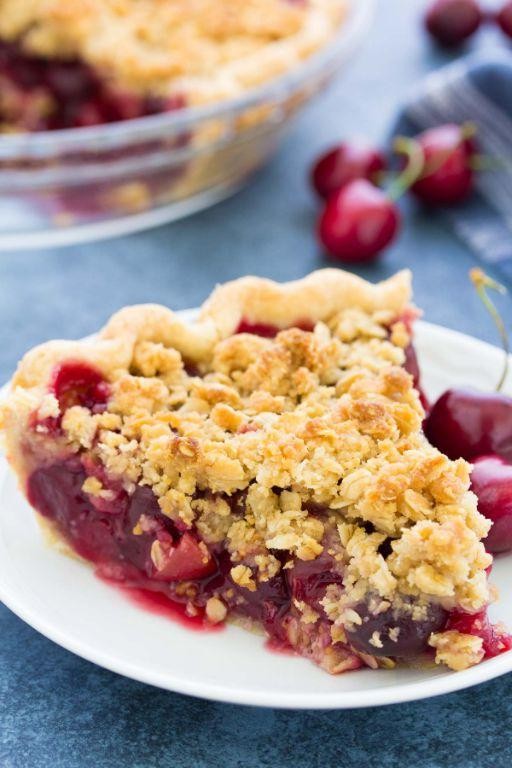
Gather ’round, pie lovers, because we’re about to turn those sweet, juicy cherries into a dessert so good, it might just make your grandma a little jealous. This easy cherry crumble pie is the ultimate no-fuss, maximum-flavor hero for when you need a show-stopping treat without the stress of a perfect lattice top.
Serving: 8 | Pre Time: 20 minutes | Cooking Time: 45 minutes
Ingredients
– 1 (9-inch) unbaked pie crust
– 4 cups fresh or frozen pitted cherries
– 1 cup granulated sugar
– 1/4 cup cornstarch
– 1 tbsp lemon juice
– 1 tsp vanilla extract
– 1 cup all-purpose flour
– 1/2 cup packed light brown sugar
– 1/2 cup unsalted butter, cold and cubed
– 1/2 tsp ground cinnamon
Instructions
1. Preheat your oven to 375°F (190°C) and place the unbaked pie crust in a 9-inch pie dish, crimping the edges decoratively.
2. In a large bowl, combine the cherries, granulated sugar, cornstarch, lemon juice, and vanilla extract, stirring gently until the cherries are evenly coated.
3. Pour the cherry mixture into the prepared pie crust, spreading it into an even layer.
4. In a separate bowl, whisk together the flour, brown sugar, and cinnamon for the crumble topping.
5. Add the cold, cubed butter to the flour mixture and use your fingers or a pastry cutter to work it in until the mixture resembles coarse crumbs with some pea-sized pieces remaining.
6. Sprinkle the crumble topping evenly over the cherry filling, covering it completely.
7. Place the pie on a baking sheet to catch any drips and bake in the preheated oven for 45 minutes, or until the filling is bubbling vigorously around the edges and the topping is golden brown.
8. Remove the pie from the oven and let it cool on a wire rack for at least 2 hours to allow the filling to set properly.
Just imagine that first bite: a buttery, crisp crumble giving way to a luscious, tangy-sweet cherry filling that’s pure comfort in every forkful. Serve it warm with a scoop of vanilla ice cream for a classic combo, or get fancy by drizzling it with a bit of melted dark chocolate for an extra indulgent twist.
Hassle-Free Blueberry Pie
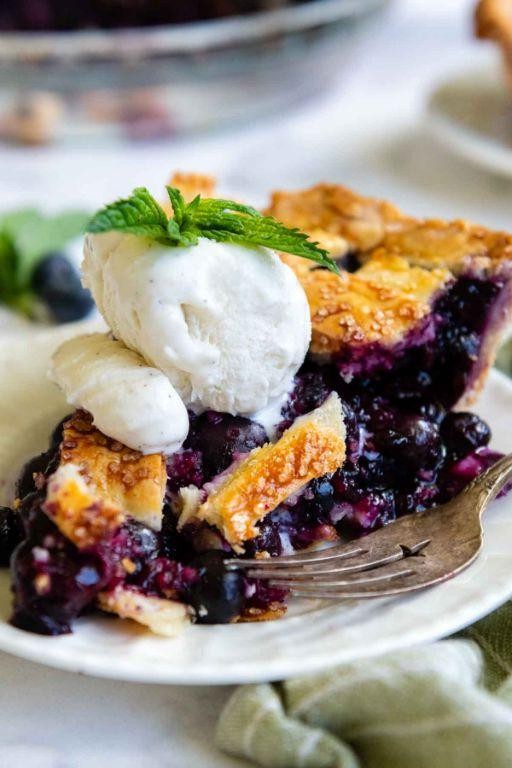
Aren’t you tired of pie recipes that demand more patience than a toddler in a candy store? Let’s ditch the drama and bake a Hassle-Free Blueberry Pie that’s as easy as, well, pie—no fancy lattice work or pastry-degree required. This juicy, jammy delight comes together with a wink and a whisk, proving that delicious doesn’t have to mean difficult.
Serving: 8 | Pre Time: 20 minutes | Cooking Time: 45 minutes
Ingredients
– 2 store-bought refrigerated pie crusts
– 5 cups fresh blueberries
– 1 cup granulated sugar
– 1/4 cup cornstarch
– 1 tbsp lemon juice
– 1 tsp ground cinnamon
– 1/4 tsp salt
– 1 egg
– 1 tbsp water
– 1 tbsp coarse sugar
Instructions
1. Preheat your oven to 375°F and place one pie crust in a 9-inch pie dish, pressing it gently into the edges.
2. In a large bowl, combine 5 cups fresh blueberries, 1 cup granulated sugar, 1/4 cup cornstarch, 1 tbsp lemon juice, 1 tsp ground cinnamon, and 1/4 tsp salt, tossing until the blueberries are evenly coated—this prevents a soggy bottom, so don’t skip the cornstarch!
3. Pour the blueberry mixture into the pie crust, spreading it into an even layer.
4. Place the second pie crust over the filling, then crimp the edges with a fork to seal them together tightly.
5. In a small bowl, whisk 1 egg with 1 tbsp water to make an egg wash, then brush it evenly over the top crust for a golden, glossy finish.
6. Sprinkle 1 tbsp coarse sugar over the brushed crust for a delightful crunch that contrasts with the soft filling.
7. Use a sharp knife to cut 4-5 small slits in the top crust to allow steam to escape during baking, preventing a pie explosion.
8. Bake the pie at 375°F for 45 minutes, or until the crust is deep golden brown and the filling is bubbling visibly through the slits—trust the visual cue over the timer here.
9. Remove the pie from the oven and let it cool on a wire rack for at least 2 hours before slicing; this patience pays off with a set, sliceable filling instead of a blueberry flood.
10. Serve slices warm or at room temperature, storing any leftovers covered at room temperature for up to 2 days.
Mmm, that first bite reveals a tender, flaky crust giving way to a burst of sweet-tart blueberries, with the cinnamon adding a cozy whisper of spice. For a playful twist, top slices with a scoop of vanilla ice cream that melts into the warm filling, or drizzle with a zigzag of honey for extra sweetness—it’s so good, you might just forget it was hassle-free!
Basic Banana Cream Pie
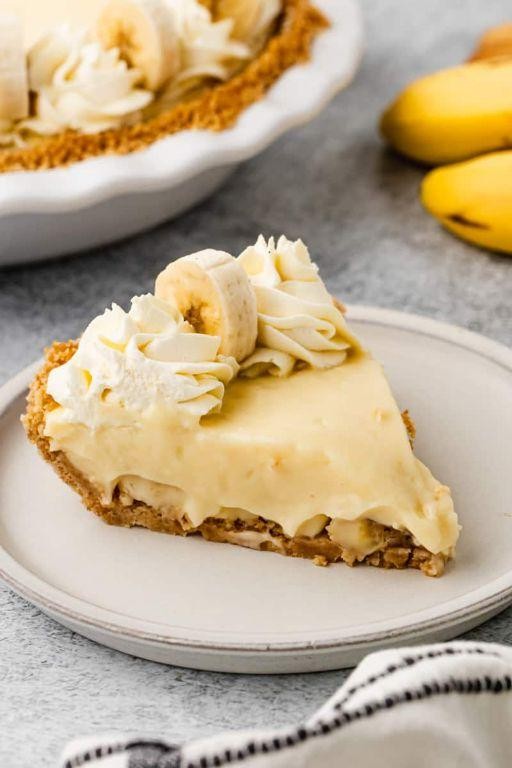
Tired of bananas turning into sad, brown mush on your counter? Transform those overripe rebels into a luscious, creamy dessert that’ll make you forget they ever flirted with the compost bin. This basic banana cream pie is the ultimate rescue mission, delivering pure, unadulterated joy in every silky, dreamy bite.
Serving: 8 | Pre Time: 30 minutes | Cooking Time: 15 minutes
Ingredients
– 1 9-inch pre-baked pie crust
– 3/4 cup granulated sugar
– 1/3 cup all-purpose flour
– 1/4 teaspoon salt
– 2 cups whole milk
– 3 large egg yolks, lightly beaten
– 2 tablespoons unsalted butter
– 1 teaspoon pure vanilla extract
– 4 medium ripe bananas
– 1 cup heavy whipping cream
– 2 tablespoons powdered sugar
Instructions
1. In a medium saucepan, whisk together 3/4 cup granulated sugar, 1/3 cup all-purpose flour, and 1/4 teaspoon salt until fully combined.
2. Gradually whisk in 2 cups whole milk until the mixture is smooth and free of lumps.
3. Cook the mixture over medium heat, stirring constantly with a wooden spoon, for 8-10 minutes until it thickens and begins to bubble gently. Tip: Constant stirring prevents lumps and ensures a silky custard.
4. Remove the saucepan from the heat. Temper the eggs by slowly whisking about 1/2 cup of the hot milk mixture into the 3 lightly beaten egg yolks in a separate bowl.
5. Whisk the tempered egg yolk mixture back into the saucepan with the remaining custard.
6. Return the saucepan to medium-low heat and cook, stirring constantly, for 2 more minutes until the custard is thick enough to coat the back of a spoon. Tip: Don’t let it boil, or the eggs may curdle.
7. Remove from heat and stir in 2 tablespoons unsalted butter and 1 teaspoon pure vanilla extract until fully melted and incorporated.
8. Pour the hot custard into a clean bowl and press plastic wrap directly onto its surface to prevent a skin from forming. Let it cool at room temperature for 30 minutes.
9. Slice 4 medium ripe bananas into 1/4-inch rounds and arrange a single layer on the bottom of the 1 pre-baked 9-inch pie crust.
10. Pour half of the cooled custard over the banana layer, spreading it evenly with a spatula.
11. Add another layer of the remaining sliced bananas, then top with the rest of the custard, smoothing the surface.
12. Chill the filled pie in the refrigerator, uncovered, for at least 2 hours until completely set.
13. Just before serving, make the topping: In a large bowl, beat 1 cup heavy whipping cream and 2 tablespoons powdered sugar with an electric mixer on high speed for 3-4 minutes until stiff peaks form. Tip: Chill your bowl and beaters for 10 minutes first for faster, fluffier whipped cream.
14. Spread or pipe the whipped cream over the chilled pie filling.
What you get is a pie with a velvety, pudding-like filling that cradles sweet banana slices, all nestled in a crisp, buttery crust. The cloud of whipped cream on top adds a luxurious, airy contrast, making each forkful a perfect balance of creamy and light. For a fun twist, drizzle with caramel sauce or sprinkle with toasted coconut before serving to guests who will undoubtedly ask for seconds.
Rapid Rhubarb Pie
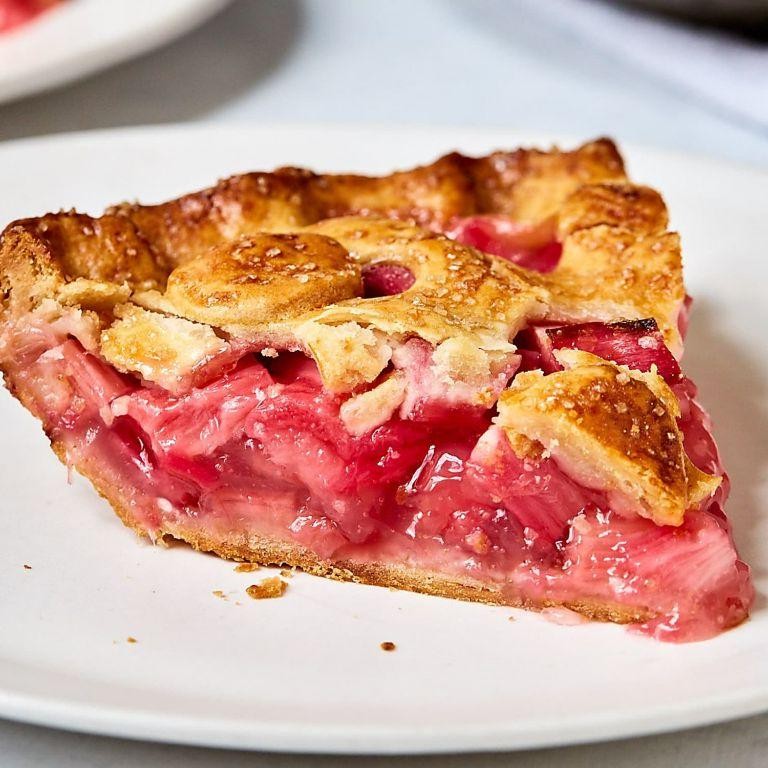
Miraculously, we’ve tamed the tart, tangy rhubarb into a pie that’s ready in a flash—no patience required! This Rapid Rhubarb Pie is the dessert hero for when a craving strikes and you need something sweet, slightly puckery, and utterly delightful on the table, stat. Consider it your secret weapon against boring weeknights or last-minute potluck panic.
Serving: 8 | Pre Time: 15 minutes | Cooking Time: 45 minutes
Ingredients
– 2 cups chopped fresh rhubarb
– 1 cup granulated sugar
– 1/4 cup all-purpose flour
– 1/4 tsp salt
– 1/2 tsp ground cinnamon
– 1 tbsp lemon juice
– 1 package (14.1 oz) refrigerated pie crusts
– 1 tbsp unsalted butter, cut into small pieces
– 1 large egg, beaten
– 1 tbsp coarse sugar
Instructions
1. Preheat your oven to 425°F and place a baking sheet on the middle rack to preheat—this helps crisp the bottom crust.
2. In a large bowl, combine 2 cups chopped fresh rhubarb, 1 cup granulated sugar, 1/4 cup all-purpose flour, 1/4 tsp salt, 1/2 tsp ground cinnamon, and 1 tbsp lemon juice; toss gently until the rhubarb is evenly coated.
3. Unroll one refrigerated pie crust and press it into a 9-inch pie plate, letting the edges hang over slightly.
4. Tip: For a flaky crust, handle the dough minimally and keep ingredients cold.
5. Pour the rhubarb mixture into the crust-lined plate and dot the top evenly with 1 tbsp unsalted butter pieces.
6. Unroll the second pie crust and place it over the filling; trim the edges to leave a 1-inch overhang, then crimp them together with your fingers or a fork to seal.
7. Cut four 2-inch slits in the top crust to vent steam during baking.
8. Brush the top crust lightly with 1 large egg, beaten, then sprinkle evenly with 1 tbsp coarse sugar for a sparkling finish.
9. Tip: Use a pastry brush for even egg wash coverage to ensure golden browning.
10. Place the pie on the preheated baking sheet and bake at 425°F for 15 minutes.
11. Reduce the oven temperature to 350°F and continue baking for 30 minutes, or until the crust is deep golden brown and the filling is bubbling through the slits.
12. Tip: If the edges brown too quickly, cover them loosely with aluminum foil to prevent burning.
13. Remove the pie from the oven and let it cool on a wire rack for at least 2 hours before slicing to allow the filling to set.
Gloriously, this pie emerges with a crisp, buttery crust that shatters at the touch, encasing a vibrant, jammy rhubarb filling that’s perfectly balanced between sweet and tangy. Serve it warm with a scoop of vanilla ice cream for a classic treat, or get creative by drizzling it with honey and topping with fresh mint for a refreshing twist. Either way, it’s a dessert that’s sure to disappear faster than you can say “rhubarb”!
Simplified Key Lime Pie

Unbelievably, you can whip up this zesty, sunshine-in-a-pie dessert without the fuss of a traditional Key lime pie—no fancy equipment or exotic ingredients required, just pure citrusy bliss that’ll make your taste buds do a happy dance. It’s the perfect sweet-tart treat to brighten any day, especially when you’re craving something refreshingly simple yet impressively delicious.
Serving: 8 | Pre Time: 20 minutes | Cooking Time: 15 minutes
Ingredients
– 1 ½ cups graham cracker crumbs
– ⅓ cup granulated sugar
– 6 tablespoons unsalted butter, melted
– 4 large egg yolks
– 1 (14-ounce) can sweetened condensed milk
– ½ cup Key lime juice (freshly squeezed or bottled)
– 1 tablespoon Key lime zest
– 1 cup heavy whipping cream
– 2 tablespoons powdered sugar
Instructions
1. Preheat your oven to 350°F (175°C).
2. In a medium bowl, combine the graham cracker crumbs, granulated sugar, and melted butter until the mixture resembles wet sand.
3. Press the crumb mixture firmly into the bottom and up the sides of a 9-inch pie dish to form an even crust. Tip: Use the bottom of a measuring cup to compact it for a sturdy base.
4. Bake the crust for 10 minutes, or until lightly golden and set. Remove from the oven and let it cool completely on a wire rack.
5. In a large bowl, whisk the egg yolks until smooth and pale yellow, about 2 minutes.
6. Gradually whisk in the sweetened condensed milk until fully incorporated.
7. Stir in the Key lime juice and Key lime zest until the filling is smooth and slightly thickened. Tip: Fresh juice adds a brighter flavor, but bottled works in a pinch—just avoid artificial substitutes.
8. Pour the filling into the cooled crust and spread it evenly with a spatula.
9. Bake the pie for 15 minutes, or until the center is set but still slightly jiggly. Tip: Overbaking can cause cracking, so keep an eye on it near the end.
10. Remove the pie from the oven and let it cool to room temperature, then refrigerate for at least 4 hours, or until fully chilled and firm.
11. In a chilled bowl, beat the heavy whipping cream and powdered sugar with an electric mixer on medium-high speed until stiff peaks form, about 3–4 minutes.
12. Spread or pipe the whipped cream over the chilled pie just before serving.
Now, this pie boasts a creamy, tangy filling that’s perfectly balanced with a buttery, crumbly crust, topped with a light, fluffy whipped cream for a dreamy finish. Serve it chilled with a sprinkle of extra zest or alongside fresh berries for a vibrant twist—it’s so good, you might just forget it’s simplified!
Trivial Custard Pie

Nervously eyeing that pie pan? Fear not, because this Trivial Custard Pie is about to become your new kitchen confidence booster—it’s so simple, you’ll wonder why you ever bought the store-bought stuff. With a silky filling that sets like a dream and a buttery crust that crumbles just right, it’s the dessert that promises maximum reward for minimal effort. Let’s turn those baking jitters into pure, unadulterated pie joy.
Serving: 8 | Pre Time: 20 minutes | Cooking Time: 45 minutes
Ingredients
– 1 9-inch unbaked pie crust
– 3 large eggs
– 1/2 cup granulated sugar
– 1/4 teaspoon salt
– 1 teaspoon vanilla extract
– 2 1/2 cups whole milk
– 1/4 teaspoon ground nutmeg
Instructions
1. Preheat your oven to 350°F (175°C).
2. Place the 9-inch unbaked pie crust in a pie dish, pressing it gently against the sides and bottom.
3. In a large mixing bowl, whisk together 3 large eggs until smooth and slightly frothy.
4. Add 1/2 cup granulated sugar and 1/4 teaspoon salt to the eggs, whisking until fully combined and the mixture lightens in color.
5. Stir in 1 teaspoon vanilla extract until incorporated.
6. Gradually pour in 2 1/2 cups whole milk while whisking continuously to prevent curdling.
7. Carefully pour the custard mixture into the prepared pie crust, filling it almost to the top.
8. Sprinkle 1/4 teaspoon ground nutmeg evenly over the surface of the custard.
9. Place the pie dish on a baking sheet to catch any potential spills, then transfer it to the preheated oven.
10. Bake for 45 minutes, or until the custard is set around the edges but still slightly jiggly in the center when gently shaken.
11. Remove the pie from the oven and let it cool completely on a wire rack for at least 2 hours to firm up.
12. Once cooled, refrigerate the pie for at least 4 hours or overnight before serving to allow the flavors to meld and the texture to set fully.
Silky and subtly sweet, this custard pie boasts a velvety texture that melts on the tongue, with a hint of nutmeg adding a warm, aromatic finish. Serve it chilled with a dollop of whipped cream or fresh berries for a refreshing twist, or enjoy it plain to savor the creamy simplicity—it’s so good, you might just forget how trivial it was to make.
Fuss-Free Mixed Berry Pie
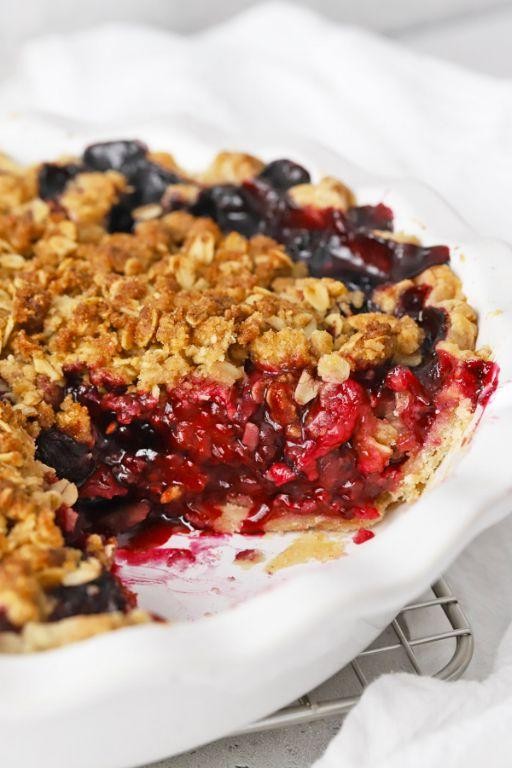
Kick your baking anxiety to the curb with this Fuss-Free Mixed Berry Pie—it’s the dessert that promises all the glory of a homemade pie without the drama of a temperamental crust. Perfect for when your kitchen skills feel more ‘takeout’ than ‘Top Chef,’ this recipe is your secret weapon for looking like a pastry pro. Let’s turn those berries into a show-stopping treat that’ll have everyone begging for seconds (and the recipe).
Serving: 8 | Pre Time: 20 minutes | Cooking Time: 45 minutes
Ingredients
– 2 store-bought pie crusts
– 4 cups mixed fresh berries (such as strawberries, blueberries, raspberries, and blackberries)
– 3/4 cup granulated sugar
– 1/4 cup cornstarch
– 1 tbsp lemon juice
– 1 tsp vanilla extract
– 1/4 tsp salt
– 1 egg
– 1 tbsp water
Instructions
1. Preheat your oven to 375°F (190°C) and place one pie crust in a 9-inch pie dish, pressing it gently into the bottom and sides.
2. In a large bowl, combine 4 cups mixed fresh berries, 3/4 cup granulated sugar, 1/4 cup cornstarch, 1 tbsp lemon juice, 1 tsp vanilla extract, and 1/4 tsp salt, tossing gently until the berries are evenly coated—this prevents a soggy bottom, so don’t skip the cornstarch!
3. Pour the berry mixture into the pie crust, spreading it out evenly with a spoon.
4. Place the second pie crust over the filling, then crimp the edges together with your fingers or a fork to seal them, trimming any excess dough with a knife.
5. Cut 4-5 small slits in the top crust with a sharp knife to allow steam to escape during baking.
6. In a small bowl, whisk 1 egg and 1 tbsp water to make an egg wash, then brush it lightly over the top crust for a golden, glossy finish.
7. Bake the pie at 375°F (190°C) for 45 minutes, or until the crust is deep golden brown and the filling is bubbling through the slits—if the edges brown too quickly, tent them with aluminum foil halfway through.
8. Remove the pie from the oven and let it cool on a wire rack for at least 2 hours before slicing; this allows the filling to set properly so it doesn’t run everywhere.
Buttery, flaky crust gives way to a jammy berry filling that’s sweet with a hint of tartness from the lemon, creating a texture that’s both tender and satisfyingly thick. Serve it warm with a scoop of vanilla ice cream for a classic combo, or get creative by drizzling it with honey and topping with fresh mint for a bright, elegant twist.
Straightforward Coconut Cream Pie

Venture into dessert bliss with a pie that’s so straightforward, you’ll wonder why you ever settled for store-bought. This coconut cream pie is the creamy, dreamy answer to your sweet-tooth prayers, and it’s ridiculously easy to pull off—no fancy chef skills required, just a spoon and a whole lot of enthusiasm. Get ready to impress your friends (or just yourself) with a slice of tropical heaven that’s as fun to make as it is to devour.
Serving: 8 | Pre Time: 25 minutes | Cooking Time: 15 minutes
Ingredients
– 1 9-inch pie crust, pre-baked
– 1 1/2 cups whole milk
– 1 1/2 cups heavy cream
– 3/4 cup granulated sugar
– 1/3 cup cornstarch
– 1/4 teaspoon salt
– 4 large egg yolks
– 2 teaspoons vanilla extract
– 1 1/2 cups sweetened shredded coconut
– 1/2 cup cold heavy cream
– 2 tablespoons powdered sugar
Instructions
1. In a medium saucepan over medium heat, whisk together 1 1/2 cups whole milk, 1 1/2 cups heavy cream, 3/4 cup granulated sugar, 1/3 cup cornstarch, and 1/4 teaspoon salt until smooth.
2. Cook the mixture, stirring constantly with a whisk, for 8–10 minutes until it thickens and large bubbles break the surface—this means it’s reached a full boil.
3. Remove the saucepan from the heat and quickly whisk in 4 large egg yolks until fully incorporated to prevent curdling.
4. Return the saucepan to low heat and cook for 2 more minutes, stirring continuously, until the custard is very thick and coats the back of a spoon.
5. Stir in 2 teaspoons vanilla extract and 1 1/2 cups sweetened shredded coconut until evenly distributed.
6. Pour the hot coconut custard into the pre-baked 9-inch pie crust, spreading it evenly with a spatula.
7. Press plastic wrap directly onto the surface of the custard to prevent a skin from forming, then refrigerate for at least 4 hours or until completely set.
8. In a chilled mixing bowl, beat 1/2 cup cold heavy cream with 2 tablespoons powdered sugar using an electric mixer on high speed for 3–4 minutes until stiff peaks form.
9. Spread the whipped cream over the chilled pie, creating decorative swirls with a spatula or piping bag.
10. Toast 1/4 cup of the remaining shredded coconut in a dry skillet over medium heat for 3–4 minutes, stirring often, until golden brown, then sprinkle it over the whipped cream for added crunch and flavor.
Now, nothing beats slicing into that velvety custard nestled in a crisp crust, with a fluffy cloud of whipped cream on top. The toasted coconut adds a nutty crunch that plays perfectly against the creamy sweetness, making each bite a tropical escape. Serve it chilled with a drizzle of chocolate sauce or alongside a cup of strong coffee for a dessert that’s downright irresistible.
Basic Shepherd’s Pie (Savory)

Ugh, who hasn’t stared into the fridge, hoping a cozy dinner would magically appear? Let’s make that dream a delicious reality with a classic shepherd’s pie—a savory hug in a dish that’s as forgiving as it is flavorful. This hearty, layered wonder is the ultimate comfort food fix for any night of the week.
Serving: 6 | Pre Time: 25 minutes | Cooking Time: 40 minutes
Ingredients
– 1 ½ lbs ground beef (85% lean)
– 1 large yellow onion, diced
– 2 large carrots, peeled and diced
– 2 cloves garlic, minced
– 1 cup frozen peas
– 2 tbsp tomato paste
– 1 tbsp Worcestershire sauce
– 1 cup beef broth
– 2 tbsp all-purpose flour
– 2 lbs russet potatoes, peeled and cubed
– ½ cup whole milk
– 4 tbsp unsalted butter
– ½ cup shredded cheddar cheese
– 1 tsp salt
– ½ tsp black pepper
– 2 tbsp olive oil
Instructions
1. Preheat your oven to 400°F (200°C).
2. Place the peeled, cubed potatoes in a large pot, cover with cold water, add 1 tsp salt, and bring to a boil over high heat.
3. Boil the potatoes for 15–20 minutes until fork-tender, then drain completely.
4. Mash the potatoes with 4 tbsp butter and ½ cup milk until smooth and creamy; season with ¼ tsp black pepper and set aside.
5. Heat 2 tbsp olive oil in a large skillet over medium-high heat.
6. Add the diced onion and carrots to the skillet; sauté for 5–7 minutes until the onions are translucent and carrots soften.
7. Add the ground beef to the skillet, breaking it up with a spoon, and cook for 8–10 minutes until no pink remains and it’s browned.
8. Stir in the minced garlic and cook for 1 minute until fragrant.
9. Sprinkle 2 tbsp flour over the beef mixture and stir for 1 minute to cook off the raw flour taste.
10. Add 2 tbsp tomato paste and 1 tbsp Worcestershire sauce, stirring to coat everything evenly.
11. Pour in 1 cup beef broth, scraping up any browned bits from the skillet, and bring to a simmer for 3–5 minutes until slightly thickened.
12. Fold in 1 cup frozen peas and season with ¼ tsp black pepper; remove from heat.
13. Transfer the beef mixture to a 9×13-inch baking dish, spreading it into an even layer.
14. Spoon the mashed potatoes over the top, spreading gently to cover the beef completely.
15. Sprinkle ½ cup shredded cheddar cheese evenly over the potatoes.
16. Bake in the preheated oven for 20–25 minutes until the cheese is melted and the edges are bubbly.
17. Let the shepherd’s pie rest for 10 minutes before serving to allow the filling to set.
Mmm, dig into that golden, cheesy crust giving way to a rich, savory beef filling studded with sweet peas and carrots. The creamy potatoes melt into the gravy, creating a cozy, unified bite that’s pure comfort—serve it straight from the dish with a crisp green salad for a perfect weeknight feast.
Simple and Sweet Peach Pie
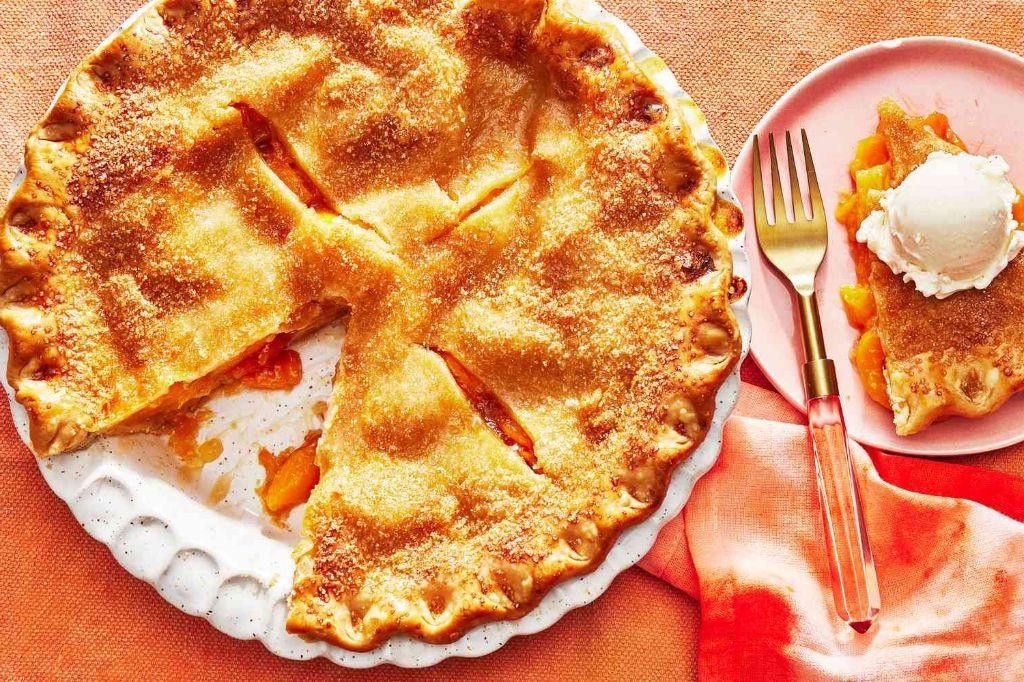
Ladies and gentlemen, gather ’round your ovens because we’re about to transform humble peaches into a dessert that’ll make your taste buds sing a sweet, summery tune! This pie is the culinary equivalent of a warm hug—simple, sweet, and utterly irresistible. Let’s get baking and create some magic, shall we?
Serving: 8 | Pre Time: 30 minutes | Cooking Time: 45 minutes
Ingredients
– 2 9-inch refrigerated pie crusts
– 6 cups fresh peaches, peeled and sliced
– 1 cup granulated sugar
– 1/4 cup all-purpose flour
– 1/4 teaspoon ground cinnamon
– 1/4 teaspoon ground nutmeg
– 1 tablespoon lemon juice
– 1 tablespoon unsalted butter, cut into small pieces
– 1 large egg
– 1 tablespoon milk
– 1 tablespoon granulated sugar (for topping)
Instructions
1. Preheat your oven to 425°F (218°C) and place one pie crust into a 9-inch pie dish, pressing it gently against the bottom and sides.
2. In a large mixing bowl, combine the sliced peaches, 1 cup granulated sugar, all-purpose flour, ground cinnamon, ground nutmeg, and lemon juice, tossing until the peaches are evenly coated.
3. Tip: For extra flavor, let the peach mixture sit for 10 minutes to allow the juices to meld—this prevents a soggy crust!
4. Pour the peach filling into the prepared pie crust, spreading it out evenly, and dot the top with the pieces of unsalted butter.
5. Place the second pie crust over the filling, crimping the edges with your fingers or a fork to seal it, then cut 4-5 small slits in the top crust to allow steam to escape.
6. In a small bowl, whisk together the egg and milk to create an egg wash, then brush it evenly over the top crust.
7. Sprinkle 1 tablespoon of granulated sugar over the egg wash for a sparkling, golden finish.
8. Tip: Place the pie on a baking sheet lined with aluminum foil to catch any drips and make cleanup a breeze!
9. Bake the pie in the preheated oven at 425°F (218°C) for 15 minutes, then reduce the temperature to 375°F (190°C) and bake for an additional 30 minutes, or until the crust is golden brown and the filling is bubbling.
10. Tip: To avoid over-browning, cover the edges of the crust with foil after the first 20 minutes of baking.
11. Remove the pie from the oven and let it cool on a wire rack for at least 2 hours to allow the filling to set properly.
Ready to dive in? This pie boasts a flaky, buttery crust that gives way to a luscious, jammy peach filling with just a hint of warm spice. Serve it warm with a scoop of vanilla ice cream for a classic treat, or get creative by drizzling it with caramel sauce for an extra indulgent twist—either way, it’s pure bliss on a plate!
Conclusion
Now you have a treasure trove of 24 simple pie recipes perfect for your busy schedule! We hope these ideas inspire you to bake something delicious without the stress. Give one a try this week—we’d love to hear which pie becomes your new favorite in the comments below. If you enjoyed this roundup, please share it on Pinterest to help other bakers find these effortless treats!


