
Tired of dry, flavorless chicken breast that tastes like cardboard? This recipe will change your chicken game forever! The secret is in the technique, not complicated ingredients.
Why This Recipe Works
- Brining the chicken first ensures maximum moisture retention during cooking, preventing that dreaded dryness that plagues so many chicken breast recipes
- Using an instant-read thermometer takes the guesswork out of doneness, guaranteeing perfectly cooked chicken every single time without overcooking
- The high-temperature start creates beautiful browning and flavor development, while finishing at a lower temperature allows gentle, even cooking throughout
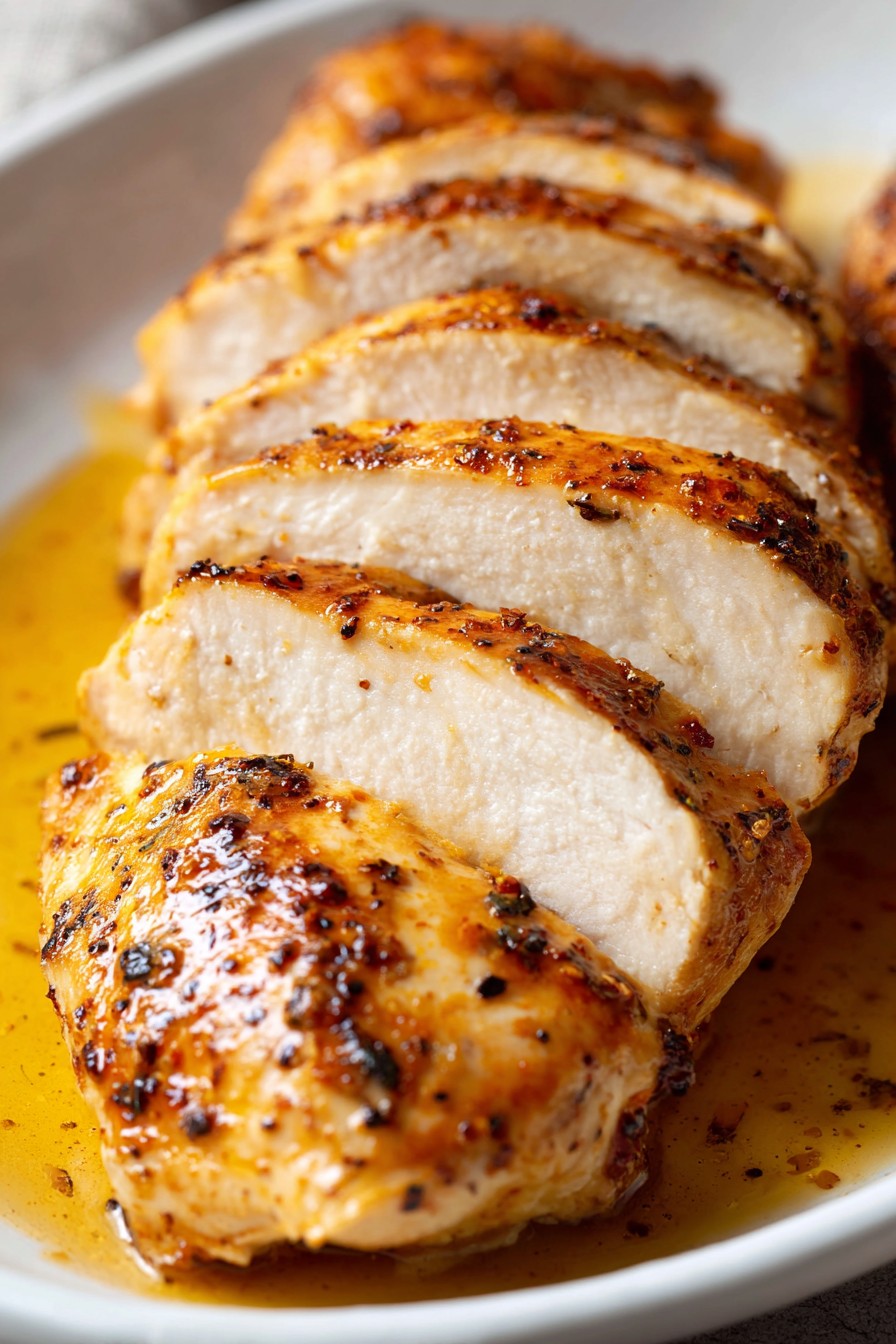
- Resting the chicken after cooking allows juices to redistribute, resulting in incredibly tender, moist meat that slices beautifully
- The simple seasoning blend enhances without overpowering, making this versatile enough for meal prep, salads, or as a main dish
Ingredients
- 4 boneless, skinless chicken breasts (about 6 ounces each)
- 1/4 cup kosher salt for brining
- 4 cups cold water for brining solution
- 2 tablespoons olive oil
- 1 teaspoon garlic powder
- 1 teaspoon paprika
- 1/2 teaspoon black pepper, freshly ground
- 1/2 teaspoon onion powder
- 1/4 teaspoon dried thyme
- Optional: fresh herbs for garnish
Equipment Needed
- Large bowl or container for brining
- Rimmed baking sheet
- Wire rack that fits inside baking sheet
- Instant-read thermometer
- Small bowl for mixing spices
- Tongs or fork for handling chicken
- Paper towels
- Cutting board
- Sharp knife
Instructions
Prepare the Brine and Chicken
Start by creating your brine solution – this is the secret weapon against dry chicken! In a large bowl, combine 4 cups of cold water with 1/4 cup of kosher salt, stirring until the salt completely dissolves. Submerge all four chicken breasts in the brine, making sure they’re fully covered. If they float, place a small plate on top to keep them submerged. Let them brine in the refrigerator for exactly 30 minutes – no longer, or they’ll become too salty. While waiting, preheat your oven to 450°F and position your oven rack in the center. This brining step is crucial because it allows the chicken to absorb moisture and seasoning, creating a buffer against drying out during the high-heat cooking process.
Dry and Season the Chicken
After 30 minutes, remove the chicken from the brine and pat each breast completely dry with paper towels – I mean bone dry! This step is non-negotiable because moisture on the surface prevents proper browning. In a small bowl, combine 1 teaspoon garlic powder, 1 teaspoon paprika, 1/2 teaspoon black pepper, 1/2 teaspoon onion powder, and 1/4 teaspoon dried thyme. Mix these spices thoroughly to ensure even distribution. Drizzle 2 tablespoons of olive oil over the dried chicken breasts, rubbing it evenly over all surfaces. Then sprinkle the spice mixture generously on both sides, pressing gently to help it adhere. Place a wire rack on your rimmed baking sheet – this elevates the chicken for even air circulation and browning.
Initial High-Heat Roasting
Place the seasoned chicken breasts on the wire rack, making sure they aren’t touching each other to allow proper air circulation. Slide the baking sheet into your preheated 450°F oven and set your timer for 15 minutes. This initial high heat creates beautiful caramelization on the outside while keeping the interior moist. Resist the temptation to open the oven door during this phase – every time you peek, you lose valuable heat and extend the cooking time. The chicken should develop a golden-brown crust and your kitchen will start smelling absolutely incredible. This high-temperature start is what separates okay chicken from spectacular chicken.
Reduce Heat and Continue Cooking
After 15 minutes at 450°F, reduce the oven temperature to 375°F without opening the oven door if possible. Continue cooking for another 10-15 minutes, depending on the thickness of your chicken breasts. Thinner breasts (about 1-inch thick) will need closer to 10 minutes, while thicker cuts (1.5 inches or more) may need the full 15 minutes. The internal temperature should reach 155-160°F on an instant-read thermometer when inserted into the thickest part of the breast. Remember that the temperature will continue to rise about 5 degrees during resting. The chicken should feel firm but still have some give when pressed with tongs.
Rest and Serve Perfectly
Once the chicken reaches 155-160°F internally, immediately remove it from the oven and transfer to a clean cutting board. Let it rest for exactly 5-10 minutes – this is when the magic happens! The juices redistribute throughout the meat, making every bite incredibly moist and tender. Cover loosely with foil if you’re concerned about it getting cold, but don’t wrap tightly or you’ll steam the beautiful crust you worked so hard to create. After resting, slice against the grain into 1/2-inch slices for maximum tenderness. Serve immediately with your favorite sides, or let cool completely for meal prep.
Tips and Tricks
For consistently perfect chicken, consider pounding thicker breasts to an even 1-inch thickness before brining – this ensures uniform cooking without dried-out edges. Use an oven thermometer to verify your oven’s accuracy, as many home ovens run hot or cold by 25 degrees or more. If you want extra crispy edges, pat the chicken dry again right before seasoning – the drier the surface, the better the browning. For enhanced flavor, let the seasoned chicken sit at room temperature for 20 minutes before roasting, allowing the spices to penetrate deeper. If you’re cooking for a crowd, you can brine the chicken up to 4 hours ahead, then pat dry and refrigerate until ready to season and cook. Leftover chicken reheats beautifully if you use gentle heat – either in a 300°F oven for 10-15 minutes or briefly in a skillet with a tablespoon of broth to add moisture. For meal prep, slice the chicken before refrigerating so it’s ready to grab for salads, wraps, or quick lunches. If you notice the spices burning during the high-heat phase, tent loosely with foil during the lower temperature phase. Always let your chicken come to room temperature for 15-20 minutes before roasting if you have time – this promotes more even cooking from edge to center. For extra juicy results, try adding a tablespoon of honey or brown sugar to your brine solution, which helps with browning and flavor development. If you’re watching sodium, reduce the brining time to 15-20 minutes rather than skipping it entirely. For the best texture, use chicken breasts that are similar in size and thickness, or adjust cooking times accordingly. Remember that carryover cooking will continue after removal from the oven, so pull at 155-160°F rather than waiting for 165°F. If your chicken breasts are particularly large, consider butterflying them rather than pounding for more even cooking. For added flavor, rub the chicken with minced garlic or herb paste under the skin (if you had skin) or add citrus zest to your spice blend. Always use a sharp knife for slicing to avoid tearing the beautiful cooked meat. If you want to make cleanup easier, line your baking sheet with parchment paper under the wire rack. For extra crispy edges, you can briefly broil for 1-2 minutes at the end, but watch carefully to prevent burning. If cooking multiple batches, let your baking sheet cool completely between uses or use a second cool sheet to prevent sticking. For the most accurate temperature reading, insert your thermometer into the thickest part of the breast, avoiding any pockets of fat or bone areas. If you’re doubling the recipe, use two baking sheets and rotate them halfway through cooking for even results. For food safety, never reuse the brining solution and always wash all surfaces that touched raw chicken thoroughly with hot soapy water.
Recipe Variations
- Italian Herb Version: Replace the spice blend with 2 teaspoons Italian seasoning, 1 teaspoon garlic powder, 1/2 teaspoon onion powder, and 1/4 teaspoon red pepper flakes. Add 1 tablespoon of lemon zest to the seasoning mix for bright, fresh flavor that pairs beautifully with pasta dishes or Mediterranean salads. Serve with a drizzle of balsamic reduction and fresh basil for restaurant-quality presentation.
- Spicy Southwest Style: Use 1 tablespoon chili powder, 2 teaspoons cumin, 1 teaspoon smoked paprika, 1/2 teaspoon garlic powder, and 1/4-1/2 teaspoon cayenne pepper depending on your heat preference. Add 1 teaspoon of lime zest to the seasoning for tangy brightness. Perfect for tacos, burrito bowls, or served with black beans and corn salsa for a fiesta-inspired meal that will have your taste buds dancing.
- Lemon Herb Delight: Create a paste with the zest of 2 lemons, 3 minced garlic cloves, 2 tablespoons fresh chopped parsley, 1 tablespoon fresh thyme leaves, and 2 tablespoons olive oil. Rub this under the chicken if you had skin, or massage it thoroughly into the meat. The citrus and fresh herbs create a light, refreshing flavor profile that’s perfect for summer meals or when you want something bright and herbaceous.
- Asian-Inspired Glaze: After the initial high-heat roasting, brush the chicken with a mixture of 2 tablespoons soy sauce, 1 tablespoon honey, 1 teaspoon grated ginger, and 1 minced garlic clove. Return to oven for the lower temperature phase, brushing again halfway through. The glaze will caramelize beautifully and create sticky, flavorful chicken that’s fantastic over rice or in stir-fries.
- Creamy Herb Crust: Mix 1/4 cup mayonnaise with 1/4 cup grated Parmesan cheese, 1 teaspoon garlic powder, 1 teaspoon dried basil, and 1/2 teaspoon black pepper. Spread this mixture over the chicken after patting dry but before the high-heat phase. The mayonnaise helps create an incredibly moist interior while the Parmesan forms a delicious golden crust that’s packed with flavor.
Frequently Asked Questions
Can I skip the brining step if I’m short on time?
While you can technically skip brining, I strongly recommend against it if you want truly juicy chicken. The 30-minute brine makes a dramatic difference in moisture retention and overall texture. If you’re absolutely pressed for time, you can reduce brining to 15 minutes and still get benefits, or at least do a quick 10-minute saltwater soak. However, the full 30 minutes is ideal because it allows the salt to penetrate deeper into the meat, breaking down proteins slightly and allowing them to hold more moisture during cooking. Without brining, your chicken is much more likely to dry out, especially with the high-heat method. If you really can’t brine, be extra careful not to overcook and consider using a meat mallet to pound the chicken to even thickness for more consistent results.
Why did my chicken turn out dry even following this recipe?
Dry chicken usually results from one of three issues: inaccurate oven temperature, overcooking, or not resting properly. First, verify your oven temperature with an oven thermometer – many home ovens are off by 25-50 degrees. Second, ensure you’re using an instant-read thermometer and pulling the chicken at 155-160°F, not waiting until 165°F (remember carryover cooking will bring it to the safe temperature). Third, the resting period is non-negotiable – cutting into hot chicken immediately causes all the juices to run out. Also check that you patted the chicken completely dry before seasoning, as surface moisture can create steam that affects texture. If your chicken breasts were particularly thin or uneven, they may have cooked too quickly in some areas.
Can I use frozen chicken breasts for this recipe?
I don’t recommend using frozen chicken directly for this recipe. The best results come from properly thawed chicken that can brine and cook evenly. If you must use frozen, thaw completely in the refrigerator overnight first, then proceed with the recipe. Never try to brine partially frozen chicken as it won’t absorb the solution properly and may cook unevenly. If you’re in a pinch, you can thaw quickly by placing sealed chicken in a bowl of cold water, changing the water every 30 minutes until fully thawed. However, planning ahead for proper thawing will give you significantly better results in terms of both texture and food safety.
How long can I store leftover roasted chicken breast?
Properly stored leftover chicken will keep in the refrigerator for 3-4 days in an airtight container. For best quality, let the chicken cool completely before refrigerating, but don’t leave it at room temperature for more than 2 hours. You can also freeze cooked chicken for up to 3 months – slice it first for easier use later. When reheating, do so gently in a 300°F oven for 10-15 minutes or until warmed through, or add to soups, sauces, or casseroles where it can heat gradually. Avoid microwaving if possible, as this can make the chicken rubbery and dry. The brining process actually helps leftovers stay moister than unbrined chicken.
Can I double this recipe for a larger crowd?
Absolutely! This recipe scales beautifully for larger gatherings. Use two baking sheets with wire racks and rotate them halfway through cooking for even results. You may need to add 2-5 minutes to the cooking time depending on your oven’s capacity and how crowded the sheets are. Make sure there’s still space between the chicken breasts for air circulation – if they’re too crowded, they’ll steam rather than roast. You can prepare the brine in a large container or multiple containers, and mix a larger batch of spices in the same proportions. For very large quantities, consider cooking in batches to ensure perfect results rather than overcrowding your oven.
Summary
Perfect oven-roasted chicken breast starts with brining, high-heat browning, precise temperature monitoring, and proper resting. This method guarantees juicy, flavorful results every time.
Oven Roasted Boneless Skinless Chicken Breast
6
servings40
minutes25
minutesIngredients
Instructions
- 1 Brine chicken in saltwater solution for 30 minutes
- 2 Pat chicken completely dry and season with spice blend
- 3 Roast at 450°F for 15 minutes on wire rack
- 4 Reduce heat to 375°F and cook until 155-160°F internally
- 5 Rest for 5-10 minutes before slicing and serving


