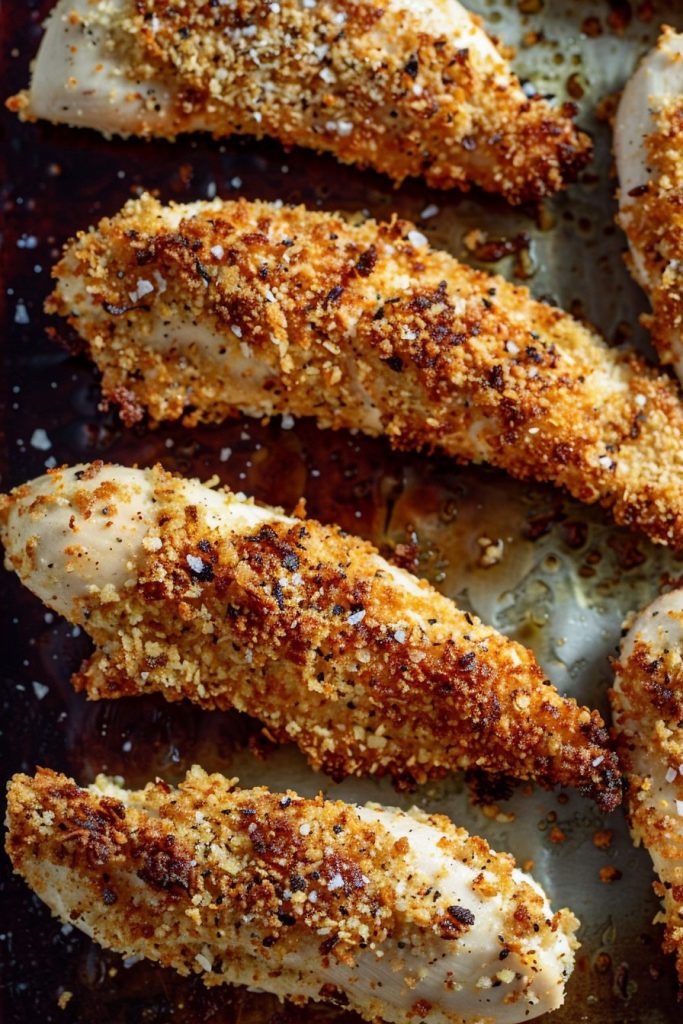
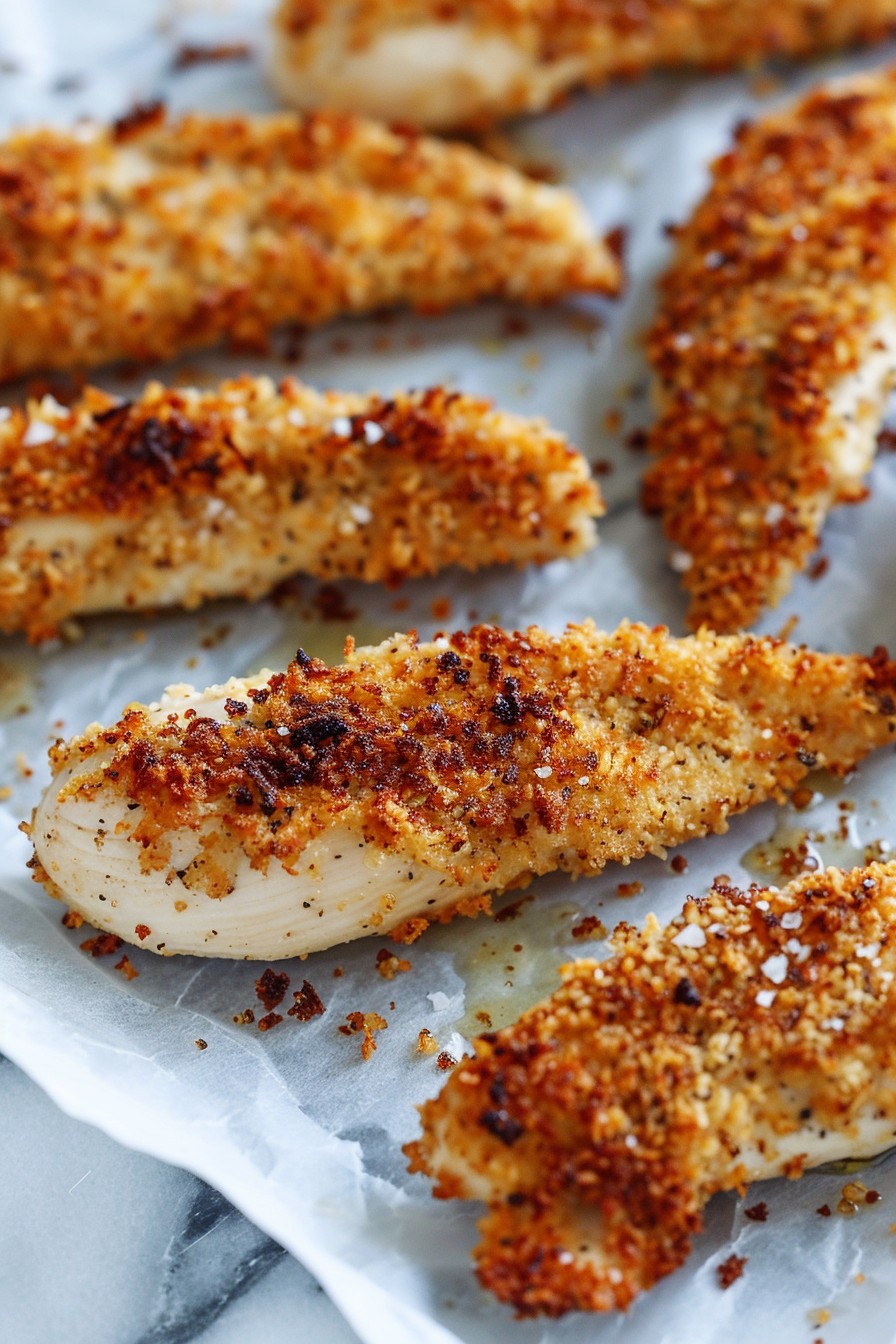
Very few things in life are as satisfying as biting into a crispy, juicy chicken strip. But who says you have to deep fry to achieve that perfect crunch? Our oven-fried version delivers all the flavor with none of the guilt, making it a win-win for your taste buds and your waistline.
Why This Recipe Works
- Healthier without sacrificing taste: By baking instead of frying, we cut down on oil without losing that beloved crispy texture.
- Perfectly seasoned: A blend of spices ensures every bite is packed with flavor.
- Easy to make: With simple ingredients and straightforward steps, this recipe is foolproof.
- Versatile: Serve these strips as a main dish, appetizer, or even on top of salads for a protein boost.
Ingredients
- 1.5 lbs chicken breast, cut into strips
- 1 cup all-purpose flour
- 2 eggs, beaten
- 1 cup panko breadcrumbs
- 1 tsp garlic powder
- 1 tsp paprika
- 1/2 tsp salt
- 1/2 tsp black pepper
- 2 tbsp olive oil
Equipment Needed
- Baking sheet
- Parchment paper
- Three shallow bowls
- Whisk
- Tongs
Instructions
Preheat and Prep
Start by preheating your oven to 400°F and lining a baking sheet with parchment paper. This ensures your chicken strips won’t stick and makes cleanup a breeze. While the oven heats, set up your dredging station with three shallow bowls: one for flour mixed with garlic powder, paprika, salt, and pepper; one for beaten eggs; and one for panko breadcrumbs.
Coat the Chicken
Working one at a time, dip each chicken strip into the flour mixture, shaking off any excess. Next, dip it into the beaten eggs, allowing any excess to drip off. Finally, coat it thoroughly with panko breadcrumbs. Place each coated strip on the prepared baking sheet. For extra crispiness, lightly drizzle or spray the strips with olive oil before baking.
Bake to Perfection
Bake the chicken strips in the preheated oven for 20-25 minutes, flipping them halfway through. You’ll know they’re done when they’re golden brown and the internal temperature reaches 165°F. Let them rest for a few minutes before serving to ensure they stay juicy.
Tips and Tricks
For those looking to elevate their oven-fried chicken strips, consider marinating the chicken in buttermilk for a few hours before cooking. This not only tenderizes the meat but also adds a subtle tanginess. Another pro tip is to use a wire rack on top of your baking sheet to allow air to circulate around the strips, ensuring they crisp up evenly. Lastly, don’t overcrowd the baking sheet; giving each strip its own space is key to achieving that perfect crunch.
Recipe Variations
- Spicy Version: Add cayenne pepper or hot sauce to the egg wash for a kick.
- Gluten-Free: Swap out the flour and panko for gluten-free alternatives.
- Cheesy Twist: Mix grated Parmesan into the breadcrumbs for a cheesy flavor.
- Herb Infused: Add dried herbs like thyme or rosemary to the flour mixture for an aromatic touch.
Frequently Asked Questions
Can I use chicken thighs instead of breasts?
Absolutely! Chicken thighs will work just as well, if not better, due to their higher fat content which keeps them moist. Just be sure to adjust cooking times as thighs may take a bit longer to cook through.
How do I store leftovers?
Leftover chicken strips can be stored in an airtight container in the refrigerator for up to 3 days. To reheat, pop them in the oven at 350°F for about 10 minutes or until heated through to maintain their crispiness.
Can I make these ahead of time?
Yes, you can prepare the chicken strips up to the point of baking and keep them covered in the refrigerator for a few hours before cooking. This makes them a great option for meal prep or entertaining.
Summary
This oven-fried chicken strips recipe offers a healthier alternative to traditional fried chicken without compromising on taste or texture. Easy to make and customizable, it’s sure to become a staple in your recipe collection.
Crispy Oven Fried Chicken Strips
6
servings15
minutes25
minutesIngredients
Instructions
- 1 Preheat oven to 400°F and line a baking sheet with parchment paper.
- 2 Set up dredging station with flour mixture, beaten eggs, and panko breadcrumbs.
- 3 Coat each chicken strip in flour, then egg, then breadcrumbs.
- 4 Place on baking sheet, drizzle with olive oil, and bake for 20-25 minutes, flipping halfway.
- 5 Serve hot and enjoy!


