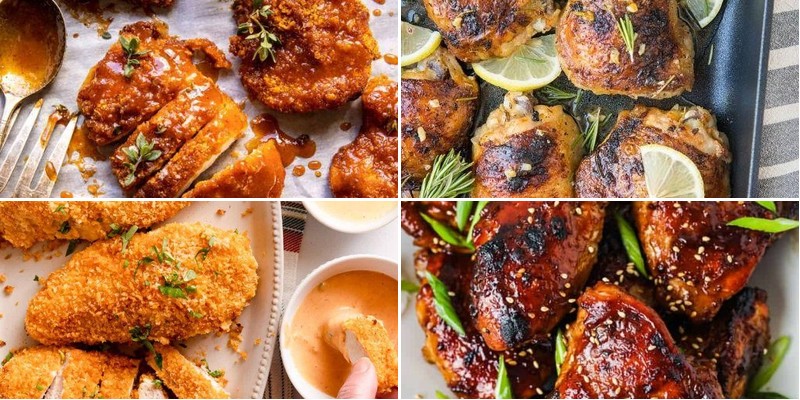
Unleash your inner chef with the ultimate comfort food upgrade! We’ve gathered 25 crispy oven-fried chicken recipes that deliver all the crunch without the mess of deep frying. From classic buttermilk to spicy global twists, these easy-to-follow dishes will become your new weeknight heroes. Get ready to discover your family’s next favorite meal—let’s dive into these irresistible recipes!
Buttermilk Oven Fried Chicken

Under the golden afternoon light, I find myself drawn back to this simple comfort, the kind that fills the kitchen with warmth and the heart with quiet satisfaction. There’s something deeply grounding about preparing this dish, a slow ritual that transforms humble ingredients into something truly special.
3
portions15
minutes60
minutesIngredients
– A couple of pounds of chicken pieces, whatever you prefer
– A good glug of buttermilk, about 1 ½ cups
– A couple of cups of all-purpose flour
– A generous tablespoon of paprika
– A teaspoon of garlic powder
– A teaspoon of onion powder
– A solid teaspoon of salt
– A half teaspoon of black pepper, freshly ground if you have it
– A few tablespoons of melted butter
– A splash of cooking oil
Instructions
1. Place your chicken pieces in a large bowl and pour the buttermilk over them, making sure each piece is fully coated. Let this sit for at least 4 hours in the refrigerator, or even better, overnight—this tenderizes the chicken beautifully and is my first tip for the juiciest result.
2. Preheat your oven to 400°F and line a baking sheet with parchment paper.
3. In another large bowl, whisk together the all-purpose flour, paprika, garlic powder, onion powder, salt, and black pepper until everything is evenly combined.
4. Remove each piece of chicken from the buttermilk, letting the excess drip off, then dredge it thoroughly in the flour mixture, pressing gently to ensure a good coating—this is my second tip: a firm press helps the coating stick during baking.
5. Arrange the coated chicken pieces on the prepared baking sheet in a single layer, making sure they don’t touch.
6. Drizzle the melted butter and a splash of cooking oil evenly over the chicken; this adds richness and helps achieve that golden, crispy finish.
7. Bake at 400°F for 35 minutes, then flip each piece carefully with tongs.
8. Continue baking for another 20-25 minutes, or until the internal temperature reaches 165°F and the coating is deep golden brown and crisp—my third tip: use a meat thermometer to avoid guesswork and ensure perfect doneness.
9. Remove from the oven and let the chicken rest on the baking sheet for 5-10 minutes before serving.
My kitchen fills with the scent of golden, crisp perfection as I pull the chicken from the oven. That first bite reveals a tender, juicy interior wrapped in a shatteringly crisp crust, with the subtle tang of buttermilk weaving through each savory layer. I love serving it piled high on a platter with creamy mashed potatoes and a simple green salad, letting the contrasts in texture and flavor tell their own quiet story.
Spicy Oven Fried Chicken Wings

Vividly remembering the first time I tried these wings at a backyard gathering years ago, I still find myself craving that perfect balance of crispy skin and tender meat, with just enough heat to make you reach for another. Sometimes the simplest recipes become the ones we return to again and again, especially when they deliver such satisfying results with minimal fuss. Today feels like the right kind of afternoon to slow down and recreate that memory in my own kitchen.
4
servings15
minutes50
minutesIngredients
– A couple of pounds of chicken wings, split into drumettes and flats
– A generous half cup of all-purpose flour
– A tablespoon of smoked paprika
– Two teaspoons of garlic powder
– A teaspoon and a half of cayenne pepper
– A good splash of olive oil, about two tablespoons
– A couple of tablespoons of hot sauce
– A teaspoon of salt
Instructions
1. Preheat your oven to 425°F and line a baking sheet with parchment paper.
2. Pat the chicken wings completely dry with paper towels—this is crucial for getting them extra crispy.
3. In a large bowl, whisk together the all-purpose flour, smoked paprika, garlic powder, cayenne pepper, and salt until well combined.
4. Toss the dried wings in the flour mixture until they’re evenly coated on all sides.
5. Arrange the coated wings in a single layer on the prepared baking sheet, making sure they aren’t touching.
6. Drizzle the olive oil evenly over the wings, then flip each one to lightly coat both sides.
7. Bake for 25 minutes at 425°F until the bottoms are golden and starting to crisp.
8. Remove the baking sheet from the oven and carefully flip each wing using tongs.
9. Brush the hot sauce evenly over the top of each wing.
10. Return to the oven and bake for another 20-25 minutes at 425°F until the skin is deeply browned and crispy all over.
11. Let the wings rest on the baking sheet for 5 minutes before serving—this allows the juices to redistribute.
Heavenly doesn’t even begin to describe that first bite—the crackle of the spice-rubbed crust giving way to impossibly juicy meat inside. I love serving these piled high on a wooden board with crisp celery sticks and a creamy blue cheese dip for cooling contrast, though they’re just as wonderful eaten straight from the pan while standing at the counter.
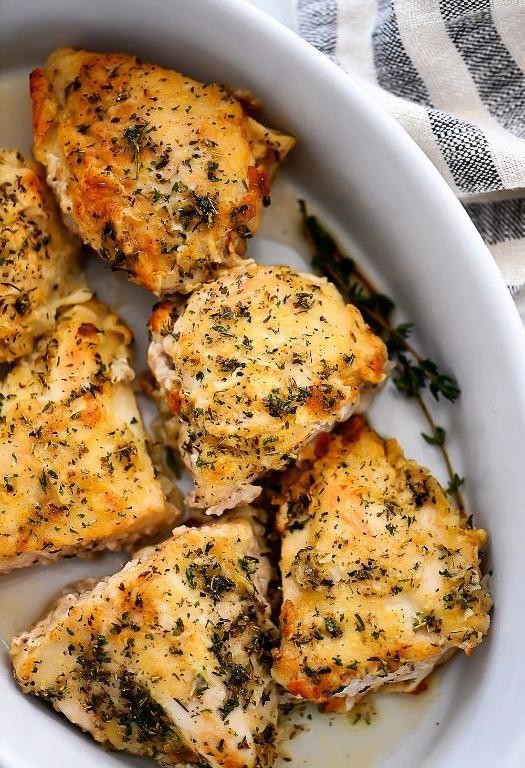
Garlic Herb Oven Fried Chicken

Now, as the afternoon light fades across the kitchen counter, I find myself thinking about how some of the simplest meals can feel like the most comforting rituals. This garlic herb oven fried chicken has become one of those quiet traditions in my home, where the scent of roasting herbs fills the house with warmth.
2
portions15
minutes40
minutesIngredients
– A couple of pounds of chicken pieces, whatever you prefer
– About a cup and a half of all-purpose flour
– A good splash of buttermilk, maybe ¾ cup
– A couple of tablespoons of olive oil
– Three or four cloves of garlic, minced
– A generous tablespoon of dried herbs (I like using an Italian blend)
– A teaspoon of paprika for that lovely color
– A solid teaspoon of salt
– Half a teaspoon of black pepper, freshly ground if you have it
Instructions
1. Preheat your oven to 400°F and line a baking sheet with parchment paper.
2. Pat the chicken pieces completely dry with paper towels—this helps the coating stick better.
3. In a medium bowl, whisk together the flour, minced garlic, dried herbs, paprika, salt, and pepper.
4. Pour the buttermilk into a separate shallow dish.
5. Dip each chicken piece first into the buttermilk, letting any excess drip off.
6. Then dredge the chicken thoroughly in the flour mixture, pressing gently to help the coating adhere.
7. Place the coated chicken pieces on the prepared baking sheet, making sure they don’t touch.
8. Drizzle the olive oil evenly over the chicken—this creates that crispy fried texture without deep frying.
9. Bake for 35-40 minutes, until the internal temperature reaches 165°F and the coating is golden brown.
10. Let the chicken rest on the baking sheet for 5 minutes before serving to allow the juices to redistribute.
My favorite part is how the garlic becomes fragrant and mellow in the oven, infusing the crispy coating with gentle warmth. The chicken stays wonderfully juicy inside, with a crackling herb crust that holds up beautifully whether you serve it with mashed potatoes or slice it over a crisp salad the next day.
Honey Mustard Glazed Oven Fried Chicken

There’s something deeply comforting about the way golden afternoon light filters through the kitchen window, illuminating specks of flour dancing in the air as you prepare a meal that feels like a warm embrace. This honey mustard glazed oven fried chicken is one of those dishes that fills the house with the kind of aroma that makes everyone wander into the kitchen, drawn by the promise of something special.
5
portions15
minutes45
minutesIngredients
– A couple of pounds of chicken thighs, bone-in and skin-on for that extra juiciness
– About a cup of all-purpose flour for that perfect crispy coating
– A good splash of olive oil, maybe two tablespoons
– A generous half cup of Dijon mustard for that tangy kick
– A quarter cup of golden honey to balance everything out
– A couple of cloves of garlic, minced until they’re almost a paste
– A teaspoon of smoked paprika for that subtle warmth
– A pinch of salt and a few cracks of black pepper to season everything just right
Instructions
1. Preheat your oven to 400°F and line a baking sheet with parchment paper to prevent sticking.
2. Pat the chicken thighs completely dry with paper towels—this is crucial for getting that crispy skin we’re after.
3. In a shallow bowl, combine the flour with the smoked paprika, salt, and black pepper.
4. Dredge each chicken thigh in the seasoned flour mixture, making sure to coat both sides evenly and shaking off any excess.
5. Arrange the coated chicken thighs skin-side up on your prepared baking sheet, leaving some space between each piece for proper air circulation.
6. Drizzle the olive oil evenly over the chicken pieces to help them brown beautifully in the oven.
7. Bake for 25 minutes at 400°F until the coating starts to turn golden and crisp around the edges.
8. While the chicken bakes, whisk together the Dijon mustard, honey, and minced garlic in a small bowl until smooth and well-combined.
9. After 25 minutes, carefully remove the baking sheet from the oven and brush each chicken thigh generously with the honey mustard glaze.
10. Return the chicken to the oven and continue baking for another 15-20 minutes at 400°F until the internal temperature reaches 165°F and the glaze is bubbly and caramelized.
11. Let the chicken rest on the baking sheet for 5 minutes before serving—this allows the juices to redistribute throughout the meat.
Each bite reveals the magic of this dish—the crackle of the honey-kissed crust giving way to impossibly tender chicken beneath. Especially wonderful when served over a bed of creamy mashed potatoes, where the sweet-tangy glaze mingles beautifully with the savory spuds, creating a harmony of flavors that feels both familiar and exciting.
Cajun Spiced Oven Fried Chicken

Remembering how my grandmother used to make fried chicken on Sunday afternoons, I find myself craving that same crispy comfort, but wanting something a little lighter and less messy to prepare. This oven-fried version captures all the satisfying crunch and soul-warming spice without the splatter of hot oil, filling the kitchen with the most incredible aroma as it bakes. It’s the kind of meal that feels like a warm hug on a busy weeknight.
5
portions40
minutes45
minutesIngredients
– A couple of pounds of chicken drumsticks and thighs, with the skin on
– A good glug of buttermilk, about 1 cup
– A cup and a half of all-purpose flour
– A couple of tablespoons of Cajun seasoning
– A teaspoon of garlic powder
– A teaspoon of smoked paprika
– A half teaspoon of cayenne pepper, if you like a little kick
– A generous pinch of salt and a few cracks of black pepper
– A few tablespoons of melted butter
Instructions
1. Place the chicken pieces in a large bowl and pour the buttermilk over them, ensuring each piece is fully coated.
2. Let the chicken marinate in the buttermilk for at least 30 minutes at room temperature; this tenderizes the meat and helps the coating stick.
3. Preheat your oven to 400°F and line a baking sheet with parchment paper.
4. In a separate shallow dish, whisk together the flour, Cajun seasoning, garlic powder, smoked paprika, cayenne pepper, salt, and black pepper until well combined.
5. Remove one piece of chicken from the buttermilk, allowing the excess to drip off.
6. Dredge the chicken piece thoroughly in the flour mixture, pressing gently to ensure an even, clumpy coating that will become extra crispy.
7. Place the coated chicken on the prepared baking sheet, leaving space between each piece for air to circulate.
8. Repeat steps 5-7 with all remaining chicken pieces.
9. Drizzle the melted butter evenly over the top of each chicken piece; this helps the coating brown beautifully in the oven.
10. Bake the chicken in the preheated oven for 45 minutes, until the internal temperature reaches 165°F and the coating is deep golden brown and crispy.
11. Let the chicken rest on the baking sheet for 5 minutes before serving to allow the juices to redistribute.
My favorite part is that first bite—the crust shatters with a audible crunch, giving way to incredibly juicy, flavorful meat underneath. Maybe serve it alongside some creamy coleslaw and cornbread to soak up all those delicious spices, or chop it up over a crisp green salad for a lighter take.
Parmesan Crusted Oven Fried Chicken

Perhaps it’s the simple comfort of golden-crusted chicken that calls to me on these crisp autumn afternoons, the way the savory aroma fills the kitchen and promises something deeply satisfying without much fuss.
4
portions15
minutes40
minutesIngredients
- About 1 ½ pounds of chicken thighs, bone-in and skin-on for extra juiciness
- A good glug of olive oil, maybe 2 tablespoons
- A couple of cloves of garlic, minced
- A generous ½ cup of grated Parmesan cheese
- Around ¾ cup of panko breadcrumbs for that light crunch
- A splash of milk, just ¼ cup to help everything stick
- A pinch each of salt and black pepper
- A little dried oregano, maybe 1 teaspoon
Instructions
- Preheat your oven to 400°F and line a baking sheet with parchment paper.
- Pat the chicken thighs completely dry with paper towels—this helps the coating crisp up beautifully.
- In a small bowl, whisk together the olive oil, minced garlic, salt, pepper, and oregano until well combined.
- Brush this seasoned oil mixture evenly over all sides of each chicken thigh.
- In a separate shallow dish, mix the panko breadcrumbs and grated Parmesan cheese thoroughly.
- Pour the milk into another shallow dish for dipping.
- Dip each oiled chicken thigh first into the milk, letting any excess drip off.
- Then press the chicken firmly into the panko-Parmesan mixture, coating all sides evenly and pressing to adhere.
- Arrange the coated chicken thighs skin-side up on the prepared baking sheet, leaving a little space between them for air circulation.
- Bake at 400°F for 35–40 minutes, until the crust is deep golden brown and the internal temperature reaches 165°F when checked with a meat thermometer.
- Let the chicken rest on the baking sheet for 5 minutes before serving—this allows the juices to redistribute throughout the meat.
Unbelievably, that Parmesan crust shatters with each bite, giving way to tender, garlic-scented chicken beneath. Serve it alongside roasted potatoes tossed in the rendered pan juices, or slice it over a simple arugula salad for a bright contrast to the rich, savory flavors.
Lemon Pepper Oven Fried Chicken
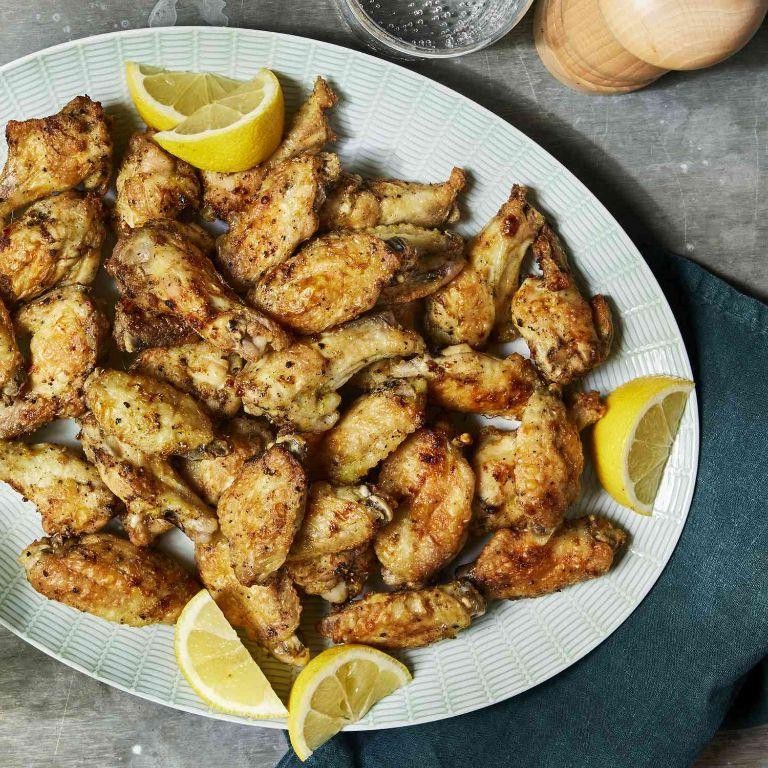
As the afternoon light slants through my kitchen window, I find myself craving that perfect balance of crispy and tender, the kind that only comes from chicken baked with care. There’s something quietly comforting about the ritual of preparing a meal that fills the house with the scent of lemon and pepper, a simple pleasure that feels like a small act of kindness to oneself.
2
portions15
minutes40
minutesIngredients
– A couple of pounds of chicken thighs, skin-on for that extra crisp
– About a cup of all-purpose flour
– A good splash of buttermilk, maybe ¾ cup
– Two tablespoons of olive oil
– The zest and juice from one fresh lemon
– A heaping tablespoon of freshly cracked black pepper
– A teaspoon of garlic powder
– A teaspoon of paprika for color
– A half teaspoon of salt
Instructions
1. Preheat your oven to 400°F and line a baking sheet with parchment paper.
2. Pat the chicken thighs completely dry with paper towels—this helps the skin get extra crispy.
3. In a medium bowl, whisk together the flour, black pepper, garlic powder, paprika, and salt until well combined.
4. Pour the buttermilk into a separate shallow dish and add the lemon juice, stirring gently.
5. Dip each chicken thigh first into the buttermilk mixture, letting any excess drip off.
6. Then dredge the chicken in the flour mixture, pressing lightly to ensure an even coating on all sides.
7. Arrange the coated chicken thighs skin-side up on the prepared baking sheet, leaving space between them for air to circulate.
8. Drizzle the olive oil evenly over the top of each piece to help with browning.
9. Bake for 35–40 minutes, until the internal temperature reaches 165°F and the coating is golden brown and crisp.
10. Remove from the oven and immediately sprinkle with the fresh lemon zest for a bright, aromatic finish.
11. Let the chicken rest on the baking sheet for 5 minutes before serving to allow the juices to redistribute.
Crunchy on the outside and wonderfully juicy inside, this chicken carries the zesty spark of lemon that cuts through the warmth of black pepper. Consider serving it alongside buttery mashed potatoes to soak up the subtle tang, or slice it over a crisp green salad for a lighter meal that still satisfies deeply.
Barbecue Oven Fried Chicken Thighs
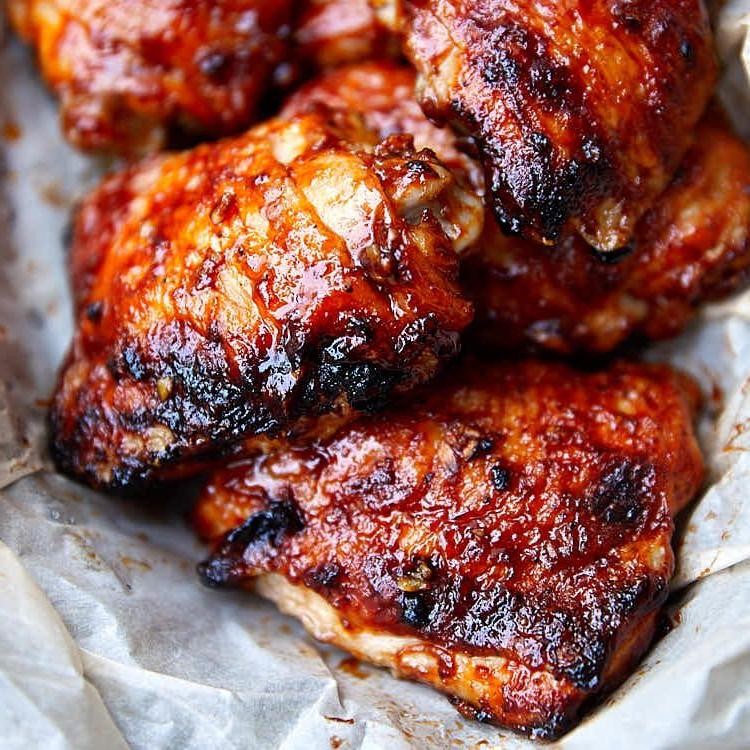
Crisp autumn afternoons always make me crave something comforting yet surprisingly simple—like these barbecue oven fried chicken thighs that fill the kitchen with warmth and the sweet, smoky scent of home. There’s something quietly satisfying about the way the oven does most of the work, leaving you with golden, juicy chicken that feels like a hug on a plate. It’s the kind of meal that slows time down, just for a little while.
2
portions10
minutes40
minutesIngredients
– A couple of bone-in, skin-on chicken thighs
– A generous half cup of all-purpose flour
– A big pinch of salt and a few cracks of black pepper
– A teaspoon of garlic powder
– A splash of buttermilk, about half a cup
– A quarter cup of your favorite barbecue sauce, plus a little extra for brushing
– A couple of tablespoons of melted butter
– A drizzle of olive oil for the pan
Instructions
1. Preheat your oven to 400°F and lightly drizzle a baking sheet with olive oil.
2. In a medium bowl, whisk together the flour, salt, black pepper, and garlic powder until well combined.
3. Pour the buttermilk into a separate shallow dish and dip each chicken thigh into it, coating both sides evenly.
4. Dredge the buttermilk-coated chicken thighs in the flour mixture, pressing gently to help the flour adhere to all surfaces.
5. Place the coated chicken thighs skin-side up on the prepared baking sheet, leaving a little space between each piece for even browning.
6. Brush the top of each chicken thigh with the quarter cup of barbecue sauce, using a pastry brush to spread it smoothly.
7. Drizzle the melted butter evenly over the sauced chicken thighs to help the skin crisp up in the oven.
8. Bake at 400°F for 35–40 minutes, or until the internal temperature reaches 165°F and the coating is deep golden brown and slightly sticky.
9. Remove the baking sheet from the oven and let the chicken rest for 5 minutes—this helps the juices redistribute so every bite stays moist.
10. Brush with a little extra barbecue sauce right before serving for an extra glossy finish. The skin turns crackly and caramelized, while the meat underneath stays incredibly tender and infused with smoky-sweet flavor. I love tearing into a thigh straight from the pan, but it’s just as good tucked into a soft bun with a tangy slaw or paired with roasted sweet potatoes for a cozy, complete meal.
Buffalo Style Oven Fried Chicken

A quiet afternoon like this always makes me crave something comforting yet spirited, the kind of meal that fills the kitchen with warmth and the promise of a satisfying dinner. Buffalo style oven fried chicken has become my go-to for days when I want that classic kick without the fuss of deep frying, letting the oven do most of the work while I steal a moment to myself.
3
portions40
minutes50
minutesIngredients
– A couple of pounds of chicken drumsticks and thighs
– A good glug of buttermilk, about 1 cup
– A splash of hot sauce, roughly 1/4 cup
– A cup or so of all-purpose flour
– A teaspoon of garlic powder
– A teaspoon of paprika
– A half teaspoon of salt
– A few tablespoons of melted butter
– Another splash of hot sauce for the glaze, about 1/4 cup
Instructions
1. Preheat your oven to 400°F and line a baking sheet with parchment paper.
2. In a medium bowl, combine the buttermilk and 1/4 cup hot sauce, then add the chicken pieces, ensuring they’re fully coated.
3. Let the chicken marinate in the buttermilk mixture for at least 30 minutes at room temperature—this tenderizes the meat and helps the coating stick better.
4. In a separate shallow dish, whisk together the flour, garlic powder, paprika, and salt until well blended.
5. Remove each chicken piece from the buttermilk, letting excess drip off, then dredge it thoroughly in the flour mixture, pressing gently to adhere.
6. Arrange the coated chicken pieces in a single layer on the prepared baking sheet, leaving space between them for even cooking.
7. Bake the chicken for 25 minutes at 400°F, then flip each piece carefully with tongs to ensure both sides crisp up.
8. Continue baking for another 20–25 minutes, or until the internal temperature reaches 165°F and the coating is golden brown and crispy.
9. While the chicken bakes, mix the melted butter and remaining 1/4 cup hot sauce in a small bowl for the glaze.
10. Once the chicken is out of the oven, brush the hot sauce-butter glaze generously over each piece while they’re still warm.
11. Let the chicken rest for 5 minutes before serving to allow the juices to redistribute, keeping it moist.
Using this method gives you that irresistible crunch without deep frying, and the rest time is key to avoiding dry chicken. Ultimately, you’ll love how the crispy exterior gives way to juicy, tender meat, with that tangy buffalo heat mellowed by the buttermilk marinade—it’s perfect piled high on a platter with celery sticks and a cool ranch dip for a simple, crowd-pleasing meal.
Rosemary and Garlic Oven Fried Chicken

Lately, I’ve been craving that perfect crispy chicken that doesn’t require standing over a sputtering skillet, the kind that fills your kitchen with the most comforting aromas while it bakes to golden perfection. Rosemary and garlic seem to dance together in this oven method, creating something truly special that feels both rustic and refined. There’s something deeply satisfying about achieving that fried texture without the mess or the grease.
3
portions25
minutes40
minutesIngredients
– About 2 pounds of chicken pieces, whatever cuts you prefer
– A good glug of olive oil, maybe 1/4 cup
– A couple of generous tablespoons of Dijon mustard
– A big splash of buttermilk, around 1/2 cup
– 2 cups of panko breadcrumbs for that extra crunch
– A handful of all-purpose flour, roughly 1 cup
– 3 fresh rosemary sprigs, leaves stripped and finely chopped
– 4 garlic cloves, minced until fragrant
– A teaspoon of smoked paprika for warmth
– A solid teaspoon of kosher salt
– Several good cracks of black pepper
Instructions
1. Preheat your oven to 400°F and line a baking sheet with parchment paper.
2. Pat the chicken pieces completely dry with paper towels—this helps the coating stick better.
3. In a large bowl, whisk together the olive oil, Dijon mustard, and buttermilk until smooth.
4. Add the chicken pieces to the buttermilk mixture, turning to coat every surface thoroughly.
5. Let the chicken marinate in this mixture for at least 20 minutes at room temperature while you prepare the coating.
6. In a separate shallow dish, combine the panko breadcrumbs, all-purpose flour, chopped rosemary, minced garlic, smoked paprika, kosher salt, and black pepper.
7. Remove each chicken piece from the marinade, letting excess drip off, then press firmly into the breadcrumb mixture to coat all sides.
8. Arrange the coated chicken pieces in a single layer on the prepared baking sheet, making sure they don’t touch.
9. Bake for 35-45 minutes, until the coating is deep golden brown and the internal temperature reaches 165°F when tested with a meat thermometer.
10. Let the chicken rest on the baking sheet for 5 minutes before serving to allow juices to redistribute. Golden and impossibly crisp, this chicken delivers that satisfying crackle with every bite while remaining incredibly juicy inside. The rosemary and garlic infuse every layer with earthy, aromatic notes that pair beautifully with roasted potatoes or a simple green salad. I love serving it family-style on a wooden board, letting everyone tear off pieces with their hands for that wonderfully communal feel.
Sesame Ginger Oven Fried Chicken

Just now, as the afternoon light slants across my kitchen counter, I find myself thinking about how some recipes feel like coming home—this sesame ginger oven fried chicken is one of those quiet comforts that never fails to soothe the soul.
2
portions15
minutes40
minutesIngredients
– 2 pounds of chicken thighs, skin-on for that perfect crisp
– 1/2 cup of all-purpose flour
– 2 large eggs, lightly beaten
– 1 cup of panko breadcrumbs
– A generous 2 tablespoons of toasted sesame oil
– A good glug of soy sauce, about 3 tablespoons
– 1 tablespoon of freshly grated ginger
– 2 cloves of garlic, minced
– A pinch of red pepper flakes for gentle heat
– A couple of tablespoons of honey for sweetness
– A splash of rice vinegar to balance it all out
Instructions
1. Preheat your oven to 400°F and line a baking sheet with parchment paper.
2. Pat the chicken thighs completely dry with paper towels—this is crucial for achieving that crispy crust.
3. In a shallow bowl, whisk together the flour with a pinch of salt and pepper.
4. In another bowl, beat the eggs until smooth and frothy.
5. Place the panko breadcrumbs in a third shallow dish.
6. Dredge each chicken thigh first in the flour mixture, shaking off any excess.
7. Dip the floured chicken into the beaten eggs, letting the excess drip back into the bowl.
8. Press the chicken firmly into the panko breadcrumbs, ensuring an even coating on all sides.
9. Arrange the coated chicken thighs in a single layer on your prepared baking sheet.
10. Bake for 25 minutes at 400°F until the coating is golden and crisp.
11. While the chicken bakes, whisk together the sesame oil, soy sauce, grated ginger, minced garlic, red pepper flakes, honey, and rice vinegar in a small saucepan.
12. Bring the sauce to a simmer over medium heat, stirring constantly for about 3 minutes until slightly thickened.
13. Remove the chicken from the oven and brush generously with the warm sesame ginger sauce.
14. Return the chicken to the oven and bake for another 10-12 minutes until the internal temperature reaches 165°F.
15. Let the chicken rest on the baking sheet for 5 minutes before serving—this allows the juices to redistribute.
Zesty with ginger and rich with toasted sesame, this chicken emerges with a crackling crust that gives way to incredibly moist meat. The sweet-spicy glaze caramelizes beautifully in the oven’s heat, creating sticky edges that beg to be picked at with your fingers. I love serving it over jasmine rice with steamed broccoli, letting the extra sauce pool around everything for dipping.
Classic Southern Oven Fried Chicken

Lately, I’ve been thinking about how some recipes feel like coming home, the way this oven fried chicken does—it’s that perfect balance of crispy and tender, without the mess of deep frying. There’s something quietly comforting about the ritual of preparing it, the way the spices fill the kitchen with a warmth that lingers long after the meal is done.
3
portions15
minutes45
minutesIngredients
– A couple of pounds of bone-in, skin-on chicken pieces
– A generous cup of all-purpose flour
– A tablespoon of paprika
– A teaspoon of garlic powder
– A teaspoon of onion powder
– Half a teaspoon of black pepper
– A teaspoon of salt
– A cup of buttermilk
– A quarter cup of melted butter
Instructions
1. Preheat your oven to 400°F and line a baking sheet with parchment paper.
2. In a large bowl, whisk together the flour, paprika, garlic powder, onion powder, black pepper, and salt until fully combined.
3. Pour the buttermilk into a separate shallow dish.
4. Dip each piece of chicken into the buttermilk, making sure it’s fully coated.
5. Dredge the buttermilk-coated chicken in the flour mixture, pressing gently to help the coating adhere evenly.
6. Place the coated chicken pieces on the prepared baking sheet, leaving space between them for even cooking.
7. Drizzle the melted butter evenly over the top of each chicken piece to help it crisp up in the oven.
8. Bake for 45 minutes, or until the internal temperature reaches 165°F and the coating is golden brown and crispy.
9. Let the chicken rest on the baking sheet for 5 minutes before serving to allow the juices to redistribute.
Zesty and golden, this chicken emerges with a crackling crust that gives way to impossibly juicy meat inside. I love pairing it with a simple coleslaw or spooning the pan drippings over mashed potatoes for a meal that feels both humble and deeply satisfying.
Panko Crusted Oven Fried Chicken

Holding this golden-brown chicken fresh from the oven, I’m reminded how some of the simplest preparations can feel like small miracles on an ordinary Tuesday evening. There’s something deeply comforting about that crisp exterior giving way to tender, juicy meat—a humble dish that somehow always satisfies more than expected.
3
portions15
minutes40
minutesIngredients
– About 2 pounds of chicken thighs, bone-in and skin-on for maximum flavor
– A good cup or so of panko breadcrumbs for that extra crunch
– A couple of generous tablespoons of olive oil to help everything crisp up
– One large egg, beaten until smooth
– A heaping tablespoon of Dijon mustard for a subtle tang
– A solid teaspoon of garlic powder
– A good pinch of smoked paprika, maybe half a teaspoon
– A couple of big pinches of kosher salt
– A few cracks of fresh black pepper
– A quick spritz of cooking spray to finish
Instructions
1. Preheat your oven to 400°F and line a baking sheet with parchment paper.
2. Pat the chicken thighs completely dry with paper towels—this helps the coating stick better.
3. In one shallow bowl, mix the panko breadcrumbs with olive oil until evenly coated.
4. In another bowl, whisk together the beaten egg, Dijon mustard, garlic powder, smoked paprika, salt, and pepper until smooth.
5. Dip each chicken thigh first into the egg mixture, making sure it’s fully coated.
6. Press the chicken firmly into the panko mixture, coating both sides thoroughly.
7. Arrange the coated chicken thighs on the prepared baking sheet, skin-side up.
8. Lightly spray the tops with cooking spray to encourage even browning.
9. Bake at 400°F for 35-40 minutes until the internal temperature reaches 165°F.
10. Check for doneness—the crust should be deep golden brown and crisp when tapped.
11. Let the chicken rest on the baking sheet for 5 minutes before serving.
Perhaps what I love most is how the panko creates this delicate, shattering crispness that gives way to incredibly moist chicken beneath. Try serving it alongside roasted potatoes that catch the drippings, or slice it over a bright green salad for contrast—either way, it transforms an ordinary meal into something quietly special.
Sweet and Tangy Oven Fried Chicken Drumsticks
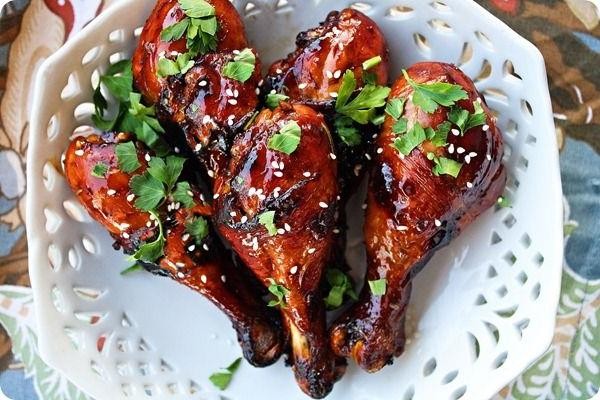
Evenings like this make me crave something that feels both comforting and special, the kind of meal that fills the kitchen with warm, promising smells. Sweet and Tangy Oven Fried Chicken Drumsticks are just that—a simple dish where sticky, glossy sauce clings to crispy skin, turning an ordinary weeknight into something quietly celebratory.
8
drumsticks15
minutes45
minutesIngredients
A couple of pounds of chicken drumsticks, about 8 pieces
A good glug of olive oil, roughly 2 tablespoons
A heaping half cup of all-purpose flour
A generous sprinkle of salt, maybe 1 teaspoon
A few good cracks of black pepper, about ½ teaspoon
A big squeeze of ketchup, ½ cup
A hearty splash of apple cider vinegar, ¼ cup
A couple of tablespoons of honey
A dash of Worcestershire sauce, 1 teaspoon
A pinch of garlic powder, ½ teaspoon
Instructions
1. Preheat your oven to 400°F and line a baking sheet with parchment paper.
2. Pat the chicken drumsticks completely dry with paper towels—this helps the coating stick better and crisp up nicely.
3. In a large bowl, toss the drumsticks with the olive oil until they’re lightly coated.
4. In a separate shallow dish, whisk together the flour, salt, and black pepper.
5. Dredge each oiled drumstick in the flour mixture, pressing gently so it adheres evenly on all sides.
6. Arrange the coated drumsticks in a single layer on the prepared baking sheet, making sure they aren’t touching.
7. Bake for 25 minutes at 400°F until the coating is set and pale golden.
8. While the chicken bakes, whisk the ketchup, apple cider vinegar, honey, Worcestershire sauce, and garlic powder in a small saucepan.
9. Bring the sauce to a simmer over medium heat, stirring often, then reduce heat and let it bubble gently for 3–4 minutes until slightly thickened.
10. After 25 minutes, remove the baking sheet from the oven and carefully brush each drumstick with the warm sauce, coating all sides.
11. Return the sauced drumsticks to the oven and bake for another 15–20 minutes at 400°F, until the glaze is sticky and caramelized and the internal temperature of the chicken reads 165°F on an instant-read thermometer.
12. Let the drumsticks rest on the baking sheet for 5 minutes before serving—this allows the juices to redistribute so each bite stays moist.
Out of the oven, they’re a beautiful mess—crisp-edged and glistening, with that perfect tug when you pull the meat from the bone. The sauce deepens into something both sweet and tangy, almost like a grown-up barbecue glaze, and I love serving these over a pile of fluffy rice to soak up every last drop.
Italian Herb Oven Fried Chicken
A quiet afternoon finds me thinking about comfort food that feels both indulgent and simple, the kind of dish that fills the kitchen with warmth and fills your heart with ease. Italian Herb Oven Fried Chicken is just that—a crispy, golden, herb-kissed embrace that’s perfect for a cozy dinner, no deep-frying required.
2
portions15
minutes40
minutesIngredients
– a couple of boneless, skinless chicken breasts
– a cup of panko breadcrumbs
– a half cup of grated Parmesan cheese
– a tablespoon of dried Italian seasoning
– a teaspoon of garlic powder
– a teaspoon of paprika
– a half teaspoon of salt
– a quarter teaspoon of black pepper
– a quarter cup of all-purpose flour
– one large egg
– a splash of milk
– a couple of tablespoons of olive oil
Instructions
1. Preheat your oven to 400°F and line a baking sheet with parchment paper.
2. Pat the chicken breasts dry with paper towels to help the coating stick better.
3. In a shallow bowl, whisk together the flour, salt, and black pepper.
4. In another bowl, beat the egg with a splash of milk until smooth.
5. In a third bowl, combine the panko, Parmesan, Italian seasoning, garlic powder, and paprika.
6. Dredge each chicken breast in the flour mixture, shaking off any excess.
7. Dip the floured chicken into the egg mixture, letting the excess drip off.
8. Press the chicken firmly into the panko mixture, coating both sides evenly for maximum crispiness.
9. Place the coated chicken on the prepared baking sheet.
10. Drizzle the olive oil over the top of each chicken breast.
11. Bake for 20 minutes, then flip the chicken carefully with tongs.
12. Bake for another 15–20 minutes, until the internal temperature reaches 165°F and the coating is golden brown and crispy.
13. Let the chicken rest on the baking sheet for 5 minutes before slicing to keep it juicy.
Now the chicken emerges from the oven with a satisfying crunch that gives way to tender, herb-infused meat. Nothing beats serving it sliced over a bed of creamy polenta or tucked into a crusty roll with a dollop of garlic aioli for a sandwich that feels like a hug.
Maple Glazed Oven Fried Chicken

Crisp autumn afternoons like this always make me crave something that feels like a warm hug, something that bridges the gap between summer’s lightness and winter’s heft. This maple-glazed chicken is exactly that—a simple, comforting dish that fills the kitchen with the most wonderful, sweet and savory aroma. It’s the kind of meal that makes a quiet evening feel special without any fuss.
2
servings15
minutes35
minutesIngredients
For the chicken, you’ll need a couple of boneless, skinless chicken breasts, a cup of all-purpose flour, a teaspoon each of garlic powder, paprika, and salt, and a half teaspoon of black pepper. For the wet mix, grab a large egg and a splash of milk. And for that glorious glaze, have a quarter cup of pure maple syrup and a tablespoon of soy sauce ready.
Instructions
1. Preheat your oven to 400°F and line a baking sheet with parchment paper.
2. In a shallow bowl, whisk together the cup of flour, teaspoon of garlic powder, teaspoon of paprika, teaspoon of salt, and half teaspoon of black pepper.
3. In a separate bowl, beat the large egg with a splash of milk until fully combined.
4. Pat the boneless, skinless chicken breasts completely dry with paper towels—this helps the coating stick better.
5. Dip each chicken breast first into the flour mixture, coating it evenly, then into the egg mixture, letting any excess drip off.
6. Dip the chicken back into the flour mixture for a second coating, pressing gently to help it adhere.
7. Place the coated chicken breasts on the prepared baking sheet, leaving space between them for even crisping.
8. Bake for 20 minutes at 400°F until the coating is set and starting to turn pale golden.
9. While the chicken bakes, whisk together the quarter cup of maple syrup and tablespoon of soy sauce in a small bowl.
10. After 20 minutes, carefully remove the baking sheet from the oven and brush the maple-soy glaze evenly over the top of each chicken breast.
11. Return the chicken to the oven and bake for another 10-15 minutes, until the internal temperature reaches 165°F and the glaze is bubbly and caramelized.
12. Let the chicken rest on the baking sheet for 5 minutes before slicing to allow the juices to redistribute.
A final rest gives the glaze a chance to set into a beautiful, sticky-sweet shell. The chicken underneath stays incredibly juicy, with a crackly, oven-fried crust that shatters with each bite. I love serving it over a bed of fluffy rice to soak up every last drop of that glossy maple sauce, maybe with some steamed greens on the side for a pop of color.
Asian Inspired Oven Fried Chicken

Sometimes, the simplest kitchen experiments become the most comforting discoveries, like this Asian-inspired oven-fried chicken that fills the house with warmth and anticipation. Slowly coating each piece feels almost meditative, a quiet ritual that promises crispy satisfaction without the mess of deep frying. The gentle hum of the oven does the work while you wait, transforming humble ingredients into something wonderfully familiar yet intriguingly new.
4
portions45
minutes40
minutesIngredients
– 2 pounds of chicken thighs, bone-in and skin-on
– A good glug of soy sauce, about ¼ cup
– A couple of tablespoons of honey
– A generous splash of rice vinegar, roughly 2 tablespoons
– A few cloves of garlic, minced
– A thumb-sized piece of ginger, grated
– A sprinkle of cornstarch, around ¼ cup
– A drizzle of sesame oil, about 1 tablespoon
– A pinch of red pepper flakes
Instructions
1. Preheat your oven to 400°F and line a baking sheet with parchment paper.
2. Pat the chicken thighs completely dry with paper towels to help the skin crisp up beautifully.
3. In a medium bowl, whisk together the soy sauce, honey, rice vinegar, minced garlic, grated ginger, and sesame oil until smooth.
4. Place the chicken thighs in a large zip-top bag and pour in the marinade, ensuring each piece is coated.
5. Seal the bag tightly, pressing out excess air, and refrigerate for at least 30 minutes or up to 4 hours for deeper flavor.
6. Remove the chicken from the marinade, letting any excess drip off, and discard the used marinade.
7. Place the cornstarch in a shallow dish and lightly dredge each chicken thigh, shaking off any extra coating.
8. Arrange the chicken skin-side up on the prepared baking sheet, spacing them about an inch apart for even cooking.
9. Sprinkle the red pepper flakes evenly over the chicken for a subtle kick.
10. Bake for 35–40 minutes, until the skin is golden brown and crispy, and the internal temperature reaches 165°F when checked with a meat thermometer.
11. Let the chicken rest on the baking sheet for 5 minutes before serving to allow the juices to redistribute. Kindly crispy skin gives way to tender, juicy meat infused with savory-sweet notes. Drizzle any pan juices over steamed rice or tuck the chicken into lettuce cups with shredded carrots and cilantro for a fresh, vibrant meal that feels both nourishing and celebratory.
Teriyaki Oven Fried Chicken

A quiet afternoon like this always makes me crave something comforting yet simple, the kind of meal that fills the kitchen with warmth without demanding too much effort. Teriyaki oven fried chicken has become my go-to for these moments, offering that perfect balance of crispiness and sweet-savory glaze that feels like a gentle hug. It’s the kind of dish that turns an ordinary day into something quietly special, all while keeping things wonderfully easy.
4
portions15
minutes40
minutesIngredients
– About 2 pounds of chicken thighs, skin-on for extra crispiness
– A good splash of soy sauce, maybe 1/4 cup
– A couple of tablespoons of honey for sweetness
– A minced garlic clove or two
– A teaspoon of grated fresh ginger
– A half cup of all-purpose flour
– A cup of panko breadcrumbs for that light crunch
– A couple of large eggs, beaten
– A drizzle of olive oil, around 2 tablespoons
– A pinch of salt and black pepper to season
Instructions
1. Preheat your oven to 400°F and line a baking sheet with parchment paper to prevent sticking and make cleanup a breeze.
2. In a small bowl, whisk together the soy sauce, honey, minced garlic, and grated ginger until smooth to create your teriyaki glaze.
3. Pat the chicken thighs completely dry with paper towels—this helps the coating adhere better and ensures a crispier finish.
4. Season the chicken evenly on both sides with salt and black pepper.
5. Place the flour in one shallow dish, the beaten eggs in another, and the panko breadcrumbs in a third for an organized dredging station.
6. Dredge each chicken thigh first in the flour, shaking off any excess, then dip it fully into the beaten eggs.
7. Press the chicken firmly into the panko breadcrumbs, coating both sides thoroughly for maximum crunch.
8. Arrange the coated chicken thighs in a single layer on the prepared baking sheet, leaving space between them so they cook evenly.
9. Drizzle the olive oil lightly over the top of each piece to help them brown beautifully in the oven.
10. Bake for 25 minutes at 400°F until the coating is golden and crisp.
11. Remove the baking sheet and brush each chicken thigh generously with the teriyaki glaze you made earlier.
12. Return the chicken to the oven and bake for another 10-15 minutes, or until the internal temperature reaches 165°F and the glaze is sticky and caramelized.
13. Let the chicken rest for 5 minutes before serving to allow the juices to redistribute, keeping it moist and tender. Perhaps my favorite part is that first bite—the crackle of the panko giving way to juicy, glazed chicken, with the teriyaki adding a glossy sweetness that clings to every crevice. I love serving it over a bed of steamed rice to soak up any extra sauce, or shredding it into a vibrant salad for a lighter twist that still feels indulgent.
Conclusion
Ready to elevate your weeknight dinners? These 25 crispy oven-fried chicken recipes prove you can enjoy that irresistible crunch without the mess of deep frying. Whether you’re craving classic buttermilk or adventurous global flavors, there’s a perfect recipe waiting for you. We’d love to hear which one becomes your family favorite—drop a comment below and don’t forget to share your cooking triumphs on Pinterest!


