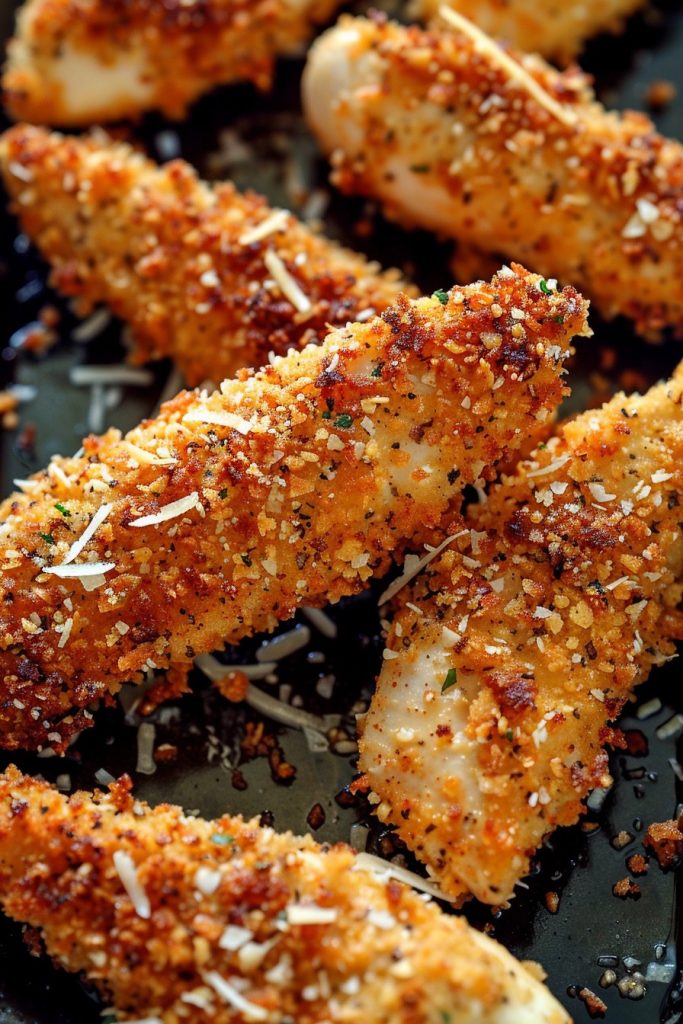
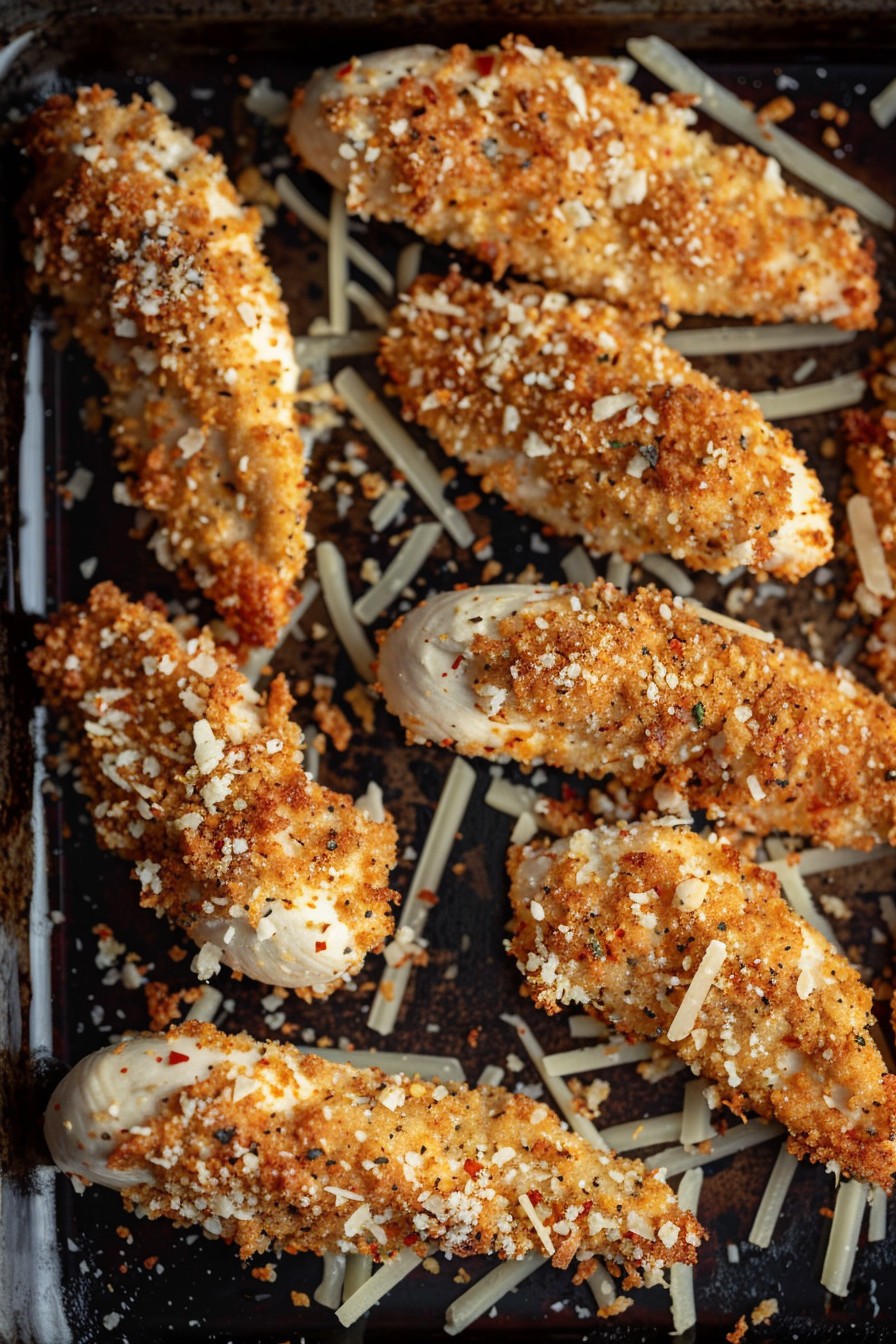
Welcome to a guilt-free way to enjoy your favorite crispy chicken fingers, baked to perfection in your oven. Who says you can’t have the crunch without the fry? This recipe delivers all the flavor and texture you love, with a fraction of the oil.
Why This Recipe Works
- Uses a clever combination of panko breadcrumbs and grated Parmesan for that irresistible crunch without deep frying.
- Marinating the chicken in buttermilk ensures each bite is juicy and flavorful.
- Baking at a high temperature mimics the crispiness of fried chicken, making it a healthier alternative.
- The recipe is customizable with your favorite spices and herbs, allowing for endless flavor variations.
- Perfect for meal prep, these chicken fingers reheat beautifully, making them great for lunches throughout the week.
Ingredients
- 1.5 lbs chicken tenders
- 1 cup buttermilk
- 1 cup panko breadcrumbs
- 1/2 cup grated Parmesan cheese
- 1 tsp garlic powder
- 1 tsp paprika
- 1/2 tsp salt
- 1/2 tsp black pepper
- Cooking spray
Equipment Needed
- Baking sheet
- Wire rack
- Mixing bowls
- Measuring cups and spoons
Instructions
Marinate the Chicken
Start by placing your chicken tenders in a bowl and covering them with buttermilk. Let them marinate for at least 30 minutes, or up to 4 hours in the refrigerator. This step is crucial for tender, juicy chicken. Tip: For extra flavor, add a teaspoon of hot sauce to the buttermilk.
Prepare the Coating
In a separate bowl, mix together the panko breadcrumbs, grated Parmesan, garlic powder, paprika, salt, and pepper. This mixture will give your chicken fingers that crispy, flavorful coating we’re after. Make sure the ingredients are well combined for even coating on each piece.
Coat the Chicken
Remove each chicken tender from the buttermilk, allowing excess to drip off, then dredge in the breadcrumb mixture, pressing gently to adhere. Place each coated tender on a wire rack set over a baking sheet. This setup allows air to circulate around the chicken, ensuring even crispiness.
Bake to Perfection
Preheat your oven to 425°F. Lightly spray the coated chicken tenders with cooking spray to help them brown. Bake for 15-20 minutes, or until the chicken is cooked through and the coating is golden and crispy. Tip: Flip the tenders halfway through baking for even browning.
Serve and Enjoy
Let the chicken fingers cool for a few minutes before serving. They’re delicious on their own or with your favorite dipping sauce. Tip: For an extra crispy finish, broil for the last 1-2 minutes of cooking, watching closely to prevent burning.
Tips and Tricks
For those looking to elevate their oven-fried chicken fingers, consider these advanced tips. First, toasting the panko breadcrumbs before coating can add an extra layer of flavor and crunch. Second, incorporating finely crushed cornflakes into the breadcrumb mixture can vary the texture delightfully. Lastly, letting the coated chicken rest for 10 minutes before baking can help the coating adhere better, reducing crumbs falling off during cooking.
Recipe Variations
- Spicy Version: Add cayenne pepper or chili powder to the breadcrumb mixture for a kick.
- Herb-Infused: Mix in dried herbs like thyme, oregano, or rosemary with the breadcrumbs for an aromatic twist.
- Gluten-Free: Use gluten-free breadcrumbs and ensure all other ingredients are gluten-free.
- Cheesy Delight: Add extra Parmesan or mix in another cheese like cheddar for a cheesier coating.
- Nutty Crunch: Substitute part of the breadcrumbs with finely ground almonds or pecans for a nutty flavor.
Frequently Asked Questions
Can I use chicken breasts instead of tenders?
Absolutely! Just cut the breasts into strips about 1-inch wide to mimic the size of tenders. Adjust cooking time as needed, since thicker pieces may take longer to cook through.
How do I store leftovers?
Store any leftovers in an airtight container in the refrigerator for up to 3 days. Reheat in the oven or toaster oven to maintain crispiness.
Can I make these ahead of time?
Yes, you can coat the chicken and keep it refrigerated on the baking sheet for up to 24 hours before baking. This can help the coating stick even better.
Summary
This oven-fried chicken fingers recipe offers a healthier, equally delicious alternative to traditional fried chicken. With a crispy coating and juicy interior, it’s sure to become a family favorite. Customizable and perfect for any occasion, give this recipe a try for your next meal!
Crispy Oven-Fried Chicken Fingers
5
servings40
minutes20
minutesIngredients
Instructions
- 1 Marinate chicken in buttermilk for 30 minutes to 4 hours.
- 2 Mix breadcrumbs, Parmesan, and spices in a bowl.
- 3 Coat each tender in the breadcrumb mixture and place on a wire rack over a baking sheet.
- 4 Bake at 425°F for 15-20 minutes, flipping halfway.
- 5 Serve warm with your favorite dipping sauce.