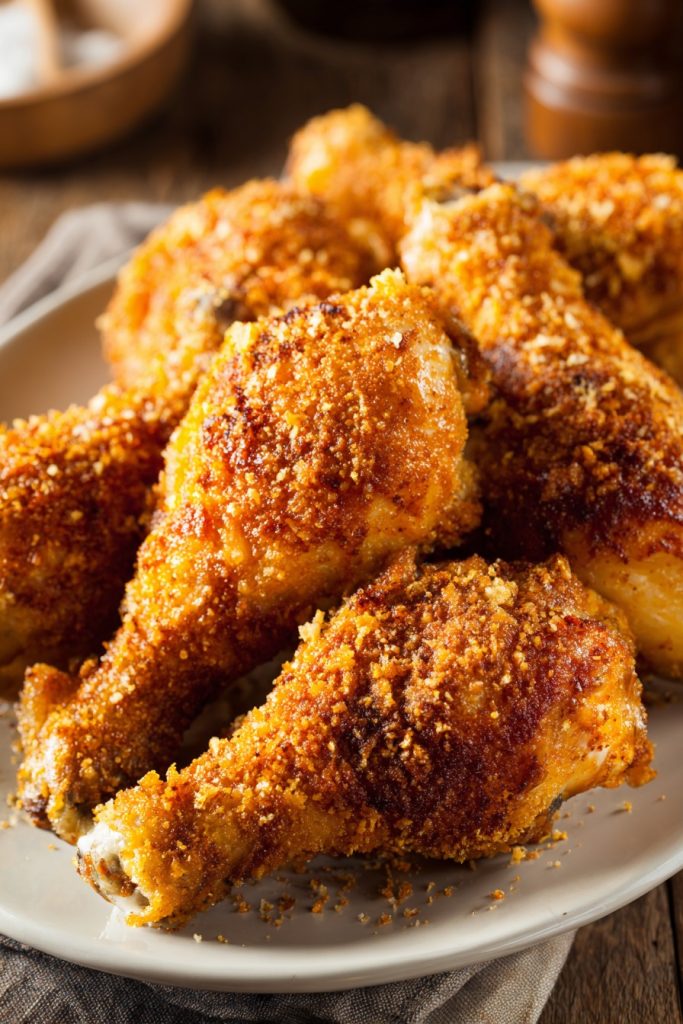
Ready to ditch the deep fryer but still crave that irresistible crunch? Raise your hand if you’ve ever wanted fried chicken without the greasy aftermath! This oven-fried version delivers all the crispy, juicy goodness you love, with way less cleanup and guilt. Let’s get those drumsticks sizzling!
Why This Recipe Works
- Our secret double-dip coating method—flour, egg, and panko—creates an ultra-crispy crust that shatters with every bite, locking in juices so the chicken stays moist and tender.
- Baking at a high initial temperature (425°F) then lowering to 375°F ensures the exterior gets golden brown and crunchy while the interior cooks through perfectly without drying out.
- Using a wire rack set over a baking sheet allows hot air to circulate evenly around the drumsticks, preventing soggy bottoms and giving you crunch from every angle.
- A blend of smoked paprika, garlic powder, and a pinch of cayenne adds depth and a subtle kick that balances beautifully with the rich chicken flavor.
- This method cuts down on oil significantly compared to traditional frying, making it a healthier option that doesn’t sacrifice any of the satisfaction or flavor.
Ingredients
- 8 chicken drumsticks (about 2 pounds), patted dry with paper towels
- 1 cup all-purpose flour
- 2 large eggs, beaten until frothy
- 1 ½ cups panko breadcrumbs
- 1 teaspoon smoked paprika
- 1 teaspoon garlic powder
- ½ teaspoon onion powder
- ½ teaspoon black pepper, freshly ground
- 1 teaspoon salt, plus extra for seasoning
- ¼ teaspoon cayenne pepper (optional, for heat)
- 2 tablespoons olive oil or melted butter, for brushing
- Cooking spray or extra oil, for greasing the rack
Equipment Needed
- Rimmed baking sheet
- Wire rack that fits inside the baking sheet
- Three shallow bowls or plates for coating stations
- Tongs or forks for handling chicken
- Paper towels
- Brush for oil
- Meat thermometer (highly recommended)
Instructions
Step 1: Prep Your Coating Stations
Grab three shallow bowls or plates and set up your assembly line. In the first bowl, combine the all-purpose flour with half teaspoon of salt and a quarter teaspoon of black pepper, whisking them together to distribute evenly. In the second bowl, pour in the two beaten eggs—make sure they’re well whisked so they’ll cling to the chicken nicely. For the third bowl, mix the panko breadcrumbs with smoked paprika, garlic powder, onion powder, the remaining half teaspoon of salt, quarter teaspoon of black pepper, and cayenne if using. Stir until the spices are fully incorporated into the panko, which will give your drumsticks that flavorful, crispy crust. This organization is key for a smooth coating process without cross-contamination or mess.
Step 2: Coat the Drumsticks Thoroughly
Take each dried drumstick and dredge it in the flour mixture, shaking off any excess so you have a light, even layer. Next, dip it into the beaten eggs, making sure to coat all sides—let any extra egg drip off to avoid clumping. Finally, press the drumstick firmly into the panko mixture, turning and patting to ensure full coverage. For extra crunch, you can even double-dip by going back into the egg and panko once more. Pro tip: Use one hand for dry ingredients and the other for wet to keep your fingers from becoming a breadcrumb disaster. Place each coated drumstick on a clean plate or tray as you finish them.
Step 3: Arrange on the Baking Setup
Preheat your oven to 425°F and position a rack in the center. Lightly grease your wire rack with cooking spray or a brush of oil to prevent sticking, then set it inside the rimmed baking sheet. Arrange the coated drumsticks in a single layer on the wire rack, ensuring they aren’t touching each other—this allows hot air to circulate freely and promotes even browning. Brush the tops lightly with olive oil or melted butter; this helps the crust turn golden and crisp up beautifully. The rack elevates the chicken, so any drippings fall away, avoiding a soggy bottom and giving you that fried texture from all sides.
Step 4: Bake to Golden Perfection
Place the baking sheet in the preheated oven and bake at 425°F for 15 minutes. This initial high heat helps set the crust and start the browning process. Then, without opening the oven door, reduce the temperature to 375°F and continue baking for another 25-30 minutes. Keep an eye on them around the 20-minute mark; you’re looking for a deep golden brown color and an internal temperature of 165°F when measured with a meat thermometer inserted into the thickest part of the drumstick, avoiding the bone. If some spots are browning too fast, you can tent loosely with foil, but don’t overdo it—we want that crunch!
Step 5: Rest and Serve Immediately
Once the drumsticks reach 165°F internally and the crust is crispy and golden, carefully remove them from the oven. Let them rest on the wire rack for about 5 minutes—this allows the juices to redistribute, ensuring each bite is moist and flavorful. Resist the urge to dig in right away; resting prevents the juices from running out when you cut or bite into them. Serve hot with your favorite sides like mashed potatoes, coleslaw, or a fresh salad. For an extra kick, sprinkle with a pinch of flaky sea salt right before serving to enhance those crispy edges.
Tips and Tricks
For the crispiest results ever, try patting the drumsticks extra dry with paper towels before coating—any moisture on the skin can steam instead of crisp up. If you have time, let the coated drumsticks sit in the fridge for 15-30 minutes before baking; this helps the coating adhere better and can lead to an even crunchier exterior. Don’t overcrowd the baking sheet! Giving each drumstick space ensures hot air circulates properly, so if you’re doubling the recipe, use two sheets or bake in batches. For a deeper flavor, you can marinate the drumsticks in buttermilk with spices for a few hours before coating—but pat them thoroughly dry afterward to avoid sogginess. If your panko isn’t browning evenly, try broiling for the last 1-2 minutes on high, but watch closely to prevent burning. For easier cleanup, line the baking sheet with aluminum foil to catch any drippings. If you’re using frozen drumsticks, thaw them completely in the fridge overnight and dry them well—never coat frozen chicken, as it’ll release too much water. Experiment with adding grated Parmesan cheese to the panko mixture for a cheesy, savory twist that browns beautifully. Lastly, if you don’t have a wire rack, you can bake directly on a greased baking sheet, but flip the drumsticks halfway through to crisp both sides—though the rack method is superior for all-around crunch.
Recipe Variations
- Spicy Buffalo Style: After baking, toss the drumsticks in a mix of ½ cup hot sauce and 2 tablespoons melted butter for a tangy, fiery kick that’s perfect for game day.
- Herb-Crusted Delight: Add 2 tablespoons of finely chopped fresh herbs like rosemary, thyme, or parsley to the panko mixture for a fragrant, garden-fresh flavor that pairs well with lemon wedges.
- Asian-Inspired Twist: Replace the paprika and garlic powder with 1 teaspoon five-spice powder and 1 tablespoon soy sauce in the egg wash, then use panko mixed with sesame seeds for a umami-packed crunch.
- Cheesy Parmesan Crust: Stir ½ cup grated Parmesan cheese into the panko mixture for a rich, savory coating that gets extra golden and delicious—great with a side of marinara sauce for dipping.
- Gluten-Free Option: Swap the all-purpose flour for almond flour or a gluten-free blend, and use gluten-free panko breadcrumbs to make this recipe celiac-friendly without losing any crispiness.
Frequently Asked Questions
Can I use chicken thighs instead of drumsticks?
Absolutely! Chicken thighs work wonderfully with this method—just adjust the cooking time since thighs are thicker. Bake at 425°F for 15 minutes, then reduce to 375°F and cook for an additional 30-35 minutes, or until the internal temperature reaches 165°F. Thighs might have more fat, so ensure they’re patted very dry before coating to avoid excess grease. The result is equally juicy and crispy, making it a versatile option for dark meat lovers.
Why isn’t my coating sticking to the chicken?
This usually happens if the chicken isn’t dry enough or if you skip the flour step. Always pat the drumsticks thoroughly with paper towels to remove surface moisture, which helps the flour adhere. Also, shake off excess flour after dredging to prevent a clumpy coating. If it’s still not sticking, try chilling the coated drumsticks in the fridge for 15-30 minutes before baking—this sets the layers and reduces slippage during cooking.
Can I make this recipe ahead of time?
Yes, but for best results, prepare the coating and store the coated, uncooked drumsticks in the fridge for up to 4 hours before baking. Avoid longer storage as the coating might get soggy. You can also bake them fully, let them cool, and reheat in a 375°F oven for 10-15 minutes to restore crispiness. I don’t recommend freezing after coating, as the texture can suffer, but cooked drumsticks freeze well for up to 2 months—reheat from frozen in the oven.
How do I know when the chicken is done without a thermometer?
While a meat thermometer is ideal for accuracy, you can check by piercing the thickest part of a drumstick with a knife—the juices should run clear, not pink, and the meat should feel firm to the touch. Also, the coating should be deep golden brown, and the drumstick should have shrunk slightly from the bone. If unsure, cut into one; the interior should be white with no traces of pink. Always err on the side of caution to avoid undercooking.
What can I use if I don’t have panko breadcrumbs?
No worries! Regular breadcrumbs or crushed cornflakes work as substitutes, though they might yield a slightly denser crunch. For a healthier twist, try crushed pork rinds for a keto-friendly version, or almond flour mixed with spices for a gluten-free option. Just keep the quantities similar—about 1 ½ cups—and adjust baking time if needed, as alternatives may brown faster or slower than panko.
Summary
This oven-fried chicken drumsticks recipe delivers crispy, juicy perfection with minimal oil. A double-dip coating and wire rack baking ensure crunch from every angle, while spices add depth. Easy to customize and healthier than frying, it’s a crowd-pleaser for any occasion!
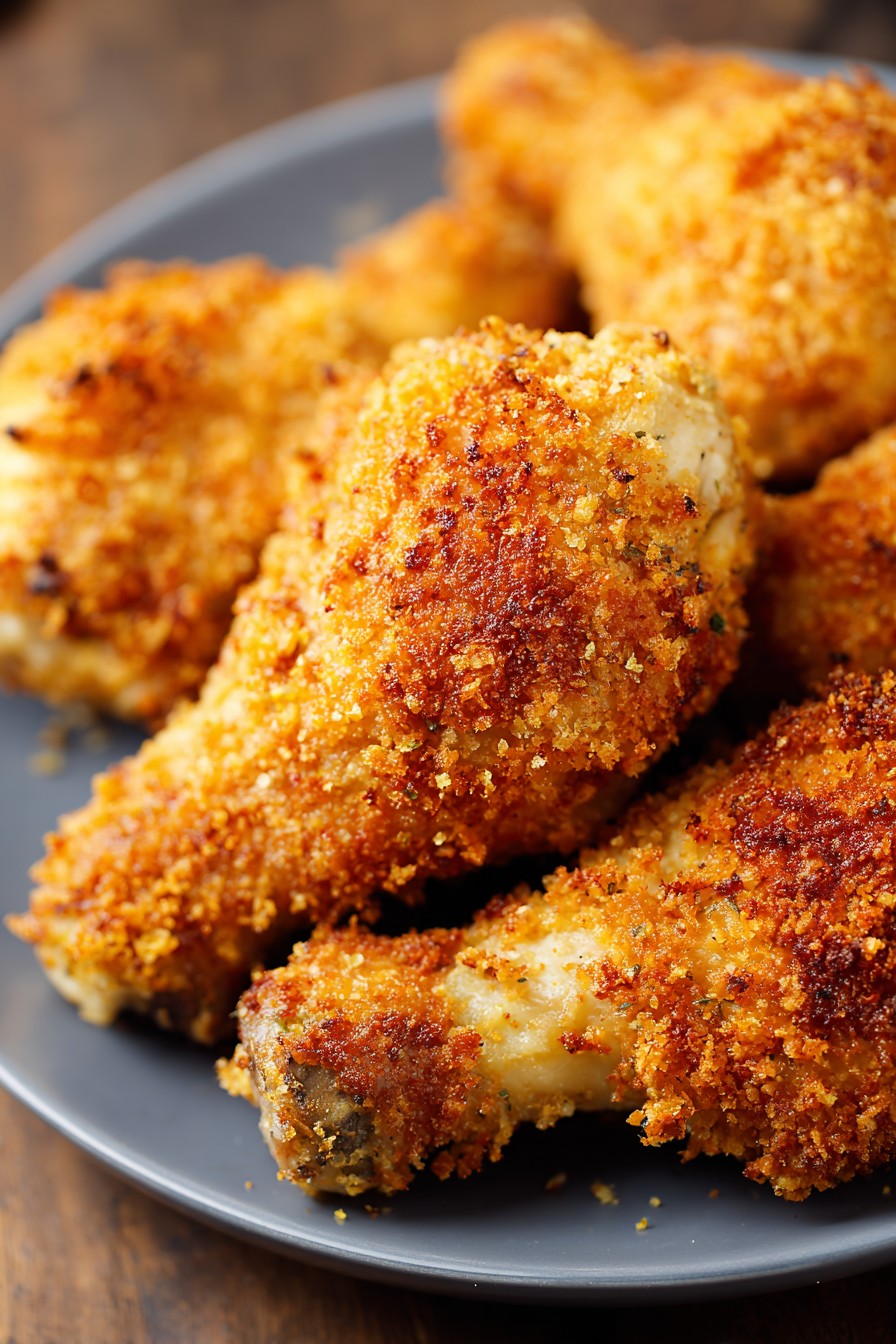
Oven Fried Chicken Drumsticks
4
servings15
minutes40
minutesIngredients
Instructions
- 1 Preheat oven to 425°F. Set up three bowls: one with flour mixed with ½ tsp salt and ¼ tsp pepper, one with beaten eggs, and one with panko, spices, and remaining salt and pepper.
- 2 Coat each drumstick in flour, then egg, then panko mixture, pressing firmly. Place on a plate.
- 3 Grease a wire rack on a baking sheet. Arrange drumsticks in a single layer, brush with oil.
- 4 Bake at 425°F for 15 minutes, then reduce to 375°F and bake for 25-30 minutes until golden and internal temp reaches 165°F.
- 5 Rest for 5 minutes before serving hot.


