Gorgeous, glorious green beans transformed from boring side dish to the star of your dinner table! Get ready to experience vegetable perfection that will make you question every steamed bean you’ve ever suffered through. This isn’t just another recipe – this is a culinary revelation that will change your relationship with green vegetables forever.
Why This Recipe Works
- The high-heat roasting method creates an incredible caramelized exterior while maintaining that perfect crisp-tender bite inside, giving you texture contrast that will make your taste buds dance with joy
- Using just the right amount of olive oil ensures every single bean gets perfectly coated without becoming greasy or heavy, creating that ideal balance between healthy and indulgent that keeps you coming back for more
- The simple seasoning blend of garlic powder, onion powder, and salt enhances the natural sweetness of the beans without overpowering their fresh, vibrant flavor profile
- Roasting at 425°F creates those beautiful browned edges and crispy bits that provide an addictive crunch you simply can’t achieve through any other cooking method
- The hands-off approach means you can prepare other components of your meal while these magical beans work their oven transformation, making weeknight dinners feel like gourmet experiences
Ingredients
- 1.5 pounds fresh green beans, ends trimmed
- 3 tablespoons extra virgin olive oil
- 1 teaspoon garlic powder
- 1 teaspoon onion powder
- 1/2 teaspoon black pepper, freshly ground
- 1 teaspoon kosher salt
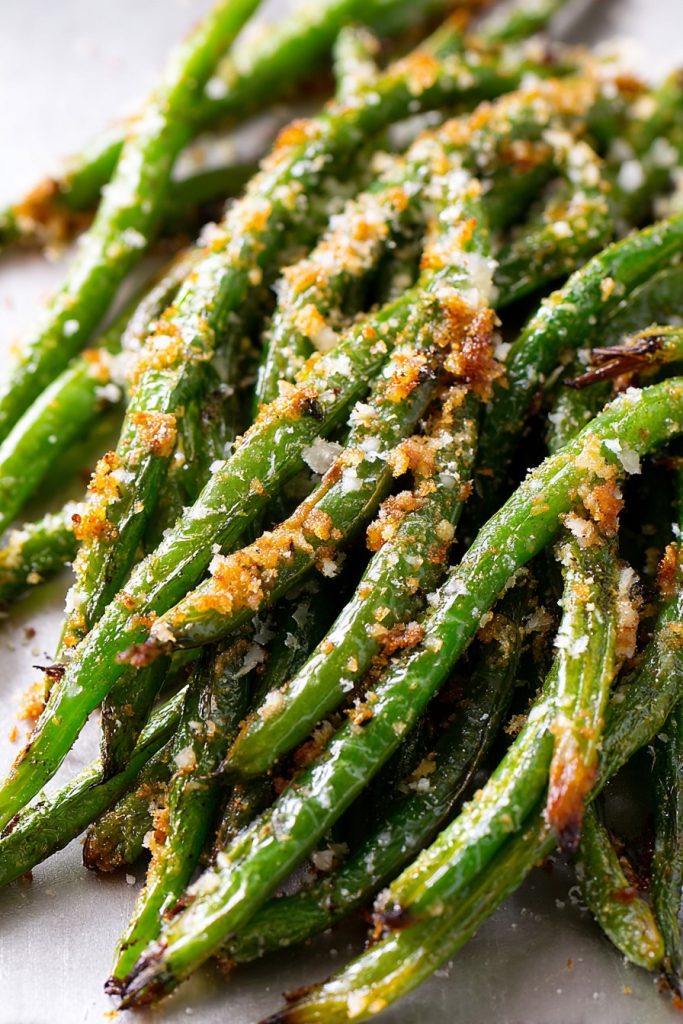
- 2 tablespoons grated Parmesan cheese (optional but recommended)
Equipment Needed
- Large rimmed baking sheet
- Parchment paper or aluminum foil
- Large mixing bowl
- Tongs or spatula
- Measuring spoons
- Knife for trimming beans
Instructions

Prepare Your Green Bean Canvas
Begin by preheating your oven to a blazing 425°F – this high temperature is absolutely crucial for achieving that perfect crispy texture we’re chasing! While the oven works its magic, grab your fresh green beans and give them a thorough inspection. You’ll want to wash them under cold running water, gently rubbing away any dirt or debris, then pat them completely dry with paper towels or a clean kitchen towel. This drying step is non-negotiable – moisture is the enemy of crispiness! Now comes the therapeutic part: lining up those beautiful beans and trimming off the stem ends. Don’t bother with the pointed tips unless they look damaged – we’re preserving maximum bean real estate here. As you work, discard any beans that appear wilted, discolored, or otherwise imperfect. Pro tip: For the most efficient trimming method, line up a handful of beans with their stem ends aligned and make one clean cut across the entire bunch – this saves precious minutes and keeps your prep flow smooth and satisfying.
Create the Flavor Coating
Now for the flavor transformation that will elevate these humble beans to legendary status! In your large mixing bowl, combine the extra virgin olive oil with garlic powder, onion powder, freshly ground black pepper, and kosher salt. Whisk this magical elixir vigorously until the spices are fully incorporated into the oil – you’re creating an emulsion that will cling perfectly to every inch of your beans. The key here is using high-quality olive oil since it’s carrying all those beautiful flavors directly to your taste buds. Take a moment to appreciate the aromatic symphony happening in your bowl – that’s the scent of vegetable greatness in the making! Now, add your perfectly trimmed and dried green beans to the bowl and use your hands or tongs to toss them with absolute determination. Make sure every single bean gets lovingly coated in that flavorful oil mixture – no bean left behind! This hands-on approach ensures even distribution and helps you feel connected to the cooking process in a way that utensils simply can’t match.
Arrange for Maximum Crispiness
Line your rimmed baking sheet with parchment paper or aluminum foil – this isn’t just for easy cleanup, it prevents sticking and promotes even browning across every glorious bean. Now, transfer your oil-coated green beans onto the prepared baking sheet and spread them into a single, even layer. This spacing is absolutely critical – overcrowding will steam your beans rather than roast them, and we are NOT here for steamed vegetable disappointment! Make sure there’s breathing room between each bean, almost like they’re social distancing for optimal crispiness. If your baking sheet feels too crowded, use two sheets or work in batches – trust me, the extra effort is worth it for that perfect texture. Arrange them so they’re mostly lying flat rather than piled on top of each other. This strategic placement allows hot air to circulate freely around each bean, creating those beautifully caramelized edges and crispy spots that will make this dish unforgettable. Pro tip: For extra crispy results, position your oven rack in the center position to ensure even heat distribution from top to bottom.
The Roasting Transformation
Place your perfectly arranged baking sheet into the preheated 425°F oven and prepare for magic to happen! Set your timer for 12 minutes – this initial roast will start the caramelization process and begin developing those beautiful browned edges we’re craving. When the timer sounds, carefully remove the baking sheet (use oven mitts – that pan is HOT!) and give the beans a confident flip or stir using tongs or a spatula. This turning step is essential for even cooking and prevents any spots from burning while others remain undercooked. Return the beans to the oven and continue roasting for another 10-13 minutes. Watch carefully during these final minutes – you’re looking for beans that are tender with significant browning and some delightfully crispy, almost fried-looking edges. The exact timing might vary slightly depending on your oven and the thickness of your beans, so let visual cues be your guide rather than sticking rigidly to the clock. That beautiful caramelization is what creates the complex, slightly sweet flavor that makes these beans absolutely irresistible.
The Grand Finale and Serving
Once your green beans have achieved that perfect balance of tender interior and crispy, caramelized exterior, carefully remove them from the oven. They should be sizzling slightly and filling your kitchen with the most incredible aroma that will have everyone gathering around wondering what culinary masterpiece you’ve created. Immediately transfer the hot beans to your serving dish – this prevents them from continuing to cook on the hot baking sheet. For an extra flavor boost, sprinkle with 2 tablespoons of grated Parmesan cheese while the beans are still piping hot, allowing the cheese to melt slightly and cling to every glorious surface. Serve these beauties immediately while they’re at their peak crispiness and temperature perfection. They make the perfect side dish for roasted chicken, grilled steak, or even as a standalone snack that will make you feel both virtuous and completely satisfied. Pro tip: For maximum crispiness, avoid covering the beans after roasting – that trapped steam will soften your beautiful crispy edges, and we can’t have that after all our hard work!
Tips and Tricks
For those who want to take their green bean game to absolute legendary status, here are the insider secrets that separate good home cooks from kitchen rockstars! First, let’s talk bean selection: always choose the freshest, brightest green beans you can find – they should snap crisply when bent and show no signs of wilting or soft spots. The thickness of your beans matters more than you might think; thinner haricot verts will cook faster and become extra crispy, while thicker standard green beans will give you more of that satisfying meaty bite. When it comes to drying your beans after washing, don’t just pat them – really get in there with a clean kitchen towel and make sure they’re bone dry. Any residual moisture will create steam in the hot oven, working against that crispy texture we’re desperately chasing. If you’re cooking for a crowd and need to prep ahead, you can wash and trim the beans up to a day in advance, but store them wrapped in paper towels inside a zip-top bag in the refrigerator to maintain crispness. For the oil coating, if you want to get really technical, try tossing the beans with oil in a large zip-top bag – this method ensures the most even distribution with the least amount of oil possible. When arranging on the baking sheet, consider rotating the pan halfway through cooking if your oven has hot spots – this guarantees uniform browning across every single bean. For extra flavor dimension, try adding a tablespoon of lemon juice or balsamic vinegar to the oil mixture – the acidity will balance the natural sweetness of the roasted beans beautifully. If you’re watching sodium, you can reduce the salt and finish with a flaky sea salt at the end for maximum impact with less overall sodium. And here’s a game-changing tip: save any leftovers (though I doubt you’ll have any!) and chop them up to add to salads, grain bowls, or even omelets the next day – they maintain their texture surprisingly well. Finally, don’t be afraid to experiment with different finishing touches like toasted almond slices, crispy fried shallots, or a drizzle of chili oil for those who like a little heat with their green vegetable perfection.
Recipe Variations
- Garlic Parmesan Explosion: During the last 5 minutes of roasting, add 3 minced garlic cloves and 1/4 cup of grated Parmesan directly to the baking sheet, tossing everything together for an intensely flavorful, cheesy crust that will have everyone fighting for the last bean. The minced garlic toasts beautifully in the hot oven, losing its harsh raw bite and developing a sweet, nutty complexity that pairs perfectly with the salty Parmesan and crisp beans.
- Spicy Sriracha Honey Glaze: Whisk together 2 tablespoons each of sriracha and honey with 1 tablespoon of olive oil, then toss with the green beans before roasting for a sweet-heat combination that will wake up your taste buds and have you reaching for more. The honey caramelizes beautifully in the hot oven while the sriracha provides that gradual building heat that keeps each bite interesting and addictive.
- Lemon Herb Mediterranean Twist: Add the zest of one lemon and 2 teaspoons of dried Italian seasoning to the initial oil mixture, then finish the roasted beans with a generous squeeze of fresh lemon juice and 2 tablespoons of chopped fresh parsley for a bright, herbaceous flavor profile that tastes like sunshine on a plate. The citrus cuts through the richness while the herbs provide layers of aromatic complexity.
- Bacon and Onion Bliss: Before roasting your beans, cook 4 slices of chopped bacon until crispy, then toss the beans in the rendered bacon fat instead of olive oil and add 1/2 thinly sliced red onion to the baking sheet for a smoky, savory version that turns simple green beans into the ultimate comfort food side dish.
- Asian-Inspired Sesame Ginger: Replace the olive oil with sesame oil and add 1 tablespoon each of soy sauce and grated fresh ginger to the coating mixture, then finish with toasted sesame seeds and sliced green onions for an umami-packed variation that brings restaurant-quality flavors right to your dinner table.
Frequently Asked Questions
Can I use frozen green beans instead of fresh?
While fresh green beans will always give you the best texture and crispiness results, you can absolutely use frozen in a pinch – but there are crucial adjustments you need to make! First, do NOT thaw the frozen beans – the excess moisture will create steaming rather than roasting. Toss them directly from the freezer with the oil and seasonings, but increase your initial roasting time by 5-7 minutes to account for the extra water content. The texture will be slightly softer than with fresh beans, but you’ll still achieve beautiful caramelization and flavor. Just be prepared for them to release more liquid during cooking, so make sure your baking sheet has a good rim to contain any juices. The convenience factor might make this worthwhile for busy weeknights, but for special occasions, fresh is definitely worth the extra effort.
Why are my green beans coming out soggy instead of crispy?
Oh no, we’ve encountered the dreaded sogginess – but fear not, this is almost always fixable with a few simple adjustments! The most common culprit is overcrowding on the baking sheet – if your beans are piled on top of each other or too close together, they steam rather than roast. Make sure they’re in a single layer with space between each bean. Another frequent issue is insufficient oven temperature – if your oven runs cool, consider increasing to 450°F or using an oven thermometer to verify accuracy. Also, ensure your beans are completely dry before oiling them, as any residual moisture turns to steam. Finally, don’t skip the step of flipping/stirring halfway through – this ensures even exposure to the hot air circulating in your oven. With these tweaks, you’ll achieve that perfect crisp-tender texture every single time!
How do I store leftovers and reheat them properly?
Leftovers? I’m impressed you have any! But if you do find yourself with extra roasted green beans, store them in an airtight container in the refrigerator for up to 3 days. The key to successful reheating is avoiding the microwave at all costs – that appliance will turn your beautifully crispy beans into a sad, steamed mess. Instead, spread them in a single layer on a baking sheet and reheat in a 400°F oven for 5-8 minutes until warmed through and re-crisped. You can also use an air fryer at 375°F for 3-4 minutes for even faster results. The beans will lose some of their initial perfect texture but will still be far superior to any other reheated vegetable method. For best quality, I recommend enjoying them fresh, but these methods will salvage your leftovers beautifully.
Can I prepare these green beans ahead of time for a dinner party?
Absolutely, and what a brilliant host you are for thinking ahead! You can wash, trim, and dry the green beans up to 24 hours in advance – store them wrapped in paper towels inside a zip-top bag in the refrigerator. You can even mix the oil and seasoning mixture separately and keep it covered at room temperature. However, do NOT toss the beans with the oil until right before roasting, as the salt will draw out moisture and make them soggy. For the ultimate dinner party strategy, have everything prepped and waiting, then pop them in the oven about 25 minutes before you plan to serve. The roasting time aligns perfectly with finishing other dishes and getting everyone seated – they’ll be piping hot and perfectly crispy right when you need them!
Summary
Transform ordinary green beans into an extraordinary side dish with this simple roasting method that creates perfect crisp-tender texture and incredible caramelized flavor in just 25 minutes. This technique will make vegetables the star of your meal and have everyone asking for your secret.
Crispy Oven Baked Green Beans
6
servings10
minutes22
minutesIngredients
Instructions
- 1 Preheat oven to 425°F and line a rimmed baking sheet with parchment paper
- 2 Wash and thoroughly dry green beans, then trim stem ends
- 3 In a large bowl, whisk together olive oil, garlic powder, onion powder, pepper, and salt
- 4 Toss green beans in the oil mixture until evenly coated
- 5 Spread beans in a single layer on prepared baking sheet
- 6 Roast for 12 minutes, then flip/stir beans and continue roasting for 10-13 more minutes until tender with crispy, browned edges
- 7 Sprinkle with Parmesan cheese if using and serve immediately


