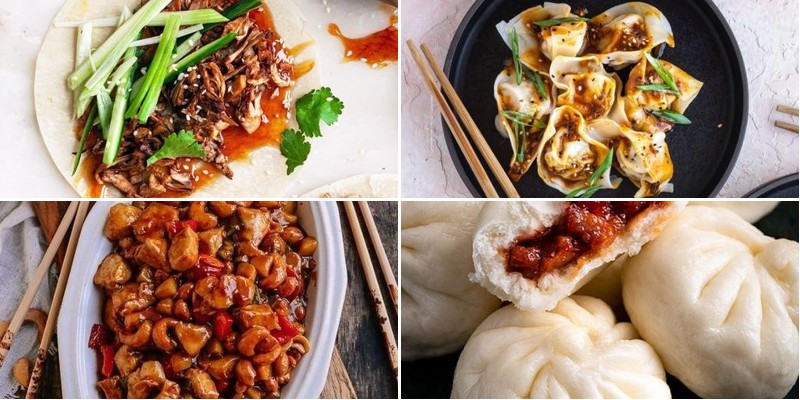
Get ready to bring authentic Chinese flavors right into your kitchen! Whether you’re craving quick weeknight dinners or planning a special feast, these 21 exquisite recipes will transform your cooking. From sizzling stir-fries to comforting soups, discover dishes that are surprisingly easy to make yet impressively delicious. Let’s dive in and explore the vibrant world of Chinese cuisine together—your next favorite meal is waiting!
Kung Pao Chicken with Cashews
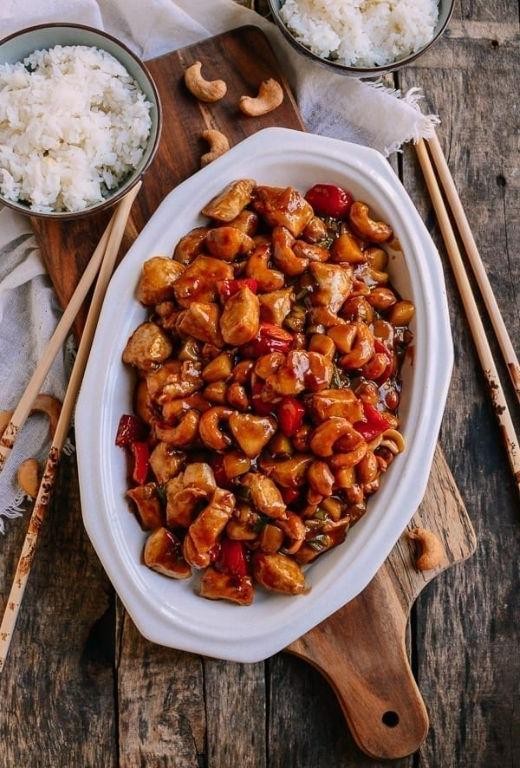
Zestful evenings call for dishes that comfort both hands and heart, and this Kung Pao Chicken with Cashews feels like a quiet conversation with flavors that have traveled far to meet here. There’s something grounding in the sizzle of the wok, the warmth of spices, the gentle crunch of cashews—a reminder that nourishment can be both bold and tender.
5
servings15
minutes12
minutesIngredients
– 1 pound boneless, skinless chicken thighs, cut into bite-sized pieces
– 2 tablespoons toasted sesame oil, fragrant and golden
– 3 cloves garlic, minced finely until almost paste-like
– 1 tablespoon freshly grated ginger, aromatic and pungent
– 1/2 cup roasted unsalted cashews, buttery and crisp
– 1/4 cup low-sodium soy sauce, deeply savory
– 2 tablespoons rice vinegar, bright and tangy
– 1 tablespoon honey, golden and smooth
– 1 teaspoon crushed red pepper flakes, for a gentle heat
– 2 scallions, thinly sliced for fresh contrast
– 1 tablespoon cornstarch, for silky thickening
Instructions
1. In a medium bowl, whisk together 1 tablespoon cornstarch with 2 tablespoons soy sauce until no lumps remain. 2. Add the chicken pieces to the bowl, tossing gently to coat each piece evenly—this creates a velvety texture when cooked. 3. Heat 1 tablespoon toasted sesame oil in a large skillet or wok over medium-high heat until it shimmers lightly. 4. Add the chicken in a single layer, cooking undisturbed for 3 minutes to develop a golden sear on one side. 5. Flip each piece and cook for another 3 minutes until the chicken is cooked through but still juicy. 6. Transfer the chicken to a clean plate, letting it rest while you build the sauce. 7. Reduce heat to medium and add the remaining 1 tablespoon sesame oil to the same skillet. 8. Sauté the minced garlic and grated ginger for 45 seconds until fragrant but not browned—this preserves their delicate flavors. 9. Pour in the remaining soy sauce, rice vinegar, honey, and red pepper flakes, stirring to combine as the sauce bubbles gently. 10. Return the chicken and any accumulated juices to the skillet, tossing to coat in the glossy sauce. 11. Stir in the roasted cashews and half of the sliced scallions, cooking for 1 minute to warm through. 12. Sprinkle with the remaining scallions just before serving for a pop of color and freshness. A final drizzle of sauce clings to each piece, the cashews offering buttery resistance against tender chicken. Serve it over jasmine rice to catch every drop, or tuck it into lettuce cups for a cool, crisp contrast to the dish’s warm spice.
Szechuan Style Mapo Tofu

Dipping into memories of bustling Chinatown evenings, this Szechuan-style mapo tofu recipe brings back the warmth of shared meals and lingering spice that dances on the tongue long after the last bite.
4
servings15
minutes15
minutesIngredients
– 1 package (14 oz) soft silken tofu, gently drained
– 2 tablespoons fragrant toasted sesame oil
– 3 cloves garlic, finely minced
– 1 tablespoon fresh ginger, grated to aromatic perfection
– 4 ounces ground pork, with subtle marbling
– 2 tablespoons Szechuan doubanjiang (fermented broad bean paste)
– 1 teaspoon crushed Szechuan peppercorns, buzzing with citrusy heat
– 1 cup rich chicken broth, simmer-ready
– 1 tablespoon soy sauce, dark and savory
– 1 teaspoon cornstarch, for velvety thickening
– 2 scallions, thinly sliced for fresh garnish
Instructions
1. Cut the drained silken tofu into 1-inch cubes, handling them gently to prevent breaking.
2. Heat the fragrant toasted sesame oil in a large skillet over medium heat until it shimmers.
3. Add the finely minced garlic and grated fresh ginger, sautéing for 1 minute until fragrant but not browned.
4. Tip: Toasting the aromatics slowly unlocks their depth without bitterness.
5. Crumble in the ground pork, cooking for 4-5 minutes until no pink remains and it’s lightly crisped.
6. Stir in the Szechuan doubanjiang and crushed Szechuan peppercorns, coating the pork evenly for 1 minute.
7. Pour in the rich chicken broth and dark soy sauce, bringing the mixture to a gentle boil.
8. Carefully add the tofu cubes, simmering uncovered for 5 minutes to let them absorb the flavors.
9. Tip: Avoid stirring vigorously—instead, tilt the pan to baste the tofu and keep it intact.
10. Whisk the cornstarch with 2 tablespoons of cold water in a small bowl until smooth.
11. Drizzle the slurry into the skillet, stirring gently for 2 minutes until the sauce thickens and clings to the tofu.
12. Tip: For extra heat, add an extra pinch of Szechuan peppercorns at the end to preserve their tingling buzz.
13. Remove from heat and fold in half of the thinly sliced scallions.
14. Ladle the mapo tofu into bowls and garnish with the remaining scallions.
Lingering on the palate, the silken tofu melts against the pork’s savory crunch, while the peppercorns’ numbing heat weaves through each spoonful. Try serving it over jasmine rice to soak up the crimson sauce, or alongside crisp steamed greens for a textural contrast that feels like a cozy embrace.
Crispy Beijing Duck Pancakes
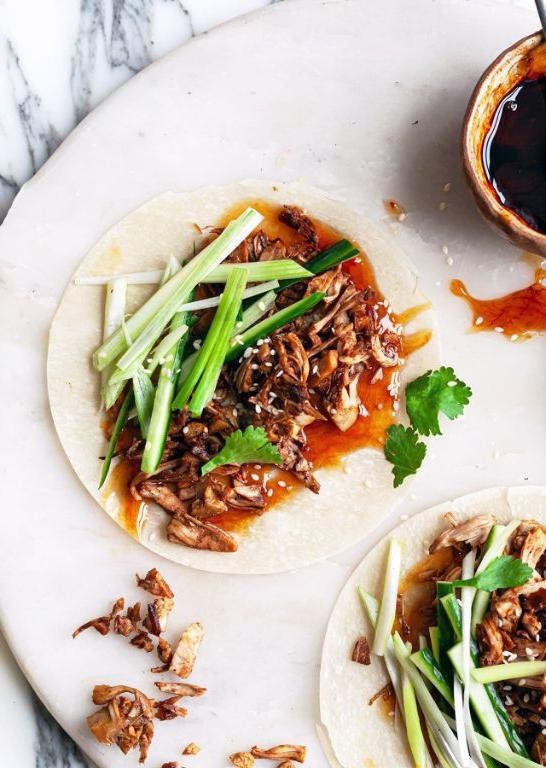
Lingering in the quiet kitchen, I find myself drawn to the meditative process of creating these delicate pancakes, each fold holding the promise of crispy duck and vibrant accompaniments. There’s something deeply comforting about the rhythm of steaming, the warmth spreading through my hands as I carefully separate each translucent wrapper. This recipe feels like unfolding a cherished memory, layer by tender layer.
16
pancakes45
minutes26
minutesIngredients
– 2 cups all-purpose flour
– ¾ cup boiling water
– 2 tablespoons toasted sesame oil
– 1 pound skin-on duck breast with crispy fat cap
– ¼ cup hoisin sauce with deep umami notes
– ½ cup thinly sliced crisp scallions
– ½ cup matchstick-cut refreshing English cucumber
Instructions
1. Combine 2 cups all-purpose flour and ¾ cup boiling water in a large bowl, stirring with a wooden spoon until shaggy dough forms.
2. Knead the dough on a lightly floured surface for 5 minutes until smooth and elastic, then cover with a damp cloth and rest for 30 minutes.
3. Roll the rested dough into a 16-inch log and cut into 16 equal pieces, keeping them covered to prevent drying.
4. Flatten each dough piece into a 3-inch circle, then brush one side lightly with toasted sesame oil using a pastry brush.
5. Press two oiled circles together oil-side to oil-side, then roll into a thin 6-inch pancake using even pressure.
6. Heat a dry cast-iron skillet over medium heat until a water droplet sizzles immediately upon contact.
7. Cook each pancake pair for 60 seconds per side until lightly browned and puffed with steam pockets.
8. Carefully separate the two pancake layers while still warm, stacking them under a clean kitchen towel.
9. Score the duck skin in a crosshatch pattern without cutting into the meat, then pat completely dry with paper towels.
10. Place duck skin-side down in a cold skillet and cook over medium-low heat for 12 minutes to render the fat slowly.
11. Flip the duck and cook skin-side up for 8 minutes until internal temperature reaches 135°F on an instant-read thermometer.
12. Rest the duck on a cutting board for 10 minutes before thinly slicing against the grain.
13. Spread each warm pancake with hoisin sauce, then layer with duck slices, crisp scallions, and refreshing cucumber matchsticks.
14. Fold the bottom third of the pancake up, then roll tightly from left to right to encase the filling completely.
Perfectly balanced between crisp and tender, these pancakes offer contrasting textures that dance across the palate. The rich duck melts against the cool cucumber, while the hoisin provides sweet depth that lingers beautifully. Serve them immediately with extra scallions scattered artfully across the plate for a vibrant presentation that honors tradition while feeling entirely new.
Sweet and Sour Pork with Pineapple

Dipping into memories of family dinners, this sweet and sour pork with pineapple feels like a warm embrace on a quiet evening—a dish that balances comfort with just enough brightness to lift the spirits.
2
servings20
minutes25
minutesIngredients
– 1 pound pork shoulder, cut into 1-inch cubes
– 1 cup cornstarch for dredging
– ½ cup vegetable oil for frying
– 1 red bell pepper, sliced into thin strips
– 1 green bell pepper, sliced into thin strips
– 1 cup fresh pineapple chunks
– 3 cloves garlic, minced
– ½ cup rice vinegar
– ¼ cup ketchup
– ¼ cup brown sugar
– 1 tablespoon soy sauce
– 1 teaspoon grated fresh ginger
– ½ cup water
– 1 tablespoon cornstarch mixed with 2 tablespoons water
Instructions
1. Pat the pork cubes dry with paper towels to ensure a crisp crust when fried.
2. Dredge each pork cube thoroughly in cornstarch, shaking off any excess.
3. Heat vegetable oil in a large skillet to 350°F, testing with a drop of water—it should sizzle immediately.
4. Fry pork cubes in batches for 4-5 minutes until golden brown and crispy, avoiding overcrowding the pan.
5. Transfer fried pork to a paper towel-lined plate to drain excess oil.
6. In a clean skillet, sauté minced garlic and grated ginger over medium heat for 1 minute until fragrant.
7. Add sliced red and green bell peppers, cooking for 3-4 minutes until slightly softened but still crisp.
8. Stir in fresh pineapple chunks and cook for 2 minutes to lightly caramelize the edges.
9. Combine rice vinegar, ketchup, brown sugar, soy sauce, and water in a bowl, whisking until smooth.
10. Pour the sauce mixture into the skillet with vegetables, bringing it to a gentle simmer.
11. Mix 1 tablespoon cornstarch with 2 tablespoons water to create a slurry, then stir it into the simmering sauce.
12. Cook the sauce for 2-3 minutes until thickened and glossy, stirring constantly.
13. Add the fried pork cubes to the skillet, tossing gently to coat evenly with the sauce.
14. Heat through for 1-2 minutes until the pork is warmed and well-integrated.
A final toss brings everything together—the pork stays wonderfully crisp beneath the glossy sauce, while the pineapple offers juicy bursts that cut through the richness. Serve it over steamed jasmine rice to soak up every drop, or spoon it into lettuce cups for a lighter, crunchier bite that lets the sweet-and-sour balance shine.
Steamed Fish with Ginger and Scallions
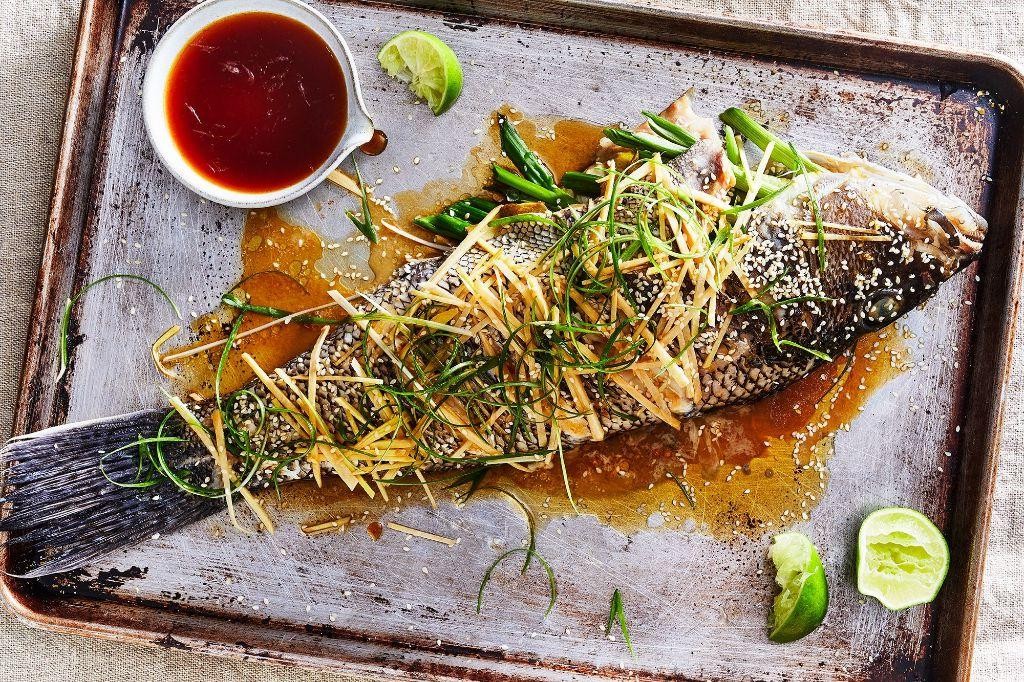
Floating back to the quiet moments of my grandmother’s kitchen, I remember how the steam would fog the windows, carrying the clean, comforting scent of ginger and scallions—a simple dish that felt like a gentle embrace on weary evenings. Steamed fish with ginger and scallions is one of those humble treasures, where minimal effort coaxes out profound flavor, letting the ingredients speak for themselves. It’s a recipe that asks for little but gives so much warmth, perfect for a quiet dinner when you need something light yet deeply satisfying.
2
servings15
minutes15
minutesIngredients
– 1 whole white-fleshed fish (about 1.5 pounds), such as branzino or sea bass, scaled and gutted
– 3 tablespoons fresh ginger, peeled and cut into fine, aromatic matchsticks
– 4 fresh scallions, trimmed and sliced into delicate 2-inch green strands
– 2 tablespoons premium soy sauce
– 1 tablespoon toasted sesame oil with a nutty fragrance
– 1 teaspoon granulated white sugar for subtle sweetness
– ½ cup water for steaming
Instructions
1. Rinse the whole fish under cold running water, then pat it completely dry with paper towels to ensure crisp skin after steaming.
2. Use a sharp knife to make three diagonal slashes, about ½-inch deep, on each side of the fish to help it cook evenly and absorb flavors.
3. Place the fish on a heatproof plate that fits inside your steamer basket.
4. Evenly scatter the fresh ginger matchsticks and half of the delicate scallion strands over the top of the fish and inside the slashes.
5. In a small bowl, whisk together the premium soy sauce, fragrant toasted sesame oil, and granulated white sugar until the sugar dissolves fully.
6. Drizzle half of this sauce mixture evenly over the fish.
7. Pour the ½ cup of water into the base of a wok or large pot, then set the steamer basket inside and bring the water to a vigorous boil over high heat.
8. Carefully place the plate with the fish into the steamer, cover tightly with a lid, and steam for exactly 10–12 minutes, or until the fish flesh turns opaque and flakes easily with a fork.
9. Tip: Check the water level midway; if it runs low, add more boiling water to avoid scorching and maintain steady steam.
10. Using oven mitts, remove the plate from the steamer and discard any accumulated liquid on the plate to prevent dilution of flavors.
11. Sprinkle the remaining fresh scallion strands over the hot fish.
12. Heat the remaining sauce mixture in a small saucepan until it just begins to simmer, about 1–2 minutes, then pour it sizzling over the scallions to wilt them slightly.
13. Tip: For extra aroma, you can heat a tablespoon of neutral oil until smoking and drizzle it over the scallions at the end for a quick “sizzle” effect.
14. Let the fish rest for 2–3 minutes before serving to allow the flavors to meld.
15. Tip: Serve immediately with jasmine rice to soak up the delicate, savory sauce.
Holding that first tender bite, the flaky flesh melts away, leaving behind the bright kick of ginger and the fresh, grassy notes of scallions. The steam locks in a remarkable juiciness, making each forkful feel both light and deeply nourishing. For a cozy twist, try it alongside stir-fried greens or spoon the leftover sauce over steamed rice the next day—it’s a quiet meal that lingers like a good memory.
Beef and Broccoli Stir Fry
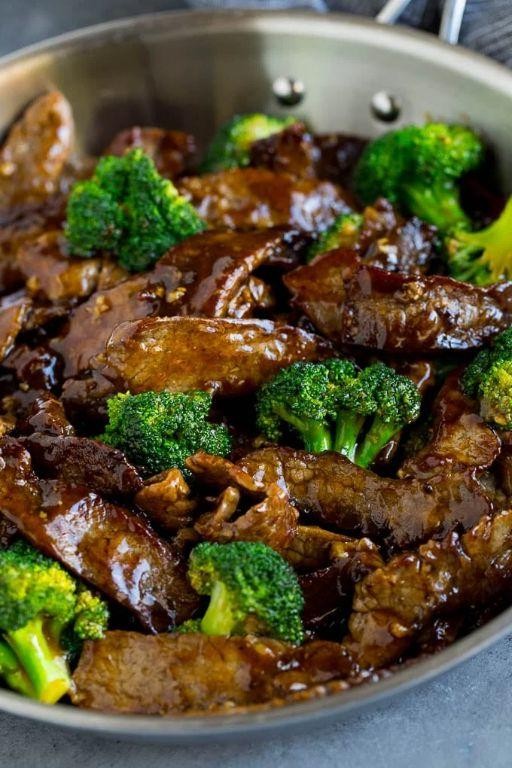
Unfolding the evening with quiet contemplation, I find myself drawn to the simple comfort of preparing beef and broccoli stir fry, a dish that feels like a gentle exhale after a long day, its familiar aromas filling the kitchen with warmth and calm.
2
servings15
minutes10
minutesIngredients
– 1 pound thinly sliced flank steak
– 3 cups fresh broccoli florets
– 2 tablespoons rich toasted sesame oil
– 3 cloves aromatic minced garlic
– 1 tablespoon freshly grated ginger
– 1/4 cup savory soy sauce
– 2 tablespoons sweet honey
– 1 tablespoon smooth rice vinegar
– 1 teaspoon vibrant red pepper flakes
– 2 tablespoons cool water
– 1 tablespoon velvety cornstarch
– 2 cups fluffy cooked jasmine rice
Instructions
1. Whisk together 1/4 cup savory soy sauce, 2 tablespoons sweet honey, 1 tablespoon smooth rice vinegar, and 1 teaspoon vibrant red pepper flakes in a small bowl until fully combined.
2. In a separate bowl, stir 1 tablespoon velvety cornstarch into 2 tablespoons cool water until no lumps remain.
3. Heat 1 tablespoon rich toasted sesame oil in a large skillet or wok over medium-high heat until it shimmers, about 1 minute.
4. Add 1 pound thinly sliced flank steak in a single layer, searing for 2 minutes without stirring to develop a golden-brown crust.
5. Flip the steak slices and cook for another 1 minute until just browned but still slightly pink inside.
6. Transfer the steak to a clean plate, leaving any drippings in the skillet.
7. Add the remaining 1 tablespoon rich toasted sesame oil to the skillet.
8. Sauté 3 cloves aromatic minced garlic and 1 tablespoon freshly grated ginger for 30 seconds until fragrant but not browned.
9. Add 3 cups fresh broccoli florets and stir-fry for 3 minutes until bright green and slightly tender.
10. Pour the soy sauce mixture over the broccoli, stirring to coat evenly.
11. Cover the skillet and reduce heat to medium, steaming the broccoli for 2 minutes until crisp-tender.
12. Stir the cornstarch mixture again and drizzle it into the skillet, stirring continuously.
13. Return the seared steak and any accumulated juices to the skillet, tossing gently to combine.
14. Simmer for 1 minute until the sauce thickens and clings to the beef and broccoli.
15. Serve immediately over 2 cups fluffy cooked jasmine rice.
The tender beef melts against the crisp broccoli, while the glossy sauce—both sweet and savory—clings to each grain of rice. For a quiet dinner, I like to garnish it with extra red pepper flakes for warmth, letting the simple joy of eating slowly fill the evening.
Hot and Sour Soup with Bamboo Shoots
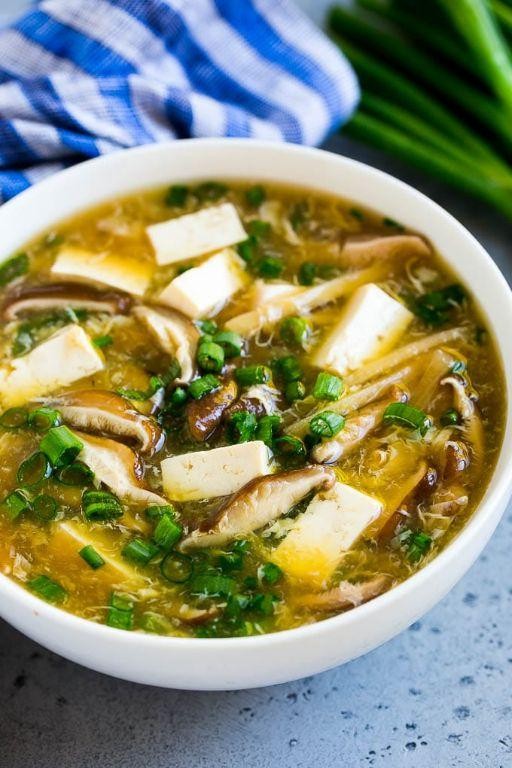
Just now, as the evening light softens outside my window, I find myself craving the kind of comfort that only comes from a bowl of soup that holds both warmth and memory. This particular recipe feels like autumn itself—gentle yet vibrant, simple yet deeply satisfying.
5
servings15
minutes20
minutesIngredients
– 6 cups rich chicken broth
– 1 cup thinly sliced fresh shiitake mushrooms
– 1/2 cup julienned bamboo shoots with their earthy crunch
– 1/4 cup delicate rice vinegar
– 2 tablespoons smooth soy sauce
– 1 tablespoon fiery chili oil with floating red flakes
– 2 large farm-fresh eggs, lightly beaten
– 1 tablespoon finely grated fresh ginger root
– 2 cloves aromatic garlic, minced
– 1 tablespoon golden cornstarch
– 2 tablespoons cool water
– 2 thinly sliced green onions for bright garnish
Instructions
1. Pour 6 cups of rich chicken broth into a heavy-bottomed pot and bring to a gentle simmer over medium heat.
2. Add 1 cup thinly sliced fresh shiitake mushrooms and 1/2 cup julienned bamboo shoots, simmering for 8 minutes until the mushrooms become tender but still hold their shape.
3. Stir in 1/4 cup delicate rice vinegar, 2 tablespoons smooth soy sauce, and 1 tablespoon fiery chili oil, blending the flavors completely.
4. Whisk 1 tablespoon golden cornstarch with 2 tablespoons cool water in a small bowl until no lumps remain.
5. Slowly drizzle the cornstarch mixture into the simmering soup while stirring constantly, cooking for 2 minutes until the soup thickens slightly and becomes glossy.
6. Add 1 tablespoon finely grated fresh ginger and 2 cloves minced aromatic garlic, stirring to release their fragrant oils for exactly 1 minute.
7. Tip: For perfect egg ribbons, hold the bowl of 2 lightly beaten farm-fresh eggs 6 inches above the soup and drizzle in a thin, steady stream while stirring in one direction.
8. Immediately turn off the heat and let the residual warmth cook the eggs for 1 minute until they form silky ribbons throughout the soup.
9. Tip: Allow the soup to rest for 3 minutes off the heat—this lets the flavors marry and the temperature become perfectly sippable.
10. Ladle the hot soup into warmed bowls and garnish generously with 2 thinly sliced green onions scattered across the surface.
11. Tip: Serve immediately while the soup is at its peak texture, as the bamboo shoots maintain their delightful crunch best when fresh from the pot.
Nothing compares to that first spoonful where the silky egg ribbons meet the crisp bamboo shoots, creating a dance of textures in every bite. The broth carries both the gentle warmth of ginger and the bright kick of chili oil in perfect harmony. I love serving this in deep ceramic bowls with extra green onions scattered like confetti across the surface, making each bowl feel like a small celebration.
Shanghai Fried Noodles with Pork

As the afternoon light fades outside my kitchen window, I find myself reaching for the familiar comfort of these noodles, their savory aroma already filling my imagination before I’ve even heated the pan. There’s something deeply satisfying about the way thin wheat noodles soak up all the flavors, creating a dish that feels both nourishing and indulgent.
5
servings15
minutes15
minutesIngredients
– 8 ounces fresh thin wheat noodles
– 12 ounces thinly sliced pork shoulder
– 3 tablespoons rich dark soy sauce
– 2 tablespoons fragrant toasted sesame oil
– 1 tablespoon golden brown sugar
– 3 cloves aromatic garlic, minced
– 1-inch piece fresh ginger root, grated
– 2 cups thinly sliced crisp Napa cabbage
– 1 cup julienned sweet carrots
– 4 slender green onions, sliced
– 2 tablespoons neutral vegetable oil
– 1/4 teaspoon freshly ground black pepper
Instructions
1. Bring a large pot of salted water to a rolling boil over high heat.
2. Add fresh thin wheat noodles and cook for exactly 2 minutes until just tender but still firm.
3. Drain noodles immediately and rinse under cold running water to stop the cooking process.
4. Toss drained noodles with 1 tablespoon fragrant toasted sesame oil to prevent sticking.
5. Heat 2 tablespoons neutral vegetable oil in a large wok or skillet over medium-high heat until shimmering.
6. Add thinly sliced pork shoulder and cook for 3-4 minutes until edges turn golden brown.
7. Stir in minced aromatic garlic and grated fresh ginger, cooking for 30 seconds until fragrant.
8. Add julienned sweet carrots and cook for 2 minutes until slightly softened.
9. Incorporate thinly sliced crisp Napa cabbage and cook for another 2 minutes until wilted but still crisp.
10. Combine rich dark soy sauce, remaining 1 tablespoon fragrant toasted sesame oil, and golden brown sugar in a small bowl, stirring until sugar dissolves.
11. Pour sauce mixture over the pork and vegetables, tossing to coat evenly.
12. Add prepared noodles to the wok, using tongs to gently separate strands and combine with other ingredients.
13. Cook everything together for 2-3 minutes, tossing continuously until noodles absorb the sauce and develop a rich brown color.
14. Season with 1/4 teaspoon freshly ground black pepper and most of the sliced slender green onions, reserving some for garnish.
15. Remove from heat and let rest for 1 minute to allow flavors to meld.
My favorite part is that moment when you lift the first forkful and see how each noodle strand has absorbed the deep, savory sauce while still maintaining its chewy texture. The pork becomes wonderfully tender against the crisp vegetables, creating layers of contrast that make each bite interesting. Sometimes I like to serve it with a soft-poached egg on top, letting the golden yolk mingle with the noodles for extra richness.
Sesame Oil Wontons in Chili Sauce
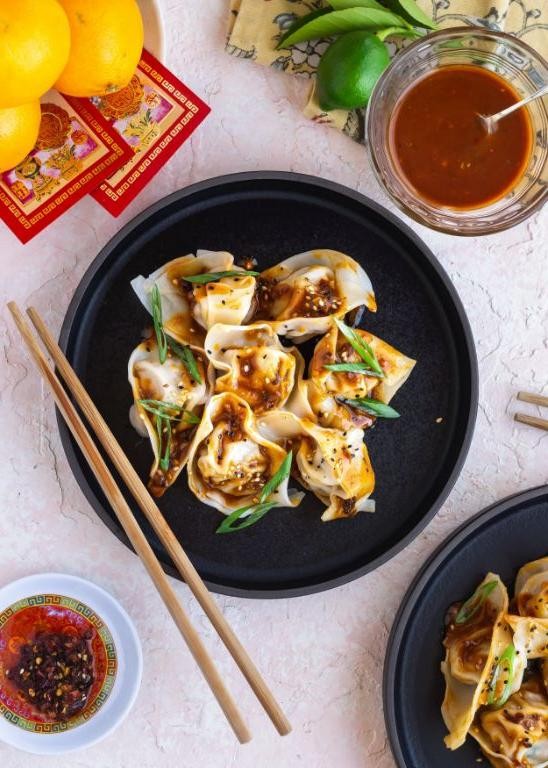
As I stand here in the quiet kitchen, watching the afternoon light fade, I find myself reaching for the familiar comforts of wrapping, folding, and the gentle steam that rises from a pot of water—a ritual that feels like coming home after a long day away.
2
servings20
minutes10
minutesIngredients
– 1 package of thin, delicate wonton wrappers
– ½ pound of finely ground pork shoulder
– 2 tablespoons of toasted sesame oil with its nutty aroma
– 1 tablespoon of rich soy sauce
– 1 teaspoon of freshly grated ginger root
– 2 cloves of minced garlic
– 3 tablespoons of vibrant chili oil with floating flakes
– 1 teaspoon of granulated sugar
– 2 tablespoons of chopped fresh scallions
– 4 cups of water for boiling
Instructions
1. Combine the finely ground pork shoulder, 1 tablespoon of rich soy sauce, 1 teaspoon of freshly grated ginger root, and 2 cloves of minced garlic in a medium mixing bowl.
2. Mix the filling ingredients thoroughly with a fork until well incorporated and slightly sticky.
3. Place one thin, delicate wonton wrapper on a clean, dry surface and spoon 1 teaspoon of the pork mixture into the center.
4. Dip your fingertip in water and moisten the edges of the wonton wrapper to help seal it.
5. Fold the wrapper in half over the filling to form a triangle, pressing the edges firmly to remove any air pockets.
6. Bring the two opposite corners of the triangle together and pinch them to form a classic wonton shape, ensuring the seal is tight to prevent bursting during cooking.
7. Repeat steps 3–6 until all the filling is used, placing finished wontons on a parchment-lined tray to prevent sticking.
8. Bring 4 cups of water to a rolling boil in a large pot over high heat, which should take about 5–7 minutes.
9. Carefully drop the wontons into the boiling water one by one, stirring gently to prevent them from sticking to the bottom.
10. Cook the wontons for 4–5 minutes, or until they float to the surface and the wrappers turn translucent, indicating they are fully cooked.
11. Use a slotted spoon to transfer the cooked wontons to a serving bowl, draining excess water thoroughly.
12. Drizzle 2 tablespoons of toasted sesame oil and 3 tablespoons of vibrant chili oil over the hot wontons.
13. Sprinkle 1 teaspoon of granulated sugar and 2 tablespoons of chopped fresh scallions evenly across the top.
14. Toss the wontons gently in the bowl to coat them evenly with the sauces and seasonings. Softly tangled in their glossy sauce, these wontons offer a tender bite that gives way to savory pork, while the chili oil lingers with a warmth that feels like a gentle embrace on a cool evening—try serving them alongside steamed jasmine rice to soak up every last drop of the fragrant oil.
Cantonese Dim Sum Shrimp Dumplings
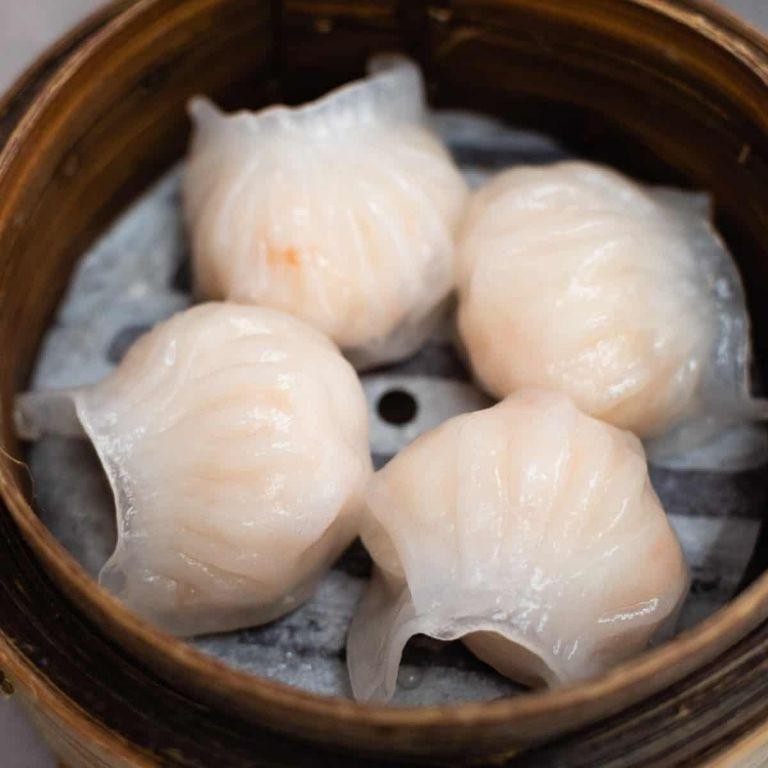
Remembering the first time I tasted these delicate parcels at a tiny Chinatown teahouse, how the translucent wrapper gave way to that burst of briny sweetness—it feels like uncovering a quiet secret, one I’ve carried with me ever since.
20
portions25
minutes6
minutesIngredients
– 1 cup wheat starch
– 1/3 cup tapioca starch
– 3/4 cup just-boiled water
– 8 ounces fresh wild-caught shrimp, peeled and deveined
– 2 tablespoons finely minced water chestnuts
– 1 teaspoon freshly grated ginger
– 1/2 teaspoon toasted sesame oil
– 1/4 teaspoon fine sea salt
– 1/8 teaspoon white pepper
Instructions
1. Combine 1 cup wheat starch and 1/3 cup tapioca starch in a heatproof bowl.
2. Pour 3/4 cup just-boiled water over the starch mixture while stirring continuously with chopsticks until a shaggy dough forms.
3. Knead the hot dough on a lightly starch-dusted surface for 3 minutes until smooth and pliable.
4. Cover the dough tightly with plastic wrap to prevent drying while preparing the filling.
5. Chop 8 ounces fresh wild-caught shrimp into pea-sized pieces, leaving some texture.
6. Gently fold shrimp with 2 tablespoons finely minced water chestnuts, 1 teaspoon freshly grated ginger, 1/2 teaspoon toasted sesame oil, 1/4 teaspoon fine sea salt, and 1/8 teaspoon white pepper until just combined.
7. Divide the rested dough into 20 equal portions, keeping unused portions covered.
8. Roll one portion into a thin 3-inch circle using a small rolling pin, dusting lightly with tapioca starch to prevent sticking.
9. Place 1 teaspoon filling in the center of the wrapper, pleating the edges firmly with your fingertips to create 5-6 folds.
10. Arrange finished dumplings on a parchment-lined bamboo steamer, leaving 1-inch space between each.
11. Steam over vigorously boiling water for exactly 6 minutes until wrappers turn translucent and shiny.
12. Remove steamer from heat and let dumplings rest for 1 minute before serving.
Maybe it’s the way the delicate, chewy skin contrasts with the springy shrimp filling, or how the water chestnuts add a subtle crunch that makes each bite feel like a small celebration. Serve them alongside chrysanthemum tea, watching the steam rise between conversations, and you’ll understand why these humble dumplings have anchored countless morning rituals.
Classic Egg Fried Rice
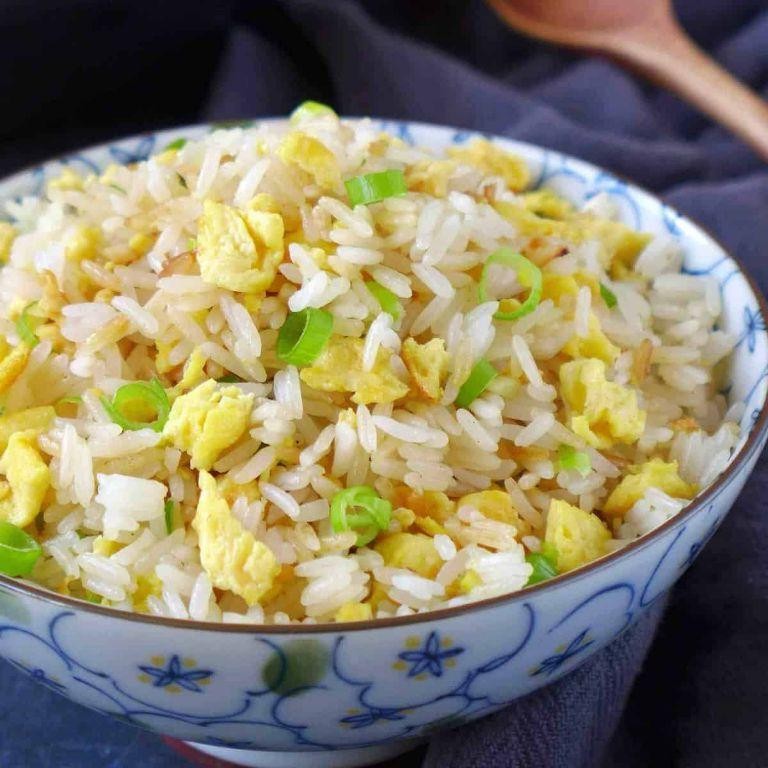
Cradling a warm bowl of classic egg fried rice feels like coming home to the simplest comfort, where each grain carries the gentle memory of countless quiet evenings spent at the stove, stirring and dreaming. There’s something deeply soothing about the rhythm of the wok, the sizzle of rice meeting heat, and the golden strands of egg weaving through it all—a humble dish that asks for little but gives so much warmth in return.
4
servings15
minutes12
minutesIngredients
– 3 cups of day-old, cold jasmine rice, grains separate and firm
– 3 large farm-fresh eggs, beaten until pale and frothy
– 2 tablespoons of rich toasted sesame oil
– 1/4 cup of finely diced sweet yellow onion
– 2 cloves of aromatic fresh garlic, minced
– 3 tablespoons of savory soy sauce
– 1/2 cup of frozen sweet peas, thawed and patted dry
– 2 thinly sliced tender green onions
– 1/4 teaspoon of finely ground white pepper
Instructions
1. Heat a large wok or skillet over medium-high heat until a drop of water sizzles and evaporates on contact.
2. Pour in 1 tablespoon of rich toasted sesame oil and swirl to coat the surface evenly.
3. Add the beaten farm-fresh eggs and cook for 45–60 seconds, scrambling gently with a spatula until softly set but still slightly wet.
4. Transfer the eggs to a clean plate immediately to prevent overcooking.
5. Wipe the wok clean with a paper towel and return it to medium-high heat.
6. Add the remaining 1 tablespoon of rich toasted sesame oil and swirl to coat.
7. Toss in the finely diced sweet yellow onion and sauté for 2–3 minutes until translucent and fragrant.
8. Stir in the minced aromatic fresh garlic and cook for 30 seconds until golden and aromatic.
9. Add the 3 cups of day-old, cold jasmine rice, breaking up any clumps with the spatula.
10. Cook the rice for 4–5 minutes, stirring frequently, until grains are heated through and slightly toasted.
11. Drizzle the 3 tablespoons of savory soy sauce evenly over the rice and toss to coat uniformly.
12. Fold in the thawed frozen sweet peas and cook for 1 minute until warmed.
13. Return the softly scrambled eggs to the wok, breaking them into small curds as you mix.
14. Sprinkle the 1/4 teaspoon of finely ground white pepper and the thinly sliced tender green onions over the rice.
15. Toss everything together for 1 final minute until well combined and heated through. Lightly fluffy and speckled with emerald peas, this fried rice cradles the subtle sweetness of onion and the deep umami of soy, while the eggs remain tender against the toothsome grains. Serve it straight from the wok into shallow bowls, perhaps topped with a drizzle of chili oil or alongside quick-pickled vegetables for a bright, contrasting crunch.
Peking Pork Chops with Plum Sauce
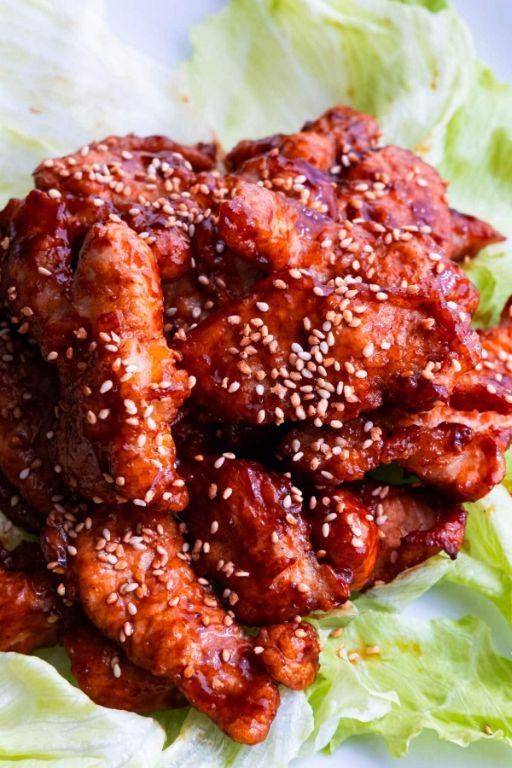
Holding the warm plate in my hands, I remember how these Peking pork chops first came into my life—through my grandmother’s weathered recipe box, where the sweet-tangy plum sauce whispered stories of autumn afternoons and family gathered around the table. The way the sauce clings to each tender chop feels like a gentle embrace, a reminder that some flavors are meant to be savored slowly, like memories unfolding one bite at a time. Making them today feels like tracing her footsteps in the kitchen, where patience and care transform simple ingredients into something deeply comforting.
2
servings15
minutes20
minutesIngredients
– 4 bone-in pork chops, about 1-inch thick
– 1 cup smooth plum jam
– 3 tablespoons rich soy sauce
– 2 tablespoons fragrant rice vinegar
– 1 tablespoon finely grated fresh ginger
– 2 cloves garlic, minced until fragrant
– 1 tablespoon toasted sesame oil
– 1/2 teaspoon finely ground black pepper
– 2 tablespoons thinly sliced green onions
– 1 tablespoon toasted sesame seeds
Instructions
1. Pat the pork chops dry with paper towels to ensure a crisp sear.
2. Season both sides of the pork chops evenly with the finely ground black pepper.
3. Heat a large skillet over medium-high heat until a drop of water sizzles upon contact.
4. Place the pork chops in the skillet and sear for 4 minutes without moving them to develop a golden-brown crust.
5. Flip the pork chops and sear the other side for another 4 minutes until browned.
6. Reduce the heat to medium-low and transfer the pork chops to a plate.
7. In the same skillet, add the smooth plum jam, rich soy sauce, fragrant rice vinegar, finely grated fresh ginger, and minced garlic.
8. Whisk the sauce continuously for 2 minutes until it thickens slightly and bubbles gently.
9. Return the pork chops to the skillet, spooning the sauce over them to coat evenly.
10. Simmer the pork chops uncovered for 10 minutes, flipping them halfway through, until the internal temperature reaches 145°F on an instant-read thermometer.
11. Drizzle the toasted sesame oil over the pork chops and stir gently to incorporate.
12. Transfer the pork chops to a serving platter and pour the remaining sauce over the top.
13. Garnish with thinly sliced green onions and toasted sesame seeds.
14. Let the pork chops rest for 5 minutes before serving to allow the juices to redistribute. Perhaps what I love most is how the sticky plum glaze gives way to succulent, fork-tender meat, with each bite balancing sweet, savory, and a hint of ginger warmth. Serve these chops over steamed jasmine rice to catch every drop of sauce, or slice them thinly for lettuce cups topped with crisp cucumber matchsticks—a playful twist that lets the flavors shine in new ways.
Steamed Buns with BBQ Pork Filling
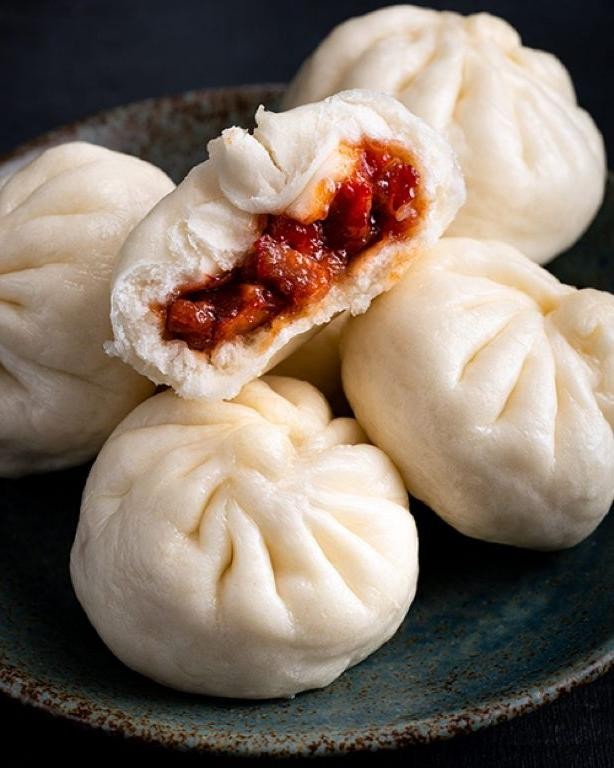
Years of chasing complex flavors have taught me that some of the most profound comfort comes from the simplest, steamy packages of joy, like these soft buns cradling their sweet-savory heart.
12
rolls95
minutes20
minutesIngredients
– 1 cup warm whole milk (about 110°F)
– 2 tablespoons granulated sugar
– 1 packet active dry yeast
– 3 cups all-purpose flour, plus more for dusting
– 1 teaspoon fine sea salt
– 2 tablespoons rich unsalted butter, softened
– 1 pound finely diced Chinese BBQ pork (char siu)
– 2 tablespoons sticky hoisin sauce
– 1 tablespoon fragrant toasted sesame oil
– 2 thinly sliced fresh scallions
Instructions
1. Pour the warm whole milk into a large mixing bowl and whisk in the granulated sugar until dissolved.
2. Sprinkle the active dry yeast over the milk mixture and let it stand for 5 minutes until foamy.
3. Stir in the all-purpose flour and fine sea salt until a shaggy dough forms.
4. Knead the dough on a lightly floured surface for 8 minutes until smooth and elastic.
5. Work the softened unsalted butter into the dough until fully incorporated and the surface is glossy.
6. Place the dough in a lightly oiled bowl, cover with a damp cloth, and let rise in a warm place for 1 hour until doubled in size.
7. While the dough rises, combine the finely diced Chinese BBQ pork, sticky hoisin sauce, fragrant toasted sesame oil, and thinly sliced fresh scallions in a bowl to make the filling.
8. Punch down the risen dough and divide it into 12 equal pieces on a floured surface.
9. Roll each piece into a 4-inch circle, keeping the edges thinner than the center.
10. Place 2 tablespoons of the pork filling in the center of each dough circle.
11. Gather the edges of the dough and pinch them together firmly at the top to seal each bun.
12. Place each bun seam-side down on a square of parchment paper and cover with a cloth to proof for 30 minutes until puffy.
13. Arrange the buns in a steamer basket, leaving 1 inch between them for expansion.
14. Steam the buns over boiling water for 15 minutes, then turn off the heat and let them rest for 5 minutes before lifting the lid.
15. Carefully remove the steamed buns from the steamer.
Kneading the dough until it’s supple ensures those beautifully soft, cloud-like textures, while the filling’s sweet pork and savory hoisin create little bursts of umami in every bite. They’re perfect torn open straight from the steamer, the warmth escaping like a secret, or served alongside a simple cucumber salad for contrast.
Conclusion
Your culinary adventure awaits with these 21 exquisite Chinese recipes! From comforting classics to vibrant new flavors, there’s something delicious for every home cook. Try your favorites, share which dishes you loved most in the comments below, and don’t forget to pin this article on Pinterest to save these amazing recipes for your next kitchen adventure.