After squeezing fresh oranges for your morning juice, don’t toss that vibrant pulp! This collection transforms leftover orange pulp into 31 delightful culinary creations, from zesty baked goods to refreshing beverages and savory marinades. Discover how to reduce food waste while adding a burst of citrus flavor to your kitchen adventures. Let’s explore these inventive recipes that will make you see orange pulp in a whole new light!
Orange Pulp Muffins with Honey Drizzle
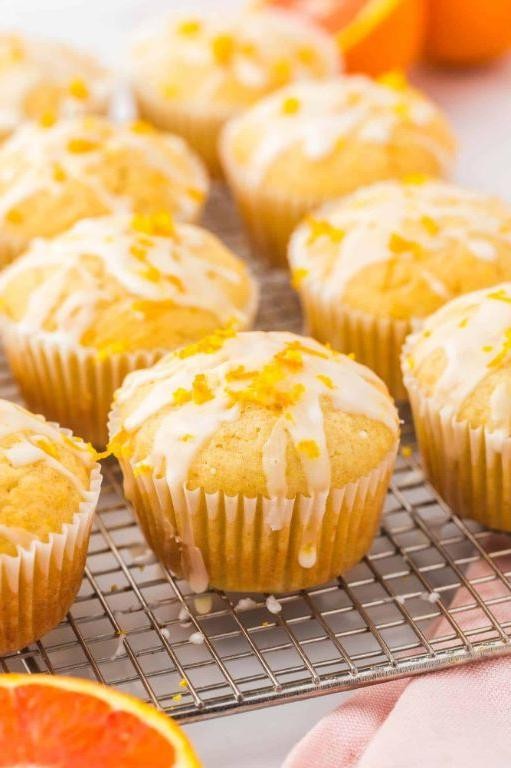
Diving into my kitchen this morning, I found myself staring at a bowl of leftover orange pulp from yesterday’s juicing session – you know that moment when you hate wasting anything? That’s exactly what inspired these sunny little muffins that fill the house with the most incredible citrus aroma while they bake.
12
muffins15
minutes20
minutesIngredients
- For the muffin batter:
- 2 cups all-purpose flour
- 1/2 cup granulated sugar
- 2 tsp baking powder
- 1/2 tsp salt
- 1 cup fresh orange pulp
- 2 large eggs
- 1/2 cup whole milk
- 1/4 cup vegetable oil
- 1 tsp vanilla extract
- For the honey drizzle:
- 1/4 cup honey
- 1 tbsp fresh orange juice
Instructions
- Preheat your oven to 375°F and line a 12-cup muffin tin with paper liners.
- Whisk together 2 cups all-purpose flour, 1/2 cup granulated sugar, 2 tsp baking powder, and 1/2 tsp salt in a large bowl.
- In a separate bowl, beat 2 large eggs until frothy using a hand whisk.
- Add 1 cup fresh orange pulp, 1/2 cup whole milk, 1/4 cup vegetable oil, and 1 tsp vanilla extract to the beaten eggs.
- Combine the wet ingredients with the dry ingredients using a spatula, mixing just until no flour streaks remain – this prevents tough muffins.
- Scoop the batter evenly into the prepared muffin cups, filling each about 2/3 full.
- Bake for 18-22 minutes until the tops spring back when lightly pressed and a toothpick inserted comes out clean.
- Transfer the muffins to a wire rack and let cool completely for about 30 minutes.
- While cooling, warm 1/4 cup honey and 1 tbsp fresh orange juice in a small saucepan over low heat for 2 minutes, stirring constantly.
- Drizzle the warm honey mixture over the cooled muffins using a spoon, creating thin lines across the tops.
Orange pulp gives these muffins the most delightful moistness that stays perfect for days, while the honey drizzle adds just enough sweetness to balance the bright citrus notes. I love serving them warm with a pat of butter that melts into all those little orange pockets, or packing them for picnics where they always disappear first from the basket.
Zesty Orange Pulp Pancakes
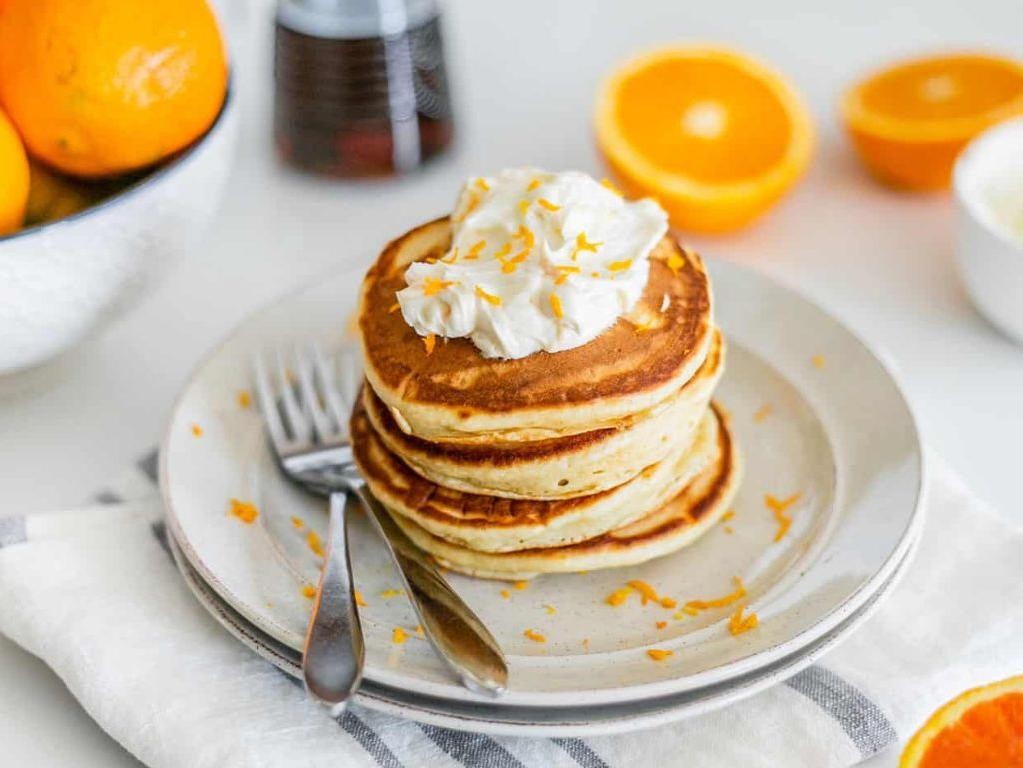
Perfect for lazy weekend mornings when I’m staring at that lonely orange in my fruit bowl, these pancakes came from my desperate attempt to use up leftover citrus before it went bad. I’ve always hated wasting food, especially when it could transform ordinary pancakes into something spectacularly bright and flavorful.
8
pancakes10
minutes20
minutesIngredients
For the Dry Mix
– 1 ½ cups all-purpose flour
– 2 tablespoons granulated sugar
– 1 tablespoon baking powder
– ½ teaspoon salt
For the Wet Mix
– 1 large egg
– 1 ¼ cups whole milk
– 3 tablespoons melted unsalted butter
– ½ cup fresh orange pulp (from 1 large orange)
– 1 teaspoon vanilla extract
For Cooking
– 2 tablespoons vegetable oil
Instructions
1. Whisk together the flour, sugar, baking powder, and salt in a large bowl until fully combined.
2. In a separate medium bowl, beat the egg vigorously with a fork for 30 seconds until frothy.
3. Pour the milk, melted butter, orange pulp, and vanilla extract into the egg mixture and stir until just incorporated.
4. Tip: Don’t overmix the wet ingredients—a few lumps are fine and prevent tough pancakes.
5. Pour the wet ingredients into the dry ingredients and gently fold with a spatula until no dry flour remains, about 15 strokes.
6. Heat a non-stick skillet over medium heat for 2 minutes until a drop of water sizzles immediately.
7. Add 1 teaspoon of vegetable oil to the skillet and swirl to coat the surface evenly.
8. Pour ¼ cup of batter onto the skillet for each pancake, leaving 2 inches between them.
9. Tip: Watch for bubbles forming across the entire surface of the pancake—this indicates it’s ready to flip.
10. Cook for 2-3 minutes until the edges look set and bubbles pop without filling in.
11. Flip each pancake carefully with a thin spatula and cook for another 1-2 minutes until golden brown underneath.
12. Tip: Keep cooked pancakes warm in a 200°F oven on a baking sheet while finishing the batch.
13. Repeat with remaining batter, adding more oil to the skillet as needed.
Keep these orange pulp pancakes light and fluffy by resisting the urge to press them down while cooking. The fresh citrus pulp creates delightful bursts of tangy sweetness throughout each bite, while the tender crumb practically melts in your mouth. I love stacking them high with extra orange slices between layers and a drizzle of maple syrup for a breakfast that feels both refreshing and indulgent.
Citrus Orange Pulp Sorbet
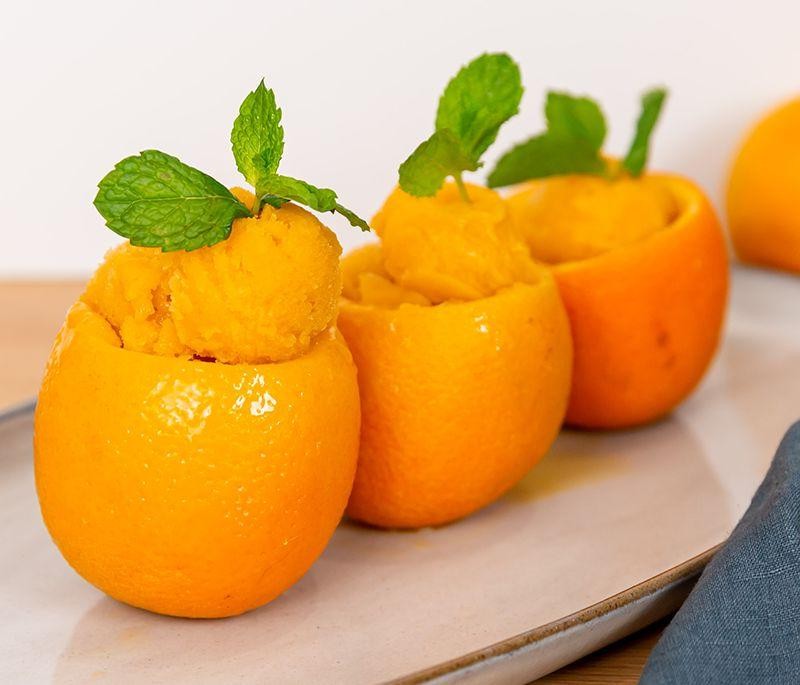
Sometimes the best recipes come from trying to use up what’s already in your kitchen—last week I found myself with a surplus of oranges from my neighbor’s tree, and this refreshing sorbet was the delicious result. It’s the perfect way to capture that bright citrus flavor when you have extra fruit on hand, and honestly, it’s become my go-to dessert for clearing out the produce drawer. I love how simple it is to make while still feeling fancy enough to serve to guests.
8
servings25
minutes4
minutesIngredients
For the sorbet base:
- 4 cups fresh orange pulp (from about 8-10 medium oranges)
- 1 cup granulated sugar
- 1 cup water
- 2 tablespoons fresh lemon juice
- 1 teaspoon orange zest
Instructions
- Combine 1 cup granulated sugar and 1 cup water in a small saucepan over medium heat.
- Stir the mixture constantly with a wooden spoon until the sugar completely dissolves, about 3-4 minutes. Tip: Don’t let the syrup boil until the sugar is fully dissolved to prevent crystallization.
- Remove the saucepan from heat and let the simple syrup cool to room temperature, about 20 minutes.
- While the syrup cools, scoop 4 cups of fresh orange pulp from 8-10 medium oranges, ensuring you remove all seeds and white pith.
- Place the orange pulp, 2 tablespoons fresh lemon juice, and 1 teaspoon orange zest in a blender.
- Pour the cooled simple syrup into the blender with the orange mixture.
- Blend on high speed for 45-60 seconds until completely smooth and no pulp chunks remain. Tip: For extra smooth sorbet, strain the mixture through a fine-mesh sieve to remove any remaining pulp fibers.
- Pour the blended mixture into a 9×13-inch baking dish or ice cream maker container.
- If using an ice cream maker, churn according to manufacturer’s instructions for 25-30 minutes until thick and creamy.
- If freezing without an ice cream maker, place the baking dish in the freezer and stir the mixture with a fork every 30 minutes for 3-4 hours until firm. Tip: The frequent stirring creates smaller ice crystals for a smoother texture.
- Transfer the sorbet to an airtight container and freeze for at least 4 hours or until firm enough to scoop.
Knowing when this sorbet is perfectly frozen makes all the difference—it should be firm enough to hold its shape but still scoopable straight from the freezer. The texture is wonderfully smooth and almost creamy despite containing no dairy, while the flavor bursts with pure, bright orange essence that’s both refreshing and satisfying. I love serving it in hollowed-out orange halves for a beautiful presentation, or pairing it with dark chocolate shavings for an elegant dessert that always impresses.
Homemade Orange Pulp Chutney
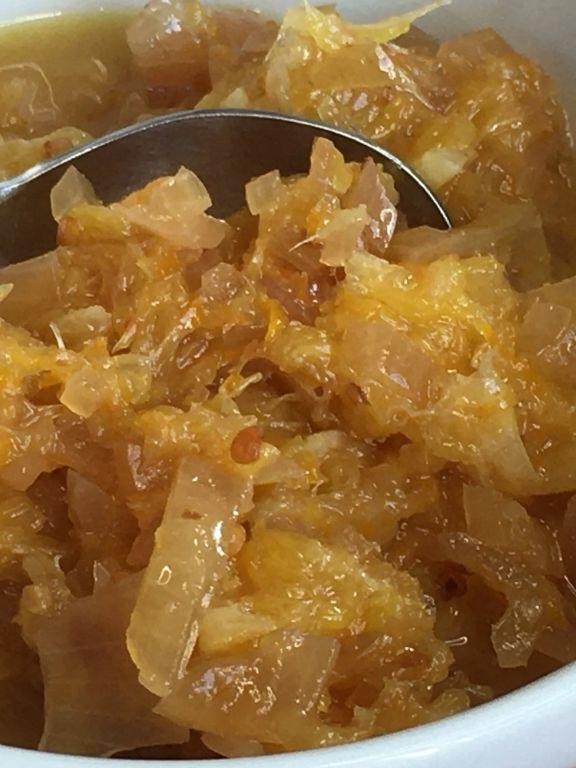
Craving something bright and tangy to jazz up my meals, I found myself staring at a bowl of oranges that needed using—this chutney was born from that “waste not, want not” moment. Growing up, my grandma always said the best recipes come from kitchen experiments, and this one’s a keeper. It’s my go-to when I want to add a burst of citrusy sweetness to everything from grilled chicken to cheese boards.
1
jar15
minutes32
minutesIngredients
- For the orange base:
- 4 large oranges, peeled and chopped (about 2 cups pulp)
- 1 cup granulated sugar
- 1/2 cup apple cider vinegar
- For flavor and spice:
- 1 small yellow onion, finely diced
- 1 tbsp fresh ginger, grated
- 1 tsp red chili flakes
- 1/2 tsp salt
Instructions
- Peel 4 large oranges, remove any thick white pith, and chop the pulp into 1/2-inch pieces—you should have about 2 cups.
- Heat a medium saucepan over medium heat and add the chopped oranges, 1 cup granulated sugar, and 1/2 cup apple cider vinegar.
- Stir continuously for 2 minutes until the sugar dissolves completely—this prevents crystallization later.
- Add 1 small finely diced yellow onion, 1 tbsp grated fresh ginger, 1 tsp red chili flakes, and 1/2 tsp salt to the pan.
- Reduce the heat to low and simmer uncovered for 25–30 minutes, stirring every 5 minutes to avoid sticking.
- Cook until the mixture thickens to a jam-like consistency and coats the back of a spoon—it should leave a clear trail when you drag a finger through it.
- Remove the pan from heat and let the chutney cool completely in the saucepan for 1 hour.
- Transfer the cooled chutney to a clean, airtight jar and refrigerate for up to 2 weeks.
Glossy and chunky, this chutney balances sweet orange with a gentle kick from ginger and chili. I love it smeared on warm brie or as a glaze for pork chops—it turns simple dinners into something special. Trust me, you’ll find excuses to spoon it onto everything!
Orange Pulp and Almond Cake
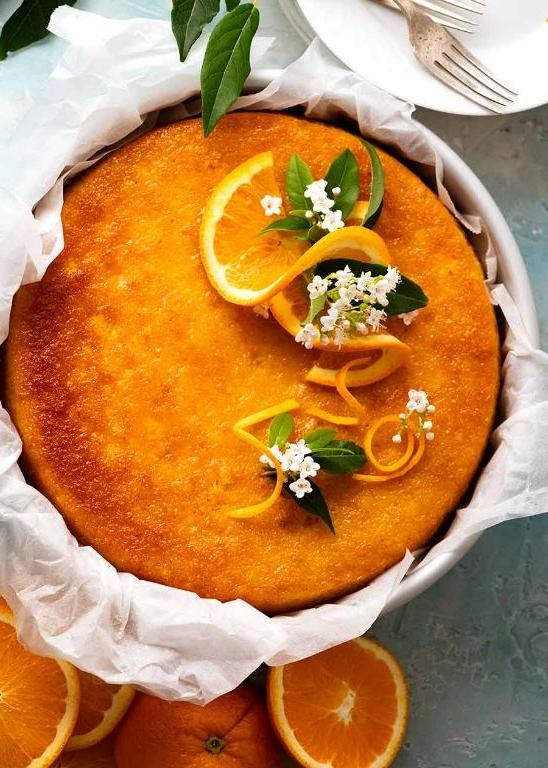
Gosh, I never know what to do with all that leftover orange pulp after juicing my morning citrus, but this cake has become my favorite solution—it’s moist, fragrant, and feels like a cozy hug in dessert form. I first tried it during a weekend baking spree when my almond stash was begging to be used, and now it’s a staple for using up those fruity bits without waste.
8
servings15
minutes40
minutesIngredients
– For the cake batter:
– 1 ½ cups all-purpose flour
– 1 cup granulated sugar
– ½ cup almond flour
– 1 tsp baking powder
– ½ tsp salt
– ¾ cup fresh orange pulp (from about 2 oranges)
– ½ cup unsalted butter, softened
– 2 large eggs
– ¼ cup whole milk
– 1 tsp vanilla extract
– For the glaze (optional):
– ½ cup powdered sugar
– 2 tbsp fresh orange juice
Instructions
1. Preheat your oven to 350°F and grease a 9-inch round cake pan.
2. In a medium bowl, whisk together 1 ½ cups all-purpose flour, 1 cup granulated sugar, ½ cup almond flour, 1 tsp baking powder, and ½ tsp salt until fully combined.
3. In a separate large bowl, use an electric mixer to beat ½ cup softened unsalted butter on medium speed for 1 minute until creamy.
4. Add 2 large eggs one at a time to the butter, beating for 30 seconds after each addition until smooth.
5. Mix in ¾ cup fresh orange pulp, ¼ cup whole milk, and 1 tsp vanilla extract on low speed for 1 minute until incorporated.
6. Gradually add the dry ingredients to the wet mixture, mixing on low speed for 2 minutes until no flour streaks remain—tip: scrape the bowl’s sides halfway through to avoid lumps.
7. Pour the batter into the prepared pan and spread it evenly with a spatula.
8. Bake at 350°F for 35–40 minutes, or until a toothpick inserted into the center comes out clean—tip: rotate the pan halfway for even browning.
9. Cool the cake in the pan on a wire rack for 15 minutes, then invert it onto the rack to cool completely.
10. For the glaze, whisk ½ cup powdered sugar and 2 tbsp fresh orange juice in a small bowl until smooth, then drizzle it over the cooled cake—tip: wait until the cake is fully cool to prevent the glaze from melting.
Just imagine slicing into this tender cake and finding those little bursts of orange pulp nestled in the crumb; it’s subtly sweet with a nutty depth from the almonds that pairs perfectly with a dollop of whipped cream or a hot cup of tea. I love serving it slightly warm for breakfast, where it feels indulgent yet wholesome, or topping it with fresh berries for a colorful twist that highlights the citrus notes.
Refreshing Orange Pulp Smoothie
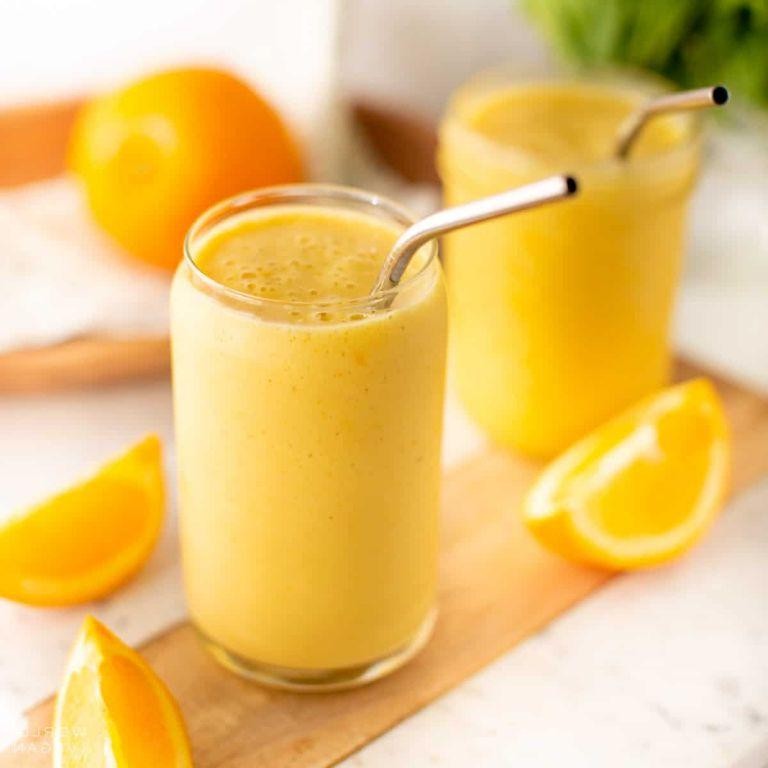
My morning routine usually involves stumbling to the kitchen half-asleep, but this vibrant orange smoothie has become my favorite wake-up call—it’s like sunshine in a glass! I started making it after a friend shared her secret for using fresh orange pulp instead of just juice, and now I’m hooked. Trust me, once you taste that bright, citrusy flavor, you’ll want to whip it up every day too.
2
servings10
minutesIngredients
- For the smoothie base:
- 2 cups fresh orange pulp (from about 4 large oranges)
- 1 cup plain Greek yogurt
- 1/2 cup ice cubes
- For sweetness and flavor:
- 2 tbsp honey
- 1 tsp vanilla extract
- 1/4 tsp ground cinnamon
Instructions
- Peel 4 large oranges and remove all white pith to avoid bitterness.
- Separate the orange segments and place them in a blender, reserving any juice that collects.
- Add 1 cup plain Greek yogurt to the blender for creaminess and protein.
- Pour in 2 tablespoons of honey for natural sweetness.
- Measure 1 teaspoon vanilla extract and add it to enhance the citrus flavor.
- Sprinkle in 1/4 teaspoon ground cinnamon for a warm, subtle spice note.
- Add 1/2 cup ice cubes to chill the smoothie without diluting it too much.
- Blend on high speed for 45-60 seconds until completely smooth and frothy.
- Check consistency—if too thick, blend in 1-2 tablespoons of reserved orange juice.
- Pour immediately into glasses and serve cold.
Every sip of this smoothie delivers a creamy, velvety texture with bursts of fresh orange that aren’t overly sweet. I love how the cinnamon adds just a hint of warmth that makes it feel cozy yet refreshing. Try serving it in chilled mason jars with a thin orange slice on the rim for a pretty brunch touch—it’s almost too beautiful to drink!
Spiced Orange Pulp Marmalade
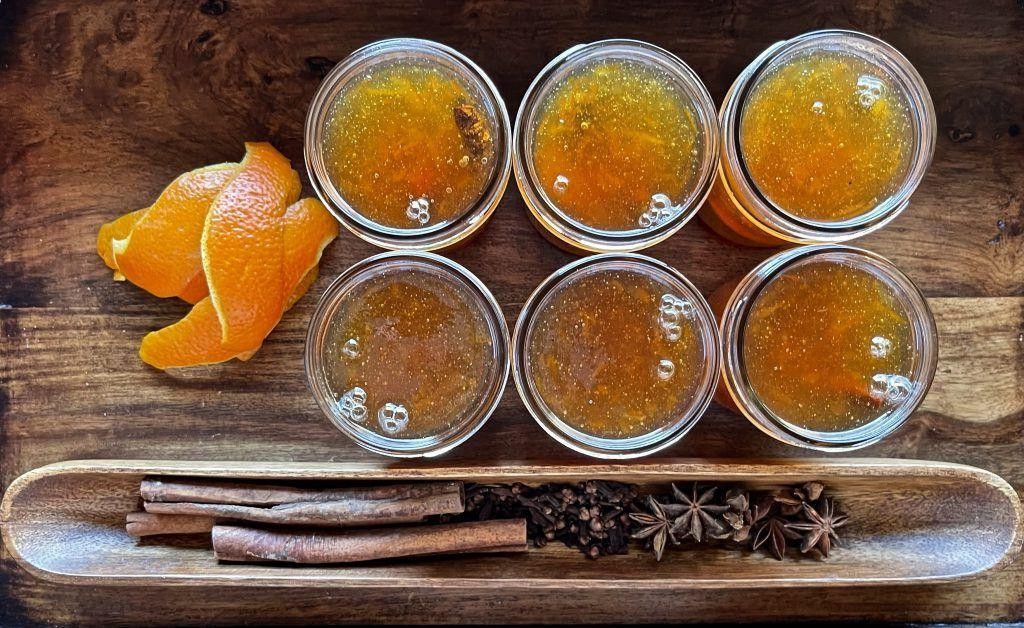
Yesterday, as I was cleaning out my fruit bowl, I found myself staring at a pile of oranges that were just past their prime for eating fresh—you know, when they’re a little too soft but still perfectly fragrant. Rather than composting them, I decided to transform those beautiful oranges into something magical: a spiced orange pulp marmalade that fills your kitchen with the most incredible citrusy-spiced aroma while it bubbles away on the stove.
1
batch40
minutesIngredients
- For the orange base:
- 4 cups fresh orange pulp (from about 6-8 medium oranges)
- 1 cup freshly squeezed orange juice
- 2 cups granulated sugar
- For the spice infusion:
- 2 cinnamon sticks
- 1 teaspoon whole cloves
- 1/2 teaspoon freshly grated nutmeg
- For setting:
- 1 packet (1.75 oz) powdered pectin
- 1 tablespoon lemon juice
Instructions
- Remove all seeds and white pith from the orange pulp, keeping only the juicy segments and membranes.
- Combine the orange pulp, orange juice, and granulated sugar in a heavy-bottomed pot.
- Place the cinnamon sticks, whole cloves, and grated nutmeg in a cheesecloth pouch and tie it securely.
- Add the spice pouch to the pot with the orange mixture.
- Bring the mixture to a boil over medium-high heat, stirring constantly with a wooden spoon.
- Reduce heat to maintain a steady simmer and cook for 20 minutes, stirring occasionally to prevent sticking.
- Remove the spice pouch using tongs, squeezing it against the side of the pot to extract all the flavorful oils.
- Sprinkle the powdered pectin evenly over the marmalade while stirring continuously.
- Add the lemon juice and continue stirring for 1 minute to fully incorporate.
- Increase heat to medium and cook for another 10 minutes until the marmalade thickens noticeably and reaches 220°F on a candy thermometer.
- Test the set by placing a small spoonful on a chilled plate—it should wrinkle when pushed with your finger.
- Remove from heat and skim off any foam from the surface with a spoon.
- Ladle the hot marmalade into sterilized jars, leaving 1/4 inch of headspace.
- Wipe the jar rims clean with a damp cloth and seal immediately with sterilized lids.
- Process the jars in a boiling water bath for 10 minutes to ensure proper sealing.
Glowing with deep amber tones and speckled with tender orange pulp, this marmalade sets up with a perfect spreadable consistency that’s neither too firm nor too runny. The warm spice notes dance beautifully with the bright citrus, creating a complex flavor that transforms ordinary toast into something special. I love swirling a spoonful into my morning yogurt or using it as a glaze for roasted chicken—it adds a sweet-spicy complexity that always impresses dinner guests.
Orange Pulp and Carrot Salad
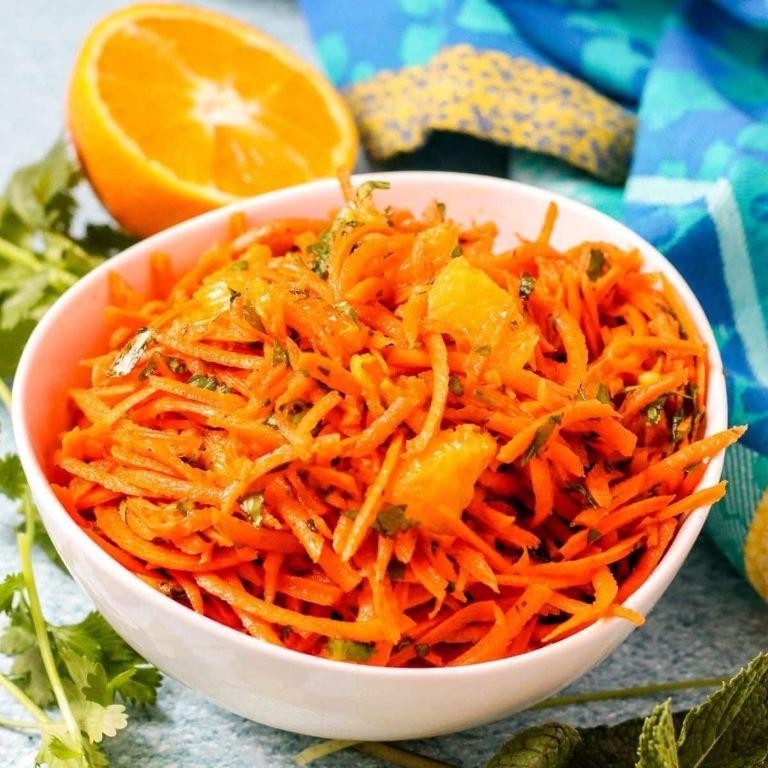
Wandering through the farmers market last weekend, I spotted the most vibrant carrots and immediately knew I had to create something fresh and zesty. This orange pulp and carrot salad has become my go-to lunch ever since my friend Sarah introduced me to the combination during our picnic last month. There’s something magical about how the citrus brightens up the earthy carrots that keeps me making this weekly.
4
servings15
minutes4
minutesIngredients
- For the salad base:
- 4 large carrots, peeled
- 2 large oranges
- For the dressing:
- 2 tablespoons olive oil
- 1 tablespoon honey
- 1 teaspoon Dijon mustard
- 1/4 teaspoon salt
- 1/8 teaspoon black pepper
- For garnish:
- 2 tablespoons chopped fresh mint
- 2 tablespoons toasted walnuts
Instructions
- Using a box grater, shred the 4 peeled carrots into a large mixing bowl.
- Cut both oranges in half and use a citrus juicer to extract all the juice into a small bowl, being careful to catch any seeds.
- Using a spoon, scrape out the remaining orange pulp from the juiced halves and add it to the shredded carrots.
- In a separate small bowl, whisk together the 2 tablespoons olive oil, 1 tablespoon honey, 1 teaspoon Dijon mustard, 1/4 teaspoon salt, and 1/8 teaspoon black pepper until fully combined.
- Pour the dressing over the carrot and orange pulp mixture, then toss thoroughly with salad tongs until everything is evenly coated.
- Chop 2 tablespoons of fresh mint leaves and sprinkle them over the salad.
- Toast 2 tablespoons of walnuts in a dry skillet over medium heat for 3-4 minutes, watching carefully until they become fragrant and lightly browned.
- Roughly chop the toasted walnuts and scatter them over the salad as the final garnish.
Nothing beats the satisfying crunch of fresh carrots against the juicy burst of orange pulp in every bite. The honey dressing creates this beautiful sweet-tangy balance that makes the salad feel both refreshing and substantial. I love serving it alongside grilled chicken or stuffing it into pita pockets for a quick, portable lunch that never fails to brighten my day.
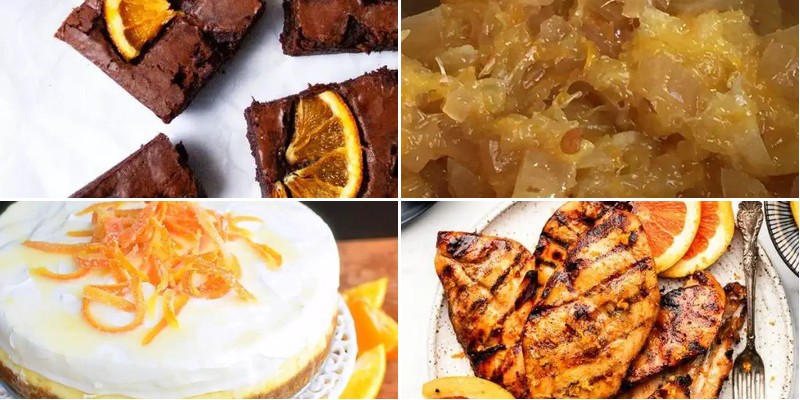
Chocolate Orange Pulp Brownies
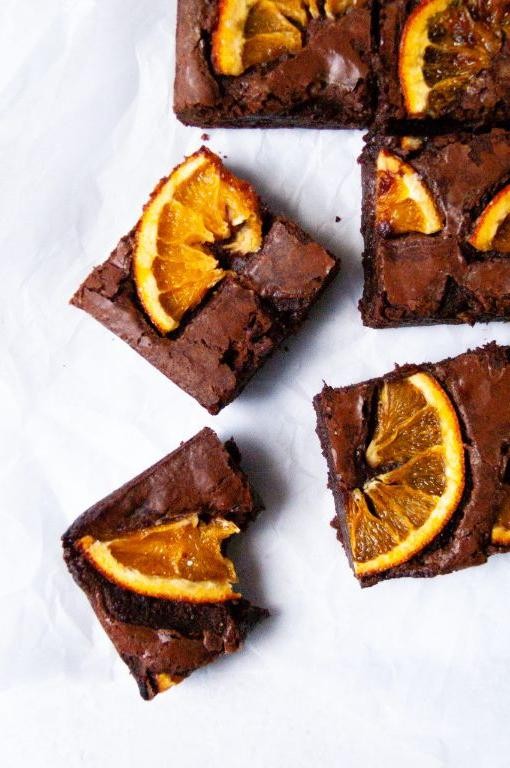
Vividly remembering my grandmother’s kitchen during holiday seasons always brings back the aroma of chocolate and citrus mingling together. I’ve taken her classic brownie recipe and given it a modern twist by incorporating fresh orange pulp, creating these decadent Chocolate Orange Pulp Brownies that fill my home with the same comforting scents. The combination might sound unusual, but trust me—the bright citrus notes cut through the rich chocolate in the most magical way.
16
portions20
minutes30
minutesIngredients
For the Brownie Batter:
- 1 cup unsalted butter
- 1 ½ cups granulated sugar
- ¾ cup cocoa powder
- 3 large eggs
- 1 teaspoon vanilla extract
- ½ cup all-purpose flour
- ¼ teaspoon salt
For the Orange Component:
- ½ cup fresh orange pulp (from 2 medium oranges)
- 1 tablespoon orange zest
Instructions
- Preheat your oven to 350°F and line an 8×8 inch baking pan with parchment paper, leaving some overhang on two sides for easy removal.
- Melt 1 cup unsalted butter in a medium saucepan over low heat, swirling occasionally until completely liquid.
- Remove the saucepan from heat and whisk in 1 ½ cups granulated sugar until the mixture looks glossy and the sugar begins to dissolve.
- Add ¾ cup cocoa powder to the butter-sugar mixture and whisk vigorously until smooth and no dry spots remain.
- Beat in 3 large eggs one at a time, making sure each egg is fully incorporated before adding the next.
- Stir in 1 teaspoon vanilla extract and ½ cup fresh orange pulp until evenly distributed throughout the batter.
- Gently fold in ½ cup all-purpose flour and ¼ teaspoon salt using a spatula, being careful not to overmix—just until no white streaks remain.
- Fold in 1 tablespoon orange zest, distributing it evenly while preserving those bright citrus oils.
- Pour the batter into your prepared pan and use a spatula to spread it into an even layer, reaching all corners.
- Bake at 350°F for 25-30 minutes, until the edges are set and a toothpick inserted about 1 inch from the edge comes out with moist crumbs but not wet batter.
- Transfer the pan to a wire rack and let the brownies cool completely in the pan for at least 2 hours before slicing.
Just out of the oven, these brownies have the most incredible fudgy texture with little bursts of bright orange throughout. The citrus pulp keeps them incredibly moist while adding a refreshing contrast to the deep chocolate flavor. I love serving them slightly warmed with a scoop of vanilla ice cream, or cutting them into small squares for an elegant dessert platter at dinner parties.
Orange Pulp Marinade for Grilled Chicken
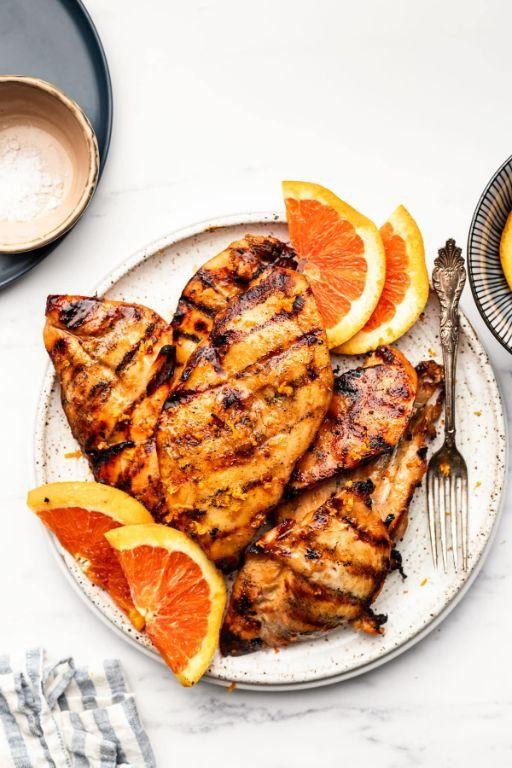
Sometimes the best recipes come from kitchen experiments gone right—like that time I had leftover orange pulp from juicing and decided to marinate chicken with it. Since then, this orange pulp marinade has become my go-to for grilled chicken, especially during summer cookouts when I want something bright and citrusy without being overly sweet. I love how it fills the kitchen with this amazing zesty aroma that reminds me of sunny California orchards.
2
servings15
minutes14
minutesIngredients
For the marinade:
– 1 cup fresh orange pulp (from about 3 medium oranges)
– 1/4 cup olive oil
– 3 tbsp soy sauce
– 2 tbsp honey
– 3 garlic cloves, minced
– 1 tsp smoked paprika
– 1/2 tsp black pepper
For grilling:
– 4 boneless, skinless chicken breasts (about 1.5 lbs total)
– Cooking spray
Instructions
1. Combine 1 cup fresh orange pulp, 1/4 cup olive oil, 3 tbsp soy sauce, 2 tbsp honey, 3 minced garlic cloves, 1 tsp smoked paprika, and 1/2 tsp black pepper in a medium bowl.
2. Whisk the marinade ingredients vigorously for 1 minute until fully emulsified and the honey is completely dissolved.
3. Place 4 chicken breasts in a large resealable plastic bag or shallow baking dish.
4. Pour the marinade over the chicken, ensuring all pieces are completely coated.
5. Seal the bag or cover the dish with plastic wrap and refrigerate for at least 4 hours or up to 8 hours for maximum flavor penetration.
6. Preheat your grill to medium-high heat (400°F) and lightly coat the grates with cooking spray to prevent sticking.
7. Remove the chicken from the marinade, letting excess drip off while reserving the used marinade for basting.
8. Place the chicken breasts on the hot grill and cook for 6-7 minutes until you see clear grill marks and the edges begin to turn opaque.
9. Flip the chicken using tongs and brush the tops with reserved marinade.
10. Continue grilling for another 6-7 minutes until the internal temperature reaches 165°F when tested with an instant-read thermometer.
11. Transfer the grilled chicken to a clean plate and let it rest for 5 minutes before slicing to allow juices to redistribute.
Done right, this chicken develops a beautiful caramelized crust with tender, juicy interior that practically melts in your mouth. The orange pulp creates these little sweet-tart bursts throughout each bite, while the smokiness from the paprika balances everything perfectly. I love serving it sliced over a bed of quinoa with grilled asparagus or shredding it for incredible citrus-kissed tacos with avocado crema.
Light Orange Pulp Cheesecake
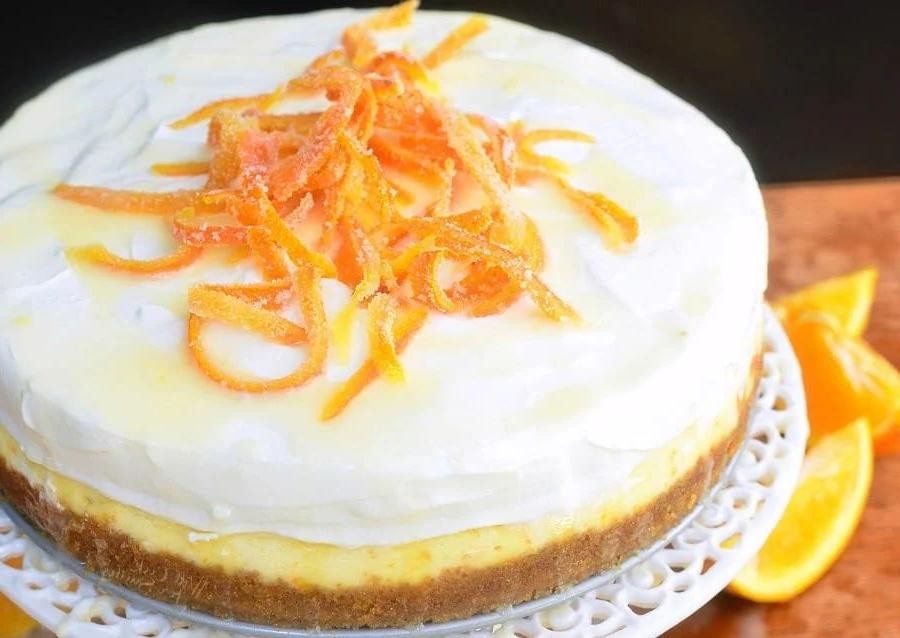
Haven’t we all had those moments when we crave something sweet but want to keep it light? I discovered this Light Orange Pulp Cheesecake during a summer picnic last year when my friend brought over the most refreshing dessert that didn’t leave us feeling heavy. Now it’s my go-to when I want something elegant yet effortless to share with guests.
8
servings25
minutes50
minutesIngredients
For the crust:
- 1 ½ cups graham cracker crumbs
- ¼ cup granulated sugar
- 6 tablespoons unsalted butter, melted
For the filling:
- 16 ounces cream cheese, softened
- ½ cup granulated sugar
- 2 large eggs
- 1 teaspoon vanilla extract
- ¾ cup fresh orange pulp
- 1 tablespoon orange zest
Instructions
- Preheat your oven to 325°F.
- Combine 1 ½ cups graham cracker crumbs, ¼ cup granulated sugar, and 6 tablespoons melted unsalted butter in a medium bowl. Tip: Use your fingers to press the crust mixture firmly into the pan—this creates the perfect compact base that won’t crumble when sliced.
- Press the crust mixture evenly into the bottom of a 9-inch springform pan.
- Bake the crust for 10 minutes at 325°F until lightly golden, then remove from oven and let cool completely.
- In a large mixing bowl, beat 16 ounces softened cream cheese with ½ cup granulated sugar until smooth and creamy, about 2 minutes.
- Add 2 large eggs one at a time, beating well after each addition until fully incorporated.
- Mix in 1 teaspoon vanilla extract, ¾ cup fresh orange pulp, and 1 tablespoon orange zest until just combined. Tip: Don’t overmix once you add the orange pulp—this keeps the texture light rather than dense.
- Pour the filling over the cooled crust and spread evenly with a spatula.
- Bake at 325°F for 35-40 minutes until the edges are set but the center still jiggles slightly when gently shaken. Tip: The jiggle test is key—the center will firm up as it cools, preventing cracks from overbaking.
- Turn off the oven, crack the door open, and let the cheesecake cool inside for 1 hour to prevent sudden temperature changes.
- Refrigerate for at least 4 hours or overnight before serving.
Unbelievably creamy with bright citrus notes that cut through the richness, this cheesecake has a texture that’s both smooth and lightly textured from the fresh pulp. I love serving it chilled with extra orange zest sprinkled on top or alongside fresh berries for a color contrast that always impresses at dinner parties.
Orange Pulp and Ginger Tea
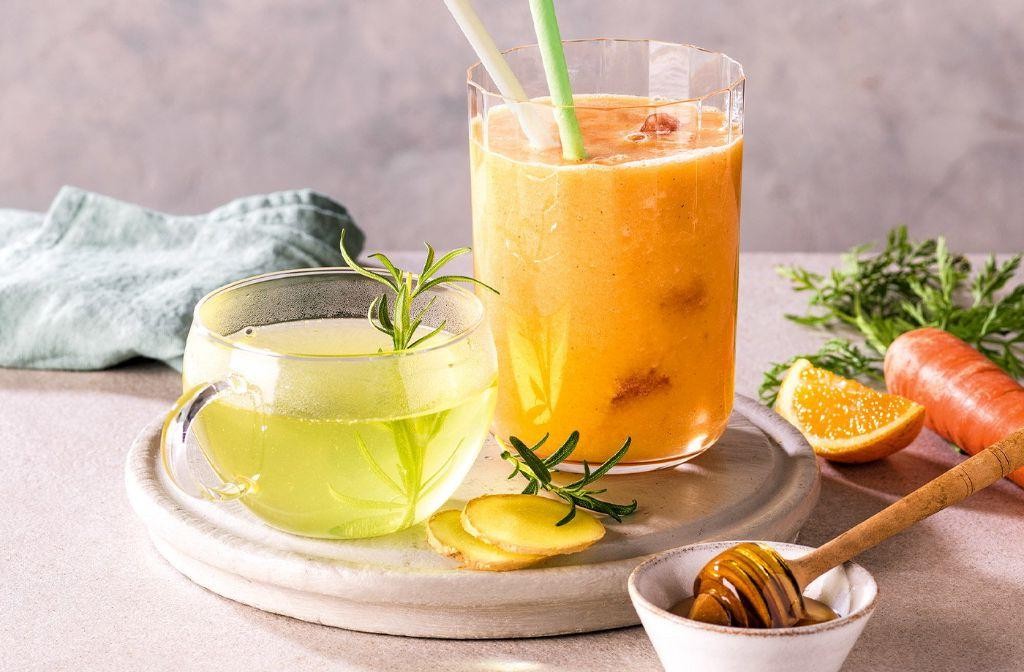
Gathering around my grandmother’s kitchen table on chilly autumn afternoons always meant one thing – the comforting scent of citrus and spice filling the air. I’ve adapted her traditional recipe over the years, adding my own twist with fresh orange pulp that makes this tea feel like a warm hug in a mug. There’s something magical about how the ginger’s warmth and orange’s brightness come together to soothe both body and soul.
4
servings15
minutes15
minutesIngredients
For the orange base:
– 2 large oranges
– 1/4 cup granulated sugar
For the tea infusion:
– 4 cups water
– 3-inch piece fresh ginger
– 2 tablespoons honey
Instructions
1. Wash both oranges thoroughly under running water to remove any surface dirt or wax.
2. Cut the oranges in half crosswise and squeeze out all the juice into a small bowl, reserving the pulp-filled halves.
3. Use a spoon to scrape out the remaining pulp and membranes from each orange half, collecting about 1/2 cup of orange pulp.
4. Combine the orange pulp and 1/4 cup granulated sugar in a small saucepan.
5. Cook the orange pulp mixture over medium heat for 5 minutes, stirring constantly until the sugar dissolves completely and the pulp softens.
6. While the pulp cooks, peel the 3-inch ginger piece using the edge of a spoon to easily remove the skin.
7. Thinly slice the peeled ginger into approximately 15-20 coins about 1/8-inch thick.
8. Bring 4 cups of water to a rolling boil in a medium saucepan over high heat.
9. Add the sliced ginger to the boiling water and reduce heat to maintain a gentle simmer.
10. Simmer the ginger in water for 10 minutes to fully extract its flavor and spicy notes.
11. Stir the cooked orange pulp mixture into the ginger tea.
12. Remove the saucepan from heat and stir in 2 tablespoons of honey until fully dissolved.
13. Let the tea steep off heat for 5 minutes to allow the flavors to meld together.
14. Strain the tea through a fine-mesh sieve into serving mugs, pressing gently on the solids to extract all the liquid.
Just brewed, this tea delivers a beautiful balance of sweet orange brightness and ginger’s gentle heat that lingers pleasantly on the palate. The strained version gives you a clear, elegant beverage, but I sometimes leave the pulp in for extra texture and fiber. Try serving it over ice with a sprig of fresh mint for a refreshing twist, or add a cinnamon stick stirrer during colder months for extra warmth.
Conclusion
Remarkable how versatile orange pulp can be! From breakfast treats to savory dinners, these 31 recipes showcase its incredible culinary potential. We hope you feel inspired to try some of these delightful creations in your own kitchen. Don’t forget to share your favorites in the comments below and pin this article to your Pinterest boards for future cooking adventures!


