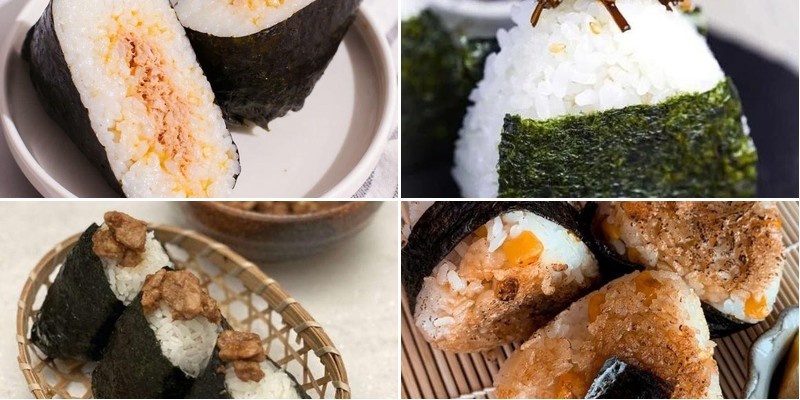
Looking for a fun twist on quick dinners? Onigiri, those delightful Japanese rice balls, are about to become your new kitchen obsession. They’re endlessly customizable, perfect for packed lunches, picnics, or a cozy snack. We’ve gathered 19 mouthwatering filling ideas that will take your rice balls from simple to spectacular. Get ready to roll up your sleeves and discover your next favorite flavor combination!
Spicy Tuna and Mayo Onigiri
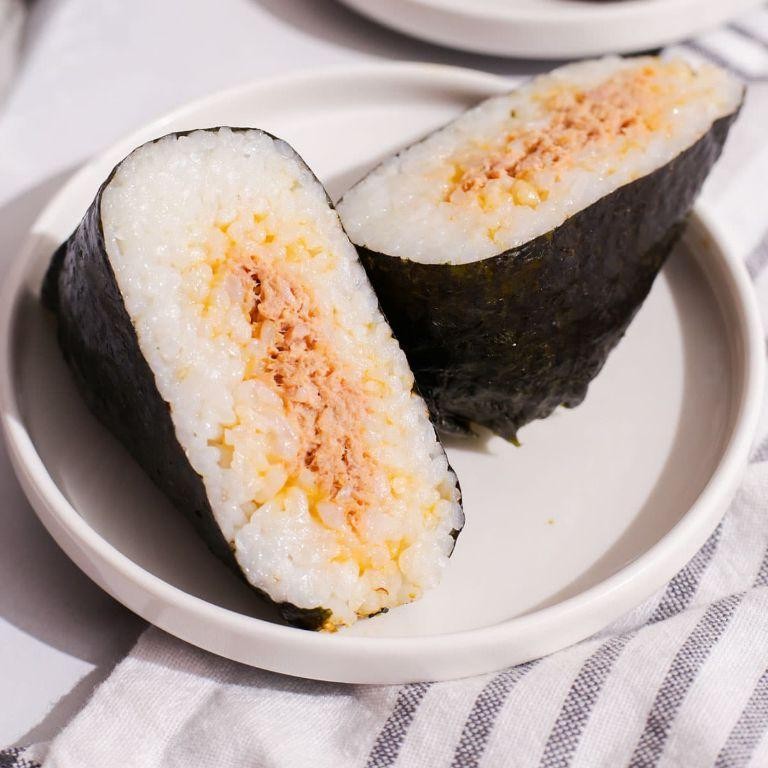
Tired of boring lunch options? Transform your midday meal with these flavor-packed rice balls. They combine spicy tuna with creamy mayo in a handheld package that’s perfect for on-the-go eating.
5
portions20
minutes25
minutesIngredients
– 2 cups sushi rice
– 2 1/4 cups water
– 1/4 cup rice vinegar
– 2 tbsp sugar
– 1 tsp salt
– 2 cans tuna in water
– 1/4 cup mayonnaise
– 2 tbsp sriracha
– 1 tbsp soy sauce
– 4 sheets nori
Instructions
1. Rinse 2 cups sushi rice under cold running water until water runs clear.
2. Combine rinsed rice and 2 1/4 cups water in a rice cooker and cook according to manufacturer’s instructions.
3. Mix 1/4 cup rice vinegar, 2 tbsp sugar, and 1 tsp salt in a small bowl until dissolved.
4. Transfer cooked rice to a large bowl and pour vinegar mixture over it.
5. Fold vinegar mixture into rice using a cutting motion to avoid crushing grains.
6. Let rice cool to room temperature, about 20 minutes.
7. Drain 2 cans tuna thoroughly and place in a medium bowl.
8. Add 1/4 cup mayonnaise, 2 tbsp sriracha, and 1 tbsp soy sauce to tuna.
9. Mix tuna and sauce until fully combined.
10. Wet your hands with water to prevent sticking.
11. Take 1/3 cup rice and form a small well in the center.
12. Place 2 tbsp tuna mixture into the rice well.
13. Enclose tuna completely with rice, forming a triangular shape.
14. Cut 4 nori sheets into 1-inch wide strips.
15. Wrap one nori strip around the base of each onigiri.
16. Repeat with remaining rice and filling.
17. Serve immediately or refrigerate for up to 2 hours.
Enjoy the contrast between the cool, seasoned rice and the spicy tuna filling. These portable treats stay fresh for hours, making them ideal for packed lunches or quick snacks. Experiment with different fillings like salmon or vegetables for endless variations.
Grilled Salmon with Soy Sauce Onigiri
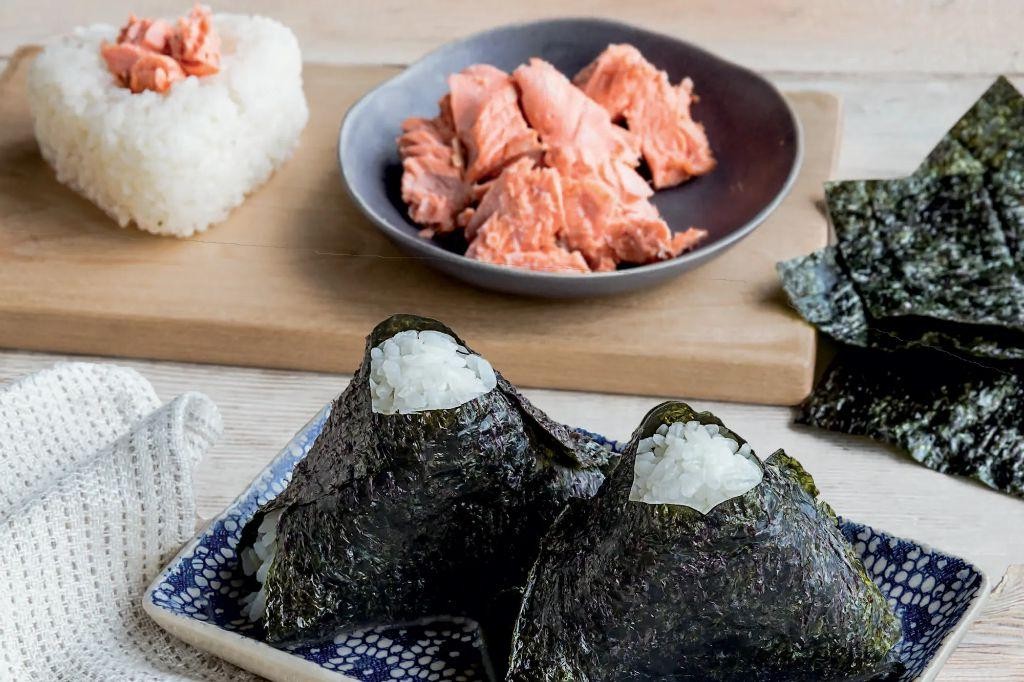
Grilled Salmon with Soy Sauce Onigiri
Get ready to level up your dinner game with this Japanese-inspired fusion dish. Grilled salmon meets handheld rice perfection in a meal that’s bold, savory, and totally Instagram-worthy.
2
onigiri20
minutes20
minutesIngredients
– 2 salmon fillets (6 oz each)
– 1 cup sushi rice
– 1 ¼ cups water
– 2 tbsp soy sauce
– 1 tbsp rice vinegar
– 1 tsp sugar
– 1 tsp sesame oil
– ½ tsp salt
– 2 sheets nori
– 1 tbsp vegetable oil
Instructions
1. Rinse 1 cup sushi rice under cold water until water runs clear.
2. Combine rinsed rice and 1 ¼ cups water in a rice cooker, then cook according to manufacturer instructions. (Tip: Let rice sit for 10 minutes after cooking for ideal texture.)
3. In a small bowl, whisk together 2 tbsp soy sauce, 1 tbsp rice vinegar, 1 tsp sugar, and ½ tsp salt until sugar dissolves.
4. Transfer hot cooked rice to a large bowl and gently fold in the soy sauce mixture until evenly distributed.
5. Wet your hands with water, then shape ½ cup rice mixture into a tight triangle, repeating to form 4 onigiri total.
6. Cut 2 sheets nori into 1-inch wide strips and wrap one strip around the base of each onigiri.
7. Pat 2 salmon fillets dry with paper towels and brush both sides with 1 tsp sesame oil.
8. Heat a grill pan over medium-high heat and brush with 1 tbsp vegetable oil.
9. Place salmon skin-side down and grill for 4–5 minutes until skin is crispy. (Tip: Don’t move the salmon for the first 3 minutes to get a perfect sear.)
10. Flip salmon and grill for another 3–4 minutes until internal temperature reaches 145°F.
11. Remove salmon from heat and let rest for 2 minutes before flaking with a fork.
12. Gently press flaked salmon into the center of each onigiri before serving. (Tip: Serve immediately while nori is crisp for the best texture contrast.)
Buttery salmon flakes melt into the savory rice, creating pockets of umami in every bite. The crisp nori wrapper adds a satisfying crunch that plays perfectly against the tender rice. Try serving these with pickled ginger and a sprinkle of sesame seeds for an extra flavor boost.
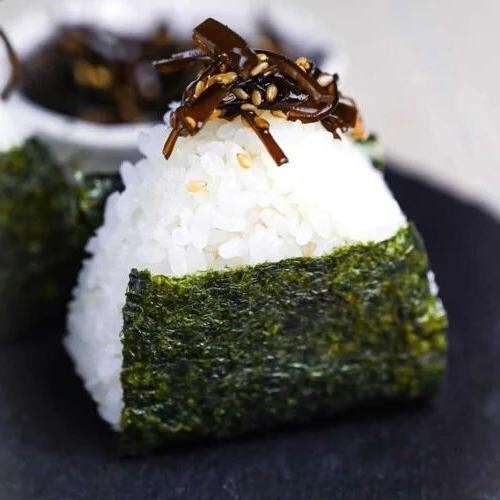
Pickled Plum and Shiso Onigiri
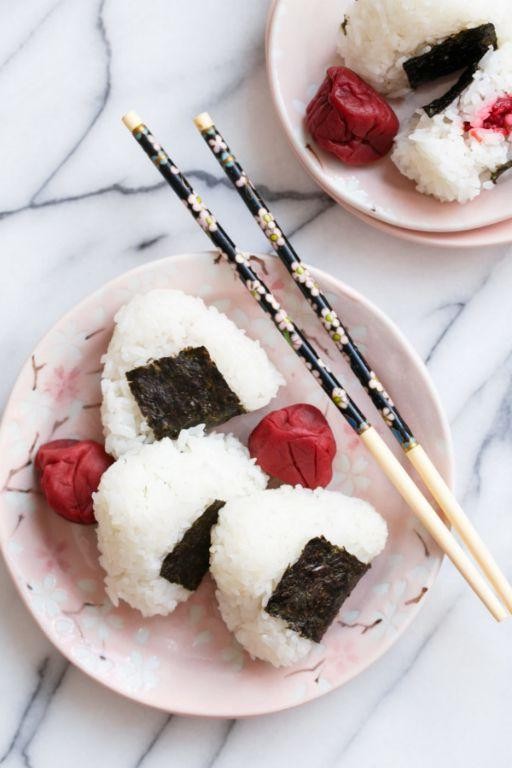
Jazz up your lunch game with these umami-packed rice balls. Pickled plum and shiso create a flavor explosion that’ll make your taste buds dance. Perfect for meal prep or on-the-go snacking.
8
onigiri15
minutes20
minutesIngredients
– 2 cups Japanese short-grain rice
– 2 ¼ cups water
– 1 tsp salt
– 4 pickled plums (umeboshi)
– 8 fresh shiso leaves
– 2 sheets nori
Instructions
1. Rinse 2 cups Japanese short-grain rice under cold running water until water runs clear.
2. Combine rinsed rice and 2 ¼ cups water in a rice cooker and cook according to manufacturer’s instructions.
3. Transfer cooked rice to a large bowl and let cool for 10 minutes until warm but not steaming hot.
4. Add 1 tsp salt to the warm rice and mix gently with a rice paddle using cutting motions.
5. Wet your hands with cold water to prevent sticking before handling rice.
6. Take ½ cup of rice and form a small well in the center with your thumb.
7. Place ½ pickled plum and 1 shiso leaf in the well.
8. Enclose the filling by gently shaping rice into a compact triangle about 1-inch thick.
9. Repeat steps 5-8 to make 8 total onigiri.
10. Cut 2 sheets nori into 1-inch wide strips using kitchen scissors.
11. Wrap one nori strip around the base of each onigiri, leaving the top exposed.
12. Arrange finished onigiri on a plate and serve immediately or refrigerate for up to 2 days.
Each bite delivers a perfect balance of tart plum against fragrant shiso. The slightly chewy rice contrasts beautifully with the crisp nori wrapper. Try pairing with miso soup or packing in bento boxes for a portable flavor adventure.
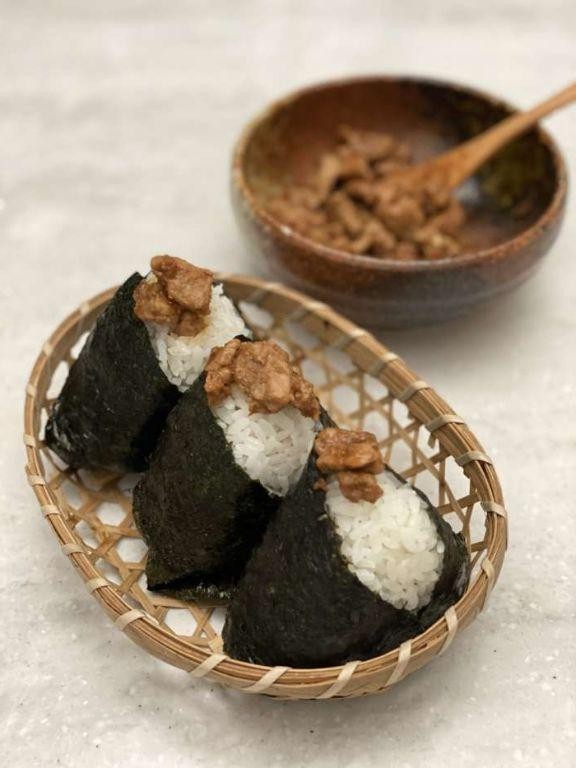
Teriyaki Chicken Onigiri
Ditch the boring lunch routine with these handheld flavor bombs. Teriyaki chicken onigiri delivers savory-sweet satisfaction in every portable bite. Perfect for meal prep warriors and snack enthusiasts alike.
6
portions20
minutes25
minutesIngredients
- 2 cups sushi rice
- 2 cups water
- 1 lb boneless chicken thighs
- 1/4 cup soy sauce
- 2 tbsp mirin
- 2 tbsp brown sugar
- 1 tsp grated ginger
- 1 tsp vegetable oil
- 2 sheets nori
- 1 tsp sesame seeds
Instructions
- Rinse 2 cups sushi rice under cold water until water runs clear.
- Combine rinsed rice and 2 cups water in a rice cooker, then cook according to manufacturer instructions.
- Cut 1 lb boneless chicken thighs into 1/2-inch cubes while rice cooks.
- Heat 1 tsp vegetable oil in a skillet over medium-high heat until shimmering.
- Add chicken cubes to the hot skillet, arranging them in a single layer.
- Cook chicken for 6-8 minutes, turning pieces until all sides develop golden-brown sear marks.
- Whisk together 1/4 cup soy sauce, 2 tbsp mirin, 2 tbsp brown sugar, and 1 tsp grated ginger in a small bowl.
- Pour sauce mixture over the cooked chicken in the skillet.
- Simmer sauce for 3-4 minutes, stirring constantly until it thickens and coats the chicken evenly.
- Transfer cooked rice to a large bowl and let it cool for 5 minutes until handleable.
- Wet your hands with cool water to prevent rice from sticking to your palms.
- Take 1/3 cup of rice and form it into a triangle shape, creating an indentation in the center.
- Place 2 tbsp of teriyaki chicken mixture into the rice indentation.
- Cover the filling with another 1/4 cup of rice, sealing the edges completely.
- Cut 2 sheets nori into 1-inch wide strips using kitchen scissors.
- Wrap one nori strip around the base of each rice triangle, creating a handle.
- Sprinkle 1 tsp sesame seeds over the completed onigiri for visual appeal and nutty flavor.
Master the art of portable perfection with these teriyaki chicken onigiri. The sticky rice creates a satisfying chew against the tender, glazed chicken filling. Serve them warm for immediate enjoyment or pack them chilled for a lunchbox surprise that stays perfectly textured for hours.
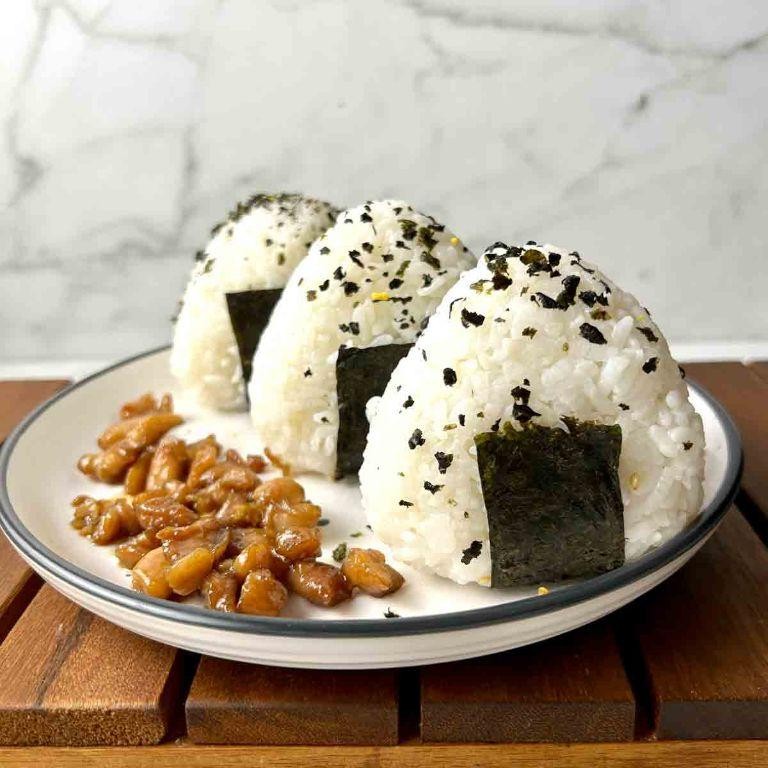
Kombu Seaweed and Sesame Onigiri
Huddle up, flavor chasers! These kombu seaweed and sesame onigiri are your new grab-and-go obsession. Pack them for lunch, picnics, or late-night cravings—they’re savory, portable perfection.
6
portions10
minutes20
minutesIngredients
– 2 cups short-grain white rice
– 2 cups water
– 1 sheet kombu seaweed (4×4 inches)
– 2 tbsp toasted sesame seeds
– 1 tbsp soy sauce
– 1 tsp rice vinegar
– 1/2 tsp salt
– 1 tbsp sesame oil
Instructions
1. Rinse 2 cups short-grain white rice under cold running water until the water runs clear.
2. Combine the rinsed rice, 2 cups water, and 1 sheet kombu seaweed in a rice cooker. Cook on the standard white rice setting.
3. Remove the cooked rice from the rice cooker and discard the kombu sheet.
4. Transfer the hot rice to a large bowl and sprinkle with 1/2 tsp salt, 1 tbsp rice vinegar, and 1 tbsp soy sauce.
5. Use a rice paddle to fold the seasonings into the rice with cutting motions to avoid mashing the grains.
6. Toast 2 tbsp sesame seeds in a dry skillet over medium heat for 2 minutes, shaking the pan constantly until golden and fragrant.
7. Fold the toasted sesame seeds into the seasoned rice until evenly distributed.
8. Wet your hands with cool water to prevent sticking, then rub 1 tbsp sesame oil between your palms.
9. Scoop 1/3 cup of rice into your damp hands and press firmly to form a compact triangle shape.
10. Repeat with the remaining rice, rewetting and oiling your hands between each onigiri.
11. Serve immediately or wrap tightly in plastic wrap for storage.
Grab these savory triangles and notice the subtle umami from the kombu, the nutty crunch of sesame, and the perfect sticky-yet-firm texture. Tuck one into a bento box with pickled ginger, or pan-fry them until crispy for a next-level treat.
Shrimp Tempura Onigiri
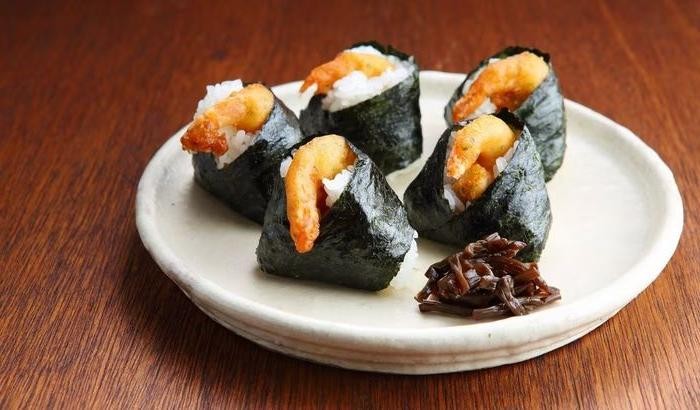
A crispy, handheld twist on two Japanese classics that’ll have your taste buds doing backflips. Imagine golden shrimp tempura wrapped in perfectly seasoned rice triangles—crunchy outside, tender inside. Seriously addictive snack energy that’s perfect for lunchboxes or party platters.
8
portions25
minutes30
minutesIngredients
– 1 cup sushi rice
– 1 ¼ cups water
– 2 tbsp rice vinegar
– 1 tsp sugar
– ½ tsp salt
– 8 large shrimp, peeled and deveined
– ¾ cup all-purpose flour
– ¼ cup cornstarch
– 1 cup ice-cold water
– 1 large egg
– 4 cups vegetable oil
– 2 tbsp soy sauce
– 1 sheet nori, cut into 8 strips
Instructions
1. Rinse 1 cup sushi rice under cold water until water runs clear.
2. Combine rinsed rice with 1 ¼ cups water in a saucepan and bring to a boil over high heat.
3. Reduce heat to low, cover, and simmer for 18 minutes.
4. Remove rice from heat and let stand, covered, for 10 minutes.
5. Heat 2 tbsp rice vinegar, 1 tsp sugar, and ½ tsp salt in a small saucepan over low heat until dissolved.
6. Transfer cooked rice to a large bowl and gently fold in vinegar mixture with a rice paddle.
7. Let rice cool to room temperature, about 20 minutes.
8. Pat 8 large shrimp completely dry with paper towels.
9. Make three shallow cuts on the underside of each shrimp to prevent curling.
10. Heat 4 cups vegetable oil in a heavy pot to 350°F.
11. Whisk ¾ cup all-purpose flour, ¼ cup cornstarch, 1 cup ice-cold water, and 1 large egg until just combined—lumps are fine for crispier tempura.
12. Dip each shrimp in the batter, letting excess drip off.
13. Fry shrimp in batches for 2-3 minutes until golden brown and crispy.
14. Drain tempura on a wire rack set over a baking sheet.
15. Wet your hands with water to prevent sticking and grab a handful of rice.
16. Flatten rice in your palm and place one tempura shrimp in the center.
17. Wrap rice around shrimp, forming a tight triangle shape.
18. Wrap one nori strip around the base of each onigiri.
19. Brush each onigiri lightly with 2 tbsp soy sauce using a pastry brush.
Just wait until you bite into that satisfying crunch giving way to fluffy rice and juicy shrimp. The nori adds that essential salty-seaweed flavor that ties everything together. Serve these warm with extra soy sauce for dipping, or pack them cold for a picnic—they travel surprisingly well!
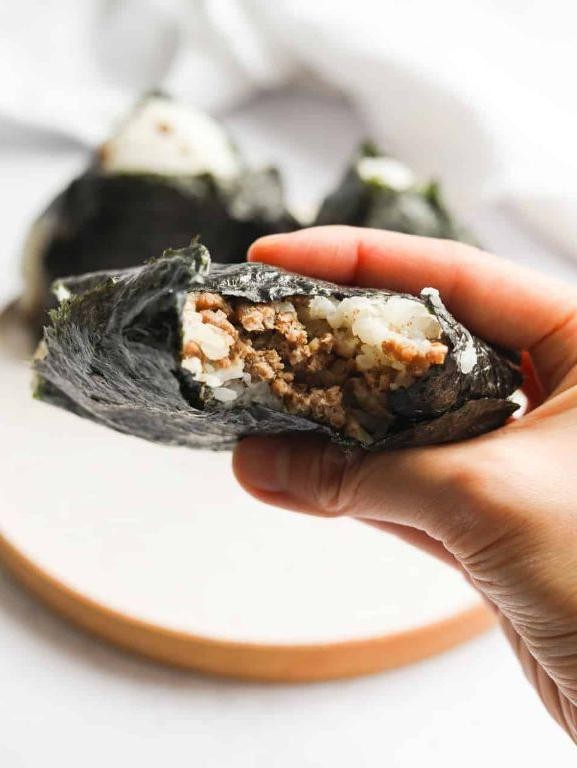
Savory Miso Pork Onigiri
Craving something savory that’s perfect for meal prep? These miso pork onigiri deliver umami-packed flavor in every bite—no fancy skills required, just pure comfort food magic.
8
onigiri15
minutes28
minutesIngredients
- 1 cup sushi rice
- 1 ¼ cups water
- 1 lb ground pork
- 3 tbsp white miso paste
- 2 tbsp soy sauce
- 1 tbsp rice vinegar
- 1 tsp sesame oil
- 2 sheets nori
- ¼ tsp salt
Instructions
- Rinse 1 cup sushi rice under cold water until water runs clear.
- Combine rinsed rice with 1 ¼ cups water in a medium saucepan.
- Bring rice to a boil over high heat, then immediately reduce heat to low.
- Cover saucepan and simmer rice for 18 minutes—don’t peek during cooking to prevent steam escape.
- Remove rice from heat and let stand, covered, for 10 minutes.
- Transfer cooked rice to a large bowl and sprinkle with 1 tbsp rice vinegar and ¼ tsp salt.
- Gently fold vinegar mixture into rice using a cutting motion to avoid crushing grains.
- Heat a large skillet over medium-high heat and add 1 tsp sesame oil.
- Add 1 lb ground pork to the hot skillet, breaking it up with a spatula.
- Cook pork for 6-8 minutes, stirring frequently, until no pink remains.
- Reduce heat to medium and stir in 3 tbsp white miso paste and 2 tbsp soy sauce.
- Cook pork mixture for 2 more minutes until miso is fully incorporated and fragrant.
- Let pork mixture cool for 5 minutes before handling—this prevents burned fingers when shaping.
- Wet your hands with cool water to prevent rice from sticking.
- Take ¼ cup cooked rice and flatten it in your palm.
- Place 1 tbsp pork filling in the center of the rice.
- Cup your hand to enclose filling with rice, forming a compact triangle shape.
- Cut 2 nori sheets into 1-inch wide strips using kitchen scissors.
- Wrap one nori strip around the base of each onigiri, shiny side out for better presentation.
- Serve immediately or store in airtight container for up to 3 days.
Make these ahead for grab-and-go lunches—the chewy rice contrasts beautifully with the savory pork filling. Miso brings deep umami that pairs perfectly with the crisp nori wrapper. Try drizzling with spicy mayo or packing with pickled ginger for extra zing.
Avocado and Smoked Salmon Onigiri
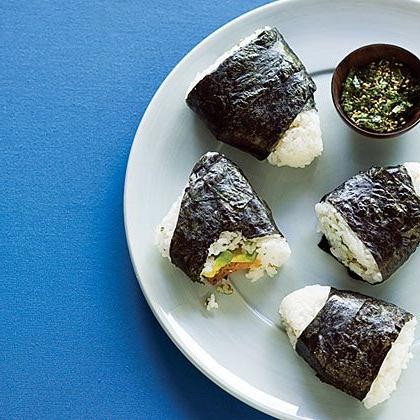
Craving something beyond basic sushi rolls? These avocado and smoked salmon onigiri deliver restaurant-quality flavors in your own kitchen. Combine creamy avocado with smoky salmon for a handheld delight that’s perfect for picnics or packed lunches.
8
onigiri25
minutes28
minutesIngredients
– 2 cups sushi rice
– 2 ¼ cups water
– ¼ cup rice vinegar
– 2 tbsp sugar
– 1 tsp salt
– 1 ripe avocado
– 4 oz smoked salmon
– 2 sheets nori
– 1 tbsp sesame seeds
– 2 tsp soy sauce
Instructions
1. Rinse 2 cups sushi rice under cold water until water runs clear.
2. Combine rice with 2 ¼ cups water in a saucepan and bring to a boil over high heat.
3. Reduce heat to low, cover, and simmer for 18 minutes.
4. Remove from heat and let stand covered for 10 minutes.
5. Heat ¼ cup rice vinegar, 2 tbsp sugar, and 1 tsp salt in a small saucepan over medium heat until dissolved.
6. Transfer cooked rice to a large bowl and gently fold in vinegar mixture with a rice paddle.
7. Cool rice to room temperature by fanning while stirring.
8. Cut 1 ripe avocado into ½-inch cubes and toss with 2 tsp soy sauce.
9. Chop 4 oz smoked salmon into bite-sized pieces.
10. Wet your hands with water to prevent sticking and take ⅓ cup rice.
11. Flatten rice in your palm and create a small indentation in the center.
12. Fill indentation with 1 tbsp avocado and 1 tbsp smoked salmon.
13. Enclose filling by molding rice into a compact triangle shape.
14. Cut 2 sheets nori into 1-inch wide strips.
15. Wrap one nori strip around the base of each onigiri.
16. Sprinkle 1 tbsp sesame seeds over completed onigiri.
17. Serve immediately or refrigerate for up to 2 hours. Lightly crisp nori contrasts with the tender rice interior, while the avocado adds creamy richness against the salmon’s smoky saltiness. Layer these triangles in a bento box with pickled ginger or pack them for a beach day—they travel beautifully without losing their satisfying texture.
Sweet Korean BBQ Beef (Bulgogi) Onigiri
Ready to level up your lunch game? These Korean BBQ beef onigiri combine savory-sweet bulgogi with perfectly sticky rice. Grab your rice paddle—this fusion snack is about to become your new obsession.
8
onigiri40
minutes8
minutesIngredients
- 1 cup short-grain white rice
- 1 ¼ cups water
- 1 lb ribeye steak, thinly sliced
- ¼ cup soy sauce
- 2 tbsp brown sugar
- 1 tbsp sesame oil
- 2 cloves garlic, minced
- 1 tsp grated ginger
- 2 green onions, chopped
- 1 tbsp vegetable oil
- 2 sheets nori, cut into strips
Instructions
- Rinse 1 cup short-grain white rice under cold water until water runs clear.
- Combine rinsed rice and 1 ¼ cups water in a rice cooker and cook according to manufacturer instructions.
- Whisk together ¼ cup soy sauce, 2 tbsp brown sugar, 1 tbsp sesame oil, 2 minced garlic cloves, and 1 tsp grated ginger in a bowl.
- Add 1 lb thinly sliced ribeye steak to the marinade, ensuring all pieces are coated.
- Marinate steak at room temperature for 30 minutes—this tenderizes the meat quickly without refrigeration.
- Heat 1 tbsp vegetable oil in a large skillet over medium-high heat until shimmering.
- Cook marinated steak in a single layer for 2-3 minutes per side until caramelized.
- Add 2 chopped green onions during the last minute of cooking.
- Transfer cooked rice to a large bowl and let cool until handleable but still warm.
- Wet your hands with water to prevent sticking when shaping onigiri.
- Take ⅓ cup cooked rice and flatten it in your palm.
- Place 1 tbsp bulgogi beef in the center of the rice.
- Enclose filling completely with rice, forming a triangular shape with firm pressure.
- Wrap each onigiri with a strip of nori at the base for easy handling.
- Serve immediately while rice is still slightly warm for optimal texture.
You’ll love the contrast between the warm, sticky rice and the savory-sweet beef filling. Try drizzling with spicy mayo or packing these for a picnic—they travel beautifully without falling apart.
Egg Salad with Japanese Mayo Onigiri

Perfect your lunch game with this Japanese-inspired twist on classic egg salad. Pack these portable rice balls with creamy, umami-rich filling for an instant upgrade. They’re meal-prep magic that stays fresh for days.
6
portions20
minutes30
minutesIngredients
– 4 large eggs
– 1 cup Japanese short-grain rice
– 1 ¼ cups water
– ¼ cup Japanese mayonnaise
– 1 tsp rice vinegar
– ½ tsp sugar
– ¼ tsp salt
– 2 sheets nori
Instructions
1. Rinse 1 cup Japanese short-grain rice under cold running water until water runs clear.
2. Combine rinsed rice and 1 ¼ cups water in a rice cooker and cook according to manufacturer’s instructions.
3. Place 4 large eggs in a single layer in a saucepan and cover with cold water by 1 inch.
4. Bring water to a rolling boil over high heat, then immediately remove from heat and cover for 12 minutes.
5. Transfer cooked eggs to an ice bath and let cool completely for 15 minutes.
6. Peel cooled eggs and place in a medium bowl.
7. Mash eggs with a fork until crumbly but not pasty.
8. Add ¼ cup Japanese mayonnaise, 1 tsp rice vinegar, ½ tsp sugar, and ¼ tsp salt to mashed eggs.
9. Mix filling ingredients until fully combined and creamy.
10. Transfer cooked rice to a large bowl and let cool until handleable but still warm.
11. Wet your hands with cold water to prevent sticking.
12. Take ⅓ cup warm rice and form a small well in the center.
13. Place 2 tbsp egg salad filling into the rice well.
14. Enclose filling completely with rice, shaping into a compact triangle.
15. Repeat with remaining rice and filling to make 6 onigiri.
16. Cut 2 sheets nori into 1-inch wide strips.
17. Wrap one nori strip around the base of each onigiri.
Really notice how the creamy, tangy egg salad contrasts with the slightly sweet, sticky rice. The nori adds that essential salty crunch that makes every bite satisfying. Try sprinkling with sesame seeds or serving with pickled ginger for extra flavor dimensions.
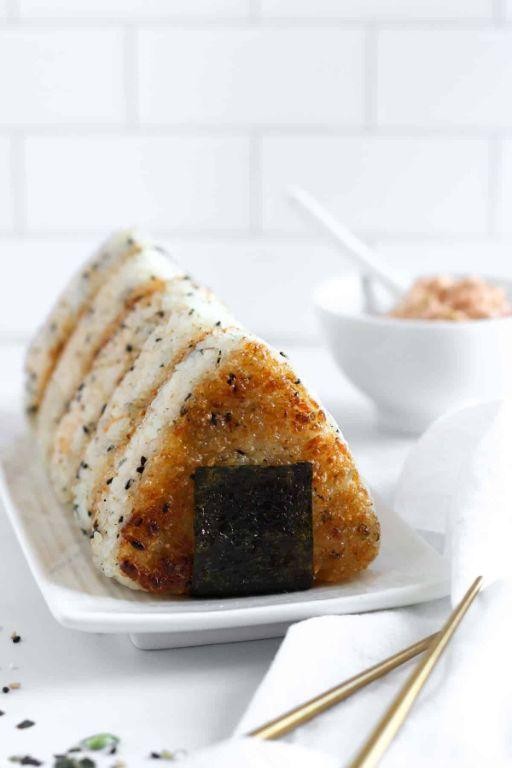
Crispy Bacon and Cheese Onigiri

Zap your snack game with these crispy bacon and cheese onigiri. They’re the perfect mashup of Japanese tradition and American comfort food—crispy, cheesy, and totally addictive in just a few bites.
6
onigiri15
minutes20
minutesIngredients
– 2 cups cooked short-grain rice
– 6 slices bacon
– 1/2 cup shredded cheddar cheese
– 2 tbsp soy sauce
– 1 tbsp rice vinegar
– 1/4 cup panko breadcrumbs
– 2 tbsp vegetable oil
– 1/4 tsp salt
Instructions
1. Cook 6 slices of bacon in a skillet over medium heat for 8-10 minutes until crispy.
2. Transfer bacon to a paper towel-lined plate to drain excess grease.
3. Crumble cooled bacon into small pieces using your hands.
4. Combine 2 cups warm cooked rice with 1 tbsp rice vinegar and 1/4 tsp salt in a large bowl.
5. Mix crumbled bacon and 1/2 cup shredded cheddar cheese into the rice mixture.
6. Wet your hands with water to prevent sticking, then scoop 1/3 cup of rice mixture.
7. Shape rice into a tight triangle about 1-inch thick, pressing firmly to compact.
8. Brush each onigiri with 2 tbsp soy sauce using a pastry brush.
9. Coat each soy-brushed onigiri in 1/4 cup panko breadcrumbs, pressing gently to adhere.
10. Heat 2 tbsp vegetable oil in a non-stick skillet over medium-high heat until shimmering (350°F).
11. Pan-fry onigiri for 3-4 minutes per side until golden brown and crispy.
12. Drain on a wire rack to maintain crispiness.
Serve these warm for maximum cheese pull. The crispy panko shell gives way to savory bacon-studded rice with melty cheese pockets throughout. Try dipping in spicy mayo or packing for lunch—they stay crispy for hours.
Spicy Kimchi and Tofu Onigiri
Tired of boring lunch routines? These spicy kimchi and tofu onigiri will literally change your meal prep game. Packed with umami flavor and just the right amount of heat, they’re perfect for on-the-go eating that actually excites your taste buds.
8
onigiri20
minutes15
minutesIngredients
– 2 cups sushi rice
– 2 cups water
– 1/4 cup rice vinegar
– 1 tbsp sugar
– 1 tsp salt
– 1 cup kimchi, chopped
– 8 oz firm tofu, pressed and crumbled
– 1 tbsp sesame oil
– 2 tbsp soy sauce
– 1 tsp gochujang
– 1 sheet nori, cut into strips
– 1/4 cup sesame seeds
Instructions
1. Rinse 2 cups sushi rice under cold water until water runs clear.
2. Combine rinsed rice and 2 cups water in a rice cooker, then cook according to manufacturer’s instructions.
3. Mix 1/4 cup rice vinegar, 1 tbsp sugar, and 1 tsp salt in a small bowl until dissolved.
4. Transfer cooked rice to a large bowl and gently fold in vinegar mixture while rice is still warm.
5. Heat 1 tbsp sesame oil in a skillet over medium-high heat until shimmering.
6. Add 8 oz crumbled tofu and cook for 5 minutes, stirring occasionally, until lightly browned.
7. Add 1 cup chopped kimchi, 2 tbsp soy sauce, and 1 tsp gochujang to the skillet.
8. Cook kimchi-tofu mixture for 3 minutes, stirring constantly, until well combined and heated through.
9. Wet your hands with cold water to prevent sticking, then take 1/3 cup of seasoned rice.
10. Flatten rice in your palm and place 2 tbsp of kimchi-tofu filling in the center.
11. Carefully fold rice around filling, shaping into a tight triangle about 1-inch thick.
12. Press 1/4 cup sesame seeds onto all sides of each onigiri for coating.
13. Wrap each onigiri with a strip of nori just before serving to maintain crispness.
14. Serve immediately or refrigerate in an airtight container for up to 2 days.
Make these onigiri your new lunch obsession with their perfect balance of chewy rice, spicy kimchi kick, and savory tofu crumbles. The crispy nori wrapper adds that satisfying crunch contrast, while the sesame seed coating gives each bite extra nutty flavor. Try drizzling with extra gochujang or packing them for picnics – they stay firm and delicious even at room temperature.
Curry Potato and Corn Onigiri
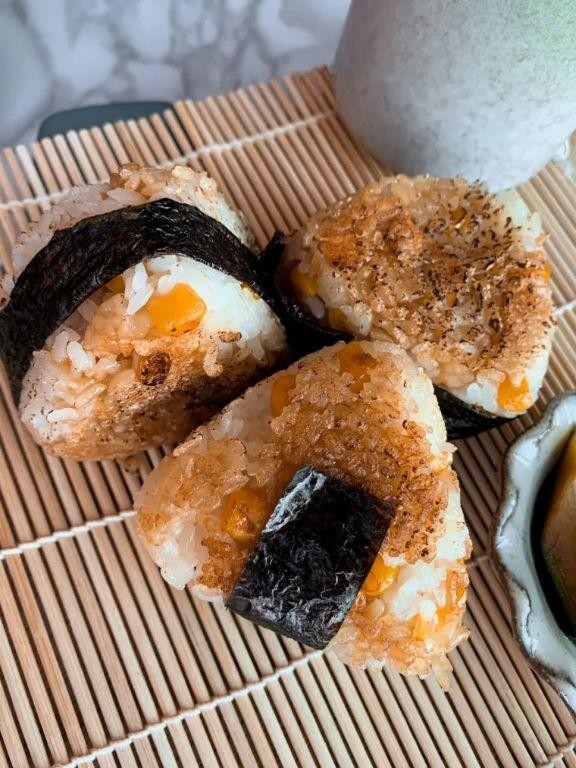
A flavor explosion that’s about to become your new lunch obsession. Curry-spiced potatoes and sweet corn tucked into perfectly shaped rice triangles—these onigiri are portable, packable, and seriously delicious. Get ready to meal-prep like a pro.
6
onigiri15
minutes17
minutesIngredients
– 2 cups cooked Japanese short-grain rice
– 1 large russet potato, peeled and diced into 1/2-inch cubes
– 1/2 cup frozen corn kernels
– 2 tbsp curry powder
– 1 tsp salt
– 1 tbsp vegetable oil
– 1/4 cup water
– 1 sheet nori, cut into 1/2-inch wide strips
Instructions
1. Heat 1 tbsp vegetable oil in a skillet over medium heat.
2. Add diced potato and cook for 5 minutes, stirring occasionally until edges begin to golden.
3. Sprinkle 2 tbsp curry powder over potatoes and stir for 30 seconds to toast the spices.
4. Pour in 1/4 cup water and cover the skillet, reducing heat to low.
5. Simmer potatoes for 10 minutes until tender when pierced with a fork.
6. Add 1/2 cup frozen corn and 1 tsp salt, stirring to combine.
7. Cook uncovered for 2 more minutes until corn is heated through and liquid evaporates.
8. Transfer potato-corn mixture to a bowl and let cool to room temperature.
9. Moisten your hands with water to prevent rice from sticking.
10. Take 1/3 cup cooked Japanese short-grain rice and flatten it in your palm.
11. Place 1 tbsp of the cooled potato-corn filling in the center of the rice.
12. Cup your hand to enclose the filling completely with rice, pressing firmly.
13. Shape the rice into a compact triangle about 1-inch thick.
14. Wrap a nori strip around the base of the onigiri, shiny side out.
15. Repeat with remaining rice and filling.
What you get is a satisfying contrast of fluffy rice, soft spiced potatoes, and pops of sweet corn. The nori adds that essential salty crunch—perfect for picnics or packed lunches. Try serving them warm with a drizzle of sriracha mayo for an extra kick.
Conclusion
Ready to elevate your lunch game? These 19 onigiri fillings offer endless possibilities for delicious, portable meals. Whether you’re craving classic tuna mayo or adventurous kimchi beef, there’s a perfect rice ball waiting for you. Try these recipes, then share your favorite in the comments below! Don’t forget to pin this article to your Pinterest boards so you can reference these tasty ideas again.


