Prepare yourself for the most incredible, mouth-watering, soul-satisfying banana bread experience of your entire life! Picture this: warm, fragrant, perfectly moist banana bread straight from your oven, filling your kitchen with that magical aroma that instantly transports you back to grandma’s kitchen. This isn’t just any banana bread recipe – this is THE banana bread that will make you the hero of breakfast tables, snack times, and midnight cravings everywhere!
Why This Recipe Works
- Ultra-moist texture that stays fresh for days thanks to the perfect balance of mashed bananas and just the right amount of oil
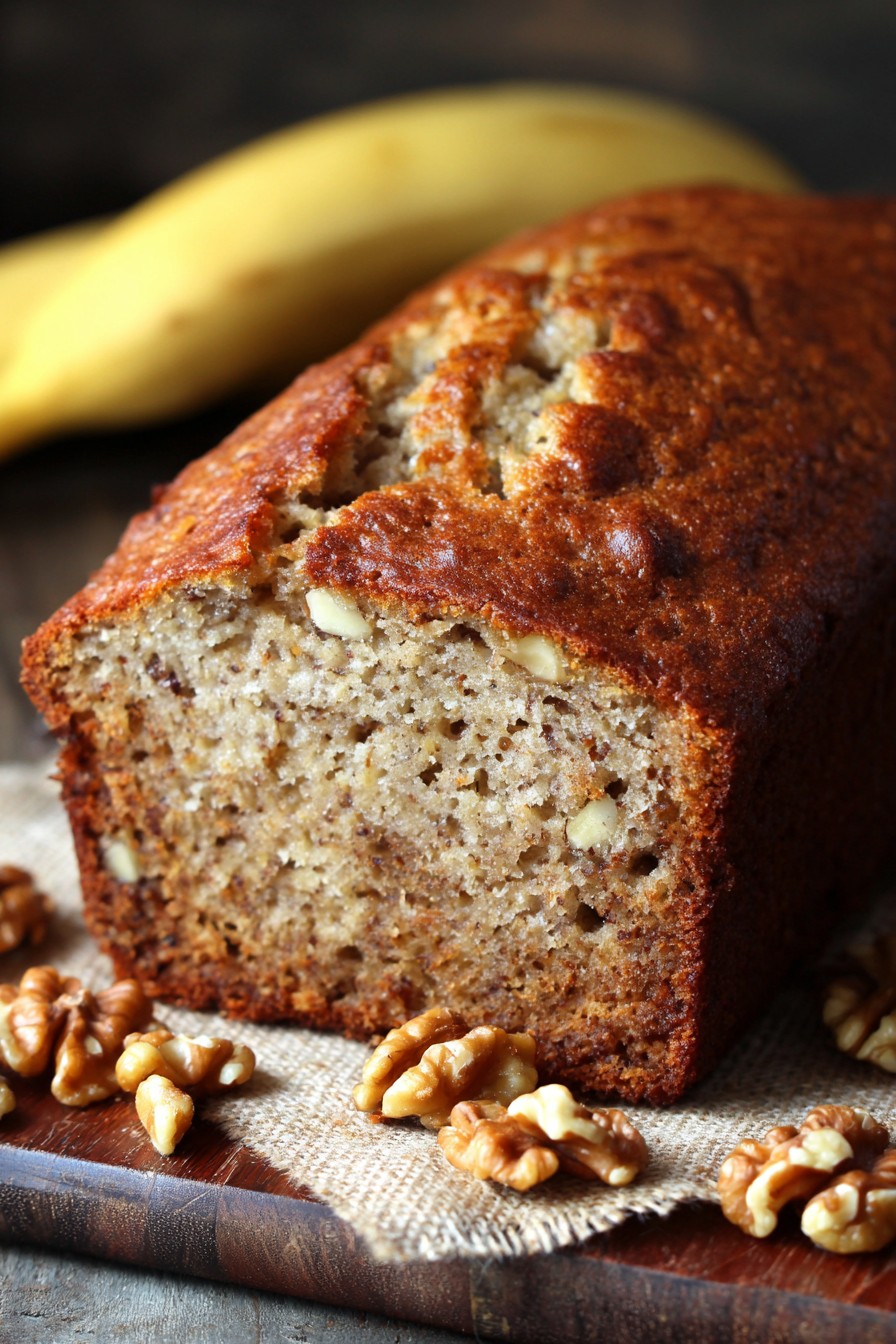
- Deep, complex banana flavor that comes from using super-ripe, almost black bananas that have developed maximum sweetness and flavor intensity
- Perfectly balanced sweetness that lets the natural banana flavor shine through without being overly sugary or cloying
- Beautiful golden-brown crust that forms the most satisfying crunchy exterior while maintaining that soft, tender interior we all crave
- Simple, straightforward method that even beginner bakers can master on their first try, delivering professional-quality results every single time
Ingredients
- 3 large extra-ripe bananas, mashed (about 1 1/2 cups)
- 1 3/4 cups all-purpose flour
- 1 cup granulated sugar
- 1/2 cup vegetable oil
- 2 large eggs
- 1 teaspoon baking soda
- 1/2 teaspoon salt
- 1 teaspoon vanilla extract
- 1/2 teaspoon ground cinnamon
- 1/2 cup chopped walnuts (optional)
Equipment Needed
- 9×5 inch loaf pan
- Large mixing bowl
- Medium mixing bowl
- Whisk or electric mixer
- Rubber spatula
- Measuring cups and spoons
- Cooling rack
- Toothpick or cake tester
Instructions
Preheat and Prepare Your Pan
Get ready to create some baking magic! First things first – preheat that oven to a perfect 350°F (175°C). While that’s heating up, grab your 9×5 inch loaf pan and give it some love! You can either grease it thoroughly with butter or cooking spray, or line it with parchment paper for the easiest removal ever. Seriously, don’t skip this step unless you want your beautiful banana bread to become one with the pan! PRO TIP: For extra insurance against sticking, grease the pan and then dust it lightly with flour, tapping out any excess. This creates the perfect non-stick surface that will have your bread sliding out like a dream!
Mash Those Bananas to Perfection
Now for the star of the show – those beautiful, overripe bananas! Take your three super-ripe bananas (the blacker, the better – I’m talking almost completely brown here!) and mash them in your large mixing bowl. You want them mashed until they’re smooth but still have a few small chunks for texture – think thick applesauce consistency. Use a potato masher, fork, or even just beat them with your electric mixer on low speed. The key here is to release all that amazing banana flavor and natural sweetness that only comes from properly ripened bananas. This step is absolutely crucial for that authentic old-fashioned banana bread taste and texture we’re chasing!
Combine Wet Ingredients with Energy
Mix Dry Ingredients Separately
Time to give your dry ingredients their moment to shine! In your medium mixing bowl, whisk together 1 3/4 cups of all-purpose flour, 1 teaspoon of baking soda, 1/2 teaspoon of salt, and 1/2 teaspoon of ground cinnamon. Whisk them together until they’re completely uniform in color and texture – you want every single teaspoon of that baking soda distributed evenly throughout the flour. PRO TIP: For extra-light and fluffy banana bread, you can sift your dry ingredients together instead of just whisking. This aerates the flour and breaks up any lumps, resulting in the most tender crumb you’ve ever experienced in homemade banana bread!
Combine Everything Gently
Here comes the most important technique moment! Add your dry ingredients to your wet ingredients, but listen carefully – you want to mix just until the flour disappears and no dry spots remain. Use a rubber spatula and fold gently, turning the batter from the bottom up. Overmixing is the enemy of tender banana bread! If you’re using walnuts, now’s the time to fold in that 1/2 cup of chopped walnuts. Just a few gentle folds to distribute them evenly throughout the batter. The batter will be thick but still pourable – that’s exactly what we want for that perfect banana bread texture!
Bake to Golden Perfection
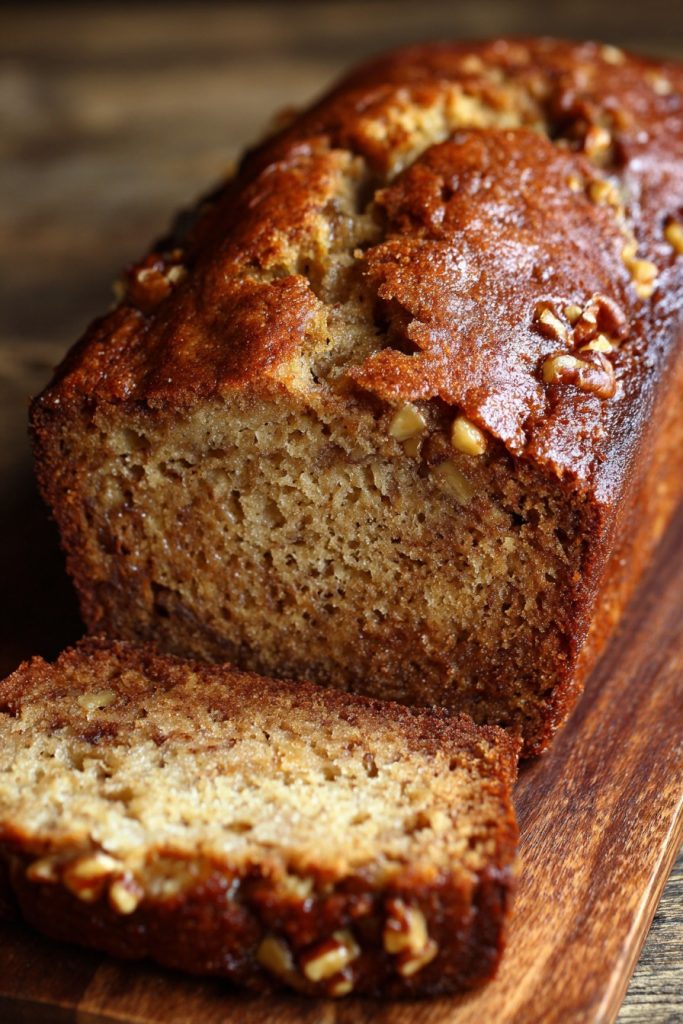
The moment of truth has arrived! Pour your beautiful banana bread batter into your prepared loaf pan and spread it evenly into all the corners. Pop that beauty into your preheated 350°F oven and set your timer for 55 minutes. Now here’s the secret: after 55 minutes, start testing with a toothpick inserted into the center. If it comes out with a few moist crumbs attached, you’re golden! If there’s wet batter, continue baking in 5-minute increments until perfect. PRO TIP: If your bread is browning too quickly on top, tent it loosely with aluminum foil for the remaining baking time. You’re looking for a deep golden brown crust and that amazing crack down the center that says “I’m perfect!”
Cool Completely Before Slicing
I know, I know – this is the hardest part! When your banana bread is perfectly baked, remove it from the oven and let it cool in the pan on a wire rack for exactly 15 minutes. Then, carefully run a knife around the edges and turn it out onto the cooling rack. Now here’s where patience becomes your superpower: you MUST let it cool completely before slicing – at least 1-2 hours. I know it’s tempting to dive right in, but cutting into warm banana bread will give you a gummy, messy slice. Waiting allows the structure to set properly, giving you those beautiful, clean slices that hold their shape perfectly!
Tips and Tricks
Ready to take your banana bread game to absolute legendary status? Let me hit you with some next-level tips that will transform your baking forever! First up – banana ripening magic! If your bananas aren’t quite ripe enough, you can speed up the process by placing them on a baking sheet and baking at 300°F for 15-20 minutes until the skins turn black. They’ll be perfectly soft and sweet for mashing! Storage secrets incoming – your banana bread will stay moist and delicious for up to 4 days at room temperature when wrapped tightly in plastic wrap or stored in an airtight container. For longer storage, you can freeze individual slices wrapped in plastic and then foil for up to 3 months – perfect for quick breakfasts or unexpected cravings!
Now let’s talk texture customization! If you prefer a denser, more traditional banana bread, use all-purpose flour as written. But if you’re dreaming of an extra-light and cake-like texture, try replacing 1/4 cup of the all-purpose flour with cake flour! The crumb will be incredibly tender and delicate. For those who love extra moisture, you can substitute 1/4 cup of the vegetable oil with an equal amount of Greek yogurt or sour cream – this adds incredible richness while keeping everything super moist. Don’t forget about the magic of resting your batter! If you have the time, let your mixed batter sit at room temperature for 30 minutes before baking. This allows the flour to fully hydrate and gives you an even more uniform texture throughout your finished loaf.
Temperature matters more than you might think! Always bring your eggs to room temperature before mixing – cold eggs can cause your batter to seize up and not incorporate properly. Simply place them in warm water for 5-10 minutes before cracking. And here’s a pro baker secret: weigh your flour instead of using measuring cups for the most consistent results every time. 1 3/4 cups of all-purpose flour equals exactly 210 grams – this eliminates the variability that comes from how you scoop and level your flour. Your banana bread will be perfect every single time! Finally, don’t be afraid to get creative with your pan – you can bake this batter in muffin tins (reduce baking time to 20-25 minutes) or even in mini loaf pans for gift-giving!
Recipe Variations
- Chocolate Chip Explosion: Fold in 1 cup of semi-sweet chocolate chips along with the walnuts for the ultimate treat that will make you feel like you’re eating dessert for breakfast! The melted chocolate pockets throughout the bread create these amazing gooey surprises in every single bite. Kids absolutely go crazy for this version, and let’s be honest – adults do too! You can use milk chocolate chips for extra sweetness or dark chocolate chips for a more sophisticated flavor profile.
- Double Nut Delight: Replace the walnuts with a combination of 1/4 cup chopped pecans and 1/4 cup chopped almonds for incredible texture and flavor complexity. The pecans bring that buttery richness while the almonds add a satisfying crunch that takes this banana bread to gourmet status. Toast the nuts lightly before chopping to really maximize their flavor potential – just spread them on a baking sheet and toast at 350°F for 5-7 minutes until fragrant!
- Tropical Paradise: Add 1/2 cup shredded sweetened coconut and 1/2 cup crushed pineapple (well-drained) to transport your taste buds straight to the islands! The coconut adds wonderful texture while the pineapple brings natural sweetness and moisture that makes this variation incredibly addictive. You can even top it with a simple coconut glaze made from powdered sugar and coconut milk for extra tropical vibes!
- Spiced Autumn Bliss: Boost the cinnamon to 1 teaspoon and add 1/2 teaspoon each of nutmeg and allspice for the coziest fall-inspired banana bread imaginable. The warming spices complement the banana flavor beautifully and make your kitchen smell absolutely incredible. This version is perfect with a cup of hot apple cider or pumpkin spice latte for the ultimate autumn comfort experience!
- Cream Cheese Swirl Sensation: Before baking, drop spoonfuls of sweetened cream cheese mixture (4 oz cream cheese, 1/4 cup sugar, 1 egg yolk) over the batter and swirl with a knife for gorgeous marbled effect. The tangy cream cheese creates these amazing pockets of richness that contrast beautifully with the sweet banana bread. It’s like having cheesecake and banana bread in one incredible package!
Frequently Asked Questions
Can I use frozen bananas for this recipe?
Absolutely yes, and it’s actually a fantastic way to always have ripe bananas on hand! When your bananas become overripe, simply peel them and freeze them in a zip-top bag. When you’re ready to bake, thaw them completely at room temperature or in the microwave, then drain off any excess liquid that has accumulated. The freezing process actually breaks down the banana cells even more, resulting in an incredibly moist and flavorful banana bread. Just be sure to measure your mashed bananas after thawing, as frozen bananas can release more liquid than fresh ones. This method is a game-changer for reducing food waste and always being ready for spontaneous banana bread baking sessions!
Why did my banana bread sink in the middle?
Can I make this recipe gluten-free or healthier?
You absolutely can adapt this recipe to fit various dietary needs! For gluten-free version, substitute the all-purpose flour with your favorite 1:1 gluten-free flour blend – Bob’s Red Mill and King Arthur both make excellent options. For a healthier twist, you can replace half the oil with unsweetened applesauce and reduce the sugar to 3/4 cup without sacrificing too much texture. Whole wheat flour can replace up to half the all-purpose flour for added fiber, though the bread will be denser. You can also use coconut sugar instead of granulated sugar for a lower glycemic option. Just remember that significant modifications will change the texture, so expect slightly different results when making substitutions!
How do I know when my banana bread is perfectly baked?
The toothpick test is your best friend here, but there are several other indicators of perfect doneness! Insert a toothpick into the very center of the loaf – it should come out with a few moist crumbs attached, but no wet batter. The top should be a deep golden brown with a beautiful crack running down the center. The edges will pull away slightly from the sides of the pan, and if you gently press the top, it should spring back rather than leaving an indentation. Another great test is internal temperature – when a digital thermometer inserted into the center reads between 200-205°F, your banana bread is perfectly baked. Remember that it will continue cooking slightly as it cools, so don’t overbake!
Can I double this recipe and make two loaves?
Yes, this recipe doubles beautifully for when you need extra loaves for gifting, freezing, or feeding a crowd! Simply multiply all ingredients by two and mix in a larger bowl to accommodate the increased volume. The baking time might need slight adjustment – start checking at the 55-minute mark, but it could take up to 65-70 minutes total. The loaves might bake at slightly different rates if placed on the same oven rack, so consider rotating them halfway through baking for even browning. Doubling is also perfect for making one classic loaf and one variation, so you can enjoy different flavors from the same baking session. Just be sure not to overfill your mixer bowl if using a stand mixer!
Summary
This incredible old fashioned banana bread delivers perfect moisture, amazing flavor, and that classic comfort we all crave. With simple ingredients and foolproof techniques, you’ll create bakery-quality results that will have everyone begging for your secret recipe. Get ready to become the banana bread hero of your household!
Old Fashioned Banana Bread
6
servings15
minutes55
minutesIngredients
Instructions
- 1 Preheat oven to 350°F. Grease a 9x5 inch loaf pan.
- 2 Mash bananas in large bowl until smooth with small chunks.
- 3 Add sugar, oil, eggs, and vanilla to bananas. Mix until smooth.
- 4 In separate bowl, whisk flour, baking soda, salt, and cinnamon.
- 5 Add dry ingredients to wet ingredients. Mix just until combined.
- 6 Fold in walnuts if using. Pour into prepared pan.
- 7 Bake 55-65 minutes until toothpick comes out clean.
- 8 Cool in pan 15 minutes, then transfer to wire rack to cool completely.


