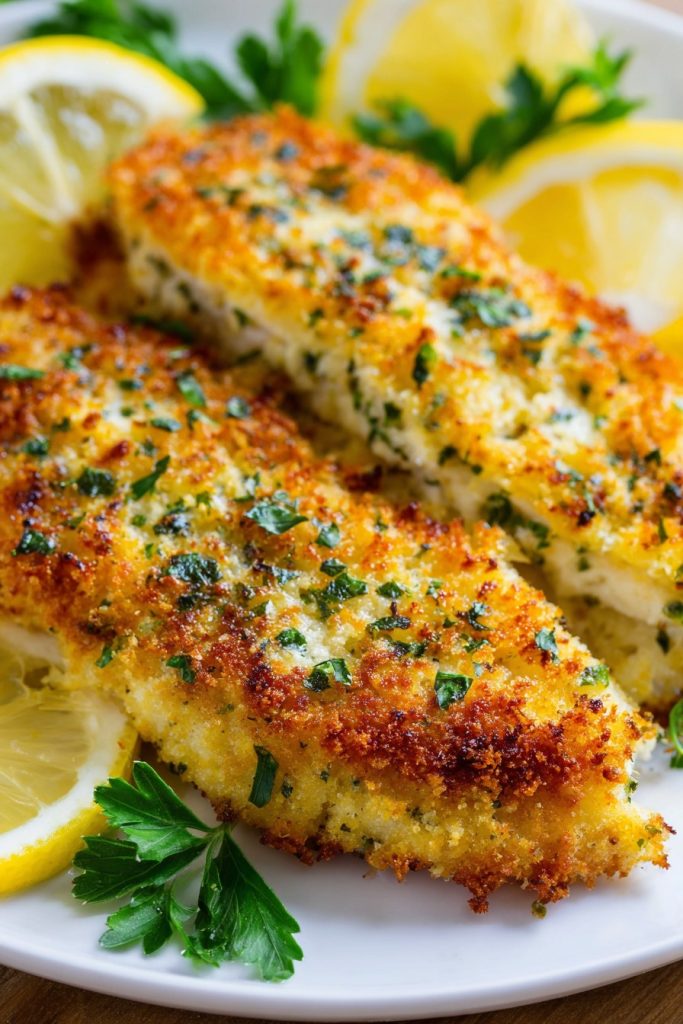
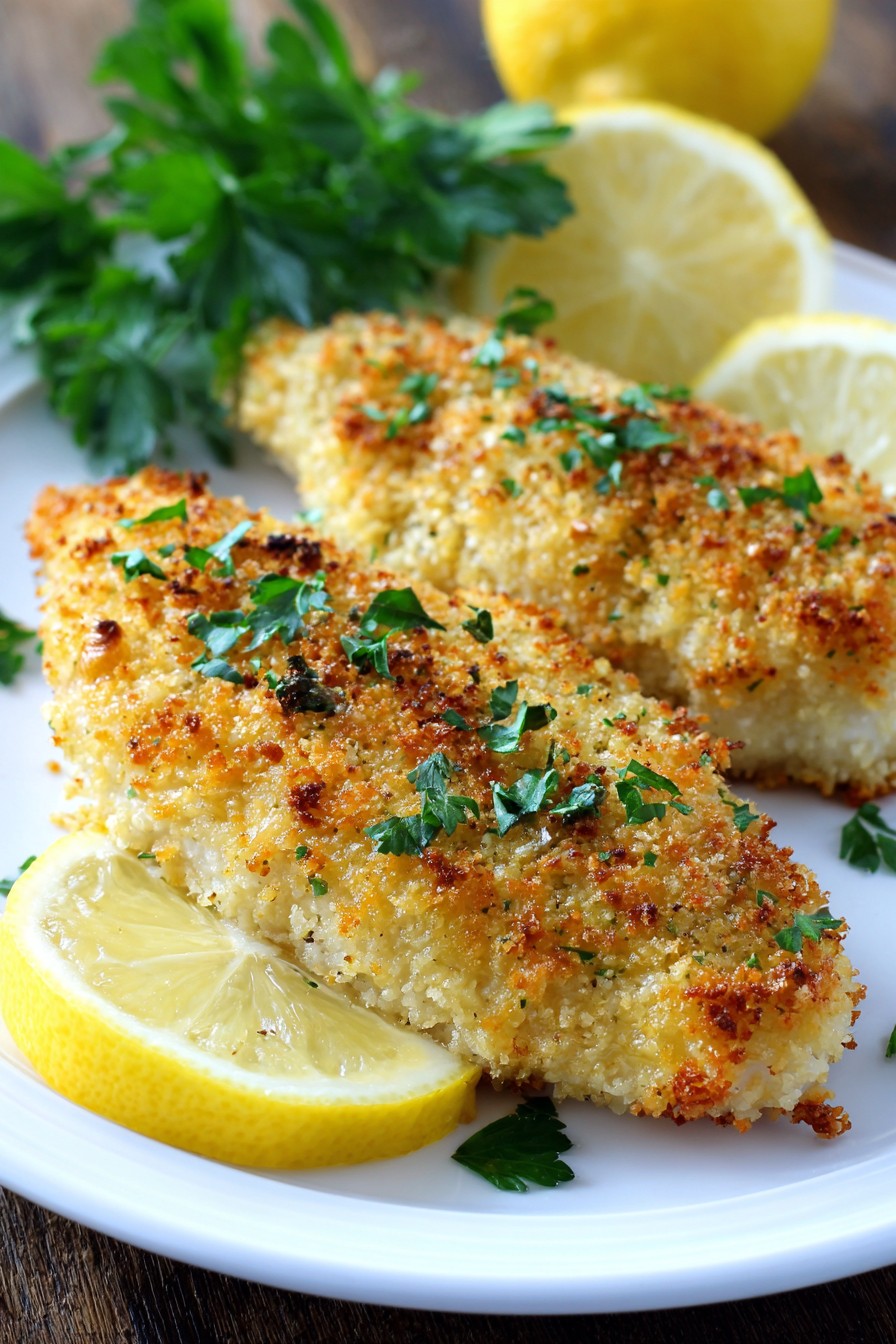
Zesty flavors and crispy textures await with this homemade version of Noodles and Company’s famous Parmesan Crusted Chicken! Zero excuses needed to recreate this restaurant favorite in your own kitchen—it’s surprisingly simple yet delivers that signature crunch and cheesy goodness we all crave. Get ready to impress your family with a dish that tastes straight from the menu!
Why This Recipe Works
- The combination of panko breadcrumbs and grated Parmesan creates an incredibly crispy, golden-brown crust that stays crunchy even after baking, avoiding the sogginess that plagues many breaded chicken recipes.
- Using a double-dredging technique (dipping in flour, egg wash, then breadcrumb mixture) ensures the coating adheres perfectly to the chicken, preventing any bare spots or falling-off during cooking.
- Baking at a high temperature (425°F) mimics the effect of frying by quickly crisping the exterior while keeping the chicken breasts juicy and tender inside, eliminating the need for messy oil splatters.
- Incorporating Italian seasoning and garlic powder into the breadcrumb mixture amplifies the flavor profile beyond just cheese, giving you that authentic Noodles and Company taste without any artificial additives.
- Resting the coated chicken for 10 minutes before baking allows the breading to set properly, resulting in a more uniform crust that doesn’t separate from the meat when sliced or served.
Ingredients
- 2 large boneless, skinless chicken breasts (about 1.5 pounds total), pounded to ½-inch thickness
- 1 cup all-purpose flour
- 2 large eggs, beaten with 2 tablespoons water
- 1.5 cups panko breadcrumbs
- 1 cup freshly grated Parmesan cheese (not pre-shredded)
- 2 teaspoons Italian seasoning
- 1 teaspoon garlic powder
- 1 teaspoon kosher salt
- ½ teaspoon black pepper
- ¼ cup olive oil or avocado oil for drizzling
- Fresh parsley, chopped (for garnish)
- Lemon wedges (for serving)
Equipment Needed
- Meat mallet or rolling pin
- Three shallow bowls or plates
- Rimmed baking sheet
- Parchment paper or silicone baking mat
- Wire rack (optional but recommended)
- Measuring cups and spoons
- Grater (if grating Parmesan yourself)
- Tongs
Instructions
Prepare Your Chicken and Station
Begin by placing your chicken breasts between two pieces of plastic wrap or in a large zip-top bag. Using a meat mallet or heavy rolling pin, pound them to an even ½-inch thickness—this ensures uniform cooking and maximum crispy surface area. Set up your dredging station with three shallow bowls: one with flour seasoned with half the salt and pepper, one with the egg wash (eggs beaten with water until frothy), and one with the panko-Parmesan mixture (combine panko, grated Parmesan, Italian seasoning, garlic powder, and remaining salt and pepper). Line a baking sheet with parchment paper and place a wire rack on top if using; this promotes air circulation for extra crispiness. Pat the chicken completely dry with paper towels—this crucial step helps the coating stick better!
Coat the Chicken Thoroughly
Working with one chicken breast at a time, dredge it first in the seasoned flour, shaking off any excess. Dip it completely into the egg wash, allowing any extra to drip off. Finally, press it firmly into the panko-Parmesan mixture, ensuring every surface is thoroughly coated—don’t be shy about really pressing those breadcrumbs into the meat! Place the coated chicken on your prepared baking sheet and repeat with the second breast. Let them rest for 10 minutes at room temperature; this allows the coating to hydrate and adhere properly, preventing it from sliding off during baking. Meanwhile, preheat your oven to 425°F—the high heat is essential for achieving that golden, crispy crust without frying.
Bake to Golden Perfection
Right before baking, drizzle or brush the coated chicken breasts with olive oil—this helps them brown beautifully and adds extra crispness. Place the baking sheet in the preheated 425°F oven on the center rack and bake for 15-18 minutes. At the 12-minute mark, check for doneness; the crust should be deep golden brown and crispy. The chicken is ready when it reaches an internal temperature of 165°F on an instant-read thermometer inserted into the thickest part. Avoid opening the oven door frequently as this causes temperature fluctuations that can prevent proper crisping. If you notice one side browning faster than the other, you can rotate the pan halfway through cooking.
Rest and Check Doneness
Once the chicken reaches 165°F internally and the crust is golden brown, remove it from the oven and let it rest on the baking sheet for 5 minutes before slicing. This resting period allows the juices to redistribute throughout the meat, ensuring moist, tender chicken rather than dry, stringy results. Check for doneness by making a small cut into the thickest part—the meat should be white throughout with clear juices, no pinkness. If you’re using a wire rack, transfer the chicken to a cutting board to avoid steaming the bottom crust. While resting, the residual heat will continue to crisp the coating slightly, giving you that perfect Noodles and Company texture.
Serve Immediately with Style
Slice the rested chicken against the grain into ½-inch strips—this ensures tender bites rather than chewy ones. Serve immediately while hot and crispy, garnished with freshly chopped parsley and lemon wedges for squeezing over the top. The acidity from the lemon brightens the rich Parmesan flavor beautifully. This chicken pairs perfectly with pasta, mashed potatoes, or a fresh salad—just like at the restaurant! For the full Noodles and Company experience, serve over their signature Wisconsin Mac & Cheese or buttered noodles. Remember: crispy food waits for no one, so enjoy right away for the best texture and flavor experience!
Tips and Tricks
For the crispiest possible crust, consider using a wire rack placed on your baking sheet—this elevates the chicken allowing hot air to circulate underneath, preventing sogginess from accumulated moisture. If you don’t have a rack, flipping the chicken halfway through baking can help achieve even browning on both sides. Always use freshly grated Parmesan rather than pre-shredded varieties; the cellulose anti-caking agent in pre-shredded cheese can prevent proper crisping and melting. For extra flavor, add a teaspoon of lemon zest to the breadcrumb mixture or include a pinch of red pepper flakes for subtle heat.
If you prefer darker, crispier crust, you can broil for the last 1-2 minutes of cooking—watch carefully as it can burn quickly! For meal prep, you can prepare the coated chicken up to the baking step, cover tightly, and refrigerate for up to 24 hours before baking; add 2-3 minutes to the cooking time since it will be cold from the fridge. Leftovers reheat best in an air fryer or toaster oven at 375°F for 5-7 minutes to restore crispiness; microwave heating will make the coating soft and soggy.
For perfect thickness every time, buy chicken breast cutlets instead of whole breasts, or ask your butcher to butterfly them for you. If your breadcrumb mixture isn’t adhering well, try patting the chicken even drier or adding an extra tablespoon of flour to the egg wash to create a thicker binding agent. For gluten-free version, use gluten-free panko breadcrumbs and replace the flour with cornstarch or gluten-free flour blend—the results will be equally crispy! If you’re doubling the recipe, make sure not to overcrowd the baking sheet; use two sheets and rotate them between oven racks halfway through cooking for even results.
Recipe Variations
- **Spicy Kick Variation**: Add 1 teaspoon of cayenne pepper or smoked paprika to the breadcrumb mixture, and serve with a spicy marinara dipping sauce for those who enjoy heat. You can also incorporate finely chopped jalapeños into the coating or drizzle with sriracha honey after baking.
- **Herb-Forward Version**: Triple the Italian seasoning or create your own blend with fresh chopped basil, oregano, and thyme mixed into the panko. For ultimate freshness, top with a gremolata made from lemon zest, garlic, and parsley after baking.
- **Different Cheese Options**: Replace half the Parmesan with grated Romano or Asiago for sharper flavor, or use a mix of Parmesan and mozzarella for stretchier, meltier results. For a nuttier profile, incorporate finely grated Pecorino or even some nutritional yeast for dairy-free version.
- **Protein Swaps**: Try this coating with pork cutlets (cook to 145°F), firm tofu slices (press thoroughly first), or even cauliflower steaks for vegetarian option. Cooking times will vary slightly based on thickness and protein type.
- **Crispy Chicken Sandwich**: Use larger chicken breasts and serve on brioche buns with lettuce, tomato, and garlic aioli for an incredible homemade chicken sandwich that rivals any restaurant version.
Frequently Asked Questions
Can I use regular breadcrumbs instead of panko?
While you can technically use regular breadcrumbs, panko (Japanese-style breadcrumbs) creates a significantly crispier, lighter crust because they’re made from crustless bread and have a flakier, airier texture. Regular breadcrumbs tend to become denser and can sometimes turn soggy rather than achieving that perfect crunch. If you must substitute, try combining regular breadcrumbs with crushed cornflakes or cracker crumbs for better texture. Whatever you use, make sure they’re finely ground but not powder-fine—you want some texture for that authentic Noodles and Company experience!
Why did my coating fall off during baking?
Coating separation usually happens for three main reasons: not patting the chicken completely dry before dredging, not pressing the breadcrumb mixture firmly enough onto the chicken, or not letting the coated chicken rest before baking. Moisture is the enemy of adhesion—ensure your chicken is thoroughly dried with paper towels. When pressing the breadcrumbs, really use your palms to embed them into the surface. The 10-minute rest allows the egg wash to slightly hydrate the coating, creating a bond that holds during baking. Also avoid moving the chicken unnecessarily once placed on the baking sheet.
Can I air fry instead of baking?
Absolutely! Air frying produces an even crispier result with less oil. Preheat your air fryer to 400°F, arrange the coated chicken in a single layer (you may need to cook in batches), and air fry for 12-15 minutes, flipping halfway through. Check for doneness at 165°F internal temperature. The circulating hot air creates fantastic browning on all sides, but watch carefully as cooking times can vary between air fryer models. You might need to reduce the temperature to 380°F if the coating browns too quickly before the chicken cooks through.
How do I store and reheat leftovers?
Store leftover chicken in an airtight container in the refrigerator for up to 3 days. For reheating, avoid the microwave—it will make the coating soft and soggy. Instead, use an air fryer at 375°F for 5-7 minutes or a conventional oven at 375°F for 10-12 minutes until heated through and crispy again. You can also reheat in a skillet with a tiny bit of oil over medium heat, turning occasionally until crisp. The chicken will never be quite as perfect as fresh, but these methods will restore much of the texture and prevent sogginess.
Can I make this recipe gluten-free?
Yes, successfully! Replace the all-purpose flour with cornstarch, gluten-free flour blend, or even finely ground almond flour for the first dredge. Use certified gluten-free panko breadcrumbs (several brands now offer this) and double-check that your Parmesan cheese doesn’t contain any gluten-containing anti-caking agents. The cooking method remains exactly the same, and you’ll achieve similarly crispy results. For extra insurance, ensure all your seasonings are gluten-free as some pre-mixed blends might contain wheat-based fillers.
Summary
Recreate Noodles and Company’s famous Parmesan Crusted Chicken at home with this surprisingly simple recipe. Crispy panko-Parmesan coating, juicy chicken, and restaurant-quality results without deep frying! Perfect over pasta or as a standalone star.
Noodles and Company Parmesan Crusted Chicken
5
servings20
minutes18
minutesIngredients
Instructions
- 1 Preheat oven to 425°F and line baking sheet with parchment.
- 2 Set up three bowls: flour seasoned with half salt/pepper, egg wash, and panko mixed with Parmesan, Italian seasoning, garlic powder, remaining salt/pepper.
- 3 Dredge dried chicken in flour, then egg, then press into panko mixture. Place on baking sheet and rest 10 minutes.
- 4 Drizzle with oil and bake 15-18 minutes until golden and internal temperature reaches 165°F.
- 5 Rest 5 minutes, slice against grain, and serve with parsley and lemon.
